There are few pleasures as reliably comforting as a warm square of rich chocolate, the kind that melts on the tongue and makes you forget deadlines for a moment. This article walks you through everything I’ve learned chasing that perfect bite — from ingredient choices to tiny technique tweaks that determine whether your batch comes out fudgy or cakey. You’ll find a clear, dependable recipe, smart variations for different moods, and practical fixes for common problems. I’ll also share small rituals I use when I bake that help the process feel less like chemistry and more like a celebration. Whether you bake weekly for friends or keep a secret stash in the freezer, these notes aim to make your brownies reliably irresistible.
Why these brownies deserve a place in your repertoire
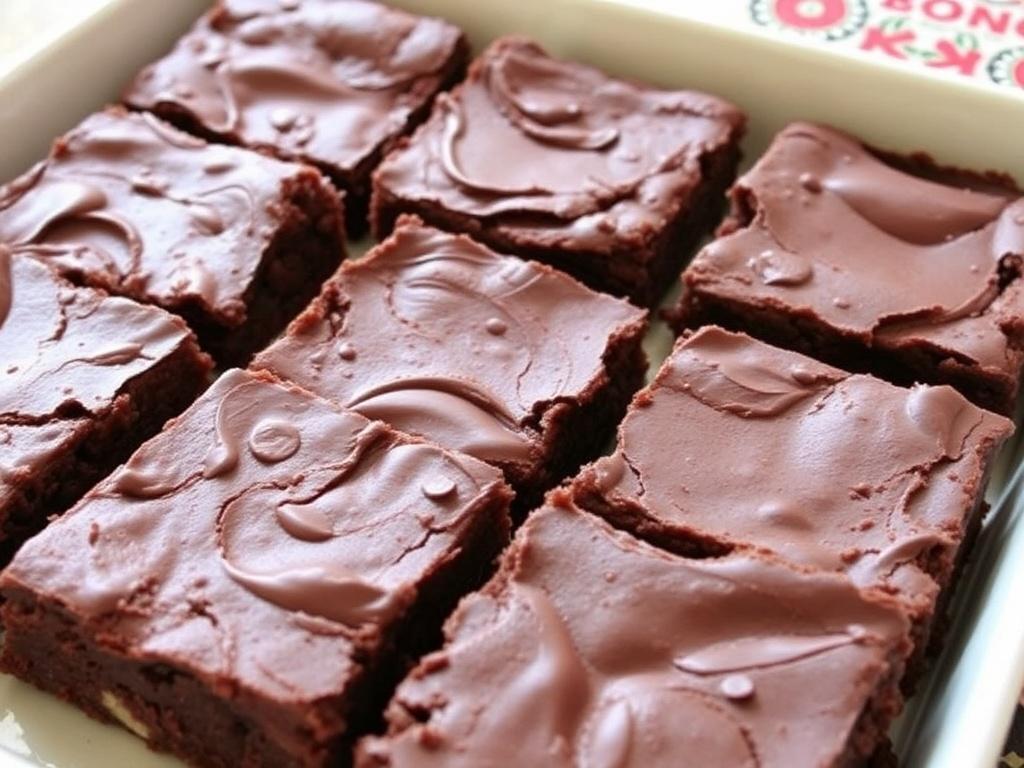
Not all brownie recipes are created equal, and part of the charm lies in their versatility. A base that favors butter and chocolate over flour and leavening produces that dense, fudgy texture many people reach for; swap the ratios and you get something lighter and more cake-like. For anyone who identifies as a chocolate devotee, mastering one dependable formula opens a hundred doorways: you can riff with nuts, swirl in caramel, or fold in espresso for a grown-up edge. The brownies described here prioritize glossy tops, fudgy interiors, and a balanced chocolate flavor that doesn’t overwhelm. These qualities make them useful both as a simple midweek treat and as a show-stopping finish to a dinner party.
Beyond taste and texture, there’s comfort in knowing exactly how a recipe reacts to changes. I often experiment with single adjustments — a minute longer in the oven, a different type of sugar, a pinch more salt — and watch how the results shift. Over time you internalize which variables are forgiving and which demand attention. That understanding lets you be creative without being anxious. The rest of this guide aims to transfer that confidence so you can improvise with purpose.
Ingredients and what each one actually does
Before you reach for the bowl, it helps to know why the standard ingredients are there. Butter and chocolate contribute fat and flavor; eggs provide structure and moisture; sugar sweetens and helps produce the shiny crust; flour offers the starch that binds everything together. Salt enhances the chocolate’s depth, and a touch of vanilla rounds the aroma. Small changes among these elements lead to big differences in mouthfeel and taste, so I’ll explain the roles so you can modify intelligently.
| Ingredient | Typical Amount | Primary Role |
|---|---|---|
| Unsalted butter | 170–225 g (3/4–1 cup) | Fat and flavor; helps create fudginess |
| Dark chocolate (60–70%) | 170–200 g (6–7 oz) | Main chocolate flavor and texture |
| Granulated sugar | 200–300 g (1–1 1/2 cups) | Sweetness and glossy crust |
| Eggs | 2–3 large | Structure, richness, and moisture |
| All-purpose flour | 90–120 g (3/4–1 cup) | Stabilizes and sets the brownie |
| Cocoa powder (optional) | 1–2 tbsp | Boosts chocolate intensity without extra fat |
| Salt | 1/4–1/2 tsp | Enhances and balances sweetness |
That table reflects the core components and typical ranges I use. If you prefer a denser bar, increase butter and chocolate while keeping flour low. Want a more pronounced cocoa flavor without additional fat? Add a tablespoon or two of unsweetened cocoa powder. These adjustments don’t require new techniques, only an awareness of proportions.
Step-by-step method for reliably fudgy brownies
Technique matters as much as ingredients. I recommend using an approach where you melt chocolate and butter together, then whisk in sugar and eggs off the heat. This method helps maintain a glossy top and prevents the eggs from curdling. Gently fold in flour just until it disappears; overworking the batter develops gluten and leans toward cake. Spread the batter in a lined pan, tap once to remove large air pockets, and bake until a thin crust forms but a tester with a few crumbs comes out mostly clean.
Working in stages keeps things simple and predictable. Melt chocolate and butter in a heatproof bowl over a pot of simmering water or in short bursts in the microwave, stirring between bursts. Once smooth, take the bowl off the heat, then whisk in sugar — some bakers add sugar after cooling slightly to preserve that sheen. Add eggs one at a time, whisking until smooth after each addition. Fold in flour with a flexible spatula until you see no streaks; don’t paddle at high speed.
- Preheat oven to 175°C (350°F) and line an 8×8-inch pan with parchment.
- Melt 170 g butter and 170–200 g chopped dark chocolate until glossy.
- Whisk in 200 g granulated sugar until combined and slightly cooled.
- Add 2–3 large eggs, one at a time, whisking until silky.
- Fold in 90–120 g all-purpose flour, 1–2 tbsp cocoa if using, and 1/4 tsp salt.
- Pour into pan, bake 20–30 minutes depending on desired fudginess.
The exact baking time varies with oven and pan type, so watch the surface and use a gentle tester. For very fudgy centers aim for the lower end, removing the pan when the edges are set and the middle still jiggles fractionally. Let the pan cool to room temperature before slicing for cleaner edges; cutting too soon often results in a messy, molten-looking slab. These simple timing decisions are what separate “good” from “wow” brownies.
Fudgy versus cakey — how to steer the outcome
Texture is a controllable feature. If your goal is a fudgy, almost brownie-truffle interior, emphasize fat and chocolate while keeping flour low and avoiding extra leaveners. For a cakier result, increase flour and add a small amount of baking powder or separate and beat the eggs to introduce more air. Small changes have large effects, so make one adjustment at a time to learn what each does. I prefer fudgy bars for their concentrated chocolate whisper, but cakier versions have their place, especially when serving alongside lighter accompaniments.
Another variable is mixing intensity. Vigorous mixing raises the chance of gluten development, which creates a more breadlike crumb. Conversely, gentle folding keeps the structure loose and dense. The temperature of your ingredients matters too: slightly warmed eggs incorporate more smoothly into melted chocolate, whereas cold eggs can cause the chocolate to seize or the batter to appear grainy. Once you control these factors, you can dial your texture precisely.
Flavor variations and inspired mix-ins

Brownies are a blank canvas for flavor. A personal favorite is a swirl of salted caramel folded into the top before baking; it cures the sweetness with a saline note that pairs beautifully with dark chocolate. Adding chopped toasted pecans or walnuts gives a pleasing contrast of texture without disrupting the fudgy interior. For a modern twist try a scattering of toasted coconut or a handful of dark chocolate chunks to create pockets of molten richness.
- Espresso powder: intensifies chocolate without tasting like coffee.
- Orange zest: brightens the chocolate, especially with 60% cocoa chocolate.
- Chili or cayenne: adds a gentle warmth that elevates the flavor.
- Hazelnut spread swirl: creates a marbled, nutty layer inside the bar.
When adding mix-ins, keep proportions modest to avoid upsetting structure. A cup of nuts or chocolate chunks is usually the maximum I recommend for an 8-inch pan. For swirls, dollop mixture on top and drag a knife through once or twice — over-swirl breaks the crust and lets batter settle unevenly. These small habits make the difference between a pretty brownie and an exceptional one.
Troubleshooting: common problems and how to fix them
Surface cracks and thin crust
A shiny, cracked top is a hallmark of well-made brownies, but excessive cracking or a dry crust can signal overbaking or too much sugar. If your crust is too brittle try reducing the oven time by a few minutes or lowering the temperature by 10–15°C. Another approach is to use a mix of granulated and brown sugar; brown sugar contributes moisture and chew. If you want the shiny crust without excessive fissures, ensure that sugar is fully dissolved into the warm melted chocolate and butter before adding eggs.
Ovens vary, and an oven thermometer is a cheap way to know what’s happening inside. If your oven runs hot the exterior will set long before the interior, producing deep cracks and dryness. Adjust bake times and consider placing the pan on a middle rack away from direct heat. Humidity in the kitchen also plays a subtle role, so expect slightly different outcomes between winter and summer baking sessions.
Dry, crumbly brownies
Dryness usually points to too much flour, overmixing, or overbaking. Revisit your measuring technique: spoon flour into the cup and level it rather than scooping directly with the cup, which packs in too much flour. Keep mixing gentle and stop as soon as the last streak of flour disappears. If overbaking is the culprit, aim for a shorter time; the brownies should still have a small jiggle in the center when you pull them from the oven.
Ingredient substitutions can also introduce dryness. Using low-fat substitutes or excessive cocoa powder without compensating with additional fat will produce a drier texture. If you must make swaps, consider adding a tablespoon of oil or an extra egg yolk to restore moisture. These small corrections are often enough to rescue a batch.
Gooey center that never sets
If your brownies remain overly loose after cooling, the issue may be underbaking, an oversized pan, or too much butter or liquid. Check that you used the recommended pan size; a larger pan spreads batter thinner and reduces bake time, sometimes to the point of underdone centers. Reduce liquids slightly or bake a little longer next time, testing frequently after the minimum bake time. Remember that the brownies will firm as they cool, so removing them at the right visual cue is more reliable than timing alone.
For particularly stubborn goo, a brief rest in the refrigerator helps — chilling firms up fats and makes slicing neater. If you prefer a molten center intentionally, serve immediately after a short cool-down and treat them like warm, spoonable desserts. Both approaches are valid, but clarity about your goal before baking prevents disappointment.
Serving, storing, and gifting
Presentation matters even for a humble bar. Dusting with fine powdered sugar, scattering flaky sea salt, or laying a few fresh raspberries brightens the plate and balances richness. Warm brownies pair beautifully with ice cream or a dollop of mascarpone, while room-temperature bars reveal more nuanced chocolate notes. Think about the company and occasion when choosing accompaniments; a tart fruit compote lifts up very chocolatey bars for lighter palates.
Storage is forgiving: keep cooled brownies in an airtight container at room temperature for 2–3 days, or freeze individual squares for up to three months. To freeze, wrap pieces tightly in plastic and tuck them into a freezer bag; thaw slowly in the refrigerator or at room temperature. When gifting, stack squares between layers of parchment in a decorative tin; add a ribbon and a small note with reheating instructions if you include a chilled or frozen item.
My tried-and-true Chocolate Lovers’ Favorite Brownies recipe
I’ve landed on a formula that consistently produces a glossy top and dense, fudge-like center. The proportions below suit an 8×8-inch pan and are forgiving enough for home bakers. I often halve or double the recipe depending on the crowd, and I’ll note small optional swaps as I go. Follow the method and then feel free to personalize with one of the variations suggested earlier.
- 170 g unsalted butter (6 oz)
- 170–200 g dark chocolate, chopped (6–7 oz, 60–70% cocoa)
- 200 g granulated sugar (1 cup)
- 2 large eggs at room temperature
- 90 g all-purpose flour (3/4 cup)
- 1 tbsp unsweetened cocoa powder (optional)
- 1/4 tsp fine salt and 1 tsp vanilla extract
Method: Preheat oven to 175°C and line an 8×8-inch pan with parchment, leaving an overhang for easy removal. Melt butter and chopped chocolate together until smooth, then remove from heat and whisk in sugar until integrated. Let the mixture cool slightly, then whisk in the eggs one at a time, followed by vanilla. Fold in flour, cocoa, and salt just until blended; add any mix-ins by folding gently. Pour into the prepared pan and bake 20–28 minutes, testing at 20 minutes; the top should be set but the center still slightly soft. Cool completely on a rack before slicing into squares.
Final thoughts and next steps
Mastering a single, reliable brownie recipe opens up endless possibilities. Once you understand how ingredient ratios and technique affect texture, you can confidently adjust for different preferences and built-in surprises. Try baking one batch as written and keep notes on small tweaks so you can repeat what worked. Invite a friend over to taste-test variations; feedback from other chocolate lovers often reveals pleasant surprises you hadn’t anticipated. Above all, enjoy the process — brownies are forgiving, fast, and immensely satisfying, and that’s why they remain a beloved pillar among dessert recipes.