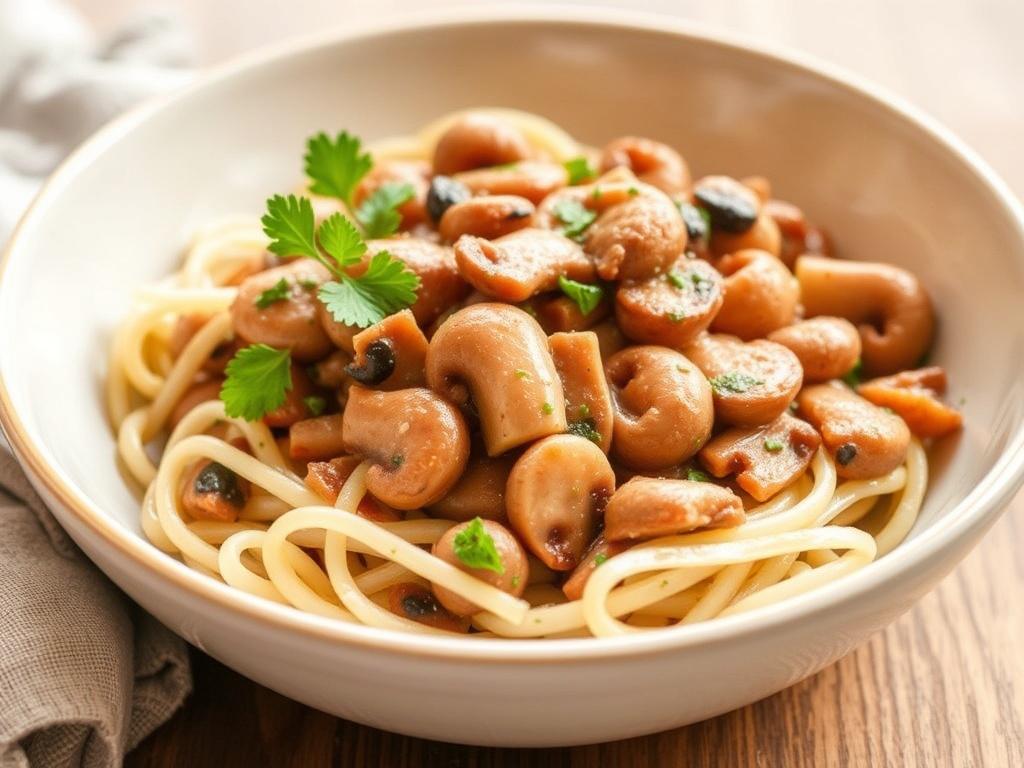
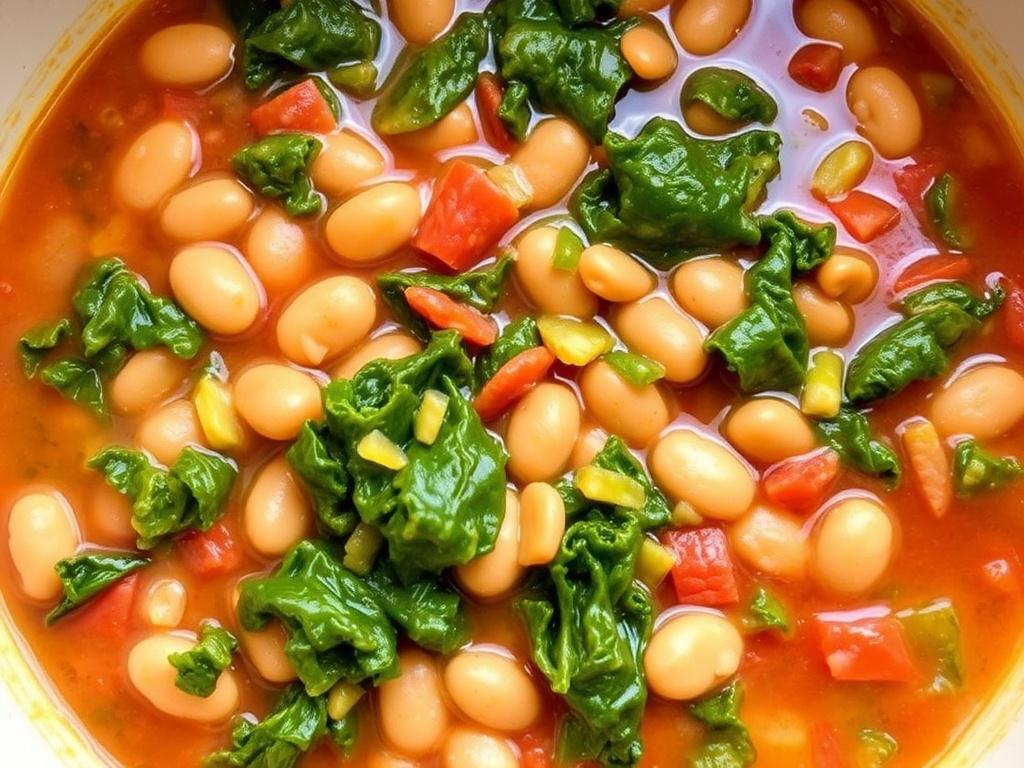
Category: Recipes

Creole Chicken with Sausage: A Hearty, Tomato-Scented Comfort from the Gulf Coast

There’s a warm, homey feeling that wafts up from a pot of Creole-style chicken and sausage as it simmers—tomato, garlic, caramelized onion, and smoke mingling into something irresistible. This dish brings together simple proteins, pantry-friendly spices, and a technique that rewards patience: browning, building layers of flavor, then letting it all marry slowly. I want to walk you through the history that shaped these flavors, the practical choices that make the difference between good and great, and a full, detailed recipe so you can make a memorable meal at home. Along the way I’ll share small tricks I use in my own kitchen, plus variations for weeknights, batch cooking, and feeding a crowd.

Where Creole Comes From and Why It Matters

Creole cooking grew in New Orleans and the surrounding Gulf Coast as a fusion of French, Spanish, African, Caribbean, and Native American influences, and it favors tomatoes and aromatic herbs in ways that set it apart from its Cajun cousin. That tomato-forward profile is part of why a Creole chicken with sausage feels bright and layered rather than just smoky and rustic. Historically, Creole kitchens used whatever was available: chicken raised in backyards, cured sausages shipped from port towns, and a pantry full of onions, bell peppers, celery—the so-called Holy Trinity—that form the flavor base.

Understanding that background helps when you decide how to cook today. Use tomatoes not as an afterthought but as a structural element; treat the sausage as both seasoning and texture; and respect the technique of browning and deglazing to capture depth. The end result should taste like a place: sun, river salt in the air, and a table where people gather and talk while the pot works its magic. Keep that image in mind as you plan ingredients and time.

Main Ingredients: Choices That Affect Flavor

At the heart of this recipe are four pillars: chicken, smoked sausage, tomatoes, and the Holy Trinity of onion, bell pepper, and celery. Chicken thighs—skin-on, bone-in—give the most forgiving texture and deep flavor when braised, though boneless thighs shorten cooking time without sacrificing richness. Sausage is typically Andouille or another smoked, coarse-grain link; its fat renders into the sauce and supplies savory, peppery notes. If you prefer milder heat, choose a milder smoked sausage; if you want more kick, opt for a spicier Andouille.

Tomatoes are the Creole stamp: crushed tomatoes or a mix of diced tomatoes and a splash of tomato paste will provide acidity and body. Stock—preferably homemade or low-sodium chicken stock—keeps the sauce round and savory. Fresh garlic, bay leaves, thyme, paprika, and a restrained pinch of cayenne complete the spice profile; finish with a handful of chopped parsley or green onion for freshness. Little details—like the quality of sausage or the patience in browning the chicken—shift the final dish more than fancy ingredients do.

Ingredients Table for a Generous 6-8 Servings

Below is a compact table that lists ingredients and suggested amounts if you plan to serve family or a small gathering. Adjust quantities up or down as needed; scaling is straightforward because the technique remains the same.

Ingredient Amount
Chicken thighs (skin-on, bone-in or boneless) 3 pounds
Smoked sausage (Andouille or similar), sliced 14–16 ounces
Yellow onion, diced 1 large
Green bell pepper, diced 1 large
Celery stalks, diced 3 medium
Garlic, minced 4 cloves
Crushed tomatoes 28 ounces
Tomato paste 2 tablespoons
Chicken stock 2 cups
All-purpose flour (if making a roux) 2–3 tablespoons
Butter or oil 2–3 tablespoons
Smoked paprika, dried thyme, bay leaves To taste
Salt and pepper To taste
Cooked rice, for serving 4–6 cups

Step-by-Step Method: Building Flavor from Browning to Simmer

Begin by patting the chicken dry and seasoning it simply with salt and pepper; dry meat browns better, which is essential. Brown the thighs skin-side down in a heavy-bottomed pot until the skin is deeply colored and releases easily—this may take eight to ten minutes per side depending on pan heat. Remove the chicken and set it aside; now brown the sliced sausage in the same pot. The sausage will render flavorful fat that becomes the foundation for the sauce, so don’t skimp on this step.

Next, if you like a slightly thickened sauce, make a simple roux by sprinkling a couple of tablespoons of flour over the fat and toasting it briefly until it smells nutty and turns a light brown. Stir in the diced onion, bell pepper, and celery, and cook until they soften and pick up a little color. Add garlic, deglaze the pan with a splash of stock or a few tablespoons of water, then stir in the crushed tomatoes, tomato paste, herbs, and the rest of the stock. Return the browned chicken and sausage to the pot, bring to a gentle simmer, and cook until the chicken is tender and the flavors have blended—about 30 to 40 minutes for bone-in thighs, slightly less for boneless.

Condensed Cooking Steps

For those who prefer a compact roadmap, here’s an ordered list that captures the essential stages. Follow each step intentionally; the timing is flexible, but sequence matters. Skip nothing unless you’re consciously substituting a technique for a reason.

  1. Season and brown chicken; set aside.
  2. Brown sliced sausage; remove some if you want extra crisp pieces.
  3. Sauté Holy Trinity in rendered fat; add garlic.
  4. Incorporate flour for a roux if desired; toast briefly.
  5. Add tomatoes, paste, stock, and seasonings; deglaze well.
  6. Return proteins to pot; simmer until tender and sauce thickened.
  7. Adjust seasoning; finish with parsley or green onion and serve over rice.

Technical Tips That Make the Dish Shine

Creole Chicken with Sausage. Technical Tips That Make the Dish Shine

Temperature control is a small thing that makes a big difference. Don’t rush the browning: medium-high heat gives color without burning; if the pan is too hot, the exterior burns before flavors develop, and if it’s too cool, you’ll steam rather than brown. When you brown sausage, leave the fond—the browned bits on the bottom of the pot—they carry intense flavor into the sauce when you deglaze. A wooden spoon is perfect for scraping and loosening those morsels into the tomatoes and stock.

Balancing acidity and richness matters. If the sauce tastes too acidic from the tomatoes, add a touch of honey or a teaspoon of sugar and continue to simmer; if it feels flat, a splash of vinegar or lemon juice right at the end brightens the whole pot. Thickness is adjustable: simmer longer to reduce and intensify, or add more stock if you want a looser, stew-like consistency. Taste as you go and season in small increments so you don’t overdo it.

Choosing Between Bone-In and Boneless

Bone-in thighs deliver deeper flavor and resist overcooking; their collagen melts into the sauce, enriching texture. Boneless thighs or breasts cook faster and are sometimes preferred for weeknight convenience, but they can dry out if over-simmered. If you use boneless pieces, shorten the simmer time and consider removing them once tender so they don’t break apart. For presentation, sear with skin on then finish skin-off in the sauce; it keeps the meat succulent while making serving neater.

Variations: From Weeknight Shortcuts to Party-Sized Pots

This recipe is adaptable. For a quick weeknight version, slice boneless thighs and brown them fast, use pre-cooked smoked sausage, and skip the roux—just sauté the Holy Trinity, add canned tomatoes, stir in spices, and simmer for 20 minutes. For a slow-cooked Sunday pot, brown everything and finish in a low oven or slow cooker for several hours; the flavors deepen and the chicken becomes fall-apart tender. An Instant Pot method pressures the dish to tender in under an hour—brown on the sauté setting, then pressure cook for 10 to 12 minutes depending on cut.

You can also tailor heat and texture by swapping sausage or adding vegetables. Use a kielbasa for a milder, sweeter smoke; include okra for a thicker, Southern-style finish; or toss in sliced mushrooms for earthiness. Vegetarian cooks can substitute hearty plant-based sausages and use mushroom or vegetable stock while keeping the Holy Trinity and tomatoes intact for a robust, Creole-inspired stew.

Sides and Serving Suggestions

This Creole chicken with sausage sings when spooned over plain steamed rice, which soaks up the sauce and lets the main flavors take the spotlight. For an earthier plate, serve with creamy polenta or buttery grits; toss a handful of chopped green onions on top for color and snap. A simple side of sautéed greens—collards, kale, or Swiss chard—adds bitterness to balance the tomato richness and brings welcome texture contrast.

For entertaining, set up a rice station with bowls of hot cooked rice, chopped parsley, lemon wedges, and hot sauce so guests can customize. Add a bright, crunchy salad dressed with a lemon vinaigrette to cut through the dish’s weight, and consider a crusty French loaf or corn muffins to mop up any lingering sauce. These small accompaniments make a family-style meal feel both casual and considered.

Storage, Reheating, and Freezing

This dish stores beautifully and often tastes better after an overnight rest because the flavors meld. Refrigerate in an airtight container for up to four days; reheat gently on the stovetop over low heat with a splash of stock to restore looseness. Avoid overheating, which can toughen the chicken. For longer storage, cool completely, then freeze in meal-sized portions for up to three months. Thaw overnight in the fridge and reheat as above.

When reheating from frozen directly, use low heat and a covered pan to prevent drying. If the sauce separates or feels grainy after freezing, whisk in a tablespoon of butter or an extra splash of stock as it warms to smooth the texture. Proper storage makes this an ideal candidate for batch cooking and busy weeks when you want a home-cooked meal with minimal evening effort.

Nutrition, Portions, and Pairings

Nutritionally, this meal balances protein and vegetables and can be moderated for calories by choosing leaner cuts or reducing added fats. A typical serving contains protein from the chicken and sausage, carbohydrates from the rice, and fiber from the vegetables and tomatoes. If you’re watching sodium, pick low-sodium stock and check the sausage label—cured meats contribute most of the salt. Increasing the vegetable ratio—more peppers, tomatoes, and a handful of greens—adds volume and micronutrients while keeping the dish satiating.

Wine or beer pairings lean toward brightness and acidity to complement the tomato base and smoky sausage. A chilled dry rosé or a citrusy Sauvignon Blanc works nicely, as does a medium-bodied lager or amber ale. Nonalcoholic options include iced tea with lemon or a sparkling water with a wedge of lime to cut the palate richness between bites.

Allergen and Diet Notes

Be mindful that sausages often contain gluten, dairy, or other fillers depending on brand. For gluten-free kitchens, choose a certified gluten-free sausage and gluten-free flour or omit the roux and thicken with a cornstarch slurry if needed. To reduce saturated fat, trim visible fat from the chicken and pick a leaner sausage, though this will alter the traditional mouthfeel. Always check labels when cooking for people with allergies or strict dietary needs.

Stories from My Kitchen: A Personal Note

I learned to make this style of Creole chicken with sausage from a friend who grew up in southern Louisiana; she taught me how to smell a roux and how patience rewards you with a sauce that tastes like an embrace. Once, I brought a pot to a neighborhood potluck and watched it disappear faster than anything else on the table—kids and adults alike came back for seconds, spooning it over rice with wide, satisfied grins. Those moments have stayed with me: the recipe isn’t just about feeding people, it’s about making a pot that invites conversation and fills a room with warmth.

On rainy nights, this is my go-to comfort. I brown the chicken while the rain taps the windows, then let the pot hum on low while I tidy the house or read. The aroma becomes a quiet promise of something good to come, and when the family sits down, conversation seems easier, laughter a little louder. Food that makes the ordinary evening feel special is, to me, the highest compliment a recipe can give.

Common Mistakes and How to Avoid Them

One frequent misstep is rushing the browning stage; impatient cooks often skip proper searing and lose the depth that carries through the whole dish. Another is over-relying on heat instead of layers—if you throw everything in on high and expect magic, you’ll get a flat, one-note sauce. Also, under-seasoning during the cooking process and then dumping a lot of salt at the end can’t replicate the balanced flavor achieved by gradual adjustments throughout simmering.

To avoid these mistakes, taste early and often, and season in small amounts as the sauce reduces. Respect timing: take the few extra minutes to brown carefully. Finally, when trying variations—different sausage or plant-based substitutes—adjust cooking times and seasoning to the ingredient’s character rather than following the original recipe blindly. With these simple corrections, your pot will reward you consistently.

Final Serving Tips and a Small Checklist Before Serving

Right before serving, lift the lid and check texture and seasoning one last time. If the sauce seems thin, simmer a bit uncovered; if it’s too thick, add a splash of stock. Remove bay leaves and tuck fresh herbs into the pot for an aromatic finish. A final grind of black pepper and a swirl of butter or a drizzle of good olive oil will add sheen and roundness to the sauce.

Here’s a quick checklist to run through before you call everyone to the table: rice is hot and fluffed, pot is at serving temperature, fresh herbs chopped, lemon wedges and hot sauce available, and bread warmed if using. Small touches like these make serving seamless and let the dish shine precisely as it should.

Ready to Cook

Bringing together chicken, smoked sausage, tomatoes, and that unmistakable Creole seasoning creates a meal that is both robust and comforting. The method is straightforward but rewards attention: brown with patience, layer flavors deliberately, and finish with a little brightness. Whether you make a quick weeknight skillet or a slow-simmered Sunday pot, this dish is designed to be shared, and it stands up well to improvisation and personal touches.

Gather your ingredients, pick a pot you trust, and give yourself the time to build flavors. The reward is a home-cooked plate that tastes like the Gulf Coast: warm, tomato-laced, and full of welcome. Enjoy the process and the company you’ll feed around the table.
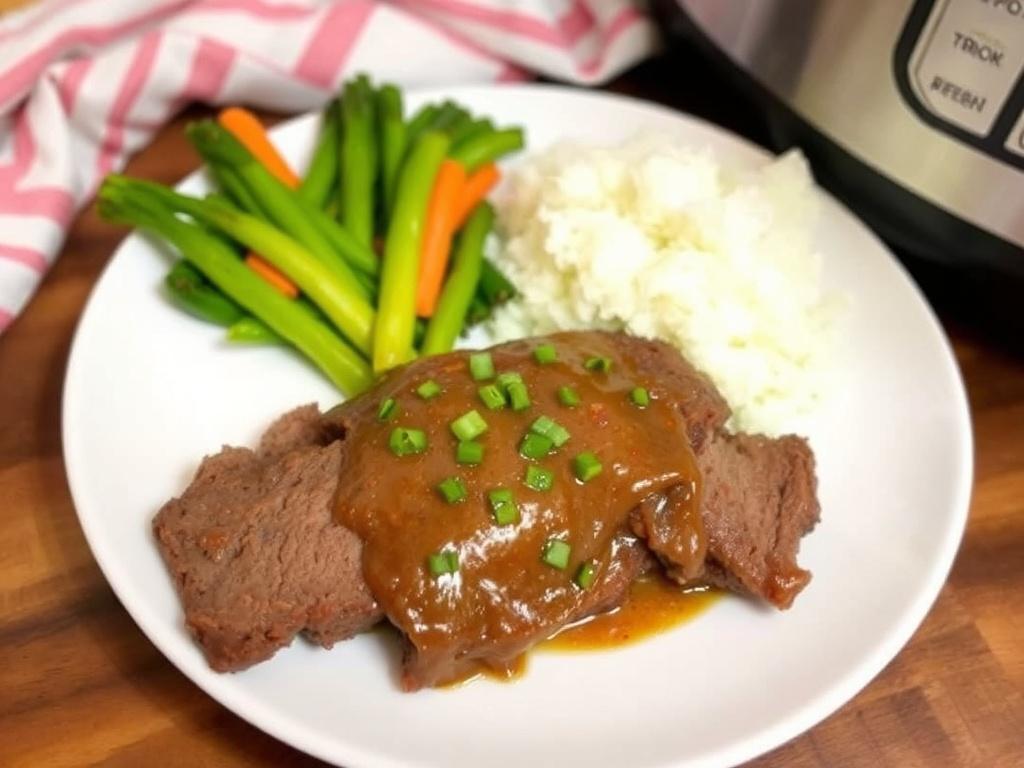
Fall-Apart Brisket in Less Time: The Complete Guide to Instant Pot Beef Brisket

There is something deeply satisfying about a plate of fork-tender brisket that slides apart with the push of a fork. This guide will walk you through turning a tough cut into a juicy centerpiece using an electric pressure cooker, while keeping the spirit of a slow-smoked roast intact. I will cover choosing the right cut, prepping and seasoning, the exact cooking strategy, and finishing touches that turn simple meat into a true comfort meal. Along the way I will share practical tips I have learned from repeated experiments and hands-on cooking, so you avoid common mistakes and get consistent results. Read on and you will leave with a reproducible method that rewards patience without requiring a full day in the kitchen.

Why pressure-cooked brisket works and what to expect

Brisket is a working muscle with a lot of connective tissue and collagen, which means that slow, moist heat is the secret to converting toughness into tenderness. A pressure cooker accelerates that transformation by forcing moist heat deep into the meat, breaking down collagen into gelatin in a fraction of the time required by smoking or braising. Texture is the main difference you should monitor: the goal is fork-tender but not mushy, with strands of meat that still hold some structure. Flavor development also matters; pressure cooking captures and concentrates the liquids and aromatics so you end up with a rich braising sauce. If you understand these fundamentals, you can adapt timing, liquid, and searing to get predictable, delicious results on the first try.

Expect a brisket cooked under pressure to be different from a low-and-slow smoked version in terms of crust and smoky nuance, but not in depth or comfort. You can recreate a crust by searing before pressure cooking and finish under the broiler if you like a caramelized exterior. The interior should be moist and glossy from the rendered fat and gelatin, and the cooking liquid becomes a natural sauce that can be reduced or enriched. For many home cooks, the balance between busy schedules and a desire for a hearty roast makes this method especially appealing. In short, you trade a few hours of patience for an outcome that still feels homey and indulgent.

Choosing the right cut and how to trim it

Not all brisket packages are created equal, and choosing the right piece will influence the final texture and flavor. You want a whole brisket (packer cut) when possible, which includes both the flat and the point; the flat is leaner and slices neatly, the point has more marbling and gives that buttery mouthfeel. If a whole packer is unavailable, a well-marbled flat will still yield a satisfying result if you manage cooking times and resting carefully. Look for consistent fat marbling throughout the muscle and avoid overly dry or discolored pieces.

Trimming is as much about practical cooking as about aesthetics. Trim excess hard fat that won’t render fully during the relatively short pressure cooking cycle, but keep a thin layer of fat to protect the meat and add flavor. Remove any silver skin or thick membrane that could prevent seasonings from penetrating or create an unpleasant chew. If you plan to slice for presentation, mark the grain and keep the flat intact so you can cut against the grain after resting. These small steps make a visible difference in final tenderness and appearance.

Essential ingredients and pantry staples

A focused list of ingredients keeps the cooking process straightforward and highlights the beef without overwhelming it. Basic pantry items like kosher salt, freshly ground black pepper, and garlic are indispensable. A balance of aromatics—onion, carrot, celery—adds a savory backbone, while a splash of acid in the form of vinegar, beer, or tomato products helps unlock flavor and tenderize the tissue. Liquid is essential for pressure cooking; beef stock is ideal for depth, but water plus soy sauce or Worcestershire works in a pinch.

Below is a compact ingredient list suitable for a 3 to 4 pound brisket. Quantities can be scaled, but the ratios help preserve the flavor profile when you increase weight. Keep spices simple: smoked paprika, cumin, and a touch of brown sugar often create a pleasing balance between caramel notes and savory depth. Fresh herbs can be added whole to the pot for aromatics and removed before serving.

  • 3–4 lb beef brisket (flat or packer)
  • 1 tablespoon kosher salt, 1 teaspoon black pepper
  • 1 tablespoon smoked paprika, 1 teaspoon ground cumin
  • 2 tablespoons olive oil (for searing)
  • 1 large onion, 2 carrots, 2 stalks celery, roughly chopped
  • 3–4 cloves garlic, smashed
  • 2 cups beef stock (or water + 1 tbsp Worcestershire)
  • 2 tablespoons tomato paste or 1/2 cup crushed tomatoes (optional)
  • 2 tablespoons apple cider vinegar or a light beer (optional)

Step-by-step recipe: from sear to slice

The recipe below offers a structured approach that balances searing for flavor with efficient pressure cooking for tenderness. Searing first builds Maillard reaction flavors that the pressure environment cannot create on its own, and deglazing the pot unlocks those browned bits into the braising liquid. Use the sauté function of your electric pressure cooker or a separate skillet if your model tends to smoke during high heat. After searing and deglazing, arrange the brisket on the trivet or lay it directly into the liquid depending on how much sauce you prefer.

Timing is the key variable: use a weight-based guideline and allow a natural pressure release for best texture. A final resting period after cooking allows the juices to redistribute and firms the meat slightly so it slices cleanly. Below is a straightforward sequence that you can follow; read it once through before starting so you have everything ready when heat and time begin to affect the meat.

  1. Pat brisket dry and apply a rub of salt, pepper, smoked paprika, and brown sugar. Let rest at room temperature for 20–30 minutes if time allows.
  2. Set the cooker to sauté, heat oil, and sear brisket 3–4 minutes per side until deeply browned. Remove and set aside.
  3. Sauté onions, carrots, and celery until soft, then stir in garlic and tomato paste. Deglaze with stock and vinegar, scraping browned bits.
  4. Return brisket to the pot, fat side up, on a trivet or nestled into the liquid. Lock lid and set to high pressure.
  5. Cook using a guideline of 1 hour per pound for a balance of tenderness without falling apart, then allow natural release for 15–20 minutes.
  6. Remove brisket, tent with foil, and let rest 20–30 minutes. Strain and reduce cooking liquid for sauce if desired, then slice against the grain and serve.

Searing tips that make a measurable difference

Searing is where you earn much of the flavor people associate with roasted brisket; those browned surfaces become the foundation of the braising liquid. Use high heat and a thin layer of neutral oil with a high smoke point. Don’t overcrowd the pot—if the brisket cools the surface, it will steam rather than brown. If searing inside the multi-cooker creates too much smoke, use a heavy skillet and transfer the fond into the cooker with the deglazing liquid.

When you sear, aim for a deep mahogany color rather than black charring. Move the meat with tongs rather than piercing it with a fork to preserve juices. Searing also helps the seasoning adhere and crisp slightly under finishing heat. If you like a peppery crust, press cracked pepper into the surface before searing so it toasts but does not burn. These steps take only a few minutes but multiply the sensory reward of the final dish.

Pressure settings and timing: guidelines for consistent tenderness

Finding the right cook time is a balance of size, cut, and your texture preference. For most flats between 3 and 5 pounds, a good rule is 60 minutes per pound for a tender but sliceable result. If you prefer the meat to shred for sandwiches or tacos, increase time by 10 to 15 minutes per pound. These are starting points; meat age, thickness, and how aggressively you trimmed fat can shift results slightly.

Allowing for a natural pressure release of 15–20 minutes helps the muscle fibers relax and prevents a sudden collapse that can squeeze out juices. Quick-release right after a long cook risks tightening the meat and increasing toughness. If your cooker has a meat/stew preset, use it as a baseline but be willing to add incremental minutes on subsequent tries to dial in the texture you prefer. Keep a notebook—small adjustments produce consistent improvement over just a couple of attempts.

Resting and slicing: how to present and serve

Resting is often overlooked but is essential to a successful slice. After pressure cooking, tent the brisket with foil and allow it to rest for 20 to 30 minutes; this reabsorbs juices and firms the meat for cleaner slices. Slice against the grain in thin, even slices for the flat; the point may be better shredded or chopped for mixing into sauces. Use a long, sharp carving knife or an electric slicer for precision, and work from the thinner end toward the thicker part to maintain uniformity.

Arrange slices on a warmed platter and spoon some of the reduced braising liquid over the top to add sheen and moistness. If you prefer, reserve a thicker jus on the side so each person controls how saucy their portion becomes. For family-style serving, stacking slices and finishing with chopped parsley and a sprinkle of flaky salt creates a rustic, inviting presentation. These finishing touches do as much for perception as for flavor.

Sauce, jus, and finishing techniques

The cooking liquid is a treasure trove of concentrated flavor and can be transformed in multiple ways. Strain the liquid and simmer it to reduce and intensify, then finish with a pat of butter for gloss and mouthfeel. If you want a barbecue profile, whisk in a spoonful of your favorite sauce and simmer briefly; for a richer gravy, make a beurre manié (butter and flour paste) and whisk to thicken. Acid and sweetness are balancing agents—if the sauce feels flat, a teaspoon of vinegar or a touch of brown sugar can brighten it.

If you prefer a thicker, clingier sauce for sandwiches, reduce the liquid by half over medium heat and adjust seasonings. For a lighter approach, skim fat and serve the jus as a sipping sauce on the side. Herbs and aromatics can be added late in the reduction phase to preserve freshness; chopped thyme or rosemary blends particularly well with beef. Keep tasting as you reduce—the concentrated flavors evolve quickly and you can tailor the sauce precisely to the meal.

Serving ideas: turning brisket into a real comfort meal

Brisket lends itself to a wide range of serving styles, from plated Sunday roast to messy, gratifying sandwiches. For a classic comfort meal, serve sliced brisket over creamy mashed potatoes with a generous ladle of jus and a side of roasted root vegetables. The interplay of silky potatoes, rich meat, and bright vegetables ticks all the boxes for comfort without feeling heavy in a clumsy way. Alternatively, use chopped brisket in tacos with pickled red onions and a green salsa for a lively weeknight change.

Sandwiches are an especially versatile option: pile warm brisket into a toasted roll, add a smear of mustard or aioli, and top with crunchy slaw to cut richness. For a family-style spread, set up a station with sliced meat, sauces, and sides so everyone customizes their plate. The idea is to lean into textures and contrasts—acidic pickles, crisp slaw, or a herbaceous salad bring a freshness that complements the deep meat flavors. These combinations deliver a satisfying meal that feels like a hug but tastes refined.

Side dish pairings that elevate the plate

Choosing the right sides transforms brisket from a single good element into a memorable dinner. Classic companions like mashed potatoes, creamy polenta, or buttery egg noodles provide a neutral, comforting base that soaks up sauce. For brightness and balance, serve roasted Brussels sprouts or a simple green bean sauté with garlic and lemon. A crisp, vinegary slaw or quick pickles offers the acid and crunch that provide a pleasing counterpoint to the meat’s richness.

For holiday or special-occasion dinners, consider more structured sides: a gratin, herb-roasted fingerlings, or glazed carrots can add color and texture variety. Grain-based sides—barley pilaf, farro salad—also work well, especially when tossed with roasted vegetables and a lemon vinaigrette to cut density. The key is contrast: pair the unctuousness of the brisket with something bright, crisp, or acidic to keep each bite lively.

Make-ahead, leftover ideas, and freezing

Brisket is forgiving when it comes to make-ahead planning. Cooked meat keeps beautifully in the fridge for 4 to 5 days, and the flavors often improve after a day as the sauce permeates the slices. For storage, keep meat and sauce together in an airtight container to prevent drying. Reheat gently in a low oven with foil or in a saucepan with added stock to revive moisture; avoid high heat which can toughen proteins and dry the slices.

Leftovers are culinary opportunities. Turn slices into hash with sautéed potatoes, peppers, and eggs for breakfast. Chop the meat and mix with barbecue sauce for pulled-brisket sandwiches, or toss with pasta and roasted vegetables for a hearty weeknight bowl. Brisket freezes well for up to three months; freeze in portions with cooking liquid to preserve texture and flavor. Thaw slowly in the refrigerator overnight and reheat using gentle methods for best results.

Troubleshooting common issues

If brisket comes out too tough, the likely culprits are undercooking or rapid pressure release. Add time in 10–15 minute increments and allow a natural release; muscle fibers relax gradually and need that gentle finish. If meat is overly soft or falling apart, the cut may have been overcooked for your preferred texture or the piece was small and thin. Adjust future cooks by reducing time or choosing a slightly different target texture.

Excessively fatty or greasy sauce can be corrected by skimming cooled liquid and discarding the solidified fat. If the sauce tastes flat, balance it with acid and salt; if it tastes too salty, dilute with a little unsalted stock and reduce further. For dry edges, slice thicker against the grain and serve with more jus or use the meat in a saucier application like chili or stew. Cooking is iterative—small adjustments create significant improvements over a few tries.

Variations and global twists

Brisket adapts well to flavor profiles from many cuisines, and the pressure cooker is a perfect medium for exploring those variations. For a Korean-inspired version, braise with soy sauce, ginger, garlic, and a touch of brown sugar, then finish with sesame oil and scallions. A Mexican take could include chipotle peppers, cumin, and orange juice for a balance of heat and citrus, perfect for tacos. These shifts require minimal changes in technique but deliver distinctly different dining experiences.

Another idea is to go Eastern European: use paprika, bay leaves, and caraway seed in the braising liquid, serve with dumplings or buttery spaetzle. If you want barbecue leanings, incorporate liquid smoke and a spoonful of your favorite barbecue sauce into the cooking liquid, then finish by broiling or grilling slices briefly to set a crust. These variations are fun ways to keep the method fresh and tailor the dish to diverse palates.

Personal notes and lessons from practice

Instant Pot Beef Brisket. Personal notes and lessons from practice

Over years of experimenting I learned to trust the meat more than the clock. Early attempts had me obsessing over exact minutes and frantic adjustments, which often produced inconsistent results. Once I adopted weight-based timing and focused on the quality of the initial sear and a patient natural release, every batch improved. One memorable test involved a brisket that had been neglected in the fridge for a few extra days; surprisingly, it produced one of the most flavorful outcomes because the dry surface absorbed the rub better and searing created a deeper crust.

I also discovered the power of the resting period. Skipping that step once led to a beautiful roast that bled juices across the cutting board and fell into an unattractive pile. Since then I always allow a 20–30 minute rest under foil—it makes slicing clean and the plate prettier. These are small practices, but they matter when you want to serve a dish that feels intentional and refined, even if it’s ultimately a home-style comfort meal.

Quick reference cooking times and tips

Here is a compact table to use as a quick reference for pressure times and general notes. These are guidelines and should be adjusted for your specific electric pressure cooker model and the precise size of the cut. Keep in mind that carryover heat and resting time continue to affect texture after pressure release. When in doubt, err on the side of slightly longer cooking and plan for a thorough natural release.

Brisket Weight Pressure Time (High) Result
2–3 lb 60–90 minutes Sliceable, tender
3–5 lb 90–120 minutes Fork-tender, good for slices or shredding
5–7+ lb 120–150+ minutes Shreds easily, very tender

Final serving suggestions and how to make it your own

To make your brisket truly your own, think about the story you want to tell at the table: rustic and homey with mashed potatoes, smoky and casual in sandwiches, or festive and composed with glazed vegetables and a composed salad. Garnishes matter: fresh herbs, a squeeze of acid, or a scattering of crunchy fried shallots change the finishing note substantially. Serving temperature is also relevant—warm plates help the slices stay glossy and the sauce cling better.

Whether you are feeding a small family or a crowd, the pressure cooker method puts a satisfying main dish within reach of a busy schedule. The result is not a compromise but a different expression of brisket that conserves time while delivering comfort and depth. Try a couple of variations, keep notes, and soon you will have a reliable formula that matches your preferences. Invite friends, serve generous portions, and enjoy the relaxed pleasure of a meal that welcomes conversation and seconds.

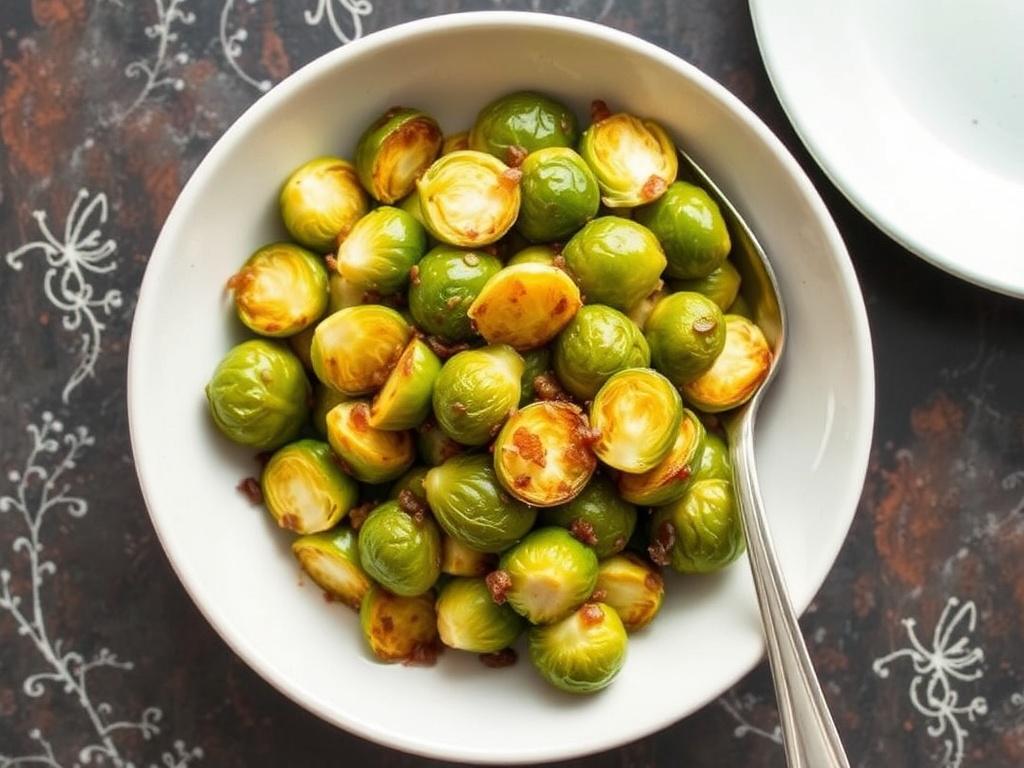
Sautéed Brussels Sprouts: Turning a Once-Dismissed Vegetable into a Weeknight Star

If you grew up dodging brussels sprouts on your dinner plate, prepare for a small revolution. Sautéed brussels sprouts can be bright, caramelized, even a little indulgent — not the soggy, sulfurous things from childhood. This article walks through choosing the best heads, prepping them for quick cooking, mastering heat and timing, and building flavor combinations that make these little cabbages a regular part of your cooking rotation. Along the way I’ll share techniques that I use at home, common mistakes to avoid, and a few recipes that are flexible enough for weeknights or company. Read on and you may find yourself buying more brussels sprouts than you used to.

Why brussels sprouts deserve a second look

Brussels sprouts have a reputation that sticks, despite their potential. When handled properly they develop deep, nutty flavors and crisp edges, with tender interiors that soak up dressings and glazes. In terms of utility they are incredibly versatile — they can be a simple side, a main for a vegetarian plate, or a component in salads and bowls. Nutritionally they punch above their weight, high in fiber, vitamins, and antioxidants, making them a genuinely healthy choice. Most of all, the right cooking method changes everything: fast, high heat and little water keeps bitterness down and sugar up, which is exactly what sautéing does best.

Picking and storing the best heads

Good results start at the market. Choose brussels sprouts that are compact and bright green, with tight leaves and no yellowing. Smaller heads tend to be sweeter and cook more evenly; very large ones can be woody in the core. If you buy stalks, use them within a few days; loose heads keep well in the crisper drawer for up to a week. Avoid vacuum-packed, pre-shredded versions if you want the best texture, though shredded sprouts do have their place when speed matters. Once home, store them unwashed in a breathable bag to avoid moisture buildup, which accelerates spoilage.

Prep: trimming, halving, and why that matters

How you prepare brussels sprouts has a direct effect on the final dish. Start by trimming the base to remove any hard, brown bits, then peel away damaged outer leaves. For sautéing, halving is the sweet spot: it exposes the inner layers to direct heat, allowing browning without falling apart. For very small sprouts you may leave them whole; for very large ones, quartering prevents sogginess. If you prefer a softer interior, par-cook them briefly by steaming or blanching before finishing in the pan. That extra step can be useful when you want both a tender center and crisp edges.

Tools and pantry staples for great results

You don’t need fancy gear to make excellent sautéed brussels sprouts, but a few items help. A heavy-bottomed skillet or cast-iron pan promotes even browning and heat retention. A good chef’s knife and cutting board make trimming faster and safer. Pantry-wise, olive oil and butter cover most flavor bases; neutral oils with high smoke points are useful for higher-heat searing. Salt, pepper, and a pungent vinegar or citrus will round out the dish. Optional but transformative: garlic, shallots, crushed red pepper, honey or maple syrup, bacon or pancetta for those who eat meat, and toasted nuts for texture.

Basic sautéed brussels sprouts: step-by-step

Here’s a reliable method I return to again and again. Heat a skillet over medium-high heat until it’s hot but not smoking. Add a tablespoon or two of oil, then place the halved brussels sprouts cut-side down in a single layer; leave them alone for several minutes to develop a golden crust. Once browned on the cut side, toss or stir and add aromatics like garlic or shallot. Finish with a knob of butter, a squeeze of lemon or a splash of vinegar, and season to taste. The goal is contrast: crisp, browned edges with tender, flavorful interiors.

Because timing is everything, here’s a short checklist to follow: pat sprouts dry, preheat the pan, space them so they don’t steam, resist the urge to stir immediately, then finish with an acid and seasoning. If you like a touch of sweetness, a drizzle of maple syrup or honey near the end will caramelize gracefully. If you prefer savory umami, finish with soy sauce or miso butter instead of lemon. The method is forgiving and rewards experimentation.

Flavor pairings that work every time

Sautéed Brussels Sprouts. Flavor pairings that work every time

Sautéed brussels sprouts pair beautifully with contrasting elements. Acid brightens and balances the vegetal richness; lemon juice, apple cider vinegar, or a good balsamic will do the job. Sweetness highlights caramelization — think date syrup, maple, or briefly sautéed apples. For crunch, toasted almonds, hazelnuts, or pepitas add texture and visual interest. Protein ideas include crispy pancetta, smoked salmon, or crumbled goat cheese for creaminess. Herbs and aromatics like thyme, sage, and garlic bring depth without overwhelming the sprouts themselves.

Classic combinations to try: lemon and parmesan, bacon and shallot, maple and mustard, or soy-ginger with sesame for an Asian-inspired twist. When pairing with starches, choose contrasts: creamy mashed potatoes, nutty farro, or simple risotto provide a soft backdrop to the roasted edges. If you plan a holiday plate, consider serving these alongside roast chicken or pork, where the sprouts’ assertive flavor cuts through rich meats.

Recipes: three favorite variations

Below are three distinct takes that show how adaptable sautéed brussels sprouts are. Each version follows the same basic technique but changes the finishing accents to create a different mood. Try them as written, then tweak to your taste; these recipes are as much guidelines as rules. Use seasonal ingredients and adjust levels of sweet and acid depending on what’s on hand.

  • Garlic and Lemon: Sauté halved sprouts until browned, add minced garlic and cook briefly, finish with lemon zest and juice, salt, and a pat of butter. Scatter chopped parsley for brightness.
  • Balsamic-Maple: After browning, deglaze the pan with a splash of balsamic vinegar and a teaspoon of maple syrup. Reduce until glossy and coat the sprouts. Finish with toasted walnuts and flaky sea salt.
  • Asian Sesame: Sear sprouts, toss with a mix of soy sauce, sesame oil, grated ginger, and a pinch of sugar. Top with sesame seeds and scallions for crunch and fragrance.

Ingredients at a glance

Here’s a compact ingredient list that covers the basics and common add-ons. Use it when shopping or when you want to improvise from your pantry. Quantities depend on servings, but three to four tablespoons of oil for a pound of sprouts is a reliable starting point. Adjust aromatics and finishes to taste; a little acid goes a long way at the end.

Essential Optional
Brussels sprouts Bacon or pancetta
Olive oil or neutral oil Maple syrup or honey
Salt and pepper Balsamic vinegar or lemon
Garlic or shallot Toasted nuts or seeds

Common mistakes and how to fix them

Even experienced cooks stumble with brussels sprouts sometimes. One frequent issue is steaming instead of browning; this happens when the pan is overcrowded or the sprouts are wet. Fix it by cooking in batches or using a larger pan, and pat the sprouts dry before adding them to the oil. Another misstep is under-seasoning. Vegetables need seasoning at two points: during cooking and at the end. Taste as you go and add small adjustments finally, especially acid and salt to elevate flavors.

Overcooking is another culprit: limp, dull sprouts mean missed potential. Aim for a crisp-tender texture, pulling the pan off the heat when the center yields to a fork but still has some resistance. If the sprouts develop a faint bitterness, balance it with a sweet element, like a touch of honey, or brighten with acid. Lastly, don’t skip the finish: a sprinkle of cheese, nuts, or herbs transforms the dish from utilitarian to memorable.

Healthy benefits and nutritional notes

Brussels sprouts are a great example of taste and nutrition aligning. They are high in vitamins C and K, fiber, and contain compounds called glucosinolates that have been studied for their potential health effects. In a balanced diet they support gut health, satiety, and micronutrient intake without a lot of calories. Cooking methods matter: sautéing in a moderate amount of healthy oil preserves nutrients while adding beneficial fats that help absorption of fat-soluble vitamins. Keep dressings and finishes moderate if you are watching calories.

For those watching sodium, use acid and herbs to boost flavor and reduce reliance on salt. If you need a palm of sweetness, choose natural options like a little maple syrup or caramelized onions rather than heavy sauces. The flexible nature of sautéed brussels sprouts means you can craft dishes that fit low-carb, vegetarian, or heart-healthy plans without sacrificing flavor.

Make-ahead, storage, and reheating

Sautéed sprouts store well and often taste even better the next day after flavors meld. Cool them to room temperature quickly, then refrigerate in an airtight container for up to three days. Reheating is best done in a hot skillet to revive crispness; avoid microwaving if you care about texture. If you want to prep ahead for a larger meal, par-cook the sprouts by blanching and storing them trimmed and halved; finish in the pan just before serving for the best surface browning.

Freezing is possible but not ideal for texture: frozen-and-thawed sprouts tend to be softer. If frozen storage is necessary, blanch briefly before freezing and expect a change in mouthfeel. For meal prep, pack sprouts separately from dressings and nuts, adding those components fresh at serving time to preserve crunch. Proper storage and smart reheating will keep the dish tasting lively even when prepared ahead.

Side dishes and main course pairings

Sautéed brussels sprouts can play many roles at the table. As a side, they balance fatty proteins: roasted pork, grilled salmon, or a simply roasted chicken all benefit from their assertive flavor. For vegetarian mains, serve them over grains like farro or barley, toss them into warm salads with roasted squash and pomegranate, or combine with lentils for a protein-rich bowl. They also shine with pasta: a simple pasta tossed with lemon, olive oil, parmesan, and browned sprouts is a weeknight hero.

Think about textures and contrasts when pairing: soft purées, creamy sauces, or starchy sides complement the sprouts’ crispness. In a composed plate, use sprouts as a bridge between savory and bright elements, such as nutty brown rice on one side and a vinaigrette-dressed salad on the other. Their ability to take on sweet, salty, and acidic notes gives you freedom to compose dishes across many cuisines.

Global inspirations: flavoring ideas from around the world

Sautéed brussels sprouts adapt well to global flavors. In Mediterranean cooking, finish with preserved lemon, olives, and a drizzle of good olive oil. For an Asian twist, add soy sauce, rice vinegar, chili flakes, and top with sesame seeds and scallions. A Middle Eastern profile could include pomegranate molasses, toasted pine nuts, and sumac for tang. Each approach highlights different facets of the sprouts, from their capacity to carry sweet reductions to their affinity for bold spices.

Experiment with spice blends too: a Moroccan ras el hanout can make for an aromatic side, while a simple curry powder muffles bitterness and adds warmth. When borrowing global flavors, keep balance in mind; brussels sprouts are assertive and can handle strong seasonings, but they still need a bright acid or fresh herb to lift the dish and avoid heaviness.

Vegetarian and vegan options

Brussels sprouts are a natural fit for vegetarian and vegan cooking. Use olive oil or vegan butter instead of animal fats, and bring in umami through soy sauce, miso, or nutritional yeast. Nuts and seeds substitute for crunchy bacon; toasted hazelnuts or almonds provide mouthfeel and richness. For creaminess, a spoonful of tahini or a dairy-free yogurt can be whisked into a warm dressing and tossed with the sprouts just before serving.

Protein additions such as chickpeas, tempeh, or white beans transform sautéed sprouts into a satisfying main. Pan-sear chickpeas until crisp before tossing them in; they add color and a nutty note that plays well with lemon or balsamic finishes. These plant-forward versions keep the dish healthy without sacrificing pleasure.

Serving for a crowd and scaling up

When cooking for a group, the biggest challenge is maintaining the sprouts’ texture. Overcrowding the pan will steam them; instead cook in batches and keep finished portions warm on a sheet in a low oven. If oven space is limited, finish leftover batches with a quick sauté in the seasoned pan to reheat and re-crisp. Timing and plating matter: serve immediately after the final finish so the acids and fats are fresh and the edges remain crisp.

For potluck-style meals, consider serving the sprouts at room temperature dressed lightly with oil and acid, and provide finishing elements like toasted nuts, grated cheese, and lemon wedges so guests can personalize. This approach absorbs some of the fuss while still delivering a flavorful, texturally interesting dish that holds up outside the kitchen.

Personal note: how sprouts won a permanent place on my table

I used to be indifferent to brussels sprouts until I learned to treat them like tiny cabbages rather than a boiled side. A turning point came one winter when I tossed halved sprouts into a screaming-hot skillet with butter and garlic, then finished them with lemon and parmesan. The contrast of crisp edges and bright acid felt revelatory. Since then I’ve adapted that framework to dozens of variations, relying on the same basic techniques to make the sprouts shine. They now appear on my table not as an afterthought but as a versatile platform for seasonal flavors.

That experience taught me two things: first, good technique matters more than fancy ingredients; second, small tweaks — a different acid, a handful of nuts, a smoked protein — can change the whole mood of the dish. This is why I recommend experimenting and keeping a few pantry staples on hand that let you pivot quickly between savory, sweet, or tangy finishes.

Troubleshooting: answers to common questions

Why are my sprouts mushy? Usually because they steamed rather than seared. Dry them, spread them in a single layer, and give the cut side time to brown before stirring. Why do they taste bitter? Slight bitterness can be natural, but overcooking intensifies it. Brighten the dish with acid or a dash of sweetness. Why don’t they brown? Your pan is likely not hot enough, or the oil amount is too small. Heat management and pan choice make the difference.

If you find uneven cooking, check for unevenly sized sprouts; quarter the largest to match cooking time. If garlic is burning before sprouts are done, add it later in the process or use softer aromatics like shallot. Small adjustments fix most problems — once you understand the variables, the dish becomes reliably good.

Final tips and inspiring last notes

If you take away one thing, let it be this: treat brussels sprouts like any ingredient that wants browning and contrast. Heat, space, and a finishing acid are your friends. Start simple, then layer flavors and textures that speak to your kitchen and season. Keep herbs, nuts, and a good vinegar or lemon on hand and you can transform sautéed brussels sprouts into countless dishes. They reward curiosity, and a little practice goes a long way toward making them one of your most dependable vegetables.

Try a few experiments in the coming week: a maple-balsamic batch for weeknight comfort, a soy-ginger pan for something bright, and a garlic-parmesan version when you want a crowd-pleaser. Each will teach you a bit more about timing and seasoning. In short, these little vegetables offer big returns for modest effort. Invite them into your repertoire, and you might start planning menus around what you can do with the next bag of brussels sprouts at the market.

Stuffed Peppers: The One-Dish Meal That Welcomes Every Cuisine

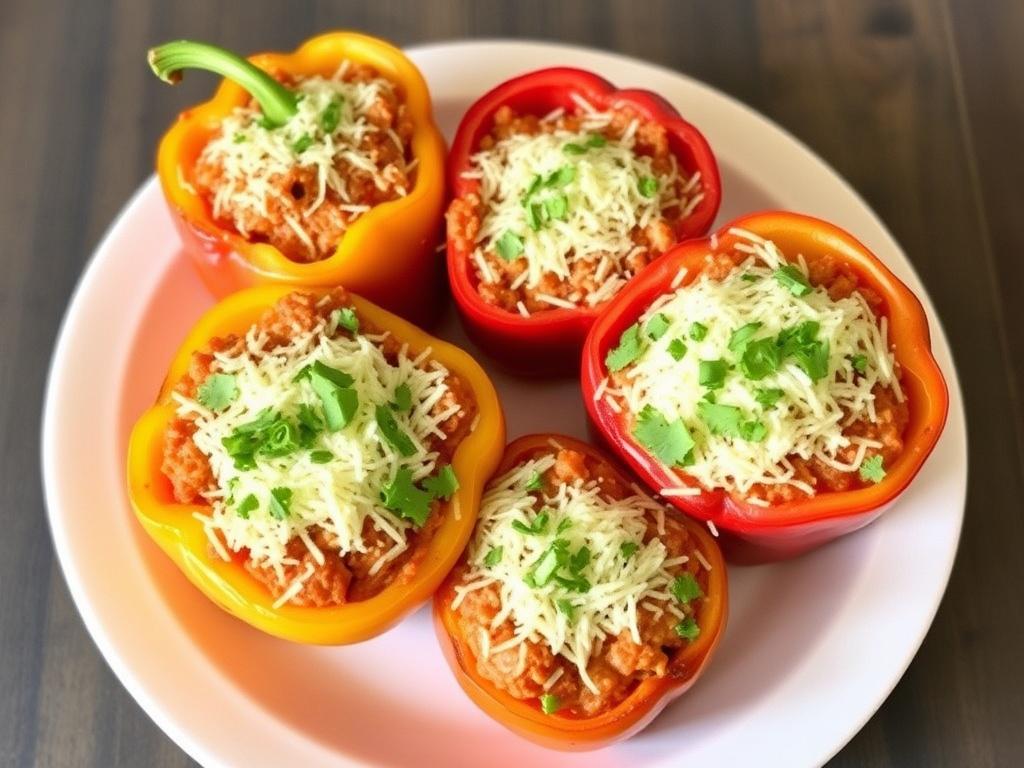
There is something quietly satisfying about a pepper filled with a warm, savory mixture that holds together like a small edible bowl. These bright vessels — crimson, golden, green — promise a filling that can be comfortingly familiar or wildly inventive. In this article I’ll walk you through the history, ingredient choices, techniques, and flavor variations that make stuffed peppers a kitchen staple, and share practical tips I’ve learned from years of cooking and experimenting. Whether you favor a classic meat-and-rice approach or a vegetarian, grain-forward version, you’ll find ideas and step-by-step guidance to make the dish your own.

A short history and why they endure

Pepper-based fillings have roots in many culinary traditions because they solve a basic human problem: how to present a hearty meal in an appealing, portable package. From Mediterranean kitchens that layer rice and herbs to Latin American adaptations that add beans and spices, the concept keeps returning in home cooking and restaurant menus alike. The reason is simple — the pepper acts as a natural container, concentrating aroma and moisture while keeping everything together during cooking. This structural and sensory advantage has allowed the dish to evolve rather than disappear.

Another reason stuffed vegetables persist is their versatility. A single recipe can be altered by swapping a protein, adding a different grain, or changing the spice mix, and the result still reads as the same comforting idea. They scale easily: a lone cook can roast a single pepper, while a family batch can feed several hungry people. This adaptability makes the recipe a reliable tool for home cooks who want variety without reinventing the wheel each dinner.

Anatomy of a perfect stuffed pepper

At its core a successful stuffed pepper balances three elements: a sturdy vessel to hold the filling, a filling with textural contrast, and a cooking method that melds flavors without turning everything mushy. The pepper should remain slightly tender but not collapse; the filling should be cohesive yet offer bites of grain, vegetable, or meat that keep the mouth interested. Moisture control is key: too dry and the filling feels chalky, too wet and the pepper becomes soggy.

Think in layers when planning flavor. A base of aromatics — onion, garlic, maybe celery — sets a savory foundation. The middle layer could be rice or another grain, combined with a protein and chopped vegetables for texture. Finally, a finishing element like cheese, chopped herbs, or a bright sauce adds contrast and lifts the dish. Attention to each layer during assembly transforms a routine stuffed pepper into something memorable.

Choosing the right peppers

Not all peppers are created equal for stuffing. Bell peppers are the obvious choice because of their size and flat bottoms that let them stand upright, but even within the bell family you’ll want medium-to-large fruits that are neither too thin-walled nor overly broad. Thick-walled peppers hold their shape during baking, and the best specimens have a smooth skin and steady color without soft spots. If you prefer a roasted flavor, choose peppers whose skins char nicely when placed under high heat or on a grill.

For smaller portions or a spicier presentation, consider using poblano, Cubanelle, or even long Italian peppers; they require gentler handling and sometimes shorter cooking times. When choosing colors, remember that red and yellow peppers are usually sweeter while green ones bring a slightly bitter edge. Combine colors on the tray for visual appeal and to vary flavor across the batch.

Grains and rice: base and alternatives

Rice is a classic grain to include in the filling because it absorbs flavors and keeps the mixture substantial. Long-grain white rice yields a lighter, fluffier texture, while short-grain rice gives creamier mouthfeel. Parboiled or converted rice is forgiving and retains structure after baking. If you use brown rice, plan for pre-cooking because it needs longer to soften. I often favor a mixture — partially cooked rice that finishes in the pepper — to achieve the best texture.

If you’re aiming for variety, swap rice for quinoa, bulgur, farro, or even pearl barley. Each grain changes the texture and nutritional profile: quinoa brings a nutty bite and complete protein, bulgur cooks quickly and yields a pleasing chew, and farro adds a hearty, almost toothsome quality. Consider the moisture each grain contributes and adjust your filling binder accordingly so everything holds together without collapsing into porridge.

Proteins and flavor builders

Ground beef and pork are familiar partners to rice in traditional recipes because they brown well and release fat that enriches the filling. For a leaner option use ground turkey or chicken and compensate with a splash of oil or a handful of grated cheese for richness. Lentils, crumbled tofu, and textured vegetable protein work superbly in vegetarian versions, especially when seasoned boldly; they provide bulk and soak up flavors effectively. Combining proteins — for instance, ground beef with finely chopped mushrooms — is a useful technique to extend meat and introduce earthiness.

Seasoning is the invisible scaffold of every great filling. Beyond salt and pepper, think about layers of umami such as tomato paste, soy sauce, miso, or grated Parmesan. Fresh herbs deliver brightness while dried spices add warmth and depth. When building the filling, taste as you go; the mixture should be slightly punchier than you imagine because some of that intensity softens during baking or braising inside the pepper.

Flavor profiles and global variations

When you travel mentally through the stuffed-pepper world, you find distinct families of flavors. Mediterranean versions lean on tomatoes, oregano, and lemon; Eastern European interpretations include dill and sometimes sauerkraut; Latin renditions bring cumin, cilantro, and chili heat. Each regional style reveals what local cooks pair naturally with peppers and which grains, proteins, and sauces feel like home. Embracing one of these profiles gives every pepper a coherent personality.

One of the delights of this dish is cross-pollination. You can start with a Mediterranean mise en place, add Mexican chiles, and finish with a sprinkle of feta — the result is still a stuffed pepper but one with an adventurous voice. That flexibility explains why the technique is so enduring: the structure remains the same while flavor turns on a dime depending on your pantry and mood.

Mediterranean style

Mediterranean stuffed peppers frequently pair rice with minced lamb or beef, tomatoes, onion, and herbs such as parsley, mint, or oregano. A squeeze of lemon or a scattering of chopped olives at the end brightens the deep, savory notes. Often the filling is cooked briefly before stuffing so the rice has already absorbed seasoning and fat, ensuring a cohesive mouthfeel after baking.

In Greece and neighboring regions, variations might include pine nuts, currants, or a drizzle of olive oil and a dusting of grated cheese before serving. The dish tends to be balanced between tangy and savory, making it appealing alongside a simple salad or roasted vegetables. These touches keep the finished plate from feeling heavy even when the filling is rich.

Mexican and Southwestern twists

In a Southwestern interpretation, peppers might be filled with a spiced mix of rice, black beans, corn, and ground meat or textured plant protein. Chili powder, cumin, and smoked paprika anchor the flavor, and a finishing flourish of cilantro, avocado, or a dollop of crema refreshes each bite. Roasting the peppers first adds char and complexity that pairs well with spice-forward fillings.

For a vegetarian approach, swap in quinoa and add roasted sweet potato cubes for body and sweetness. Toppings like pickled jalapeños, lime wedges, or cotija cheese change the mouthfeel and introduce textural contrast. These pepper bowls translate well to casual gatherings because they’re colorful and forgiving of variations.

Asian-inspired takes

Stuffed peppers also work beautifully with Asian flavor profiles: think sticky rice or short-grain rice combined with seasoned ground pork, ginger, scallions, and a soy-based glaze. Incorporate sesame oil and a touch of rice vinegar to keep the filling lively. In some regions, hollowed sweet peppers are steamed with a fragrant pork mixture and served with a sharp dipping sauce for extra umami.

To adapt an Asian profile to a vegetarian filling, use shiitake mushrooms and water chestnuts for textural contrast and a mixture of miso and hoisin for depth. Because these flavors can be delicate, avoid overwhelming the pepper with overly heavy sauces — a light glaze or spooned sauce on the plate is often more elegant than saturating the filling.

Technique: planning, prepping, and stuffing

Successful execution begins with organization. Have the filling ready before you cut the tops off the peppers; this minimizes time the peppers sit empty and exposed. Pre-cook any long-cooking components — like brown rice or lentils — so that the final bake or braise is a finishing step rather than a rescue mission. Mise en place matters: measure spices, chop vegetables uniformly, and keep liquids within easy reach to prevent overcooking.

Layering matters as much as ingredients. Start with a base of sautéed aromatics to build flavor, add your protein and brown it well, then stir in your grain and any binding elements. If you’re using cheese as a binder, reserve some for topping so it can form a golden crust. The filling should hold together when scooped because that structure prevents a watery filling from diluting the pepper while it cooks.

Preparing the peppers

Cutting the tops off is the most common approach because it creates a neat presentation and a convenient pocket. Use a small, sharp knife and slice horizontally, keeping the stem intact if possible; the visual contrast of a crisp green cap is appealing. Remove seeds and white membranes carefully because they can impart bitterness and leave an irregular interior that makes filling awkward. If the pepper won’t stand upright, trim a tiny sliver from the base, being cautious not to create a hole.

Some cooks prefer to halved peppers lengthwise for a quicker cook time and more surface area for browning. This method reduces structural demands on the pepper and means filling to the edge, which crisps nicely under a broiler. When using halved peppers, place them cut-side up in the pan and press the filling down so it makes contact with the pepper for better integration of flavors.

Crafting the filling

Cook rice until just shy of done if you plan to finish it inside the pepper; that way grains don’t become overly soft. If using raw rice in the filling, increase your liquid proportions and extend cooking time during baking. Combine the grain with sautéed aromatics and your chosen protein, then add binders like beaten egg, breadcrumbs, or mashed beans if you want the mixture to hold shape. Season generously at this stage because taste dulls after baking.

Texture balance is crucial. Add small diced vegetables — carrots, celery, zucchini — for bite, and include a handful of nuts or seeds for crunch if that appeals. Stir in herbs toward the end of cooking to preserve their brightness and finish with a splash of acid, such as lemon juice or vinegar, to lift the overall profile. A last-minute drizzle of olive oil improves mouthfeel and encourages a glossy finish.

Stuffing and cooking methods

When transferring the filling into peppers, do it with a spoon and gently press down to remove air pockets, but avoid over-packing which can burst the pepper as rice expands. Arrange stuffed peppers in a snug pan that supports them upright. Add a shallow bath of liquid — broth, tomato sauce, or a seasoned water mixture — to the base of the dish; this creates steam during baking, prevents dryness, and infuses flavor into the pepper sides.

Cover the pan during the initial bake to trap moisture and later remove the cover to allow browning. Timing varies by pepper size and whether you pre-cooked components. Monitor texture by testing one pepper near the end of the estimate: the interior should be hot and the pepper tender but not collapsed. A final broil or a sprinkle of cheese can introduce pleasing color and a textural top note.

Oven baking

Oven baking is the most forgiving method because it allows even heat distribution and the option to steam by covering the dish. Preheat to 180–200°C (350–400°F) depending on how quickly you want caramelization; lower temperatures favor slow melding of flavors while higher ones hasten browning. Place the stuffed peppers in a baking dish, pour in an inch of tomato sauce or broth, cover with foil, and bake until peppers are tender and the filling reaches an internal temperature of at least 74°C (165°F) if using ground meat.

Remove the foil during the last 10–15 minutes to encourage a browned top. If you like a crisp finish, switch to broil for a brief 2–4 minutes but watch them closely to prevent burning. Rest the peppers for several minutes after baking; this allows juices to redistribute so each bite is moist but not soupy.

Stovetop and skillet braise

For a quicker meal, you can braise peppers in a deep skillet with a tight-fitting lid. Start by sautéing the filling components in the pan, then nestle the prepared peppers into the mixture and pour in enough liquid to come about halfway up the pepper sides. Bring to a gentle simmer, cover, and cook until the peppers have softened. This method concentrates flavors quickly and reduces the need for an oven.

Stovetop techniques are especially useful for halved peppers which cook quickly and benefit from direct contact with the filling and pan. Finish with a sprinkle of fresh herbs or a drizzle of sesame oil for contrast. Because heat is more direct and uneven than in an oven, rotate the pan occasionally and check doneness by piercing the thickest part of a pepper with a paring knife.

Grilling or roasting whole

Grilling imparts a smoky dimension that transforms even simple fillings into something celebratory. For filled peppers, you can either grill the peppers first until softened and charred, then stuff them and finish on indirect heat, or use heavy-duty foil to create pockets that roast over coals. The charred skin brings a sweetness that complements spicy or richly herbed fillings; be mindful of flare-ups that could blacken exteriors too aggressively.

When roasting whole in a hot oven or grill, consider partially cooking the filling beforehand to ensure all components reach the desired tenderness. Wrap peppers in foil for longer, gentler heats or leave them exposed for short, high-heat sessions that prioritize char. Rest before serving so the smoky aromas settle and the filling firms slightly, making for easier slicing and a better texture.

Timings, temperatures, and troubleshooting

Understanding rough timings helps prevent common mishaps — undercooked rice, collapsing peppers, or overly dry filling. Below is a concise reference to guide baking times based on pepper size and whether components were pre-cooked. Use it as a starting point and adjust for your oven’s temperament and the density of your filling. Remember that fillings containing raw meat need to reach food-safe temperatures, so err on the side of longer cooking if in doubt.

Other common issues include watery fillings caused by excess tomato juice or insufficient binding, and scorched bottoms when the pan is too dry. To mitigate these, use a measured amount of liquid in the baking dish, stir the filling to check consistency before stuffing, and tent with foil during most of the bake. Simple fixes save a dish: a tablespoon of breadcrumbs can absorb extra moisture and a short broil at the end restores texture.

Pepper size Typical bake time at 180°C (350°F) Notes
Small peppers (e.g., lunchbox) 20–30 minutes Halved or whole with short-grain filling
Medium bell 35–45 minutes Pre-cooked rice, covered most of the time
Large bell 45–60 minutes May require longer if raw grains used

Make-ahead, freezing, and leftovers

Stuffed Peppers. Make-ahead, freezing, and leftovers

Stuffed peppers are excellent candidates for make-ahead meals. You can assemble them, cover tightly, and refrigerate for up to 24 hours before baking; this is handy for weeknight dinners or entertaining. If freezing, par-bake the peppers for 10–15 minutes to firm them slightly, cool completely, then wrap each individually and store in airtight containers. Reheat from frozen low and slow to avoid overcooking the exterior while the interior warms through.

Leftovers keep well and often taste better as flavors continue to meld overnight. Reheat gently in a 160–170°C (325–340°F) oven or covered in the microwave, adding a splash of broth if the filling has dried. Use leftover stuffing as a filling for tacos, as a topping for baked potatoes, or folded into omelettes for a creative second-meal transformation.

Serving ideas and pairings

Because stuffed peppers are substantial, pair them with lighter sides that complement rather than compete. A crisp green salad with a zesty vinaigrette offsets richness, while simple roasted vegetables reinforce the homey, rustic character of the dish. Grain salads, pickled onions, or a bright yogurt sauce provide pleasant contrasts in texture and temperature.

Here are a few pairing suggestions that work well across styles:

  • Fresh green salad with lemon vinaigrette for Mediterranean versions
  • Charred corn and black bean salad for Southwestern flavors
  • Steamed greens and quick-pickled cucumbers for Asian-inspired peppers
  • Crusty bread or flatbreads when you want something to sop up juices

My kitchen notes and tips from experience

I remember the first time I made a big tray of stuffed peppers for a casual dinner party; I underestimated how much attention guests pay to texture. The peppers looked beautiful but the filling turned out soggy because I used too much tomato sauce in the base. Since then I keep fillings on the drier side and rely on a measured simmering liquid in the pan so each pepper steams just enough. That mistake taught me to trust layers and restraint.

Another practical habit I adopted is to toast grains like rice or bulgur briefly in a dry pan before cooking. The light toasting deepens flavor and helps grains hold their shape. I also find that a small amount of grated hard cheese folded into hot filling binds things pleasantly and adds savory complexity without feeling heavy. These small rituals have become part of my pepper-making routine because they consistently improve results.

Stuffed peppers invite creativity without demanding reinvention. They respond well to pantry improvisation and scale from solo lunches to family feasts. Armed with an understanding of pepper selection, grain choices, protein swaps, and cooking methods, you can confidently design plates that suit seasons, dietary needs, and moods. Experiment, take notes, and build your own signature version — I promise the process is as rewarding as the meal itself.

Oven Alchemy: How to Make Roasted Vegetables That Steal the Show

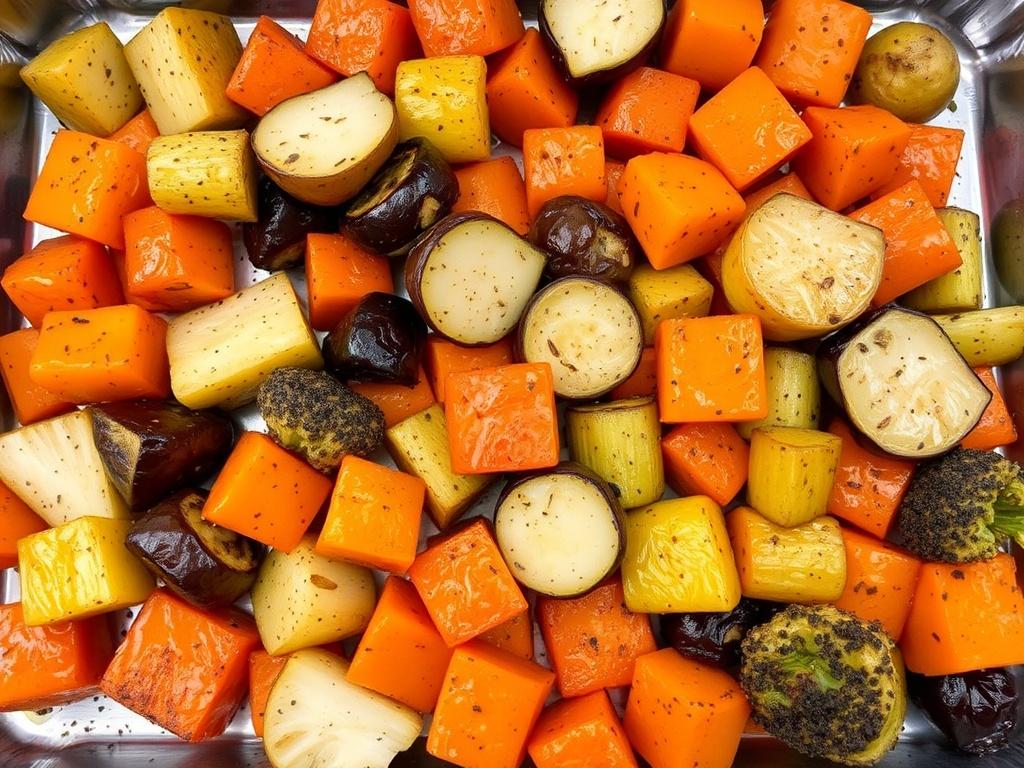
There is a simple kind of magic that happens when heat meets produce—edges darken, sugars transform, and ordinary vegetables become something deeply comforting and strangely celebratory. This article is a practical, lively guide to that transformation: how to pick the best ingredients, which techniques coax out the most flavor, and how to turn roasted vegetables into side dishes, mains, or leftovers you actually look forward to. I’ll share science-backed methods, seasoning ideas, troubleshooting tips, and recipes I use at home when I want food that warms both body and mood. Whether you’re aiming for crisp edges and tender hearts or a caramelized glaze that clings to every bite, the goal is the same: simple cooking that tastes complex.

Why roasting transforms vegetables

Roasting is not merely heating; it’s a controlled chemical conversation. As vegetables dry in the oven, their sugars and amino acids engage in the Maillard reaction, producing brown pigments and a cascade of new flavors: nutty, sweet, savory. At the same time, water evaporates from the surface, concentrating taste and allowing edges to caramelize and crisp. That interplay between concentrated interior moisture and a drier surface gives roasted vegetables their satisfying dual textures—silky inside, golden outside.

Beyond chemistry, roasting changes perception. Bitter or bland notes mellow and take on depth, while natural sweetness is amplified without adding sugar. The technique is forgiving, too; unlike sautéing, which demands constant attention, the oven delivers even heat and lets you multitask. Well-roasted produce can stand on its own, support proteins, or anchor winter menus with hearty flavors that feel both rustic and refined.

Finally, roasting is an efficiency hack in a busy kitchen. Ovens allow you to cook many different items at once at similar temperatures, freeing stove space and reducing cleanup. They also encourage creative leftovers: roasted vegetables turn into vibrant salads, purees, and grain bowls. Embracing the oven means embracing versatility without losing flavor.

Choosing produce: what to roast and when

Not every vegetable responds the same way to dry heat. Roots and dense vegetables love long, hot exposure because they contain starches and sugars that benefit from extended caramelization. Tender leaves and thin-sliced items do better at higher temperatures for shorter times to avoid burning. Seasonal availability matters: summer squash and tomatoes roast brilliantly in July, while parsnips and Brussels sprouts become cozy staples for a winter side in December. Knowing the character of each vegetable helps dictate temperature, cut size, and timing.

Texture and water content are the main variables. High-water vegetables like zucchini or mushrooms release liquid and can steam if crowded on the pan; cutting them thicker or roasting at higher temperatures on a hot sheet keeps them crisp. Conversely, starchy vegetables such as sweet potatoes or beets require longer, lower heat to soften through without blackening the exterior. The aim is balance: uniform pieces ensure even cooking, and proper spacing prevents steaming.

Here’s a practical reference table with common roasting times and ideal oven temperatures. Use it as a starting point and adjust for your oven and personal preference.

Vegetable Cut Temp (°C / °F) Time
Carrots 1/2-inch coins or sticks 200 / 400 25–35 minutes
Beets 1-inch cubes 190 / 375 40–60 minutes
Brussels sprouts Halved 220 / 430 20–30 minutes
Cauliflower Florets 220 / 430 25–35 minutes
Sweet potatoes 1-inch cubes 200 / 400 30–40 minutes
Zucchini Thick rounds 220 / 430 15–20 minutes

Root vegetables: the backbone of hearty plates

Roots like carrots, parsnips, beets, and turnips reward patient roasting. Their density softens and their sugars deepen; a low-and-slow approach or a medium-high roast until tender both work depending on whether you want a glazed interior or a caramelized crust. Toss them with a neutral oil, salt, and a touch of acid after roasting to brighten the natural sweetness. In my kitchen, a mix of carrot, parsnip, and sweet potato tossed with thyme and orange zest often disappears during the first course.

One practical tip: roast beets wrapped in foil if you want a softer, moister texture, or roast them unwrapped on a hot sheet for more intense caramelization. For even cooking among different roots, cut denser vegetables smaller and softer ones larger so they finish together. A sheet pan lined with parchment keeps edges dark without sticking and makes cleanup straightforward.

Brassicas and cruciferous vegetables

Broccoli, cauliflower, and Brussels sprouts thrive under high heat. Their edges char quickly, producing an appealing bitterness that balances their vegetal flavors. Tossing them with a bit of oil and placing them cut-side down on the pan promotes good contact and faster browning. A last-minute scatter of lemon, Parmesan, or toasted nuts cuts through the richness and adds textural contrast.

Brussels sprouts are an especially dramatic example: halved sprouts roast into tender centers and crispy outer leaves, transforming a vegetable often maligned into a crowd-pleaser. If your oven tends to produce uneven heat, rotate the pan midway through roasting. That small action prevents one side from overdoing while the other waits its turn.

Alliums and nightshades

Onions, garlic, shallots, peppers, and tomatoes respond differently but all benefit from heat. Onions and shallots become lusciously sweet and make a compelling base for many dishes; they can be roasted whole until soft or sliced for faster caramelization. Garlic mellows into buttery cloves perfect for spreading on bread or stirring into mashed root vegetables.

Tomatoes and peppers concentrate when roasted, turning syrupy and fragrant. I like to halve cherry tomatoes and roast them until their skins wrinkle and interiors sweeten; they’re excellent folded into pasta or layered over toasted bread. Bell peppers roasted until blackened, cooled in a bowl, and peeled reveal a smoky, silky flesh ideal for sauces and salads.

Tools and techniques: pans, oil, salt, temperature

Good roasting begins with good equipment, but it’s forgiving equipment: a heavy-duty rimmed sheet pan, sturdy roasting tray, and an oven thermometer are the essential trio. Dark pans brown faster, so reduce temperature slightly if you use them to avoid burning. A rimmed sheet keeps juices from dripping into the oven and gives you space to spread vegetables out, which is crucial—crowded pans steam, not roast.

Oil choice matters for flavor and smoke point. Use oils that can tolerate oven heat—light olive oil, avocado oil, or grapeseed work well. Save extra-virgin olive oil for finishing, where its flavor is appreciated without being stressed by high temperatures. Salt early to draw moisture and concentrate flavor, but adjust seasonings at the end; some herbs and salts taste brighter when added after cooking.

Temperature decisions hinge on texture goals. For crisp edges, aim for higher heat—220–230°C (425–450°F). For tender, evenly cooked roots, 190–200°C (375–400°F) gives time for internal softening before exterior over-browning. A high broil at the end can add charring, but watch closely; flames or charcoal-like edges can turn quickly from desirable to bitter.

Common pan and cooking mistakes—and how to fix them

Crowding the pan is the most frequent error: vegetables placed too closely steam each other and fail to brown. If you only have one pan, roast in batches or use two racks in the oven, switching pans halfway. Another mistake is using too little oil; a glaze helps heat transfer and promotes even browning. Finally, cutting pieces unevenly leads to mixed doneness—vote for uniformity and you’ll be rewarded.

Over-seasoning before roasting can sometimes draw out too much moisture, especially with salt and sugar. Salt early for structure but save vulnerable finishing touches like fresh herbs, citrus zest, and delicate cheeses for after roasting. When vegetables look done on the outside but are undercooked inside, return them at a lower temperature covered with foil until tender, then finish uncovered for crisping.

Oil choices and seasoning combinations

Oils and herbs shape the final personality of roasted vegetables. Neutral oils allow the vegetable’s flavors to shine; olive oil brings a fruitier note. For aromatic depth, experiment with oils infused with chili, garlic, or herbs. A small amount of butter added late in the roast amplifies richness, especially on winter-root combinations.

Seasoning is where the dish becomes distinctly yours. Classic pairings like rosemary with potatoes or thyme with carrots are reliable, but don’t hesitate to branch out: smoked paprika and cumin brighten roasted cauliflower, while za’atar gives an herbal, lemony lift to eggplant. Acidic finishes—vinegars, lemon juice, or pomegranate molasses—balance richness and highlight caramelized edges. Below are a few seasoning pairings to rotate:

  • Rosemary, garlic, coarse salt — for potatoes and parsnips
  • Smoked paprika, cumin, lemon — for cauliflower or sweet potatoes
  • Za’atar, olive oil, lemon zest — for eggplant and peppers
  • Balsamic, honey, thyme — for carrots and beets
  • Chili flakes, lime, cilantro — for corn and zucchini

Flavor building: caramelization, charring, and glazes

Caramelization concentrates sugars and creates that crave-worthy depth. For the best results, dry your vegetables before roasting; moisture on the surface delays browning. Toss them in oil, spread with space, and resist the urge to turn them constantly. Let contact with the hot pan do the work. Turning too often interrupts crust formation and reduces overall flavor development.

Charring adds a smoky edge that can be used sparingly to dramatic effect. A quick blast under the broiler or a few minutes on a screaming-hot pan produces darkened tips that taste roasted rather than burnt. Glazes—made from reduced vinegar, honey, maple, or fruit juices—coat vegetables in a glossy finish that locks in sweetness and introduces a sticky contrast to crisp edges. Brush glazes on near the end to avoid burning.

Finishing elements matter: acid brightens, salt lifts, and crunchy toppings add interest. A sprinkle of toasted seeds or nuts provides contrast; a smear of herbed yogurt or a handful of fresh herbs creates balance. Think in layers: base seasoning, caramelization, finishing acid, and a textural flourish to round out each bite.

Acid, fat, sugar and heat—balancing the components

Cooking is an exercise in balancing four elements. Acid—vinegar, lemon, tamarind—cuts richness and makes flavors pop. Fat—oils and butter—carries aroma and provides mouthfeel. Natural sugars in vegetables lend sweetness under heat, and applied sugar in glazes intensifies caramelization. Heat tames bitterness and unlocks complexity. Adjust one element and the others respond, so taste thoughtfully and add small increments rather than huge jumps.

For winter side dishes especially, I often prefer a bold acid finish: a splash of sherry vinegar or a scattering of pomegranate seeds lifts dense, roasted roots. These accents are easy and transformative; they convert an otherwise heavy component into something bright and satisfying on a cold evening.

Winter side ideas: hearty vegetable dishes that warm the season

As days shorten and temperatures drop, roasted produce becomes a pillar of winter cooking. Hearty roots, brassicas, and squash roast into dense, satisfying dishes that pair well with richer proteins and robust grains. A winter side benefits from bold flavors: warm spices, citrus, preserved fruits, and nutty elements all complement the roasted base. These sides sit well alongside braises, roasted birds, or simply a bowl of warm farro for a vegetarian dinner.

Here are five winter side ideas that travel from weeknight to holiday table. Each is designed to be straightforward while delivering layered flavor: 1) Maple-mustard roasted carrots with toasted pecans and orange zest; 2) Herb-roasted winter squash with sage and browned butter crumbs; 3) Balsamic-glazed brussels sprouts with pancetta or smoked almonds; 4) Cumin-roasted beets with yogurt, dill, and lemon; 5) Sweet potato wedges with smoked paprika, lime crema, and cilantro. These dishes demonstrate how small additions—nuts, acid, dairy—alter a roasted vegetable into a centerpiece.

For a true winter side that doubles as a starter, try serving roasted root medley over creamy polenta or alongside a lentil ragout. These combinations are practical, transport well to gatherings, and satisfy hunger without feeling heavy in an uninspired way. In colder months, they offer both warmth and solace on the plate.

Using roasted vegetables as a main course

Vegetables can carry a meal when treated with respect. Build a composed bowl: grains, greens, a hearty portion of roasted veg, a protein or legume, and a punchy dressing. For vegetarian mains, roast a thick slab of pumpkin or portobello mushrooms until richly caramelized, then top with toasted seeds and a herbed ricotta. Flavor intensity and textural contrast keep the plate interesting and leave no need for heavy sauces.

Leftovers converted into mains can be a revelation. Mix cold roasted vegetables into warm pasta with browned butter and lemon, or fold them into a frittata for a quick, elegant meal. At home, a tray of roasted seasonal vegetables often becomes the basis for lunches all week: tossed with grain salads, tucked into sandwiches, or reheated beside a fried egg for a cozy dinner.

Meal planning and make-ahead strategies

Roasting in bulk is efficient. Cook large batches of mixed vegetables and store them in airtight containers for up to four days; they’re versatile enough to appear in salads, soups, or grain bowls. Freezing is an option for some vegetables—blanching first reduces textural loss—but most retain better quality when refrigerated and eaten within a few days. Label containers with the date and the intended use to avoid culinary drift.

Reheating properly keeps texture pleasant. Re-crisp roasted vegetables in a hot oven or under the broiler for a few minutes rather than microwaving to avoid sogginess. If using them in soups or stews, add roasted vegetables near the end so they keep some of their caramelized flavor. For quick lunches, toss cold roasted veg with a handful of greens, a grain, and a simple vinaigrette; the contrast of warm and cool elements is often the most satisfying.

Batch-roasting also helps with menu planning for gatherings. Roast a variety of vegetables and present them family-style with several accompaniments: yogurt dips, charred lemons, toasted seeds, and a variety of breads. Guests can assemble plates to taste, and you benefit from the low-stress cooking ahead of time.

Serving suggestions and pairings

Roasted vegetables play well with many proteins and beverages. Roast-heavy plates complement roasted or braised meats such as chicken, pork, or beef; they also pair naturally with fish and shellfish, where a sweeter root can balance delicate flesh. For vegetarian protein, pair them with legumes, tempeh, or baked tofu dressed with a bright sauce. Grains like barley, farro, and wild rice provide the chew necessary to make a vegetable-centric meal feel complete.

When choosing wines or beverages, consider sweetness and acidity. A slightly acidic white, like unoaked Chardonnay or a dry Riesling, cleanses the palate after salted, roasted bites. Lighter reds with moderate tannin—Pinot Noir, Gamay—work with roasted brassicas and mushroom-forward dishes. For non-alcoholic options, sparkling sodas flavored with citrus or herbal iced teas provide refreshing contrast to earth-forward winter side dishes.

Troubleshooting common problems

Roasted Vegetables. Troubleshooting common problems

Occasionally roasted vegetables underwhelm. If the result tastes flat, add acid and crunch at the end: a squeeze of lemon, a splash of vinegar, or toasted seeds will lift the profile. If vegetables are soggy, the cause is usually overcrowding or insufficient heat; finish them on a hot pan or a brief stint under the broiler to reclaim texture. Burnt bitterness is fixed by shaving off charred bits and balancing with something sweet or creamy—honey, maple, or yogurt.

If you find inconsistent doneness across a tray, reassess your cut sizes and pan placement. Denser items need to be smaller or given more time. Rotating pans and using a thermometer to verify oven heat are practical steps to higher success rates. When in doubt, aim for slightly underdone rather than overcooked; you can always return vegetables to the oven briefly but once they collapse, texture cannot be reclaimed.

Salt management can also be tricky. Under-salted vegetables taste muted, but over-salting is difficult to correct. Add a baseline of salt before roasting and finish with a bold, finishing salt or soft cheese. That layered approach ensures the seasoning evolves with the cooking process rather than overwhelming it at once.

Three signature recipes I use all winter

These are recipes I return to when I want reliable, crowd-pleasing results. Each is written to be flexible, encouraging improvisation rather than strict rules. I often tweak them depending on what’s in the pantry and whom I’m feeding.

Maple-Balsamic Roasted Root Medley

Ingredients: carrots, parsnips, sweet potatoes cut into uniform sticks; 2 tbsp olive oil; 1 tbsp maple syrup; 1 tbsp balsamic vinegar; 1 tsp fresh thyme leaves; salt and black pepper to taste; toasted pecans for garnish. Preheat the oven to 200°C (400°F). Toss vegetables with oil, spread on a rimmed sheet, and roast until tender, about 30–40 minutes, turning once halfway. In the last 5 minutes, drizzle maple and balsamic over the vegetables and return to the oven until glossy and sticky. Finish with pecans and an extra pinch of salt before serving.

This dish balances sweet and tangy while offering textural contrast. The glaze should be applied near the end to avoid burning, and the pecans provide a welcome crunch. On cold nights I serve it alongside roasted chicken and a simple green salad for brightness.

Charred Cauliflower with Cumin and Yogurt

Ingredients: one head cauliflower broken into florets; 3 tbsp olive oil; 1 tsp ground cumin; 1/2 tsp smoked paprika; salt; 1 cup plain yogurt; lemon zest; chopped cilantro. Preheat the oven to 220°C (430°F). Toss cauliflower with oil, cumin, paprika, and salt, then roast on a hot pan until the edges are deeply browned, 25–30 minutes. Serve over a pool of yogurt, sprinkled with lemon zest and cilantro.

The yogurt cools the char and adds creaminess; cumin ties the roast to warmer spice notes that suit winter menus. Leftovers are terrific tucked into flatbreads or grain bowls for lunch.

Brussels Sprouts with Pancetta and Apple

Ingredients: halved Brussels sprouts; 75 g diced pancetta or smoked almonds for vegetarian option; one tart apple sliced thin; 2 tbsp olive oil; 1 tbsp sherry vinegar; salt and black pepper. Roast sprouts and pancetta together on a single pan at 220°C (430°F) until sprouts are tender and pancetta crisp, about 20–25 minutes. Toss warm with apple slices and vinegar before serving.

The apple introduces a fresh sweetness that complements the savory, crisped pancetta. For a vegetarian twist, replace pancetta with smoked almonds and finish with a drizzle of maple syrup for complexity.

Cooking vegetables this way has changed how I plan meals. I used to think of roasted vegetables as an afterthought, but they’ve become a deliberate, central element on cold evenings when flavor and simplicity matter most. A tray of well-roasted produce requires little adornment yet offers the satisfaction of food that feels both nourishing and celebratory.

Try planning a week where roasted vegetables feature nightly: one night as a winter side to roast meat, another as a main over grains, and later as additions to salads and sandwiches. You’ll discover how flexible and mood-lifting they can be. The oven does much of the work; seasoning, finishing touches, and imagination do the rest. Enjoy the process—the smell of a hot oven and the slow arc of caramelization are among the small, reliable pleasures of cooking.

How to Make Baked Salmon with Herbs That Feels Like a Restaurant Dish

There’s something quietly celebratory about a tray of salmon that comes out of the oven glowing with herb-scented steam. This recipe leans on simplicity and technique so the fish tastes vivid and clean, not masked by heavy sauces. You’ll find practical guidance here — from picking the right fillet to timing the oven so the salmon stays moist and flaky. Along the way I’ll share small tricks I’ve learned cooking for friends and for quiet weeknight dinners when I wanted something honest and fast. Read on and you’ll be able to turn a few pantry herbs and a fillet into a memorable meal.

Why baked salmon deserves a regular place on your table

Salmon is forgiving: it handles a range of flavors, cooks quickly, and delivers healthy fats that feel satisfying rather than heavy. Baking concentrates the fish’s natural flavor without the fuss of constant attention at the stove, and a finished fillet needs only a squeeze of lemon to shine. People often think of frying or grilling as more exciting, but the oven lets you layer flavors gently so herbs and citrus infuse the meat. It’s a practical method for everyday meals and elegant enough for company. Once you learn the rhythm — seasoning, timed oven, short rest — it becomes a reliable culinary move.

Baked salmon with herbs works across cuisines because herbs are translators: dill leans Scandinavian, basil nods to Italy, and cilantro brings a brighter, more citrusy voice. That flexibility makes the dish useful for batch cooking, too; double the recipe and you’ll have portions for salads, rice bowls, or packed lunches. The technique is forgiving of thickness variations, and the timing is more logical than mysterious if you follow temperature guidelines. For cooks who dislike complicated recipes, this method offers control and repeatability. In short, it’s a dish that rewards attention without demanding perfection.

Choosing the right salmon: fresh vs. frozen, farmed vs. wild

Start with a fillet that smells like the sea but not overly fishy; bright eyes and firm flesh are signs of freshness when buying whole. If you buy pre-cut fillets, look for even color, intact skin, and no slimy sheen. Frozen salmon can be an excellent choice — flash-frozen shortly after catch — and often costs less while offering consistent quality. Farmed and wild salmon each bring different textures and flavors: wild tends to be leaner and more pronounced in taste, while farmed is usually fattier and more forgiving during cooking. Decide based on your budget, taste preference, and availability; either will make a great baked dish when handled properly.

Thickness matters more than origin when it comes to cooking time, so buy a fillet with reasonably even depth if you can. If you end up with very thick and very thin parts on the same piece, consider cutting into more uniform portions to avoid overcooking. Skin-on fillets offer a practical advantage: the skin holds the flesh together during cooking and crisps nicely if you give it a final broil. If you prefer skinless, handle gently to avoid flaking. Regardless of choice, pat the fish dry before seasoning — moisture on the surface prevents proper browning and dilutes flavor.

Understanding the role of herbs: pairing, freshness, and technique

Herbs transform baked salmon by introducing aromatic oils that gently infuse the flesh as it cooks. Fresh herbs are almost always preferable here: their volatile oils evaporate quickly and contribute a lively top note that dried herbs can’t match. That said, dried herbs still have a place when blended into a rub or cooked into a sauce. The key is balance — robust herbs like rosemary or thyme stand up to roasting, while delicate options such as dill and parsley are best added toward the end or used raw as a finishing sprinkle. Think of herbs as accents, not masks, so they enhance the salmon’s flavor instead of overwhelming it.

When choosing combinations, consider texture and aromatic profile. A classic pair is dill and lemon for a clean, slightly sweet finish. For a Mediterranean tilt use oregano and lemon zest with a drizzle of olive oil. If you prefer something earthier, thyme and rosemary work, but use them sparingly and pair with garlic to round the edges. To build contrast, combine one soft herb (basil, tarragon) with one woodier herb (thyme, sage). Fresh herbs can also be chopped and mixed into a compound butter or yogurt-based sauce; these mixtures add creaminess and a controlled, lingering herb presence.

Essential tools and equipment for consistent results

You don’t need a fancy kitchen to bake salmon well, but a few good tools make the process smoother. A reliable oven that holds its temperature is surprisingly important; an oven thermometer is a small investment that pays off in consistency. Use a rimmed baking sheet or an ovenproof baking dish to catch juices and allow the fish to cook evenly. A fish spatula — thin, flexible, and slightly offset — is perfect for sliding under fillets without tearing. A sharp chef’s knife helps portion the salmon cleanly, and kitchen shears are handy for trimming any ragged edges of skin or fat.

Other useful items include a wire rack that fits inside a sheet pan if you want airflow under the fillet for crisper skin, and a digital instant-read thermometer to check internal temperature precisely. For finishing, a microplane grater for lemon zest and a small mortar and pestle for crushing herbs or salt will subtly elevate the dish. Don’t overlook simple pantry items: good-quality olive oil, flaky sea salt, and freshly cracked pepper are foundational. Together, these tools and ingredients reduce guesswork and let technique shine.

Ingredients and measurements: a dependable template

Below is a straightforward ingredient list that yields a balanced, herb-forward baked salmon suitable for four servings. This template scales well and allows easy substitutions based on personal taste and what’s available in the pantry. Measurements are intentionally flexible: herbs can be adjusted to be more subtle or more assertive, and citrus can be dialed up for brightness. Keep the proportions in mind and tweak slowly rather than over-seasoning at once.

Ingredient Amount Notes
Salmon fillet about 1.2 kg / 2.5 lb Skin-on preferred, even thickness
Olive oil 2 tbsp Extra virgin for finishing
Fresh herbs (combined) 3 tbsp, chopped Dill, parsley, thyme, or basil
Lemon 1 medium Zest + wedges for serving
Garlic 1-2 cloves, minced Optional, adds depth
Salt and pepper To taste Flaky sea salt recommended

Step-by-step: preparing the fish

Begin by bringing the salmon to near room temperature so it cooks evenly; leaving it out for about 20 minutes is usually enough. Pat the fillet dry with paper towels; removing surface moisture helps the herbs and oil stick and prevents steaming. Make a shallow check on the thickest part with a finger to gauge thickness — this guides cooking time more than weight does. If the fillet has bones, run your fingers along the flesh and pull any pin bones with clean tweezers. Season the fish generously with salt and pepper before adding oil and herbs; salt draws moisture outward and helps form a flavorful crust.

To apply the herbs, mix chopped fresh herbs with olive oil, minced garlic, and lemon zest in a small bowl. Spoon the mixture over the top of the salmon and gently press it into the flesh so it adheres during baking. If you like a brighter herb presence, reserve a portion of the herbs to scatter on after the fish is cooked. For a cleaner presentation, tuck thin lemon slices on top of the fillet; they roast into sweet, slightly bitter discs that complement the salmon. If you prefer a crust, combine panko with herbs and a touch of melted butter and press that mixture atop the fillet before baking.

Preheat and timing guidelines

Set the oven between 180-200°C (350-400°F) depending on whether you favor a gentler bake or a slightly crisper exterior. Lower temperatures yield more uniformly tender results, while higher heat shortens cooking time and browns the top. A reliable rule is to bake for roughly 10 minutes per inch of thickness measured at the thickest part. Because ovens vary, begin checking a few minutes before the expected finish time with an instant-read thermometer. Aim for an internal temperature of 52-55°C (125-130°F) if you like medium-rare, or 60°C (140°F) for flakier, more done-through texture.

Roasting technique and monitoring

Place the salmon skin-side down on an oiled baking tray or on a wire rack over a tray to encourage air circulation. Bake uncovered so the top can dry slightly and herbs roast rather than steam. If you want the skin crisped, finish the dish under a broiler for 1-2 minutes, watching closely to avoid burning. Use the thermometer in the thickest part, and remember the fish will rise a few degrees while resting. When the temperature is reached, remove the fillet promptly to prevent drying out.

Finishing touches and presentation

Let the salmon rest for about five minutes after it comes out of the oven; this pause allows the juices to redistribute and keeps the flesh tender. Sprinkle reserved fresh herbs and a pinch of flaky salt post-bake to revive the aroma and add texture. A final squeeze of lemon brightens the flavors and cuts through the richness of the fish. For plating, slice the fillet into portions and serve on warmed plates so the fish stays comfortable while you bring accompaniments to the table. A drizzle of good olive oil finished with a few grains of Maldon salt lifts the dish elegantly.

Garnishes matter but should be simple: microgreens, thinly sliced radish, or a few capers lend contrast without competing. If you used a herbed butter or yogurt, serve a small spoonful alongside each portion so guests can add more if they like. For a composed presentation, place the salmon atop a bed of wilted greens or lemon-scented couscous; the visual contrast emphasizes the salmon’s color and the herbs’ vibrancy. Small choices in plating elevate the perceived effort without adding real work.

Flavor variations and regional spins

Baked Salmon with Herbs. Flavor variations and regional spins

One of the strengths of this method is how readily it adapts to different cuisines. For a Mediterranean spin, combine oregano, thyme, and lemon with a splash of white wine vinegar and a scattering of kalamata olives after baking. A Scandinavian riff leans on dill, mustard, and a touch of honey, finishing with pickled cucumber on the side. If you want Asian influence, brush the fillet with a miso-ginger glaze before baking and garnish with sliced scallions and sesame seeds. Each variation changes the mood of the dish while keeping the core technique intact.

For a smoky profile without a grill, use smoked paprika and a touch of cumin in the herb mix or finish the baked salmon with a tiny spoon of smoked butter. For a herbaceous, bright summer iteration, pile on basil and mint with cherry tomatoes and a splash of balsamic upon serving. Vegetarian-minded cooks can mirror these flavor ideas on roasted eggplant or tofu; the principle of herb-driven, oven-roasted flavor applies widely. The point is to match herb intensity to the supporting ingredients so nothing overwhelms the fish’s natural character.

Sides that complement herb-baked salmon

Select sides that play well with the fish’s richness and the herbs’ brightness. Simple steamed or roasted vegetables — asparagus, green beans, or broccolini — echo the freshness of the herbs while adding texture contrast. Grain-based sides, such as herbed rice, quinoa, or a lemony couscous, absorb the juices and provide a hearty base. A light salad with a vinaigrette can cut richness and keep the meal regenerative rather than heavy. For a more substantial plate, serve with roasted potatoes tossed in olive oil and rosemary; the starch will happily sop up any remaining herb oil.

Consider also sauces that pair without dominating: a yogurt-herb sauce with dill and cucumber mirrors Nordic flavors and offers cooling balance. A chimichurri with parsley and red wine vinegar brings lively acidity and herb complexity. If you enjoy creamier textures, a mustard-dill cream made with crème fraîche or Greek yogurt holds up well to the salmon. When planning sides, aim for a contrast in color and texture to make the meal visually inviting and satisfyingly varied.

Common mistakes and how to avoid them

Overcooking is the most frequent error — salmon becomes dry and loses its silkiness when left too long in the oven. Use an instant-read thermometer and remove the fish a few degrees shy of your target temperature to allow for carryover heat. Another mistake is under-seasoning; fish requires seasoning at the surface to develop taste, so salt thoughtfully early in the process. People also sometimes overcrowd the pan, causing the fillets to steam instead of roast; give each piece breathing room. Finally, don’t skip the rest period; rushing straight from oven to plate increases the likelihood of loose, falling-apart pieces.

Using too much acidic ingredient before baking can “cook” the fish and change its texture. If you prefer a citrusy profile, add most of the lemon zest and juice after baking or use thin slices of lemon to roast gently on top. Burning herbs is another pitfall — watch broil times closely and add delicate herbs at the end. If you aim for crisp skin, ensure it is dry and that the pan is hot enough; a cold pan or wet skin results in rubbery texture. Correcting these missteps will make the learning curve short and the results reliably good.

Storage, reheating, and using leftovers

Properly stored, cooked salmon will keep in the refrigerator for up to three days; wrap it tightly or place in an airtight container to preserve moisture. Reheating gently is crucial to avoid drying the fish; use a low oven (about 150°C / 300°F) for 10-12 minutes, or warm slices in a covered skillet over low heat with a splash of water or broth to maintain steam. Microwaving is possible but tends to change texture; use short bursts at low power and check frequently. Leftover salmon makes excellent salads, sandwiches, and pasta additions when flaked and paired with fresh herbs and a citrusy dressing.

If you want more creative reuse, turn leftover baked salmon into a warm grain bowl with sautéed greens, roasted vegetables, and a dollop of herb yogurt. Mash flaked fish with a touch of mayo, lemon, and chopped capers for a quick spread on crackers. For a heartier recycled meal, fold the salmon into a fritter mix with egg and breadcrumbs and pan-fry until golden. These approaches respect the flavor of the original dish while stretching ingredients thoughtfully.

My personal notes and small rituals

Over years of cooking, I learned that the smallest rituals yield the most consistent results. I always zest the lemon before cutting it because zest left on a halved fruit is harder to retrieve. I also keep a little jar of mixed chopped herbs in the fridge — parsley, chives, and dill — which speeds prep on busy evenings and reduces food waste. When hosting, I prepare the herb mixture in advance and refrigerate it; bringing the fillet to room temperature then takes just minutes and removes last-minute fuss. These tiny habits make the process feel manageable and, crucially, repeatable.

Another habit: taste the olive oil and salt the herbs lightly before applying them to the fish. This small check ensures the seasoning is balanced and avoids salty surprises on the plate. I prefer to broil for exactly 60 to 90 seconds at the end when I want a slightly crisp top; anything beyond that and the herbs scorch. Finally, I often keep a small bowl of lemon wedges in the middle of the table; encouraging guests to squeeze fresh citrus themselves personalizes each bite and keeps the flavors bright. These are simple touches that elevate a straightforward baked fillet into a meal people remember.

Quick reference: oven times by fillet thickness

Having a quick guide for timing removes the guesswork when cooking different-sized fillets. Below is a concise table that aligns oven times with common thicknesses, assuming an oven set around 180-200°C (350-400°F). Use an instant-read thermometer for final confirmation; the internal temperature target will always be your most reliable cue for doneness.

Thickness (at thickest part) Approximate Bake Time Target Internal Temp
1/2 inch (1.2 cm) 6-8 minutes 52-55°C (125-130°F)
1 inch (2.5 cm) 10-12 minutes 52-55°C (125-130°F)
1 1/2 inches (3.8 cm) 14-16 minutes 52-55°C (125-130°F)
2 inches (5 cm) or more 16-20 minutes 55-60°C (130-140°F)

Shopping list and pantry checklist

Before you begin, make sure you have the essentials on hand. Beyond the salmon, olive oil, and a couple of fresh herbs, a few pantry staples keep the process smooth and the flavors balanced. If you cook salmon often, maintain a small herb packet in the fridge and a jar of good flaky salt. Most adjustments to the recipe are about proportions and timing rather than unusual ingredients. This simplicity is why the method is so satisfying to prepare on a regular basis.

  • Fresh salmon fillet, skin-on if possible
  • Olive oil and/or unsalted butter
  • Fresh herbs: dill, parsley, thyme, basil
  • Lemon (for zest and juice)
  • Garlic, salt, and freshly ground pepper
  • Optional: panko, mustard, yogurt, or miso for variations

Final thoughts on making this dish your own

This approach to baked salmon with herbs is intentionally adaptable: modest technique, clear timing, and room to experiment with flavor accents. Once you master the baseline — seasoning, baking at the right temperature, and a brief rest — you gain confidence to tweak herbs, try different finishing sauces, and pair sides that reflect your mood or season. The dish rewards small, thoughtful choices rather than theatrical effort. With practice you’ll find a version that feels like yours and becomes part of the rotation for quick dinners and low-key entertaining alike.

If you take nothing else from this guide, remember three practical tips: dry the fillet before seasoning, use an instant-read thermometer for accuracy, and add the most delicate herbs at the end. Those habits preserve texture and let the herbs sing. Try a few variations, keep notes, and soon you’ll be serving salmon that feels both effortless and considered. Enjoy the process — and the meal.

Gentle Heat, Big Flavor: Mastering Boiled Pork with Garlic

There is a quiet pleasure in transforming a humble cut of meat into something tender, fragrant, and unexpectedly celebratory. Boiled Pork with Garlic is one of those dishes that looks simple on the surface but rewards attention with a deep, comforting flavor and a texture that melts in the mouth. This article will walk you through the why and how, from selecting the right pork to little tricks that make garlic sing without turning bitter. Along the way I’ll share practical tips, variations, and a few personal moments from my kitchen experiments. Whether you want a weeknight shortcut, a family centerpiece, or a base for sandwiches and salads, the method here will give you consistent, reliable results.

Why boil pork? The method’s strengths explained

Boiling meat often gets a bad rap among home cooks who associate the method with blandness or overcooked protein. What gets overlooked is that gentle simmering, when done properly, extracts and concentrates flavors while breaking down connective tissue in tougher cuts, creating tenderness without the dryness that high heat can cause. For pork, especially shoulder or butt, a slow, controlled simmer allows the collagen to convert into gelatin, which gives the cooking liquid body and the meat a silky texture. Add garlic and aromatics to the pot, and the water becomes more than a medium — it becomes a seasoning agent that penetrates the flesh from the inside.

Boiling also offers practical benefits: it’s forgiving, energy-efficient on the stove, and produces a flavorful broth that can be reused. Unlike roasting, which demands dry heat and continuous monitoring to avoid charring, simmering lets you set a steady temperature and focus on small adjustments. A pot of pork and garlic on a back burner can be a calm centerpiece of a busy day, supplying both the main protein and a base for soups, sauces, or grain bowls. And for those who appreciate the contrast of textures, finishing the meat briefly in the oven or under a broiler can add the crisp edge that boiled meat sometimes lacks, marrying succulence with a satisfying crust.

Choosing the right cut of pork

Boiled Pork with Garlic. Choosing the right cut of pork

Not every cut works equally well for boiling; lean, fast-cooking pieces like tenderloin can dry out or become fibrous if treated like a slow-cook cut. For Boiled Pork with Garlic, aim for cuts that balance meat and connective tissue — they tolerate long simmering and develop depth of flavor. Shoulder (also labeled pork butt in some markets) and picnic roast are the classics here, offering marbling and collagen that render into gelatin. Alternatively, pork belly will give you a richer, unctuous result thanks to its higher fat content, though it yields a different mouthfeel and often needs less time to become tender.

Here’s a compact table to help you pick, with estimated simmer times and flavor notes. Use it as a starting point; exact timing depends on the size of the piece and your stove’s simmering intensity.

Cut Texture & Flavor Estimated Simmer Time
Pork shoulder / butt Marbled, rich, becomes flaky and tender 1.5–3 hours
Picnic roast Similar to shoulder, slightly fattier near skin 1.5–3 hours
Pork belly Very rich, silky fat, melt-in-mouth 1–2 hours
Pork loin / tenderloin Lean, mild flavor, quick-cooking 30–45 minutes

Ingredients and essential tools

Before you start simmering, gather everything so the process flows. For a classic boiled pork with garlic you’ll need a primary piece of pork, fresh garlic in generous amounts, aromatics such as bay leaves, peppercorns, and onion, plus salt to build seasoning. A splash of acidity — white wine, cider vinegar, or lemon — brightens the broth and balances the fat. Fresh herbs like thyme or parsley bring a leafy lift, while celery and carrot add subtle sweetness to the stock. For finishing, keep an oven-safe tray and a sheet of foil handy if you plan to crisp the exterior.

Tools are simple: a heavy-bottomed pot large enough to hold the meat and water with a little headspace, a lid, a slotted spoon or tongs for lifting the meat, and a thermometer if you want precision. An oven or broiler is useful for textural contrast; the oven step is optional but highly recommended when you want a caramelized surface. If you enjoy making sauces, a fine mesh strainer and a shallow pan for reducing the cooking liquid into a glaze will come in handy. Below is a compact list of ingredients and tools to print or pin to your phone.

  • Ingredients: 1.5–2 kg pork shoulder or chosen cut, 8–12 cloves garlic (adjust to taste), 1 large onion, 2 carrots, 2 celery stalks, 2 bay leaves, 1 tbsp black peppercorns, 1–2 tbsp salt, splash of white wine or vinegar, fresh herbs.
  • Tools: large pot with lid, tongs or slotted spoon, thermometer, fine sieve, oven-safe tray (optional), cutting board and sharp knife.

Step-by-step: how to make Boiled Pork with Garlic

Cooking in clear steps helps keep the simmer steady and the flavors balanced. Start by rinsing the pork and patting it dry, then score the exterior lightly if there’s a large layer of fat — this encourages even rendering. Peel whole garlic cloves and leave them intact; they will soften and mellow in flavor, infusing the meat and the broth without turning acrid. Roughly chop the onion, carrot, and celery; they don’t need to be perfect because they’ll be strained later. With everything prepped, the actual simmer becomes a relaxed and rewarding part of the day.

Below is a concise, ordered list of cooking steps. Read through once before you begin, then follow at a leisurely pace. Each step contains an actionable note to prevent common missteps, like boiling too hard or under-seasoning early on. Remember that times are guidelines; cook until the meat’s texture is right for you rather than slavishly following the clock.

  1. Place the pork in the pot and add cold water until the meat is fully submerged. Cold water helps extract flavor gradually.
  2. Add garlic cloves, chopped onion, carrots, celery, bay leaves, peppercorns, and a generous pinch of salt. Bring to a gentle simmer over medium-low heat.
  3. Skim any foam that rises in the first 20 minutes to keep the broth clear. Cover partially and maintain a low simmer — small bubbles, not a rolling boil.
  4. Cook until the meat reaches tenderness and easily pulls apart with a fork; adjust salt as needed about halfway through cooking. This is typically 1.5–3 hours depending on the cut.
  5. Lift the pork from the pot and let it rest briefly. If you want a browned exterior, transfer to an oven-safe tray and finish under a hot broiler or in a 220°C (430°F) oven for 6–10 minutes, watching closely.
  6. Strain the cooking liquid if using as broth, or reduce it on the stove to make a concentrated sauce or glaze. Reserve cooked garlic and herbs for blending into sauces or spreading on toasts.

Finishing meat in the oven or under a broiler is where the word “boiled” meets texture contrast. The gentle simmer has already delivered moist tenderness; a quick oven stint adds color and caramelized flavor. If the oven isn’t an option, searing slices in a hot pan for a minute per side gives a similar benefit. Either way, finish with a sprinkle of coarse salt to lift the flavors and a drizzle of a bright acid such as lemon juice or a splash of vinegar to cut through the richness.

Flavor variations and regional twists

The core technique of simmering pork with garlic adapts fluidly to many cuisines. For an Asian-inspired profile, add star anise, ginger, soy sauce, and a little sugar to the pot; finish with sesame oil and scallions. If you prefer Mediterranean notes, incorporate olives, lemon zest, rosemary, and a splash of white wine into the simmer. For an aromatic Latin touch, include cumin, oregano, and bay leaves, then shred the pork and crisp it briefly in a hot pan to make tacos or tortas. These shifts keep the underlying richness intact while steering the final dish toward different flavor families.

Texture variations matter as much as flavor shifts. If you want pull-apart shreds for sandwiches or salads, cook the pork until it easily falls apart and then gently shred with two forks. For elegant, sliceable roasts suited to plated meals, aim to stop cooking when the meat is just tender enough to slice thinly without falling to pieces, then finish in the oven for color. You can also brine lean cuts beforehand to prevent dryness, or inject a garlic-herb paste into the meat for an intense internal seasoning that infuses during the simmer.

Serving suggestions: what pairs well with boiled pork

Boiled pork with garlic has versatility that invites a wide range of accompaniments. For a homey plate, serve thick slices over mashed potatoes or creamy polenta, spooning reduced pan juices or a garlic-forward sauce on top. The muscular broth from the simmer complements braised greens like collards or chard; wilt the greens in a splash of the cooking liquid for cohesion. If you’re craving brightness, pair the meat with a crisp cabbage slaw dressed in vinegar and a touch of sugar, which cuts the fat and adds a refreshing crunch.

Another excellent route is to transform leftovers into new meals. Shredded pork becomes the foundation for tacos with pickled onions, steamed buns filled with herbs and cucumber, or a hearty stew. For a composed dinner, roast seasonal vegetables in the oven — carrots, parsnips, and potatoes develop caramelized edges that harmonize with the gentle savory notes of the pork. When planning sides, think about texture contrasts and a balance between richness and acidity to keep the plate lively.

Make-ahead, storing, and reheating

One of the strengths of boiled pork is how well it keeps and even improves after a day in the refrigerator, as flavors meld and the meat often becomes moister. Store cooked pork and the strained broth separately in airtight containers; the broth can be skimmed of fat after chilling so the surface solidifies, making it easy to remove excess fat for a lighter mouthfeel. Properly refrigerated, cooked pork will keep safely for three to four days, and the reduced broth can last about the same if sealed well.

When reheating, gentle methods preserve texture. Warm slices or shreds in a covered pan with a splash of the reserved cooking liquid over low heat to avoid drying. If you need to use the oven, cover the meat with foil to trap steam and heat at a moderate temperature, around 160–170°C (320–340°F), until just warmed through. Microwaves work too but use short bursts and rotate the meat, adding a little liquid to prevent localized overheating. For long-term storage, freeze portions in airtight bags with a measure of broth; frozen pork will generally keep well for up to three months and thaws quickly in the fridge overnight.

Nutrition notes and health considerations

Pork is a nutrient-dense protein source, rich in B vitamins, zinc, and iron, and when simmered the resulting broth contains gelatin and minerals extracted from the meat and connective tissue. The fat content varies by cut; choosing a leaner portion reduces total saturated fat while sacrificing some of the silkiness that fattier cuts provide. If you’re watching sodium, be mindful of added salt during simmering; you can always finish dishes with a small final seasoning rather than salting heavily at the start. Garlic contributes not only aroma but also compounds linked to potential cardiovascular benefits, especially when used fresh and in larger amounts.

Common mistakes and how to avoid them

Several pitfalls can undermine an otherwise promising pot of pork. The most frequent is boiling too hard, which tightens muscle fibers and releases excess proteins that cloud the broth, resulting in a tough texture and muddy appearance. Maintain a low, steady simmer with occasional gentle skims to keep the liquid clear and the meat tender. Another misstep is under-seasoning; because water dilutes flavor, the meat should be salted judiciously during cooking rather than left to a single final adjustment.

Avoid overcooking lean cuts like tenderloin in this method — they can become mealy if simmered for hours. If you want the quick-cooking lean cuts, reduce simmer time significantly and monitor internal temperature to preserve juiciness. Finally, don’t discard the cooking liquid; its concentrated savory notes are gold for sauces, soups, or even as a cooking liquid for grains. Strain and reduce it for a glossy sauce or freeze it in small portions to use later.

Troubleshooting quick reference

  • If broth is cloudy: skim foam early and keep a gentle simmer rather than a rolling boil.
  • If meat is dry: either the cut was too lean or cooking was too aggressive — next time choose shoulder or reduce cooking time.
  • If garlic is bitter: use whole cloves and avoid burning the garlic during any finishing sear; simmered garlic mellows significantly.
  • If flavor is flat: finish with an acid or reduce the broth to concentrate flavors; add fresh herbs at the end.

Personal note: a memory from my kitchen

Years ago I learned the power of gentle simmering on a blustery weekend when I had a generous shoulder roast but very little time for fussing. I filled my largest pot with water, tossed in a ton of garlic because I love robust aromatics, and let it simmer while I tackled other chores. By evening the meat was absurdly tender and the house smelled like a welcoming restaurant. I finished the pork under the oven broiler to get that browned edge, and the contrast between the soft interior and crisp exterior was revelatory. The leftovers became lunches for days — shredded over rice, tucked into sandwiches with pickled cucumbers, and even stirred into a quick stew.

Putting it all together

Boiling pork with garlic is both simple and versatile, rewarding both cautious beginners and creative cooks. The method centers on patience: low heat, whole aromatics, and respect for the timing that each cut demands. Use the cooking liquid as an asset, finish in the oven for texture when desired, and don’t be afraid to adapt the aromatics toward different cuisines. The result is an economical, flavorful protein that integrates seamlessly into weeknight dinners, festive spreads, and meal-prep routines.

Try a small test batch with the suggested cuts, then iterate: add a citrus note one time, braise with soy and star anise the next. Keep a jar of reduced cooking liquid in the fridge for impromptu sauces, and remember that the simplest ingredients — pork, garlic, salt — can produce something unexpectedly generous when treated with intention. Invite a friend or family member to taste as you adjust; feedback is one of the best tools for refining your approach. Enjoy the slow building of flavor, and let the kitchen reward you with a dish that feels both familiar and carefully earned.

Eggplant in Tomato Sauce: How to Turn Humble Vegetables into a Comforting Feast

Eggplant in Tomato Sauce can be a weeknight rescue and a centerpiece for a leisurely dinner. The pairing of silky aubergine and bright tomato hits a satisfying balance between earthiness and acidity, making it easy to imagine at the table of many cuisines. In this article I will walk you through choosing produce, preparing the vegetables, mastering cooking techniques and assembling a range of dishes from rustic skillet fare to oven-baked gratins. Expect practical tips, a few simple recipes and notes from my own kitchen experiments. Read on if you want to make eggplant sing without fuss.

Why Eggplant and Tomato Make Such a Good Match

The eggplant is a sponge by nature, soaking up flavors and fat while releasing a lush, meaty texture. Tomatoes bring brightness and acid that cut through that richness and keep the dish from feeling heavy. Together they form a combination that works whether you want a light, vegetable-forward meal or a hearty, comforting plate suitable for guests. Texture matters as much as taste here: soft roasted cubes, silky purée or layered slices each create different mouthfeels. Understanding this chemistry helps you decide how to cook them and what other ingredients will make sense.

Tomato sauce acts like a flavor conductor, carrying herbs, garlic and olive oil into the eggplant’s nooks and crannies. When simmered slowly the sauce becomes concentrated and clings to the vegetable, creating pockets of intensity in every bite. That is why you will often see the pairing across the Mediterranean, in the Balkans and in parts of the Middle East. It also explains why choices like whether to peel, salt or pre-cook eggplant influence the final outcome so much.

Choosing the Right Eggplant

Not all eggplants are created equal for a sauced preparation. Look for glossy skin, firm but slightly yielding flesh and a bright green cap. Smaller Italian varieties tend to have fewer seeds and thinner skin, which makes them ideal for quick sautés and layered bakes. Larger globe types can be delicious if you cut and cook them properly, but they sometimes hold more bitterness or a mealy texture if neglected. If possible, choose fruit that feels heavy for its size; that usually means a denser, less watery interior.

Consider also the color and variety. Deep purple is classic, but white and striped varieties offer milder flavors and a firmer bite. If you plan to roast or bake, thicker slices work better because they stand up to heat without disintegrating. For a skillet or ragù-style dish, smaller cubes are preferable since they absorb sauce quickly. Keep freshness in mind: eggplant will brown and soften over time, so buy it the day you plan to cook or early that morning.

Preparing Eggplant: To Salt or Not to Salt

For decades cooks salted eggplant to draw out bitterness and reduce moisture. Modern varieties are often less bitter than older ones, so salting is optional depending on texture and the recipe. If you are using thin slices for a layered bake, a brief salting can firm them up so they do not collapse under sauce. Sprinkle coarse salt, let sit for 20 to 30 minutes, then rinse and pat dry; this also removes some excess oil absorption later on.

If you plan to roast or pan-sear small cubes, you can skip salting and focus on high-heat caramelization instead. The goal is to concentrate flavor and reduce squeamish sponginess, and you can achieve that by properly heating your pan or oven. Personally I salt sometimes and skip it other times depending on timing and mood. Experiment and decide what gives you the texture you prefer.

Tomato Sauce Fundamentals

A good sauce is the backbone of this dish, and you do not need dozens of ingredients to make one that sings. Quality tomatoes, garlic, olive oil, salt and a touch of sweetness are frequently enough. For fresh tomatoes I like to blanch and peel them first, then simmer gently to reduce and thicken. If convenience matters, a good canned San Marzano or other plum tomatoes are excellent; they deliver consistent acidity and body without fuss.

Flavor building matters: start by sweating garlic and onion in oil to release aromatics, then add tomatoes and a pinch of sugar if the tomatoes are tart. Fresh herbs like basil at the end and oregano during the simmer contribute classic Mediterranean notes. If you want depth, add a splash of balsamic or a spoonful of tomato paste early in the cooking to encourage caramelization. The goal is a balanced sauce that complements rather than overwhelms the eggplant.

Cooking Techniques: Pan, Roast, and Bake

Deciding how to cook eggplant shapes the final dish profoundly. Pan-frying yields crisp edges and a tender interior, while roasting concentrates sweetness and provides a smoky note. Baking is the right choice when you want to assemble a gratin or a layered casserole, and it’s the most hands-off method once the dish is in the oven. Consider your time, desired texture and how much oil you want to use when you pick a technique.

Each method has its own tricks. For pan-searing, dry the cubes or slices thoroughly and use a hot pan with just enough oil to coat the surface. For roasting, cut even pieces, toss lightly in oil, and spread them on a single layer so they brown instead of steam. When you bake, layer with sauce and, if using cheese, sprinkle that toward the end to avoid burning. All of these approaches can produce excellent results if you respect heat and timing.

Pan-Searing and Skillet Methods

The skillet method is fast and suits weeknight cooking. Heat oil until shimmering, add eggplant in a single layer and let it develop color before turning. Avoid crowding: too many pieces in the pan drop the temperature and cause steaming. Once golden, add garlic and tomatoes or pour the sauce in to finish cooking the eggplant through. This technique is great for making a chunky ragù to serve over pasta or grains.

Skillet cooking also allows for flavor adjustments on the fly. Taste as you go and season the sauce in stages. For an extra layer, toss in olives, capers or a splash of white wine while the sauce reduces. Fresh herbs at the end preserve brightness, and a finish of lemon zest can lift the entire pan. Personally I reach for the skillet when I want dinner in under 40 minutes with maximum friendliness to improvisation.

Roasting to Intensify Flavor

Roasting concentrates the eggplant’s sweetness and imparts subtle caramelized edges that play beautifully against a tangy tomato base. Cut into uniform cubes or slices, toss with a little oil, and roast on a hot sheet until golden and slightly collapsed. If you roast whole eggplants the flesh becomes almost mousse-like, excellent when blended directly into sauce for a silky texture. Roasting is less hands-on than pan-frying and produces a deep flavor with minimal fuss.

One practical note: roasted eggplant absorbs more immediate flavor when combined with sauce while still warm. That warmth helps the tomato cling and be absorbed more effectively. If you plan to bake a casserole afterward, roast first to prevent sogginess in the final dish. Also consider broiling briefly at the end for a more pronounced char when you want that smoky touch in a short time.

Baking and Layered Casseroles

Baked preparations invite structure and presentation, whether you choose a simple gratin or a layered classic. Think about how each layer will behave: eggplant slices, sauce and cheese need to be balanced so nothing becomes watery or burnt. Precooking the eggplant slightly, by roasting or searing, often produces the best texture after a long bake. A low and slow oven melds flavors without drying the dish out too quickly.

When you bake, give the casserole breathing room by covering for part of the time, then uncover to brown cheese or crispen edges. Baking is forgiving for groups since you can reheat gently and it typically improves a day after as flavors marry. Use a moderate oven around 180 to 200 degrees Celsius and check for bubbling sauce and a golden top. The satisfaction of slicing into a coherent, saucy bake is worth the small time investment.

Classic Recipes and How to Make Them Your Own

There are a handful of canonical ways to present eggplant in tomato sauce; each reflects regional tastes and technique. Melanzane alla Parmigiana is a well known layered bake with cheese, tomato sauce and eggplant slices. A simple skillet eggplant ragù mixes cubes of aubergine into simmering tomato, garlic, basil and sometimes ground meat. Stuffed eggplant brings tomato sauce into the cavity along with herbs, grains or minced filling and then the whole thing is baked.

How you adapt those classics depends on whether you prefer a vegetarian dinner, a protein boost or a lighter plate with lots of fresh herbs. For example you can swap traditional mozzarella for burrata at the last moment to add a creamy center, or add lentils to make a vegetarian protein-packed ragù. Small changes in spice, cheese or cooking time can shift the dish from rustic to elegant or from heavy to bright.

Melanzane alla Parmigiana: A Practical Version

This layered casserole rewards planning but is simple in execution. Slightly pre-roasted or lightly pan-seared slices reduce oil absorption and keep the bake from becoming greasy. Layer sauce, eggplant and grated cheese, repeat and finish with a thin layer of sauce and cheese for an appealing crust. Bake until bubbling and slightly golden, let it rest so slices hold together, then cut into generous wedges for serving.

Here is a compact ingredient table to guide proportions for a four to six person bake.

Ingredient Quantity
Eggplant 2 medium (about 1.2 kg)
Tomato sauce (homemade or canned) 800 g
Olive oil 3 tbsp
Mozzarella or provolone 200 g, shredded or sliced
Parmesan 50 to 80 g, grated
Salt, garlic, basil To taste

Use this table as a baseline and scale up for a crowd. If you want a lighter version, reduce the cheese and add a layer of spinach or sautéed greens for contrast. Let the bake rest for 15 minutes after it comes out of the oven; it slices more cleanly and the flavors settle.

Skillet Eggplant with Tomato: Fast Comfort

A one-pan eggplant and tomato skillet is my go-to when I want something fast, nourishing and adaptable. Start by searing cubes in oil until golden, then sauté garlic and add tomatoes with herbs. Simmer until the eggplant is tender and the sauce is reduced. Finish with fresh basil and a generous drizzle of olive oil. Serve over pasta, rice or creamy polenta for an easy weeknight triumph.

To make this more substantial, fold in chickpeas or browned ground meat. If you prefer a lighter bite, mix in a handful of spinach just at the end so it wilts without losing color. Small, targeted changes like these transform the skillet into an entirely different dish depending on what is in your pantry.

Variations from Around the World

Regions adapt eggplant and tomato according to spice palettes and staple ingredients. In the Levant, eggplant is often charred, peeled and then dressed with lemon, garlic and tahini, the tomato acting more like a bright counterpoint. In Greece, eggplant blends with tomatoes, olives and capers in a stew called imam bayildi or in moussaka as a layered dish. In India, brinjal comes alive with mustard seeds, curry leaves and tamarind to create a tangy, spiced version with tomato playing an important role.

These variations are instructive because they show how flexible the base idea is. Adopt a new spice or herb and the dish suddenly travels to a different part of the world. For instance adding smoked paprika and cumin gives a Spanish or North African twist, while soy and ginger steer it toward East Asian flavors. Think of tomato and eggplant as a canvas; the accents define the painting.

Serving Suggestions and Pairings

Eggplant in tomato sauce functions well as a main or as a side. As a main it pairs with pasta, crusty bread or grains; as a side it complements grilled meats and fish. Cheese is an obvious partner: grated hard cheese adds saltiness, while fresh creamy cheese offers contrast. Bright, acidic accompaniments like pickled vegetables or a fennel and orange salad cut through the richness and refresh the palate between bites.

For beverages, lighter reds and rosés are natural companions, as are crisp white wines with good acidity. Nonalcoholic pairings include sparkling water with lemon or a yogurt-based drink in spicier versions. Think texture as you pair: soft polenta or mashed potatoes echo the saucy nature, while a simple arugula salad provides a necessary crunchy contrast.

Storing, Reheating and Meal Prep

Eggplant in tomato sauce actually improves with time as flavors marry overnight, which makes it an excellent candidate for meal prep. Refrigerate in an airtight container for up to four days, or freeze portions for up to three months. Thawing in the refrigerator is preferable to preserve texture, though reheating from frozen in a covered dish at moderate oven heat also works.

For reheating on the stovetop, keep the temperature low and add a splash of water if the sauce has thickened excessively. A gentle oven reheat preserves surface texture better than microwaving when you want to maintain crispness on a baked top. If you have leftovers and want to reintroduce some freshness, add a handful of chopped basil or a drizzle of high quality olive oil right before serving.

Nutritional Notes

Eggplant is low in calories and provides fiber, while tomato supplies vitamin C, potassium and beneficial lycopene. Combining the two in olive oil brings healthy monounsaturated fats, but be mindful of quantities since eggplant absorbs oil. Using techniques like roasting first or measuring oil carefully helps keep calorie counts reasonable without sacrificing flavor. Adding legumes or lean protein can make the dish more complete and balanced nutritionally.

If sodium is a concern, reduce added salt and favor herbs, lemon and spice to build flavor. For a lower-fat version, roast eggplant with minimal oil and use a tomato base concentrated by reduction rather than added sugars. These small adjustments let you enjoy the comfort of eggplant in tomato sauce while aligning the dish with your dietary goals.

Troubleshooting Common Problems

Two recurring issues are oiliness and sogginess. Oiliness stems from eggplant soaking up too much oil while cooking. Prevent it by using less oil, pre-roasting or pressing salted slices. Sogginess often comes from undercooked sauce or crowded baking dishes. Reduce the sauce properly and give eggplant space to brown to avoid that watery texture.

Another complaint is blandness. That usually means insufficient seasoning or not cooking long enough for flavors to concentrate. Season in layers, taste as you go and add acid near the end to brighten flavors. And if your eggplant tastes bitter, choose a different variety next time or salt briefly to remove bitterness. Small, deliberate corrections often rescue a dish that seems lackluster.

Practical Tips from My Kitchen

I learned early on that timing matters more than fuss. When guests arrive, a lightly roasted eggplant and a simmering tomato sauce can be assembled into a great tart or baked dish in under an hour. I often roast eggplants whole on busy days, scoop out the flesh and fold it into sauce with a spoonful of tahini and lemon for a smoky, silky spread. That shortcut saves time and yields a luxurious texture without constant attention.

One memorable experiment involved using leftover roast eggplant to make a layered casserole with slices of roasted sweet pepper and a scattering of feta. The result surprised me by being both humble and celebratory. That taught me to think of the eggplant and tomato base as modular: swap shapes, cheeses and herbs depending on what the moment calls for, and the dish remains satisfying.

Quick Recipe Box: A Reliable Weeknight Eggplant in Tomato Sauce

Below is a concise recipe you can make without special equipment. It balances simplicity and depth so you can get comfortable with the core technique and then improvise. The steps emphasize flavor building and offer optional additions for personal preference. This is the version I come back to when I want something wholesome and forgiving.

  • Ingredients: 1 large eggplant, 1 can good tomatoes or 500 g fresh peeled, 1 onion, 2 cloves garlic, 3 tbsp olive oil, handful basil, salt and pepper.
  • Prep: Dice eggplant, salt briefly if desired and pat dry, chop onion and garlic.
  • Cook: Sear eggplant cubes in a hot pan with 2 tbsp oil until golden. Remove, then sweat onion and garlic in remaining oil. Add tomatoes, simmer 15 minutes, return eggplant to pan and cook until saucy.
  • Finish: Stir in basil, adjust salt, drizzle oil. Serve over pasta or with bread.

This recipe scales easily and invites additions: capers, olives, a pinch of chili or a can of beans if you want more substance. It is a dependable base for weekday dinners and scales up for guests with minimal fuss.

Advanced Variations to Try

Eggplant in Tomato Sauce. Advanced Variations to Try

If you enjoy experimenting, consider collapsing the eggplant into a smooth purée and folding it into the tomato sauce for a luxurious texture that coats pasta elegantly. Alternatively, try stuffing halved eggplants with a mixture of rice, herbs and pine nuts, then ladle tomato sauce over and bake until tender. You can also smoke the eggplant briefly on a stovetop grill pan to introduce an intriguing, subtle char that plays especially well with fresh tomato qualities.

Another direction is to lean into spices: add smoked paprika, cumin and coriander for a North African feel, then finish with chopped cilantro and lemon. Or, use curry leaves and mustard seeds for an Indian-inspired brinjal curry with tomato. These variations demonstrate the ingredient’s versatility and invite you to borrow techniques from other cuisines to keep your repertoire interesting.

Tools and Pantry Staples That Make Life Easier

A few simple tools elevate results and cut down on frustration. A heavy skillet or cast iron pan gives even heat for browning, while a rimmed baking sheet allows for single-layer roasting. A good can opener and a sturdy wooden spoon are small conveniences that matter in everyday cooking. In the pantry, keep quality canned tomatoes, extra virgin olive oil and dried oregano or basil as quick ways to assemble a flavorful base without last-minute shopping.

Investing in a digital thermometer is optional but helpful when you bake larger casseroles; it ensures the center reaches a safe, hot temperature without excessive drying. Sharp knives and a reliable cutting board speed prep and reduce accidents. Once you have the basics, you will find the rest falls into place with a little practice and repetition.

Bringing It All Together

Eggplant and tomato form one of those pairings that invite creativity and reward patience. Whether you want the immediacy of a skillet or the composed beauty of a baked casserole, the fundamentals remain the same: respect the vegetable’s texture, build a balanced sauce and use heat to develop flavor. Small adjustments will help you tune the dish to your taste, season and available time. The more you cook it, the more confidently you will improvise.

Cooking eggplant in tomato sauce is as much about rhythm as it is about measurements. Plan a little, taste often and adapt. You will end up with a dish that feels personal and satisfying, not merely a recipe followed by rote. That is the real pleasure of cooking: turning simple ingredients into something memorably delicious.

Mushroom Julienne: The Creamy Classic Reimagined

There are dishes that slip quietly into family rotations and then linger in memory because of a single quality: comfort. Mushroom julienne belongs to that small, affectionate category. At once simple and indulgent, it blends tender fungi with a lusciously creamy sauce and a gratinated top that makes people reach for seconds. In this article I will take you through its history, ingredient logic, technique, variations and practical tips so you can make a version that suits your kitchen and taste. Expect clear steps, a few personal tricks from my own stove, and ideas for turning this classic into something new.

Where it came from: a short culinary history

The dish commonly referred to as mushroom julienne has roots in European cuisine, where gratinated preparations were a way to add texture and richness to humble ingredients. Originally popular in Eastern Europe and France, it became a restaurant staple because it pairs well with wine and can be portioned elegantly in ramekins. Over time, cooks adapted the basic formula—mushrooms, butter, cream and cheese—for local tastes, sometimes adding brandy, garlic or onions. Tracing its exact origin is less important than understanding the logic behind it: a balance of earthiness, fat and browning that turns simple mushrooms into a memorable starter or side. That logic explains why the dish traveled and why home cooks keep returning to it.

Historically, the name refers to a julienne cut, though modern practice often focuses more on texture than strict knife technique. Restaurants would serve it before the main course to stimulate appetite without spoiling it, while home cooks elevated store-bought mushrooms with minimal effort. In socialist kitchens, where ingredients could be scarce, adding cream and a final cheese crust turned a plain meal into something celebratory. Today, the recipe survives both as a nostalgic classic and as a canvas for contemporary adaptations—dairy-free versions, seafood additions, or herbs and spices inspired by other cuisines.

Understanding the ingredients and why they matter

Every component of a mushroom julienne serves a clear purpose. Mushrooms provide the central flavor: their umami and slight mineral notes create the savory backbone. Butter and oil are carriers for flavor and help with browning. Cream is not just richness; it binds the elements and mellows sharper notes from garlic or acid. Finally, a gratinéed cheese layer introduces contrast: a toasty top that gives bite against the soft interior. When you think of ingredients in these functional terms, substitutions become easier and more deliberate.

Salt and acid are subtle but crucial partners. Salt amplifies the fungi’s natural savor; a squeeze of lemon or a splash of white wine cuts through the richness and prevents the dish from feeling cloying. Fresh herbs like parsley or chives add brightness, while a little nutmeg—used sparingly—can deepen the creaminess without overtly changing the profile. Understanding those small interactions lets you customize the dish: lighten it, make it more aromatic, or intensify the umami foundation.

Quality matters more for some components than others. You can use ordinary supermarket cream and get good results, but choose mushrooms based on freshness and firmness. If you aim for a true gratin finish, pick a cheese that melts and browns well; Gruyère and Emmental work differently but both contribute a pleasing nuttiness. Thinking of this recipe as a system of flavors instead of a fixed list makes it adaptable and resilient in everyday cooking.

Choosing the right mushrooms

Not all mushrooms are created equal in the pan. Button and cremini are reliable—they develop good texture and are widely available—but wild varieties like chanterelles and porcini offer deeper, more complex flavors if you can source them. Shiitake brings a meaty density and a subtle smokiness. Mixing two or three kinds is a simple way to achieve a layered taste without adding many extra steps. Consider texture as well: some mushrooms release more water while others keep a firmer bite after cooking.

When working with dried mushrooms, rehydrate them in warm water and use both the rehydration liquid and the mushrooms themselves for an intensified mushroom note. Be careful with the soaking liquid; strain it to remove grit, then reduce it slightly to concentrate flavor before adding to the cream. If you choose wild mushrooms, always confirm they are safe for consumption and properly cleaned. Sourcing makes a difference in flavor, and even small changes in mushroom variety can shift the final character of your julienne.

The classic technique: step-by-step

The method looks straightforward but benefits from attentive technique. Start by cleaning and slicing the mushrooms; a coarse chop preserves body while thin slices accelerate cooking. Sauté in a combination of butter and neutral oil so the butter doesn’t burn. Let the mushrooms color gently rather than steam—wait for water to evaporate and for edges to pick up a golden hue. Add aromatics like shallot or garlic toward the end of the sauté to preserve their fragrance.

Once the mushrooms are caramelized, deglaze the pan with a splash of wine or stock to lift those concentrated brown bits. Reduce briefly, then add cream and a pinch of nutmeg or mustard for depth. Simmer until the sauce thickens slightly; it will continue to set under heat in the oven. Spoon into individual ramekins or a shallow baking dish, top with grated cheese, and slide under a broiler or into a hot oven until the surface is bubbling and bronzed.

Temperature control is surprisingly important. High heat at the start helps with browning, but finish the sauce at a gentle simmer to avoid breaking the cream. When broiling, watch closely because cheese can go from perfectly golden to overly charred in moments. Serve the dish hot so the textures read as intended: crisp, molten top; silky sauce; tender mushrooms beneath.

Ingredients list and suggested proportions

For cooks who like precise guides, here is a practical ingredient list that delivers a balanced result for four portions. Quantities can be scaled, but proportions are useful: about equal parts mushrooms and cream by volume will yield the signature texture and richness. Cheese and butter play supporting roles, so modest amounts suffice to gratinate and enrich without overwhelming the mushrooms.

Ingredient Amount (serves 4) Notes
Mushrooms, mixed varieties 600–700 g cremini, button, porcini mix recommended
Unsalted butter 2 tbsp for flavor and sautéing
Neutral oil 1 tbsp prevents butter from burning
Shallot, finely chopped 1 medium substitute: small onion
Garlic, minced 1 clove add late to avoid bitterness
Dry white wine or stock 50 ml deglaze and add acidity
Heavy cream 250–300 ml creates the creamy base
Gruyère or Emmental, grated 100–120 g for gratin crust
Salt, pepper, lemon to taste finish and balance

Technique details that change the result

Small procedural choices greatly affect texture and flavor. For instance, salt the mushrooms early only lightly; salting too much before browning draws out water and prevents proper caramelization. Use a wide pan to give the fungi space, and avoid overcrowding. If the pan is crowded, mushrooms steam and become rubbery. Stir infrequently in the first stages so they can form those golden edges that pack flavor.

When you add cream, don’t rush to a rolling boil. Gentle heat allows the sauce to thicken gradually and keeps the cream from separating. If you want a slightly thicker body without lowering cream content, incorporate a small flour or cornstarch slurry, but do it sparingly so the sauce remains silky. Alternatively, reduce some of the deglazing liquid first to concentrate flavor and then add cream; the result feels richer without extra dairy.

Variations and regional twists

One of the strengths of this dish is its adaptability. In coastal regions, cooks add small shrimp or diced crab for a surf-and-turf note. In Eastern Europe, a touch of sour cream replaces heavy cream for a tangy finish. Some modern chefs finish with a scattering of toasted breadcrumbs rather than melted cheese, offering a lighter, crisp contrast. Herbs and spices vary too: thyme and tarragon give French notes, while smoked paprika or cumin can move the flavor toward Mediterranean or North African palettes.

Another promising route is to think beyond individual servings. Use the same mushroom-cream base to top toasted sourdough, fold into pasta, or incorporate into a savory pie. Each format emphasizes different textures: ramekins highlight the gratin crust, crostini showcase contrast between crunch and silk, and pasta turns it into a main course. Variations are not just additive; they change how the ingredients interact and how diners experience the mushrooms and cream.

For those avoiding animal products, plant-based creams—oat or cashew—combined with umami boosters like miso or nutritional yeast create convincing alternatives. The goal remains balancing body and acidity so the sauce feels rounded. If you experiment with substitutes, keep track of quantities. Small changes in fat content or acidity will affect timing and how the sauce finishes under heat.

Cheese choices and the gratin crust

Cheese is more than ornament; it contributes aroma, salt and the browned notes that people love. Gruyère and Emmental are classic choices because they melt smoothly and brown attractively. A sharper cheese like aged cheddar works but will shift the flavor toward a more assertive profile that can overshadow delicate mushrooms. Freshly grated cheese always melts and browns better than pre-shredded packets that include anti-caking agents.

Experimenting with blends is fun: a base of Gruyère for texture plus a small proportion of Parmesan for savory punch creates a nuanced top. If you prefer a lighter crust, combine cheese with panko breadcrumbs tossed in a little olive oil and herbs to add sensory contrast. Applying the crust at the last minute under a hot broiler yields the best results—do not broil for too long because the sauce underneath can overheat and split.

Serving and pairing suggestions

Mushroom julienne can act as a starter, a side dish or a light main. For a formal dinner, serve it in individual ramekins with a small green salad dressed simply to cut through the richness. If using it as a side, pair it with roasted meats or simple grilled fish. The earthiness of the mushrooms works well with medium-bodied red wines, while a crisp white with moderate acidity will balance the creamy sauce and refresh the palate.

Think about texture when composing a plate. A bright, crunchy element—pickled shallots or a fennel salad—complements the soft interior and browned top. Bread is practical and gratifying; a slice of rustic country loaf soaks up the remaining sauce beautifully. For a vegetarian meal, serve mushroom julienne alongside roasted root vegetables, steamed greens or a grain pilaf to round out the plate.

Make-ahead, storage and reheating

This dish is forgiving when prepared in advance with a few caveats. You can prepare the mushroom base and the cream sauce a day ahead, then assemble and refrigerate unbaked. Top with cheese only when you are ready to bake; this preserves the best gratin texture. If freezing, omit the cheese and use airtight containers; reheat from frozen in a moderate oven until heated through, then add cheese and brown briefly.

Leftovers will keep in the fridge for two to three days. Reheat gently in a low oven to prevent the sauce from breaking. Microwave reheating is possible but less ideal because it tends to make the mushrooms mealy and the cheese rubbery. For best texture, bring the dish to room temperature briefly, then reheat covered until warm and finish under a broiler if you want to restore the crisp top.

Troubleshooting common problems

If your mushrooms are watery, the likely cause is overcrowding or insufficient initial browning. Correct this by using a larger pan, cooking in batches and ensuring heat is adequate. If the sauce separates, reduce the temperature and whisk in a little cold cream to help re-emulsify. A sauce that is too thin can often be corrected by reducing it gently over low heat or stirring in a small beurre manié—equal parts butter and flour—to thicken without changing flavor dramatically.

Over-salted results are hard to fix, so season in stages and taste as you go. A bit of acid can cut perceived saltiness; try a squeeze of lemon or a splash of wine. If the gratin browns too quickly while the interior remains cool, lower the oven rack and finish with the broiler for short bursts while monitoring closely. These small adjustments will save many cooks from disappointing finishes.

Personal notes from years of cooking

Early on I treated this dish as a recipe to be followed. Over time I learned that the joy comes from small improvisations. I remember a winter dinner where a mix of dried porcini and fresh cremini transformed the dish; the rehydration liquid concentrated the mushroom essence and changed the whole character of the sauce. Another time, swapping half the cream for crème fraîche added a subtle tang that cut through the richness on a warm evening, making the plate feel lighter.

One practical habit I recommend is keeping a small jar of mixed dried mushrooms in the pantry. They rescue the dish when fresh produce is uninspiring. Also, I often toast a handful of walnuts or hazelnuts and scatter them on top after broiling—this adds crunch and an extra layer of flavor that guests notice even if you don’t announce it. Little rituals like that turn a routine preparation into something distinctively yours.

Three practical recipes to try

Mushroom Julienne. Three practical recipes to try

Below are three concrete recipes that demonstrate the dish’s flexibility: a classic version, a seafood variation, and a dairy-free option. Each follows the same core logic—sauté, deglaze, add body and gratinate—but the details shift to highlight different elements. Use them as templates: change herbs, cheeses or mushrooms to align with what you enjoy or have on hand.

Classic Mushroom Julienne

Begin with 600 g mixed mushrooms, sliced, 2 tbsp butter, 1 tbsp oil, 1 finely chopped shallot and 1 clove garlic. Sauté the shallot in butter and oil until translucent, add mushrooms and cook until golden, then deglaze with 50 ml white wine. Stir in 250 ml heavy cream, warm through with salt, pepper and a pinch of nutmeg. Spoon into ramekins, top with 100 g grated Gruyère and broil briefly until golden and bubbling. Serve hot with lemon wedges and parsley sprinkled across.

Seafood and Mushroom Julienne

Follow the classic method but reserve some mushrooms to finish with shrimp or crab. Sauté mushrooms and aromatics, deglaze and add cream, then fold in 200 g cooked, shelled shrimp or flaked crab at the end to warm through. Use a milder cheese like Emmental for the gratin so seafood flavors remain visible. Garnish with dill or tarragon. This version works well with a dry white wine and a side of buttered new potatoes.

Dairy-Free Mushroom Julienne

Substitute an unsweetened cashew cream or full-bodied oat cream in place of heavy cream; use olive oil instead of butter for sautéing. Amplify umami with a teaspoon of white miso dissolved in a little warm water and stirred into the sauce before finishing. Top with a mixture of toasted breadcrumbs and nutritional yeast for a golden crust that mimics cheese. The dish will be lighter but still nourishing and layered in flavor when mushrooms are well caramelized.

Finishing touches and presentation ideas

Presentation elevates home cooking into an event. Serve in warmed ramekins and wipe the edges clean before bringing to the table to create a neat impression. A scattering of fresh herbs or a light dusting of paprika adds color and aroma. Consider pairing with small plates of contrasting textures—crisp radish slices, marinated baby cucumbers or a handful of olives—to provide palate refreshers between bites of the creamy gratin.

For a shared family meal, bake the julienne in a shallow ceramic dish and place it at the center of the table so everyone can help themselves. Encourage guests to spoon it over toasted bread or a bed of rice; this communal style makes the dish feel generous. Thoughtful plating does not require fuss; small details like warm plates and a simple green accompaniment communicate care and make the dish feel complete.

Turning this dish into a signature

To make mushroom julienne your own, pick one personal twist and refine it until it consistently pleases. Maybe you always add a single herb, or you prefer a specific mix of mushrooms that becomes your trade mark. Keep notes: how long you sauté, which wine works, what temperature gets your cheese perfectly browned. Over time those deliberate choices accumulate into a version that friends and family associate with you.

As you experiment, think of the recipe as a conversation between elements rather than a checklist. Each change nudges the balance: more acid brightens, more cheese adds savory salt, different mushrooms shift the earthiness. When you understand those dynamics, improvisation becomes purposeful and the dish evolves rather than drifts. The result is a comforting classic that still surprises you at the table.

Bring the pan to the table, let people pull portions that mix creamy sauce and crunch, and notice how a simple combination of mushrooms, cream and heat can create a small moment of pleasure. That is the enduring appeal of this dish: its ability to transform basic ingredients into something warmly memorable.

Italian Bean & Kale Stew: A Hearty Bowl That Warms Body and Memory

This stew is one of those dishes that feels like a warm handshake from the kitchen: simple, solid, and perfectly honest. Italian Bean & Kale Stew pulls together a few humble ingredients into something deeply comforting — creamy beans, tender kale, fragrant herbs and a savory broth that soaks into every spoonful. It’s the kind of pot that fills the house with aroma while asking nothing dramatic in return, just a bit of time and a good pan. Whether you’re cooking for a frigid evening, prepping lunches for the week, or craving something nourishing and unfussy, this recipe answers with quiet confidence. Read on for history, technique, variations, storage tips, and a few personal notes from my own kitchen experiments.

Where This Stew Comes From

The roots of this dish trace back through regional Italian cooking where legumes and dark greens were staples in rural households. Beans and kale were affordable, hearty, and stored well through the colder months, so they formed the backbone of many family meals. In central and northern Italy, versions of bean-and-greens stews vary by village, sometimes simmered with pork, sometimes left vegetarian and brightened with lemon. These recipes were practical: they used pantry items, stretched modest protein sources, and were designed to comfort and sustain.

Over time, the combination migrated into more contemporary kitchens and adapted to modern diets, acquiring a few new tricks along the way. Chefs and home cooks began to introduce different beans, textured cooking oils, and finishing elements such as aged cheese or chili oil to elevate the basics. Still, the spirit remains unchanged — a rustic stew that celebrates texture, slow melding of flavors, and the kind of nourishment that feels like an embrace. For those who love seasonal cooking, it’s a prime example of making much from little, perfect for a winter stew rotation or for year-round simplicity.

Why This Combination Works

Beans provide body and a creamy mouthfeel when cooked down gently, while kale contributes a contrasting chew and a green, slightly bitter note that keeps the stew lively. The interplay between soft legumes and the bright resilience of the greens is what gives this dish balance. Additionally, beans soak up surrounding flavors, which means aromatics, stock, herbs and a splash of acid all get magnified in the final bite. That’s why a modest base — olive oil, onion, garlic, and tomatoes or tomato paste — can yield complexity when given time.

From a nutritional standpoint, pairing beans with kale creates a well-rounded bowl: plant-based protein, fiber, iron and vitamins together offer lasting satisfaction that doesn’t rely on large portions. In colder months, the stew’s warmth and satiety make it psychologically comforting as much as physically filling. Flavor-wise, finishing with something salty and bright — a drizzle of excellent olive oil, a sprinkle of Pecorino or a squeeze of lemon — lifts the stew and prevents it from feeling dull. In short, it’s practical, tasty and genuinely sustaining.

Essential Ingredients and How to Choose Them

Not all beans are the same, and the choice will shape texture and cooking time. Cannellini or Great Northern beans are classic for an Italian-style stew: they hold shape but become tender and creamy inside. If you prefer a nuttier flavor, borlotti or chickpeas can be excellent alternatives. When using dried beans, plan ahead — soak and cook them separately for the best texture. Canned beans are perfectly fine for speed; rinse them to remove excess sodium and to prevent a metallic aftertaste.

Kale choice matters more than most people expect. Lacinato kale, also known as Tuscan or cavolo nero, is the traditional pick: its long, dark leaves have a robust texture and a slightly smoky flavor that stands up to simmering. Curly kale works too, but strip the fibrous stems and chop the leaves finely to avoid chewy strands. Freshness is key; look for crisp leaves without yellowing. Other greens like Swiss chard or spinach can be used for variation, but they change the cooking rhythm — spinach wilts quickly, chard bridges the gap between delicate and hearty.

Ingredients Table

Below is a practical ingredient guide to get you started, with common substitutions and approximate quantities for a family-sized pot.

Ingredient Amount Substitutions/Notes
Olive oil 3 tbsp Use extra virgin for finishing if possible
Onion 1 large, finely chopped Shallot or leek for milder flavor
Garlic 3 cloves, minced Adjust to taste
Tomato paste 1-2 tbsp Chopped tomatoes can substitute some paste
Beans 2-3 cups cooked (or 2 cans, drained) Cannellini, borlotti or chickpeas
Kale 6-8 cups chopped Lacinato preferred; stems removed
Vegetable or chicken stock 4-6 cups Low sodium recommended
Herbs & seasoning Salt, pepper, rosemary or thyme Bay leaf optional
Finishing Lemon, chili flakes, Pecorino For brightness and contrast

Step-by-Step Cooking Method

Start by layering flavors. Warm your pot over medium heat, add olive oil, then sweat finely chopped onion until translucent and fragrant. Stir in garlic for a minute — don’t let it burn — then add tomato paste and toast it briefly; this deepens sweetness and removes raw acidity. If you’re using pancetta or smoked bacon, render it first to build a savory base, and then proceed with the aromatics. Once the base smells rich, introduce your beans and stock to the pot.

Next comes simmering, which is where the stew develops depth. Bring the mixture to a gentle boil, then reduce to a low simmer so the liquids whisper around the ingredients rather than roil. If you’re using dried beans cooked separately, add them now to meld flavors without overcooking. Add herbs like rosemary or thyme and a bay leaf; they release slowly and blend into the broth. Simmer for at least 20 to 30 minutes so the beans soften further and the broth concentrates a little.

Introduce the kale toward the end so it retains color and texture. Add chopped kale in batches, allowing each addition to wilt slightly before adding more, making it easier to stir and evenly distribute through the stew. Continue simmering just long enough for the leaves to become tender but not pasty, usually five to ten minutes depending on the type of kale. Taste and adjust seasoning; this is the moment to add salt, cracked black pepper, or red pepper flakes if you want a little heat. A small squeeze of lemon brightens the whole pot, so don’t skip it.

To finish, decide how rustic or refined you want the texture. Many cooks like to mash a cup of the beans against the side of the pot to thicken the broth naturally, then stir to distribute the creaminess. Alternatively, blend a portion and return it to the pot for a silkier result while keeping whole beans for contrast. Finish with a drizzle of good olive oil and, if appropriate, a grating of Pecorino or Parmesan for savory richness. Serve hot with crusty bread or a scoop of polenta to absorb the delicious broth.

Cooking Steps — Quick Checklist

Use this quick list as you cook to keep the sequence smooth and intuitive:

  • Render any cured pork if using, then sweat onions.
  • Add garlic and tomato paste; toast briefly.
  • Pour in stock and beans, simmer with herbs.
  • Add kale near the end; cook until tender.
  • Finish with acid, oil, and cheese to taste.

Technique Tips for Better Texture and Flavor

A few small techniques transform an average pot into something remarkable. First, don’t rush the aromatics; a proper sweat of onion and gentle toasting of tomato paste unlocks sweetness and develops umami without adding ingredients. Second, control the simmer — a vigorous boil breaks down beans unevenly and clouds the broth. Gentle heat gives you a clearer, more concentrated flavor. Also, when using canned beans, rinse and drain well, then warm them in the stew instead of boiling; this preserves their shape and prevents them from disintegrating into mush.

Another useful trick is to reserve some cooking liquid when preparing dried beans. That bean water carries starch and flavor, which can enrich the stew without introducing extra salt. If you prefer a creamier consistency, mash a portion of the beans against the side of the pot or briefly purée with an immersion blender. Finally, timing the greens is crucial: add them too early and they become grey and limp; too late and they remain tough. Aim for bright, tender leaves that still add structure.

Salt management matters. Start with modest seasoning and build gradually; beans can absorb a lot of salt, and it’s easier to add more than to correct oversalting. If the stew tastes flat near the end, a tiny splash of acid — lemon juice or red wine vinegar — will lift and clarify flavors. For a smoky edge, finish with a few drops of smoked olive oil or a sprinkle of smoked paprika. These finishing touches can make the stew feel intentional and layered rather than one-note.

Vegetarian, Vegan, and Protein-Boost Options

The stew is naturally adaptable. For a vegetarian or vegan version, simply skip any meat and use vegetable stock. To boost plant-based protein beyond legumes, stir in some toasted nuts or seeds at the end for a crunchy counterpoint, or serve with a dollop of tahini for richness. If you want more animal protein without overwhelming the bowl, fold in shredded rotisserie chicken or a few slices of Italian sausage cooked separately for a meaty finish. These small shifts change the dish’s character while keeping its core identity intact.

For a higher-protein, lower-carb take, reduce the beans slightly and add more leafy greens or roasted cauliflower chunks. Another technique is to mix two kinds of beans — one creamy and one firm — to create texture contrast while keeping overall protein content high. For a truly rustic approach, include a bone-in ham hock in the simmering stage; it will infuse the stew with smoky depth and tender meat you can shred back into the pot. Remember to adjust salt if using cured or smoked components to avoid oversalting.

Flavor Variations to Keep It Interesting

Small changes make the stew feel new each time you cook it. Swap rosemary for sage in autumn for a softer, woodsy note, or add fennel seed and crushed red pepper for a slightly spicier, aromatic profile evocative of southern Italian kitchens. Incorporating a spoonful of miso at the end adds savory complexity and a rounded umami punch without making the stew taste Asian; miso plays nicely with beans and greens. For a Mediterranean twist, finish with chopped olives and capers, which introduce briny brightness against the stew’s richness.

Spice up the pot with smoked paprika and cumin for a Spanish-inspired edge, then top with cilantro and a squeeze of lime at serving. Another direction is to add caramelized leeks and a splash of dry white wine early in the cook to introduce floral and fruity notes. If you want a creamier texture without dairy, stir in a spoonful of cashew cream or blended white beans for silkiness. The key is to change one or two elements at a time so the dish evolves but remains cohesive.

Serving Suggestions and Pairings

This stew shines with simple accompaniments that respect its rustic nature. Thick slices of toasted country bread are the classic choice, ideal for sopping up the broth and for offering a comforting crunch. Polenta is another natural partner; serve a scoop of creamy polenta in the bowl and ladle the stew on top for a Northern Italian vibe. For a lighter approach, serve alongside a crisp green salad dressed with lemon and olive oil to cut through the stew’s earthiness.

Drink pairings depend on the variation you choose. For a straightforward, herb-forward pot, a medium-bodied red like Chianti complements the tomato and herb elements without overpowering the greens. If the stew is spiced with smoked paprika or chorizo, a Spanish red or a robust rosé works nicely. For white wine lovers, an unoaked Sauvignon Blanc or Vermentino offers acidity and herbal notes that echo the kale and uplift the bowl. Non-alcoholic pairings include a sparkling water with citrus or a robust herbal tea.

Make-Ahead, Storage, and Reheating

This is a stew that grows happier with time, which makes it ideal for meal prep. Flavors continue to meld in the fridge, so the next-day version often tastes even better than the day you cook it. Store in airtight containers for up to four days, and for longer storage freeze portions for up to three months. When freezing, leave a little headspace in the container because liquids expand, and consider blanching the kale briefly before freezing if you want to preserve color and texture.

Reheat gently on the stovetop over low heat to avoid breaking down the beans too much; add a splash of stock or water if the stew feels too thick after refrigeration. If reheating in the microwave, cover and stir halfway through to promote even warming. Freshen with a squeeze of lemon and a drizzle of olive oil just before serving to restore brightness. If the greens have darkened after storage, a quick stir-in of chopped fresh parsley or arugula brightens both appearance and flavor.

Nutritional Benefits and Portioning

Beans and kale make a nutrient-dense combination. Beans provide fiber and plant protein, contributing to satiety and steady blood sugar control. Kale brings vitamins A, C and K, as well as calcium and antioxidants, so a bowl offers both macro and micronutrient benefits. Combined with olive oil and modest amounts of cheese, the stew balances healthy fats with heartiness, making it a smart choice for a winter stew that supports both taste and health.

Portioning is straightforward: a generous bowl with 1 to 1.5 cups of stew provides a satisfying meal, especially if paired with bread or polenta. For calorie-conscious diners, increase the proportion of greens and reduce bread accompaniment. Families can stretch a pot by serving it as a component alongside roasted vegetables, grain salads, or a simple protein for those needing larger portions. The stew’s flexibility is part of its charm — it fits into many eating patterns without fuss.

Common Questions and Troubleshooting

Why did my beans fall apart? Often this is due to overcooking or starting with older dried beans that need longer to hydrate. Use gentle simmering and add canned beans toward the end if texture is your priority. Another reason can be rapid temperature changes, so avoid high boils. If a few beans break down, that’s fine; they thicken the broth deliciously, but if you want intact beans, treat them gently.

How do I prevent bitter kale? Tough stems and overcooking can create an off-putting texture or bitterness. Remove stems and chop leaves into even pieces, and add them late in the process to preserve color and flavor. Massaging curly kale briefly with a touch of salt and olive oil before adding can soften it and reduce bitterness. Choosing Lacinato kale also reduces the chance of excessive bite because it has a naturally sweeter, earthier character.

Is this stew suitable for meal prep? Absolutely. It stores well and often tastes better the next day. Keep extra olive oil and lemon on hand to refresh each reheated portion. If freezing, use portion-sized containers to make thawing quick and convenient. Reheat gently to maintain texture, and add fresh greens if you want a brighter mouthfeel.

Personal Notes from My Kitchen

Italian Bean & Kale Stew. Personal Notes from My Kitchen

I first fell for this combination on an icy evening when a few pantry staples and a bag of kale were all I had. The pot simmered for an hour and the house filled with a smell that felt like homecoming. Since then, I’ve tweaked the ratio of beans to greens, tried smoked salt, experimented with different beans, and learned that a small spoon of tomato paste makes a huge difference in richness. Each version taught me something about balance and patience, and I now keep a mason jar of toasted breadcrumbs in the pantry just for finishing bowls on particularly hungry nights.

One memorable batch included fennel and orange zest, a twist that made the stew surprisingly bright and perfumed, pairing especially well with a winter citrus salad. Another time I overcooked the kale and learned to rescue the pot by stirring in peppery arugula at the end. These modest experiments remind me that this stew is a framework rather than a rulebook; it welcomes improvisation while rewarding restraint and good ingredients. Sharing it with friends on a cold night became a ritual in my circle, and I still enjoy seeing how each cook interprets the same humble list of components.

Recipes for Related Dishes

If you enjoy this stew, several relatives of the dish are worth trying. Ribollita is a Tuscan bread-and-vegetable soup that folds stale bread into a bean and kale base until it becomes thick and almost porridge-like. Minestrone often includes beans and greens but leans more on seasonal vegetables and pasta or rice, offering a lighter, chunkier experience. These dishes share technique and spirit with the stew but differ in texture, starch content, and regional seasoning, offering a pleasant range of options for different moods and pantry inventories.

Another neighbor to try is a simple white bean and rosemary cassoulet-style bake; it’s similar in ingredients but baked until the top becomes golden and crusty. Each variation highlights a different strength of beans and greens: robustness in stews, comforting cohesion in bread-based soups, or a crisp, gratin finish in bakes. Exploring these is a great way to deepen your repertoire while keeping the central theme — wholesome, peasant-rooted cooking — intact.

Final Thoughts on Making It Your Own

Italian Bean & Kale Stew is generous in spirit and forgiving by nature, which makes it perfect for cooks of any skill level. Start with the basic template — quality olive oil, a good stock, well-chosen beans and vibrant kale — and adjust through small changes that reflect your pantry and palate. Make it meatless or heartier, spice it up or keep it restrained, but always finish with an acidic lift and a drizzle of good oil to tie the flavors together. The best version is the one that keeps you warm, nourished and coming back for another bowl.

When feeding others, let the stew be a conversation starter rather than a rigid recipe. Invite people to add their own garnishes, pass around cheese, chili flakes and lemon wedges, and watch how a simple pot encourages sharing. In an age of busy plates and sharp schedules, this stew offers a slower, kinder kind of cooking — one that values fullness of flavor, practicality and the small comforts that become memories. Give it time, invest a little care, and it will repay you with something that tastes like home.