Category: Recipes

Sweet Potato & Black Bean Enchiladas: Cozy, Smoky Comfort for Any Night

There is something quietly irresistible about a tray of enchiladas that come out of the oven bubbling and aromatic, and this version pairs roasted sweet potato with tender black beans to deliver both heart and soul. Here I will walk you through the reasoning behind the flavors, precise ingredients, clear steps, and ways to make the dish your own, whether you cook for two or a hungry group. You will find tips on texture, balance, and timing so the filling isn’t soggy and the tortillas stay tender but not falling apart. Along the way I’ll share small habits from my kitchen that help every bake come out vivid and satisfying. This article is organized to be a practical resource and a little bit of a love letter to simple, vegetable-forward comfort food. Read more

Warm Bowl, Cooler Days: The Art and Soul of Chicken Noodle Soup

There are few dishes that feel as immediate and intimate as a steaming bowl of chicken noodle soup. It arrives at the table not as a spectacle but as comfort: warm, familiar, and honest. In this article I will walk you through history and technique, ingredient choices and troubleshooting, plus a reliable, flavorful recipe you can rely on. Along the way I’ll share practical tips from my kitchen and explain why a good broth can change everything. Read on and you might end up with a new favorite method for making this classic dish. Read more

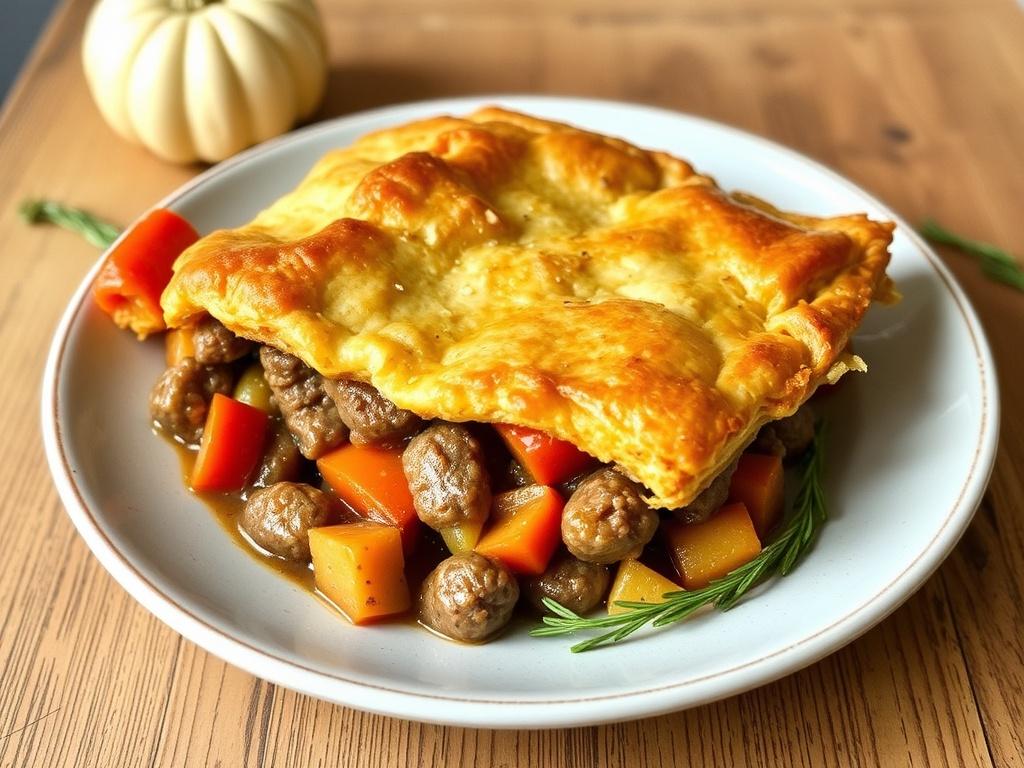
Earthy Comfort: Crafting the Perfect Meat Pie with Root Vegetables

There is something elemental about a warm pie plated beside a wooden table, steam curling up and a scent that promises comfort. This article walks you through building a meat pie with root vegetables that is at once rustic and thoughtfully composed. I will cover ingredient choices, technique, pastry options, seasoning strategies and practical tips for make-ahead and freezing. Expect concrete guidance, a few personal notes from my kitchen experiments and recipe variations so you can adapt the dish to seasons and pantry constraints. Read on if you want a pie that feeds a family and rewards patience. Read more

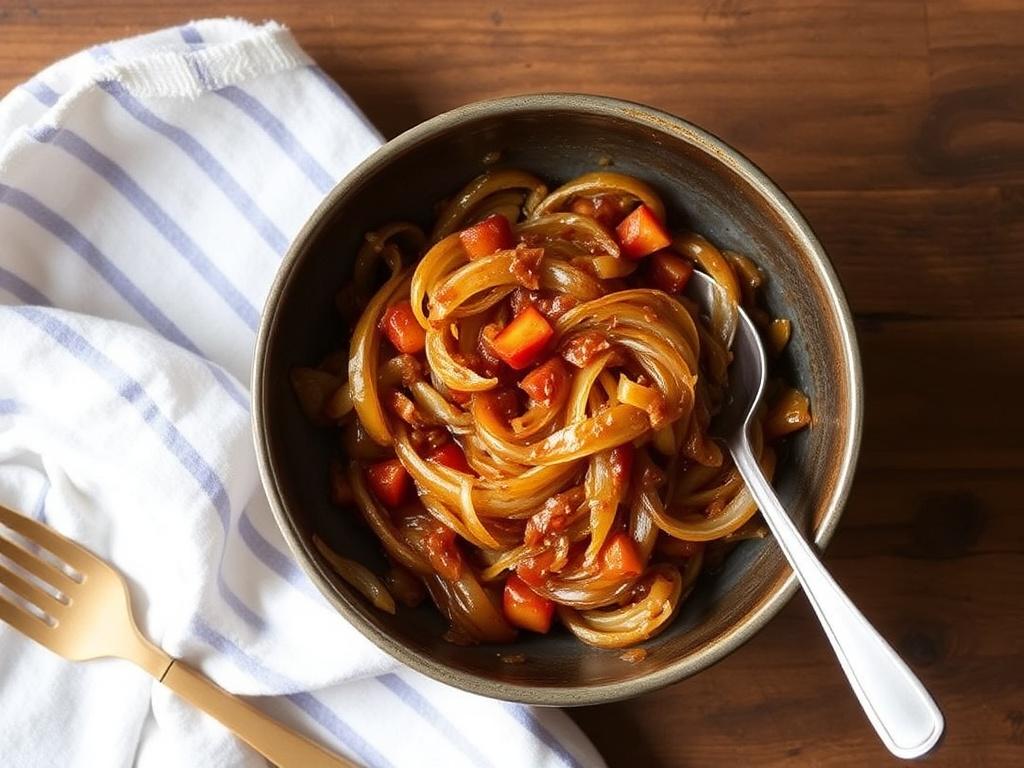
Caramelized Onions Side: The Sweet, Savory Upgrade Your Plate Has Been Waiting For

There are few things in the kitchen that transform a simple meal into something unexpectedly glorious like a well-made bed of caramelized onions. This side elevates humble ingredients—plain sliced onions, a bit of fat and time—into a glossy, sweet-tasting accompaniment that works with everything from roasted meat to creamy polenta. In this article I’ll walk you through why these onions matter, how to make them reliably, and dozens of ways to use them so they never become just “that thing in the corner” on your plate. Expect practical technique, flavor ideas, storage tips, and a couple of personal habits I’ve picked up over years of cooking. Read more

Homemade Biscotti: How to Bake the Perfect Crunchy Cookie at Home

There is something quietly satisfying about pulling a tray of crisp, golden biscotti from the oven and watching steam rise as the kitchen fills with a toasty, almond-scented aroma. These twice-baked Italian cookies have a personality all their own: dry enough to dunk, sturdy enough to last, and versatile enough to welcome a dozen different flavor ideas. In this piece I will walk you through the practical steps, ingredient choices, and creative variations so you can confidently make your own batch at home. Along the way I’ll share small tricks learned from real hands-on baking, the reasons behind each technique, and ways to adapt the recipe for different diets. Whether you see them as a simple coffee companion or an elegant dessert offering, the goal here is to make the process approachable and rewarding. Read more

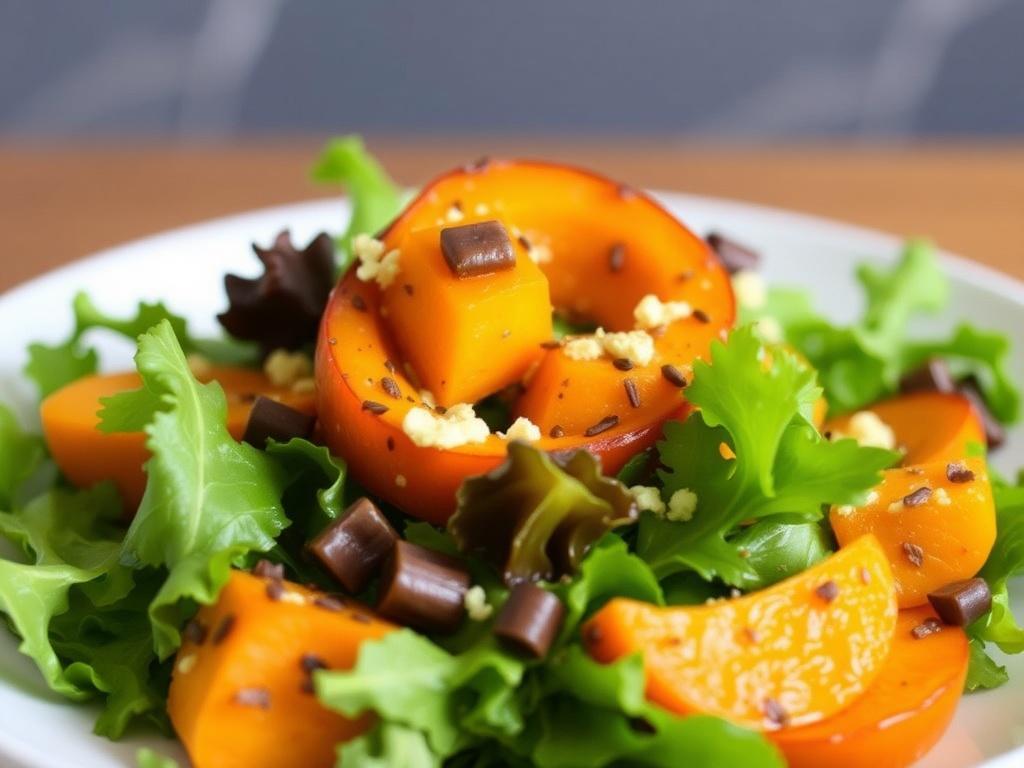
Roasted Pumpkin Salad That Makes You Look Forward to Fall

There is a certain alchemy that happens when pumpkin meets high heat and a confident hand with spices. This Roasted Pumpkin Salad is not a mere side dish, it is a centerpiece idea for dinners that want warmth, color and crisp contrast. In the paragraphs that follow I will walk you through choosing the right squash, mastering the roast, building dressings, and balancing textures so the finished salad feels complete and memorable. I will share practical timings, flavor combinations that actually work, and a reliable recipe you can follow tonight. If you have a craving for seasonal food that feels both grounded and a little inventive, stay with me. Read more

Warm Bowls and Quiet Evenings: Pork and Potato Soup That Feels Like Home

There is a certain comfort in a steaming pot that smells of slow-cooked pork and earthy potatoes, a scent that tells you dinner will be simple and honest. This article walks through the soul of a classic pork and potato soup, from choosing the right cut of meat to the final scatter of herbs on top. I want to share not just a recipe but the thinking behind each step, so you can adapt the dish to your pantry, the season, or your mood. Along the way you will find practical tips, small substitutions, and ideas to stretch the soup into lunches, weeknight suppers, or a centerpiece for a cozy dinner. Read on if you like brothy, satisfying bowls that balance richness and restraint.

Where this soup comes from and why it feels familiar

Soups that pair pork and potato have roots in many cuisines because both ingredients are accessible, affordable, and forgiving in the pot. Across Europe and in parts of Asia, cooks have long simmered pork bones or scraps with starchy tubers to extract flavor and calories in one efficient dish. The combination works because pork brings fat and savory depth while potato gives body and a soft, creamy texture as it breaks down. That familiar quality—warm, filling, and unpretentious—makes it archetypal comfort food for evenings when you want to be nourished without fuss. Thinking of this family of soups helps when you want to tweak flavors: smoke, sweetness, or spice can nudge the basic formula in many directions.

Why pork and potato are a culinary match

At the culinary level, pork and potato complement each other in flavor, texture, and chemistry. Pork, especially when slowly cooked, releases gelatin and savory compounds that enrich broth and coat the palate, while potato releases starch that thickens the liquid and creates a silky mouthfeel. The interaction between rendered fat and dissolved starch gives the broth body without the need for cream or roux, which keeps the soup lighter but still satisfying. Aromatics like onion, garlic, and celery provide a sweet counterpoint, and acidic notes, such as a splash of vinegar or lemon, can brighten the whole bowl. Understanding these relationships helps you decide when to add a creamy element or when to keep the soup clear and brothy.

Choosing the right cut of pork

Not all pork is created equal for soup, and the cut you pick will determine texture, complexity, and cooking time. For a rich, gelatinous broth consider shoulder or picnic roast; these cuts have enough connective tissue to break down into silky, mouth-coating richness during a long simmer. If you prefer pieces of tender meat in the bowl, bone-in pork chops or a trimmed pork shank work well and add subtle marrow flavor. For a smoky profile, use diced smoked ham or incorporate a smoked ham hock to infuse the liquid without overwhelming it. If budget and speed are priorities, diced pork loin will do but avoid overcooking, as lean cuts can become dry and stringy.

Potato choices and how they influence texture

Potatoes bring more than starch; their variety changes the final texture of the soup dramatically. Waxy potatoes, such as red or new potatoes, hold their shape when simmered and are ideal if you want distinct chunks in every spoonful. Floury potatoes, like russets, break down and lend a natural creaminess; they are perfect if you prefer the soup to be thicker and almost velvety without adding dairy. Yukon Gold sits in the middle, offering a buttery flavor and partial breakdown that gives both body and bite. Consider also cutting size: large cubes will remain intact, while small dices will soften faster and begin to thicken the broth earlier in the cooking process.

Essential aromatics and flavor anchors

A good soup is built on layers, and aromatics lay the first ones down. Start with a classic mirepoix of onion, carrot, and celery for sweetness and complexity, or shift to leek and fennel for a gentler, anise-tinged base. Garlic adds depth, but use it judiciously to avoid overtaking the pork, especially if your meat is smoked. Bay leaves, whole peppercorns, and a sprig or two of thyme are reliable herbs that hold up to long simmering, giving the broth a rounded, savory character. For finishing, fresh parsley, chopped chives, or a squeeze of lemon lift the bowl and prevent it from feeling heavy.

Core recipe: step-by-step method

Below is a straightforward approach that balances ease and flavor while allowing room for personalization. Begin by searing cubed pork shoulder in a heavy pot until browned on all sides; this Maillard reaction creates flavor that dissolves into the broth. Remove the meat and lightly caramelize the aromatics in the same pot to absorb the browned bits, then return the pork with stock, herbs, and potatoes. Simmer gently until the pork is tender and the potatoes reach your preferred texture, then adjust seasoning and finish with an acid and some fresh herb. The method is forgiving: a low simmer for longer time deepens flavor, while a brisker boil shortens cooking time but requires closer attention to prevent overcooking.

Ingredients for four to six servings

To make a sensible base batch that you can scale, use roughly one kilogram of pork shoulder trimmed and cubed, about 800 grams of potatoes cut into uniform pieces, and eight cups of stock or broth. Add one large onion diced, two carrots sliced, two stalks of celery chopped, three cloves of garlic minced, two bay leaves, six peppercorns, and a few sprigs of thyme. Finish with salt to taste, a tablespoon of vinegar or lemon juice, and a handful of chopped parsley for garnish. These proportions create a balanced soup with both meat and potato in each spoonful without overpowering the broth.

Quick reference cooking table

For convenience, here is a compact table that maps the main steps to approximate times so you can plan your evening. Keep in mind that stove temperatures and pot conductance vary, so use these times as guidelines rather than strict rules. Browning the pork usually takes about 8 to 12 minutes, softening aromatics another 6 to 8, simmering the pork and potatoes together roughly 30 to 45 minutes depending on cut and dice size, and resting time five minutes before serving. If you choose bone-in cuts, add 15 to 30 minutes for the bones to yield flavor and marrow. This pacing helps you coordinate side dishes and gives you flexibility if guests arrive early or late.

Step Approximate time Notes
Browning pork 8–12 minutes High heat in a heavy pot, work in batches
Sauté aromatics 6–8 minutes Softens vegetables, picks up fond
Simmer soup 30–45 minutes Low simmer for tender meat and soft potatoes
Rest and finish 5 minutes Adjust seasoning, add acid and herbs

Flavor variations to try

This soup is an excellent canvas for variation, which is why it remains a favorite in home kitchens. For a smoky twist, introduce diced smoked sausage or a ham hock early in the simmer, and consider a few drops of liquid smoke if you want pronounced campfire notes. If you prefer creamy, stir in a cup of crème fraîche or whole milk near the end and warm gently without boiling. Spice lovers can add smoked paprika, a dash of cayenne, or chopped chiles with the aromatics to build heat from the base. For an herb-forward green version, toss in chopped kale or spinach five minutes before finishing; they wilt quickly and contribute bright color and nutrition.

Vegetarian adaptation

You can make an entirely different but still satisfying dish by swapping pork for hearty mushrooms and adding miso for umami depth. Use a combination of cremini and shiitake mushrooms browned well to mimic meatiness, and incorporate a tablespoon of white or red miso dissolved in warm stock to round out the flavor. Add a drizzle of good olive oil and perhaps a handful of cooked lentils for protein and texture. While not a pork substitute in flavor, this approach keeps to the spirit of a filling potato soup and suits a plant-forward weekly rotation.

Make-ahead, storing, and freezing tips

Soups based on pork and potato are excellent candidates for make-ahead cooking, but they have particular handling needs because potatoes change texture when chilled or frozen. If you plan to freeze, undercook the potatoes slightly so they don’t turn mushy during reheating; alternatively, freeze the broth and pork separately from the potatoes and add freshly cooked or thawed potatoes at reheating. Store cooled soup in airtight containers in the refrigerator for up to four days and reheat gently on the stove to preserve texture. If you notice the soup thickened substantially in the fridge, loosen it with a splash of stock or water while warming, then adjust seasoning.

Serving ideas and what to pair it with

A bowl of pork-and-potato soup is satisfying on its own, but thoughtful pairings elevate the meal without stealing the show. Rustic breads like sourdough or a seeded country loaf are perfect for sopping up broth and offer a textural contrast to the soft potatoes. A simple green salad with a sharp vinaigrette cuts through the richness and refreshes the palate between spoonfuls. For drinks, a crisp lager or a light-bodied white wine such as Verdejo balances the fatty elements, while a dry cider harmonizes beautifully with pork. Small, salty accoutrements such as pickled onions or cornichons add brightness and an acidic counterpoint that keeps the flavors lively.

Nutritional considerations and swaps

This soup can be adapted to various dietary needs without losing its essence, and small swaps can change nutrient profile and calorie density. Choose leaner pork cuts and trim visible fat if you aim to lower saturated fat, or keep fattier cuts for a more indulgent, traditional bowl. Use low-sodium broth to control salt and add finishing salt as needed, so you avoid over-salting during the long simmer. Adding vegetables like carrots, parsnips, and leafy greens increases fiber and micronutrients; legumes such as white beans contribute protein and make the soup heartier without extra meat. A short table below outlines a few common swaps and their effect.

Swap Effect
Pork shoulder to pork loin Leaner but less gelatinous broth
Russet to red potatoes From creamy body to firmer chunks
Full-fat cream to low-fat milk Less richness, lighter mouthfeel

Troubleshooting common problems

Even simple soups can run into a few predictable issues, and knowing quick fixes saves dinner. If the broth tastes flat, a small splash of acid—vinegar or lemon juice—brightens flavors without adding seasoning. If the soup becomes greasy after cooling, refrigerate briefly and skim the hardened fat from the surface before reheating. Overcooked potatoes can disintegrate and make the soup pasty; next time cut larger pieces or reduce simmer time and add them later. If the pork is tough, it likely needs more time at a gentle simmer; switch to a low heat and allow connective tissue to break down slowly until fork-tender.

Finishing touches and garnishes that make a difference

The finishing touches are where the bowl becomes personal and memorable, and small contrasts can elevate the entire experience. A scattering of fresh herbs such as parsley, dill, or chives adds color and freshness that cuts the heavier flavors. For crunch and aroma, toast some thin bread crumbs in butter with garlic and sprinkle them on top just before serving. A drizzle of good olive oil or a few drops of chili oil provides a glossy sheen and subtle heat that spreads across the palate. Lastly, consider a light sprinkle of tangy cheese like grated aged cheddar or a few curls of Parmesan for richness and umami at the finish.

How I cook this soup at home: a short story

In my kitchen this soup often begins on a chilly evening when I find a neglected pork shoulder in the freezer and a sack of potatoes in the pantry. I brown the meat in a heavy pot while music plays, letting the browned bits accumulate and deciding on herbs based on what I have: sometimes thyme, sometimes a sprig of rosemary. I like to add one smoked ham hock on days when I want deeper flavor; its presence makes the house smell nostalgic, like the kinds of family dinners I remember. The soup is forgiving, and I have fed it to neighbors and friends who praised its warmth and simplicity, a reminder that good food does not need to be complicated to be meaningful.

Ways to serve leftovers and stretch the meal

Pork and Potato Soup. Ways to serve leftovers and stretch the meal

Leftover pork and potato soup is versatile and can be reinvented in a few minutes into new meals that feel intentional. Use the leftovers as a base for a pot pie: thicken slightly, pour into a baking dish, top with pastry or biscuits, and bake until golden. Turn it into a thickened chowder the next day by blending part of the soup for a creamier texture, then add fresh vegetables or corn for brightness. For quick lunches, reheat and ladle over toasted bread or croutons, scatter with greens, and top with a soft-cooked egg for protein and silkiness. These transformations stretch both flavor and budget while keeping the comfort intact.

Parting thoughts on making it your own

What makes this kind of pork and potato soup enduring is its adaptability and the ease with which each cook can imprint personal taste. Use this guide as a scaffold: pick a pork cut that suits your time and budget, choose potato types for the texture you like, and layer aromatics and herbs in proportions that speak to your palate. Don’t be afraid to experiment with smoke, spice, or cream, but always finish with a bright element to sharpen the bowl. In the end, the best measure of success is a warm silence around the table as everyone digs in; the soup should feel like home, however you choose to define it.

Smoky Comfort in a Bowl: Crafting the Perfect Potato, Leek & Chorizo Soup

This soup is the kind that invites you to slow down and breathe in the steam before the first spoonful. A marriage of soft potato, sweet leek and spicy cured sausage creates a balance that is both humble and unexpectedly sophisticated. In this article I will walk you through ingredients, technique, variations and tips so you can make a version that suits your pantry and palate. Expect practical advice, a few personal observations from my kitchen, and clear instructions that keep the cooking relaxed rather than fussy. Let’s turn simple components into something that feels like a small celebration at the table.

Why this combination works so well

Potatoes bring body and creaminess to a broth, while leeks add a gentle onion-like sweetness that stays delicate when cooked slowly. Chorizo contributes fat and smoky spice, which season the whole pot without needing many additional spices. Together they create layers: starch for texture, aromatic sweetness for lift, and cured meat for umami and depth. When these elements are treated with care — browned where needed and simmered gently — the result is comforting but not heavy. That balance is why this recipe appears in bistros and home kitchens alike, adapted to personal tastes without losing its soul.

Another reason this soup resonates is its versatility. It functions as a starter for a dinner party or as a main course with a hunk of bread and a green salad. You can adjust thickness to your mood and seasonality, making it lighter in summer or heartier in winter. The technique teaches some universal kitchen skills: sweating aromatics, deglazing, and controlling starch to reach the right consistency. Those skills carry over to many other dishes, which makes the time invested here doubly useful.

Ingredients: what to buy and why

Good results start with sensible choices. For the base you need potatoes, leeks, stock and a fat source; chorizo and a little dairy or cream round the flavor and texture. Fresh ingredients matter most: firm potatoes with low eyes give a smooth finish, and bright green leeks provide the mild onion flavor that lifts the soup. Use a flavorful stock — chicken or vegetable — because it amplifies the soup without overshadowing the chorizo. Salt, pepper and a bay leaf or two are usually enough for seasoning, with optional parsley or smoked paprika for garnish.

Here is a compact shopping list to simplify the trip to the market. Quantities assume 4 generous portions, but I’ll indicate how to scale them for more or fewer servings. Choose Spanish chorizo for that authentic, smoky paprika note, or a milder variant if you prefer less heat. If you want the soup dairy-free, swap cream for a splash of extra olive oil or a spoonful of almond cream at the end.

  • 800 g potatoes (about 4 medium), waxy or all-purpose
  • 2 large leeks, white and pale green parts only
  • 200–250 g chorizo, sliced or diced
  • 1 liter chicken or vegetable stock
  • 2 tbsp olive oil or 1 tbsp butter
  • 100 ml double cream or crème fraîche (optional)
  • 1–2 bay leaves, salt and black pepper
  • Fresh parsley or chives for finishing

Step-by-step method: clear and manageable

Start by cleaning the leeks thoroughly — dirt hides between their layers — then slice them thin. Peel and cube the potatoes into even pieces so they cook uniformly. Slice the chorizo into rounds or small cubes depending on whether you want more rendered fat or little pockets of sausage. Having everything prepped helps the cooking flow, because once the pan heats up there’s no time for chopping without risking overcooking other ingredients. Mise en place matters, even for simple soups.

Heat a heavy-bottomed pot and render the chorizo until it releases its oil and starts to brown, then remove a spoonful for garnish if you like. Sauté the leeks in the rendered fat until they soften and become translucent, taking care not to let them brown too much. Add the potatoes, toss to coat, then pour the stock and add bay leaves; bring to a simmer and cook until potatoes are tender. Finish by blending part or all of the soup for a creamy texture, return the chorizo, stir in cream if using, and correct seasoning. Keep the heat low at the end so flavors marry without breaking the dairy.

Practical step list

Here is a simple order of operations that I follow every time. The list emphasizes timing so that the leeks remain tender and the potatoes reach the right softness without falling apart. Following a sequence prevents the common mistake of overcooking vegetables while waiting for other elements to finish. It also keeps the pot tidy and the flavors bright.

  1. Prep vegetables: wash leeks, peel and cube potatoes.
  2. Render chorizo; reserve some bits for garnish.
  3. Sauté leeks in chorizo oil until soft.
  4. Add potatoes, stock and bay leaves; simmer until tender.
  5. Blend to desired texture, return chorizo, add cream and season.

Technique and small tips that make a big difference

When rendering chorizo, use medium heat so the fat melts steadily without burning the paprika. That fat is flavor currency; it shapes the soup more than any spice jar. Cook the leeks slowly until they are soft and sweet; rushing them at high heat steals their nuance. If you aim for a silky soup, use an immersion blender and blend while the pot is still warm rather than piping hot to avoid splatter. Taste as you go and adjust salt at the end because chorizo and stock can be quite salty combined.

For a chunkier texture, reserve one-third of the potatoes and add them back after blending the rest. That contrast between velvety base and few tender chunks makes each spoonful interesting. Another small trick: add an acidic counterpoint like a teaspoon of sherry vinegar or a squeeze of lemon at the end to brighten the flavors. Acid wakes up the taste buds and prevents the soup from seeming flat, especially if you use rich cream.

Choosing the right chorizo: fresh, cured, spicy or sweet

Chorizo comes in many forms; pick one based on how you want the dish to sound on the palate. Spanish cured chorizo is firm and smoky, ideal when you want slices that release fat and a steady paprika tone. Fresh Mexican-type chorizo is softer and often spicier, which offers a different character but also more moisture and a different fat profile. If you’re not sure, buy a small amount and taste it raw to assess heat and smoke; that guides how much to use in the pot.

Remember that the sausage’s salt and spice levels determine your seasoning. A strongly smoked chorizo may need less finishing salt and little extra smoked paprika, whereas a milder link might benefit from a pinch of smoked salt or a dash of hot sauce. If you want to keep the soup milder for children or sensitive palates, sauté the chorizo first and remove some of the rendered fat before adding leeks and potatoes. That reduces heat and intensity while preserving aroma.

Texture and consistency: creamy, rustic, or somewhere in between

Texture is a major part of what makes this type of soup satisfying. Blending everything creates a thick, spoon-coating finish, while leaving it unblended results in a brothy stew with distinct chunks. A good compromise is a partial blend: purée two-thirds of the soup and fold in the remaining solids for body and interest. Thickness also depends on the potato variety; starchy potatoes break down more and thicken the liquid, while waxy ones hold their shape.

If your soup becomes too thick after blending, add stock or a splash of milk to loosen it. Conversely, if it’s thin, simmer it uncovered for a few minutes to concentrate flavors or mash a few potato pieces directly in the pot to thicken naturally. Avoid over-relying on cream to correct texture; use it for richness and silkiness rather than as a fix for thin soup. Let the potatoes and technique do most of the work.

Flavor variations and regional twists to try

This recipe is a canvas, and small twists lead to delightful variations. Add roasted red pepper purée for sweetness and color, or include chopped fennel with the leeks for an aniseed lift that plays with the chorizo’s smokiness. For a Mediterranean touch, stir in chopped olives and a handful of torn basil just before serving. Swap a splash of cider for some of the stock to introduce a fruity tang that counters the sausage’s richness.

For a heartier, stew-like version, add beans such as cannellini or butter beans in the last ten minutes of cooking. They absorb flavor and increase protein for a more substantial meal. Alternatively, fold in baby spinach leaves at the end for freshness and a quick wilt. Each addition changes the soup’s profile, but the core principle remains: build layers gradually and taste at each stage.

Make it vegetarian or vegan without losing soul

You can achieve great depth without meat by using smoked or roasted ingredients that mimic the warmth of chorizo. Try smoked paprika and a splash of liquid smoke in combination with sautéed mushrooms and diced smoked tofu or tempeh for a bite. Roasting halved tomatoes and adding them during the simmer intensifies umami and contributes complexity. A drizzle of good olive oil and a spoonful of miso at the finish further lifts the savory notes.

Vegetable stock should be rich and well-seasoned because the absence of chorizo means the broth must carry more flavor on its own. Reduce a cup of the stock down with a halved onion and a couple of garlic cloves before adding it to the soup for an extra layer. Finish with fresh herbs and a sprinkle of toasted seeds to replace the textural contrast that chorizo provides. The result will be satisfying and bold, even without cured meat.

Serving suggestions and wine or beer pairings

Potato, Leek & Chorizo Soup. Serving suggestions and wine or beer pairings

Serve the soup in warmed bowls with toasted country bread or crusty baguette to soak up the liquid. A bright green salad with a tangy vinaigrette offsets the soup’s richness and adds a crisp element that cleanses the palate. For garnish, use the reserved chorizo bits, chopped parsley, and maybe a swirl of creme fraiche or a few drops of fruity olive oil. Presentation matters because the simple combination looks especially inviting when plated with care.

As for drinks, a chilled dry rosé pairs beautifully by echoing the glossy spice without overwhelming the soup’s texture. For beer lovers, a malty amber ale complements the smoky notes and stands up to the sausage. If you prefer wine, an unoaked Grenache or a light Tempranillo will match the paprika character and keep the meal balanced. Ultimately choose a beverage you enjoy and that complements rather than competes with the soup.

Storage, freezing and reheating tips

This soup holds well in the fridge for 3 to 4 days and freezes nicely if you want to keep portions for later. When planning to freeze, undercook the potatoes by a couple of minutes so they don’t turn mealy after thawing and reheating. Freeze in airtight containers with a little headspace for expansion, and label with the date so you can rotate your stock. Thawed soup benefits from a gentle reheat on the stovetop rather than in the microwave to preserve texture and prevent separation of any dairy added.

When reheating, stir in a splash of stock or water if the soup seems thick, and heat slowly to avoid curdling if dairy was used. If the flavors have mellowed in storage, brighten with a teaspoon of vinegar or a squeeze of lemon. If you froze the soup with chorizo, crisp the sausage separately in a pan before adding it to the reheated pot to restore texture. These small steps help the soup taste nearly as fresh as when it was first made.

Nutritional snapshot: calories and macronutrients

Below is a rough nutritional table for one serving based on four portions, using the standard ingredients listed earlier. Values will vary depending on the exact chorizo and cream used, and on portion size. The table gives a baseline for those tracking calories or macronutrients and helps with adjustments if you want a lighter or more protein-rich version. Use it as a guide rather than an exact prescription.

Nutrient Approximate per serving
Calories ~420 kcal
Protein 14–18 g
Fat 22–28 g (depends on chorizo & cream)
Carbohydrates 35–45 g
Fiber 4–6 g

Troubleshooting common problems

If the soup tastes flat, check salt first and then add a small acid element such as lemon or sherry vinegar to enliven it. If it’s too salty, dilute with unsalted stock or add a peeled, raw potato cut into large chunks and simmer briefly to absorb some salt; remove the chunks before serving. If the texture is grainy after blending, it may be overblended at very high speed; return to a gentle heat and whisk in cream or olive oil to smooth it out. Small fixes often rescue a pot better than starting over.

If the chorizo’s flavor is too dominant, bulk the soup with extra potatoes or beans and finish with fresh herbs to rebalance. Conversely, if the chorizo is too timid, a pinch of smoked paprika or a drop of liquid smoke intensifies the smoky profile without adding extra salt. For an overly thin soup, simmer uncovered to reduce it or mash a few pieces of potato against the pot to thicken naturally. Keeping a calm, patient approach helps when things go off plan.

My experience: a memory that shaped my recipe

I remember making a similar soup on a rainy evening when I was learning to cook for myself, with a stubborn pot that refused to simmer properly on the tiny stove I had. The chorizo was a last-minute find from a nearby deli and tasted bolder than I expected, which prompted me to add extra potatoes and a splash of cream to balance it. That improvisation produced a version I kept returning to because the contrast between silky base and smoky sausage felt complete. Ever since, I try to cook this soup when I want something reliable and honest on the table.

Over time I refined timing, learned to reserve a few chorizo bits for texture, and discovered that a small squeeze of lemon at the end keeps the taste bright. Serving it to friends taught me which changes people preferred: some wanted more heat, others a creamier finish. Those real-world tweaks show that recipes are living things; they benefit from adjustments made at the stove, not just read from a page. Cooking becomes more rewarding when you make a dish your own.

Final ideas to take with you

This soup succeeds because of balance: starch and aromatics tempered by smoky spice and rounded by fat. Keep your technique patient, taste regularly, and make one or two deliberate choices about texture and heat before you begin. Small details — how you render the chorizo, whether you blend everything, and what garnish you choose — define the final character more than the exact measurements. Treat the recipe as a framework rather than a rulebook, and you’ll find it fits many occasions and moods.

When you next want a meal that feels comforting but not heavy, try this combination and use the suggestions here to tailor it to your kitchen and tastes. Invite someone to share the bowl; soup is best enjoyed with togetherness and little conversation while spoons scrape the bottom of the dish. If you experiment, take notes so you remember what worked, and don’t be afraid to make a version that is uniquely yours.

Golden Skillet Cornbread: Crispy Edges, Tender Crumb, Instant Favorite

There is a particular comfort that wafts through a kitchen when a pan of cornbread comes out of the oven, edges deeply browned and the center still steaming. This article walks through the reasons a hot skillet transforms simple batter into something remarkable, explains ingredient choices in plain language, and offers practical tips so the next batch you bake turns out reliably delicious. I will share a classic cast-iron recipe, sensible variations, troubleshooting fixes, and serving ideas that turn this humble bread into a memorable side dish. Expect clear steps, a couple of short tables to compare options, and personal notes from my own cooking experiments. Read on and you will have everything you need to bake cornbread that holds its own beside stews, chilies, greens, and barbecues.

Where Cornbread Came From and How It Evolved

Cornbread traces its roots to Indigenous peoples of the Americas who ground maize into meal and baked or steamed it for sustenance long before European contact. Early colonial kitchens adopted cornmeal out of necessity, and the simple combinations of meal, water, and fat slowly evolved into the regionally distinct recipes we recognize today. In the American South, the addition of wheat flour, eggs, and leavening agents created a lighter loaf, while in other places cornbread remained coarse and dense, often served as a portable staple. Industrial milling, access to buttermilk, and cast-iron cookware all shaped modern versions that balance texture, flavor, and convenience. Understanding this history helps explain why techniques and ingredients vary so widely from household to household.

Regional preferences still dictate how cornbread appears on the plate: some cooks favor a slightly sweet, cake-like texture with added sugar, while others insist on a savory loaf with crunchy edges and no sweetness whatsoever. These differences are not failures but choices determined by what accompanies the bread, whether it is a spicy bean stew, a smoky barbecue plate, or a simple bowl of soup. Over time, the skillet has become synonymous with cornbread for good reason: the metal’s retained heat creates a crust that contrasts with a tender interior. Recognizing those traditions makes it easier to select a recipe that fits your meal and the mood you want to set at the table.

Why the Skillet Matters

The skillet, especially cast iron, is more than a vessel; it is an active participant in the baking process. When you preheat the pan in the oven with butter or oil added, the fat sizzles and forms a thin layer that crisps the batter immediately upon contact. That rapid searing at the edges locks in moisture toward the center, giving you the characteristic contrast between a crunchy perimeter and a soft crumb. A preheated skillet also helps with even browning, because the metal holds steady heat all around the batter instead of warming slowly from the bottom. This physical interaction between batter and hot surface is what separates ordinary pan-baking from skillet-baked cornbread.

Using a skillet changes how you approach timing and texture, and it requires a little more attention at the start of the bake. You should preheat long enough that a pat of butter melts and browns quickly; this is the moment to pour in batter. The thickness of the pan matters too: a heavy cast-iron pan retains heat well and produces dramatic crust, while a lighter metal will brown faster but may not sustain high heat as long. For those who prefer a softer crust with lighter color, a nonstick or glass pan will do, but you will not get the same singing sizzle that only a hot skillet provides. Accepting that trade-off is part of choosing how you want your cornbread to perform at the table.

Choosing the Right Cornmeal

Cornmeal comes in a few distinct textures and processing styles, and those choices directly affect mouthfeel and flavor. Fine cornmeal yields a smoother cake with less noticeable grain, which some people prefer alongside delicate soups. Medium ground cornmeal gives a pleasant corn grain without feeling gritty, and it is the most versatile choice for everyday recipes. Stone-ground varieties retain more of the corn’s oils and germ, offering a deeper, nuttier flavor and a coarser texture that many find appealing for traditional cornbread. Picking the right one depends on whether you want a refined crumb or a rustic bite.

Freshness matters as much as grind. Because cornmeal contains natural oils, it can oxidize and become stale if stored too long, which will show up as flat flavor. Store unopened bags in a cool, dark place; once opened, a sealed container in the refrigerator extends life and preserves aroma. Experimenting with different grinds is worthwhile: a blend of fine and stone-ground cornmeal can give you both tenderness and character in a single loaf. The table below highlights main differences to make selection easier.

Cornmeal Type Texture Flavor Profile Best For
Fine Smooth, cake-like Mild Light cornbread, muffins
Medium Balanced grain Noticeable corn Everyday loaves
Stone-ground Coarse, hearty Nutty, deep Rustic, traditional cornbread

Essential Ingredients and What They Do

At its core, this bread needs a handful of components that each play a specific role: cornmeal for structure and flavor, wheat flour to lighten the crumb, a leavening agent for lift, a liquid to hydrate, fat for tenderness, eggs for binding, and salt to balance. Cornmeal alone produces dense outcomes, which is why many recipes mix in all-purpose flour to give batter some elasticity and airflow when baking. Baking powder and sometimes baking soda react with acidity to create a finer texture and help the loaf rise. Buttermilk, sour cream, or a mix of milk and vinegar gives both tang and a tender crumb, while fat—whether butter, oil, or bacon drippings—adds flavor and keeps the bread moist after cooling.

Sweetness is optional and should be chosen deliberately based on the meal it accompanies: a tablespoon or two of sugar brightens flavors without making the bread taste like dessert, whereas larger quantities produce a cake-like cornbread that stands beautifully with fruit or butter. Eggs contribute structure so the bread cuts cleanly, and they also help suspend cornmeal particles in batter for even distribution. Salt is small in quantity but essential; it accentuates the corn’s natural sweetness and prevents the loaf from tasting flat. With the roles of each ingredient clear, you can tweak the quantities to reach your ideal texture and flavor.

Equipment: Picking the Perfect Pan

Cast-iron skillets are the traditional choice because they absorb and maintain a high, even heat that yields that coveted crisp crust. A 10-inch skillet produces a roughly two-inch thick cornbread that bakes evenly and fits most ovens, but sizes from 8 to 12 inches are common depending on how thick you like your loaf. If you do not own cast iron, a heavy-duty ovenproof skillet, a pie plate, or a square baking pan will work; you will simply adjust expectations for crust development. Make sure whatever pan you use can tolerate high oven temperatures and respond predictably when preheated.

Preheating the pan is an often-missed step that makes a substantial difference in texture. Place the skillet in the oven while it warms, then add the butter or oil to melt and lightly brown before the batter goes in. This step produces immediate searing and helps the edges pull away from the pan at the end of baking. Use an oven mitt and treat the hot skillet carefully; transferring a blazing-hot pan requires two hands to avoid spills. Over time you will learn how hot your pan needs to be to create the ideal crust without scorching the bottom.

For those who bake often, consider seasoning your cast iron and keeping it well maintained, because a well-seasoned pan contributes a subtle depth of flavor and natural release. Wipe it clean, avoid harsh soaps when possible, and dry thoroughly before storing to prevent rust. If you prefer nonstick ease, choose a reliable ovenproof nonstick skillet and reduce oven temperatures slightly to prevent coating damage. Your choice of pan changes the dynamic of the baking process, so match it to the texture you seek.

Classic Cast-Iron Cornbread Recipe

This recipe aims for balance: crisp exterior, moist interior, and a versatile flavor that works with both savory and slightly sweet accompaniments. It uses buttermilk for tang and tenderness, a modest amount of sugar so the bread remains flexible at the table, and preheated buttered cast iron to deliver the signature crust. Measurements are scaled for a 10-inch skillet; adjust the bake time slightly if using a different size. Read through the steps before you start so every action lands at the right time, particularly when dealing with a hot pan.

  • 1 cup yellow cornmeal (medium grind)
  • 1 cup all-purpose flour
  • 1 tablespoon baking powder
  • 1/2 teaspoon baking soda
  • 1 teaspoon fine salt
  • 2 tablespoons granulated sugar (optional)
  • 2 large eggs
  • 1 1/4 cups buttermilk
  • 1/4 cup melted butter plus 2 tablespoons for the pan
  • 1 tablespoon neutral oil or bacon drippings

Begin by preheating your oven to 425°F (220°C) and placing the skillet inside to warm thoroughly. Mix dry ingredients in a bowl, then whisk eggs and buttermilk in a separate bowl before folding wet into dry; stir only until just combined to avoid overdeveloping gluten. Once the pan is hot and the butter has melted and begun to foam, carefully pour it into the batter along with the oil, then pour the batter back into the skillet. The batter should sizzle on contact; this sound is a good sign that the crust will be crisp. Return the skillet to the oven and bake until the top is golden and a toothpick comes out mostly clean, usually 20 to 25 minutes for a 10-inch pan.

  1. Preheat oven and skillet to 425°F with the pan inside for at least 15 minutes.
  2. Combine cornmeal, flour, baking powder, baking soda, salt, and sugar in a bowl.
  3. Whisk eggs with buttermilk in a separate bowl until smooth.
  4. Stir wet into dry ingredients until just mixed; avoid overmixing.
  5. Remove hot skillet carefully, add 2 tablespoons butter to melt, then pour batter into the pan.
  6. Bake 20–25 minutes until golden and a toothpick comes out with a few moist crumbs.
  7. Let cool 10 minutes before cutting and serving, or spread butter over the hot top for immediate service.

Small adjustments can be made without derailing the bake. If you prefer a softer crust, reduce oven temperature to 400°F and lengthen bake time slightly to avoid over-browning. For an extra-moist crumb, add 1/4 cup of plain yogurt or sour cream to the batter. Once you’ve made this foundation a few times, feel free to tweak sugar, salt, or fat to suit your particular taste or the menu it will accompany.

Variations to Try

Adding character to cornbread is where the fun begins; a handful of chopped jalapeños and cheddar turns it into a lively companion for chili, while kernels of roasted sweet corn bring summer brightness to the loaf. Herbs such as chives and thyme combine well with honey butter for a refined side, and crumbled bacon folded into the batter provides smoky richness that pairs especially well with greens and beans. For a sweeter route, add blueberries or maple syrup into the batter and reduce salt slightly to keep things balanced. Keep portion sizes moderate when adding mix-ins to avoid weighing the batter down.

  • Jalapeño and cheddar: chopped peppers, grated cheese
  • Honey butter cornbread: brush with honeyed butter after baking
  • Corn and scallion: fresh kernels and sliced scallions folded in
  • Bacon and maple: crisp bacon bits with a drizzle of maple after baking
  • Blueberry cornbread: fresh berries folded gently for a sweet touch

When incorporating add-ins, consider moisture and density: watery ingredients require a slight reduction in liquid elsewhere, and heavy items should be tossed in flour first to prevent sinking. Taste elements should harmonize with the main course, so a sweet cornbread suits fruit or breakfast whereas a savory, peppery version complements robust stews. Mixing textures—crunchy nuts, soft cheese, crisp corn—can make every bite interesting. With every variation, the skillet method remains effective at producing a satisfying contrast of crunchy edge and tender center.

Serving Suggestions: Making Cornbread a Star Side Dish

Skillet Cornbread. Serving Suggestions: Making Cornbread a Star Side Dish

Cornbread’s versatility is a major asset; it acts as a foil for spicy, creamy, and smoky dishes alike. Serve it warm with a pat of butter and honey alongside chili for a classic pairing that soaks up sauce without falling apart. Plate slices next to braised greens and roasted meats where the bread offers a slightly sweet counterpoint to savory flavors. For more casual meals, cut into wedges and serve with pickles, sharp cheese, and cold slaw for a balanced plate that covers texture and temperature contrasts.

Presentation matters and does not need to be fussy. A wedge of hot cornbread garnished with a scattering of chopped herbs adds color and freshness, while a wooden board and a small dish of compound butter create an inviting family-style moment. Consider offering condiments like hot honey, chili oil, or herbed butter to let guests customize their bites. If serving cornbread as a side dish for a larger spread, time it so it finishes near the start of the meal so slices remain warm and appealing to pass around. The right pairing can elevate a simple loaf into the best part of the plate for many guests.

Make it part of a composed meal by matching textures and weights: a light soup asks for thinner, more cake-like cornbread, whereas a hearty barbecue benefits from thick wedges with rustic grain. Think about temperature contrasts too; warm bread and cold slaw form a satisfying mouthfeel. Use cornbread to soak up sauces and to act as a starch on the plate, interchangeable with rolls or biscuits depending on the cuisine. With a little attention to complementary flavors, cornbread can easily graduate from supporting role to crowd-pleasing highlight.

Troubleshooting Common Problems

Even experienced home bakers sometimes face issues, and most problems have straightforward fixes. If your cornbread turns out dense, the likely causes are overmixing the batter, insufficient leavening, or packed cornmeal. To correct density, stir gently until ingredients are combined and measure baking powder carefully to ensure proper rise. If the center is gummy while edges are done, the oven temperature may be too low or your pan too large for the amount of batter; increasing heat slightly or using a smaller skillet will help. Keeping a thermometer in the oven and testing for doneness with a toothpick are reliable habits.

Problem Likely Cause Fix
Dense crumb Overmixing or old leavening Mix until just combined; replace baking powder
Burnt edges, raw center Oven too hot or pan too small Lower temp 25°F and use correct skillet size
Crumbly slices Too little fat or egg Add melted butter or an extra egg next time

If the crumb falls apart when cutting, consider increasing the binding elements like eggs or reducing cornmeal slightly in favor of a bit more flour. Overbaking dries the loaf, so check for just a few moist crumbs on the tester rather than waiting for absolute dryness. For uneven browning, rotate the skillet halfway through baking and confirm that your oven racks are centered to provide balanced heat. These adjustments usually eliminate repeat problems quickly and let you hone a dependable method.

Storing, Freezing, and Reheating

Cornbread holds up well when stored properly, and quick handling right after baking preserves moisture and flavor. For short-term storage, cool the loaf completely and wrap it tightly in plastic wrap or place in an airtight container; it will keep at room temperature for one to two days. For longer life, freezing is effective: wrap individual wedges or the whole loaf in plastic, then in foil, and place in the freezer for up to three months. Label packages with the date for easy rotation and to avoid freezer fatigue where old packages hang on the back shelf.

To reheat, a hot oven revives crust and interior better than a microwave. Place slices in a 350°F oven for 8 to 12 minutes until warmed through and the surface crisps slightly. For single servings or quick warming, a brief microwave burst followed by a toast in a skillet can produce satisfactory results. If you have frozen cornbread, thaw overnight in the refrigerator before reheating to ensure even warmth and to prevent the exterior from drying out. These simple steps make it convenient to prepare batches ahead for gatherings or weekly meals.

Adapting the Recipe: Gluten-free and Vegan Options

Adapting cornbread for dietary needs is straightforward with a few ingredient swaps that preserve texture and flavor. For a gluten-free version, replace all-purpose flour with a cup-for-cup gluten-free baking blend that contains xanthan gum, and use a slightly coarser cornmeal to add structure. Baking times are similar, though gluten-free batters sometimes benefit from resting for 10 minutes before baking to hydrate the flours. Be vigilant about cross-contamination if cooking for someone with celiac disease, and confirm that your cornmeal is certified gluten-free to avoid issues.

Vegan cornbread demands substitutes for eggs and dairy, and several options work well: use flax or chia “eggs” (one tablespoon ground seed plus three tablespoons water per egg) for binding, swap buttermilk for a plant-based milk with a tablespoon of vinegar for acidity, and use melted coconut oil or vegan butter for richness. Texture can be exceptionally similar to the original when ratios are adjusted and a touch of extra fat is included. Taste will vary slightly, but a skilled balance of salt and acid will keep the cornbread satisfying and fully plant-based.

Finishing Touches and Presentation

Small finishing touches elevate cornbread from rustic to memorable and give guests a reason to linger over the table. Brush a bit of melted butter or a flavored compound butter on top while the loaf is still hot to add gloss and immediate flavor. Sprinkle flaky sea salt, chopped herbs, or a light dusting of coarse sugar to suit whether you chose a savory or sweet direction. Serving on a warm plate or straight from the skillet emphasizes hominess and practical heat retention for longer-lasting warmth.

Consider accompaniments that echo or contrast the loaf’s flavors: a lemony butter or a herb vinaigrette provides brightness, while a drizzle of hot honey introduces sweet-heat complexity. Arrange wedges on a wooden board with small ramekins of condiments to make the cornbread an interactive part of the meal. Even simple visual choices, like tearing a bit of bread at the table to show texture, can communicate care and invite conversation about the food. These finishing elements matter almost as much as the baking itself.

When I host, I often place the cast-iron skillet directly on the table with a spoonful of compound butter in the center and a small jar of honey nearby. Guests appreciate being able to take a warm wedge and customize it, and the shared skillet becomes a convivial focal point. Over the years I have learned to time the bake so the bread is finished as people sit down, and that rhythm creates an easy, relaxed feel. Little rituals like this turn a practical side dish into a moment worth remembering.

Personal Notes from the Kitchen

One particular winter, I baked cornbread in a heavy 10-inch skillet just as a snowstorm cut power to half the neighborhood, and the warm loaf became an impromptu consolation during candlelit dinner. The smell of butter and corn filled the small apartment and made the evening feel unexpectedly festive despite the inconvenience. That night I learned to rely on the skillet method for quick, reliable results: the intense, even heat produced a crust that seemed to hold stories in it, a texture that guests kept commenting on. Memories like that are part of why I reach for this recipe when I want food that comforts on many levels.

Another lesson came from scaling the recipe up for a large family reunion. I discovered that splitting batter into several smaller skillets produced more consistent results than crowding one oversized pan, and guests liked grabbing personal wedges from each skillet. That experience reinforced two principles that guide my cooking: match equipment to batch size, and favor methods that deliver repeatable results. These practical habits reduce stress and improve outcomes, which is why I include them here as part of a mindful approach to baking cornbread.

On a technical level, I keep a small jar of seasoned cornmeal in the pantry and measure by weight when possible for consistent texture. Digital scales remove the guesswork of scooping, and using a thermometer occasionally to verify oven accuracy has saved me from overbaking more than once. These small practices have made my skillet bakes steadier and have allowed me to explore variations without sacrificing reliability. Cooking becomes more joyful when a few reliable routines support experimentation.

Final Thoughts and Practical Encouragement

Skillet-baked cornbread is a dependable and versatile element in a home cook’s repertoire, capable of being both humble and attention-grabbing depending on how you season and serve it. Mastering the basic technique — preheating the pan, balancing wet and dry ingredients, and understanding your oven — delivers consistent results and opens the door to thoughtful variations. Trust the process, make small, deliberate adjustments, and remember that even imperfect loaves make excellent companions to a wide range of dishes. Keep practicing, enjoy the sensory rewards of scent and texture, and let your skillet become a tool you reach for whenever a warm, satisfying side is in order.


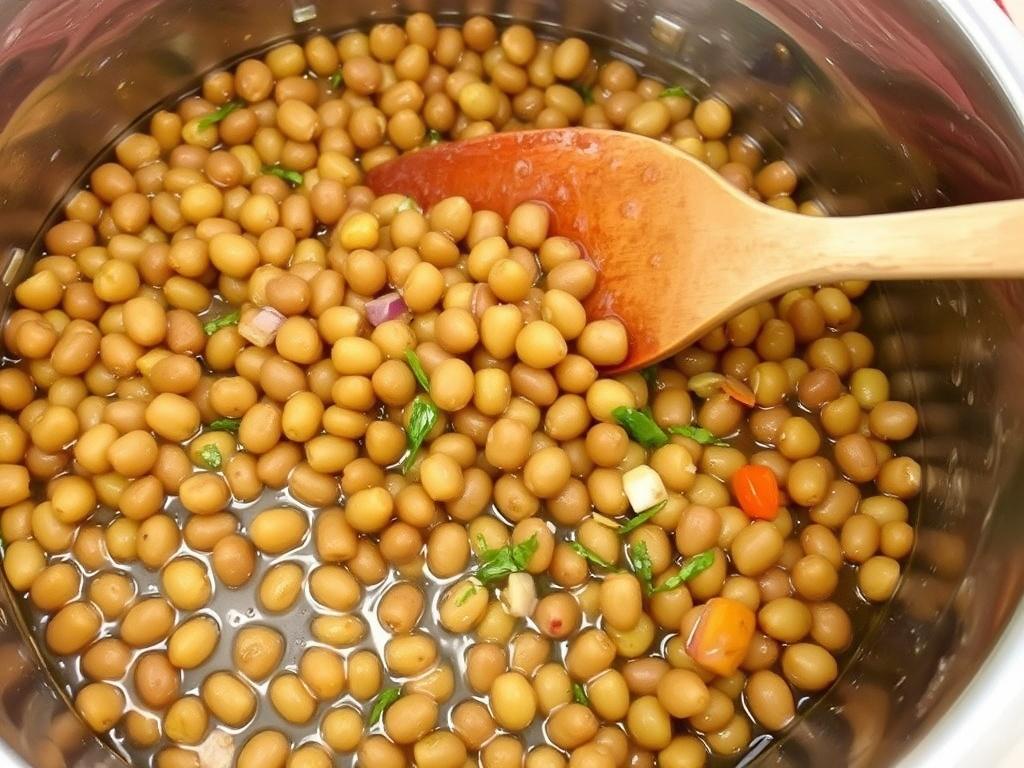
Marinated Lentils: How Simple Pulses Become Bright, Satisfying Dishes

There is a quiet kind of magic when humble lentils meet a well-balanced dressing: suddenly a plain bowl turns lively, textures sharpen and a vegetarian staple becomes irresistible. In this piece I want to walk you through everything that turns cooked pulses into marinated delights — from choosing the proper variety to constructing a vibrant vinaigrette and pairing the result on plates that feel thoughtful, not routine. You will find practical cooking instructions, templates for marinades that work every time, storage tips and ways to use leftovers so nothing languishes in the fridge. I will also share a few personal touches that I use in my kitchen, small habits that lift flavor without fuss. Read on and you will have a toolbox for building salads, sides or protein-packed mains centered on marinated lentils.

Why marinate lentils

Marinating gives cooked lentils purpose. A splash of acid wakes their earthy flavor and the oil carries those flavors into every bite, creating cohesion between herbs, spices and the legume itself. Unlike raw vegetables that need long pickling, lentils absorb dressings quickly and keep their texture, which makes them ideal for make-ahead dishes. When you dress them, you are not only adding taste but also changing mouthfeel: a glossy, coated lentil feels richer and more inviting on the fork. This technique turns a neutral pantry staple into something you can serve to guests without apology.

Beyond flavor, marination improves versatility. A batch of dressed lentils can be the protein in a grain bowl, a filling for stuffed peppers, a spoonable element on toast, or the star of a composed salad. Because the beans hold up well, you can play with stronger ingredients — fermented vegetables, preserved lemons, roasted peppers — without losing balance. Marinating also encourages creativity with textures: crunchy nuts, crisp greens and creamy cheeses juxtapose beautifully with the slightly yielding pulse, making each bite interesting.

Choosing the right lentils

Not all lentils behave the same when dressed. Some fall soft and creamy while others keep a firm bite, and that affects what you should do with them afterward. For salads that require distinct spheres and a pleasant chew, green and Puy lentils are reliable. Red and yellow varieties break down more readily and are best for warm stews or when you want the lentils to merge with the dressing and thicken it slightly. Black beluga lentils are attractive for presentation and offer a small, firm texture that stands up to robust ingredients.

Picking the right type reduces frustration and elevates the finished plate. Texture is fundamental: if you plan to marinate and refrigerate for several days, choose lentils that stay intact. If you want a creamy base for spreads or warm bowls, choose the ones that collapse into a purée more easily. Cooking time varies across types, so being familiar with each kind helps prevent overcooking and the mushy result that marinating cannot fix.

Type Texture Cooked Best Uses Typical Cooking Time
Brown Soft, slightly grainy Salads, stews, sandwiches 20–25 minutes
Green Firm, peppery Cold salads, composed plates 25–30 minutes
Puy (French green) Very firm, nutty Gourmet salads, warm bowls 20–25 minutes
Red/Yellow Soft, creamy Purees, soups, thick dressings 12–18 minutes
Black Beluga Firm, shiny Plated salads, side dishes 20–25 minutes

Basic technique: cooking lentils for marination

Marinated Lentils. Basic technique: cooking lentils for marination

Good marinated lentils start with correctly cooked pulses. Rinse the lentils under cool water and pick out any small stones or debris. Use two to three parts water to one part lentils for most varieties, and begin simmering in an uncovered pot. Salt toward the end of cooking; salting early can make some varieties firm but often increases boiling time and reduces their ability to hydrate evenly. Aim to cook them just to tenderness, not beyond: a firm but yielding center will absorb vinaigrette and retain texture.

Drain cooked lentils and let them cool slightly before dressing so they take on the marinade without becoming oily or waterlogged. If a recipe calls for hot lentils to be dressed, allow a brief rest so steam dissipates and the dressing clings rather than slipping off. For faster prep on busy days, cook a large pot and refrigerate the cooked pulses, keeping them plain; dress only the portion you need when you are ready to serve. This preserves freshness and lets you vary flavors across meals from a single cooked batch.

  • Rinse thoroughly and pick through.
  • Simmer in unsalted water, adjusting heat to maintain a gentle simmer.
  • Test for doneness early to avoid mush; remove from heat while still slightly firm.
  • Drain and cool before dressing, unless the recipe specifies warm marination.

The chemistry of a good marinade

A great marinade balances acid, fat, salt and aromatic components to transform lentils without overwhelming them. Acid brightens and softens flavors, oil binds and distributes fat-soluble aromatics, and salt amplifies the entire profile. Sweetness, often from honey or a touch of maple, can round acidity and highlight spices. Herbs and aromatics — garlic, shallot, fresh parsley, cilantro, dill — provide identity, while toasted spices add depth. The proportions are flexible but aim for harmony so no single element dominates.

One reliable formula is to start with a 3:1 oil-to-acid ratio for a slippery, comfortable dressing, and adjust based on the character you want: a zippier lemon dressing might lean toward 2:1, while a creamy tahini-based glaze tolerates less oil. Consider texture too: emulsifiers such as mustard or tahini help the dressing cling, which is useful when you want the lentils to stay evenly coated. Salt should be moderate before tasting; you can always correct later once lentils and other ingredients meld.

Component Role Typical Ratio
Oil Carries flavor, adds mouthfeel 2–3 parts (to acid)
Acid Brightness, balance 1 part
Salt Flavor amplifier Season to taste
Sweetener Rounds harsh acid Optional, small amounts
Emulsifier Stabilizes dressing Mustard/tahini, 1–2 tsp per cup

Classic marinades and flavor templates

Having a few reliable templates saves time and encourages experimentation. Mediterranean dressing leans on olive oil, lemon, garlic and herbs, delivering a fresh, herbaceous profile that suits green and Puy lentils. Middle Eastern templates bring tahini, lemon, cumin and sumac into play, which pairs well with warm spices and roasted vegetables. Asian-influenced dressings use soy, rice vinegar, sesame oil and ginger, giving a savory-sweet backbone that is excellent with black lentils and crisp cucumbers. Each template can be adjusted by heat level, herb choice and additional ingredients like preserved lemon or crushed chilies.

Think of templates as starting points rather than rules. Swap herbs, change the acid or introduce fermented condiments to make a base your own. For instance, a Mediterranean dressing with preserved lemon and capers becomes briny and complex, perfect for a lentil salad with feta. A tahini-laced marinade can be thinned with water or extra lemon to vary texture from thick dip to poaching liquid for warm bowls. Keep tasting and adapting until the balance suits your palate.

Mediterranean lemon-herb template

Start with extra virgin olive oil, fresh lemon juice, minced garlic and chopped flat-leaf parsley. Add a touch of Dijon or whole-grain mustard to marry oil and acid, then finish with salt, cracked black pepper and a faint sprinkle of red pepper flakes for warmth. This profile brightens the inherent earthiness of the pulses without masking it and pairs naturally with spinach, roasted peppers and creamy cheeses. It is versatile and keeps well in the refrigerator for a day or two after contact with lentils.

When I make this at home I like to add a handful of chopped mint and a spoonful of grated Parmesan for savory depth, particularly when serving with grilled vegetables. The lemon accent wakes the lentils, and the herbs make the dish feel celebratory rather than utilitarian. Adjust the lemon to your taste; if it feels sharp, balance with a small drizzle of honey or a teaspoon of balsamic for complexity.

Middle Eastern tahini-cumin template

This version leans on tahini, lemon, garlic and toasted cumin for a silky, nutty dressing that clings to each pulse. A splash of pomegranate molasses or a teaspoon of date syrup introduces sweet acidity that complements roasted eggplant or tomato. Fresh herbs such as cilantro and parsley are lively companions, while a sprinkle of toasted pine nuts or chopped pistachio adds crunch and richness. It is an especially good approach when you want a creamy texture without dairy.

In my kitchen the tahini template is a go-to for weekend meal prep because it coats the lentils in a way that remains satisfying cold. I often roast a tray of root vegetables and toss them directly with the dressed lentils for a warm autumn salad. The tahini softens in the presence of lemon and water, creating a pleasant coating that binds components together on the plate.

Asian-inspired soy-sesame template

Combine light soy or tamari with rice vinegar, toasted sesame oil, minced ginger and a touch of brown sugar for balance. Scallions and toasted sesame seeds provide fragrant finishing notes, and red chili flakes or a spoonful of gochujang add heat when desired. This template plays nicely with crunchy elements such as pickled carrots or daikon and also with leafy greens like bok choy. It converts lentils into an umami-forward component that integrates seamlessly into bowls with grains and roasted tofu.

I once served this with beluga lentils, shredded roasted cabbage and quick-pickled cucumbers, and the combination cut through the richness of a miso-glazed egg. The sesame oil should be used sparingly because of its potency; a little goes a long way and elevates the profile toward roasted, nutty aromas. Use lime instead of rice vinegar for a citrus lift that brightens the entire dish.

Step-by-step recipe: Lemony herb marinated lentils

This is a practical, flexible recipe that showcases the principles above and is easy to scale. Cook one cup of green or Puy lentils until tender but still holding shape, then drain and cool to warm. While they cook, whisk together the dressing: three tablespoons extra virgin olive oil, one tablespoon fresh lemon juice, one small minced garlic clove, one teaspoon Dijon mustard, salt and pepper to taste, and a tablespoon each of finely chopped parsley and mint. Toss the warm lentils with the dressing so they absorb flavor while still slightly warm, then taste and adjust. Finish with crumbled feta and toasted walnuts for texture when serving.

This version works well hot, warm or cold, which makes it a useful staple for packed lunches and dinner spreads. I like to prepare a double batch and keep half plain for future variations, dressing only the portion I will consume within two days. If you prefer a creamier mouthfeel, stir in a tablespoon of Greek yogurt or a spoonful of tahini after tossing. The simple lemon-herb profile is also a friendly canvas for additions like roasted beets, grilled zucchini or slices of avocado.

  • Ingredients: 1 cup green or Puy lentils, 3 tbsp olive oil, 1 tbsp lemon juice, 1 clove garlic (minced), 1 tsp Dijon, 1 tbsp parsley, 1 tbsp mint, salt and pepper, optional feta and walnuts.
  • Method highlights: Rinse and simmer lentils 20–25 minutes; drain; whisk dressing; toss while lentils are warm; adjust seasoning; garnish and serve.

Serving and pairing ideas

Dressed lentils are a bridge between simple and composed dishes. Use them as the protein base of a grain bowl alongside farro or rice, then add seasonal vegetables and a dollop of yogurt or labneh. They pair beautifully with grilled fish or chicken, absorbing juices and providing a textural counterpoint. For vegetarian plates, serve marinated lentils with roasted squash, pickled red onions and bitter greens such as radicchio to balance sweetness. The trick is to combine contrasting textures and complementary flavors so the lentils are part of a larger conversation on the plate.

Leftover marinated lentils also translate into quick weekday solutions. Spoon them onto toast with a smear of ricotta and a drizzle of olive oil for a fast lunch, or fold them into an omelette for added substance at breakfast. They make an excellent filling for stuffed vegetables: hollowed peppers or tomatoes benefit from the lentil’s heft and the marinade’s brightness. When entertaining, present a bowl of dressed lentils on a buffet as a hearty, room-temperature option that appeals to omnivores and vegetarians alike.

  • Bowl base with grains and roasted vegetables
  • Topping for grilled meats or fish
  • Sandwich or toast spread with soft cheese
  • Stuffing for peppers, tomatoes or mushrooms
  • Cold salad with greens, olives and citrus segments

Make ahead, storage and safety

Lentils are forgiving in storage but require common-sense handling. Keep dressed lentils in an airtight container in the refrigerator and consume within three to four days for best quality. Acidic dressings help preserve the mixture slightly longer than a plain oil-only coating, but texture and flavor will gradually change. If the dressing separates or becomes slightly watery, a gentle stir and a short rest at room temperature usually restores balance. Avoid leaving marinated lentils at room temperature for more than two hours to prevent bacterial growth.

If freezing is necessary, freeze cooked but undressed lentils rather than their dressed counterparts. Freezing changes cell structure and can make the texture mushy, especially when combined with oil-based dressings. Thaw frozen lentils in the refrigerator and dress them fresh when ready to use. For transporting to picnics or potlucks, pack the dressing separately and combine on site to keep textures crisp and flavors bright.

Nutrition: why lentils are a healthy choice

Lentils are a nutritional bargain: they provide plant-based protein, fiber and an array of micronutrients at a low cost and with minimal environmental footprint. A single cup of cooked lentils supplies substantial protein and folate, along with iron, magnesium and potassium. Their fiber content supports steady blood sugar response and promotes a feeling of fullness, which makes marinated lentils a satiating choice for meals. The combination of lentils with olive oil and fresh vegetables in a dressing increases the bioavailability of fat-soluble vitamins, making the dish nutritionally efficient.

When building marinades, prioritize ingredients that complement the health benefits: extra virgin olive oil contributes heart-healthy monounsaturated fats, vinegar and lemon add negligible calories while supporting flavor, and herbs supply antioxidants. If you are tracking sodium, modulate added salt and use salty elements like olives, capers or feta sparingly. The result is a dish that feels indulgent without undercutting nutritional goals — a genuine win for anyone aiming to eat well without sacrificing enjoyment.

Nutrient (per 1 cup cooked) Approximate Amount
Calories 230
Protein 18 g
Fiber 15.6 g
Iron 6.6 mg
Folate 358 mcg

Variations and creative twists

Once you know the principles, variations are limited only by imagination and pantry contents. Try a smoky barbecue-inspired dressing with smoked paprika, sherry vinegar and a touch of molasses, especially with black lentils and roasted sweet potatoes. A citrus-and-herb mix with orange zest, blood orange juice and chopped basil lifts summer produce like fennel and heirloom tomatoes. You can incorporate fermented ingredients such as miso, kimchi brine or umeboshi paste for an umami boost that deepens over a day in the fridge. Small changes create markedly different experiences from the same lentil base.

Texture additions are equally important: toasted seeds, crisp shallots, fried shallots or quick-pickled vegetables introduce contrast and keep the dish lively through several meals. I keep a jar of toasted pepitas in the pantry to sprinkle over salads on demand, and a little acid-bright quick pickle often rescues a dull meal. When experimenting, change one variable at a time so you can understand how each element influences the whole.

Common mistakes and how to fix them

Overcooking is the most frequent error and it is not always recoverable. If your lentils are mushy, repurpose them into warm lentil mash, a thickened soup or a spread enriched with tahini and lemon. If they are undercooked and hard, return them to simmer briefly with extra water until they reach tenderness. Another common misstep is a dressing that is either too oily or too acidic; correct by balancing with a little water, a pinch of sugar or a spoonful of yogurt to mellow extremes. Taste constantly and adjust — small corrections often fix what seems like a big problem.

Failing to season adequately will render even a technically perfect dish bland. Salt is the amplifier that brings forward herbs and citrus, so add it in stages and taste after the components have had a chance to meld. If your salad tastes flat after chilling, add a splash more acid and a grind of fresh pepper before serving. Finally, mismatching textures can make a salad boring: always include at least one crunchy element and one creamy or soft element to keep interest across bites.

Bringing it to the table

Marinated lentils reward curiosity and small experiments. Start with a reliable cooking method, choose the lentils that suit your textural goals, and build a dressing that balances acid, oil and aromatics. Keep a few templates in mind and adapt them based on what you have on hand; the best dishes are often the ones that use what is seasonal and nearby. When you learn to see these pulses as a malleable, flavorful base rather than a utilitarian side, you will find countless ways to incorporate them into everyday meals.

In my experience, a well-made batch of dressed lentils becomes a kitchen ally: it feeds last-minute guests, makes weekday dinners feel composed and stores well enough to salvage hurried lunches. Treat them with attention when they are being cooked and with generosity when you season them. Little choices — a pinch more lemon, a warm spoonful of dressing, a scatter of toasted nuts — make them sing. Keep experimenting and you will build personal combinations that feel like your own signature.