Category: Recipes

Tacos Reimagined: Bold Fillings to Make Weeknight Meals Sing

Tacos Reimagined: Bold Fillings to Make Weeknight Meals Sing

There’s a particular joy in holding a warm tortilla that’s been dressed with unexpected flavors, and this article is about that exact spark. Creative Taco Fillings for Every Taste will serve as your roadmap: from sticky-sweet pork and charred vegetables to bright seafood and surprising vegetarian swaps. I’ll walk through building balanced bites, suggest combinations that work, and share practical tips so these tacos fit both a lazy Tuesday and a dinner party. Expect recipes you can improvise, pantry-friendly shortcuts, and pairing ideas to round out a meal. No fluff—just flavorful, doable guidance to make tacos your most versatile meal idea.

Start with the basics: tortillas, texture, and balance

A great filling is only half the story; the shell and the textures complete the experience. Choose your vehicle deliberately: a soft corn tortilla reads as authentic and slightly sweet, while a flour tortilla gives structure to heavier fillings. For an extra crisp, warm corn tortillas on a hot skillet until they blister, or fry flour shells briefly for a satisfying crunch. Think in contrasts—creamy avocado against crunchy pickled onions, or silky braised meat paired with a bright herb salsa. Balancing heat, acid, fat, and crunch turns simple taco fillings into something memorable.

Don’t neglect temperature and moisture control: watery fillings make tortillas soggy fast. If a salsa or relish is juicy, spoon it on top rather than underneath. Layering helps too; a smear of crema or a thin slaw acts as a moisture barrier and adds another flavor layer. Consider how each bite will fall apart in your hand—tacos should be messy in a deliberate, delicious way, not disintegrating. Keep a stack of napkins close; it’s part of the fun.

Proteins that surprise: beyond the usual ground beef

Proteins anchor taco fillings, but they don’t need to be predictable. Swap in shredded beef brisket braised in ancho-chili and coffee for deep, smoky notes, or go lighter with pan-seared fish tossed in citrus and chile. Think about cooking technique as much as the protein itself: slow-cooking, quick searing, and charring bring different textures and intensity. Small changes—like finishing chicken with soy and lime—can transform a simple protein into something that sings with complementary toppings. Aim to make the protein flavorful on its own; toppings should accent, not compensate.

For busy cooks, there are smart shortcuts. Rotisserie chicken, quickly shredded and heated with a salsa verde, makes one of my favorite weeknight tacos. Canned seafood, when treated right, can also shine: drained, spiced tuna warmed with onion and jalapeño becomes a surprisingly bright filling. When scaling up for guests, sauté and season proteins ahead of time and reheat briefly on the skillet so they’re warm and juicy at service. Flavor layering is key—season early and adjust at the end.

Beef and lamb variations

When using beef, think in layers: a caramelized crust from high heat, braising liquid for depth, and a finishing acid for brightness. Carne asada, sliced thin and finished with a quick squeeze of orange or lime, is a classic because it’s so balanced. For a cozy, fall-apart option, shredded short rib or brisket braised in tomatoes and ancho chiles offers rich savoriness that pairs beautifully with pickled onions and a parsley chimichurri. Lamb is less common but delivers warmth; slow-braised lamb shoulder with cinnamon and cumin makes an elegant taco that resists being categorized.

Use spice blends intentionally rather than piling on heat. Cumin, coriander, and smoked paprika give beef a rounded profile without stealing the spotlight. For lamb, integrate herbs like mint and za’atar for a Mediterranean twist that still feels taco-friendly. Both meats prefer low-and-slow for tenderness, but finishing on high heat—briefly charring on a griddle—adds fantastic texture and flavor. Dress the finished meat simply so those savory notes remain front and center.

Seafood and shellfish: bright, quick, and elegant

Seafood is an excellent vehicle for vibrant toppings. Fish tacos can be as casual or refined as you like: a quick beer-battered cod is a classic; miso-glazed salmon with pickled cucumbers leans refined. Shrimp cooks in minutes and takes well to bold marinades—garlic, smoked paprika, and lime deliver punch without masking natural sweetness. Shellfish like scallops or lobster elevate tacos into a special-occasion dish when paired with subtle accoutrements like a citrus gremolata or a light slaw.

Use acid to highlight seafood’s delicate flavors. A bright salsa—mango-pineapple, tomatillo-jalapeño, or a grapefruit-avocado mix—adds brightness and textural contrast. Keep cooking times short and avoid heavy sauces that drown delicate flesh. When serving, warm the tortillas so the contrast between hot filling and cool topping is enjoyable. Seafood tacos make for impressive dinner ideas when you want something light but celebratory.

Pork: sweet, sticky, and versatile

Pork offers a wide range of textures and flavors, from quick-cooked carnitas to slow-braised cochinita pibil. The key to great pork tacos is rendering fat into crisp edges while maintaining tender interior meat. For a quick route, dice pork shoulder, season with smoked paprika and oregano, then pan-sear until crisp. Slow-roasted cuts benefit from citrusy marinades or an achiote paste that lends subtle floral and peppery notes.

Balancing pork’s richness with acidity and freshness is essential. A pineapple or apple slaw cuts through fattiness and adds contrast. For sticky preparations—honey-chipotle or orange-soy glazes—serve with raw vegetables or pickles to refresh the palate. Pork adapts to many cuisines; try a Korean-inspired bulgogi pork with kimchi and sliced scallions to surprise guests. These tacos are especially forgiving when you’re feeding a crowd.

Veggie and plant-based proteins that don’t feel like compromise

Vegetarian taco fillings can be as bold as any meat-based option. Roasted cauliflower tossed in curry powder, charred mushrooms with a balsamic glaze, or smoky black beans with cumin all build satisfying textures and deep flavors. The trick is to give plant ingredients a strong treatment: roast until caramelized, season boldly, and finish with a bright acid. Toppings like crumbled queso fresco or a tangy yogurt crema add richness and help mimic the mouthfeel that meat provides.

Jackfruit and seared tofu are excellent carriers of flavor. Jackfruit has a pulled-meat texture and soaks up sauces spectacularly—try braising it in adobo for a punchy taco. Tofu benefits from pressing, marinating, and high-heat searing to develop crust and chew. Legumes, when cooked right, make hearty fillings: lentils with smoked paprika and roasted peppers feel substantial and pair well with herb-forward salsas. These plant-based choices are ideal for those seeking lighter dinner ideas without sacrificing satisfaction.

Dressings, salsas, and finishing touches

Sauces define the personality of a taco. A cool crema softens heat and binds ingredients; a bright chimichurri or cilantro-lime salsa adds herbaceous brightness; an ancho-mole sauce introduces sweet-smoky complexity. Layer sauces with a light hand—too much overwhelms the filling and dampens textures. Consider both flavor and function: creamy elements add richness, acidic sauces brighten, and spicy condiments bring heat.

Below is a compact pairing chart to help you match sauces with fillings. Use it as a jumping-off point rather than a rigid rule; creativity often comes from unexpected pairings.

Filling Suggested Sauce Why it Works
Slow-braised beef Ancho-mole or chimichurri Mole adds depth; chimichurri brightens the rich meat
Seared fish Citrus salsa or salsa verde Acidity lifts delicate flavors
Roasted veggies Smoky aioli or tahini-lime drizzle Cream balances caramelized edges
Pulled pork Pineapple salsa or slaw Sweet-acid cuts through fat

Toppings and texture boosters

Toppings are where tacos get playful. Finely chopped raw onion or radish gives a sharp crunch. Pickled elements—onions, cucumbers, or jalapeños—introduce acidity and a pleasant bite. Fresh herbs like cilantro, mint, or flat-leaf parsley add brightness and lift heavier fillings. Toasted seeds or crushed tortilla chips contribute grit and interest when you want a contrasting mouthfeel.

Think of toppings as a final seasoning stage: salt and acid are the simplest tools to elevate the whole taco. Finish with a sprinkle of flaky sea salt, a squeeze of lime, and maybe a drizzle of good olive oil for richer fillings. Keep a small bowl of pickles or quick-pickled vegetables on hand; they work with nearly every protein and are an easy way to add brightness to dinner ideas. A well-chosen topping can turn a good taco into something that people remember.

Creative taco builds for every palate

Creative Taco Fillings for Every Taste. Creative taco builds for every palate

Here are curated combinations to suit varied tastes—comfort, spice, light, and vegetarian. Each build follows a basic blueprint: base protein, supporting flavors, textural element, and finishing sauce. These are meant as templates; swap ingredients based on what’s in season or what’s in your pantry. The goal is to show that tacos are adaptable and can carry flavors from any cuisine without losing their essential charm.

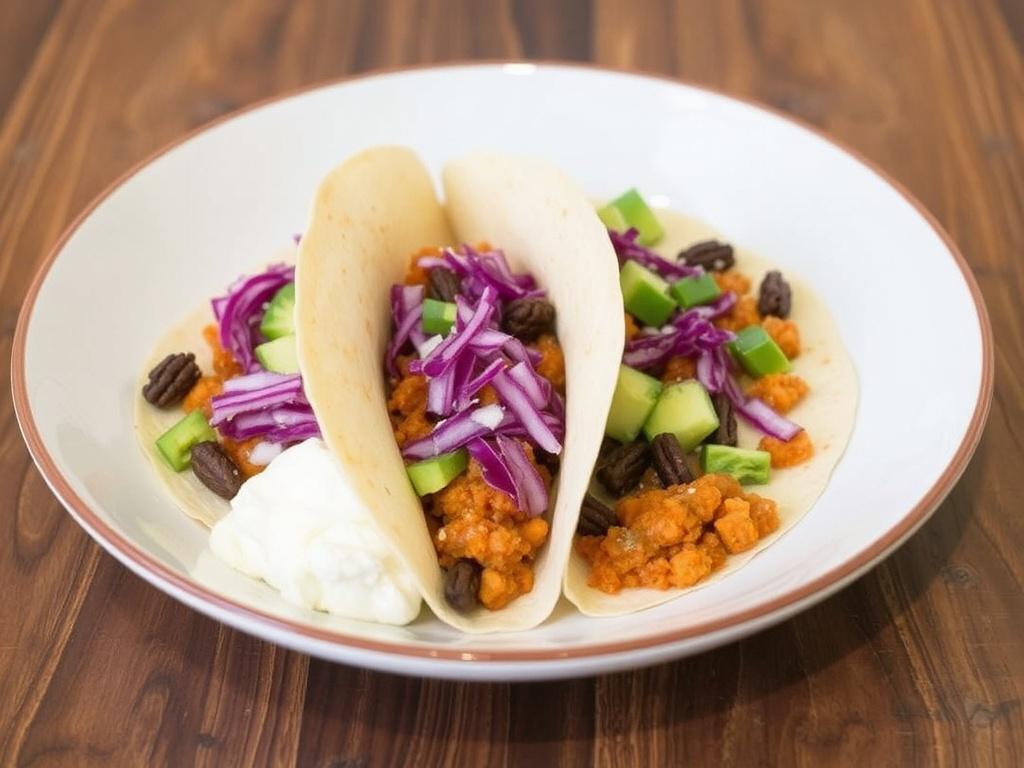
  • Smoky brisket, charred scallions, pickled red onion, and cilantro chimichurri.
  • Miso-glazed black cod, cucumber slaw, sesame seeds, and yuzu crema.
  • Charred cauliflower, roasted chickpeas, tahini-lime sauce, and pomegranate seeds.
  • Citrus-marinated pork, grilled pineapple, jalapeño-cilantro slaw, and cotija.
  • Spiced lentils, roasted peppers, avocado crema, and crispy shallots.

These ideas make it easy to rotate taco nights without repetition. Mix and match components; for example, a cilantro-lime salsa that pairs with fish will also brighten a pork taco. Treat the list as inspiration rather than instructions—half the fun is personalizing each filling to your taste.

Formats and presentation: from street food to plated courses

Tacos can be casual handhelds or plated courses for a more refined meal. For parties, consider a taco bar: warm tortillas, three proteins, several salsas, and an array of toppings allow guests to assemble their own. If presenting tacos as a plated starter, use smaller tortillas, neat portions, and microgreens for a refined look. On the flip side, messy family-style tortillas wrapped in foil and served with a side of beans feels comforting and communal.

Presentation affects perception. Use fresh, colorful garnishes and vary topping heights to create visual interest. A small lime wedge on the side signals brightness and invites interaction. For plated service, place sauces in dots or streaks rather than pouring them over the top, preserving texture and color. These small decisions turn dinner ideas into memorable meals.

Weeknight strategies: quick, satisfying dinner ideas

Busy evenings call for taco strategies that save time without skimping on flavor. Prep components on the weekend: roast a tray of vegetables, braise a pork shoulder, or make a large pot of seasoned beans. During the week, reheat and assemble—tacos come together faster than most stir-fries. Keep staples in rotation: tortillas, pickles, a basic crema, and a jarred salsa you trust.

Here are five fast dinner ideas that use pantry-friendly elements and take under 30 minutes to assemble from leftovers or quick-cook proteins. They’re practical, flexible, and built for real life.

  1. Shredded rotisserie chicken + salsa verde + avocado slices + radish.
  2. Spicy black beans + charred corn + queso fresco + cilantro-lime crema.
  3. Pan-seared shrimp + mango salsa + shredded cabbage + jalapeño aioli.
  4. Leftover roast pork + pineapple relish + pickled onions + cotija.
  5. Tofu crumbles + sautéed spinach + sesame-soy glaze + scallions.

Batch cooking and make-ahead tips

Make-ahead tactics stretch your efforts further and make taco nights effortless. Cook larger batches of proteins and freeze in portioned containers. Prepare salsas and pickles that develop more flavor over a day or two—quick-pickled onions improve remarkably overnight. Store tortillas wrapped in a towel within an airtight bag and warm them straight from the bag on a hot skillet briefly to revive freshness.

When freezing, avoid mixing sauces into proteins; keep them separate to preserve texture. For travel-friendly meal prep, pack fillings in separate containers and assemble at mealtime. Label and date everything. These small practices make tacos a realistic option even during the busiest weeks without compromising taste or texture.

Shopping smart and pantry essentials

Having the right pantry staples broadens your taco repertoire instantly. Keep a few dried chilies, good-quality canned tomatoes, a jar of pickled jalapeños, and a couple of vinegars on hand. A block of queso fresco or feta, limes, tortillas, and a resilient herb like cilantro make a huge difference. Frozen shrimp, canned beans, and jarred adobo are excellent for last-minute tacos.

Seasonings deserve attention: smoked paprika, cumin, coriander seeds, and chili powders form the backbone of many fillings. Invest in a neutral oil and a small bottle of toasted sesame oil for cross-cultural fusion recipes. With these staples, you can improvise fillings from what’s in the fridge and still arrive at focused, satisfying flavors that feel intentional.

My experiments in the kitchen

Over the years I’ve treated tacos as a laboratory for flavor. I once crisped leftover Thanksgiving turkey with a chili-citrus glaze and paired it with cranberry salsa—an oddly perfect holiday taco that became a family favorite. Another time, a late-night search in the fridge yielded smoked salmon, cream cheese, and pickled cucumber; wrapped in warm tortillas, it felt like a seaside bagel reborn as a creative taco. These small experiments taught me that rules exist to be bent; the best tacos often come from playful substitutions.

One persistent lesson: keep components simple but clearly defined. When I overcomplicated a filling with too many competing flavors, the taco lost focus. The most successful combinations had one dominant flavor, one contrasting element, and one texture for balance. That structure has guided my improvisations and helped meal planning feel less like guesswork and more like a creative exercise.

Final notes for the adventurous cook

Tacos are an invitation to explore flavors without intimidation. Start with a reliable protein and add one unexpected element—a spice, an herb, or a fruit-based salsa—to transform the ordinary into the memorable. Rotate through the suggested builds and tweak them to match what’s fresh and on sale. Keep practicing seasoning and temperature control; small technique improvements yield big rewards.

These ideas are meant to spark experimentation and simplify dinner ideas rather than prescribe rigid recipes. Use the templates, experiment a little, and you’ll find the combinations that become your household favorites. Tacos are endlessly forgiving and endlessly satisfying; enjoy the process of making them your own.
Best Homemade Soup Recipes for Fall: Cozy Bowls to Celebrate Chilly Evenings

Best Homemade Soup Recipes for Fall: Cozy Bowls to Celebrate Chilly Evenings

There is a particular pleasure in chopping root vegetables while the light thins and the window fogs at the edges. This collection of Best Homemade Soup Recipes for Fall is written for those evenings: when you want a simple pot that fills the kitchen with steam and scent, and a bowl that feels like a warm handshake. I collected recipes and techniques that work for busy weeknights and slow weekend afternoons, mixing classics and seasonal twists. You will find options for meat eaters and vegetarians, pureed silks and chunky stews, plus practical tips for storing and reheating. Read on, and you’ll leave with a handful of dependable soups to rotate through the season.

Why Soup Belongs in Your Fall Kitchen

Fall changes the way we eat: brighter salads give way to dishes that hug you from the inside. Soup answers that shift perfectly because it concentrates flavors, uses seasonal produce, and can be economical while still feeling indulgent. A good pot lets you showcase squash, apples, mushrooms, and cabbage in different textures and profiles; simmering softens and sweetens, and a splash of acid at the end brightens everything. Beyond nutrition, there is a ritual to soup-making that slows the pace: browning, deglazing, tasting, adjusting. That rhythm is part of why homemade soup becomes comfort food this time of year.

Another reason to lean on soups in autumn is versatility. One base stock can transform into multiple dinners with different add-ins—grains, proteins, or a swirl of cream. You can—or should—design your week so a large pot feeds lunches and dinners for several days, freeing up time for evening walks or reading by lamp light. Soups also travel well and freeze without losing much quality, which makes them ideal for planning. With a few foundational techniques, you’ll be able to improvise confidently and create bowls people remember.

Pantry Essentials and Tools

Best Homemade Soup Recipes for Fall. Pantry Essentials and Tools

To turn out consistently good bowls, keep a modest pantry of staples: onions, garlic, carrots, celery, canned tomatoes, dried or canned beans, grains, and a jar of good stock or bouillon. Spices like smoked paprika, ground cumin, black pepper, and bay leaves cover many flavor directions. A can of coconut milk opens doors to Thai or Indian-inspired fall recipes, while a bottle of sherry or white wine is invaluable for deglazing and boosting depth. Fresh herbs—parsley, thyme, sage—add brightness near the end of cooking.

In terms of tools, a heavy-bottomed pot or Dutch oven is often worth the investment because it browns well and distributes heat evenly. A blender or immersion blender helps when you want silky purees; a slotted spoon, ladle, and a fine mesh sieve are small instruments that improve texture and presentation. You’ll also want airtight containers for freezing portions. Below is a short checklist to paste on your phone before a grocery run.

  • Vegetables: onions, carrots, celery, squash, potatoes
  • Pantry: canned tomatoes, beans, lentils, rice or barley
  • Flavor builders: stock, wine, soy sauce, miso
  • Fats: olive oil, butter
  • Fresh finishing: lemon, fresh herbs, cream or yogurt

Warm Classics to Start With

Roasted Butternut Squash Soup

Roasting squash concentrates sweetness and caramelizes edges, giving a depth a simple boil cannot match. This soup balances roasted butternut with sautéed onion, a touch of apple or carrot for balance, and stock, finished with a splash of cream or coconut milk for silkiness. Toast a few pumpkin seeds as a garnish to add crunch and a roasted note that echoes the soup’s caramelized flavor. It’s reliably seasonal and a favorite for family dinners and small gatherings because it looks rich but is straightforward to prepare.

Method overview: cube and roast the squash with a little oil and salt until edges brown, sauté onion and garlic, add roasted squash and stock, simmer briefly, then puree until smooth. Finish with acid—a squeeze of lemon or apple cider vinegar—and adjust seasoning. For a smoky variation, stir in a teaspoon of smoked paprika or chipotle. If you want to keep the bowl vegan, use coconut milk; for a creamier, classic result, stir in a knob of butter or a splash of cream.

Classic Chicken Noodle Soup

Chicken noodle is comfort food in its clearest form: warm broth, tender meat, and soft noodles. For fall, swap in brown rice or barley to deepen the texture, or keep to egg noodles for nostalgia. Starting with a whole roasted or poached chicken yields the richest stock, but good-quality store-bought stock can also save time without compromising much. Aromatics—carrot, celery, onion—and fresh thyme or parsley are essential to make the broth sing.

Make it by simmering bones or a chicken carcass with onion halves, carrots, celery, and peppercorns for an hour or two, then strain the stock and add bite-sized chicken and noodles toward the end so they don’t overcook. Reserve some fresh herbs to sprinkle on top before serving. A personal tip: shred the chicken into uneven pieces for a homey texture—uniformity belongs to restaurants, not the home kitchen.

French Onion Soup

Browned onions carry an irresistible sweet-savory quality that translates beautifully into a bowl topped with cheese. The key here is patience: cook sliced onions low and slow until they reach a deep mahogany color. Deglaze the pan with a dry white wine or sherry, add beef or vegetable stock, and finish with a thyme sprig. Toasted bread and a generous layer of melting Gruyère or Comté make the lid to this bowl, so plan for a broiler or oven step.

Technique tip: flipping the onions into a wide pan increases surface area and encourages even browning. If the onions catch or develop bitter spots, lower the heat and add a splash of water to loosen the fond, then continue. Serving is theatrical and warming: ladle into ovenproof bowls, top with bread and cheese, and bake until bubbling. The reward is a rich, caramelized broth with a golden, cheesy crown.

Lentil and Sausage Stew

Lentils make fall recipes heartier without being heavy; paired with a smoky sausage they become a slow, satisfying ragout. Browned sausages add Maillard flavors that infuse the whole pot, while lentils hold shape and soak up the broth. This is a dinner you can stretch: serve over polenta, with rustic bread, or ladled into baked potato boats. The combination also reheats exceptionally well, and flavors deepen over a day or two.

Build the dish by browning slices of sausage, then sautéing onions, carrots, and celery in the fat. Add lentils, stock, and a bay leaf, and simmer gently until tender. Finish with chopped parsley and a splash of vinegar to brighten. Choose brown or green lentils for texture; red lentils will fall apart and create a different, creamier result. For a vegetarian version, swap smoked paprika and soy-simmered mushrooms for the sausage’s depth.

Mushroom Barley Soup

Mushroom barley is an earthy, chew-your-spoon bowl that makes the most of fall mushrooms—cremini, shiitake, or chestnut—combined with chewy pearled barley. The barley adds body and a nutty chew, while mushrooms supply umami and a meaty presence even without added meat. It’s a great transitional recipe as temperatures dip but you might still crave something robust and homey rather than creamy.

Cook shallots and mushrooms until deeply browned to develop concentrated flavor, add garlic, thyme, and barley, then pour in stock and simmer until the barley is tender. Stir in a handful of fresh parsley to lift the palate. If you like a bit of richness, finish with a swirl of butter or a spoon of crème fraîche. Leftovers will thicken as the barley absorbs liquid—thin with hot stock or water when reheating.

Creamy, Pureed, and Vegetarian Options

Potato Leek Soup

Potato leek is a quiet classic: simple, silky, and nourishing. The key is using good waxy potatoes for creaminess and cooking leeks gently to avoid bitterness. Finish with a touch of cream or a dollop of Greek yogurt to add richness without overwhelming the delicate onion-sweetness of leeks. This soup is an excellent canvas for toppings—crispy bacon, chives, or a drizzle of herb oil all work well.

Slice leeks thin and rinse away grit before sautéing; add diced potatoes and stock and simmer until the potatoes fall apart. Purée until smooth and pass through a sieve if you want a finer texture. Season carefully and add acid at the end to balance the creaminess. For vegans, replace cream with coconut milk or mashed white beans to thicken.

Roasted Tomato and Basil Soup

Roasting tomatoes concentrates their sweetness and reduces the metallic tang fresh tomatoes can have in early fall, when fruit isn’t peak. Combine roasted tomatoes with onion and garlic, simmer briefly, and purée until smooth. Fresh basil at the end lifts the flavor and makes the soup feel lighter. This bowl pairs beautifully with grilled cheese or warm garlic croutons for a satisfying lunch or light dinner.

Start by roasting halved tomatoes and a head of garlic until caramelized, then sauté onion until translucent and add the roasted veg and stock. Simmer to meld flavors, then purée and finish with fresh basil and a splash of cream or olive oil. If you want a smoky angle, roast a halved red pepper alongside the tomatoes. Store extras in the fridge and reheat gently to avoid over-thinning.

Pumpkin Coconut Curry Soup

Pumpkin plays well with warm spices—cumin, coriander, turmeric—and the addition of coconut milk gives the soup a silky, slightly sweet finish that pairs with spicy notes. This direction leans on Southeast Asian flavors and is a pleasant change if you’ve had many cream-based bowls. It’s also a fast weeknight option when you use canned pumpkin or pre-roasted cubes.

Sauté onion and ginger, add curry paste or spices, then stir in pumpkin and stock. Simmer until blended, then add coconut milk and finish with lime juice and cilantro. Balance is crucial: add salt and acid to sharpen flavors and stop the sweetness from flattening the profile. Serve with jasmine rice or naan for a fuller meal.

Techniques That Make a Good Soup Great

Small techniques transform ordinary pots into memorable bowls. Browning—not just softening—your aromatics builds a foundation of flavor. When you deglaze the pan with a splash of wine, vinegar, or stock, you lift the browned bits into the liquid and multiply depth. Roasting vegetables before simmering caramelizes natural sugars and produces a naturally sweet, deeper broth without added sugar.

Another critical technique is seasoning in layers. Season lightly at the beginning, taste and correct during cooking, and add a final adjustment of salt and acid just before serving. Acid brightens and balances: lemon juice, vinegar, or even a spoonful of yogurt can change a dish from flat to lively. Texture plays a role too—consider adding toasted seeds, fried sage, or a swirl of cream to create contrasts that keep each spoonful interesting.

When pureeing, be mindful of temperature: hot purées can loft steam and cause splatters when using a blender. Use an immersion blender or allow the soup to cool a bit before pulsing in batches. If you want a velvet finish, push the purée through a sieve or chinois. For thickening without cream, simmer to reduce, stir in a paste of cooked butter and flour, or add cooked rice or beans and purée a portion to naturally thicken the pot.

Quick Comparison: Good Fall Soups at a Glance

Soup Prep Time Vegetarian Friendly Best Served With
Roasted Butternut Squash 45–60 min Yes Crusty bread, toasted seeds
Chicken Noodle 1–2 hr (with stock) No Warm dinner rolls
French Onion 1 hr Can be Cheesy toast
Lentil and Sausage 45–75 min No (swap sausage) Polenta or pickled veg
Mushroom Barley 1 hr Yes Herbed butter toast

Batch Cooking, Freezing and Reheating

Soups are ideal for batch cooking because many develop better flavor over time. When freezing, cool the soup to room temperature, leave a little headspace in containers, and label with date and contents. Avoid freezing soups with dairy or cream unless you’re okay with a slight change in texture; instead, add cream when reheating. Pureed soups generally freeze and reheat beautifully; soups with pasta or rice can absorb liquid and become mushy, so either freeze without those additions or undercook them before freezing.

When reheating, warm gently over low heat rather than boiling vigorously to protect texture and emulsions. Taste and adjust once heated—salt and acid often need a final tweak. If the soup is too thick after refrigeration or freezing, add hot stock or water and bring back to a simmer. Portion into single-serving containers for quick lunches or for handing to friends who need a comforting meal.

Serving, Garnishes and Pairings

Garnishes are small gestures that elevate a bowl: herbs, citrus zest, toasted nuts, a spoonful of crème fraîche, or crisped pancetta. Think of garnishes as contrast and punctuation—texture, fat, and acid in small amounts that make the main soup sing. Pair soups with simple sides: a green salad with vinaigrette for balance, grilled cheese for indulgence, or a grain bowl to bulk up a lighter broth. A well-chosen bread completes the experience; choose a sturdy, dippable loaf for thick soups and a thinner slice for brothier bowls.

Presentation matters less than warmth and seasoning, but the attention is appreciated. Serve bowls pre-warmed, wipe rims clean, and offer spoons with a little extra napkin for drips. If you’re hosting, prepare garnishes in small bowls and let guests finish their own cups; it’s interactive and reduces last-minute fuss. These little rituals turn ordinary meals into something memorable.

A Few Personal Notes from My Kitchen

I learned many of these lessons by accident and experiment: the first time I roasted a whole tray of squash and peppers, I expected a sweet soup, but the caramelized edges taught me to crave that depth. Another moment was a rainy evening when I rescued a bland pot with a splash of sherry and a spoonful of mustard—simple acidity and a little punch turned bland into brilliant. These improvisations are why I encourage testing small additions and keeping a notebook of what worked.

Family habits also shaped my approach. On Sunday afternoons we would have a big pot that lasted through the week, and everyone knew the ritual: one person ladled, another arranged bread, and someone else grated cheese. Those shared moments made clear that food is not only fuel but connection. I still cook that way when time allows—preparing a large pot feels like making a small, edible gift to future selves.

Fall is a season for bowls that warm, comfort, and invite slow conversation. Use the recipes and techniques here as a springboard—swap ingredients, try new spices, and make each soup your own. Keep a set of go-to fall recipes that you can turn to when the evening cools and you want something steady on the table. With a little practice, you’ll have a repertoire of homemade soup favorites that fit every mood: bright and herby, rustic and chunky, or smooth and luxurious. Enjoy the process, and let the kitchen fill with the smells of the season.

Authentic Italian Risotto Made Easy: Master Creamy, Flavorful Risotto at Home

Authentic Italian Risotto Made Easy: Master Creamy, Flavorful Risotto at Home

Risotto often carries a reputation for being fussy and time-consuming, but the truth is gentler: it asks for attention, not anxiety. In this guide I walk you through a clear, sensible approach to making risotto that tastes like a trattoria dish without theatrical effort. Whether you want a weekday dinner that feels special or a weekend project for guests, the techniques here turn a potentially intimidating dish into a reliable one. I’ll show which rice to choose, how to treat your stock and aromatics, and where a little patience yields a big payoff. By the end you’ll see why the phrase Authentic Italian Risotto Made Easy is not an oxymoron but a practical promise.

Why risotto is different from plain rice

Risotto is less about the grain absorbing liquid steadily and more about coaxing out starch to create a luxurious, clingy sauce. Short-grain rice varieties like Arborio, Carnaroli, or Vialone Nano are designed for that purpose; they release starch gradually, allowing the dish to become creamy without adding cream. The technique involves constant movement and incremental addition of hot stock so the rice cooks evenly and the starch emulsifies into a silky texture. This method rewards attention with a dish that sits somewhere between porridge and creamy pilaf, but with clearly defined grains. Understanding that texture is the goal changes how you approach timing and stirring.

Another difference is flavor-building during the cooking process rather than relying solely on pre-made sauces. Toasting the rice briefly in fat, sweating aromatics like shallot or onion, and deglazing with wine layer aromas that the rice absorbs as it cooks. The stock you use becomes an ingredient, not just liquid, so its quality and seasoning matter. Making risotto is therefore less like following a recipe exactly and more like tending a small, gradual transformation on the stove. Once you internalize the rhythm — stir, add, wait, taste — the results become consistent and forgiving.

Ingredients and essential tools

A short list of quality ingredients pays dividends in risotto. Good stock, fresh shallots or onions, a decent dry white wine, proper rice, butter, and Parmesan are the backbone of many classic recipes. Extra ingredients like mushrooms, seafood, or seasonal vegetables add character, but they work best when the base is right. Simple tools are sufficient: a heavy-bottomed wide pan, a ladle, a wooden spoon or spatula, and a small saucepan to keep your stock warm. Minimal equipment keeps the focus on technique rather than gadgets.

Choosing the right rice is central and worth a little study before you shop. I recommend keeping a small list of preferred brands or varietals at home so you don’t reach for long-grain rice by mistake. Also check that your stock is hot before you begin; adding cold stock shocks the rice and slows the cooking. Finally, use freshly grated Parmesan and real butter for the finishing; their emulsifying properties help achieve that velvety finish. Little details like these separate a so-so bowl from an excellent one.

Rice Best For Grain Characteristic
Carnaroli Classic restaurant risotto High starch, holds shape well
Arborio Home cooking, versatile Creamy, slightly chewier grain
Vialone Nano Seafood risottos, soft texture Shorter grain, absorbs flavor readily

Stock, aromatics and mise en place

Make your stock the night before if you can; a simple chicken or vegetable stock concentrates flavors when reduced a little. If using store-bought stock, choose low-sodium or dilute it to taste so you control the final seasoning. Keep the stock simmering on a low flame in a separate pot so each ladle added to the rice is hot; this keeps the cooking even and avoids temperature swings. For aromatics, finely chop shallots or onions and sweat them gently in butter or olive oil until translucent but not browned. Preparing everything in advance — measuring rice, grating cheese, chopping additions — lets you focus on the cooking rhythm without scrambling.

Mise en place also helps when you want to add mix-ins like mushrooms, peas, or shrimp at the right moment. Sauté mushrooms separately until they have a golden surface and reduced liquid; fold them into the risotto near the end to preserve texture. If you plan to use saffron, bloom the threads in a small amount of warm stock to extract color and aroma. Keeping your additions staged means you can control both texture and timing, and it prevents overcooking delicate ingredients. A calm, organized prep area is the unsung companion of good risotto.

Step-by-step: A classic easy risotto

Below is a reliable method that turns the core principles into a reproducible routine. Think of this as the skeleton you can dress up with mushrooms, asparagus, seafood, or saffron. The list is intentionally straightforward so it’s easy to follow for cooks of any experience level. Follow the sequence and pay attention to the signals from the rice — taste and texture matter more than rigorous timing. This approach frames the dish as approachable, the essence of easy risotto without sacrificing authenticity.

  1. Warm your stock and keep it at a gentle simmer in a separate pot.
  2. In a wide pan, melt butter or heat oil over medium heat and sweat finely chopped shallots or onion until translucent.
  3. Add the rice and toast it for one to two minutes, stirring until each grain is glossy.
  4. Deglaze with a splash of dry white wine and let it evaporate while stirring.
  5. Add one ladle of hot stock, stir until mostly absorbed, and continue adding stock ladle by ladle, stirring frequently.
  6. When the rice is al dente and the texture is creamy, turn off the heat and stir in butter and grated Parmesan to finish.
  7. Adjust seasoning, fold in any pre-cooked additions, and serve immediately.

Key moments to watch are the first ladle after toasting, which should sizzle briefly, and the final stage when the rice reaches al dente and has a loose, creamy consistency. If the risotto looks dry before the rice is cooked, add another splash of hot stock or a little warm water — better to gradually hydrate than to flood it. Finishing with cold butter and cheese off the heat brings the emulsion together into a glossy sauce that clings to each grain. Serve immediately because risotto continues to thicken as it sits; its ideal state is loose and slightly flowing on the plate.

Common problems and how to fix them

Authentic Italian Risotto Made Easy. Common problems and how to fix them

Too gummy? That usually means the rice was stirred obsessively or cooked too slowly in too much liquid. If the texture tips toward glue, spread the risotto on a baking sheet briefly to cool it and stir in a splash of warm stock with a knob of butter to loosen the grains before rewarming gently. If the rice is undercooked but the liquid is exhausted, add hot stock or water a little at a time and continue cooking until the grains are tender. A handy rule: keep the heat moderate; an aggressive boil can make the grains burst and become mushy.

Too salty or bland are both salvageable with small adjustments. For a salty pot, add unsalted hot water or an unsalted stock to dilute, and balance with acid like a squeeze of lemon if needed. If the risotto is flat, finish with more freshly grated Parmesan and a swirl of good olive oil or butter to lift flavors. Texture problems are often timing issues, so taste earlier than you expect; every variety of rice cooks slightly differently and ambient humidity can change times. Learning to rely on taste and mouthfeel rather than the clock makes you a more confident risotto cook.

Variations and flavorful riffs

Once you master the basic technique, variations are simply exercises in timing and flavor pairing. Mushroom risotto benefits from sautéed mushrooms folded in at the end; pea and mint risotto welcomes brightness and goes exceptionally well with a lemony finish. Seafood risottos demand separate cooking of delicate items and quick folding so shrimp or scallops remain tender. Saffron risotto, the classic Milanese, requires careful blooming of the saffron and a gentle hand to preserve the spice’s aroma without overpowering the dish.

Here are a few reliable combinations that work well with the method described above:

  • Mushroom, thyme, and Parmesan — earthy and comforting.
  • Lemon, pea, and pecorino — fresh and springlike.
  • Saffron with bone marrow or butter — luxurious and aromatic.
  • Shrimp and tomato with basil — bright and Mediterranean.

Serving, finishing touches and leftovers

Serve risotto in shallow bowls so the heat disperses and the surface does not set into a dense layer. A final finishing drizzle of extra-virgin olive oil or a small pat of butter brightens the mouthfeel, and a scattering of fresh herbs adds contrast. Grate the cheese at the end and mix it in off the heat so it emulsifies without clumping. If you like a firmer presentation, let the risotto rest briefly and then spread it into a pan to cool, but know that reheated risotto will never fully replicate the freshly made creaminess.

For leftovers, cool quickly and store in an airtight container in the refrigerator for up to two days. Reheat gently with a splash of hot stock or water and stir briskly to revive the emulsion; a little extra butter or cheese helps restore silkiness. Leftover risotto also makes excellent croquettes or arancini: shape chilled risotto into balls, coat with breadcrumbs, and fry until golden for a delicious second life. Treat leftovers as an opportunity rather than a compromise.

Wine pairings and simple sides

Pairing wine with risotto depends on the dominant flavors. For mushroom risotto, choose a medium-bodied red like Barbera or a fuller white like oaked Chardonnay; seafood risottos pair well with crisp, mineral whites such as Vermentino or Pinot Grigio. A saffron or buttery risotto loves a richer white or even a light red with low tannins. Keep the wine balanced and avoid heavy tannic reds that can overpower the dish’s delicate creaminess.

Sides should be simple and textural: a crisp salad with lemon and olive oil, roasted seasonal vegetables, or lightly dressed greens. Since risotto is rich, bright and acidic accompaniments create pleasant contrast without competing. Small antipasti such as marinated olives or a simple dish of pickled vegetables also complement risotto by cutting through fat and refreshing the palate. Remember, the goal is harmony, not complexity.

From my kitchen: a brief personal note

I learned to love risotto by burning a few early attempts and then patiently untangling what went wrong. One winter evening, after a pot that turned gluey, I slowed down, warmed the stock longer, and realized the rice needed gentler nudging rather than a frantic stir. That night a simple mushroom risotto came together, and I still remember the small triumph of tasting a bowl that felt restaurant-worthy. Those early mistakes taught me the value of rhythm and attention, lessons that stick with me every time I stand over the pan.

Over the years I’ve simplified the routine so it fits into weeknight life: mise en place is non-negotiable, and a good stock in the freezer is a quiet superpower. I often double the stock batch and freeze portions, which turns risotto from an all-day affair into an achievable midweek dinner. Sharing risotto with friends has also shaped my approach; I cook it in a large pan, invite conversation, and finish it while people sip wine. That communal rhythm is part of why risotto feels like more than a dish — it’s a small ritual that connects kitchen and table.

Now that you have a practical method and a few reliable variations, risotto becomes a flexible tool rather than a culinary Everest. Keep a few good rice choices on hand, prioritize hot stock, and treat stirring as attentive tending rather than punishment. With these techniques you can create Italian risotto that tastes authentic yet is perfectly suited to a home kitchen. Enjoy the process and the creamy rewards it brings to your table.

Quick Weeknight Pasta Recipes That Rescue Busy Evenings

Quick Weeknight Pasta Recipes That Rescue Busy Evenings

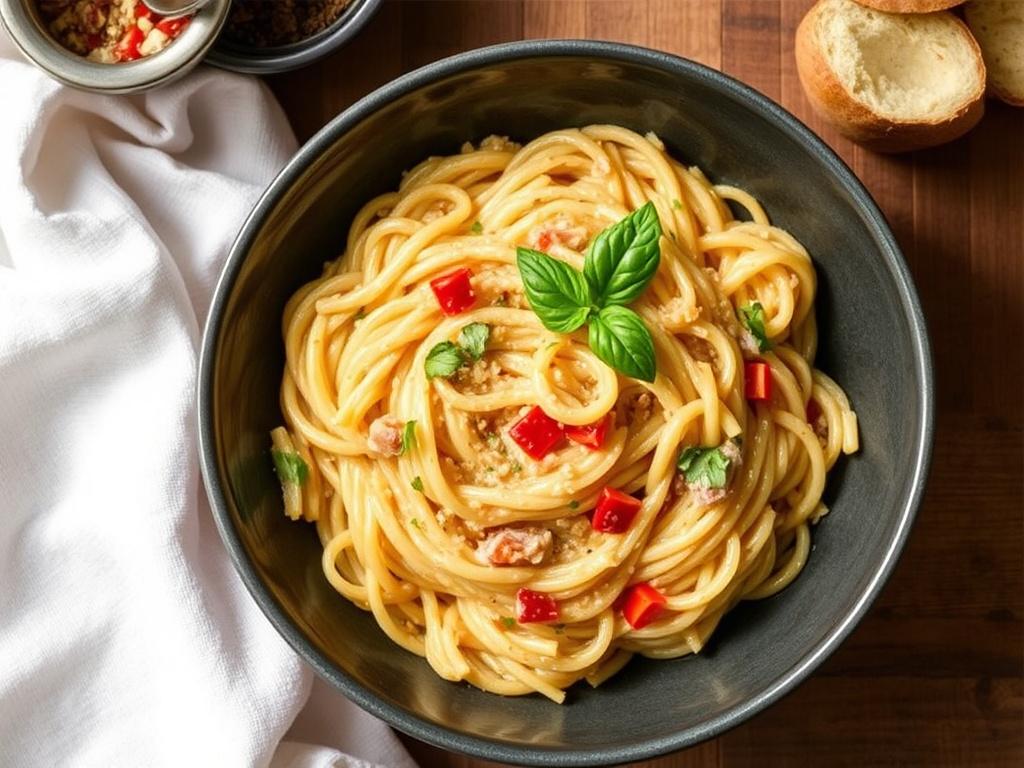
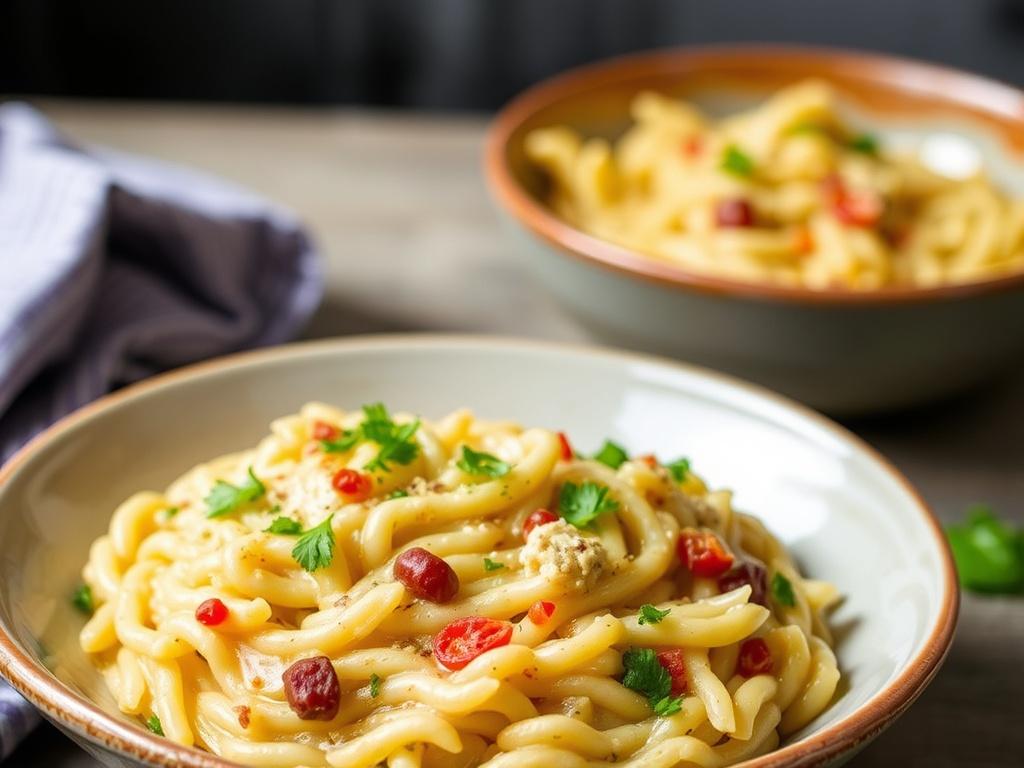
Pasta has a quiet superpower: it turns pantry odds and ends into a worthy meal in the time it takes to wash a few dishes. These Quick Weeknight Pasta Recipes are designed for tired afternoons and unpredictable schedules, when you want something satisfying without a long list of steps. I’ll share dependable tricks, a handful of recipes that actually taste like you cared, and a few of my kitchen habits that keep weeknights peaceful. This guide balances speed and flavor so you can serve a proper dinner and still have energy left for the rest of the evening. Read on and you’ll find options for meat lovers, vegetarians, and anyone who appreciates practical, delicious food.

Why pasta is the best choice for a weeknight dinner

Pasta cooks quickly and adapts to whatever you have on hand, which is invaluable on a busy night. Dried pasta keeps forever, and a box plus a few staples—olive oil, garlic, canned tomatoes, cheese—can translate into a proper meal in under 25 minutes. The chemistry of pasta is forgiving: starchy water, a hot pan, and a simple sauce come together in a way that feels like cooking even when you’re rushing. For families, pasta offers variety and portion control; everyone can add what they like, from chili flakes to extra veggies. Finally, mastering a handful of techniques turns pasta into a reliable weeknight dinner solution rather than a last-ditch effort.

Pantry staples that make quick pasta brilliant

Stocking a few reliable ingredients transforms an empty fridge into a source of fast, well-flavored dishes. Things I always keep: a few shapes of dried pasta, canned tomatoes, a jar of pesto, good olive oil, garlic, parmesan or Pecorino, red pepper flakes, and a can of beans. Those items pair easily with frozen vegetables, a lemon, and some cured meat or sausages for protein, and they open up countless quick pasta variations. Having these staples saves time because you don’t need to plan or shop; you just cook. Below is a compact list you can print and pin to your pantry door so quick pasta comes naturally when the day runs long.

  • Dried pasta: spaghetti, penne, fusilli
  • Canned tomatoes or passata
  • Olive oil, garlic, and onions
  • Hard cheese: Parmesan or Pecorino
  • Jarred pesto or anchovies for depth
  • Frozen peas, spinach, or broccoli
  • Canned beans or tuna for protein
  • Red pepper flakes and lemon

Techniques that save time and amplify flavor

Small changes in technique make a big difference when you want a fast, tasty meal. First: salt the pasta water generously, because the pasta itself is your first seasoning layer and that step can’t be skipped. Second: reserve a cup of starchy pasta water before draining—adding it to the sauce binds oil and cheese to the noodles and produces silkier texture with no extra ingredients. Third: finish the pasta in the skillet with the sauce for a minute or two so flavors marry; tossing in the pan is where bland becomes excellent. Lastly, use multi-tasking: while the water comes to a boil, sauté aromatics and measure toppings; timing and order matter more than complexity.

Quick recipes to rotate through your week

Quick Weeknight Pasta Recipes. Quick recipes to rotate through your week

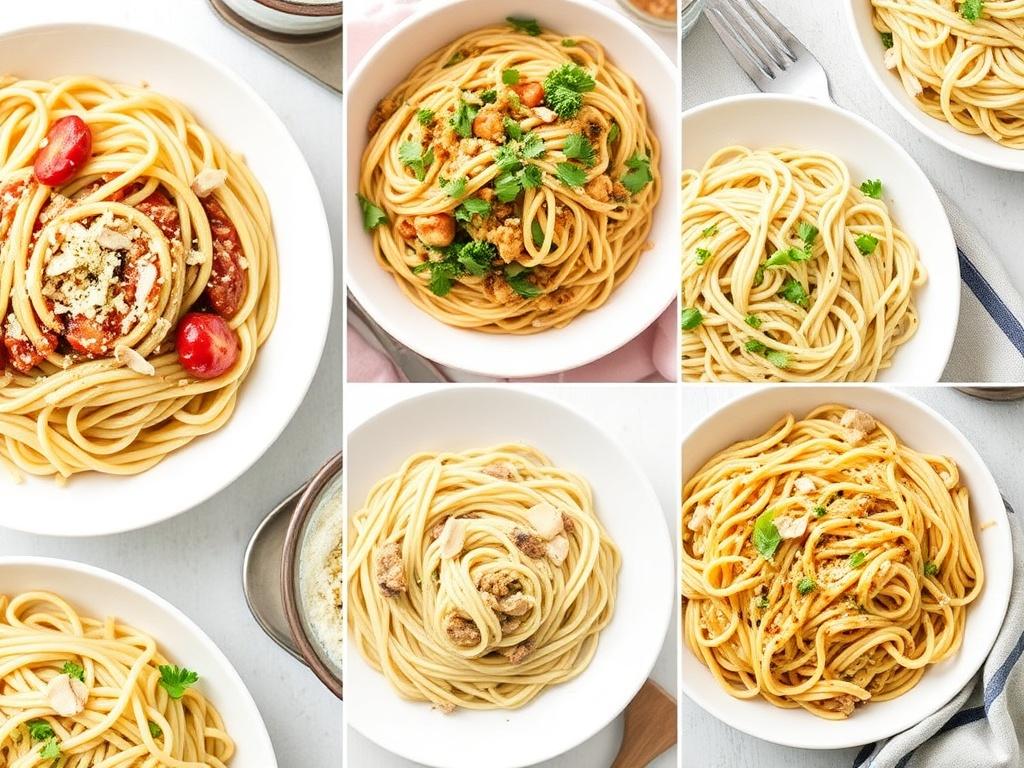
Below are dependable, fast recipes that require little prep and deliver maximum satisfaction, each written so you can scan and start cooking in minutes. I developed these dishes over many hurried evenings, testing variations until they worked consistently with minimal oversight. Each recipe includes a short ingredient list and a clear method that keeps you focused and efficient. Use the table after the recipes to compare cook times and difficulty so you can pick a dish by how tired you are. These options cover vegan, vegetarian, seafood, and meaty preferences while leaning into the easy Italian vibe that comforts and satisfies.

1. Garlic-Lemon Spaghetti with Broccoli and Chickpeas

This dish is bright and surprisingly creamy without dairy, thanks to starchy pasta water and lemon. Start with spaghetti or any long noodle you have, paired with frozen or fresh broccoli and a can of chickpeas for filling protein. Olive oil, sliced garlic, lemon zest, and chili flakes provide pungent backbone, while a splash of pasta water yields a silky finish that coats each strand. It’s a quick pasta feel-good dish that’s also light, which works well when you want comfort without heaviness. I often make a double batch and toss leftovers cold with a bit more lemon the next day.

Ingredients: spaghetti (or linguine), 2 cups broccoli florets, 1 can chickpeas (drained), 3 cloves garlic sliced, 1 lemon (zest and juice), red pepper flakes, olive oil, salt, and pepper. Method: Boil pasta in salted water and add broccoli to the pot for the last 3 minutes; reserve 1 cup pasta water. Meanwhile, warm oil in a pan, gently brown garlic with red pepper flakes, add chickpeas to heat through. Add drained pasta and broccoli to the pan, toss with lemon zest and juice, then add enough pasta water to create a glossy sauce. Finish with black pepper and grated cheese if desired and serve immediately.

2. Creamy Tomato-Basil Penne (no heavy cream)

You can achieve a comforting, creamy tomato sauce without pouring heavy cream into the pan. Use good canned tomatoes, a splash of reserved pasta water, and a spoonful of mascarpone or Greek yogurt stirred in off the heat for that smooth mouthfeel. Fresh basil folded in at the end keeps the sauce fragrant and alive, while a pinch of sugar balances acidity if needed. This is a reliable weeknight dinner when you want something familiar and soothing but still fast. I like to serve this with a simple green salad and crusty bread to mop up the sauce.

Ingredients: penne, 1 can whole peeled tomatoes or chopped, 1 small onion finely diced, 2 cloves garlic, 2 tablespoons mascarpone or yogurt, handful basil leaves, olive oil, salt and pepper. Method: Sauté onion until translucent, add garlic briefly, then crush tomatoes into the pan and simmer 8–10 minutes. Cook penne in salted water and reserve pasta water before draining. Stir a couple of tablespoons of pasta water into the sauce, then off the heat stir in mascarpone or yogurt until smooth. Add drained pasta and basil, toss to combine, and finish with grated cheese and a drizzle of olive oil.

3. Shrimp Aglio e Olio with Cherry Tomatoes

Seafood transforms a simple aglio e olio into a slightly elevated weeknight meal without adding time to the clock. Quick-cooking shrimp paired with garlic, chili flakes, and halved cherry tomatoes offers sweetness and acidity that balance the garlic oil. Use linguine, spaghetti, or any long pasta, and finish with lemon and parsley to keep flavors fresh. Because shrimp cook in about two minutes, timing is key: have everything ready to go so nothing overcooks. This is my go-to when guests drop by unannounced—fast, elegant, and forgiving if you’re distracted.

Ingredients: pasta of choice, 12–16 large shrimp peeled and deveined, 3 cloves garlic sliced, 1 cup cherry tomatoes halved, chili flakes, parsley, lemon, olive oil, salt. Method: Start pasta in salted water. Sauté garlic and chili flakes in olive oil until aromatic, add tomatoes and cook until softened. Add shrimp, cook briefly until just opaque, then add pasta and a splash of reserved pasta water. Toss to coat, finish with lemon juice and chopped parsley, and serve with a final drizzle of olive oil and grated cheese optional.

4. One-Pot Sausage Rigatoni with Peppers

One-pot pasta dishes save both time and cleanup while concentrating flavor as the pasta absorbs the sauce. Crumble sweet or spicy sausage and brown it with sliced bell peppers and onions, then add rigatoni, canned tomatoes, and just enough broth to cook the pasta. Stirring occasionally prevents sticking; the starch released thickens the sauce as it cooks. The result is rustic, hearty, and great for families who prefer a meat-forward meal. I sometimes toss in a handful of spinach at the end to add color and a little green without much fuss.

Ingredients: rigatoni, 1 pound Italian sausage, 1–2 bell peppers sliced, 1 onion sliced, 1 can diced tomatoes, 3–4 cups chicken or vegetable broth, olive oil, salt, pepper, grated cheese. Method: Brown sausage in the pot, remove briefly, then sauté onions and peppers in the rendered fat. Return sausage, add rigatoni and tomatoes, then pour in broth to just cover the pasta. Bring to a simmer and cook uncovered, stirring, until pasta is al dente and sauce has thickened. Finish with cheese, adjust seasoning, and serve straight from the pot.

5. Pesto Fusilli with Peas and Lemon — a weeknight shortcut

Pesto is the fastest way to lift a simple pasta into something bright and herbaceous, and store-bought jars are perfectly fine when time is limited. Toss fusilli with thawed frozen peas, a generous spoonful of pesto, lemon zest, and a splash of pasta water to loosen. The corkscrew shape traps sauce and little peas in every bite, which makes this an instant family favorite. This dish works warm or at room temperature and is a smart way to use leftover roasted vegetables or grilled chicken. My blender pesto recipe is great for meal-prep weekends, but a good jar saves you precious weekday minutes.

Ingredients: fusilli or rotini, 1 cup frozen peas, 3–4 tablespoons pesto, 1 lemon (zest and optional juice), olive oil, salt, pepper, grated cheese. Method: Cook pasta in salted water and add peas for the last 2 minutes. Reserve pasta water, drain, and return to pot. Stir in pesto, lemon zest, and a splash of pasta water to create a creamy coating. Adjust with olive oil and salt to taste, top with cheese, and serve promptly.

Quick comparison: time and difficulty

Here’s a compact table to help choose a recipe based on how much time and energy you have. The columns show approximate active cooking time, total time from start to table, and a difficulty estimate to guide decisions on hectic evenings. I cooked and timed these recipes multiple times to ensure the estimates are realistic for a typical home kitchen. Use the table to plan your week so you know when to pick the truly fast options and when you can afford a slightly longer, hands-on meal. This simple guide prevents staring into the fridge wondering what to do next.

Recipe Active Time Total Time Difficulty
Garlic-Lemon Spaghetti with Broccoli and Chickpeas 10–12 min 20–25 min Easy
Creamy Tomato-Basil Penne 12–15 min 20–25 min Easy
Shrimp Aglio e Olio with Cherry Tomatoes 10 min 15–20 min Easy–Medium
One-Pot Sausage Rigatoni with Peppers 15–18 min 25–30 min Medium
Pesto Fusilli with Peas and Lemon 8–10 min 15 min Very Easy

Batch-cooking, leftovers, and reheating tips

Making extra pasta intentionally is a practical move, but storing it correctly keeps quality intact. For sauced pasta, cool quickly, portion into airtight containers, and refrigerate for up to four days; sauces with dairy or seafood deserve earlier use. Reheat gently: add a little water or broth and warm over low heat while stirring so the sauce loosens without drying. Dry pasta or plain cooked noodles can be tossed in a little oil to prevent clumping and used cold in salads or quickly warmed in a skillet. Freezing is possible for many baked pasta dishes, but simple sauced pasta usually preserves best in the fridge for short windows.

Sides, pairings, and what to serve with pasta

Pairing a simple side with pasta rounds out the meal with texture and freshness, often without much extra work. A quick green salad dressed with lemon and olive oil, roasted vegetables you made earlier, or a small plate of marinated olives and cheese can do the job. Bread is an obvious companion—warm it to mop up sauce and make the meal feel more composed. For drinks, sparkling water with lemon or a glass of inexpensive red or white depending on the sauce keeps things balanced and unfussy. These small touches make weeknight pasta feel intentional rather than thrown together.

Final notes and a few personal habits that help

Over time I developed a few rituals that keep weeknights calm and the food reliably good: mise en place before turning on the stove, always boiling water early, and not overcomplicating the sauce when tired. When I’m especially busy I default to a jarred pesto or canned tomatoes and boost them with fresh herbs, citrus, or a squeeze of cream for richness. Another habit is to cook one extra portion whenever I can, so tomorrow’s lunch is already solved. Pasta rewards small routines with consistently delicious results, and these Quick Weeknight Pasta Recipes are designed to be both forgiving and flavorful so you can eat well even on the busiest nights.

Delicious Summer Salad Inspirations: Bright Plates for Warm Days

Delicious Summer Salad Inspirations: Bright Plates for Warm Days

Summer invites food to loosen its collar and breathe. When the heat climbs, salads become more than a side dish; they turn into the main event, a way to celebrate sun-ripened produce, cool textures and bold, simple dressings. In this collection I offer practical ideas and flavor combinations that keep meals light, satisfying and full of character. Whether you want a hearty bowl that doubles as dinner or a quick, cooling plate between errands, these Delicious Summer Salad Inspirations aim to rekindle your relationship with raw, vibrant food. Read on for building blocks, concrete recipes and real-world tips that make putting together a great summer salad both joyful and reliable.

Why salads shine in the summer

Hot weather changes appetites: heavy, slow-cooked meals feel like a burden and cold plates feel like relief. Salads answer that need by offering hydration, fiber and concentrated flavors without weighing you down. They let seasonal produce speak for itself, which is part of their appeal; a perfectly ripe peach or a sun-warmed tomato needs only a few supporting players to transform a meal. From a nutritional perspective, salads provide vitamins and minerals in an easy-to-digest form, and they adapt to any dietary preference. Finally, salads are social food: they travel well to picnics, scale up for barbecues and encourage sharing of textures and tastes.

Anatomy of a vibrant summer salad

Delicious Summer Salad Inspirations. Anatomy of a vibrant summer salad

A great summer salad balances four elements: base, body, texture and dressing. The base sets the tone — tender lettuce, peppery arugula or a grain such as farro — and should complement the main ingredients rather than compete with them. The body delivers substance: roasted vegetables, juicy fruit, or a protein like chickpeas or grilled fish. Texture keeps every forkful interesting, so add something crunchy or creamy such as toasted seeds or a smear of soft cheese. Finally, the dressing ties everything together, sharpening or mellowing flavors as needed. When these parts are in harmony, you get a plate that’s both simple and unforgettable.

Greens and bases

Choose your leafy backdrop with intent: butter lettuce offers silky, delicate bites while romaine provides more structure for heftier toppings. Mixed baby greens are forgiving and work well with fruit-forward salads, while spinach holds up to warm ingredients like sautéed mushrooms or soft poached eggs. If you want a grain base, cooked and cooled quinoa, barley or freekeh add chew and make the salad more filling. For portability, robust leaves and grains resist wilting, which matters when you pack lunch or serve outdoors. Think about the mouthfeel you want and match the base to your main ingredients accordingly.

Fruits and vegetables

Summer is the time to let produce lead: stone fruits, ripe tomatoes, cucumbers and corn each bring a unique kind of sweetness and freshness. Use a mix of raw and quickly cooked elements to add depth — blistered cherry tomatoes, charred corn kernels or lightly grilled peaches bring smoky notes that contrast with crisp, raw ingredients. Consider color and acidity as well; orange bell peppers or purple plums make the plate more visually enticing, and acidic items like citrus segments or pickled red onion brighten the overall profile. Small changes in ripeness can shift the salad from subtle to striking, so taste as you build.

Proteins, legumes and grains

To transform a side salad into a complete meal, layer in protein and grains. Tuna, poached salmon, grilled chicken or shrimp integrate naturally with summer flavors, and plant-based options such as chickpeas, edamame or lentils provide satisfying heft. Whole grains like farro, barley or bulgur add chewiness and keep you full without heaviness. For speed, canned beans or pre-cooked grains are excellent; rinse, cool and fold in. Balancing protein with bright elements — herbs, acid, crunchy textures — prevents the salad from feeling dense or monotonous.

Herbs, nuts, cheese and crunch

Small accoutrements make a big difference: fresh herbs such as basil, mint or cilantro add aroma and a fresh lift, while toasted nuts or seeds contribute warmth and crunch. Cheese introduces creaminess and salt — feta and ricotta salata work well with fruit, while aged cheddar or Parmesan suits grain-based bowls. Consider pickled or fermented accents, like capers or quick-pickled shallots, to add a tangy counterpoint. These finishing touches are where personality emerges, so taste boldly and add them judiciously.

Dressings that make summer salads sing

A dressing should highlight ingredients, not hide them. For summer salads, vinaigrettes with citrus, light mustards or a touch of honey often work best; creamy dressings can be used sparingly or thinned with yogurt or buttermilk. A good rule is to start with an acid, balance with oil and season to taste with salt and perhaps a sweetener or herb. Warm salads call for dressings served at or near room temperature so the oil doesn’t congeal. Below is a compact table of dressing ratios and flavor notes to keep on hand when improvising.

Dressing Basic ratio Flavor notes
Classic vinaigrette 3 parts oil : 1 part acid Versatile, bright; works with most summer salads
Citrus-mustard 2.5 parts oil : 1 part citrus + 0.5 tsp mustard Fresh, slightly sharp; pairs well with fruit and seafood
Yogurt-herb 2 parts yogurt : 1 part oil : 0.5 part lemon Cooling and creamy; ideal for cucumber and mint salads

Recipe inspirations to try this season

Watermelon, Feta and Mint Salad with Lime

  • 2 cups cubed watermelon
  • 1 cup crumbled feta
  • Handful of torn mint leaves
  • 1 small cucumber, thinly sliced
  • Juice of 1 lime, 1 tbsp olive oil, pinch of salt and pepper

This salad is a study in contrasts: sugary, juicy watermelon set against salty, crumbly feta and the bright snap of lime. Toss the fruit and cucumber gently so the watermelon doesn’t release too much juice, then fold in the cheese and mint. Dress just before serving to preserve texture; a little olive oil binds flavors without overwhelming the fruit. Serve chilled and bring napkins — the watermelon can be delightfully messy in the best way. It’s one of my go-to plates when peaches haven’t reached peak ripeness, because its freshness always reads like a victory over the summer heat.

Grilled Peach and Burrata Salad with Prosciutto

  • 2 ripe peaches, halved and grilled
  • 1 ball burrata
  • 4–6 thin slices prosciutto
  • Arugula, handful; drizzle of aged balsamic and olive oil

Grilling concentrates the peach’s sugars and adds a slight char that plays beautifully with creamy burrata. Arrange grilled halves over arugula, tear the prosciutto into ribbons, and crown with the soft cheese. A modest splash of aged balsamic and a grind of black pepper finish the plate. This salad works as a celebratory starter or a light dinner with crusty bread. I often prepare the peaches on a cast-iron skillet when the grill is busy; the result is the same smoky-sweet satisfaction.

Quinoa, Corn and Black Bean Salad

  • 1 cup cooked quinoa, cooled
  • 1 cup fresh or grilled corn kernels
  • 1 can black beans, rinsed and drained
  • Chopped red bell pepper, cilantro, juice of 1 lime, olive oil

This bowl is a very reliable healthy salad that travels well and satisfies hungers for longer. Quinoa provides a neutral, nutty canvas and the beans add protein while corn brings summer sweetness. Toss with lime, cumin, olive oil and cilantro for a bright, slightly smoky profile. It keeps for a few days in the fridge, making it an excellent choice for meal prep. When I bring this to gatherings, people often go back for seconds because it tastes like summer in a bowl but fills you up.

Cucumber, Mint and Yogurt Salad with Dill

  • 2 large cucumbers, thinly sliced
  • 1 cup plain yogurt
  • 2 tbsp chopped mint, 1 tbsp chopped dill
  • Salt, lemon zest and a drizzle of olive oil

This is the essence of cooling food and makes for wonderfully refreshing meals on hot afternoons. The yogurt thins with lemon juice to create a silky dressing that coats each cucumber slice. Mint provides lift and dill adds an herbal whisper that complements seafood or grilled meats. Serve it slightly chilled, and add a scattering of toasted pistachios if you want a crunch. It’s my fallback when the thermometer insists on summer; simple, quick and profoundly satisfying.

Heirloom Tomato, Avocado and Basil Salad

  • Assorted heirloom tomatoes, sliced
  • 1–2 ripe avocados, cubed
  • Fresh basil leaves, torn
  • Extra virgin olive oil, flaky sea salt, freshly ground pepper

When tomatoes are at their peak, dress them as sparingly as possible to let their flavor sing. Layer slices with avocado to introduce creaminess, scatter basil for fragrance, and finish with a splash of good oil and a few flakes of sea salt. The result is a salad that feels luxurious despite its minimalism. I remember a summer afternoon when a single plate of this, eaten on a back porch, felt like the whole day’s accomplishment. That simplicity is the point: quality ingredients executed without fuss.

Thai Mango and Chicken Salad with Lime-Chili Dressing

  • Shredded roasted chicken
  • 1 ripe mango, thinly sliced
  • Shredded cabbage, carrots, cilantro and toasted peanuts
  • Dressing: lime juice, fish sauce, a touch of sugar, chopped chili

This salad offers bright, layered flavors with a balance of sweet mango and savory, salty dressing. Use leftover grilled chicken or quickly poach breasts for a weeknight adaptation. Toss everything just before serving so the cabbage retains crunch and the peanuts stay toasted. The lime-chili dressing is assertive — adjust heat and salt to taste. It’s a great way to introduce a spicier option among milder dishes at summer gatherings and always draws compliments for its lively contrast of textures.

Make-ahead, storage and transport tips

Planning ahead makes salads practical for busy weeks and outdoor events. Store components separately when possible: greens in a paper towel-lined container, dressings in a small jar, and crunchy toppings in a sealed bag. Grains and proteins hold up well pre-mixed and make for quick assembly; keep delicate herbs and avocados off until the last moment to avoid browning. When packing for a picnic, use a shallow, rigid container to preserve ingredient arrangement and prevent crushing. These small habits reduce sogginess and maintain flavors, turning salad prep from a last-minute scramble into a reliable routine.

Pairing salads with drinks and main dishes

Salads pair with drinks and mains by mirroring or contrast. A citrusy dressing complements a crisp white wine or a light lager, while richer, nutty salads work with an oaky rosé or iced tea with lemon. For mains, think of salads either as a palate cleanser — a cucumber-mint dish beside grilled lamb — or as a hearty companion, such as a quinoa bowl alongside a roasted vegetable platter. When serving a variety of salads, balance textures and intensities: include one cooling choice, one protein-rich bowl and one with bold, spicy flavors to satisfy diverse appetites. Matching temperature matters too; chilled salads are best with chilled beverages.

Adapting salads for diets and allergies

Salads are inherently adaptable and can be tailored for gluten-free, vegan or low-FODMAP needs with small swaps. Replace grains with quinoa or millet for gluten-free options, use tofu or legumes instead of animal proteins for vegan bowls, and opt for nut-free seeds if allergies are a concern. Dressings can be made oil-free using yogurt or avocado bases, and salt can be reduced by adding citrus and herbs to brighten flavors instead. When hosting, label components and offer a simple base and several toppings so guests can compose a bowl that meets their needs. Flexibility is one of salads’ biggest strengths; be explicit about choices and everyone eats well.

A personal note from the market and the picnic blanket

Each summer I find myself drawn to the same corner of the farmer’s market where heirloom tomatoes blush under a small umbrella stand. Buying fruit and vegetables that morning dictates the day’s menu: what looks vibrant ends up on the plate. I once built an entire dinner on impulse — grilled corn, a hand of basil, leftover pan-seared fish — and invited neighbors to share the results. The salad that evening was simple, with nothing more than lemon, olive oil and a handful of toasted seeds, yet it felt celebratory. Those spontaneous meals taught me that great summer salads reward immediacy and curiosity more than precision.

Putting it all together

Salads in summer should be practical and pleasure-driven at once. Start from a good base, add seasonal produce, choose proteins and finish with thoughtful textures and a bright dressing. Keep a handful of reliable recipes and a small repertoire of dressing ratios for easy improvisation. Make-ahead strategies and smart packing extend the life of your creations beyond the kitchen. Try one or two of the recipes above, then venture into combinations that reflect what your local market offers this week. In the end, Delicious Summer Salad Inspirations are less about strict rules and more about encouraging you to cook with the season, to taste as you build, and to enjoy food that cools and comforts as the days lengthen.

Gluten-Free Dessert Ideas That Actually Taste Like Dessert

Gluten-Free Dessert Ideas That Actually Taste Like Dessert

Searching for gluten-free dessert ideas that don’t feel like a compromise? You’re in the right place. This article walks through ingredients, techniques, and real recipes that keep texture and flavor front and center, whether you’re baking for someone with celiac disease, cooking for an allergy-friendly gathering, or simply exploring new tastes. I’ll explain swaps that work, common pitfalls to avoid, and offer dessert examples you can make tonight — no rubbery cookies, no sad slices. Expect practical tips and a few personal notes from my own kitchen experiments along the way.

Why gluten-free doesn’t have to mean flavor-free

Gluten is a structural protein that helps doughs stretch and hold gas, so removing it changes the rules of the game, not the prize. That means you need to think about texture and moisture differently: flours that absorb more liquid, binders that replace gluten’s elasticity, and techniques that encourage rise and tenderness. When these elements are balanced, the results are as satisfying as traditional desserts and sometimes even better, with new flavors and textures that surprise you. Once you understand the why, adapting familiar recipes becomes less intimidating and more creative.

Another important note is cross-contamination. For truly allergy-friendly desserts, separate utensils, clean work surfaces thoroughly, and store gluten-free ingredients apart if you also bake with wheat. People with celiac can react to tiny amounts of gluten, so vigilance matters. If you’re baking for a group with mixed needs, labeling and clear communication go a long way toward making guests feel cared for and safe.

Essential gluten-free ingredients and smart swaps

Building a versatile gluten-free pantry starts with a handful of reliable flours and starches, plus leaveners and binders that work well together. Almond flour and oat flour bring nutty and malty notes, respectively; rice flour and sorghum are neutral bases; tapioca and potato starches help with chew and crispness. For binding, xanthan gum and psyllium husk mimic some of gluten’s structure, while eggs and nut butters add richness and hold. Knowing which ingredient contributes flavor, structure, or moisture helps you pick the right combination for a given dessert.

Below is a compact table to help you match common wheat-based roles to gluten-free alternatives. Keep in mind that many desserts benefit from flour blends rather than a single substitute — blending creates better balance between taste and texture.

Role in recipe Gluten-free options Notes
Neutral flour base White rice flour, sorghum flour Good for cakes and cookies when blended
Moisture & tenderness Almond flour, oat flour Adds flavor and keeps crumb soft
Chew and crisp Tapioca starch, potato starch Useful for cookies and crusts
Binding Xanthan gum, psyllium husk, chia gel Use small amounts to avoid gumminess
Structure & lift Baking powder, whipped egg whites Combine chemical and mechanical leavening

Techniques that save gluten-free desserts

Small technique changes often make the biggest difference. For example, sifting dry ingredients avoids clumps and ensures even distribution of starches. Letting batters rest for 15 to 30 minutes allows flours like rice and oat to hydrate, producing a smoother crumb. When you whisk egg whites, fold them gently into batters to trap air without deflating; that mechanical lift often compensates for absent gluten. Also remember oven temperature: many gluten-free cakes bake faster or brown more quickly, so watch toward the end of the recommended time.

Another tip is to favor native fats and flavor carriers. Butter, coconut oil, or nut butter add mouthfeel and richness, which distracts from any slightly granular texture. If a batter feels dry, adding one tablespoon of yogurt, applesauce, or extra egg yolk can rescue moisture without making the final product heavy. Experimentation matters — start by adjusting one variable at a time so you learn how each change affects the final result.

Quick and reliable recipes you can make tonight

Let’s get practical. Here are a few recipes that consistently deliver: flourless chocolate cake, almond-flour lemon bars, coconut macaroon nests, and chia-seed pudding. Each leans on different techniques so you gain a sense of range: flourless recipes sidestep the flour question entirely; nut-flour desserts rely on natural oils for structure; pudding-style desserts use thickening agents instead of baking. I’ve included methods rather than strict measurements, so you can scale or tweak flavors easily.

Flourless chocolate cake: Melt high-quality dark chocolate with butter, fold into whipped eggs and sugar, and bake in a lined pan. The result is dense and deeply chocolatey, with a cracked top and a mousse-like center. It’s naturally gluten-free and often improved by a sprinkle of espresso powder or orange zest. Serve slightly warm with a dollop of whipped cream or a scoop of dairy-free ice cream for a striking dessert that feels luxurious but takes little hands-on time.

Almond-flour lemon bars: Use a simple crust made from almond flour, a touch of tapioca for crispness, butter, and a bit of sweetener pressed into a pan. Blind-bake briefly, then pour a lemon curd made with eggs, lemon juice, zest, and sugar. Bake until just set and cool completely before slicing. The almond base provides a tender, crumbly contrast to the bright, silky curd. These bars travel well and make a lovely addition to an allergy-friendly dessert spread.

Cookies and bars that keep their shape

Cookies can be trickier because structure matters: you want edges that crisp and middles that hold together without crumbling. A reliable formula is combining almond or oat flour for body, a starch like tapioca for chew, a binding agent such as an egg or flax “egg,” and a small amount of xanthan gum for elasticity. Refrigerating dough before baking helps control spread and improve texture, especially with higher-fat flours. Don’t be discouraged if your first batch looks different — color and spread vary with flour blends and sugar types, but flavor is the true test.

Try these simple projects: almond butter cookies with a touch of sea salt, oatmeal-chocolate chip cookies using certified gluten-free oats, and brown butter shortbread made with rice and tapioca flours. For bars, look to recipes that rely on pressed crusts and dense fillings, like pecan pie bars made with a gluten-free oat crust or layered chocolate-salted caramel squares. Bars often fare better for gatherings because they’re easier to slice and transport without falling apart.

Allergy-friendly adjustments beyond gluten

Many people who choose gluten-free also need dairy-free, nut-free, or egg-free options. An allergy-friendly dessert starts with identifying the specific restriction and then choosing substitutes that preserve texture and flavor. For dairy-free swaps, use coconut cream, full-fat coconut milk, or vegan butter. For nut allergies, replace almond flour with a combination of oat and rice flour and add a bit more starch. For egg-free baking, aquafaba (the liquid from canned chickpeas), flax or chia gels, and commercial egg replacers can work well, though you may need to tweak leavening.

When removing multiple allergens at once, prioritize the role each ingredient plays. For example, if you eliminate both gluten and eggs, include a reliable binder like psyllium husk or xanthan gum to help with structure, and increase fat or moisture slightly to prevent dryness. Taste and texture tests are essential; small-batch trials help avoid wasting ingredients on a large, untested recipe. Label desserts clearly for guests, noting which common allergens they still contain.

Plated desserts and showstoppers

Gluten-Free Dessert Ideas. Plated desserts and showstoppers

Want to impress at a dinner party? A gluten-free plated dessert can be dramatic without being complicated. Consider a deconstructed pavlova made with small coconut or aquafaba meringues, a sharp berry compote, and a silky mascarpone or coconut cream. Another elegant option is a layered trifle using gluten-free sponge pieces, pastry cream, and macerated fruit; the visual contrast of layers makes for an attractive centerpiece. The key is balance: a crunchy element, a creamy component, and a bright acidic note often make a dish sing.

For larger celebrations, think about gluten-free tart shells. Shortcrusts using a mix of almond flour and rice flour hold up well when blind-baked and filled with ganache or curd. If you’re serving many people, bake several smaller tarts rather than one large one — small pastries are easier to slice precisely and to label for allergy-safe distribution. Presentation details — a dusting of powdered sugar, a few fresh herbs, or a scatter of toasted seeds — elevate simple recipes into memorable desserts.

Storage, transport, and serving tips

Gluten-free desserts sometimes behave differently after cooling. Many stay moister and can be firmer when chilled, so plan storage accordingly. Cakes made with almond flour or extra eggs often improve after a day in the refrigerator, allowing flavors to meld. Cookies can become softer; to restore crispness, warm them for a few minutes in a low oven before serving. For picnics or potlucks, pack components separately when possible — a tart shell plus a cooled filling travel better than an assembled tart that might soften or leak.

Labeling is a practical courtesy if you’re at a mixed gathering. Note whether a dessert is not only gluten-free but also nut-free, dairy-free, or vegan. If cross-contamination is a concern, mention if items were prepared in a shared kitchen. These small details build trust with guests who rely on accurate information and make sharing food less stressful for hosts and visitors alike.

Pantry checklist and useful tools

Keep a compact set of tools and supplies for reliable gluten-free baking: a scale for precise measurements, silicone baking mats, fine-mesh sifters, and plastic dough scrapers. A kitchen scale is especially helpful because volumes of gluten-free flours vary significantly. Measuring by weight ensures consistency and reduces the guesswork that leads to dry or dense bakes. A bench scraper helps manage sticky, high-fat doughs common with almond or coconut flours.

Must-have pantry items Why they matter
Almond flour Provides moisture, richness, and structure
White rice flour Neutral base for blends
Tapioca starch Adds chew and crispness
Xanthan gum or psyllium Helps bind and mimic gluten
Certified gluten-free oats Great for cookies and crusts
Baking powder and soda Essential leavening agents

My kitchen experiments and what they taught me

I remember the first time I made a gluten-free birthday cake for a friend with celiac — the batter looked different, and I worried the crumb would be dry. I reduced the flour slightly, added an extra egg yolk, and folded whipped egg whites into the batter. The result was light and tender, and the birthday person couldn’t tell the difference. That taught me an important lesson: technique often outweighs fear. Little adjustments can transform texture without complicated ingredient lists.

Another experiment involved swapping almond flour for oat flour in a shortbread. The almond version was more tender and flavorful, while the oat base held up better for a fruit tart. From those trials I learned to choose flours by purpose: almonds for richness, oats for structure and heartiness. These practical discoveries are the kind you accumulate over time; they make adapting recipes intuitive rather than trial-and-error every single time.

Where to find reliable recipes and further learning

Look for sources that test recipes specifically for gluten-free outcomes rather than merely swapping flours in standard recipes. Blogs and cookbooks by authors with celiac experience tend to offer more precise instructions and measurements, and many community forums share user-tested adjustments. Local cooking classes focused on allergy-friendly baking can be a fast track to hands-on learning, and they’re often full of practical tricks you won’t find in a recipe alone. Keep a small notebook or digital folder with your favorite successful tweaks — those personal notes become your kitchen’s secret handbook.

As you try more recipes, you’ll develop instincts for what will work and what needs tweaking. Start with a few dependable formulas, practice them until you can reproduce results, and then branch out. The more desserts you make, the more you’ll enjoy the creative side of gluten-free baking — experimenting with spices, citrus, and textures rather than worrying about what you can’t use.

Final serving thoughts and a gentle encouragement

Creating gluten-free, allergy-friendly desserts is a combination of science, art, and a bit of patience. Focus on balance: moisture, structure, and flavor, and choose ingredients that complement one another rather than trying to replicate wheat exactly. Celebrate the differences — they’re often what make the desserts memorable. Invite feedback, label clearly, and don’t be afraid to share your experiments; good desserts tend to bring people together regardless of what’s in them.

Try one of the recipes here this week, tweak it to suit your pantry, and notice how small technique shifts change outcomes. Over time you’ll collect a set of go-to gluten-free dessert ideas that are reliable, tasty, and genuinely crowd-pleasing. Above all, keep tasting and adjusting — the best desserts come from cooks who pay attention and take pleasure in the process.

Classic Homemade Pizza Variations That Actually Work: From Neapolitan to Deep-Dish

Classic Homemade Pizza Variations That Actually Work: From Neapolitan to Deep-Dish

There’s a particular thrill in pulling a blistered crust from a household oven and watching the cheese bubble like a small, edible pond. In this article I’ll walk you through Classic Homemade Pizza Variations that are realistic for a home cook, useful across different ovens, and forgiving enough for experimentation. You’ll find guidance on dough, sauce, and cheese, along with several distinct pizza styles to try — each explained with practical tips rather than vague platitudes. I’ll also share little hacks that saved my dinners on more than one occasion, and a few recipes you can attempt this weekend. Read on if you want to move beyond frozen pies and understand what makes a pizza feel right in the mouth.

The Foundation: Dough, Sauce, and Cheese

A good pizza begins with a few basic decisions: what flour you use, whether you want a thin or thick crust, and how you treat the dough. Flour type defines texture — high-protein bread flour gives chew, 00 flour softens and allows for those characteristic charred bubbles on a very hot surface, while all-purpose is a fine compromise for everyday home-baking. Hydration matters too; a wetter dough yields larger holes and a lighter crumb but can be trickier to shape. For sauce, simplicity wins: crushed San Marzano or good canned plum tomatoes, a pinch of salt, and a little olive oil let the tomato sing without fighting the crust. Cheese choices are decisive: fresh mozzarella for Neapolitan-style, low-moisture mozzarella for New York-style, and blends with provolone or asiago for richer, meltier finishes.

How you treat the dough during fermentation changes everything. A slow, cold rise in the fridge develops flavor and digestibility, and a short room-temperature proof gives speed when you’re in a hurry. I usually make a large batch and freeze portions — it saves time and improves consistency. Basic technique is straightforward: mix, rest, fold a few times, then chill. You don’t need a fancy mixer; hand-kneading or a gentle stretch-and-fold routine gets you there. Below are common dough approaches to choose from depending on the pizza style you want to try:

  • Neapolitan: 00 flour, 60-65% hydration, short yeast, very high heat.
  • New York-style: bread flour, 58-62% hydration, slightly longer fermentation, tossed thin.
  • Chicago deep-dish: dough enriched with butter or oil, pressed into a pan, thicker crust.
  • Roman/Sheet: lower hydration, rolled thin and baked on a sheet for crispness.

Classic Pizza Styles to Make at Home

Neapolitan

Neapolitan pizza is about contrast: a tender interior with a charred rim and a few bright ingredients. Authentic versions cook at extremely high heat, but at home you can approximate the effect by preheating a pizza stone or steel at maximum oven temperature for at least an hour. Keep toppings minimal — crushed tomatoes, a few basil leaves, and slices of fresh mozzarella — because moisture and weight will prevent the crust from puffing properly. Stretch dough gently by hand; don’t use a rolling pin or you’ll lose the air pockets that make the crust sing. Finish with a drizzle of extra-virgin olive oil after baking to lift the flavors.

New York-style

The New York slice is the working-class hero of pizza: foldable, substantial, and built to travel. The dough is slightly chewier than Neapolitan thanks to higher gluten content and a bit less hydration. A pan or pizza stone preheated thoroughly helps recreate the crisp yet yielding base; bake at the highest temperature possible in your oven, then slide the pie directly onto the rack if you want extra bottom browning. Use low-moisture mozzarella to reduce sogginess and add toppings in moderation to preserve that characteristic fold. This style rewards a bit of grease from quality cheese and a good crust, so don’t be shy about finishing with a light oil brush if the pie looks dry.

Chicago Deep-Dish

Deep-dish pizza is essentially a savory pie, with a buttery crust that needs to hold its own against generous layers of cheese, sauce, and toppings. Use a sturdy pan and press the dough up the sides so it forms a firm shell; blind-baking the crust a little before filling can prevent a soggy bottom. Layer cheese directly on the dough, add meats or vegetables next, and top with chunky tomato sauce so the sauce remains upfront when served. Baking is slower than other styles — expect 30 to 45 minutes depending on depth — and the result is a comforting, knife-and-fork affair rather than a foldable slice. This is the pizza to make when you want something more like dinner than a snack.

Roman and Pizza al Taglio

Roman-style pizzas often come in two tracks: the ultra-thin, crisp Roman tonda, and the rectangular, airy pizza al taglio sold by weight. The latter uses a high-hydration dough and long cold fermentation to produce an open crumb and crisp base when baked on a sheet. Baked in oiled pans, these rectangular pies take toppings that can be a little heavier, and they’re ideal for feeding a crowd because you can cut them into generous squares. For home cooks, the sheet approach is forgiving: you can par-bake the crust, add toppings, and finish under the broiler for a glossy finish. It’s a flexible format for creative toppings and brunch-ready combinations.

Margherita — The Quintessential Classic Pizza

Margherita is a lesson in restraint: the simplicity tests your core technique more than any elaborate topping arrangement. Tomato, fresh mozzarella, and basil must be in balance — too much cheese or sauce hides subtleties in the crust. At home, aim for a thin center and a puffed, blistered edge; use a hot stone or steel and bake quickly to trap steam and create those airy pockets. Finish with fresh basil and a whisper of olive oil to keep the herbs fragrant. When I first mastered a Margherita at home, I realized that the dish reveals mistakes immediately, which is why it’s so useful as a barometer of your pizza-making skills.

Pepperoni and Classic Toppings

Pepperoni is a ubiquitous favorite for a reason: its fat renders and crisps at the edges, seasoning the entire pie. For consistent results, use thinly sliced, moderately fatty pepperoni and place it evenly so each bite has a little curl. Classic toppings like mushrooms, onions, and bell peppers work best when sliced thin and pre-cooked or lightly sautéed to remove excess moisture. Meats such as Italian sausage or pancetta benefit from a quick brown before hitting the dough, which concentrates their flavors and prevents greasiness. Keep the sauce and cheese proportionate so toppings complement rather than overwhelm the crust.

White Pizza and Alternative Bases

White pizza skips tomato sauce and focuses on cheeses, herbs, and often garlic or cream — a treat for cheese lovers. Ricotta dollops, mozzarella, and a drizzle of olive oil create a luscious mouthfeel, while bitter greens like arugula or sautéed spinach add counterpoint. Consider non-tomato sauces too: pesto, olive tapenade, or even a thin béchamel offer new directions for familiar dough. For a lighter eating experience, add fresh arugula or citrus-finished fennel after baking. These alternatives show how a base change transforms the whole eating experience without dramatic technique shifts.

Vegetarian and Seasonal Pizza Variations

Vegetarian pizzas flourish when you match vegetable textures to cooking times: quick-roasted cherry tomatoes, caramelized onions, and grilled zucchini all bring different mouthfeels. Seasonal produce can make a pizza sing — think roasted butternut and sage in autumn, or asparagus and lemon in spring. Briny accents like capers or olives add depth, while a finishing splash of aged balsamic cuts richness and adds brightness. I like to experiment with a “market” pizza: whatever looks best at the farmers market becomes the centerpiece, with a restrained hand on sauce and a thoughtful cheese pairing.

Style Oven Temp (approx) Bake Time Key Feature
Neapolitan 450-500°C (wood-fired) / 500°F (home oven on steel) 90s–7 mins (depending on heat) Puffed, charred cornicione
New York 500–550°F 7–12 mins Thin, foldable slice
Chicago Deep-Dish 375–425°F 30–45 mins Thick, buttery crust
Roman/Sheet 475–500°F 12–20 mins Crisp bottom, airy interior

Techniques and Tools That Elevate Homemade Pizza

Classic Homemade Pizza Variations. Techniques and Tools That Elevate Homemade Pizza

A few tools will significantly improve outcomes: a steel or stone for thermal mass, a peel for handling, and a good oven thermometer to know what your thermostat is actually doing. A steel transfers heat faster than a stone, which helps emulate pizzeria conditions in a domestic oven; it’s worth the investment if you bake frequently. A perforated pizza peel prevents excess flour from burning under the pie, and a bench scraper makes portioning dough simple. But technique matters as much as equipment: preheat thoroughly, handle dough gently, and resist the urge to overload with toppings. Mastering these basics is the fastest route from adequate to excellent homemade pizza.

Small refinements pay off disproportionately. Stretch dough by gravity and hand, not the rolling pin, to preserve air. Use a timer for fermentation phases and write down results so you can repeat successes. If your oven lacks high heat, try a cast-iron skillet on the stovetop to start the crust, then transfer to the oven to finish. Rotate pies midway for even color, and let cooked pizzas rest a minute before slicing to let the cheese set slightly. These habits reduce common errors and make your process predictable, which is invaluable when feeding others.

Toppings, Balancing Flavors, and Pairings

Toppings should create layers of contrast: creamy vs. acidic, fatty vs. bitter, crisp vs. tender. For example, a classic Margherita pairs tangy tomato with creamy mozzarella and peppery basil; a barbecue chicken pie pairs sweet sauce with smoky meat and sharp red onion. Think in threes — acid, fat, and salt — to achieve balance. Fresh herbs and finishing oils are small touches that make a pizza feel finished and intentional. Below are a few reliable topping combinations that work across multiple pizza styles.

  • Margherita: crushed tomato, fresh mozzarella, basil, olive oil.
  • Pepperoni Classic: low-moisture mozzarella, pepperoni, optional grated parmesan.
  • White Mushroom: ricotta, fontina, sautéed mushrooms, thyme.
  • BBQ Chicken: shredded chicken, barbecue sauce, red onion, smoked gouda.
  • Prosciutto & Arugula: thin prosciutto after baking, fresh arugula, lemon zest.

Troubleshooting Common Home Pizza Problems

Soggy center, dense crust, or lack of browning are the usual culprits. A soggy center often comes from too much sauce or wet toppings; try draining watery vegetables and using less sauce, or par-bake the crust briefly before topping. Dense crust usually stems from under-proofing or too much flour when shaping; let dough rest and avoid aggressive pressing. Lack of browning points to insufficient surface temperature, so preheat a stone or steel for a long time — the oven dial rarely reflects actual surface heat. Adjusting these variables systematically will quickly solve most problems.

Another common issue is uneven bake: edges done, center raw. This often means the pie was overloaded or the oven heat distribution is uneven. Use a pizza peel to slide the pie closer to the heat source and rotate the pie during baking. If you consistently see hot spots, a baking steel provides a more uniform conduction. Finally, keep notes: record oven settings, bake times, and dough formulas so you can replicate what worked and avoid what didn’t.

Recipes to Try This Weekend

Simple Margherita

Start with a 250g dough ball, stretched thin and placed on a well-floured peel, or parchment for a sheet. Apply crushed tomatoes lightly, dot with slices of fresh mozzarella, and add a sprinkling of salt. Slide onto a preheated steel or stone in the oven set as high as possible and bake until the rim is puffed and spotted, about 6-8 minutes in a 500°F oven. Finish with torn basil and a drizzle of extra-virgin olive oil. Eat immediately; the contrast of hot cheese and cool basil is the point.

New York-style Slice

Use a dough made from bread flour with a slightly longer fermentation for chewiness; shape thin and wide on a peel dusted with semolina for texture. Top with a modest layer of sauce and low-moisture mozzarella, leaving a small rim bare. Bake at 500–550°F for 8–12 minutes until the crust is golden and the cheese has tiny pools of oil. Slice into wedges, fold in half, and enjoy while still warm for the classic street-slice experience. This pizza rewards a firm hand when topping — restraint equals biteability.

Quick Pan Deep-Dish (Home-Friendly)

Press enriched dough into a well-oiled round pan, letting it come up the sides to create a sturdy shell. Layer mozzarella first, followed by cooked sausage or vegetables, and top with a chunky tomato sauce seasoned with oregano. Bake at 400°F for 30–40 minutes until the crust is deeply golden and the filling bubbles. Let the pie rest briefly before slicing so the layers settle. This is a slower but deeply satisfying variation when you want something heartier.

My Personal Notes and Experiments

When I first started, my pizzas were either underbaked or burned — a classic beginner’s swing. Over time I learned to trust a long, cool fermentation and to measure water temperature and yeast carefully. One memorable experiment involved adding a small percentage of whole-wheat flour to a standard dough; the flavor added complexity without wrecking texture when I adjusted hydration upward. I also discovered that letting dough come to room temperature for an hour before shaping makes a big difference in extensibility. These little empirical adjustments turned occasional decent pizzas into reliably good ones for family dinners and casual get-togethers.

Serving, Storage, and Reheating

Serve pizza within minutes of baking if you want the best texture — crust crisp, cheese glossy, toppings vibrant. If you need to store leftovers, cool quickly and refrigerate in an airtight container for up to three days or freeze for longer. Reheating on a skillet over medium heat with a tight-fitting lid restores crispness better than a microwave; alternatively, a hot oven or toaster oven for 5-8 minutes will refresh slices nicely. For frozen pies, thaw overnight in the fridge and re-crisp in a very hot oven. Proper reheating preserves both texture and flavor so your second night is nearly as good as the first.

Experimentation is the most reliable path to making pizza your own. Use the guidelines here as a map rather than a bible: try one style at a time, take notes, and tweak hydration or bake time to match your oven. Above all, enjoy the process — pizza is forgiving, sociable, and endlessly adaptable. With a few practice pies and a willingness to adjust, you’ll find the versions that become your household classics, ready to share with friends and family.

Weeknight Magic: Easy One-Pot Dinner Recipes That Actually Save Time

Weeknight Magic: Easy One-Pot Dinner Recipes That Actually Save Time

There are evenings when the last thing anyone wants is a sink full of dishes or a recipe that requires a dozen steps. This collection of Easy One-Pot Dinner Recipes is written for those nights when you still want a satisfying meal, but without the culinary marathon. One pot meals let ingredients mingle, flavors concentrate, and cleanup shrink to almost nothing, which is a relief after a long day. I cooked and refined many of these dishes in a small apartment kitchen, where counter space was precious and patience even more so, and they held up under real-life weeknight pressure. Read on for practical techniques, five reliable recipes, storage tips, and small tricks that make these meals genuinely doable and delicious.

Why one-pot dinners deserve a place in your rotation

One-pot cooking simplifies both the process and the mindset around dinner, turning a complicated chore into a focused, creative act. When ingredients go into the same vessel, you skip the juggling of pans and the repeated heating and cooling that dulls flavor; instead, you coax depth from a single workflow. This approach is particularly good for busy households where time and attention are limited, because the task becomes about layering flavors rather than stage-managing multiple components. Nutritionally, one-pot meals encourage balanced meals naturally, since you can add grains, proteins, and vegetables together and control portions without extra effort. Over time, you also build confidence — those small wins make cooking feel accessible rather than intimidating.

Another practical advantage is versatility: a basic method adapts to what you have on hand, so food waste drops and creativity increases. I often start with a protein and a grain and then pivot based on the vegetables in the crisper drawer, which yields surprising, pleasant combinations. For people who meal plan, these meals scale well and reheat superbly, keeping texture and taste intact with minimal fuss. If you aim for fewer pots and less mess while maintaining satisfying weeknight dinners, one-pot techniques become an indispensable tool in your culinary kit. They are not a compromise, but a smarter way to feed yourself and the people you care about.

Essential tools and pantry staples for success

You do not need a kitchen full of gadgets to make great single-pot meals, but a few reliable items make a big difference. A heavy-bottomed Dutch oven or a deep skillet with a tight-fitting lid will cover most bases, because it holds heat evenly and tolerates both stovetop and oven. A wooden spoon, a heatproof spatula, and a good sharp knife speed up prep and reduce frustration; invest in those and you will notice the workflow improve. A splatter screen or lid with a strainer feature also helps when you want to reduce mess while simmering sauces or frying aromatics.

On the pantry side, keeping these staples on hand will let you improvise when the clock is ticking: long-grain rice, orzo or pasta, canned tomatoes, a few dried beans or lentils, shelf-stable broths, and a collection of dried herbs and spices. Extra-virgin olive oil, soy sauce, and a jar of stock concentrate or bouillon are flavor anchors that rescue many a last-minute decision. Having frozen vegetables and a couple of ready proteins like chicken thighs or a pack of frozen shrimp removes the need for a grocery run and makes it easy to assemble a meal that feels intentional. These items are small investments that pay off every week.

Flavor-building techniques that transform simple into memorable

The secret to one-pot richness lies in technique rather than complexity. Start by browning proteins and toasting aromatics; caramelization creates savory notes you cannot fake with shortcuts. Deglazing the pan with wine, broth, or even a splash of vinegar lifts browned bits off the bottom and folds them into the sauce, which amplifies depth. Layering is key: add ingredients in a sequence that respects cook time, so vegetables retain texture and grains absorb flavor evenly. Adjust seasoning at the end after reduction so you can calibrate salt and acid without overshooting.

Finish with fresh elements to brighten the dish — lemon zest, fresh herbs, a drizzle of good oil, or a scatter of cheese can make the outcome feel polished. Acid balances richness and makes flavors pop, so don’t skip a bright component. Texture matters too, so include something crunchy or herbaceous if the main body of the dish is soft; toasted seeds, chopped parsley, or a crisp green salad on the side accomplish that without extra pots. Over time you will learn which small tweaks elevate a simple pot supper into something that draws compliments.

Five reliable recipes to keep in your weeknight arsenal

1. Chicken, Rice, and Lemon Herb Skillet

This classic one-pot chicken and rice cooks through in a single vessel and yields a comforting, fragrant meal with minimal hands-on time. Brown bone-in chicken pieces in a heavy skillet until the skin has a golden crust, then remove and sauté onion and garlic in the same pan to capture those flavorful browned bits. Add long-grain rice and briefly toast it, pour in warm chicken broth and lemon juice, return the chicken to the pan, and simmer until the rice is tender and the chicken is cooked through. Finish with chopped parsley, a little grated lemon zest, and a scatter of toasted almonds for contrast. This method is forgiving, so it adapts well to boneless breasts, thighs, or even turkey pieces when you need a pantry-friendly substitution.

I learned this version while cooking for a partner who preferred simple flavors but disliked leftovers with lifeless texture, so I kept the sauce slightly loose and brightened it with lemon to keep each bite lively. Leftovers reheat well in a covered dish with a splash of broth to bring the rice back to life. If you want to stretch the meal, stir in frozen peas or baby spinach at the end and let residual heat wilt them gently. The result is a family-friendly, one-pot comfort dish that looks more sophisticated than the effort invested.

2. Creamy One-Pot Pasta Primavera

Pasta that cooks in a single pot with vegetables and a light cream sauce is a fast, satisfying option for nights when everyone in the house wants something slightly different. Begin by sautéing shallot or onion in olive oil, then add a mix of seasonal vegetables — bell pepper, zucchini, asparagus tips — and a pinch of red pepper flakes for warmth. Pour in broth and an amount of pasta that will absorb the liquid as it cooks, stirring periodically to prevent sticking. When the pasta nears al dente, stir in a splash of cream or crème fraîche, a handful of grated Parmesan, and finish with lemon to cut through the richness.

I often double up vegetables in this dish to make the meal more colorful and to reduce the need for a side salad. Using short pasta shapes like penne or fusilli allows sauce to cling, and the single-pot approach yields a slightly starchy sauce that feels indulgent without heavy cream. For a lighter variation, use a mix of Greek yogurt and a little pasta water instead of cream; add yogurt off the heat to prevent curdling. This recipe works wonderfully with leftover roasted vegetables or a tin of artichoke hearts for extra depth.

3. Rustic Lentil and Vegetable Stew

Lentils are a one-pot hero: they cook relatively quickly, hold shape, and provide robust texture and protein for vegetarian dinners. Start by frying carrots, celery, and onion until softened, then add garlic, cumin, and smoked paprika to build a warm spice profile. Add rinsed lentils, diced tomatoes, and vegetable broth, then simmer gently until the lentils are tender but not mushy. Finish with a splash of vinegar or lemon to brighten the stew and a handful of chopped herbs like parsley or cilantro for freshness.

This stew is forgiving and portable; I have served it over rice, polenta, or with toasted bread on the side depending on what’s in the pantry. If you want more heft, stir in a can of chickpeas or some chopped kale to increase both volume and nutrition. Leftovers develop flavor overnight, making the next-day lunch even better than the first-night dinner. It’s a dependable, cozy recipe that delivers a lot of satisfaction for relatively little effort.

4. Shrimp, Tomato, and Orzo Skillet

Seafood cooks quickly, which makes shrimp a smart choice for fast one-pot dinners that still feel special. Sauté garlic and shallot until fragrant, add crushed tomatoes and a pinch of red pepper for warmth, then stir in orzo and enough broth to cook it through. After the orzo has absorbed most of the liquid and is nearly tender, nestle shrimp into the sauce and cook for a few minutes until they turn pink and firm. Finish with a flourish of basil, a drizzle of olive oil, and a little lemon to balance the tomato’s acidity.

I first made this dish for guests on a humid summer night when I wanted something bright but effortless; it disappeared from the table fast. Using orzo keeps the comfort factor high while the tomato-shrimp combination reads like a quick coastal supper. If shrimp is expensive or you prefer a plant-based switch, replace it with cannellini beans and a handful of chopped spinach for the last few minutes. This recipe proves one-pot can be both fast and restaurant-worthy.

5. Skillet Beef, Potatoes, and Spinach

This all-in-one skillet combines browned ground beef or diced sirloin with small potatoes, onions, and a handful of greens for a hearty, stovetop roast feel. Sear the meat to develop color, set it aside, then sauté potatoes and onion in the rendered fat until edges turn crisp. Return the meat to the pan, add broth and herbs, then cover and simmer until the potatoes are tender. Stir in baby spinach or chard at the end to wilt it gently and finish with a spoonful of mustard or a few drops of Worcestershire sauce for complexity.

It’s a practical, satisfying meal for cooler nights when you want something robust without an oven involved. I’ve used this recipe after long hiking days when the group needed calories fast and no one wanted to fuss with sides. For variety, swap the beef for smoked sausage, turkey, or mushrooms to change the flavor profile while keeping the method identical. Serve with a simple green salad if you want something crisp to offset the hearty skillet.

Quick reference table: cooking times and substitutions

A small table can save time when deciding which recipe to make and how to swap ingredients without losing the essence of the dish. Below is a compact reference that I use when planning weeknight meals to estimate total cooking time and appropriate protein swaps. Keep a printed copy near your recipe stash for fast decisions on busy evenings.

Dish Approx. Cook Time Easy Swaps
Chicken, Rice, and Lemon 35-45 minutes Chicken thighs for breasts; couscous for quick grains
One-Pot Pasta Primavera 20-30 minutes Gluten-free pasta; yogurt instead of cream
Lentil Stew 30-40 minutes Split peas or chickpeas; add barley for chew
Shrimp and Orzo 15-20 minutes White beans for plant-based option; quinoa for GF
Beef, Potatoes, Spinach 30-35 minutes Sausage or mushrooms; sweet potatoes for variety

Meal planning, leftovers, and storage

Easy One-Pot Dinner Recipes. Meal planning, leftovers, and storage

One-pot meals are naturally suited to batch cooking and planned leftovers because they hold up well in the refrigerator and often taste better the next day. Cool food quickly, portion into shallow containers, and refrigerate within two hours to maintain quality and safety. Most of these dishes will keep for three to four days chilled; lentil and tomato-based meals sometimes last a day longer thanks to their acidity and fiber content. For longer storage, freeze portions in airtight containers for up to three months, thawing gently in the fridge overnight before reheating.

Reheating is straightforward: warm gently on low with a splash of water or broth to restore moisture, or heat in the oven at moderate temperature if you prefer even warming. Avoid overheating shellfish or delicate greens during reheating; add them fresh or reintroduce briefly at the end of reheating to preserve texture. I often pack one-pot leftovers for work lunches because they travel and reheat well, and the single-container habit makes commuting easier. This practicality is one reason these dishes become staples for people balancing many demands.

Small habits for truly easy cleanup

The phrase easy cleanup is accurate only if you build tiny habits around cooking and put them into practice, so the final washup feels quick rather than punitive. Wipe as you go: clean chopping boards and collapse used bowls into the sink while something simmers, return measuring cups to their place immediately, and soak the pan if something’s stuck while you tend to a salad. Use a lid to limit splatter, and line toaster or oven racks with foil when broiling components to cut back on scrubbing. A good dish brush and a squirt bottle with hot, soapy water make the initial scrub less annoying and shorten the time needed at the sink.

Another tip is to serve directly from the pot when appropriate, which reduces the number of serving dishes that need washing and creates a casual, family-style atmosphere. I adopted this habit early on when hosting small dinners in a tiny kitchen and found it not only cut cleanup time but also made the meal feel warmer and less formal. Paper towels or compostable napkins reduce dishwashing further when acceptable, though I reserve them for casual weeknight meals. With these habits, the promise of one-pot cooking — delicious food with minimal mess — becomes entirely achievable.

Final thoughts and starting points for experimentation

One-pot cooking is less about strict recipes and more about a flexible method that respects time, ingredients, and appetite. Start with the five recipes above and then test substitutions based on what you like and what is available; the technique stays the same even when flavors shift. Keep pantry staples accessible and practice a couple of flavor-building moves like browning and deglazing, and you will be surprised how quickly your confidence grows. These meals are designed to be practical, adaptable, and rewarding each time you make them.

Cooking with fewer pots changes the dynamic in the kitchen: it reduces cleanup, encourages improvisation, and makes weeknight dinners feel manageable again. When you need a satisfying meal without the fuss, reach for these methods and adapt as you go. Over time, you will assemble a personal rotation of trusted one-pot dinners that reflect your tastes, schedule, and the small kitchen hacks you’ve picked up along the way. Enjoy the process, and let the pot do most of the work.

Ultimate Guide to Vegan Baking: Mastering Plant-Based Desserts at Home

Ultimate Guide to Vegan Baking: Mastering Plant-Based Desserts at Home

This guide is written for anyone who wants to make bakery-worthy sweets without animal products, from curious beginners to experienced bakers exploring dairy-free desserts. I will walk you through the essentials — ingredients, techniques, equipment, and troubleshooting — so that each loaf, cake or cookie comes out with the texture and flavor you expect. Along the way you’ll learn practical swaps and small adjustments that transform ordinary recipes into reliable plant-based baking successes. Expect clear explanations, a few personal tips from my kitchen experiments, and a compact substitution table to keep on hand. By the time you finish reading, you should feel confident adapting most traditional recipes to a vegan format and making them your own.
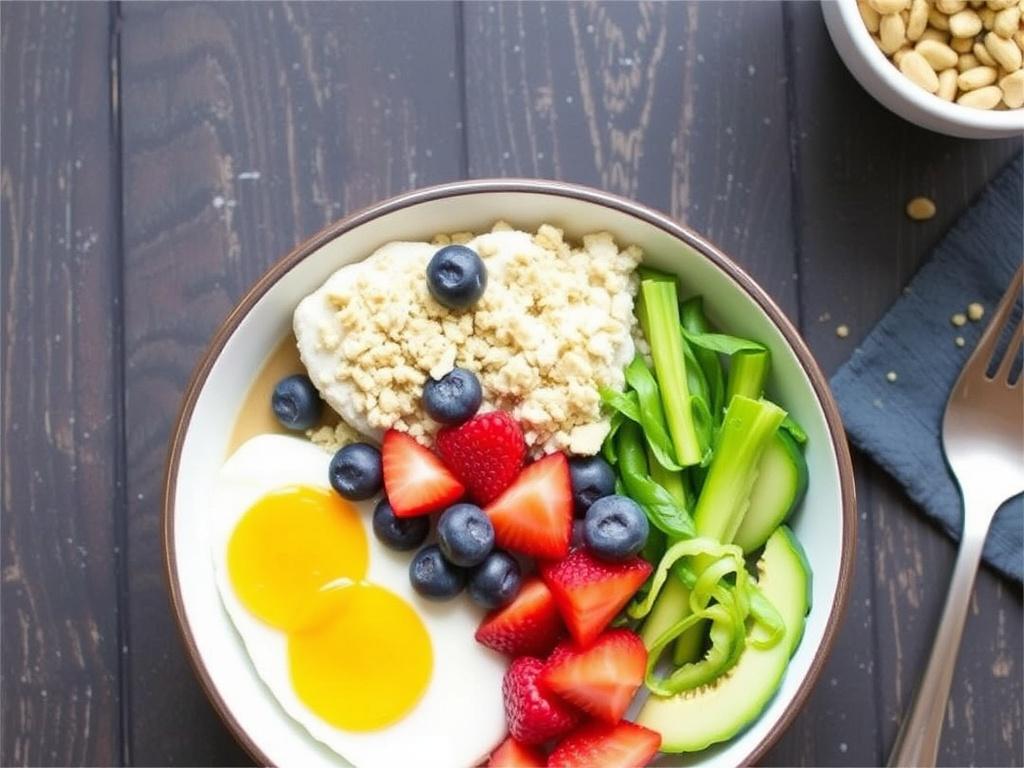
Why plant-based baking is more than a trend

Switching to plant-based baking is often framed as a lifestyle choice, but it also opens creative possibilities: different flours, oils and natural binders create textures and flavors that are simply not possible with butter and whole eggs. Many people discover new favorites — olive oil cakes with a fruity, tender crumb, or aquafaba-made meringues that surprise even the most skeptical guests. Health, ethics and allergies are common motivations, yet the practical upside for home bakers is consistency: vegan components like shelf-stable oils and plant milks behave predictably, reducing last-minute scrambling for forgotten butter. Over the years I’ve seen home recipes improve when bakers focus on technique and ingredient function rather than trying to mimic animal-based items exactly. That shift in mindset is the real power of plant-based baking.

Another practical reason to learn dairy-free desserts is versatility. A reliable egg replacement or buttery alternative means you can keep baking when you run out of dairy, host guests with allergies, or prepare treats ahead of time for events. Commercial vegan ingredients have improved dramatically — non-dairy spreads, aquafaba powders and neutral vegetable shortenings are more available and of higher quality than a decade ago. This market maturity makes it easier to reproduce textures from traditional baking without sacrificing taste. The knowledge you gain here will also help you scale recipes up or down, improvise in a poorly stocked pantry, and approach dessert-making with curiosity rather than caution.

Essential pantry ingredients for vegan bakers

A well-stocked pantry is the backbone of consistent baking. Start with neutral oils (rapeseed or light olive oil), a sturdy vegetable shortening or vegan butter for flaky pastries, and at least two kinds of flour: all-purpose and a higher-protein option like bread or whole wheat for structure. Stock multiple sweeteners — granulated sugar for creaming, brown sugar for moistness and molasses notes, and a liquid sweetener such as maple or agave for glazes and dressings. Leaveners (baking powder and baking soda), a neutral plant milk, and binders like flax or chia seeds are small items that make a huge difference in final texture. Finally, keep vanilla extract, citrus zest, cocoa powder and a few spices on hand to elevate simple batters into memorable desserts.

Below is a compact substitution table I keep near my counter; it’s useful when converting recipes or improvising.

Ingredient Vegan Substitute Best Use
Egg (1 whole) Flax egg (1 tbsp ground flax + 3 tbsp water) or 3 tbsp aquafaba Muffins, quick breads, pancakes
Milk (1 cup) Almond, soy, oat or oat milk (unsweetened) Cakes, batters, custards
Butter (1/2 cup) Vegan butter or coconut oil (solid) Cookies, pie crust, laminating dough
Heavy cream (1 cup) Coconut cream or blended silken tofu Frostings, ganaches, custards
Gelatin Agar-agar Jellies, cheesecakes

How egg replacers actually work

Eggs play several roles in recipes: binders, leavening agents, emulsifiers and sources of moisture. Picking the right replacer starts with identifying the egg’s purpose in the original recipe. For binding and moisture, flax or chia eggs (ground seed + water) are inexpensive and easy to make, forming a gel that helps hold crumbs together. Aquafaba — the liquid from cooked chickpeas — is exceptional when you need aeration or meringue-like properties because it traps air much like egg whites. In recipes that rely on eggs for structure, such as sponge cakes, a combination of aquafaba and additional leavening often produces the best result.

Commercial egg replacers based on starches or potato protein can be useful in gluten-free or highly structured applications. Another handy trick is to use mashed fruit or vegetables — applesauce, mashed banana, or pumpkin — which add moisture and a little binding, while contributing flavor. Be mindful that fruit-based replacements alter taste and color, so they’re best in recipes that complement those notes. In my kitchen I alternate methods depending on mood: flax eggs for simplicity, aquafaba when I need a glossy meringue, and silken tofu for dense, rich cheesecakes.

Fats and dairy-free butters: balancing flavor and texture

Fats influence mouthfeel, crumb structure and shelf life; the choice between oil and solid fat is crucial. Oils like canola and refined sunflower produce tender cakes and moist brownies because they remain liquid at room temperature, while solid fats such as vegan butter or coconut oil contribute layered flakiness in pastries and crispness in cookies. Many vegan butters are formulated to behave similarly to dairy butter in creaming methods and flavor; try a few brands to find one you prefer. When making laminated doughs or puff pastry, use a solid vegan butter with a high fat content to achieve lift and layers.

For fillings and frostings, coconut cream and blended cashews make excellent dairy-free alternatives with silky textures. Coconut imparts a distinct flavor unless you use refined coconut cream; cashew cream is neutral and adapts to sweet or savory applications. A personal tip: when swapping butter for oil in pound-cake-style recipes, reduce liquid slightly because oil contributes more moisture. In the early days of my experiments I learned that small adjustments like this prevent soggy bases and encourage even baking.

Sugars and natural sweeteners: performance in the oven

Not all sweeteners behave the same in heat. Granulated sugar contributes to structure through creaming with fat, which incorporates air and helps cakes rise. Brown sugar brings moisture and a deeper caramel note due to molasses, which is excellent for cookies and spiced breads. Liquid sweeteners like maple syrup and agave hydrate batters and can accelerate browning; when using them, lower other liquids and slightly reduce oven temperature to prevent over-browning. Date paste and puréed fruit are wholesome options that add fiber and flavor, but they also darken the crumb and can weigh down delicate batters.

Some substitutes, such as erythritol or non-caloric sweeteners, can alter texture and cooling properties, causing graininess or a dry finish. For most home bakers aiming for familiar textures, mixing natural and granulated sugars or using coconut sugar in small proportions provides a balance between flavor and performance. I often use a blend: cane sugar for structure, a touch of maple for complexity, and brown sugar when I want a moist, chewy crumb. Tasting and adjusting are part of the craft — sweetness levels and aroma can be tuned to match your palate.

Flours, structure and gluten considerations

Ultimate Guide to Vegan Baking. Flours, structure and gluten considerations

Flour choice determines crumb openness, chew, and strength. All-purpose flour is the workhorse for many vegan recipes, delivering predictable results. Higher-protein flours like bread flour add chew and structure, useful in yeast breads and dense cakes, while low-protein cake flour or a mix with cornstarch yields a delicate crumb for layered cakes. Whole-grain flours contribute nuttiness and moisture but absorb more liquid, so increase hydration accordingly. Combining flours — for instance, mixing whole wheat with all-purpose — can give you complexity without sacrificing tenderness.

For gluten-free baking, a reliable blend matters more than any single flour. A typical GF mix includes rice flour, tapioca starch and potato starch with a binder such as xanthan gum to mimic gluten’s elastic properties. These mixes often require different hydration and longer resting times to hydrate starches fully. I recommend testing small batches when switching to unfamiliar flours: note how much liquid the batter or dough accepts and whether additional binder improves texture. Over time you’ll build intuition about how each flour behaves in plant-based recipes.

Leavening, steam and air: producing lift in vegan cakes

Getting lift in vegan baking is not mysterious; it’s chemistry. Baking powder and soda are your primary leaveners, but their effectiveness depends on acidity, mixing method and oven temperature. Acidic ingredients like vinegar, buttermilk alternatives (plant milk + vinegar), or cocoa combined with baking soda provide quick reactions that help batters rise. Mechanical aeration — creaming fat and sugar or whipping aquafaba — introduces air bubbles that expand during baking. For light, sponge-like textures, gentle folding and minimal overmixing preserve those bubbles until they set.

Steam is also a powerful leavening ally in items like popovers, certain breads and choux. Ensuring a hot oven at the start and avoiding opening the door early lets steam inflate the structure. For recipes where eggs traditionally trap air, replace them with a combination approach: a chemical rise from leaveners plus a whipped component, often aquafaba, to simulate the aeration. One practical trick I use with cupcakes is to preheat pans briefly; a well-warmed tin helps batter jump and reduces surface cracking.

Technique adjustments when adapting recipes

Adapting a conventional recipe to be vegan requires more than swaps; it needs small technique changes too. When replacing butter with oil in creamed cakes, skip the long creaming step because oil does not hold air the same way; instead, whisk eggs or aquafaba for aeration, then gently fold in dry ingredients. When using plant milks, mix them with an acid and let them sit for a minute to create a buttermilk substitute that reacts with baking soda. If a recipe depends on cold butter for flakiness, choose a solid vegan butter and keep everything chilled to preserve layers.

Timing matters: vegan batters sometimes set faster or slower depending on moisture and fat type. Keep an eye on bake times and use textual cues rather than relying solely on the clock. For example, a vegan loaf might still be moist but fully cooked; check with a skewer and consider residual heat when removing from the oven. Over time, these adjustments become second nature — I often tweak oven temperature by 10–15°F and shave a few minutes off times for cakes made with oil instead of butter.

Troubleshooting common problems and quick fixes

Even with care, issues happen. Dense cakes are often a result of overmixing, insufficient leavening, or using too heavy a flour. The fix can be as simple as folding less and ensuring baking powder is fresh; if the recipe is heavy on whole grains, add a little extra liquid or an additional leavener. Cookies that spread too much usually have too warm a fat or too little flour; chilling the dough or adding a tablespoon of extra flour often corrects the spread. For dry, crumbly muffins, increase the wet ingredients or reduce flour by small increments to restore moistness.

Below are some quick troubleshooting tips presented as straightforward remedies that I use frequently:

  • Problem: Cake sinks in the middle. Remedy: Lower oven temperature slightly and avoid opening the door during initial set; check leavening amounts.
  • Problem: Frosting splits or becomes grainy. Remedy: Use a neutral, room-temperature non-dairy milk; reblend with a tiny splash and whisk until smooth.
  • Problem: Meringue weeps or collapses. Remedy: Use chilled aquafaba whipped with a small acid (cream of tartar), and avoid high humidity during drying.

Simple recipes and inspiration to get started

Start with forgiving recipes that welcome experimentation: banana bread, brownies, simple cookies and quick muffins are ideal because they tolerate swaps and highlight technique rather than precision. A basic banana bread using oil or vegan butter, flax eggs, and a mix of all-purpose and whole-wheat flour is a great first project — it teaches hydration, binding and flavor balance. Brownies made with olive or coconut oil and melted dark chocolate produce rich, fudgy results without dairy, and they’re an excellent vehicle for add-ins like nuts or espresso.

For a more advanced but rewarding project, try choux pastry with aquafaba-based pastry cream or a vegan laminated dough for croissants using high-fat vegan butter. In my experience, the first croissants took patience, but once I dialed in butter consistency and folding technique, the layers were memorable. Keep a baking journal: note substitution ratios, oven quirks and timing so you can reproduce successes and learn from missteps. This record becomes a personalized recipe bank over time.

Storage, freezing and finishing touches

Proper storage extends the life of dairy-free desserts and often improves flavor. Many vegan cakes and quick breads stay moist longer because plant oils do not solidify at refrigerator temperatures the way dairy fats do; store cakes at room temperature in an airtight container for 2–3 days, or freeze slices individually wrapped for up to three months. For frostings made with coconut cream or nut bases, refrigeration is necessary to maintain stability; bring them to room temperature before serving to restore spreadability. Labeling frozen items with date and contents saves time and reduces waste.

Small finishing touches elevate presentation and flavor: a sprinkle of flaky sea salt balances sweetness on brownies, toasted nuts add contrast to muffins, and a light dusting of powdered sugar or cocoa powder makes a plain loaf look deliberate. Glazes made from powdered sugar and citrus juice drizzle beautifully and keep well for transport. When freezing filled pastries, flash-freeze on a tray before bagging to prevent sticking and maintain shape.

Tools and investments that pay off

You don’t need a professional kitchen to bake well, but a few tools make plant-based baking easier and more consistent. A reliable digital scale is the single best investment; weighing ingredients removes ambiguity and improves repeatability. An oven thermometer is indispensable because many ovens deviate from their set temperature, and vegan batters can be sensitive to heat. A stand mixer or a sturdy hand mixer speeds up whipping tasks like aquafaba meringues and creaming, while silicone spatulas and folding tools help incorporate air without overmixing.

Other useful items include a good set of measuring spoons, a bench scraper for handling dough, and quality nonstick bakeware or a well-seasoned sheet pan. For those who bake bread or laminated doughs frequently, consider a plastic bench scraper and a dough scraper set; they make shaping neater and faster. I still use the same wooden spoon I bought years ago for initial mixing — some things never need replacing — but accurate measuring and reliable bakeware truly change outcomes.

Plant-based baking rewards curiosity more than conformity. Start small, keep notes, and gradually try bolder substitutions and new techniques; the learning curve is forgiving and often delicious. Taste as you go, adjust for texture and moisture, and don’t be afraid to make the recipe yours by experimenting with spices, extracts and add-ins. Over time you’ll compile a set of go-to formulas that deliver the results you want, whether you’re making quick dairy-free desserts for family weeknights or crafting showstopping cakes for guests.

Baking is a hands-on craft that benefits from repetition and reflection. With the fundamentals outlined here — smart ingredient choices, purposeful technique modifications and a few well-chosen tools — you can approach any traditional recipe and adapt it with confidence. Keep a sense of play: some experiments will surprise you, others will teach you something practical about structure or flavor. Most importantly, enjoy the process; the best desserts are those shared with people who appreciate the effort and care behind them.

10-Minute Healthy Breakfast Bowls: Simple, Nourishing Starts for Busy Mornings

10-Minute Healthy Breakfast Bowls: Simple, Nourishing Starts for Busy Mornings

There are mornings when the idea of breakfast feels like a chore, and then there are mornings when a bowl can change everything. This guide presents practical, tasty ideas for 10-Minute Healthy Breakfast Bowls that fit into real life: short on time, high on flavor and nutrition. I’ll walk through pantry essentials, building blocks, flavor tricks, and easy strategies so you can assemble a satisfying bowl without fuss. Along the way you’ll find a handful of ready-to-go recipes and swaps for dietary needs, plus tips that make these bowls genuinely convenient. Read on and pick a few favorites you’ll return to again and again.

Why bowls work for busy mornings — and why ten minutes is enough

Bowls compress texture, flavor and nutrition into a compact, pleasing package; that’s part of their strength. A balanced bowl combines a base, a protein, healthy fats and bright toppings, which together create satiety and steady energy for the morning. Ten minutes is plenty when you choose components that don’t fight for attention: quick-cooking grains, ready-made yogurts, canned beans, or pre-washed fruit take the stress out of assembly. The ritual of layering also helps you eat more mindfully, even on rushed days, because the finished bowl looks inviting and signals readiness to the brain. In short, a little planning and smart staples turn a hurried breakfast into a reliable healthy breakfast habit.

Designing these bowls around what you already grab in the kitchen makes speed realistic. If your pantry contains a few versatile items, there’s always a bowl to build: oats that become overnight or quick-cooked, yogurt that mellows tart fruit, seeds and nuts that provide crunch. Variety comes from simple swaps rather than complex technique, so you can keep mornings relaxed and flavorful. For families, bowls are also modular — each person can top the same base differently, which reduces stress and food waste. Once you get comfortable with the template, assembling quick breakfast bowls becomes almost automatic.

Pantry essentials and fresh pick-me-ups

A small, well-chosen pantry removes decision fatigue and speeds up preparation. Stock quick grains like rolled oats and quinoa, protein-rich staples such as canned beans and nut butters, and seeds for texture and nutrition. Also keep a selection of dried and fresh fruit, jars of honey or maple syrup, and a few spices — cinnamon, cardamom, and smoked paprika — to change the mood of a bowl fast. Having a dependable base of refrigerated items matters too: plain yogurt, kefir or plant-based alternatives, and a dozen eggs will expand your options considerably.

Below is a concise list of go-to items that turn a sparse kitchen into a breakfast-ready one. These are not extravagant ingredients; they’re the kind that sit quietly until morning and then perform brilliantly.

  • Rolled oats, quick-cook oats, and quinoa
  • Plain yogurt (dairy or plant-based), cottage cheese, kefir
  • Chia seeds, flaxseed meal, hemp seeds, mixed nuts
  • Nut butters: peanut, almond, or sunflower
  • Fresh fruit: bananas, apples, berries; frozen fruit for smoothies
  • Canned chickpeas or white beans for savory bowls
  • Maple syrup, honey, tahini, soy sauce

Equipment that speeds things up

You don’t need a long list of gadgets to make a bowl in ten minutes, but a few tools are helpful. A small pot and sieve, a blender for smoothies and quick purées, and a set of measuring spoons will save time and keep results consistent. Mason jars or portable containers matter if you plan to pack bowls for work or school — they keep layered ingredients intact and make transport easier. A good sharp knife and a sturdy cutting board shorten prep time for fresh fruit and vegetables. The most useful investment is a reliable blender; it doubles for quick smoothie bowls, dressings, and soaking oats into a creamy texture.

Organization counts as equipment, in a way: clear containers for prepped toppings, labeled jars for grains, and a designated breakfast shelf reduce decision-making. When ingredients are visible and accessible, you’ll be surprised how much faster you move through the morning. Small tweaks like this turn a chaotic start into a simple routine.

The building blocks: bases, proteins, fats and toppings

Every bowl follows the same basic recipe in spirit: start with a base, add a protein source, include healthy fats, and finish with texture and flavor. The beauty is in swapping within those categories to suit time constraints and taste. For an instant energy lift, choose a carbohydrate-focused base like oats or a blended fruit layer. To prolong fullness, prioritize proteins — Greek yogurt, cottage cheese, eggs, or a scoop of protein powder work well. Fats from nuts, seeds, and avocado stabilize blood sugar and enhance flavor.

Keep a mental checklist for the morning: base, protein, fat, two toppings, and a finishing touch such as a spice or a drizzle. That checklist makes a quick breakfast into a balanced one without counting calories or consulting a recipe. As you build more bowls, you’ll recognize combinations that feel satisfying and which you can repeat on autopilot during the busiest weeks.

Bases in detail: yogurt, oats, chia and smoothie options

Yogurt is one of the quickest paths to a creamy, protein-forward bowl. Choose plain Greek or strained yogurt for higher protein and a tang that balances sweet toppings. Rolled oats give you flexibility: cook them briefly, soak overnight for a soft texture, or use quick oats with hot milk for a five-minute option. Chia pudding requires a short soak when you’re in a hurry with hot liquids and a whisk, but it’s also perfect for advance prep. Smoothie bases — blended frozen fruit with a handful of greens — make a refreshing base that’s ready in a blender and holds toppings surprisingly well if you thicken with banana, nut butter or yogurt.

When speed matters, consider precooking or partial preparation: cook a batch of quinoa for several bowls in just 20 minutes the night before, or portion out overnight oats. A frozen banana becomes the backbone of a smoothie bowl and fills in for dairy if you prefer a plant-based option. The goal for the base is texture and a neutral enough backdrop to accept proteins and toppings without competing for attention.

Protein and fat boosters that stay simple

Protein keeps you full and supports muscle recovery after activity. Quick protein sources include Greek yogurt, cottage cheese, canned beans for savory bowls, and pasteurized eggs cooked to your taste. Nut butters are practical because they offer both protein and fats and can be swirled into both sweet and savory bowls. For plant-based protein boosts, consider hemp seeds, a scoop of plant protein powder, or a spoonful of toasted chickpeas for crunch.

Fats add satiety and mouthfeel. Avocado, tahini and nuts deliver richness and pair with a wide range of flavors. Toasted seeds — pumpkin and sunflower — add a toasty note as well as crunch. Use fats in modest portions: a tablespoon or two is often enough to make a bowl feel luxurious and filling. These small additions make a quick breakfast into a balanced, nutrient-dense meal that keeps you moving through the morning.

Flavor hacks and finishing touches

A bowl transforms from bland to memorable with a couple of thoughtful finishing touches. Citrus zest, a pinch of flaky sea salt, or a dash of toasted spices often make the difference between pleasant and crave-worthy. A spoonful of jam, a drizzle of maple or soy, and a sprinkle of granola or toasted coconut deliver a satisfying final layer. Small amounts pack big flavor, so you don’t need to complicate preparation to get excellent results.

Herbs and spices deserve experimentation: cinnamon and nutmeg frame sweet bowls, while za’atar or smoked paprika brighten savory bowls. Acid is underrated; lemon or apple cider vinegar cut through richness and sharpen flavors. When you vary these elements, the same set of base ingredients becomes a fresh breakfast repeatedly. Keep a small jar of one or two favorite finishing touches to speed decisions on hectic mornings.

Five adaptable bowls you can make in about ten minutes

Below are five reliable bowls that showcase the templates above: one dairy-forward, one grain-based, a smoothie bowl, a savory option, and a light chia parfait. Each is built from pantry-friendly components and can be assembled in ten minutes or less with minimal cooking. I present them as flexible blueprints — feel free to swap toppings and adjust quantities to match appetite and schedule. These bowls cover different moods and dietary preferences while remaining quick and approachable.

Use the list to pick a mood — creamy, crunchy, green, savory, or bright — and then follow the simple build notes. If you’re packing a bowl for later, keep wet and dry items separate until serving to preserve texture. The recipes below emphasize ease, so they work well on weekdays as part of a consistent quick breakfast routine.

Bowl Prep Time Best For Key Components
Berry-Quinoa Yogurt 8–10 min Protein-rich mornings Quinoa, Greek yogurt, mixed berries, almonds
Peanut-Banana Oat 5–8 min On-the-go breakfasts Quick oats, milk, peanut butter, banana, chia
Green Smoothie Bowl 6–9 min Hot-weather green boost Frozen banana, spinach, yogurt, seeds, granola
Savory Avocado-Egg Grain 9–10 min Hearty savory option Cooked grains, avocado, soft-boiled egg, chili oil
Chia-Citrus Parfait 5–10 min Light, refreshing choice Chia seeds, orange segments, yogurt, toasted nuts

Berry-Quinoa Yogurt — bright and protein-packed

Cooked quinoa warms quickly in a small pan or microwave; scoop it into a bowl and let it cool slightly before adding Greek yogurt. Stir in a teaspoon of honey or maple and a pinch of cinnamon to tie the flavors together, then mound on mixed berries and chopped almonds for texture. The quinoa brings a slightly nutty chew that pairs beautifully with tart berries and creamy yogurt. If you have leftover quinoa from dinner, this one can be assembled in under five minutes, and it travels well if packed into a jar.

Peanut-Banana Oat — the classic that actually satisfies

Combine quick oats and milk in a microwave-safe bowl, heat for about a minute, and stir in a tablespoon of peanut butter and sliced banana. Add chia seeds for thickness and a sprinkle of flaky salt to enhance the peanut flavor. For a cold version, mash banana with peanut butter and fold into overnight oats. This bowl is especially forgiving: nut butter and banana make it feel indulgent while delivering protein and healthy fat that sustain energy until lunch. It’s my go-to when a quick breakfast is needed before a morning run.

Green Smoothie Bowl — refreshing without drama

Blend a frozen banana with a handful of spinach, a scoop of yogurt, and a little milk until thick and spoonable rather than pourable. Pour into a bowl and decorate with sliced fruit, toasted coconut, and a scattering of seeds for crunch. Thickening with frozen fruit or an extra spoonful of nut butter keeps the topping from sinking, which preserves texture. This is the bowl I choose when I want vegetables first thing and a bowl that feels like a treat rather than a chore.

Savory Avocado-Egg Grain Bowl — salt, comfort and staying power

Start with warm cooked grain — often quinoa or farro — and top with sliced avocado and a soft-boiled or poached egg. Finish with a spoonful of spicy oil, a squeeze of lemon, and a sprinkle of sesame seeds or furikake for umami. Canned white beans can replace the egg for a vegan option, and quick-pickled onions add brightness if you have a jar ready. This bowl works well when lunch can’t be guaranteed because it keeps you full and focused.

Chia-Citrus Parfait — light, bright and easy to prep

Mix chia seeds with a ratio of about three parts liquid to one part seeds, stir in a little sweetener, and allow it to thicken for a few minutes while you segment citrus. Layer the chia pudding with yogurt and orange or grapefruit segments, then top with pistachios for contrast. If you make the chia mix the night before, assembly in the morning is immediate and the result feels fresh and sophisticated. The citrus cuts through the creaminess and makes this bowl feel precisely right for a warm day.

Make-ahead moves and packing tips

Minute Healthy Breakfast Bowls. Make-ahead moves and packing tips

Some mornings beg for full advance prep, and other days only allow for five minutes of assembly. For the most consistent quick breakfast routine, batch-cook grains and portion them into jars for three or four days. Toast seeds and nuts in a single session and store them in an airtight container to preserve crunch. Pre-portion fresh fruit and keep a small container of chopped toppings in the fridge so you can just grab a jar and go. These small rituals compress morning work into evening prep with big returns in the morning.

Packing is straightforward when you separate wetter from crunchier elements: put yogurt or base on the bottom, keep granola or toasted nuts in a small bag or separate compartment, and add citrus just before eating. Mason jars with screw lids work brilliantly for layered bowls that travel. For smoothie bowls, consider a thermos that keeps the center cool and the toppings crisp. A few minutes spent packing thoughtfully turns a portable bowl into a desirable meal rather than a soggy obligation.

Dietary swaps and troubleshooting common issues

Adapting bowls to dietary preferences is mostly a matter of ingredient exchange rather than recipe reinvention. Swap dairy yogurt for a high-protein plant-based yogurt if you avoid dairy, or use silken tofu blended with a touch of plant milk to create a creamy base. Replace nuts with seed butter and seeds for nut allergies, and use gluten-free oats or rice-based grains if gluten is a concern. Beans and lentils make savory bowls vegan-friendly while providing favorable texture and protein.

If a bowl feels flat, check three things: acid, salt and texture. A squeeze of lemon or a pinch of flaky salt often rescues a sweet bowl that tastes muted. A crunchy element — toasted oats, seeds or chopped nuts — brings interest to an otherwise soft mixture. If your bowl makes you hungry an hour later, increase the protein or fat slightly; these nutrients extend fullness and balance energy levels through the morning.

My mornings and why these bowls stuck with me

For years I struggled with either skipping breakfast or grabbing sugary items that left me shaky mid-morning. A few seasons of focused experimentation taught me that mornings respond well to ritual and to bowls that combine comforting textures with real nutrients. I now keep a small rotation of bases and toppings that I can assemble in under ten minutes, and that reliability turned breakfast from an afterthought into a small daily pleasure. When time is scarce, the bowl is magically forgiving: one spoonful of something balanced resets the day.

On days I’m packing for travel, jars make the difference between a skipped meal and a calm start. I usually prepare three jars at once and label them so the week begins with a predictable and satisfying routine. That small habit reduced stress and freed mental energy for work, family and creativity. If you adopt even one of these strategies, you’ll find mornings feel less chaotic and more intentional.

Ten minutes and a handful of smart ingredients are all you need to reinvent your morning. Start by choosing one base and two favorite toppings, then rotate proteins and finishing touches across the week until you settle on a few bowls that reliably please. Whether you reach for a spoon at home or pack a jar to enjoy between meetings, these bowls are designed to be nourishing, flexible and, above all, enjoyable. Try one today and tweak it until it becomes part of your routine — it really does change the whole morning.