Category: Recipes

Homemade Thai Curry in 30 Minutes: Big Flavor, Small Fuss

Homemade Thai Curry in 30 Minutes: Big Flavor, Small Fuss

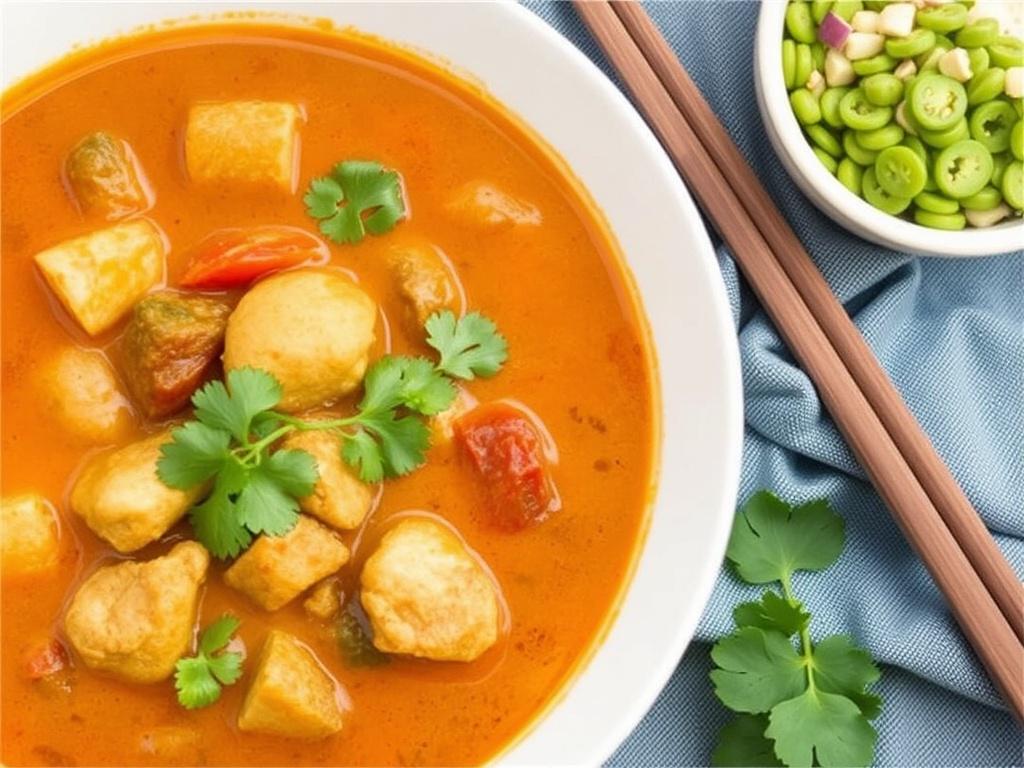
There’s something irresistible about a steaming bowl of curry that carries sweet coconut, spicy chili, and bright lime in each spoonful. This recipe for Homemade Thai Curry in 30 Minutes proves you don’t need hours or exotic equipment to get close to those layered flavors. With a handful of pantry staples, a good curry paste, and a clear plan, you can have dinner on the table while rice finishes steaming. I’ll walk you through essential ingredients, timing, quick swaps, and ways to tailor the dish to whatever protein or vegetables you have on hand. Expect practical tips, a step-by-step timeline, and a few personal notes from my own kitchen experiments.

Why this approach to Thai curry works

Fast does not have to mean shallow. The method I use focuses on building flavor in three short stages: bloom, simmer, and finish. Blooming the curry paste in oil and aromatics releases essential oils and intensifies the paste’s complexity; a short simmer in coconut milk allows flavors to marry; finishing with acid and fresh herbs adds brightness that tricks the palate into thinking the dish simmered for hours. Each stage takes minutes, but together they create depth. This structure is the backbone of any good quick curry and is especially useful when preparing a quick curry for weeknight meals.

Another reason this recipe succeeds is planning. Mise en place—prepping vegetables, measuring liquids, and having garnishes ready—saves time and prevents overcooking. The ingredient list emphasizes versatile components that appear often in international cuisine, like fish sauce, lime, and cilantro, which you may already stock. With a reliable pantry and a clear order of steps, the 30-minute target becomes realistic instead of aspirational. I find this approach turns what could be rushed chaos into a calm, focused cooking session.

Essential ingredients and pantry staples

For a balanced Thai curry you need five flavor pillars: curry paste, coconut milk, aromatics, seasoning, and fresh finish. Curry paste brings spice and fragrant herbs; use red, green, or yellow depending on the heat and character you want. Coconut milk adds creaminess and sweetness, while fish sauce and palm sugar (or brown sugar) supply savory umami and subtle caramel notes. Lime juice, basil, and cilantro at the end introduce the acidity and herbal lift that make Thai curry sing.

Keep these staples on hand for fast dinners: good-quality curry paste, canned full-fat coconut milk, fish sauce, palm or brown sugar, long-grain rice or jasmine, garlic, shallots, and limes. Fresh chilies, Thai basil, and kaffir lime leaves are excellent but optional—dried substitutes or extra lime and cilantro still produce great results. This balance of pantry fixtures and a few fresh touches is how international cuisine flavors can be summoned quickly in a home kitchen.

Ingredient table (serves 4)

Below is a compact table to guide quantities. Adjust protein and veg as you like; the liquids remain similar.

Ingredient Amount
Curry paste (red/green/yellow) 2–3 tbsp
Full-fat coconut milk 2 cans (800 ml)
Protein (chicken, tofu, shrimp) 500 g
Vegetables (bell pepper, eggplant, snap peas) 3 cups chopped
Fish sauce 1.5–2 tbsp
Brown sugar or palm sugar 1 tbsp
Lime juice 1–2 tbsp
Fresh herbs (cilantro, Thai basil) A handful each

Equipment and mise en place

No special wok required; a heavy skillet with a lid or a medium saucepan works perfectly. A sharp knife, cutting board, measuring spoons, and a wooden spoon are the next essentials. For rice, a small pot or rice cooker is helpful because it allows the curry to finish while grains steam. A timer is useful to keep the 30-minute promise honest—set it for small milestones so you don’t lose track of the simmer stage.

Mise en place is the unsung hero of quick recipes. Chop vegetables into similar-sized pieces so they cook evenly. Measure out the curry paste and fish sauce into a small bowl, thinly slice any chilies you’ll use for garnish, and have your herbs washed and spun dry. When everything is ready, the stove choreography becomes simple and the cooking goes fast. My busiest nights improved dramatically after I committed to this small ritual.

Step-by-step: How to make this curry in 30 minutes

The timeline below is designed for a single cook. Start the rice or noodles first; they take the longest and finish with the curry. While the rice is warming, begin the curry. Heat oil over medium heat, add the curry paste and aromatics—garlic and shallot—and sauté for 1–2 minutes to bloom flavors. Pour in half of the coconut milk, bring it to a gentle simmer, then add protein and firm vegetables because they need more time to cook.

After 6–8 minutes of simmering, stir in the remaining coconut milk, softer vegetables, and seasonings: fish sauce and sugar. Keep the heat to a gentle bubble; aggressive boiling splits coconut milk and dulls flavor. Finish by turning off the heat and adding lime juice and herbs so they retain brightness. If you follow the timing and sequence, the whole process aligns: rice finishes, curry rests for one minute, and you serve a hot bowl of layered flavor within 30 minutes.

Quick step list

This concise list mirrors the timeline and helps with flow:

  • Start rice or noodles.
  • Sauté paste and aromatics in oil, 1–2 minutes.
  • Add coconut milk and simmer; add protein and firm veg.
  • Add remaining coconut milk, softer veg, fish sauce, sugar; simmer 6–8 minutes.
  • Finish with lime and herbs, serve with rice.

Vegetarian and protein variations

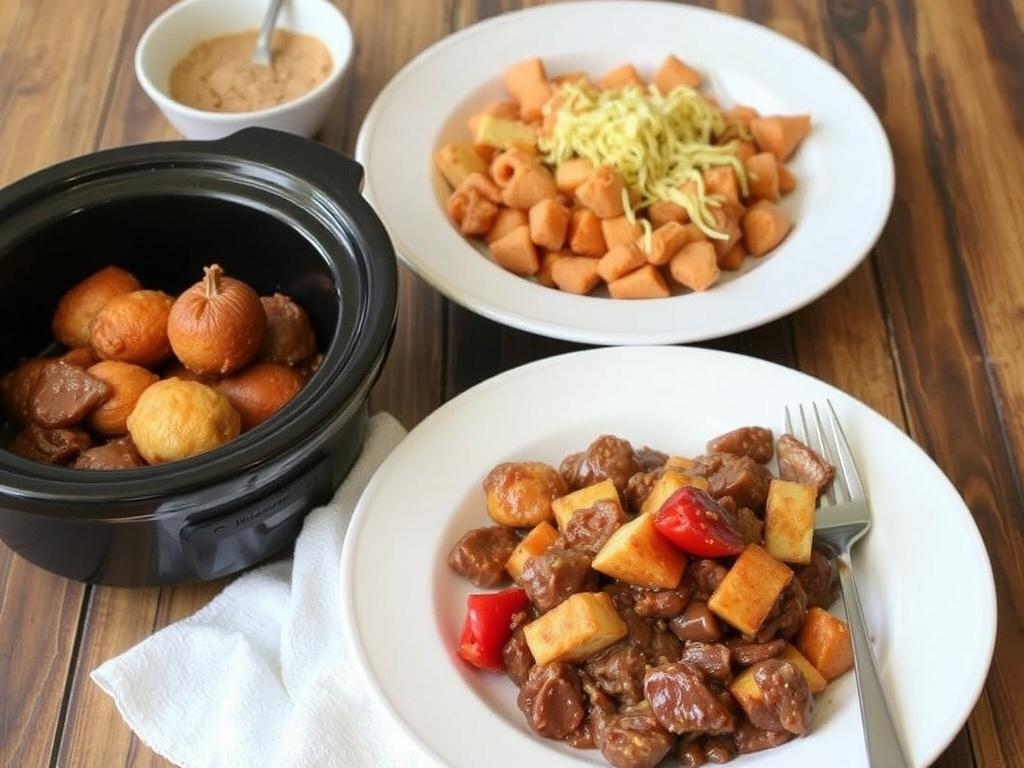
Thai curry adapts beautifully to different proteins. Chicken breast or thigh works well: thin slices cook quickly and absorb curry flavor. Shrimp requires less time—add them in the last 3 minutes of simmering. Firm tofu soaks up sauce; sear cubes briefly before adding them to maintain texture. For a heartier vegetarian option, use a mix of eggplant, sweet potato, and mushrooms. Each choice alters texture and mouthfeel, but the sauce remains the unifying element.

For plant-based eaters, replace fish sauce with tamari and add a teaspoon of miso paste for depth, or use vegan fish sauce alternatives made from seaweed. Coconut milk and sugar keep the dish rich and balanced even without animal products. I often make a quick curry with tofu and a mix of bell peppers on busy nights; pressing the tofu ahead for a few minutes reduces water and makes it more absorbent, which I learned from repeated trial. These small adjustments make the dish satisfying across dietary needs.

Authentic flavor fast: tips and shortcuts

Authenticity is about balance, not exact replication. A few techniques accelerate authenticity without long prep. Toasting the curry paste briefly in oil is a shortcut to complex aroma. If you have kaffir lime leaves, bruise them and add early; they lend a citrus backbone that compensates for shorter cooking. Using full-fat coconut milk prevents a watery sauce and gives mouth-coating richness that makes the curry feel more luxurious than the time invested suggests.

When fresh Thai basil or lime leaves aren’t available, a generous squeeze of lime and a few basil-like herbs (torn sweet basil or even mint in a pinch) bring the necessary lift. For heat control, mix a small amount of paste with coconut milk first to gauge spiciness before adding the rest. I prefer slightly less heat for weeknights and add sliced fresh chilies at the table for those who want to ramp it up. Little finishing gestures make a quick curry feel deliberate and refined.

Serving suggestions and pairings

Jasmine rice is the traditional and most compatible pairing; its floral aroma complements the curry’s richness. Sticky rice works well with thicker yellow or Massaman-style curries, while rice noodles can turn the dish into a saucy, slurpable meal. A simple cucumber salad with rice vinegar, sugar, and sliced shallots provides a crunchy, acidic counterpoint. In international cuisine contexts, I sometimes serve the curry with a side of lightly sautéed greens or a small baked sweet potato for a fusion touch.

Presentation elevates the experience: spoon curry over rice in shallow bowls, scatter herbs and thinly sliced chilies on top, and provide lime wedges on the side. For a family-style meal, keep garnishes separate so everyone can adjust spice and acidity. Serving in warm bowls also helps keep the curry hot longer and enhances the aromatic experience as steam carries those fragrant notes into the room.

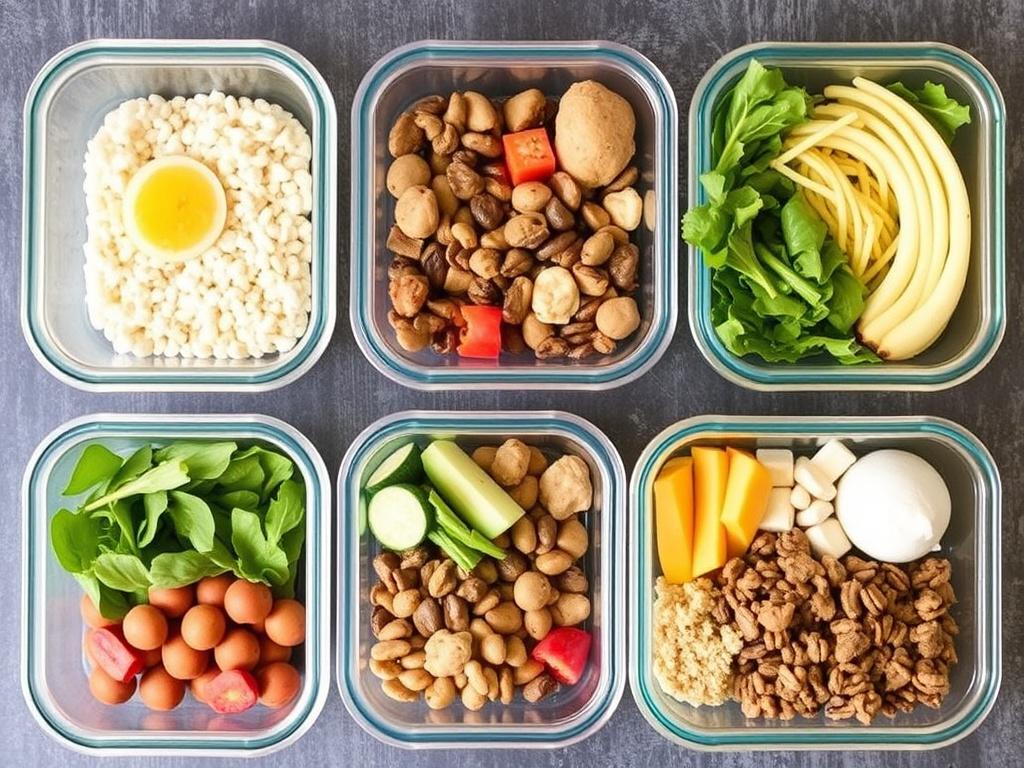
Make-ahead, storage, and reheating

While this recipe is designed for immediacy, it stores well. Refrigerate cooled curry in an airtight container for up to three days. Flavors often deepen overnight as the paste and aromatics continue to meld, so leftovers can be even better. Freeze in portions for up to two months; coconut milk can separate slightly upon thawing but the texture returns with gentle reheating. Label containers with date and protein to avoid confusion later.

Reheat over low heat with a splash of water or coconut milk to restore silky texture; avoid high heat which can curdle the coconut and toughen proteins. Add fresh herbs and lime after reheating rather than during storage; they lose vibrancy in the fridge. When reheating frozen curry, thaw overnight in the refrigerator for the best texture and even warming. These practices keep your quick curry tasting fresh even on a second night.

Nutrition and easy swaps

Homemade Thai Curry in 30 Minutes. Nutrition and easy swaps

Calories in Thai curry vary widely with coconut milk and protein choice. Using light coconut milk reduces calories but also thins texture; balance that by adding a small amount of almond milk for creaminess if desired. Increase vegetables to add fiber and volume without many calories—bell peppers, green beans, and leafy greens fold in well. Protein can be lean (chicken breast) or richer (salmon, coconut-braised tofu), depending on dietary goals.

For gluten-free eating, confirm that your curry paste and fish sauce are gluten-free; many are, but always check labels. Sodium can be moderated by reducing fish sauce and relying more on lime and herbs for flavor lift. If tracking macros, count coconut milk in your fat totals and choose protein portions accordingly. Small adjustments make this quick curry fit a wide range of nutritional plans without sacrificing taste.

Personal notes, common pitfalls, and troubleshooting

I’ve burned curry paste more than once, which taught me to lower the heat and watch closely during the bloom stage. Browning too quickly turns those aromatic oils bitter; a gentle sizzle releases aroma without charring. Another recurring problem is curdled coconut milk—this usually happens when the heat is too high; easing to a low simmer fixes it. These are small kitchen lessons that help keep the 30-minute goal stress-free rather than rushed.

Texture mismatches are common on the first attempt: overcooked vegetables or undercooked protein. To prevent that, add ingredients in order of cooking time. Firm vegetables and raw protein go in early; quick-cooking items like shrimp and delicate herbs finish the dish. When you follow the timing and sequence, the curry comes together neatly, and dinner becomes a pleasure instead of a scramble.

Quick troubleshooting checklist

  • Too spicy: add coconut milk or a pinch of sugar to tame heat.
  • Too salty: balance with acid—lime juice—or a teaspoon of sugar.
  • Watery sauce: simmer uncovered briefly or add a small spoon of curry paste.
  • Coconut milk split: reduce heat and stir gently to recombine.

Final serving ideas and encouragement

Homemade Thai Curry in 30 Minutes is more than a time-saving trick. It’s a template for turning pantry staples into something bright, comforting, and layered. Once you understand the core stages—bloom, simmer, finish—you can improvise confidently, swap ingredients, and still achieve consistent results. Invite friends over for a casual curry night or make a solo bowl and savor the moment; both are equally satisfying.

Cooking quickly does not mean cutting corners on flavor. With a little planning and these techniques, you can keep international cuisine vibrant in your weekly rotation without long cook times. Try this recipe on a busy evening—you’ll see how a few intentional steps transform simple ingredients into a dish that tastes much more expensive than the effort. Then adjust to your taste and make it your own.

Cheese Board Ideas for Entertaining: Small Bites, Big Impressions

Cheese Board Ideas for Entertaining: Small Bites, Big Impressions

There’s a special kind of alchemy that happens when a few well-chosen cheeses meet seasonal fruit, crunchy crackers and thoughtful accoutrements. In this article I’ll walk you through practical and creative cheese board ideas for entertaining that work for everything from casual wine nights to formal dinner parties. You’ll learn how to choose cheeses, balance flavors, style a board so it photographs and tastes great, and avoid the mistakes that make a platter feel cluttered or chaotic. I’ll share tips I use when hosting, plus simple build plans you can adapt to 6 guests or 30. Expect concrete shopping lists, layout strategies and pairing notes you can use tonight.

Start with a Plan: Theme, Guest List and Logistics

Every successful spread begins with a short plan: who’s coming, how long they’ll linger and what else is on the menu. A casual aperitif gathering needs different pacing and portioning than a sit-down dinner where the cheese board supplements the main course, so tailor quantities and variety accordingly. Think of a theme—Mediterranean, picnic, or cheese-and-charcuterie fusion—to narrow down shopping and create a coherent flavor story rather than a random assembly of snacks. Practical details like table space, whether guests will be standing or seated, and the availability of knives and plates influence board size and shape more than most people realize. I always map a rough diagram of placement before I shop; it saves time and keeps the result tidy and welcoming.

Consider tempo: plan to put the board out when guests have settled and are ready for nibbling, not the minute they walk in. If you’re serving a sequence of appetizers, delay the more filling elements to later in the evening so people don’t fill up too quickly. Also factor in temperature and outdoor weather—cheese left in direct sun or near heat sources softens too fast and loses structure. For larger events, multiple small boards placed around the room encourage movement and interaction, while one central table suits intimate gatherings. These small logistical choices steer the whole experience and make a platter feel intentional instead of improvised.

Choosing the Right Cheeses

Balance is the golden rule: aim for a variety of textures and intensities so every guest finds something they love. A reliable formula is three to five cheeses for a standard board: a soft cheese, a firm/semi-hard, a blue or pungent option, and a goat or fresh cheese if you like. This mix lets you offer creamy, crumbly, nutty and tangy profiles that play off accompaniments in different ways. Don’t be afraid to include a crowd-pleasing simple option like a mild cheddar or mild gouda alongside a more adventurous farmhouse or washed-rind selection. When in doubt, ask a knowledgeable cheesemonger for two staples and one unusual pick to keep the board interesting without overwhelming buyers or guests.

Below is a compact guide to common cheese choices and quick serving notes to make selection faster at the shop. I usually write down a primary and backup option so I’m not stuck if a favorite is out of stock; that flexibility keeps the shopping trip short and the results excellent. Let the season also guide you—spring sheep cheeses and summer chèvres taste brighter, while autumn pairs beautifully with aged cheddars and washed rinds.

Cheese Flavor Profile Texture Serving Tip
Brie or Camembert Buttery, mild, slightly mushroomy Soft, spreadable Bring to room temp; serve with sliced baguette
Aged Cheddar Sharp, nutty Firm, crumbly Cut into cubes or shards; pairs with chutney
Manchego Earthy, tangy Firm, slightly oily Slice thin; great with quince paste
Goat Cheese (Chèvre) Tangy, bright Soft, spreadable or log Serve plain or rolled in herbs
Blue (Gorgonzola, Roquefort) Sharp, pungent, salty Crumbly to creamy Small amounts are intense; pair with honey

Accompaniments that Elevate the Experience

Cheese Board Ideas for Entertaining. Accompaniments that Elevate the Experience

A cheese board shines because of complementary elements—sweet, salty, crunchy and acidic components that lift the cheeses and create contrasts. Fresh fruit like grapes and figs add sweetness and juiciness, while dried fruits such as apricots or cherries bring concentrated flavor and chewiness. Nuts contribute crunch and richness; lightly toasted almonds or candied walnuts are subtle but transformative. For acidity, small pickles, marinated olives or cornichons cut through fattiness and refresh the palate. Don’t forget crunchy carriers: a mix of plain water crackers, seeded crisps and slices of a rustic baguette covers different textures and flavor backdrops.

To make selection easier, here are several pairing combos you can reproduce quickly or mix and match depending on taste. They work in many settings—casual parties, holiday gatherings or intimate dinners. I keep jars of honey and a few chutneys on hand because a drizzle of honey over a blue cheese or a spoonful of fig jam with Manchego instantly raises the polish factor without fuss. Presentation-wise, small bowls for olives and a spoon for preserves keep the board tidy and approachable.

  • Brie + honey + toasted pecans + sliced baguette
  • Goat cheese + fresh herbs + crostini + grapefruit segments
  • Aged cheddar + chutney + apple slices + crackers
  • Manchego + quince paste + Marcona almonds + membrillo
  • Blue cheese + honeycomb + walnuts + crisp flatbread

Design and Layout: How to Arrange for Impact

Think of the board as a small landscape: place larger items first and fill gaps with smaller pieces, so the composition feels deliberate rather than thrown together. Start with cheeses spaced across the board to anchor the arrangement, then add bowls for wet elements like olives or spreads. Next, cluster different crackers and bread in small piles, and tuck fruit and nuts into remaining spaces. A final flourish—a scattering of fresh herbs or edible flowers—adds color and an artisanal touch. This layering approach keeps the board visually interesting and makes it easy for guests to approach from different sides without everything collapsing into one pile.

Vary heights and textures to catch the eye: stack slices of baguette, prop crackers against wedges, and let some cheese crumble naturally for a relaxed, inviting look. Keep utensils accessible—label knives for cheeses with noticeably different consistencies or stronger aromas so guests know what to expect. If you’re styling for a photo or a seasonal event, coordinate colors gently; autumn boards can embrace deep oranges and browns, while summer boards benefit from bright berries and fresh herbs. I often take a quick photo before guests arrive, which helps me tweak little gaps and ensures the arrangement feels balanced both in person and in pictures.

Portions, Timing, and Flow for Entertaining

Estimating portions avoids waste and ensures guests can sample freely. A practical guideline is about 2–3 ounces of cheese per guest when the board is part of a larger spread, and 4–6 ounces per guest if the cheese itself is the primary appetizer or the meal’s focus. Adjust these numbers for heavy eaters, the length of the event and whether other appetizers will be served. Time-wise, bring cheese out 30–60 minutes before guests arrive if stored chilled; this allows flavors to open and textures to soften, which dramatically improves taste. For outdoor summer gatherings, bring boards out in stages and replenish as necessary to keep items fresh and cool.

Flow matters: for seated dinners place the board on a side table so guests can serve themselves while drinks circulate, and for cocktail-style events distribute multiple small boards around the space to prevent crowding. Plan refills in advance—keep extra crackers and cheese sliced nearby so you can refresh without disrupting conversation. If you’re hosting a longer event, rotate fresh elements in after an hour and remove anything that looks soggy or overhandled. Small attentions like this keep the appetizer stage lively and prevent the inevitable decline that happens when a single board is left untouched for hours.

Pairing with Drinks: Simple Rules that Work

Pairings don’t require sommelier-level knowledge; basic contrasts and complements usually win the night. Sparkling wine is the most forgiving partner—its acidity and bubbles cut through rich, creamy cheeses and cleanse the palate between bites. Light-bodied whites like Sauvignon Blanc work well with tangy chèvre, while fuller-bodied whites suit buttery bries. Reds with moderate tannin are a good match for aged firm cheeses, and sweet dessert wines or late-harvest options pair exquisitely with blue cheeses. For non-alcoholic choices, consider sparkling water with citrus, unsweetened iced tea or a lightly spiced apple cider depending on season.

When in doubt, match intensity: mild cheeses with light wines, bold cheeses with bolder beverages. I like to create a small sign or a few handwritten notes suggesting pairings for curious guests; it’s a low-effort way to spark conversation and guide choices. Beer is often overlooked on cheese boards but can be fantastic—stouts with aged cheddars, saisons with tangy goat cheese and IPAs with salty blue cheeses all work well. Diversity is a strength here: offer one white, one red or one sparkling, and include a non-alcoholic option so everyone finds a complementary sip.

Dietary Needs and Allergen-Friendly Alternatives

Modern entertaining requires a bit of foresight about allergies, vegetarian preferences and dairy-free needs. Always ask guests ahead of time about key allergies and dietary restrictions; a small label next to the board indicating which cheeses contain common allergens like nuts or cow’s milk is thoughtful and practical. For lactose-intolerant guests, many aged cheeses contain very low lactose, but it’s kinder to offer clear alternatives like hard aged sheep’s cheeses or lactose-free spreads. Include gluten-free crackers or sliced vegetables for guests avoiding wheat, and offer plant-based cheese alternatives for vegans—look for well-reviewed cashew or almond-based options that melt and spread pleasantly.

Presentation can help: designate a separate small board or area for allergy-safe items to avoid cross-contact, and use different knives for each cheese to prevent flavor transfer. I keep a small stack of labels or tent cards in my hosting drawer; they save embarrassment and make guests feel seen. Even with a few simple swaps—gluten-free crispbreads, fruit-forward jams and a vegan spread—you can create an inclusive board without diluting the overall experience.

Tools, Boards and Styling Essentials

You don’t need fancy props to make a board sing, but a few tools improve functionality and aesthetics. A sturdy wooden board or slate is classic, but ceramic platters and even large cutting boards work well depending on the vibe. Invest in a few cheese knives—one for soft cheeses, one for crumbly varieties and a small spreader—and small bowls for wet items like olives and preserves. Cheese markers are handy for bigger gatherings, and a small microplane for fresh nutmeg or citrus zest can add a finishing touch. Keep a small bench scraper or palette knife for transferring soft cheeses and for quick cleanup between refills.

Styling is largely about restraint and contrast: limit yourself to a few statement pieces, use negative space to let items breathe, and alternate colors and shapes to guide the eye. Natural elements like sprigs of rosemary or figs on the stem create seasonality without looking contrived. When I host, I lay out the board on the table of the room where guests will gather and add a couple of candles and a linen napkin—small props that encourage lingering and conversation. Function and beauty should work hand in hand; if guests can’t reach their favorites easily, the prettiest board won’t perform well.

Step-by-Step Assembly: From Shopping to Serving

Follow a simple workflow to avoid last-minute scrambling and to ensure the cheese shines at service time. First, shop with a list that includes primary and backup cheeses, crackers, two types of fruit, nuts and at least two spreads. Second, on the day of the event chill any perishable items that need to stay cold and remove cheeses from refrigeration 30–60 minutes before serving to let flavors open. Third, assemble the board by placing cheeses, adding bowls and clustering accompaniments, then finishing with herbs or edible flowers for visual appeal. This staged approach keeps the process calm and allows you to make adjustments without rushing.

  1. Make a concise shopping list with backups.
  2. Prepare small bowls and utensils before assembling.
  3. Slice firm cheeses and set soft cheeses whole to open up.
  4. Arrange anchors (cheeses), then fill with sides and carriers.
  5. Add finishing touches, labels and a final taste check.

When hosting larger groups, prepare refill platters in the kitchen so you can top the main board quickly and discreetly. I often pre-slice harder cheeses and portion nuts into small ramekins for easier replenishment. Keep a damp cloth nearby for quick wiping of crumbs and sticky spills; it helps maintain a tidy look without interrupting the flow of guests. A brief pre-service checklist—utensils, napkins, plating area—saves a lot of last-minute stress and ensures the first impression is polished.

Storage, Leftovers and Creative Second Acts

Leftover cheese rarely has to be wasted, but storing it correctly preserves quality and safety. Wrap cheeses in parchment or special cheese paper, not plastic wrap directly, to allow gentle breathability and prevent off-flavors. Store stronger smelling cheeses separately to avoid aroma transfer, and keep them in the vegetable drawer of the fridge where temperature fluctuation is minimal. Soft cheeses have a shorter fridge life once cut; consume them within a few days, while aged hard cheeses can last longer if wrapped properly.

Leftovers can become new dishes: crumble blue cheese into a simple pasta, melt aged cheddar into a savory tart, or blend goat cheese with herbs for a quick spread. I often repurpose leftover cheeses into a warm gratin or fold them into an omelet for the next morning; those small reinventions feel thrifty and keep the memory of the party alive. Label and date wrapped pieces so you know what to use first, and if you froze any cheese—only certain hard cheeses tolerate freezing—thaw them gently in the fridge before using to minimize texture changes.

Final Tips and Common Mistakes to Avoid

Some pitfalls are easy to prevent: don’t overcomplicate the board with too many similar cheeses, avoid letting crackers sit under juicy fruit, and never present a fully chilled cheese without time to warm up. Keep portions manageable—too many tiny items can feel fussy and make the board look cluttered—while too few choices risk monotony. Label the cheeses when hosting a diverse crowd; guests enjoy discovering contrasts and knowing what they’re tasting. Finally, remember the human element: a warm welcome, a few suggested pairings and the invitation to help themselves make the food feel friendlier than the most elaborate arrangement.

Hosting with boards is as much about atmosphere as it is about food. The best cheese boards for entertaining are flexible, thoughtfully composed and designed to spark conversation rather than demand attention. Use these ideas as a framework, adapt them to your taste and the season, and don’t be afraid to experiment—sometimes the most memorable pairings are the ones you stumble upon by chance. Invite people in, arrange with care and let the small bites do the heavy lifting of bringing everyone together.

Crispy Air Fryer Snack Ideas: 15 Crunchy Bites to Make Right Now

Crispy Air Fryer Snack Ideas: 15 Crunchy Bites to Make Right Now

There’s something irresistible about a small, hot bite that snaps the way a fresh chip should. This collection of Crispy Air Fryer Snack Ideas gathers straightforward, flavor-forward recipes and practical tips so you can coax that satisfying crunch from your basket every time. Whether you’re after something wholesome between meals or an indulgent party nibble, these recipes show how an air fryer turns humble ingredients into golden, crunchy treats. I’ll walk through technique, timing, and a handful of go-to mixes that work for many air fryer models. Expect clear methods, a few personal tricks, and options that lean toward healthier snacks alongside a couple of all-out guilty pleasures.

Why an Air Fryer Elevates Everyday Snacking

An air fryer concentrates hot air and a little oil to give surfaces that roasted, crisp texture fast. Compared with deep frying, it uses far less fat while still producing a satisfying exterior; that makes it easier to reach crunchy results without soaking everything in oil. For busy cooks, the appliance shortens active prep time and cuts down on messy splatters, so you waste less effort and clean up quicker. In my kitchen, the air fryer lives next to the stove because it reliably finishes things that otherwise languish in the oven, and it does so in a fraction of the time. For anyone learning how to make crunchy bites, an air fryer is practical and forgiving.

Beyond convenience, the air fryer invites experimentation: you can swap coatings, tweak temperatures, or reheat frozen items with superior texture. It’s not magic, but the mechanism favors Maillard reaction — that lovely browning — which is why breaded tofu or thinly sliced apples can reach crispness at modest temps. That quality makes the appliance ideal for small-batch cooking, where maintaining texture is the main objective. If you want snack ideas that impress guests or rescue an afternoon slump, an air fryer gives you a reliable path from raw ingredient to crisp result.

How to Achieve Perfect Crispiness Every Time

Crispiness comes from dry, exposed surfaces and even, high heat. Start by patting ingredients dry: a wet potato slice or moist tofu won’t brown properly. Preheating the air fryer for three to five minutes helps the surface begin to sizzle on contact. Use a light coating of oil — a tablespoon or two is often enough for a batch — and prefer neutral oils with high smoke points for higher-temperature snacks. Keep items in a single layer so air can circulate; overcrowding is the most common reason for limp results.

Textures also depend on thickness and coating. Thin slices cook faster and crisp sooner, while thicker pieces need a brief lower-temperature stage to cook through before a final blast to brown the outside. Breadcrumbs, panko and cornmeal add crispness, and a fine dusting of cornstarch on damp foods provides a brittle finish. Finally, let things rest briefly after they exit the basket: steam trapped on the surface can make them soggy if you stack them immediately. These small steps save frustration and help transform basic ingredients into real crispy snacks.

Essential Tools and Pantry Staples

Crispy Air Fryer Snack Ideas. Essential Tools and Pantry Staples

You don’t need a long tool list to start producing great results. A basic basket-style air fryer, an oil mister, tongs, and a microplane for cheese will cover most recipes. A small wire rack that fits inside the basket can be useful for very fatty items. I also keep a shallow tray and some parchment perforated for delicate items, though I recommend using parchment sparingly because it can interfere with airflow if it’s not properly weighed down.

For pantry staples, stock up on breadcrumbs or panko, cornstarch, olive oil, neutral-flavored oil, smoked paprika, garlic powder, and a sturdy dipping sauce like yogurt-based ranch. These items allow simple seasoning swaps and make it easy to adapt a recipe on the fly. Below is a short list of the minimal extras that repeatedly prove useful.

  • Neutral oil (canola, avocado), olive oil
  • Panko or fine breadcrumbs, cornstarch
  • Salt, pepper, smoked paprika, garlic powder
  • Zip-lock bags for tossing and a small spray bottle

Quick Reference: Temperatures and Timings

Every model runs a bit differently, but this table gives a reliable starting point for the most common snack types. Adjust times by a few minutes and check early the first time you try a new recipe. The goal here is to offer a practical map so you don’t rely on guesswork when you want fast results.

Snack Temp (°F) Time
Chickpeas 400 14–18 min
Thin potato chips 360 10–14 min
Sweet potato fries 390 12–18 min
Parmesan zucchini 380 8–12 min
Mozzarella sticks (frozen) 390 6–8 min

Use these numbers as a baseline and watch for visual cues: golden edges, reduced surface sheen, and a satisfying rigidity when you tap a piece. If an item looks done on the outside but still soft, lower the temp slightly and extend the time so it cooks through without burning the crust. Most of the recipes below include specific timings that match this table, but remember to calibrate your cooker once or twice to learn its personality.

Savory Snacks that Turn Out Crunchy

Let’s move from principles to plates. Below are several savory snack ideas that reliably crisp in a typical home air fryer. I’ve written each description to emphasize what to watch for in texture and seasoning, rather than listing exact ingredient measurements, so you can scale or tweak to taste.

Crispy Roasted Chickpeas

Drain and dry a can of chickpeas, toss them with a teaspoon of oil and a mix of smoked paprika, salt and a pinch of cayenne, then spread them in a single layer. Roast at high heat until they rattle in the basket and feel crunchy when you bite — usually around 15 minutes, shaking once. These are a go-to pantry snack that satisfy like a light nut and can be flavored sweet, spicy or herbal. I often make a double batch on Sundays to have on hand for salads or to snack on during movies.

Tip for long-lasting crunch: let roasted chickpeas cool completely on a wire rack before storing in an airtight container. If they absorb extra moisture from the air, pop them into the basket for two minutes at medium heat to revive. They’re an excellent protein-forward substitute when you want something more wholesome than chips but still want that crackly texture.

Parmesan Zucchini Coins

Slice zucchini thinly, salt lightly to draw out moisture, pat dry and dust with a mixture of grated Parmesan and panko or fine breadcrumbs. Spray or brush lightly with oil and cook at moderate-high heat until the edges brown and the tops blister — usually 8 to 12 minutes depending on thickness. The result is a savory, melty bite with a crisp edge that pairs well with marinara or lemon-garlic aioli. Because zucchini contains moisture, the patting step is critical; skip it and you’ll end up with limp rounds.

This snack is forgiving for improvisation: swap the Parmesan for nutritional yeast for a dairy-free version, or add chili flakes for heat. I serve these at small gatherings because they feel a little upscale despite being wildly simple to make. They also re-crisp decently if you warm them again for a minute or two before serving.

Sweet Potato Fries with a Smoky Kick

Cut sweet potatoes into uniform sticks, toss with a scant tablespoon of oil, smoked paprika, garlic powder and salt, then arrange in a single layer and cook at 390°F. Shake halfway through to ensure even browning; expect 12 to 18 minutes depending on thickness. Sweet potatoes crisp best when they have a thin coating of starch and aren’t overcrowded. Unlike white potatoes, they caramelize quickly, which gives them a deep, sweet-savory finish that pairs beautifully with a tangy yogurt dip.

My trick is to soak cut pieces briefly in cold water, dry thoroughly and then dust with a tablespoon of cornstarch before oiling; it helps build a drier surface that crisps more reliably. These fries are a favorite impulse snack in my house because they feel substantial yet are, comparatively, part of a roster of healthier snacks that still satisfy cravings for something crunchy and filling.

Breaded Tofu Bites

Press extra-firm tofu to remove moisture, cut into cubes, toss in a slurry of soy and cornstarch, then coat with panko. Spray lightly with oil and air fry at 400°F until golden and crunchy on the exterior, about 10 to 14 minutes, turning midway. The cornstarch helps the tofu form a thin, crackly skin, while panko supplies volume and crunch. These bites absorb sauces well, so they work as a finger food or as protein on top of salads.

I often marinate cubes briefly in a garlicky sesame mix before coating for deeper flavor. When done right, the interior stays tender and the outside becomes satisfyingly crispy, which makes them one of the more dependable savory recipes for people shifting toward plant-forward eating. Serve them with a quick dipping sauce of soy, lime, and a little honey for contrast.

Sweet and Light Crispy Treats

Not every crunchy snack needs to be savory. The air fryer excels at turning fruit and dough into delicate crisps that satisfy a sweet tooth with relatively little fuss. These options are perfect when you want something snack-sized and shareable.

Cinnamon Apple Chips

Thinly slice apples on a mandoline, remove any seeds, then toss very lightly with lemon juice and a sprinkle of cinnamon. Arrange in a single layer and cook at 320°F until edges curl and slices feel dry, usually 15 to 20 minutes; flip halfway if your slices are thicker. Low, steady heat dehydrates while allowing natural sugars to caramelize without burning. The result is a super-light, crisp chip that tastes like fruit leather but with a satisfying snap.

These are excellent for packing into snack boxes or stirring into yogurt for texture. I learned to make them when looking for a lunchtime crunch that wasn’t processed, and they’ve become a staple because even kids enjoy them. Store in an airtight jar to preserve the crunch for up to a week.

Mini Cinnamon Sugar Churro Bites

Use ready puff pastry cut into small rectangles, brush with a little melted butter, and toss in cinnamon sugar after a short bake at 375°F until puffed and golden, typically 8 to 10 minutes. The pastry develops a crisp exterior that flakes satisfyingly with each bite, and the cinnamon sugar gives a nostalgic, comforting flavor. These are delightful warm, dipped in a lightly spiced chocolate sauce or a citrus-infused cream.

They’re a spontaneous party treat in my house: quick to prepare and almost instantly gone. If you use frozen pastry, let it thaw sufficiently so it can puff properly without tearing. For a slightly lighter take, use a thin whole-wheat pastry or reduce the sugar by a third and rely on a bright dipping sauce to add contrast.

Serving, Dipping and Storage Tips

Crispness is best immediately after cooking, so plan to serve snacks straight from the basket whenever possible. Prepare dips in advance — things like garlic yogurt, spicy ketchup, or a simple herb vinaigrette — to keep service smooth and to balance textures. For gatherings, work in short batches so everything reaches guests hot and crisp rather than delivered all at once and limp.

To store leftovers, cool items completely on a wire rack and refrigerate in a single layer if possible, separated by parchment to avoid steam. Reheat in the air fryer at 350°F for 2–5 minutes depending on size: this is the quickest way to restore crunch. Avoid the microwave unless you’re willing to sacrifice texture for speed.

Trying out a handful of these air fryer recipes will teach you how your model behaves and which coatings and thicknesses work best for your desired crunch. Start with roasted chickpeas and one potato or vegetable snack to learn timing, then expand to breaded proteins and occasional sweet treats. The device rewards curiosity and small adjustments much more than it punishes mistakes.

If you’re after a short shopping list to get started: chickpeas, a couple of potatoes or sweet potatoes, zucchini, firm tofu, apples, panko, cornstarch, and simple seasonings will cover most of what you need to explore a variety of crunchy snacks. Over time you’ll accumulate preferred spice blends and dipping sauces that make the process even more enjoyable. Happy crisping — and enjoy discovering which Crispy Air Fryer Snack Ideas become your regulars.

Best Plant-Based Protein Recipes That Actually Fill You Up

Eating to feel satisfied and strong does not require meat, and these Best Plant-Based Protein Recipes prove it with bold flavors and reliable nutrition. If you are curious about how to build protein-rich plates without animal products, this collection walks you through ingredients, techniques, and complete dishes that deliver. You will find options for breakfast, lunch, dinner and snacks, all designed as practical vegan and flexitarian choices for real life. I will share clear recipes, tips for boosting protein absorption and a few tricks I learned while cooking for friends who demand flavor as much as nutrition. Read on for a toolbox of dishes that make healthy meals feel exciting instead of like a compromise.

Why choose plant-based protein and how it fits into your day

Plant-based protein supports muscle maintenance, steady energy and a lower intake of saturated fat when compared with many animal-based meals, yet myths about low protein are persistent. In reality, beans, lentils, soy and certain grains supply ample protein when combined thoughtfully across the day. A mix of legumes, whole grains and seeds creates a complementary amino acid profile that meets dietary needs without hard counting. Beyond individual health, shifting to more plant-forward recipes reduces environmental impact and often increases the variety of fiber and micronutrients in your meals. Choosing plant-based options does not mean bland eating; it simply means using different building blocks and paying attention to textures, herbs and fats for satisfaction.

Designing healthy meals around plants also changes how you plan: think in containers rather than single ingredients, and aim for at least one concentrated protein source per plate. That could be a scoop of lentil ragout, a portion of marinated tempeh, or a hearty bean salad with seeds. For active people and those rebuilding strength, combining a plant protein with a rich carbohydrate keeps performance and recovery on track. Time-saving strategies such as batch-cooking beans, freezing seasoned tofu, and pre-toasting seeds are small investments that multiply through the week. Ultimately, shifting to plant-first plates becomes easy once you have a few reliable recipes that please the palate.

Key ingredients and smart strategies

Successful protein-focused plant cooking starts with ingredients you can trust to perform in different roles: legumes for creaminess and bulk, soy for meat-like texture and complete protein, grains for structure, and seeds and nuts for richness and crunch. Each of these groups offers distinct flavors and cooking behaviors, so learning basic treatments is worth the effort. For example, lentils vary widely in cook time and texture, while tempeh benefits from steaming before pan-searing to mellow bitterness and improve marinade uptake. Simple techniques such as toasting spices, releasing nut oils, and finishing with acid lift a dish from flat to memorable without added animal products. Spend time mastering a few recipes and then use them as templates for endless variations.

Ingredient Typical Protein per Cooked Serving Role in Recipes
Lentils (1 cup cooked) 18 g Hearty base for ragouts, salads, stews
Chickpeas (1 cup cooked) 15 g Binders, salads, dips, roasted snacks
Firm tofu (150 g) 15–20 g Sautés, scrambles, bakes
Tempeh (100 g) 19 g Marinades, stir-fries, sandwiches
Quinoa (1 cup cooked) 8 g Salads, bowls, breakfast porridge
Edamame (1 cup shelled) 17 g Quick salads, blended dips, snacks

When you scan that table, a pattern emerges: combining elements multiplies protein without monotony. A bowl built from quinoa, edamame and toasted pumpkin seeds hits both texture and protein marks promptly. Fermented soy products such as tempeh and natto offer concentrated protein and intense umami, reducing the need for heavy sauces. Another trick is to integrate powdered plant protein into thin items: add unflavored pea protein to soups or blend hemp powder into dressings for a subtle boost. Aim for variety across the week to keep micronutrients balanced and meals appealing.

How to think about texture, seasoning and fat

Plant-centric cooking relies heavily on contrasting textures and layered seasonings so meals feel substantial and satisfying rather than one-note. Crisp roasted chickpeas or toasted seeds introduce a pleasant bite next to creamy lentil stews, while lightly charred tofu provides a meat-like chew. Spices and aromatic bases—onion, garlic, ginger—create flavor depth, and fermented condiments such as miso, soy sauce and preserved lemon add a savory backbone. Fat is equally important for richness and nutrient absorption; a drizzle of olive oil, a spoonful of tahini or a few slices of avocado lift both calories and flavor. Balancing all these elements makes healthy meals feel indulgent without relying on animal products.

Recipe: Lentil and Walnut Bolognese

Best Plant-Based Protein Recipes. Recipe: Lentil and Walnut Bolognese

This sauce mimics classic ragu texture while packing plant protein and fiber; lentils give the bulk, walnuts add richness and a meaty bite, and tomato lends brightness. It is adaptable for pasta, polenta or stuffed vegetables, and stores well in the fridge for several days. I learned to double this recipe for busy weeks and freeze half because friends always wanted seconds. The seasoning is straightforward—carrot, celery, onion sautéed until sweet, then garlic and herbs, simmered with tomatoes and a splash of red wine or vinegar. Finish with nutritional yeast or vegan parmesan to add umami and a satisfying finish.

  • Ingredients: 1 cup cooked brown lentils, 1/2 cup finely chopped walnuts, 1 onion, 2 carrots, 2 celery stalks, 3 cloves garlic, 1 can crushed tomatoes, 1 tbsp tomato paste, olive oil, oregano, basil, salt and pepper.
  • Method: Sauté vegetables until soft, brown walnuts briefly, add garlic and tomato paste, deglaze, stir in lentils and tomatoes, simmer 20–30 minutes, season and serve.

Recipe: Smoky Black Bean and Quinoa Burgers

These burgers combine black beans for creaminess, quinoa for bite and oats for binding; smoked paprika and chipotle deliver a compelling smoky edge that holds up to toppings. Form patties and pan-sear until crisp on the exterior, then finish in the oven to firm them through. Serve on toasted buns with avocado, pickled red onion and a green sauce to cut the richness. They freeze well between layers of parchment for future quick meals, making them a practical addition to a weekly rotation. I often pair them with sweet potato wedges and a tangy slaw for a balanced plate.

  • Ingredients: 1 can black beans, 1 cup cooked quinoa, 1/2 cup rolled oats, 1 small onion, 1 egg substitute or flax egg, 1 tsp smoked paprika, 1 tsp cumin, salt and pepper.
  • Method: Mash beans, mix with cooked quinoa and oats, add spices and binder, shape patties, sear 3–4 minutes per side and bake at 180°C for 10 minutes.

Recipe: Tofu Scramble with Spinach, Mushrooms and Turmeric

A simple, protein-forward breakfast that rivals scrambled eggs for comfort and versatility, tofu scramble adapts to many flavor profiles with minimal effort. Crumble firm tofu into a hot pan, add turmeric for color and warmth, and toss in mushrooms and wilted spinach toward the end to keep them vibrant. Nutritional yeast contributes a cheesy note and a dose of B12 when fortified, which is valuable for strict vegans. This dish pairs with toasted sourdough and roasted tomatoes for a weekend brunch, or it becomes a quick weekday meal when you batch-cook the tofu base. The trick is to press tofu briefly to reduce excess water and to heat the pan well for caramelization.

  • Ingredients: 200 g firm tofu, 1 cup sliced mushrooms, 2 cups baby spinach, 1 tbsp nutritional yeast, 1/2 tsp turmeric, 1 garlic clove, salt, pepper, oil.
  • Method: Press and crumble tofu, sauté mushrooms until browned, add tofu and spices, cook until golden, fold in spinach and nutritional yeast and serve immediately.

Recipe: Tempeh Satay with Peanut Sauce

Marinated tempeh grilled or pan-fried and served with a warm peanut sauce is a concentrated protein hit with strong Southeast Asian flavors. Tempeh’s firm texture soaks up marinades beautifully; steaming it briefly before cooking opens its pores and reduces bitterness. The peanut sauce combines creamy peanut butter, soy or tamari, lime juice and a touch of sweetener for balance, and it doubles as a versatile dressing for bowls. Serve skewered tempeh with rice, pickled cucumber, and herbs for a colorful, balanced plate. I often double the sauce because it elevates steamed greens and roasted cauliflower as well.

  • Ingredients: 200 g tempeh, 2 tbsp soy sauce, 1 tbsp rice vinegar, 1 tbsp maple syrup, 2 tbsp peanut butter, 1 clove garlic, lime juice to taste.
  • Method: Slice and steam tempeh 10 minutes, marinate 30 minutes, pan-fry or grill until caramelized, whisk peanut sauce and serve warm.

Recipe: Quinoa and Edamame Power Salad

This salad is a template for busy lunches: all components can be prepped and stored separately then tossed minutes before eating for freshness and texture. Quinoa provides a light, fluffy grain base while edamame supplies a high-protein pop, and a handful of toasted seeds increases both protein and crunch. A citrusy-ginger dressing pulls the assembly together and keeps the salad lively through the week. Add roasted sweet potatoes or pickled beets for seasonal variation and top with herbs for aromatics. It travels well and makes excellent use of leftover roasted vegetables.

  • Ingredients: 1 cup cooked quinoa, 1 cup shelled edamame, 1/4 cup toasted pumpkin seeds, mixed greens, cucumber, a lemon-ginger dressing.
  • Method: Combine cooled quinoa and edamame with chopped vegetables, toss with dressing, top with seeds and herbs and pack into containers.

Recipe: Chickpea “Tuna” Salad

Mashed chickpeas mimic the flaky texture of canned tuna and pair beautifully with celery, capers and a mustardy dressing for a familiar sandwich filling. This version keeps well for several days and is adaptable as a salad topping or stuffed into avocado halves for a low-carb option. Use a bit of seaweed or kelp granules to add a subtle oceanic note if you miss seafood flavor. For creaminess, blend in a spoonful of vegan mayo or mashed avocado, and season boldly because chickpeas benefit from assertive flavors. I often make a big batch to keep in the fridge for quick lunches during hectic weeks.

  • Ingredients: 1 can chickpeas, 2 tbsp vegan mayonnaise, 1 celery stalk, 1 tbsp capers, 1 tsp mustard, lemon juice, salt and pepper, optional nori flakes.
  • Method: Roughly mash chickpeas, stir in remaining ingredients, adjust seasoning, chill and serve on bread or greens.

Recipe: White Bean and Kale Stew with Rosemary

This stew leans on cannellini beans for a creamy, satisfying base and kale for color, texture and an extra nutrient boost, creating a soothing dinner that is simple to make. Sofrito of onion and garlic sweeps through the pot, and a rosemary sprig during simmering adds aromatic depth without overpowering the beans. Finish with lemon zest and a generous splash of good olive oil to brighten and round flavors. It pairs well with crusty bread or a scoop of herbed polenta to extend the protein and complex carbohydrate ratio. Leftovers taste even better as the flavors continue to marry overnight.

  • Ingredients: 2 cups cooked cannellini beans, 1 bunch kale, 1 onion, 3 garlic cloves, 1 sprig rosemary, vegetable broth, lemon, olive oil.
  • Method: Sauté onion and garlic, add beans and broth, simmer 15 minutes, stir in chopped kale and rosemary, cook until kale is tender and finish with lemon and oil.

Recipe: Peanut-Banana Oat Protein Smoothie

For breakfasts and post-workout drinks, a peanut-banana oat smoothie is quick, portable and surprisingly filling when made with rolled oats and a scoop of plant protein powder. Bananas provide potassium and natural sweetness while oats thicken the drink and deliver resistant starch for fullness. Blend with plant milk, a tablespoon of peanut butter and a handful of spinach for an easy green boost. This smoothie is forgiving: swap almond butter for peanut or use chia seeds for texture and omega-3s. It has rescued many mornings when I needed something lunch-proof and energizing on the go.

  • Ingredients: 1 banana, 1/3 cup rolled oats, 1 cup plant milk, 1 tbsp peanut butter, 1 scoop pea protein or hemp powder, ice.
  • Method: Blend all ingredients until smooth and adjust thickness with more milk or ice as desired.

Meal prep, storage and scaling tips

Batch-cooking is your best shortcut to eating well without stress; cook several cups of beans, bake a tray of tofu or tempeh and roast a medley of vegetables to mix and match through the week. Store components separately to preserve texture: keep crispy items in one container and wet items in another, and assemble plates within hours of serving for optimal mouthfeel. Freezing portions of sauces, burger patties and stews extends shelf life and saves time on busy days. Label containers with dates and contents to avoid culinary amnesia, and reserve a couple of jars of homemade dressings to turn leftovers into polished meals. These habits convert a chaotic week into a sequence of effortless healthy meals.

When scaling recipes for family meals or batch freezing, adjust seasoning gradually because salt and acid concentrate differently when reduced or frozen. Cook grains slightly al dente if you plan to reheat them, and undercook vegetables that will be reheated to avoid mush. Reheating in a skillet often restores texture better than a microwave, and adding a splash of water or broth keeps soups from drying out. For sandwiches and burgers, keep buns separate until serving to avoid sogginess. These practical steps preserve the joy of food across multiple meals and make sticking to a plant-forward routine simpler.

Practical tips to boost protein without fuss

Small changes compound: sprinkle hemp or chia seeds over yogurt alternatives, add a scoop of pea protein to pancakes, and toss a handful of roasted chickpeas into salads for immediate increases in protein. Incorporate fermented soy like tempeh or miso into sauces to add both protein and powerful umami that cuts through bitterness without salt overload. Use nut and seed butters in dressings to deliver calories, protein, and healthy fats in a compact form that integrates smoothly into savory and sweet dishes. Keep a few high-protein staples—canned beans, firm tofu, quinoa, seeds—on hand so you can build a balanced plate in minutes. These tweaks turn everyday meals into reliable sources of sustained energy and muscle support.

For athletes and people with higher protein needs, spread intake evenly across the day rather than loading one meal; aim for 20 to 30 grams per sitting depending on activity level, and choose concentrated sources like tempeh, seitan or a dedicated protein blend when necessary. Recovery meals benefit from pairing protein with carbohydrates and some fats to replenish glycogen and aid muscle repair. Hydration and sleep are also part of the recovery equation and improve how your body uses the nutrients you eat. Tracking and adjustments are useful at first, but soon you will recognize patterns and can rely on simple templates that meet your personal needs.

Final notes and a personal thought

Over years of cooking and experimenting I have found that the secret to lasting change is not perfection but pleasure: choose recipes that excite you and make a few reliable staples part of your routine. These Best Plant-Based Protein Recipes are intended as starting points you can riff on by switching herbs, spices and seasonal produce to keep things interesting. Plant-based cooking rewards curiosity and small experiments more than strict fidelity to rules, and the outcomes often surprise people new to vegan or plant-forward eating. Start with one new recipe a week and watch how those meals become the backbone of flavorful, nourishing, healthy meals you actually enjoy.

Cloud-Soft Mornings: How to Make Fluffy Pancakes That Actually Rise

Cloud-Soft Mornings: How to Make Fluffy Pancakes That Actually Rise

There is a small, quiet joy in watching a batter bubble and turn into a golden, pillowy disc. If you have ever wondered how to make fluffy pancakes that feel like a warm little cloud on your plate, this article will walk you through ingredients, technique and small tricks that change everything. I will share tested methods, explain why they work, and offer practical solutions when things go sideways. Along the way you will find simple recipes, troubleshooting tips and ideas for toppings that lift a basic breakfast into a memorable meal. No fluff, only the kind you want inside your pancakes.

Why Fluffiness Matters for Pancakes

Fluffy pancakes are more than a texture preference; they influence taste and mouthfeel. A light, aerated crumb carries melted butter and syrup differently than a dense pancake — each bite feels balanced instead of heavy. When pancakes rise properly, they also cook faster at moderate heat, staying moist without burning the exterior. Understanding what creates that lift helps you control the final result instead of hoping for luck. That control makes breakfast relaxed and repeatable, whether you cook for one or a crowd.

Different cuisines treat griddled cakes in various ways, but the goal of a fluffy interior is universal for American-style pancakes. Leavening agents create gas, eggs contribute structure and dairy reacts to lift and flavor. Small technique choices — mixing speed, batter rest, pan temperature — amplify or kill the lift. Once you see the interaction between ingredients and method, repeating the result becomes straightforward. This is why I prefer to teach the why before giving the exact steps.

Ingredients: The Foundation of Fluffy Pancakes

Every ingredient in a pancake batter has a role, from structure to flavor to lift. Skipping or substituting without understanding the impact often leads to dense or gummy results. Below is a compact table that shows common ingredient choices, typical amounts for a basic batch and the role each plays in creating fluffy pancakes.

Ingredient Amount (for ~8 pancakes) Role
All-purpose flour 1 1/2 cups (190 g) Provides structure and starch that gelatinizes during cooking
Baking powder 1 1/2 tsp Primary chemical leavener creating gas and lift
Sodium bicarbonate + acid 1/2 tsp + 1 cup buttermilk Alternative leavening system for tang and height
Eggs 1 large Adds structure, moisture and some lift via beaten whites
Milk or buttermilk 1 to 1 1/4 cups Hydrates flour, reacts with soda, affects tenderness and tang
Butter or oil 2 tbsp melted butter Improves flavor, tenderizes crumb and helps browning
Sugar and salt 1 tbsp sugar, 1/4 tsp salt Balancing flavor; sugar aids browning

That table gives you a baseline, but the quality of each element matters too. Fresh baking powder offers reliable lift, while old powder can collapse a batter. Flour type shifts texture — cake flour makes a silkier result, bread flour yields chewiness. Small adjustments to liquid ratio change thickness and, therefore, the time for gas bubbles to expand. Keep measurements convenient but precise until you are comfortable eyeballing.

Flour and Starch: Choosing the Right Base

All-purpose flour is the most forgiving choice and produces a pleasant balance of softness and structure. If you want an extra tender crumb, substitute part of the AP flour with cake flour — try 1 cup AP and 1/2 cup cake flour for a noticeable change. Whole wheat will add flavor and density; if you use it, replace only 25 to 50 percent and increase liquid slightly to avoid dry batter. The goal is starch that will gelatinize during cooking and trap gas without becoming tough. Measure flour by spooning it into the cup and leveling, rather than packing, to keep the batter from becoming too heavy.

Leaveners: How to Get Reliable Rise

Baking powder is the simplest route; it contains an acid and base that react when wet and again with heat. Use double-acting baking powder for dependable results. If you prefer buttermilk, use baking soda rather than extra powder. Baking soda needs an acid to produce carbon dioxide, and buttermilk also adds a pleasant tang. Timing matters: batter starts to lose volatiles after mixing, so cook within 15 to 30 minutes if possible. For dramatic height, fold in a small amount of whipped egg whites — that step introduces physical air that expands with heat.

Eggs, Dairy and Fat: Balancing Structure and Tenderness

Eggs bring proteins that set as pancakes cook; they define the crumb and help trap air. Whole eggs work well, but separating and whipping whites adds lift without excess density. Dairy hydrates flour and influences acidity; buttermilk reacts with baking soda and gives an open, tender crumb. Milk yields a milder flavor and slightly tighter structure. Fat — butter or neutral oil — tenderizes by coating gluten strands, making pancakes soft. I like a mix: melted butter for flavor plus a little oil for consistent texture.

Step-by-Step: The Technique Behind Fluffy Pancakes

The recipe is only half the battle; technique completes the picture. Small habits in mixing, resting and cooking change the way pancakes rise and brown. Follow a clear sequence and you will see consistent bubbles, rounded edges and that slight dome that signals air trapped and waiting to expand. Below is a practical step list you can follow on any morning, whether you make a single serving or a larger batch. Read the notes that follow each step to understand why it matters.

  1. Combine dry ingredients in a bowl and whisk to aerate.
  2. Whisk wet ingredients separately until smooth, including melted butter.
  3. Pour wet into dry and fold together gently; some lumps are fine.
  4. Let the batter rest 10 to 30 minutes at room temperature.
  5. Heat a skillet to medium, oil lightly, and spoon batter for each pancake.
  6. Wait for bubbles to burst and edges to set before flipping once.
  7. Cook the second side until golden and serve immediately.

Combining dry ingredients first disperses leavening agents evenly, which prevents uneven rise. Whisking the wet mixture ensures melted fat is distributed and eggs are broken up, so you do not overwork the gluten later. Folding instead of stirring minimizes gluten development; a few visible lumps indicate gentle mixing. Resting allows flour to hydrate and leaveners to begin reacting; this yields a more tender interior and better lift. Finally, controlling pan temperature keeps the exterior from burning while the interior sets.

Mixing: The Fine Line Between Smooth and Overworked

When you bring wet and dry together, use a rubber spatula or large spoon and fold with broad strokes. The goal is to coat dry pockets without eliminating tiny lumps. Overmixing develops gluten and results in densified pancakes that feel chewy rather than fluffy. If you must, let the batter rest longer; that relaxes gluten slightly and produces a softer texture. I always remind myself: quiet folding wins over vigorous mixing for this recipe.

For a lighter result, you can separate the egg and whip the white to soft peaks, then fold it into the batter as the last step. This introduces more air than whole eggs alone, but requires gentle handling to avoid collapse. Add whites in two portions — fold one to lighten the batter, then the rest with care. The result is a visibly taller pancake with a softer, cloudlike crumb. Use this trick when you want a brunch showstopper for guests.

Resting: Why Waiting Helps

Giving batter time to rest is often overlooked, but it significantly improves texture. Resting lets starches absorb liquid and gluten strands relax, producing a batter that spreads less and traps gas better while cooking. With baking powder systems, a modest rest of 10 to 30 minutes is ideal; for buttermilk-soda mixes, shorter rests can work but avoid long delays as reaction with soda may exhaust the leavening. If you must prepare batter ahead, refrigerate and bring to room temperature before cooking so gases can expand. In my kitchen, a 20-minute rest has saved many morning rushes by turning so-so pancakes into something smiles are made of.

Cooking: Heat, Pan Choice and the Flip

Pan temperature is the single most important cooking variable. Preheat a heavy skillet or griddle over medium heat until a few drops of water skitter and evaporate. If the pan is too cool, pancakes spread thin and absorb fat; too hot and they brown before the interior cooks. Cook the first side until bubbles form and burst in the center, and the edges look set. Flip once with a confident motion and finish until the second side is evenly golden. Cast iron and nonstick each have benefits: cast iron holds steady heat and gives great browning, nonstick reduces the need for excess fat.

Use a light brush of oil or a small pat of butter between batches, wiping excess each time. Consistency across pancakes comes from steady temperature and uniform scoops; use a 1/4 or 1/3 cup measure for each pancake. Avoid pressing pancakes with the spatula — that squeezes air out and flattens the cake. If you notice uneven browning, reduce heat slightly and allow the pan to stabilize. A hot oven set to 200 F (95 C) is handy to keep finished pancakes warm while you finish the batch.

Advanced Tricks to Maximize Fluff

Once you master the basics, several techniques deliver an even loftier result. Each trick relies on the same physics: introduce air and prevent it from escaping until heat sets the structure. These methods are especially useful when you want dramatic height for a weekend brunch or to experiment with texture variations. Use them selectively depending on the occasion and the time you have available.

  • Separate eggs and whip whites to soft peaks, folding them into batter to add lift.
  • Substitute some milk with carbonated water for extra lightness—add just before cooking.
  • Use buttermilk plus baking soda for tangy flavor and an open crumb.

I often use whipped whites when cooking for kids who judge pancakes by sheer fluff. That extra step makes the pancakes rise taller and feel almost soufflé-like, though they are still sturdy enough to stack. Carbonated water is a quick improvisation when eggs are low, and it creates an airy batter with minimal effort. Buttermilk remains my go-to for flavor; its acidity reacts with baking soda to produce a reliable and tasty rise.

Troubleshooting: Fixing Flat, Tough or Gummy Pancakes

Even experienced cooks encounter problems. If pancakes are flat, check your leavening. Old baking powder or soda loses potency; replace it regularly. Thin batter will also spread out and yield flat cakes — add a tablespoon or two of flour to thicken. If pancakes are tough, overmixing is usually the culprit; start a new batch and fold more gently next time. Gummy or undercooked centers point to too-high heat; lower the pan and give batter a chance to set before flipping.

For uneven browning, ensure your skillet heats uniformly and avoid crowding. Soggy pancakes can result from too much liquid or insufficient cooking time; adjust by adding a little flour and cooking at a slightly lower temperature. If you see large air pockets or very irregular holes, your batter may be over-aerated or the pan too hot; make smaller adjustments and test a single pancake to refine. Troubleshooting is iterative: test, observe, and tweak one variable at a time until you find the sweet spot.

Serving, Storing and Reheating Pancakes

How to Make Fluffy Pancakes. Serving, Storing and Reheating Pancakes

Timing matters when serving. Pancakes are best right off the griddle — warm, tender and fragrant. If you must prepare ahead, keep finished pancakes in a single layer on a baking sheet in a 200 F oven; this holds them without drying for up to 30 minutes. For longer storage, freeze individual pancakes separated by parchment in a resealable bag. Reheat directly from frozen in a toaster or in a low oven until hot. Avoid microwaving infinitely: it warms quickly but can make pancakes rubbery if overdone.

Presentation elevates the experience: keep syrup warm, add a pat of butter that melts into the stack, and finish with fresh fruit or a squeeze of citrus for brightness. Savory toppings — yogurt, smoked salmon, herbs — work wonderfully with less sweet batters. In my home, a mix of seasonal fruit and a simple maple drizzle is almost always the chosen finish; it honors the lightness of the pancakes without competing for attention.

Variations and Flavor Ideas

Once you have the technique down, adapt the batter to different flavors and diets. Add mashed banana or pumpkin puree to the wet ingredients for autumnal notes, but reduce other liquids slightly to maintain batter thickness. Fold in blueberries, chocolate chips or lemon zest just before scooping to avoid bursting and discoloration. For whole-grain or gluten-free options, replace a portion of the flour with oat flour or a 1-to-1 gluten-free blend and increase liquid by a tablespoon or two to keep the batter supple.

Consider savory pancakes for a change: omit sugar, add chopped scallions, herbs and a little grated cheese, then serve with a poached egg for a hearty breakfast. Alternatively, make thin silver-dollar pancakes for a brunch buffet where guests can stack their own small cakes with various toppings. The same principles apply — control liquid, avoid overmixing and cook at a steady moderate temperature — which makes these variations easy to master once you know the essentials.

Making truly fluffy pancakes is a mix of chemistry and small habits learned by repetition. Understand the roles of ingredients, respect gentle mixing, rest the batter and mind your pan temperature. Add a few advanced tricks when you want extra height, and remember that small errors are fixable with simple adjustments. The next time you wake up looking for a satisfying breakfast, you will have a clear, flexible method that delivers clouds on a plate rather than flat discs. Enjoy experimenting and making the process your own — pancakes are forgiving, and a good stack rewards curiosity.

Comforting Slow Cooker Dinners: Easy, Homey Meals That Wait for You

Comforting Slow Cooker Dinners: Easy, Homey Meals That Wait for You

There is a special kind of calm that fills the kitchen when a pot hums away all afternoon and the aroma promises dinner without the rush. Comforting Slow Cooker Dinners bring that calm to life — they turn simple ingredients into cozy bowls that soothe and satisfy. Whether you call it a slow cooker, crockpot, or simply a method for slow simmering, the appeal is the same: minimal hands-on time, deep flavors, and leftovers that improve overnight. In this piece I’ll walk you through practical tips, pantry staples, clever techniques and a handful of dependable recipes that work on rainy evenings or busy weeknights. Read on for ideas that make comfort food feel thoughtful rather than indulgent.

Why choose low-and-slow dinners: the real advantages

Slow cooker meals are about more than convenience; they extract flavor in ways quick cooking cannot. When collagen breaks down over hours it enriches broths and sauces, giving meat a tenderness that tastes like time. For households balancing work, school, and other commitments, the appliance turns fragmented schedules into a single, satisfying endpoint — dinner ready when you are. Energy use is modest compared to the oven, and the ability to start a meal in the morning and come home to finished food changes how evenings flow. Finally, slow cooking encourages one-pot thinking, which cuts cleanup and leaves room for living.

The method also plays well with budget-friendly cuts and humble ingredients. Tougher roasts, bone-in pieces, and inexpensive beans transform into something luxurious after a long, gentle simmer. Vegetables take on a melting quality that suits mashed potatoes, soft risottos, and stews meant for warming the spirit. For cooks worried about monotony, the solution is variety: different cuisines, herbs, and finishing touches can keep the repertoire fresh. In short, this is a technique that rewards patience and creativity equally.

Pantry staples and fresh ingredients that save weeknights

Stocking up for slow cooker success doesn’t require exotic items; a small set of staples will support dozens of recipes. Think canned tomatoes, low-sodium broth, dried beans, rice or barley, and a handful of strong-flavored condiments such as soy sauce, mustard, and Worcestershire. Aromatics like onions, garlic, and carrots are foundational and last well; fresh herbs can be added at the end for brightness. Olive oil, flour or cornstarch for thickening, and a good-quality canned coconut milk broaden the spectrum to include curries and creamy braises. These basics keep the decision part easy and the execution fast.

Freshness matters mostly for finishing accents rather than for the long stew itself. Add delicate herbs, lemon zest, or a drizzle of olive oil just before serving to lift the dish. Root vegetables and winter squashes are particularly suited to the slow cooker — they hold texture without disintegrating into mush and add natural sweetness to savory preparations. If you like to plan, labeling jars of spice mixes or pre-chopping vegetables into freezer bags removes almost all friction on cooking day. Small investments in organization yield a lot of calm at dinner time.

Techniques that elevate simple crockpot cooking

Good slow-cooked dinners are rarely accidental; they come from applying a few consistent techniques. First, searing meat briefly in a hot pan before it goes into the crockpot makes a big difference: the Maillard reaction creates flavor compounds that the slow cooker alone won’t produce. Second, mind the liquid — you rarely need as much as you think, because the lid traps steam and concentrates flavors. Use broth, wine, or even beer as a base and balance with an acidic component like tomatoes or a splash of vinegar to keep the palate bright.

Layering matters too. Put dense vegetables such as potatoes and carrots at the bottom, directly under meat, so they cook evenly. Reserve delicate items and dairy until the last 30 to 60 minutes to prevent curdling or overly soft textures. For thickening, a slurry of cornstarch and cold water works quickly; alternatively, remove some cooking liquid, reduce it on the stove, and return it for a glossy finish. Finally, taste near the end and adjust seasoning: what you added in the morning often needs a final lift before serving.

Five dependable slow cooker dinners to rely on

1. Hearty Beef and Barley Stew

This is the sort of meal that announces comfort without ceremony. Use a chuck roast trimmed into cubes, sear it, then add to the crockpot with beef broth, pearl barley, carrots, celery, onions, and a bay leaf or two. Let it cook low for seven to eight hours until the barley is tender and the meat pulls apart easily. Finish with a handful of parsley and a splash of sherry or balsamic vinegar to brighten the deep flavors. It’s terrific with crusty bread or a simple green salad.

  • Ingredients (summary): chuck roast, pearl barley, beef broth, carrots, celery, onions, garlic, bay leaf, parsley, optional sherry.
  • Timing: 7–8 hours on low or 4–5 hours on high.

2. Creamy Tuscan Chicken

This version of a creamy braise borrows Italian flavors without fuss. Place bone-in chicken thighs in the crockpot with sun-dried tomatoes, garlic, a little chicken broth, and a jar of roasted red peppers for depth. During the final hour stir in cream or full-fat coconut milk, and wilt fresh spinach into the sauce. The result is rich yet balanced, and it pairs well with polenta, mashed potatoes, or simply spooned over buttered noodles. The slow heat keeps the chicken moist and the sauce silky.

  • Ingredients (summary): chicken thighs, sun-dried tomatoes, roasted red peppers, garlic, chicken broth, cream or coconut milk, spinach, Italian herbs.
  • Timing: 5–6 hours on low or 3–4 hours on high; add dairy in last 30–45 minutes.

3. Vegetarian Lentil and Sweet Potato Curry

For nights when meat feels heavy, a crockpot curry can be soulful without being heavy. Combine dried lentils, cubed sweet potatoes, canned tomatoes, coconut milk, curry powder, and a couple of bay leaves in the slow cooker. The long, gentle heat allows the lentils to collapse into a thick, stew-like texture that clings to rice or flatbreads. Near the end stir in a squeeze of lime and chopped cilantro for lift. Leftovers taste even better the next day and freeze well for quick weekday meals.

  • Ingredients (summary): lentils, sweet potatoes, canned tomatoes, coconut milk, curry powder, garlic, onion, lime, cilantro.
  • Timing: 6–7 hours on low or 3–4 hours on high. Adjust liquid to desired thickness.

4. Pulled Pork with Maple Mustard Glaze

Pulled pork is a classic crockpot triumph: a pork shoulder slowly yields tender shreds that soak up sauce beautifully. Rub the meat with smoked paprika, brown sugar, and salt, sear until caramelized, then add onions and apple cider or broth. Slow cook until the pork falls apart, then mix with a maple-mustard glaze — Dijon, maple syrup, a splash of apple cider vinegar — and serve on toasted buns. It’s excellent with quick pickled red onions and a crisp slaw for contrast.

  • Ingredients (summary): pork shoulder, smoked paprika, brown sugar, onions, apple cider or broth, Dijon mustard, maple syrup, apple cider vinegar.
  • Timing: 8–10 hours on low or 5–6 hours on high; shred and glaze in final 20 minutes.

5. Seafood Chowder for Chill Nights

Seafood in a crockpot requires gentle timing, but when handled right the result is sublime. Start with a base of diced potatoes, corn, onions, celery, fish or shellfish stock, and aromatics. Cook the root vegetables until tender, then add firm white fish, shrimp, or scallops in the last 30–45 minutes so they stay tender. Enrich with a little cream or butter at the end and finish with fresh dill or chives. Serve with rye bread for a satisfying, seaside-inspired comfort food experience.

  • Ingredients (summary): potatoes, corn, onions, celery, fish stock, mixed seafood, cream or butter, dill or chives.
  • Timing: 4–6 hours on low for vegetables; add seafood in final 30–45 minutes.

Meal planning and batch-cooking strategies

Turning the slow cooker into a planning tool multiplies its value. Cook once, eat thrice: roast a large piece of meat and use it for tacos, sandwiches, and stews across several days. I like to double recipes when the calendar looks busy and freeze individual portions in reusable containers for quick lunches. Pre-portioning dry ingredients into labeled bags — beans with spices, rice with bay leaves — speeds decision-making on hectic mornings. A modest amount of prep before the week starts yields calm dinners and fewer late-night takeout orders.

Timing and temperature control help with flexibility. If a recipe finishes early, most modern crockpots have a warm setting that maintains safety and texture for a few hours. For longer holds, try to keep liquids at a level that avoids evaporation and concentrate flavors later on the stove if needed. Keeping a running list of favorite combinations on the fridge avoids indecision: it removes the “what to cook” friction and encourages small experiments instead of culinary avoidance.

Side dishes and pairings that complete the meal

Satisfying comfort food rests on complementary sides that add texture and contrast. For rich stews and braises, bright, acidic garnishes like pickled vegetables or a squeeze of citrus cut through the richness. Hearty dishes pair well with mashed or roasted root vegetables, which soak up sauces. Lighter mains, such as the lentil curry, benefit from cooling yogurt or crisp salads to balance warm spices. Bread is a universal ally; a rustic loaf, warm biscuits, or naan make it easy to mop up every last spoonful.

Main Good Side Why it works
Beef and Barley Stew Crusty rye or whole grain bread Sturdy bread soaks up broth and adds chew
Tuscan Chicken Polenta or buttered noodles Creamy bases echo the sauce texture
Lentil Curry Cucumber-yogurt salad Cooling contrast to warm spices

Common problems and how to fix them

Comforting Slow Cooker Dinners. Common problems and how to fix them

Even with a simple appliance, things can go astray, and knowing how to respond saves a ruined dinner. If the dish is too thin, reduce the liquid on the stove or stir in a slurry of cornstarch and water until it reaches the right body. Overcooked vegetables that have turned to mush are best reframed as a spread or blended into a soup rather than discarded. Undersalted stews are fixable: add salt in small increments toward the end, and taste as you go. Finally, if meat is still tough after the recommended time, give it extra hours on low; collagen breaks down slowly, and patience is usually rewarded.

Temperature and timing mistakes are common but often reversible. If the slow cooker was set on high by accident and the food finished early, transfer to the warm setting and refresh flavors with herbs and acid. For food safety, never leave perishable items at room temperature for extended periods; the appliance should be on and functioning, or food should be cooled and refrigerated. Keeping a meat thermometer or simple timer helps avoid guesswork and builds confidence in using the appliance.

Small rituals that make slow cooker dinners feel special

Turning routine into ritual elevates the meal without adding work. I like to toast seeds or spices in a dry pan and sprinkle them over stews for an aromatic finish. A dedicated “garnish station” with chopped herbs, lemon wedges, grated cheese and crunchy elements lifts even the simplest plate. Serving food family-style from the pot invites conversation and reduces plating fuss. These little actions make slow cooker meals feel intentional, not an afterthought.

Another small habit: photograph one successful dish each week and jot down any tweaks that improved it. Over a few months this builds a private recipe bank tailored to your tastes and schedule. When friends or family ask for a favorite, you’ll reach with confidence rather than guesswork. Slow cooking rewards repetition — the more you practice, the more you’ll learn the moments when a dish needs a pinch more salt, an extra herb, or a different finishing touch.

Comforting Slow Cooker Dinners — a final note

Slow cooking is a generous practice: it lets time do the work while you live your day. The recipes and techniques here are starting points; seasoning, timing and pairings can be adjusted to match the seasons, your pantry, and the people you feed. Use the appliance to experiment with cuisines, convert economical ingredients into memorable meals, and create a calm rhythm around dinner. In my experience, a well-tended crockpot becomes less an appliance and more a quiet partner in weekly life, turning modest inputs into reliably comforting food.

Weeknight Wonder: Simple Stir Fry Recipes to Master in 30 Minutes

Stir-fry is one of those kitchen superpowers that turns a handful of ingredients into a satisfying meal without drama. In this article I will share practical techniques, reliable sauce formulas, and recipes that anyone can adapt, whether cooking for one or feeding a family. You will find vegetable-led ideas, protein-focused dishes, and pairing options for rice and noodles, all designed to keep dinner fast, flavorful, and flexible. Along the way I sprinkle personal tips from years of weekday cooking and travel through markets where stir-frying felt like the pulse of everyday life. By the end you will have a small arsenal of quick recipes and the confidence to improvise confidently.

Why stir-frying works and what it gives your food

Stir-frying is efficient because it cooks food quickly at high heat, preserving texture and color while concentrating flavors. The rapid searing caramelizes edges, sealing juices in meats and keeping vegetables bright and crisp rather than waterlogged. This method also lends itself to bold, layered seasoning: aromatics like garlic and ginger jump first, then vegetables, then a sauce that glazes everything at the end. From the perspective of nutrition and taste, that short contact with heat minimizes nutrient loss and keeps mouthfeel lively, which matters when you want a meal that feels both light and satisfying. In short, stir-frying gives speed, texture, and punchy flavor in one pan.

Understanding the basic rhythm of a stir-fry—prep first, then heat, then sequence—solves most problems before they begin. Mise en place is not a fancy chef affectation here; it is the difference between a hectic scramble and a smooth, five-minute sauté. Once ingredients are prepped and sauces measured, the actual time at the stove is a pleasant, almost meditative flurry of flipping and tasting. This predictability is why stir-frying has become central to Asian cooking traditions and why it translates so well to modern quick recipes. Treat the wok like a musical instrument and your timing like rhythm, and the results will follow.

Essential tools and pantry staples

You do not need a million gadgets to make great stir-fries, but a few reliable tools help. A good wok or a heavy-bottomed skillet provides even heat and enough surface for ingredients to sear rather than steam. A long-handled spatula or wooden spoon keeps your hand away from the heat and makes tossing simpler. Beyond tools, stock your pantry with a handful of sauces and seasonings: soy sauce, rice vinegar, toasted sesame oil, oyster sauce, and a neutral high-smoke oil such as peanut or avocado. Keep cornstarch for velveting and thickening, and have garlic, ginger, scallions, and dried chilies on hand for instant aromatic lift.

Below is a compact list of staples that will let you assemble countless fast meals without a run to the store. These items are easy to store and last a long time, making them ideal for busy cooks who want consistent results. With these on hand you can build both simple weekday stir-fries and more complex weekend dinners without stressing over missing ingredients.

  • Soy sauce (regular and low-sodium)
  • Rice vinegar and mirin
  • Oyster sauce and hoisin (optional)
  • Sesame oil and neutral high-heat oil
  • Cornstarch, sugar or honey
  • Fresh garlic, ginger, scallions
  • Dried chilies or chili paste

Basic stir-fry sauces and how to balance flavors

Successful sauces balance salt, acid, fat, and sweet. A basic ratio to remember is salty from soy, acid from vinegar or citrus, a small sweet element like sugar or honey, and a finishing drizzle of sesame oil for aroma. Adjust as you build flavors: add more acid if the dish feels flat, more sweetness if the sauce is too sharp, and a pinch of cornstarch slurry if it needs body. A couple of tablespoons of any of these go a long way with a pound of vegetables or protein, so start small and taste. The goal is a glossy coating that complements ingredients rather than drowning them.

Here are three reliable sauce formulas that work across vegetables, chicken, beef, and tofu. I include rough ratios so you can scale up or down. Keep these written on a note stuck to a kitchen cabinet and you will rarely need a recipe again.

Sauce Ingredients (per 1 lb / 450 g) Use with
Soy-Garlic 2 tbsp soy sauce, 1 tbsp rice vinegar, 1 tsp sugar, 1 tbsp cornstarch + 1/4 cup water, 1 tsp sesame oil Broccoli, green beans, chicken
Honey-Sesame 1.5 tbsp soy sauce, 1 tbsp honey, 1 tbsp rice vinegar, 1 tsp toasted sesame oil, cornstarch slurry Carrots, snap peas, tofu
Spicy Szechuan 1.5 tbsp soy, 1 tbsp chili paste, 1 tbsp rice vinegar, 1 tsp sugar, 1 tbsp sesame oil Beef, eggplant, mixed greens

Vegetable-forward stir-fries to keep on rotation

Vegetable stir-fries are the quickest way to get dinner on the table and they adapt well to whatever is in season or your fridge. Aim for a variety of shapes and textures: a denser vegetable like broccoli or cauliflower benefits from a brief blanch before stir-frying, while thin asparagus or snow peas go straight into the wok. Start with aromatics in oil, toss in the heartier vegetables first, then add tender items near the end so everything hits the right doneness at once. Finish with a splash of sauce and a scatter of herbs or toasted seeds. These dishes make excellent mains for vegetarians and bright, healthy sides for meat-based meals.

Simple combinations that never fail include broccoli and shiitake with garlic, baby bok choy with soy and oyster sauce, and a colorful medley of bell peppers, snap peas, and carrots with sesame. For wok time, individual vegetables rarely need more than two to six minutes depending on cut size. For an extra dimension, add toasted nuts or seeds at the end and a squeeze of fresh lime to lift the flavors. Leftovers reheat well; store components separately from rice and reheat quickly in a hot pan to preserve texture.

Recipe: Garlic Broccoli and Shiitake

This recipe is a weekday favorite because it takes under 20 minutes from start to finish and pairs with rice or noodles seamlessly. Trim broccoli into small florets and slice shiitake thin, then blanch the broccoli for one minute to ensure even cooking. Heat oil in the wok, fry minced garlic and ginger until aromatic, toss in the mushrooms, then add the broccoli back with a splash of broth or water to create steam. Stir in the soy-garlic sauce and cornstarch slurry, cook until the sauce thickens and coats the vegetables, then finish with a drizzle of sesame oil and chopped scallions. Serve immediately over steamed rice.

Protein stir-fries: quick recipes for chicken, beef, and tofu

Proteins need a little more attention to get ideal texture. For chicken and beef, a brief marinade with soy, Shaoxing wine or mirin, and cornstarch improves tenderness and creates a silky exterior when seared. Tofu benefits from pressing to remove excess water, followed by a light coating of cornstarch for a golden crust in the pan. When cooking meat, do not overcrowd the pan; give pieces space so they brown rather than steam. Cook proteins in batches if necessary, then return them to the wok at the end to marry with sauce and vegetables. This approach keeps everything juicy and flavorful.

Here are three fast protein approaches you can rely on during a busy week. For chicken, slice thin across the grain and marinate for 10 to 30 minutes for best results. For beef, choose flank or skirt and slice thin against the grain; flash-sear at very high heat. For tofu, press and coat lightly with cornstarch, then pan-fry until all sides are crisp before tossing into the final sauce. These small steps add texture and make quick recipes feel like something you’d expect from a restaurant.

Recipe: Quick Honey-Sesame Chicken

Slice boneless chicken thighs thin and toss briefly with 1 tsp soy, 1 tsp cornstarch, and a pinch of salt to give the meat a smooth finish. Heat oil until shimmering, sear the chicken in batches until golden, then remove and set aside. In the same pan, quickly stir-fry sliced bell peppers and snap peas with minced garlic, return the chicken, and pour in the honey-sesame sauce. Let everything bubble for a minute until the sauce thickens and glazes the pieces, then finish with toasted sesame seeds. This dish goes well with steamed white rice or a bed of soba noodles for a lighter option.

One-pan dinners, rice, and noodle pairings

Stir-fries pair naturally with rice and noodles, and choosing the right base transforms a simple pan into a full meal. Leftover cold rice makes the best fried rice because the grains separate easily; toss pre-cooked rice into a very hot pan with oil, aromatics, scrambled egg, and a small amount of soy. For noodles, lo mein is forgiving and quick: cook noodles until just done, drain, then toss into the wok with sauce and cooked proteins or vegetables. Rice noodles and glass noodles soak separately and finish in the pan for a minute so they do not break down. Keeping bases ready or using leftovers is one of the best tricks for truly fast dinners.

When planning meals, think in layers: a starch base, a protein, a vegetable element, and a finishing sauce or herb. If you prep vegetables and sauce the night before, assembly at the stove is remarkably fast. Another small efficiency is to cook a double batch of a neutral base like jasmine rice and freeze it in flat portions; thawed portions flash-fry in a pan in under five minutes. These little habits let stir-frying remain a genuine quick recipe rather than a chore.

Flavor variations and regional inspirations

Stir-frying is a canvas for many regional flavors across Asian cooking and beyond. A Korean-inspired stir-fry can be built around gochujang and sesame oil with scallions and mushrooms, while Thai influence leans on fish sauce, lime, and holy basil. Indonesian flavors often bring in kecap manis, a sweet soy that caramelizes beautifully, and Chinese Szechuan dishes add toasted Szechuan peppercorns and dried chilies for numbing spice. Experimenting with these variations keeps the technique fresh and allows you to honor different flavor profiles without changing the basic method. Treat the wok modularly: change the aromatics and sauce, keep the technique, and you get a new dish.

Using regional ingredients also teaches you the interplay of local condiments. For example, a splash of fish sauce adds umami depth that soy alone cannot replicate, while mirin or a sweet rice wine rounds flavors unlike sugar. Fresh herbs such as Thai basil or cilantro at the end give a distinct personality to a simple stir-fry, making the meal feel intentional rather than thrown together. These touches are what make quick recipes taste thoughtful.

Troubleshooting common problems

Soggy vegetables are the most common complaint and usually come from overcrowding the pan or cutting pieces too large. Solve this by cooking in batches or increasing the pan surface area and pre-blanching dense vegetables like carrots or broccoli. Tough meat generally means either undercutting against the grain or overcooking; slice thin and stop cooking as soon as it is just done because residual heat will continue to carry it the last mile. A watery sauce often happens when too much liquid is added or cornstarch slurry is insufficient; reduce liquid by a minute or two or add a touch more slurry diluted in cold water. These fixes are simple and maintain the quick nature of stir-frying.

Another tip is to keep aromatics from burning. Garlic and ginger become bitter if left unattended in smoking oil, so add them when the oil is warm but not smoking and follow with other ingredients to protect them. If your pan smokes excessively, lower the heat briefly and add a small splash of liquid to restore balance. Learning to watch the pan closely is the core skill of a good stir-fry; once you can read visual and olfactory cues, adjustments come naturally. These are practical corrections I learned the hard way during early kitchen experiments.

From my kitchen: a small, useful ritual

In my own weeknight routine I keep a jar of mixed sauce in the fridge made from simple components: soy, rice vinegar, sesame oil, and a touch of honey, scaled for a week. That jar reduces decision fatigue and preserves consistency, and it frees me to change vegetables or proteins without fuss. On travel, I noticed street cooks always had one pan with prepped aromatics, which inspired me to pre-chop garlic and ginger in small containers and keep them chilled for rapid cooking. These small rituals transformed stir-frying from an occasional experiment into a go-to dinner strategy for my household. They are practical habits you can adopt immediately.

Meal prep and make-ahead strategies

Simple Stir Fry Recipes. Meal prep and make-ahead strategies

Stir-frying adapts well to meal prep because many components can be prepared ahead without losing quality. Chop vegetables and store them in airtight containers lined with paper towels to absorb moisture, marinate proteins for a day, and make a big batch of sauce to portion into jars. Par-cook heartier vegetables that benefit from a quick finish, and refrigerate noodles or rice ready to reheat. When the day comes to cook, assembly is a matter of minutes rather than an hour of chopping and measuring. This approach preserves the fresh, immediate character of stir-frying while multiplying its convenience.

Freezing is another option: blanched vegetables and some proteins freeze well and can be tossed straight into a hot pan from frozen, reducing prep time to zero. Sauces also freeze in ice cube trays for single-serve portions that thaw quickly under warm water. These strategies keep the spirit of quick recipes alive while allowing you to plan meals around busy schedules without sacrificing flavor or texture. Practically, this is how I get homemade stir-fries on the table after a long day at work.

Try one of the sauce formulas, keep a few staple tools and pantry items, and practice the sequence of cooking a couple of times this week. Once you master timing and build a small, reliable toolkit, simple stir fry recipes will become your fast, flavorful fallback. Start with modest ambitions, enjoy the process, and then branch out by swapping ingredients and regional seasonings to make the method your own. There is a unique satisfaction in pulling together a vibrant meal in the time it takes a good takeout to arrive, and once you feel that, you will look forward to the next stir-fry night.

Easy Meal Prep for Beginners: A Practical Guide to Simple, Tasty Make-Ahead Meals

Easy Meal Prep for Beginners: A Practical Guide to Simple, Tasty Make-Ahead Meals

Starting with easy meal prep can feel like learning a musical instrument: awkward at first, but quickly satisfying when the pieces fall into place. This article walks you through the first weeks of planning, cooking and storing meals so you stop improvising dinners after a long day. I will share concrete steps, realistic templates and simple recipes that work for a busy life. Expect practical tips rather than lofty rules, and a few mistakes I made so you can avoid them. The goal is clear: make meal prep manageable, enjoyable and repeatable for anyone new to the process.

Why meal prep matters and what it really gives you

Easy Meal Prep for Beginners. Why meal prep matters and what it really gives you

Meal prep is more than saving time; it buys you breathing room. When lunches and dinners are ready or near-ready in the fridge, decision fatigue fades and you avoid last-minute convenience foods that often cost more and disappoint. Regular planning also helps stabilize your grocery budget because you shop with a purpose rather than grabbing impulse items. Over time you’ll notice less food waste because portions are controlled and ingredients are reused across meals. Finally, making meals ahead makes it easier to eat better consistently, whether your aim is more vegetables, balanced plates or simply fewer takeout nights.

Beginners often imagine meal prep as an all-or-nothing weekend marathon, but practical prepping fits into small pockets of time. Even two focused hours on a Sunday can set up three to five days of simple lunches and dinners. The payoff compounds: week after week you refine templates that match your taste and schedule, and preparation becomes faster. Think of meal prep as building a system, not producing a single perfect batch of food. That mindset reduces pressure and makes progress visible quickly.

Essential tools and pantry staples for a smooth start

You do not need a heavy shop of gadgets to begin; a few reliable tools cover most needs. Start with good storage containers in a few sizes, a sharp chef’s knife, a baking sheet, a medium saucepan and a large skillet. A rice cooker or Instant Pot helps but is not mandatory; the basics will carry you through. Durable containers that stack neatly and are microwave-safe make reheating effortless and reduce cleanup friction. When tools are simple and functional, prepping feels less like a chore and more like a practical habit.

Stocking a flexible pantry is the other side of the coin and it pays off fast. Keep staples such as dried pasta, rice, canned tomatoes, beans, olive oil, a couple of vinegars and soy sauce. Add a handful of spices—salt, black pepper, smoked paprika, cumin, dried oregano—and you can transform bland ingredients into satisfying dishes. Frozen vegetables and fruits extend variety and reduce waste, while eggs and Greek yogurt offer quick protein. Having these items on hand prevents a mid-week run to the store and supports consistent cooking.

How to plan your first week without overthinking

Start small: plan for three main meals and two simple breakfasts or snacks for the week. Choose one template for each mealtime, such as roasted protein plus grain and one vegetable for dinner, a grain bowl for lunch and overnight oats for breakfast. This keeps your shopping list focused and reuses ingredients in different combinations so nothing goes unused. Pick two proteins and two vegetables that you enjoy and trust; variety comes from seasonings and sauces rather than dozens of unfamiliar ingredients. A concise plan reduces stress and increases the chance you will follow through.

Lay out the week visually on paper or in a notes app so you can check what needs cooking and when. Identify which dishes will be fully cooked in advance and which are quick assemblies on the day you eat them. Allocate time blocks—two hours Sunday for batch cooking, thirty minutes midweek for a refresh, and ten minutes each evening to assemble the next day’s lunch. These loose rules are flexible but keep you honest. Over time you will discover the rhythm that fits your week.

Batch cooking proteins and grains: the backbone of your menu

Batch cooking is the most efficient way to fuel weekday meals because proteins and grains form the structure of almost every plate. Roast a tray of chicken thighs, pan-sear salmon fillets, or simmer a pot of lentils and you’ve solved several meals at once. For grains, cook a large pot of rice, quinoa or farro and portion it into daily servings. Keep dressings and sauces separate so reheated proteins and grains remain juicy rather than soggy. When you combine these prepped items, you can create bowls, wraps, salads and warm plates in minutes.

Cook with low-effort seasoning that scales well across meals; a simple mix of olive oil, lemon, garlic and smoked paprika brightens many proteins. For legumes, a long, gentle simmer with bay leaf and onion adds depth without fuss. If you prefer plant-based staples, batch-roast a sheet pan of chickpeas, sweet potatoes and cauliflower—they reheat well and pair with multiple sauces. Aim for two to three different proteins per week so you don’t get bored, and rotate grains to keep textures interesting.

Vegetables and salads that keep well and taste fresh

Vegetables need a bit of planning to stay crisp and appetizing through the week. Roasting is a forgiving technique: toss root vegetables, broccoli or peppers with oil and salt, roast until tender, and store in shallow containers for even cooling. Leafy salads are best assembled the day you eat them, but you can prep components—shredded cabbage, sliced cucumbers, blanched greens—and keep dressings separate. Raw veg sticks, such as carrots and bell peppers, store well in jars of water and make healthy snacking effortless.

Create a few make-ahead vegetable mixes that act as building blocks: a roasted Mediterranean mix, an Asian-style stir-fry blend, and a simple sautéed greens batch. These mixes pair with different proteins and grains and change flavor dramatically with sauces and garnishes. Adding fresh herbs, a squeeze of citrus or toasted seeds just before serving revives the dish and keeps each meal interesting. This approach makes vegetables feel like flexible teammates rather than a single-use side.

Simple recipes and templates you can rely on

Templates turn creativity into reliable meals, and recipes act as training wheels. Use three templates you can repeat and slightly modify: grain bowl, sheet-pan dinner and one-pot stew. For a grain bowl, combine a base of cooked grain, a protein, a vegetable mix and a bright dressing. For a sheet-pan dinner, place protein and hearty veg on one tray with a single seasoning blend. One-pot stews are forgiving and improve with time, which makes them great for leftovers.

Below is a small table showing straightforward combinations that work well for beginners and can be swapped week to week.

Meal Base Protein Veg & Add-ons
Grain Bowl Quinoa or brown rice Roasted chicken or tofu Roasted sweet potato, kale, tahini dressing
Sheet-Pan Dinner Salmon or chickpeas Broccoli, cherry tomatoes, lemon wedges
One-Pot Stew Barley or pasta Beef, lentils or beans Carrots, onions, canned tomatoes, herbs

Storage, reheating and food safety essentials

Proper storage extends the life of your meals and protects flavor. Portion cooked food into single- or double-serving containers while it cools to speed refrigeration and reduce the chance of spillage. Use shallow containers for faster cooling and eat meat or fish within three to four days; most cooked grains and vegetables keep well for four to five days. Label containers with dates when you start out; that small habit prevents mystery lunches by midweek.

When reheating, add a splash of water or sauce to grains and proteins to restore moisture and heat gently to avoid drying out. Microwaves and oven reheats both work; a low oven for ten minutes brings crispness back to roasted veg, while the microwave is fastest for bowls. If you freeze portions, do so in sturdy containers and thaw in the fridge overnight before reheating. Respect basic food safety rules and your meals will be both safe and satisfying.

Shopping smart and saving time in the store

A tight shopping list and a plan will cut trips and stress. Group items by store area—produce, proteins, pantry staples—so you move through the aisles efficiently. Buy bulk for staples you use often, but only for perishable items if you’re certain you’ll use them. Frozen options are great value for vegetables, fruit and some proteins because they keep well and reduce spoilage risk. Pay attention to sales, but don’t overload on items you won’t eat just because they’re discounted.

Time of day matters: shop during less busy hours if possible, and bring a measured list to avoid impulse buys. Consider one mid-week fresh run for herbs, salad greens and fruit if needed, rather than trying to predict every perishable for an entire month. If you use delivery or click-and-collect, assemble your list carefully and check item substitutions. Planning pays off not only in time saved, but in reducing the stress that kills motivation to cook at home.

Time-saving hacks and ways to stay consistent

Small rituals keep meal prep sustainable: set a weekly prep time, make a playlist for the kitchen or invite a friend to swap recipes. Batch tasks—peeling, chopping, mixing dressings—together to reduce setup and cleanup time. Use multi-purpose components: a single roasted vegetable mix can become a side, a baked-topped grain casserole, or a filling for wraps. Keep a short list of go-to sauces and dressings that transform identical bases into different meals.

Allow flexibility: miss a prep session and salvage the week with a simple salad, a quick omelette or a hearty soup. Reward consistency in small ways, like trying a new spice or ordering a favorite ingredient after three weeks of prep. The point is not perfection but momentum; small repeated wins build a habit that reshapes how you eat. Over months, those wins add up to less stress and better food.

Troubleshooting common beginner problems

Boredom, soggy greens and running out of time are the top complaints from people starting meal prep. Boredom is solved by rotating a handful of sauces and spices rather than changing core ingredients constantly. Soggy greens are avoided by storing dressings separately and using crisping techniques like toasting seeds or adding fresh herbs just before serving. If time is scarce, shift prep into smaller sessions: ten minutes at night to assemble lunches for the next day is better than nothing.

Another common issue is overeating the “fresh” food early in the week and abandoning the rest. Combat this by portioning ahead and freezing half the batch if necessary. If a recipe consistently disappoints, tweak one variable rather than abandoning the whole approach—adjust the cooking time, swap a spice, or change the acid in the dressing. Learning to troubleshoot recipes is part of the craft and makes you a more confident home cook quickly.

My own first month: lessons from the kitchen

When I started meal prepping years ago I made predictable mistakes: too many new recipes at once and overcomplicated components that required constant attention. I wasted time chopping unusual vegetables I then failed to use and felt deflated midweek. The turning point came when I simplified to three templates and focused on reliable techniques—roasting, simmering and quick sautéing. Once I embraced repetition, the rhythm returned and flavors improved because I learned how much seasoning each component needed.

One practical habit that saved me was keeping a running “swap list” of favorite sauces and seasoning blends. A single roasted chicken paired with chimichurri, soy-ginger glaze or a lemon-herb mix felt like three different meals. I also benefited from sharing a prep session with a neighbor occasionally; cooking for two households reduced per-person time and introduced new recipes. Those small changes turned meal prep from a weekend marathon into a pleasant, productive part of my week.

Starting with easy meal prep gives you a toolkit that grows with your confidence. Begin with simple templates, a compact pantry and two hours of focused batch-cooking, then adapt as you learn what you like. Focus on reliable storage, sensible shopping and a handful of sauces to keep flavors varied. Over time you will develop a rotation that feeds you well without stress, and you will appreciate the quiet satisfaction of a week where meals are mostly solved before the week even starts. Try one small experiment this week and watch how quickly the habit takes hold.

Holiday Roasts That Impress: Show-Stopping Centerpieces for Your Festive Table

Holiday Roasts That Impress: Show-Stopping Centerpieces for Your Festive Table

There is something almost ritual about the moment a roast leaves the oven and fills the room with that deep, savory scent. For many hosts, the roast is more than food; it is the anchor of the holiday table, the thing guests remember long after the last slice is gone. This article explores how to plan, prepare and present holiday roasts that impress, whether you aim for an elegant beef crown roast, a glazed ham or a stuffed vegetarian centerpiece. I will walk through choices of meat and alternatives, flavoring strategies, timing and pairing suggestions, plus practical tips I use in my own kitchen when preparing a festive meal. Expect concrete steps, a few personal notes and menus you can adapt, all laid out so you can enjoy the party as much as your guests do.

Choosing the Right Roast for Your Crowd

Start by matching the roast to the people at your table. A large family that favors traditional flavors will welcome a classic beef rib roast or honey-glazed ham, while a group of adventurous eaters might prefer lamb with Middle Eastern spices or a rich porchetta. If you need to stretch a budget, a boneless pork loin or a whole roasted chicken can be scaled up with thoughtful sides to feel just as celebratory. For mixed dietary needs, consider offering a primary protein alongside a hearty plant-based roast or stuffed winter squash so everyone at the festive meal has a plate that feels special.

Portion planning matters. For bone-in cuts allow roughly 1 to 1.25 pounds per person, and for boneless cuts plan 0.5 to 0.75 pounds. When deciding, think about leftovers too; many hosts welcome the extra sandwiches and soups that follow. Also weigh effort against reward: some roasts require long low-temperature cooks, others demand hands-on glazing and basting. Pick a centerpiece that fits your timeline, your confidence in the kitchen and the tone of the celebrations you imagine.

Planning and Timing: The Roadmap to a Perfect Roast

Good timing turns a decent roast into a memorable one. Begin with defrosting and seasoning schedules: large cuts need a day or two to thaw fully in the refrigerator and benefit from a dry-brine overnight to deepen flavor and improve crust. Use a thermometer as your best friend rather than relying on time alone; internal temperature gives you predictable doneness so you can remove the roast at just the right moment. Remember to factor resting time into the timeline—resting allows juices to redistribute and makes carving clean and graceful.

Think of the oven as a stage where multiple acts must be coordinated. If you have limited oven space, plan accompaniments that can be served at room temperature or warmed in other appliances. A staggered schedule where root vegetables, gratins and the roast finish at slightly different times will keep everything fresh and avoid scrambling at the last minute. I write a simple timeline on a sheet of paper for every large feast—what goes in, at what temperature, and when to tent with foil—so I can circulate with my guests instead of watching clocks.

Flavor Profiles and Marinades

Choosing a flavor profile early makes the rest of the meal fall into place. Classic herb butter with garlic and thyme suits beef, lamb and poultry, while citrus, honey and soy create bright notes for pork. Spices like cumin, coriander and smoked paprika lend warmth to a pork shoulder or leg of lamb, and a miso or tamarind glaze can add umami depth to a ham. For vegetarian roasts, combine nuts, mushrooms and grains with bold herbs and a glossy glaze to mimic the savory heft of meat.

Marinades and rubs deserve attention because they speak to the first bite. Here are a few quick ideas to spark combinations:

  • Herb butter: softened butter, chopped rosemary, sage, lemon zest, garlic
  • Sweet-sour glaze: brown sugar, Dijon mustard, apple cider vinegar, orange juice
  • Umami paste: miso, honey, soy, grated ginger
  • Mediterranean rub: olive oil, smoked paprika, cumin, minced garlic, lemon

Apply rubs several hours ahead for backbone flavor, and brush glazes during the last 20–30 minutes of roasting to avoid burning while creating a shiny, sticky finish. For a festive meal, combine one bold note—smokiness, sweetness or acidity—with herbs that complement, and you will have a cohesive, interesting roast.

Techniques That Elevate Any Roast

Simple techniques make a big difference. Start with room-temperature meat; cold interiors slow cooking and produce uneven results. Searing in a hot pan before roasting builds a flavorful crust and improves color. Trussing poultry or rolling and tying a porchetta keeps shapes compact for even cooking and nicer presentation. When choosing a method, weigh the cut: dense, marbled cuts benefit from oven roasting at moderate temperatures, while leaner cuts do well with fast, high heat followed by resting.

Reverse sear is a technique worth learning: cook the meat slowly at low temperature until just below target internal temperature, then sear at very high heat for a short time to form a crust. It gives control and a uniform pink interior for beef and lamb. For pork, cooks now accept a slightly lower final temperature than older guidelines, which keeps meat juicy while ensuring safety; consult current safe-temperature recommendations for each protein. Above all, use a reliable instant-read thermometer and give the roast a timed rest of at least 15 to 20 minutes before carving.

Vegetables and Sides That Complement the Roast

Sides are the supporting cast that make the roast shine. Choose textures and flavors that balance richness: bright braised greens cut through fat, a silky parsnip puree contrasts roasted textures, and a crisp, acidic salad refreshes the palate. Root vegetables roasted with herbs and a touch of honey or maple echo the caramelization of the main roast and are an easy, crowd-pleasing choice. Starch matters too; mashed potatoes, a gratin or buttered spaetzle provide comforting ballast for the meal.

Pairing examples make it simple to decide. Below is a compact table of main roast types and complementary sides to help you plan.

Main Roast Complementary Sides
Beef rib roast Horseradish cream, roasted root vegetables, creamy gratin
Honey-glazed ham Braised red cabbage, roasted sweet potatoes, mustard-maple glaze
Herb-crusted lamb Mint chimichurri, roasted carrots, lemony couscous
Porchetta or pork loin Apple compote, sautéed greens, rosemary potatoes
Stuffed squash (veg roast) Wild rice pilaf, tahini yogurt, pomegranate salad

Timing the Feast: Coordinating Multiple Dishes

Large gatherings turn cooking into choreography. Start by identifying what must be made fresh and what can be prepped the day before—gravies, sauces and many sides often taste better after a night to rest. Use the roast cooking time as the backbone of the schedule: if the roast will be in the oven for three hours, slot tasks into that window that require the oven briefly or can be finished on low heat. I always print or write a schedule showing when each dish should be started, when to baste, and when to remove the roast so the final half hour is calm.

Make use of appliances to expand capacity: slow cookers can hold sauces and braised sides warm, and microwaves or toaster ovens can reheat individual components. Assign small jobs to family or friends—someone to carve, another to whisk gravy—so you are not the only person touching the food at the last minute. Timing also means being realistic; if you have one oven and a large roast, build a menu around sides that don’t need the same temperature or can be finished on the stovetop. This way the holiday roast takes center stage without the rest of the meal feeling rushed.

Making It Look as Good as It Tastes

Holiday Roasts That Impress. Making It Look as Good as It Tastes

Presentation is part of the pleasure. A well-plated roast tells a story about care and attention. Carve with intention—thin, even slices for beef, slightly thicker for pork and lamb—and arrange them on a warmed platter with garnish that complements the flavors. Fresh herbs, citrus slices and roasted vegetables placed artfully around the roast add color and indicate the flavors inside. Even a simple flourish, like a drizzle of reduced pan juices, makes the dish look restaurant-quality.

I remember a holiday when I served a crown roast for the first time: I arranged slices like petals around a small mound of glazed carrots and sprinkled toasted breadcrumbs for crunch. Guests started photographing the plate before they tasted it; that kind of visual success breeds a buzz that enhances the meal before the first forkful. Presentation doesn’t need elaborate props—use wooden boards, clean white platters and matching bowls for condiments to keep the table cohesive and inviting.

Dietary Alternatives and Inclusive Options

Feeding a diverse group need not mean multiple full roasts; often one main plus a well-made vegetarian centerpiece will satisfy everyone. Consider a stuffed seitan roast, nut roast or a boldly seasoned stuffed winter squash as a highlight for non-meat eaters. These options can be dressed with the same glazes and sauces as meat roasts so all plates feel part of a unified festive meal. For guests with allergies, keep labels and a short list of ingredients available so people feel confident about what they eat.

Low-sodium, gluten-free and vegetarian versions of classic sides are easy to incorporate without sacrificing taste. Swap a gluten-free breadcrumb for a nut crust on a vegetarian roast, and use gluten-free thickeners for gravies. For festive celebrations where tradition matters, adapt rather than substitute: preserve the textures and contrasts people expect and adjust seasonings to suit dietary needs. This approach makes inclusivity feel like good cooking rather than a compromise.

Wine, Drinks, and Pairings

Drink pairing need not be intimidating; think in terms of balance. Rich red meats pair well with wines that offer structure and acidity, such as Cabernet Sauvignon, Bordeaux blends or a bold Syrah. Pork and roasted poultry do well with medium-bodied reds like Pinot Noir or fuller whites like oaked Chardonnay, depending on the glaze and seasonings. For an alcohol-free option, make a sparkling cranberry shrub or a spiced apple punch that refreshes the palate between bites.

When in doubt, match intensity: a boldly flavored herb crust or a sweet glaze needs a drink that can stand up to it. Serve a neutral sparkling wine at the start to lift the meal, and offer a simple guide near the drinks station so guests can choose with confidence. I often open two bottles early, one white and one red, and let guests sample; it reduces pressure and encourages conversation as people explore pairings with different dishes.

Common Mistakes and How to Avoid Them

Certain errors recur at holiday tables, but they are easy to prevent. Overcooking is the most familiar culprit; it removes juiciness and flattens flavor. A probe thermometer solves this, letting you remove meat a few degrees before the target because carryover cooking will finish the job. Another common mistake is under-seasoning—large cuts need confident seasoning at every layer, from surface rubs to any stuffing you use.

Neglecting mise en place is another trap. Small tasks overlooked early create a scramble later, and the roast becomes a stress factor instead of a shared pleasure. Prepare components ahead, set up serving dishes and designate helpers if possible. Finally, don’t skip resting and carving; a rested roast slices cleanly, looks better on the platter and tastes juicier. These corrections take little time but yield noticeably better results.

Make-Ahead Strategies and Leftover Ideas

Smart make-ahead steps preserve flavor and free you to enjoy the gathering. Many sauces, compound butters and braised components can be completed a day or two before and reheated gently. Vegetables can be roasted and refreshed in the oven for a few minutes while the roast rests. For the roast itself, you can do most of the slow cooking, then finish off with a glaze under high heat at service time to create that fresh-crisp exterior.

Leftovers transform into new meals that people actually look forward to. Turn slices of roast into sandwiches with pickles and sharp mustard, chop meat into a hearty stew or use shreds in tacos with quick slaws. Ham and pork work beautifully in bean soups, while leftover turkey or chicken makes a comforting pot pie. I always reserve a container of pan juices and fat when carving because reheating with a splash of those juices keeps cold leftovers tasting close to fresh.

Putting It Together: A Sample Menu for a Memorable Holiday

A cohesive menu simplifies shopping, timing and flavor balance. Here is a sample menu that emphasizes a centerpiece roast with complementary sides, designed for a festive meal of 8 to 10 people: herb-crusted prime rib, parsnip and potato gratin, roasted rainbow carrots with honey and thyme, braised kale with lemon, warm pear and walnut salad, gravy and horseradish cream, plus cranberry-orange relish. Finish with a simple citrus tart or a spiced pear galette so dessert remains lively but not heavy.

For timing: day-before tasks include dry-brining the roast, making gravy base, prepping vegetables and baking the tart. On the day, roast goes in while gratin and carrots are ready to go an hour or so before dinner so everything can finish together. Assign someone to carve and another to tend to drinks and plating. With a clear menu and responsibilities, the roast becomes the centerpiece the celebration deserves, and you can join your guests without worry.

Final Thoughts for Your Next Celebration

A holiday roast is more than a recipe; it is an invitation to shape an experience. Choose a roast that suits your guests and your skills, plan timing carefully, and put effort into seasoning and presentation. Small techniques—using a thermometer, resting the meat, and pairing sides thoughtfully—raise the whole meal. I find the simplest pleasures come from watching a table of people dig in, compare bites and smile at familiar flavors turned a bit better than last year’s attempt.

Whether you aim to master a classic beef rib roast, create a stunning porchetta, or present an inventive plant-based centerpiece, the goal remains the same: make a festive meal that feels intentional and welcoming. With a little preparation and these practical strategies, your next holiday roast will be one people talk about long after the last plate is cleared. Plan well, cook with care and then, most importantly, enjoy the celebrations.

How to Bake the Perfect Sourdough: A Practical, Hands-On Guide to Crusty Loaves

How to Bake the Perfect Sourdough: A Practical, Hands-On Guide to Crusty Loaves

Baking sourdough is part science, part craft, and entirely rewarding when the loaf comes out with that blistered crust and a tangy crumb. This guide walks you through the stages I consider essential: nurturing a lively starter, choosing flours and hydration levels, handling fermentation, and finally baking a loaf you’ll want to slice before it cools. I’ll share practical tips I learned by trial and error, and a few habits that make more consistent results likely. Read on for clear steps, troubleshooting notes, and small tricks that separate a decent homemade bread from a truly memorable sourdough bread. The emphasis here is on reproducible routines rather than vague rules, so you can repeat what works and tweak what doesn’t.

Understanding Your Starter: The Living Heart of Your Bread

A sourdough starter is simply flour and water fermented by wild yeasts and bacteria, but treating it like a pet helps. Feed it regularly and keep track of timing—when it doubles in size and shows bubbles throughout, that’s a reliable cue it’s ready. Room temperature, the flour you use, and how often you refresh the starter affect flavor and activity; whole grain flours tend to ferment faster and produce more lactic complexity. If you keep a starter on the counter you might feed it once or twice daily; refrigerated starters can be refreshed weekly. Learn to read its behavior rather than relying solely on clocks: volume, bubble pattern, and the “float test” (a small spoonful that floats in water) tell the real story.

Maintaining consistency in feeding ratio and schedule is the single best way to predict starter performance. I use a 1:1:1 routine for day-to-day feeding—equal parts starter, flour, and water by weight—which keeps acidity moderate and activity stable. For boosting strength before baking, a couple of successive 1:2:2 feedings at warmer temperature will make it more vigorous. Take notes: recording temperature, feeding ratios, and rise times will save you head-scratching later. Over time you’ll build an intuitive sense of when the starter is peaking and when it’s past its prime; aim to combine dough with starter at or just before peak for consistent sourdough bread.

Flour Selection, Hydration, and the Dough Feel

The flour you choose sets the texture and flavor foundation of your loaf, and hydration changes how the dough behaves more than anything else. Bread flour with higher protein gives stronger gluten and better oven spring, while adding some whole grain flour contributes flavor and an open crumb. Hydration—water as a percentage of flour—controls extensibility and openness; a 65–75% range is approachable for many home bakers, while 80% and above creates very soft, sticky dough that yields large holes if you’re confident. Weigh everything; grams are precise and eliminate unnecessary variation. Learn to assess dough by touch: tacky but not drowning in water is a good target for medium hydration dough.

Below is a simple recipe table that I use as a starting point for a 900–1000 g baked loaf; adjust percentages for different sizes and preferences. Using baker’s percentages makes it easy to scale and experiment without losing the relationship between ingredients.

Ingredient Baker’s % Weight (g) — Example
Bread flour 100% 600 g
Whole wheat or rye (optional) 10–20% 60–120 g
Water 68% 408 g
Starter (active) 20% 120 g
Salt 2% 12 g

Essential Equipment and Why It Matters

Good results don’t require expensive gear, but certain items make the process more reliable and less stressful. A kitchen scale is the single most important tool—guaranteed. A Dutch oven or a covered baking vessel creates steam and raises the loaf quickly, producing that prized crust and ear. A banneton or bowl lined with a linen cloth helps shape and support proofing dough; if you don’t have one, a bowl with a well-floured towel works. A razor or lame for scoring gives cleaner cuts than a knife, but a sharp blade will do. Finally, a digital thermometer helps you track temperatures in both starter and dough, which greatly improves predictability during bulk fermentation and final bake.

Keep your tools simple and clean. I found that drying out a banneton ruined the first few loaves until I learned to dust it generously with rice flour to prevent sticking. The Dutch oven I use has a tight-fitting lid that traps steam effectively; if yours doesn’t, add a small pan of water to the oven or spritz steam at the start of baking. Small practices like these reduce frustration and allow you to focus on dough feel and timing rather than equipment quirks.

Mixing: Hydration Meets Autolyse

Start by mixing flour and water and letting them rest—this is autolyse, and it’s extremely helpful. Autolyse hydrates the flour, encourages enzymatic activity, and lets gluten develop more gently without heavy kneading. After 20–60 minutes, add your starter and salt; adding salt later helps the enzymes do their work during autolyse and prevents premature tightening of the gluten. Mix until the starter dissolves and the dough begins to come together into a rough mass; at this stage you want a cohesive but shaggy dough. Avoid overworking; the combination of autolyse and folds during bulk fermentation will yield the structure you need.

For higher hydration doughs, a wet-hand technique or a dough scraper will make the process less messy. I often perform a few gentle pinches and turns once the starter is incorporated, enough to ensure even distribution of yeast and salt. The dough should feel alive—soft and slightly springy—rather than stiff or dry. If it seems too tight, allow a longer autolyse next time or slightly increase water. Conversely, if it spreads like a pancake, reduce hydration or increase whole grain to add structure.

Bulk Fermentation and Shaping: Timing and Texture

Bulk fermentation is where flavor and structure develop; it’s not just waiting, it’s active management. Keep the dough covered and perform a series of stretch-and-folds every 20–40 minutes during the first two hours to strengthen gluten gently. Temperature controls how fast fermentation proceeds: warmer means faster. Typical bulk fermentation ranges from 3 to 6 hours at room temperature, depending on starter strength and ambient heat. Look for a 20–50% increase in volume with visible bubbles and a soft, springy feel as indicators that it’s progressing well.

When you shape, be decisive. Tension on the outer surface of the loaf captures gas and helps oven spring; practice a tight seam and a smooth outer skin. For boules, use a series of coil folds or letter folds for batards, then let the shaped dough relax briefly before final tightening. Dust your banneton to prevent sticking and place the shaped dough seam-side up if you plan to invert it directly into a Dutch oven. If you prefer longer flavor development, cold retard in the fridge for 12–24 hours; this often improves taste and makes baking timing more flexible.

Stretch-and-Fold — A Simple Strength-Building Routine

Instead of kneading, most sourdough recipes rely on stretch-and-folds to build structure without over-oxidizing the dough. To execute, gently lift one edge of the dough and fold it over the center, rotate the bowl 90 degrees, and repeat until you’ve worked around the dough a few times. Perform 3–5 sets during the first half of bulk fermentation and then leave the dough to rest undisturbed. Each set should leave the dough stronger and less sticky, but still pliable. Watch how it changes: after a couple of sets you’ll notice the dough holds shape better and shows larger surface bubbles.

Don’t worry about perfect technique at first; consistent timing matters more than dramatic movements. I learned to trust shorter, regular folds instead of aggressive handling, which preserves the delicate gas pockets that give sourdough its open crumb. If the dough resists folding or tears easily, give it a longer rest between sets. Gentle practice and observation will make handling feel intuitive.

Scoring and Baking: Heat, Steam, and Timing

Scoring is both decorative and functional: it controls where the loaf expands and helps form an ear. Make clean, confident cuts with a sharp blade at a shallow angle to encourage lift rather than deep collapse. Preheat your oven with the Dutch oven inside to at least 230–250°C (450–480°F), then transfer the proofed loaf into the hot pot, cover, and bake. Steam is crucial for the first 15–25 minutes to keep the crust flexible while the loaf expands; a covered Dutch oven supplies this naturally. After initial steaming, remove the lid for the final 15–25 minutes to allow the crust to brown and crisp.

Internal temperature is the most objective way to judge doneness: aim for about 96–98°C (205–210°F) in the center for a fully baked crumb. If your crust is browning too fast, reduce oven temperature by 10–20°C and extend bake time slightly. For a deeper caramelization and flavor, some bakers finish with a short period under a slightly higher heat, watching carefully to avoid burning. Once out of the oven, resist the urge to slice immediately; letting the loaf cool for at least an hour sets the crumb and concentrates flavor.

Troubleshooting Common Problems

Every batch teaches something. If your loaf is dense, check starter vitality and fermentation times—an underproofed or weak starter often causes low rise. If the crumb is gummy, the loaf may be underbaked or cooled too quickly; measure internal temperature and allow proper resting time. Flat loaves can result from overhydration or poor shaping; reduce water slightly or focus on tightening during shaping. Too sour a loaf often means extended fermentation at warm temperatures; shorten bulk time or retard in the fridge to mellow acidity. Keeping a log with photos helps identify patterns and avoid repeating the same mistakes.

  • Dense crumb: increase starter activity and ensure adequate bulk fermentation.
  • Gummy center: bake longer or check internal temperature before removing.
  • Excessive sourness: reduce warm fermentation time or use less starter.
  • Sticking to banneton: dust more liberally with rice flour blend.

Flavor Development: Play with Time and Temperature

How to Bake the Perfect Sourdough. Flavor Development: Play with Time and Temperature

Flavor in sourdough comes from fermentation time, temperature, and the balance of microbes in your starter. Cooler, longer ferments emphasize acetic acids and produce sharper tang, while warmer, shorter ferments emphasize lactic acids and yield mild, rounded flavors. Including a portion of whole grain flour adds complexity and earthiness. I often prefer an extended cold retard for 18–24 hours; that cooling period deepens flavor without making the loaf overly sour. If you want a milder loaf, use a smaller inoculation of starter or shorter bulk fermentation.

Experiment in small increments. Try a control loaf and change just one variable—temperature, hydration, or starter percentage—so you can hear what each adjustment sings. Keep in mind that seasonal changes matter: summer fermentation will be faster than winter, and the same schedule rarely works year-round. Over weeks, you’ll develop a repertoire of go-to formulas for different moods: a light sandwich loaf, a deeply tangy artisan boule, or a rustic whole-grain miche.

Storage, Reheating, and Making the Most of Leftovers

Sourdough keeps better than many yeasted breads thanks to acidity; for short-term use, leave it wrapped in a cotton bag or paper at room temperature for up to three days. For longer storage, slice and freeze; toast or warm frozen slices straight from the freezer. To revive a stale loaf, sprinkle the crust with a little water and warm in a 180°C oven for 8–10 minutes—it brings back crispness and softens the crumb. Use day-old sourdough for breadcrumbs, croutons, or bread pudding; its flavor adds depth to savory and sweet preparations alike. Turning leftovers into new dishes keeps your kitchen lively and reduces waste.

Personally, I plan baking so that a loaf appears for weekends and meals where fresh bread matters most. Freezing half the loaf immediately after cooling has saved many a rushed breakfast, and reheated slices often taste nearly as good as fresh. The flexibility to pause and resume a bake with cold retardation makes sourdough an excellent candidate for a regular baking habit, even for busy schedules.

Bread baking teaches patience and rewards curiosity. Start with a workable formula, take notes, and let your senses guide adjustments. Over time you’ll develop a rhythm: feeding schedules, a reliable autolyse, gentle folds, and confident scoring that together produce consistent sourdough bread. The process is full of small decisions that add up to distinctive results, and each loaf is a lesson. Approach baking with intention and a willingness to learn, and you’ll find the satisfaction of pulling a perfect crusty loaf from your oven more often than you expect.