Category: Recipes

Relaxing Chamomile Tea: A Gentle Ritual for Evening Calm

There is a special kind of quiet that arrives when a kettle is set to boil and a handful of chamomile flowers waits in a warm cup. This article explores that gentle ritual, from the plant in the field to the steam curling from your mug. You will find practical brewing instructions, pairing ideas for different dinners, safe use notes, and a few small recipes to expand your nightly repertoire. I write as someone who has learned to value slow moments around a teapot, and I hope to share ways to make chamomile a real, useful companion rather than a forgotten sachet in the back of the cupboard. Read on for a full picture: botanical background, flavor profiles, techniques, and the small pleasures that turn a simple infusion into a restful habit.

Why Chamomile Works: Botany and Soothing Traditions

Chamomile belongs to a family of small, daisy-like flowers whose calming reputation stretches across cultures. Two main varieties appear in herbal preparations: German chamomile and Roman chamomile, each with a slightly different aroma and chemical profile. The components most often credited with calming effects are apigenin and flavonoids, which interact with the body’s relaxation pathways in subtle ways. People have steeped chamomile for centuries as a bedtime aid, a stomach soother, and a gentle comfort after a long day. Understanding the plant and its history makes tea more than a drink; it becomes a modest tradition you can adopt and personalize.

German versus Roman Chamomile: Taste and Uses

German chamomile tends to yield a sweeter, apple-like flavor with a fuller body, making it ideal for straightforward infusions. Roman chamomile is often a bit spicier and more floral, which suits blends and culinary uses where a stronger profile is helpful. For a calming cup before sleep I favor dried German flowers because they produce a rounded, mellow brew without harsh notes. In contrast, toasted or blended Roman chamomile works well when paired with stronger flavors like honey, ginger, or citrus zest. Both types are excellent in their own right, so the choice comes down to personal taste and intended use.

Proper Brewing: Temperatures, Times, and Ratios

Getting the most from chamomile requires attention to temperature and steeping time; too hot or too long and the infusion can taste bitter or astringent. A moderate approach yields the sweetest, most aromatic cup: water that has just come off a simmer and a generous spoonful of dried flowers per cup. Steeping for roughly five to seven minutes typically extracts the delicate aromatics without drawing out unwanted tannins. These are simple guidelines, not strict rules—adjust the ratio and time to match your flavor preference. Below is a compact reference to help you dial in your ideal cup quickly.

Amount Water Temp Steep Time Result
1 tsp per 6 oz 90°C / 194°F 3-4 min Light, floral
1 tbsp per 8-10 oz ~95°C / 203°F 5-7 min Full-bodied, soothing
2 tbsp per 12 oz ~95°C / 203°F 8-10 min Strong, robust

Accents and Additions: Enhancing the Infusion

A hint of lemon peel brightens chamomile without stealing its calm, while a dab of honey plays to its natural sweetness. For a spicier angle, small slices of fresh ginger or a stick of cinnamon add warmth and digestive benefits, making it a fitting end to a heavier meal. Lavender and mint pair well with chamomile in small proportions, offering floral or cooling notes respectively. When I prepare a cup after dinner I often add a sliver of lemon and a touch of local honey; the effect is simple but consistently comforting.

From Garden to Cup: Harvesting and Storing Chamomile

Growing chamomile in a small patch or pots rewards you with fresh flowers that can be used immediately or dried for winter. Harvest blooms in the morning after the dew evaporates but before the heat of day, when essential oils are stable and at their peak. Drying slowly in a shaded, ventilated area preserves the delicate flavors; avoid direct sun and high heat. Once dry, store flowers in airtight containers away from light and moisture to retain aroma and potency. Good storage matters: fresh-smelling flowers make an immediate improvement in the quality of every cup.

How to Dry and Cure for Best Flavor

Spread flowers on a breathable tray or hang small bunches in paper bags to avoid crushing the heads. Allow them to dry until stems break easily and flowers feel crisp. After drying, cure the flowers for a week in a cool dark place to let flavors settle and mellow. Check periodically for dampness or mold, discarding any suspect batches. Properly cured chamomile keeps well for up to a year, though the first six months offer the brightest aromatics.

Sensory Notes: Tasting Chamomile Like a Pro

Tasting tea involves more than flavor; aroma and mouthfeel shape the experience. Chamomile presents a gentle, honeyed aroma with apple-like undertones and a rounded, silky mouthfeel if brewed correctly. When tasting, evaluate the initial aroma, the first sip, and the aftertaste—each phase reveals different notes. Notice whether the cup feels soothing temperature-wise and whether any bitterness creeps in late. Over time you learn to recognize a well-made infusion by the balance of floral sweetness and soft, lingering warmth.

Pairing Chamomile with Food: Why It Works with Dinner

Chamomile’s mild sweetness and low tannin content enable it to pair well with numerous dishes, particularly lighter or subtly spiced fare. It complements fish, poultry, and vegetable-focused meals, and also serves as a gentle finish after dessert when you want something non-caffeinated. Compared to black or green tea, chamomile rarely clashes with flavors; instead it gently enhances them. For dinner pairings I recommend matching the infusion’s strength to the richness of the dish—lighter brew with lighter food, a fuller cup with creamier courses.

Recipes: Cold and Warm Chamomile Drinks

Chamomile adapts well to hot infusions, cold brews, and creamy variations. Below are recipes that highlight its range: a classic hot cup, an iced pitcher for summer evenings, and a milk-based “latte” for chilly nights. Each recipe is approachable and can be modified to taste; small adjustments to sweetness or spice tailor the drink to your preferences. I include simple step-by-step directions so you can reproduce these at home without fuss.

Classic Hot Chamomile

Use a tablespoon of dried flowers per cup and pour hot water just off the boil over them. Let the cup steep for five to seven minutes, then strain the flowers and add honey or lemon to taste. Serve in a pre-warmed mug to keep the infusion warm longer and to invite relaxation. This straightforward method highlights chamomile’s inherent sweetness and is my go-to when I need a quick moment of calm. It’s particularly effective after a busy dinner as a gentle digestive aide.

Iced Chamomile Pitcher

For a refreshing pitcher, steep three tablespoons of dried flowers in a liter of hot water for ten minutes, then strain and cool to room temperature. Sweeten lightly while warm so syrup dissolves evenly; a simple honey or sugar syrup works best. Chill the infusion for several hours and serve over ice with citrus slices and fresh mint leaves. This version keeps for a couple of days in the refrigerator and makes a pleasant alternative to iced black tea when you’d like something lighter after an outdoor dinner.

Chamomile Latte (Café-Style)

Steep a concentrated infusion using two tablespoons of flowers in 200 ml of hot water for seven minutes, then strain into a cup. Heat and froth 150 ml of milk or plant milk and pour over the concentrate, creating a soft foam on top. Sweeten gently with honey or agave and dust with cinnamon if desired. This creamy preparation warms the body and calms the mind, offering a small ritual that feels indulgent without caffeine. I prepare this when I want a dessert-like finish that still promotes sleep.

Blending Chamomile with Other Herbs: Creating Balanced Infusions

Chamomile blends harmonize easily with other botanicals, and small adjustments can shift the beverage from tender to lively. Add lemon balm for a citrus lift, valerian for stronger sedative tendencies, or peppermint for digestibility after heavy meals. Proportions matter: chamomile should remain the anchor, while the partner herb plays second fiddle. When I experiment with blends, I start with a base of chamomile and add 10-25 percent of a complementary herb, adjusting in small increments until the balance sings.

Safety and Contraindications: Who Should Be Cautious

Chamomile is generally safe for most adults but can interact with allergies and medications. Individuals allergic to ragweed, asters, or chrysanthemums may react to chamomile and should avoid it or consult a specialist. It can enhance the effects of sedatives and anticoagulant drugs, so coordination with a healthcare provider is prudent if you are on prescription medications. Pregnant people should consult their care provider before regular use. Responsible consumption means acknowledging these boundaries and using chamomile thoughtfully.

Children, Pets, and Chamomile: Practical Guidance

Chamomile is often used for children in small amounts to calm fussiness or support sleep, but dosing should be modest and infrequent for young kids. A weak infusion—half the usual strength—is a safer starting point, and notes of allergic reaction should prompt immediate discontinuation. For pets, the situation is different: some animals tolerate very diluted chamomile, while others may not, so veterinary guidance is essential. Always approach herbal use with a precautionary mindset when minors or animals are involved.

Storage, Shelf Life, and Sourcing Quality Flowers

Quality begins with source and storage. Buy from reputable suppliers or grow your own to ensure purity and minimal contamination. Store dried flowers in airtight, dark containers away from heat and humidity; glass jars in a cool pantry work well. Properly stored chamomile retains good flavor for six months to a year, though the first half-year is where the aroma is most vibrant. Rotate stock and prefer smaller quantities if you anticipate long gaps between use.

Using Chamomile in Cooking and Baking

Beyond beverages, chamomile lends a shy floral note to desserts and savory dishes alike. Infuse cream for panna cotta, steep milk for custard, or grind flowers into sugar for a delicate twist on cookies. In savory cooking, a subtle chamomile broth can season grains or poach fish gently, pairing well with mild herbs like dill and parsley. I have used chamomile-infused cream in a lemon tart with success: the floral element played nicely with citrus without overwhelming the palate.

Recipes for the Kitchen: Simple Incorporations

  • Chamomile-Infused Sugar: Mix dried flowers with granulated sugar and let sit for a week; use in tea cakes and shortbread.
  • Panna Cotta: Steep 2 tbsp of flowers in 500 ml of cream for 20 minutes, strain, and proceed with standard panna cotta steps.
  • Poaching Liquid: Brew a strong chamomile infusion and use it to poach pears or white fish for a delicate, aromatic finish.

Crafting an Evening Ritual Around Chamomile

The power of chamomile comes not only from its chemistry but from the ritual you build around it. Prepare the kettle with intention, choose a favorite cup, dim the lights and let the steam collect on the rim. Pair a cup with a light dinner of seasonal vegetables or a modest fish course to avoid heaviness before sleep. Over time the act of brewing itself becomes a signal to the nervous system that the day is winding down. I have found that these small repeated motions—measuring flowers, watching a teapot—help separate work hours from rest hours.

Integrating Tea into an Overall Sleep Strategy

Chamomile is a modest aid in a larger sleep-support routine. Consistent sleep times, reduced screens before bed, and a calm environment amplify its effects. Use chamomile as a complement to habits that encourage relaxation: soft lighting, a short reading period, or light stretching. Treat the tea as a companion within a system rather than a cure-all. When practiced regularly, this combination has a cumulative calming effect that improves nightly rest.

Personal Notes: Moments with Chamomile

Relaxing Chamomile Tea. Personal Notes: Moments with Chamomile

My own relationship with chamomile began as an experiment after a chaotic week. The first cup surprised me: it was gentle in a way that coffee never could be, soothing without dullness. Since then I have kept chamomile in rotation, sometimes as an after-dinner sip and sometimes as a base for a cold pitcher on warm evenings. One memorable evening after a long family meal, a pot of chilled chamomile cut through the richness and offered everyone a subtle reset; the mood softened and conversation grew lighter. Those small domestic victories are why I recommend making chamomile a habit rather than a last resort.

Final Practical Tips and Common Mistakes to Avoid

Common mistakes include using water that is too hot, steeping too long, or using stale flowers; each wastes chamomile’s delicate charm. Measure roughly rather than guessing, taste early, and adjust slowly. Avoid adding heavy flavors that overpower the infusion; small accents are more effective than bold companions. Keep a small jar of fresh flowers near the kettle and commit to using them more often than letting them sit. With a few practical adjustments you’ll consistently create cups that relax and satisfy.

A Parting Thought

Chamomile is most persuasive when it’s part of a lived routine—something you reach for with purpose, not out of habit. Whether you prefer hot or cold, simple or blended, the quiet ritual of brewing can become a nourishing end to the day. This is tea that encourages stillness and invites small, intentional pleasures. Try a few methods outlined here, notice what works for your body and your table, and let the ritual become yours.

Brewed Sunshine: Unlocking Vitamin-Rich Sea Buckthorn Tea

The first time I brewed sea buckthorn tea, the kitchen filled with a tang so bright it felt like sunlight in a cup. That sharp, citrusy hit is the hallmark of sea buckthorn berries, and when steeped properly they release a concentrated, fragrant infusion loaded with vitamins and flavor. In this article I’ll walk you through what makes this drink special, how to brew it to preserve its nutrients, and practical ways to fold it into your everyday routine. Along the way I’ll share recipes, storage tips, and my own kitchen experiments so you can feel confident making and enjoying this vibrant tea. Expect useful detail—no fluff—and clear guidance for both fresh berries and pantry-friendly forms.

What is sea buckthorn and why it matters

Sea buckthorn is a thorny shrub that produces small orange berries, known for their tart taste and dense nutrient profile. Native to parts of Europe and Asia, the plant has long been used in traditional foods and remedies; modern interest focuses on the berries’ high levels of vitamins and phytochemicals. People harvest the whole berry—skin, pulp, and seeds—for juices, oils, preserves, and, of course, infusions. When you steep the berries or leaves, those compounds mingle with water to create a tea that’s lively on the palate and potentially supportive for general wellbeing.

The plant is resilient, often thriving in poor soils and windy coastal areas, which contributes to its reputation as a hardy source of nutrition. Both the fruit and the leaves are used for drinks: berries give intense flavor and color, while leaves yield a milder, herbaceous infusion. As a culinary ingredient, sea buckthorn is versatile; it pairs with sweet, savory, and spicy elements, which makes it fun to experiment with. For anyone intrigued by new teas that combine taste and nutrients, sea buckthorn is worth a try.

Nutritional profile: vitamins, antioxidants, and more

Sea buckthorn stands out for an unusually broad mix of micronutrients and bioactive compounds—vitamins, carotenoids, flavonoids, and essential fatty acids among them. The berries are particularly noted for high levels of vitamin C and carotenoids (precursors to vitamin A), plus vitamin E and various polyphenols. Together these substances act as antioxidants and contribute to the characteristic bright color of the juice and tea. Leaves contain different but complementary compounds, offering milder antioxidant activity and a softer flavor when brewed.

Rather than rely on a single nutrient theory, it helps to think of sea buckthorn as a complex food: the combination of acids, vitamins, and oils produces effects different from isolated supplements. Drinking an infusion extracts water-soluble vitamins and flavonoids efficiently, while oils and fat-soluble compounds are better captured in syrups, tinctures, or oil extractions. This is why method matters—how you prepare the berries changes which compounds end up in the cup.

Quick reference: main components and their culinary or health roles

To keep things clear, here’s a compact table that outlines the primary groups of constituents in sea buckthorn and why they matter when you make tea or other preparations. I’ve focused on functional categories rather than precise quantities, because composition varies by variety and growing conditions.

Component Typical role Relevance to tea
Vitamin C Antioxidant and immune-supporting factor Water-soluble; sensitive to heat, so brief infusion retains more
Carotenoids (beta-carotene) Vitamin A precursors; contribute color Mostly fat-soluble; less extracted in plain hot water
Flavonoids and polyphenols Antioxidant and flavor contributors Partially water-extractable; give tart, astringent notes
Fatty acids (in pulp/seeds) Unique oils with possible topical benefits Not highly water-soluble; better in oil-based extracts
Organic acids Give tartness and preserve freshness Readily dissolve in water and shape the tea’s taste

How brewing method affects nutrients and flavor

Brewing technique has a big impact on what you actually drink. Vitamin C is water-soluble but sensitive to heat, so boiling the berries for a long time will reduce the vitamin C content while intensifying other flavor compounds. For a sharper, fresher cup that emphasizes vitamin C and bright aromatics, short infusions using hot—but not boiling—water are best. If you prefer a deeper, jammy profile and don’t mind sacrificing some heat-sensitive vitamins, a gentle simmer or decoction will extract more flavor from skins and seeds.

Cold extraction is another option and underrated for preserving delicate compounds. Cold-brewed sea buckthorn yields a smoother, less astringent drink with good retention of vitamin C and nuanced fruitiness. It takes longer—often several hours to overnight—but the result feels cleaner and is easier on the stomach. For people sensitive to acidity, choosing cold-brew over hot brewing can make the tea more enjoyable.

Brewing methods and practical tips

Below are practical methods to make sea buckthorn teas tailored to different goals—maximal vitamin retention, bold flavor, or convenient iced drinks. Each method includes a few key steps and the reasoning behind them so you can pick what fits your taste and schedule.

  • Quick infusion (preserves vitamin C): use crushed berries or a spoon of berry purée; pour water at about 80–85°C and steep 5–10 minutes; strain. Short steeping keeps delicate vitamin C and bright aromatics.
  • Cold brew (gentle, lower acidity): combine berries with room-temperature or cold water and refrigerate 6–12 hours; strain. This yields a smooth cup that retains many heat-sensitive compounds.
  • Decoction (robust flavor): simmer berries in water for 10–20 minutes; mash and strain. Use if you want a syrupy base for cocktails or hot toddies and don’t mind reduced vitamin C.
  • Concentrate/syrup (versatile): gently cook berries with a small amount of water and optional sweetener; reduce to a thick syrup. Keeps longer and is handy for mixing into other teas and sauces.

Leaf tea vs. berry tea: choosing which to brew

Leaves and berries produce distinct infusions, each with advantages. Leaves provide a mild, green, herbaceous tea analogous to other leaf teas; they’re lower in acidity and a good daily option if you want a gentle antioxidant boost. Berries are potent and tart, offering more vitamin C and stronger flavor, which many people enjoy as a short, aromatic infusion or cold-brewed concentrate. Depending on the season and your pantry, you may prefer one over the other or blend both for balance.

I often alternate: in summer I favor cool berry infusions for iced drinks, while in cooler months I reach for leaf tea blended with spices. Combining a small amount of berry concentrate with a base tea—like rooibos or green tea—gives bright acidity without overwhelming the cup. This flexibility makes sea buckthorn an interesting ingredient for home tea experimentation.

Flavor profiles and pairings

Describing sea buckthorn flavor is a bit like naming a citrus you’ve never met: tangy, slightly astringent, with resinous and floral undernotes that can remind you of orange peel and apricot skin. The berries’ tartness benefits from sweet or spicy companions; honey, licorice root, or a pinch of sugar calms the edges, while ginger and cinnamon add warm counterpoints. Floral herbs—chamomile, lemon verbena—soften the acidity and create a layered cup that’s easy to sip.

When blending with other teas, match intensity. Pair berry concentrates with mild bases such as rooibos or light black teas; leaves blend nicely with green or oolong varieties without clashing. For cocktail or culinary uses, sea buckthorn pairs well with vodka, sparkling water, vanilla, and nuts—its bright acidity acts like lemon in many recipes, but with a deeper color and more complex aroma.

Recipes: from simple infusions to immunity blends

Here are practical recipes that cover morning boosts, cold-weather tonics, and refreshing iced versions. Each recipe focuses on approachable ingredients and straightforward technique so you can try them without special equipment. Measurements are adaptable—adjust sweetness and concentration to taste.

Basic sea buckthorn infusion

Ingredients: 1 tablespoon crushed sea buckthorn berries (fresh or thawed), 250 ml hot water (80–85°C), honey or sweetener to taste. Method: Place crushed berries in a teapot or infuser, pour hot water, steep 5–8 minutes, then strain. Serve hot or cool and refrigerate for iced tea. This method preserves bright aromatics and much of the water-soluble vitamin content.

Winter immunity blend

Ingredients: 1 tablespoon sea buckthorn concentrate or 2 tablespoons crushed berries, 1 slice fresh ginger, 1 cinnamon stick, juice of 1/2 lemon, 300 ml hot water, honey to taste. Method: Add berries and spices to hot water, steep 8–10 minutes, strain, and finish with lemon and honey. Drink warm. The spices and citrus complement the tart berry and create a comforting, vitamin-forward beverage.

Iced sea buckthorn refresher

Ingredients: 2 tablespoons sea buckthorn syrup or concentrate, 1 tablespoon lemon juice, 500 ml chilled water or sparkling water, ice, mint for garnish. Method: Mix syrup and lemon with chilled still or sparkling water; serve over ice with mint. This version is great for warm days—bright, cooling, and easy to scale up for a pitcher.

Preserving and storing sea buckthorn for tea all year

Fresh sea buckthorn has a short shelf life, but several preservation options keep its flavor and nutrients accessible long-term. Freezing whole berries is the simplest approach: spread them on a tray until firm, then transfer to a sealed bag to avoid clumping. Frozen berries thaw quickly for use in infusions or smoothies and retain much of their nutritional value. Drying leaves and storing them in airtight containers provides a pantry-friendly leaf tea for daily steeping.

Powders and concentrates sold commercially can be convenient, but quality varies—check the ingredient list. Some products contain added sugars or fillers, so opt for pure powdered berry or freeze-dried concentrates when possible. Homemade syrups or reduced concentrates allow you to control sweetness and concentration; keep these refrigerated and use within a few weeks, or freeze small portions for longer storage.

Health considerations and practical cautions

Sea buckthorn tea is generally well tolerated, but its acidity can bother sensitive stomachs, especially if consumed undiluted or in large amounts. If you have reflux or gastric sensitivity, prefer a cold brew or dilute the infusion with other teas. Pregnant or breastfeeding people should check with a healthcare provider before regular use of concentrated preparations, as traditional safety data is limited for high-dose extracts. When in doubt, enjoy moderate amounts and observe how your body responds.

Another practical point: if you’re taking prescription medications, particularly blood-thinning drugs or treatments with narrow therapeutic windows, consult your clinician before making concentrated sea buckthorn extracts a daily habit. The plant contains a complex mix of bioactive compounds that can theoretically interact with medications. For most people, occasional tea and culinary use are safe and enjoyable, but personalized advice is always best for regular therapeutic use.

Sourcing: how to choose good sea buckthorn

Buy berries from reputable suppliers or harvest them from known cultivars if you have access; quality varies widely by cultivar, soil, and climate. Look for bright, unblemished berries if buying fresh or frozen. For leaves, choose a reputable tea vendor who provides information about harvest and drying processes—improper drying can lead to loss of aroma and beneficial compounds. Organic or low-spray sources are preferable when possible, since the berries are consumed with skin and pulp.

Local foraging is an option in some regions, but be careful: sea buckthorn has thorny branches and can be mistaken for other shrubs. If you forage, identify the plant accurately and harvest sustainably, leaving enough fruit for wildlife. When purchasing processed products—powders, syrups, or oils—inspect labels for added sugars, fillers, or preservatives and choose minimally processed options for the truest flavor and nutritional profile.

Culinary uses beyond tea

Tea is just one way to use sea buckthorn. The berries make attractive jams, sauces, vinaigrettes, sorbets, and cocktails, where their acidity brightens dishes the way lemon or vinegar might. Because of the strong flavor, sea buckthorn often benefits from sweetening or pairing with creamy elements like yogurt, mascarpone, or coconut milk. In savory cooking, try reductions to glaze fish or mix a small amount into dressings to bring acidity and color.

One of my favorite kitchen experiments was adding a spoonful of sea buckthorn concentrate to a carrot-ginger soup—its citrusy tang lifted the soup without overtaking the base flavors. For bakers, folded into fillings or used as a sauce, sea buckthorn creates striking visual contrast and a memorable taste. The same concentrated syrups used for tea can be drizzled over panna cotta, stirred into granola, or mixed into cocktails for a distinctive twist.

Practical troubleshooting: color, staining, and taste balance

Vitamin-Rich Sea Buckthorn Tea. Practical troubleshooting: color, staining, and taste balance

Sea buckthorn juice stains fabric and some cooking surfaces; handle concentrated syrups and mashed berries with care. If you’re making large batches, protect countertops and clothing, and use glass or stainless containers that won’t retain color. On taste, if your brew is too sharp, add a balancing sweetener or blend it with a smooth base tea like rooibos. A touch of fat—milk, cream, or coconut—softens the tannic edge and can make the tea more comforting.

If the tea tastes excessively bitter, it may have been over-steeped or brewed at too high a temperature. In that case, dilute with more water or add a milder tea to round the edges. Conversely, a weak, flat cup usually means under-extraction—try crushing the berries more thoroughly or lengthening infusion time. Small adjustments go a long way toward finding your ideal cup.

Personal notes from the author: kitchen experiments and favorites

I keep a small jar of frozen berry purée in the freezer year-round for quick brightening of soups, dressings, and my go-to sea buckthorn toddy. My winter ritual is a hot infusion with a sliver of ginger and a dash of local honey—simple, warming, and reliably uplifting after outdoor walks. In summer I love an iced version with mint and sparkling water; the color is so striking it always draws comments when I serve it to guests. These small experiments helped me understand how adaptable sea buckthorn can be across meals and seasons.

Another practical discovery: seeds and skin hold a lot of flavor, but they also contribute astringency, so I often fine-strain after a short infusion and use the leftover solids to make a reduced syrup. That two-step approach yields a fresh cup plus a pantry-friendly concentrate for later. Sharing these kitchen shortcuts makes the ingredient less intimidating for anyone new to it.

Where sea buckthorn fits in a daily routine

Think of sea buckthorn tea as an accent rather than a staple—something you rotate into your beverage repertoire for variety and occasional nutrient support. A few small cups a week, or an occasional concentrate in the morning, gives you access to the berries’ unique flavors and compounds without overwhelming your system. For people who value seasonal rituals, brewed sea buckthorn makes a satisfying winter tonic and a lively summer refresher.

Stored concentrates and frozen purée make it easy to include sea buckthorn without daily harvesting or processing. For everyday sipping, a leaf tea or a diluted berry infusion is gentle and practical. When you want an extra boost—during cold season or when you need a bright flavor lift—use a concentrate or a slightly stronger infusion with warming spices and honey.

Final encouragements and next steps

If you’re curious, start small: try a single infusion from frozen berries or a spoon of concentrate in hot water and note how the flavor and your body respond. Experiment by adding familiar companions—ginger, lemon, honey, or rooibos—until you find combinations you enjoy. Keep in mind that the way you prepare the tea changes which nutrients and flavors arrive in your cup; choose methods that match your goals, whether they’re flavor-forward, vitamin-preserving, or convenient for everyday use.

Sea buckthorn tea is more than a trend; it’s a versatile ingredient with a history and a distinct personality. Treated with a little curiosity and respect for its potency, it rewards with vivid taste and interesting nutritional qualities. Take it as an invitation to explore—your tea shelf will be more colorful for it, and you may discover new rituals that brighten your days.

Warm Apple Cider: the Cozy Elixir for Crisp Evenings

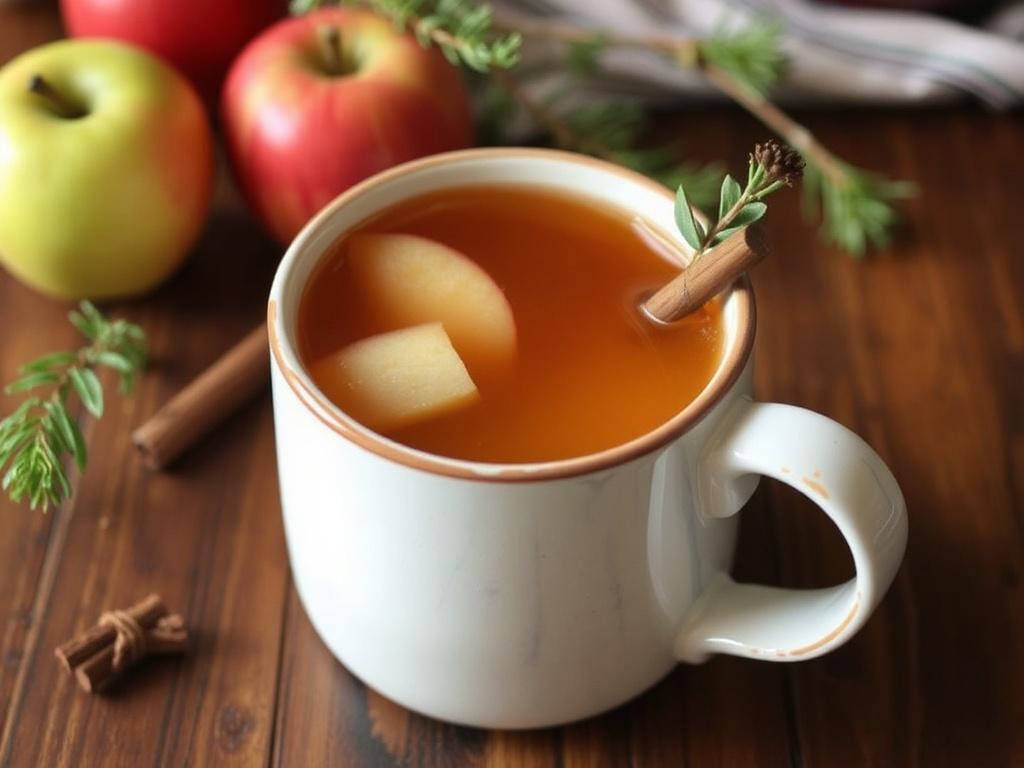
There is something quietly persuasive about a steaming mug held between cold hands, its surface sending up curls of fragrant steam. Warm Apple Cider sits in that sweet spot between simple comfort and culinary possibility, a drink that invites conversation, slow afternoons, and the kind of nostalgia that arrives without warning. Whether made quickly on a weekday evening or simmered for a gathering of friends, this apple-forward beverage carries layers of spice, body, and warmth that make it more than the sum of its parts. In the pages that follow I’ll walk through history, practical recipes, regional twists, and tips drawn from years of making this drink for family and for friends. Expect concrete measures, troubleshooting advice, and ideas for pairing, storage, and subtle experimentation to make your own signature mug of mulled cider.

Roots and rituals: where warm apple cider comes from

Apple-based drinks have accompanied human gatherings for centuries, long before refrigeration or modern supermarkets. Cider in its many forms originated as a practical way to use apples after harvest; pressed and fermented or left fresh, it became a staple in households across Europe and North America. The practice of warming and spicing apple juice predates commercial bottling, tied to seasonal celebrations where heat and spices served both to preserve and to transform humble fruit into something festive. Over time, the spices—most commonly cinnamon and cloves—came to signal hospitality and seasonal change, a shorthand for Autumn and early winter gatherings. Understanding this history helps when you begin to customize recipes, because the techniques you use echo practices refined over generations.

The spices that define the profile

The backbone of a classic mug is the trio of apple, cinnamon, and cloves. Cinnamon contributes warmth and a clean sweetness without adding sugar, while cloves bring depth and a faint astringency that balances the cider’s natural sugars. Cardamom, star anise, and nutmeg are frequent companions, each nudging the flavor in a distinct direction—cardamom brightens, star anise gives herbal licorice notes, and nutmeg rounds the finish. When you begin experimenting, treat these additions as accent ingredients rather than equals; the goal is to let the apple character lead while spices provide structure. Fresh whole spices will always deliver a clearer, more layered perfume than ground versions, especially when the drink simmers slowly.

What to buy: selecting apple cider and spices

Choosing the right base liquid is the simplest decision that changes everything. In many parts of the world apple cider refers to unfiltered, unfermented apple juice; in others it can mean hard cider, which contains alcohol. For a classic warm apple cider meant for all ages, look for fresh-pressed, unfiltered apple juice in the refrigerated section or from a local orchard. Read labels: avoid sweeteners and preservatives if you want a purer apple flavor to build on. For spices, prioritize whole cinnamon sticks and whole cloves; they last longer and release oils more gently than ground powders when simmered.

Proportions that work

Here’s a reliable rule of thumb I return to: for every 4 cups of apple cider use 1 or 2 cinnamon sticks and 6 to 8 whole cloves, adjusted to taste. That ratio yields a balanced spicing that highlights the apple rather than overpowering it with heat or astringency. If you like it sweeter, add a tablespoon or two of maple syrup or brown sugar per quart, rather than relying on overly ripe or concentrated ciders which can taste cloying. For smaller batches a single cinnamon stick and three or four cloves in a pint is sufficient. Keep in mind that extended simmering concentrates both sugars and spice oils, so taste as the cider reduces and make small adjustments.

Step-by-step: the essential stovetop recipe

The stovetop method is the most forgiving and the one that produces the fullest aromatic profile, making it my go-to on cold evenings. Start by pouring your cider into a wide pot—wider pots allow faster evaporation and richer concentration if you want a more intense flavor. Add your cinnamon sticks and cloves, and any secondary spices like a split vanilla bean or a few cardamom pods. Heat gently until no more than a bare simmer; avoid boiling, which drives off delicate aromatics and can introduce bitterness.

Simmer for twenty to forty minutes depending on the depth of flavor you want, checking periodically and skimming any foam. Before serving, strain out the solids, and finish each mug with a thin slice of fresh apple or an orange twist for brightness. If you plan to serve a crowd, keep the cider warm in a crockpot or insulated pot set to low, replenishing spice sticks if the fragrance fades over a long stretch. This method gives you control and produces consistently pleasing results.

Quick version for busy nights

When time is short, you can still make a satisfying cup in ten minutes. Warm the cider gently with one small cinnamon stick and three cloves, allow it to infuse off heat for a few minutes, then reheat briefly and serve. This technique relies on maximum surface contact and fresh spices; chop or lightly crush whole cloves to speed extraction if necessary. Add a splash of lemon juice to brighten flavor and prevent the drink from feeling too heavy. Quick versions won’t have the same depth as a long simmer, but they deliver comforting warmth and the core notes we associate with spiced apple beverages.

Variants: non-alcoholic, spiked, and beyond

Warm apple cider is wonderfully adaptable. The non-alcoholic version suits children and anyone abstaining from booze, and its ease makes it an excellent party option where everyone can enjoy the same base drink. To spike a batch for adults, choose a spirit that complements rather than competes: rum adds molasses warmth, bourbon brings vanilla and oak notes, and dark beer can lend a surprisingly pleasing roasted complexity. Add alcohol at the end of heating to preserve aromatics and limit alcohol loss to evaporation.

There are also cider-based cocktails that use a hot-mulled base as a component; think hot toddy variations swapped for cider instead of water. For a lighter option, mix warm cider with a splash of seltzer and serve in a tall glass with lots of ice for a fizzy fall cooler—this works well on transitional weather days. Vegetarian or vegan guests are generally fine with most ciders, but those served commercially could contain added preservatives; if in doubt, choose locally pressed juice or labeled vegan products.

Table: quick comparison of popular spiking options

Spirit Flavor contribution Suggested amount (per 1 liter cider)
Dark rum Caramel, molasses, warmth 100–150 ml
Bourbon Vanilla, oak, gentle heat 80–120 ml
Apple brandy (Calvados) Intensified apple notes, fruity depth 60–100 ml
Dark beer (small amount) Roasted, bitter balance 50–100 ml

Pairings: what to serve with a mug

Because apple cider is modestly sweet and richly aromatic, it’s a versatile companion for both savory and sweet fare. Cheese boards with sharp cheddar, aged gouda, or tangy blue cheese echo the apple’s acidity and provide texture contrast. Savory pastries—sausage rolls, empanadas, or meat pies—work particularly well when you serve cider at a hands-on gathering because the drink cleanses the palate. For dessert, think spice-forward choices like ginger cookies, a dense apple cake, or a slice of sharp cheddar-topped pie for a classic regional pairing.

One of my favorite pairings is a bowl of roasted root vegetables tossed with a cider reduction: the shared flavor notes make each sip and bite reinforce the other. If you’re serving brunch, pair warm cider with pancakes, smoked salmon, or a simple frittata. For a crowd, set up a small self-serve station with garnishes—cinnamon sticks, orange slices, star anise—so guests can personalize their mugs.

Storage, reheating, and food safety

Proper storage keeps your cider tasting fresh and prevents bacterial growth. If you’ve simmered a large batch, cool it within two hours and refrigerate in airtight containers for up to four days. For longer storage, freeze portions in sealed containers for up to three months; thaw overnight in the refrigerator before reheating. When you reheat, do so gently over low heat to avoid over-concentrating flavors or boiling off aromatics. If the cider tastes flat after refrigeration, a short fresh infusion with a cinnamon stick and a few cloves will revive its bouquet.

Do not leave hot cider on a counter overnight at room temperature; bacteria can proliferate in sugary liquids. If you’re serving a crowd over an extended period, keep the drink at a safe `keeping` temperature above 60 degrees Celsius (140 degrees Fahrenheit) in a proper insulated vessel. For large public events, label spiked and unspiked versions clearly to avoid surprises.

Regional adaptations and international echoes

Every culture interprets warm apple beverages through its ingredients and spice traditions. In parts of Northern Europe, warm spiced drinks may include juniper or black peppercorn for a savory edge. In the American South, cider is often enlivened with ginger and a touch of molasses or maple syrup to reflect local sweetening traditions. Scandinavian versions might add aquavit for a pronounced caraway layer, while in places with strong tea cultures, brewed tea is sometimes blended with apple juice and spicing for complexity.

Exploring these variations is a low-commitment way to learn how small changes shift the balance of a drink. I’ve returned from travels with ideas as simple as swapping orange peel for lemon when citrus is in season, and those small substitutions often become staples at home. Use them to design a regional-themed evening—serve Northern European style with hearty breads and smoked fish, or pair a Southern take with biscuits and slow-roasted pork.

Vegetarian and dietary notes

Most homemade versions are naturally vegetarian and vegan, provided you avoid adding honey or certain sweetened condiments. Many commercial apple ciders contain no animal products, but preservatives and clarifying agents used in some hard ciders may be non-vegan; check labels if this concerns you. For low-sugar diets, choose a fresh-pressed cider with no added sugar and dilute slightly with sparkling water to reduce sweetness without sacrificing aroma. If you’re serving people with allergies, be mindful: some spices like nutmeg or star anise may trigger sensitivities in a few individuals.

Making it your own: advanced techniques and flavor layering

Warm Apple Cider. Making it your own: advanced techniques and flavor layering

Once you’ve mastered the basic formula, play with extraction methods and sequencing to build complexity. Toast spices lightly in a dry pan before adding them to cider to release more volatile oils; this amplifies the aroma without adding heat. Cold-infusing spices in cider overnight in the refrigerator will yield a cleaner, more floral profile, which you can then warm gently before serving. Another method is to ferment a small portion of your cider slightly and blend it back in for a touch of acidity and sparkle—this requires care but produces interesting depth.

Barrel-ageing small batches in oak chips or finishing with a splash of aged spirits creates additional texture and nuance. I once steeped a liter of cider with a few charred applewood chips wrapped in foil for a subtle campfire quality that paired beautifully with smoked meats. Keep notes: small changes like a minute longer of simmering or adding a different citrus peel can produce dramatic results, and recording ratios and timings will help you replicate favorites.

Troubleshooting common problems

Occasionally cider can become too tart, too bitter, or overly spiced. If the drink tastes overly tart, a small spoonful of brown sugar or maple syrup will round it out; if bitterness develops from over-simmering, dilute with additional fresh cider and briefly reheat. Over-spiced batches can be mellowed by adding more base liquid and a few slices of raw apple to absorb excess oils. If the aroma fades during a long service, add fresh spice sticks and a strip of citrus peel to revive the fragrance without making the beverage taste raw or astringent.

Personal reflections and memories tied to cider

For me, warm apple cider is a sensory bookmark of seasons and people. I remember bringing a thermos of spiced cider to a late-night bonfire where the first snowfall of the year started gently, and strangers became friends over shared mugs. Another time, a simple pot of cider simmered in a small apartment warmed the whole place while I baked bread, and that combination of yeasty loaf and spiced apple smell felt like domestic magic. These memories inform how I cook it now: I prioritize aroma and conviviality over complexity, because the true value of the drink is how it brings people together.

When I make cider for guests, I always keep the spice jar handy and let them choose a garnish—sometimes the smallest participatory touch makes a gathering feel shared. Over seasons I’ve learned that restraint is often the best choice: let the apple sing, let cinnamon and cloves support that melody, and use extras sparingly to avoid drowning the core flavor. That balance has become my personal standard and a yardstick I recommend to others.

Practical checklist before you start

Before you begin, assemble your ingredients and tools: fresh-pressed apple cider, whole cinnamon sticks, whole cloves, a wide pot, a fine-mesh strainer, and optional spices or spirits. Decide whether you’ll serve immediately, keep warm for guests, or store extra for later; this choice dictates quantity and container types. If serving guests, prepare garnishes and labels ahead of time—simple details like a small tray of orange slices and cinnamon sticks make the presentation matter. Finally, allow yourself a tasting period during cooking so adjustments can be made early, and avoid overcompensating at the very end.

Simple ingredient checklist

  • 4 cups fresh-pressed apple cider (or more, scaled to guests)
  • 1–2 cinnamon sticks per 4 cups
  • 6–8 whole cloves per 4 cups
  • Optional: star anise, cardamom pods, nutmeg
  • Optional sweeteners: maple syrup, brown sugar

Final thoughts and encouragement

Making warm apple cider is one of those culinary projects that rewards both precision and play. Start with a straightforward recipe, learn how your chosen cider behaves under heat, and then layer in small experiments: a toasted spice here, a splash of rum there, a slow cold infusion to brighten flavors. Over time you’ll build a repertoire of versions suited to different moods and gatherings, and you’ll likely develop a favorite that becomes part of your seasonal routine. Above all, remember that the most important element is the company you share it with—a well-made mug of spiced apple drink is the sort of thing that invites conversation and makes ordinary evenings feel a little more intentional.

Foraged Gold in a Cup: The Quiet Allure of Rosehip Tea

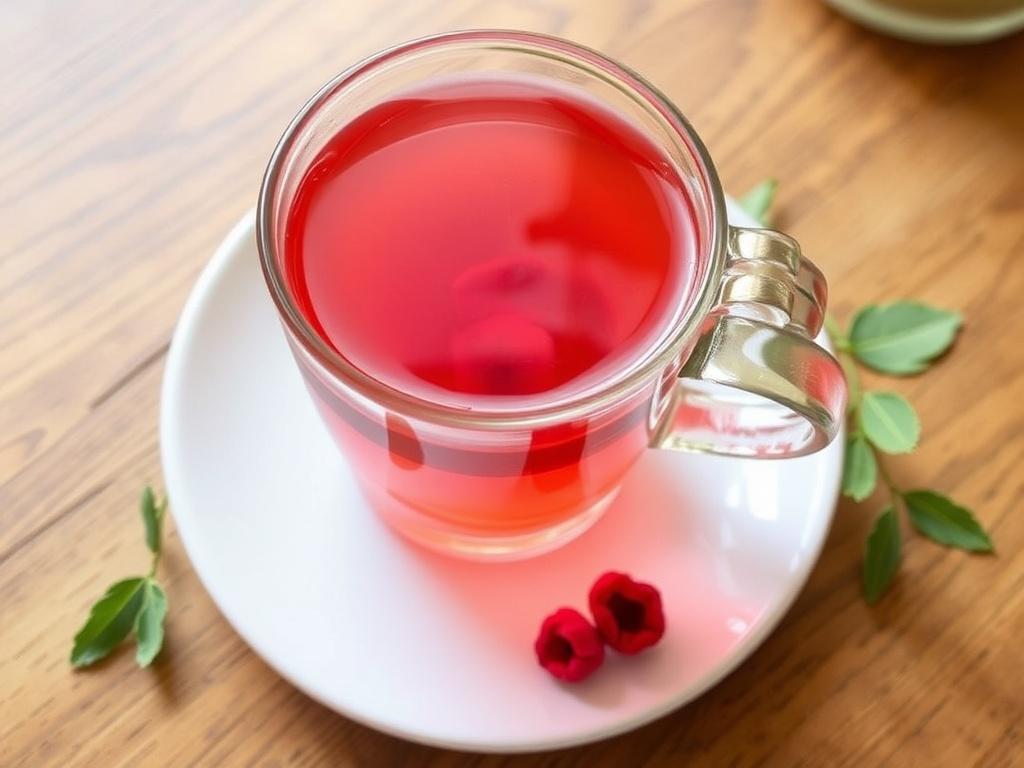
There are teas that shout and teas that whisper, and the brew made from rosehips belongs to the second kind. It arrives with a color like late afternoon sunlight and a flavor that balances tartness and warmth in a way that feels both honest and surprising. People turn to it for comfort during cold months, to support resilience through seasonal sniffles, or simply because it tastes good steeped slowly in a favorite pot. In this piece I want to trace the story of that cup: from wild hedgerow to kitchen, from active compounds to recipes you can try this evening. Along the way I will share practical tips, a few personal experiments, and the best ways to treat rosehips so their essence sings in every infusion.

What exactly are rosehips and where do they come from?

Rosehips are the fruit left behind when roses finish flowering, small globes that swell on the stems and ripen to shades of red, orange, or sometimes deep purple. They are botanical clutter turned into resource: full of seeds and a thin, pleasantly tart flesh that has been gathered by people for centuries. The most commonly used types come from wild dog rose (Rosa canina) and rugosa rose, though several species produce edible hips suitable for drying. Historically they were valued as a source of vitamin C when other fruits were scarce, becoming especially important in northern climates where winters can be long and produce scarce. Today you can find them dried in specialty shops, sold as loose herbal, or foraged from hedgerows if you know what to look for.

Traditional and modern uses

Across cultures rosehips have been turned into syrups, jams, and preserves before the more modern habit of steeping them as an herbal infusion took hold. In parts of Europe and Scandinavia they appear in winter recipes intended to bolster nutrition during dark months, and during wartime some countries promoted them as a local source of vitamin C. In contemporary kitchens the fruit is appreciated both for its healthful compounds and for its culinary versatility. You will find them in teas alongside hibiscus, in cordials to sweeten cocktails, and as a tart complement to desserts. Their understated complexity means they can play supporting roles or stand alone, depending on how you prepare them.

Harvesting and preparing rosehips for brewing

Timing is important when gathering rosehips: late summer to early autumn is ideal, but a touch of frost can actually improve flavor by softening the flesh. Choose hips that are firm but give slightly to pressure, avoiding mushy or moldy specimens; the color should be vibrant rather than dull. Once collected, they need to be cleaned—remove stems and blossom remnants and rinse under cold water. You can dry them whole, halve them to speed drying, or deseed before drying if you prefer a smoother infusion; each method produces a slightly different mouthfeel. Dried hips keep well if stored in an airtight container away from light, and they retain much of their character for a year or more when treated gently.

Drying methods and tips

There are several ways to dry rosehips, and your choice will affect both convenience and flavor. Air-drying on racks in a warm, dry room preserves volatile compounds but takes longer, typically a week or more depending on humidity. A food dehydrator brings speed and consistency, usually finishing the job within 8 to 24 hours at a low temperature, and it is my go-to for larger batches. Oven drying is possible on the lowest setting, but you must watch closely to avoid caramelization that changes the taste. If you plan to store hips for months, check them after the first week in storage to make sure no moisture has crept back in and started fermentation.

How to brew: ratios, temperatures, and steeping times

Brewing rosehips is forgiving but benefits from attention to ratios and temperature if you want clarity of flavor. Use about one to two tablespoons of dried hips per 250 milliliters of water as a baseline, and lean toward the higher amount when you want a tart, robust cup. Bring water to a full boil before pouring over the hips, then cover and steep; the covering traps aromatic molecules that otherwise escape with steam. Steeping times vary: a short steep gives a gentle fruitiness, while an hour or more yields a deeper, jammy character. Re-steeping is possible—hips can give two good infusions—though subsequent cups grow milder.

Quick guide to common brewing styles

The following table offers a simple reference for brewing styles and expected results, useful when you’re experimenting at home. Ratios are approximate and can be adjusted to taste based on whether you prefer a light, tea-like cup or a syrupy, medicinal infusion. Temperature and steeping time are the key levers that determine extraction: higher heat pulls more vitamin C and acids, but a gentler approach preserves delicate aromatics. Use the table as a starting point, then tweak for your own palate and the particular batch of hips you have.

Style Ratio (dried hips per 250 ml) Water Temp Steep Time Taste Notes
Light infusion 1 tbsp 95–100°C 8–12 minutes Bright, slightly tart
Full-bodied brew 1.5–2 tbsp 95–100°C 30–60 minutes Rich, jammy, tangy
Cold infusion 2 tbsp Cold 8–12 hours (refrigerated) Clear, refreshing, less tart

Flavor profile and pairing ideas

The flavor of rosehip infusion hovers between cranberry and rhubarb, with a floral undertone that hints at the plant’s rosy origin. It can be tangy like a light vinaigrette and sweet when steeped long enough to release pectin and natural sugars. Pairings depend on whether you want to accentuate tartness or mellow it: honey, vanilla bean, or a slice of apple will soften the edge, while hibiscus or citrus will sharpen it. For food, think baked goods that can stand up to acidity—almond cake, spiced biscuits, or a slice of cheddar for an unexpected contrast. As a base in cocktails, clarified rosehip syrup brings color and a subtle bitterness that modern mixology loves.

Healthful compounds and what science says

Rosehips are rich in vitamin C, carotenoids, and various polyphenols, which together contribute to antioxidant activity and support for immune function. Research points to anti-inflammatory properties as well, with some studies suggesting benefits for joint discomfort when consumed regularly. The actual vitamin C content depends on preparation: heat and long storage can degrade it, but thicker infusions and syrups may still offer meaningful amounts. Rosehips also contain flavonoids that interact with cellular pathways linked to oxidative stress. While the beverage is not a cure-all, incorporating it as part of a varied diet supports overall wellness in a subtle, cumulative way.

Rosehip tea and seasonal wellness

There is a clear seasonal logic to drinking this infusion: the bright, tart flavor wakes the palate during gray days, and the nutritional profile supports resilience during winter. In cold months I find myself reaching for a thermos of boiled hips sweetened with a touch of honey and a strip of orange peel; it wards off the blandness of routine and gives a small nutritional boost. Many cultures historically used local wild fruits to bridge seasonal shortages, and rosehips fit perfectly into that tradition. Drinking the infusion is as much about ritual—preparing a pot, wrapping hands around a warm mug—as it is about compounds in a lab. For people focused on gentle, food-based approaches to wellness, it’s an attractive option.

How to sweeten and spice rosehip infusions

Sugar and honey are common sweeteners, but you can also use maple syrup or stevia if you prefer lower glycemic options. Spices like cinnamon, cardamom, and cloves play nicely with rosehip’s tartness, turning a simple cup into a winter-warmed beverage. Citrus peel brightens the flavor while ginger adds a warming, digestive edge that makes the drink feel more like a tonic. I often simmer the hips with a cinnamon stick and a few slices of fresh ginger when I want something robust and soothing after a long day outdoors. Add sweetener gradually, tasting as you go, because minimal amounts are sometimes all that’s needed to achieve balance.

Recipes you can try tonight

Rosehip Tea. Recipes you can try tonight

Here are a few recipes that showcase different aspects of the fruit: a straightforward infusion, a spiced winter blend, and a rosehip syrup that is useful year-round. The basic cup is quick and reliable; the spiced version makes for a comforting ritual in colder months, and the syrup concentrates the flavour into something versatile. I recommend making the syrup in small batches—its intensity can dominate if overused, but a little goes far in cocktails and desserts. When following any of these recipes, measure carefully the first time and then adjust to match your taste preferences.

  • Basic infusion: 1.5 tbsp dried hips, 250 ml boiling water, steep 20–30 minutes, strain, sweeten if desired.
  • Spiced winter brew: 2 tbsp hips, 300 ml water, 1 stick cinnamon, 3 slices fresh ginger, simmer 15 minutes, steep covered 30 minutes, strain.
  • Rosehip syrup: 200 g fresh or 100 g dried hips, 500 ml water, 200 g sugar, simmer until thick, strain through fine sieve, bottle.

Using rosehip syrup and preserves

Rosehip syrup transforms the fruit into a concentrated flavoring suitable for pancakes, cocktails, and yogurt. It also freezes well, which is useful if you make a large batch in autumn and want to preserve a bit of summer for winter. For a more textured approach, cook hips down with sugar to make a jam that pairs extraordinarily well with soft cheeses. When I had a bumper crop one autumn, I made both syrup and a spiced conserve; the syrup went into fizzy water and late-night cocktails, while the conserve starred at breakfast and cheese boards. Both preparations extend the season and make it easy to add rosehip flavor to recipes where an infusion would be impractical.

Sourcing and sustainability

If you purchase dried hips, look for transparent suppliers that indicate species, region, and handling methods; organic certification helps reduce pesticide concerns. Foraging is tempting and rewarding, but it requires knowledge: identify the species confidently to avoid inedible look-alikes, and take only what you need so plants can reproduce. Cultivated rugosa roses in gardens often produce generous hips and are a safe source for small harvests. Whatever your source, favor practices that protect hedgerows and respect private property; the wild ecosystems that produce these fruits are fragile in many places. Buying from small regional producers can also support sustainable harvesting and preserve local varieties.

Storage best practices

Proper storage keeps dried hips flavorful and prevents loss of nutrients and aroma. Use airtight containers made of glass or food-grade plastic, and keep them in a cool, dark place away from direct heat or sunlight. Avoid transferring them into a frequently opened pantry jar if you plan to store for many months; oxygen exposure accelerates degradation. For longer preservation, refrigeration or freezing of vacuum-sealed bags is effective, though dried hips are generally stable for a year when stored well. Label your containers with the date of drying to track freshness—and if you ever detect off smells or visible mold, discard the batch without hesitation.

Safety considerations and contraindications

Rosehip infusion is generally safe for most people, but there are a few caveats to bear in mind. Because the fruit contains vitamin C and certain acids, it can interact with medications such as anticoagulants or drugs affecting the kidneys; consult your healthcare provider if you take prescription medications. Large amounts of the fruit or concentrated extracts may upset sensitive stomachs or increase the risk of kidney stones in predisposed individuals due to oxalate content. Allergic reactions are uncommon but possible, especially for those with sensitivities to other Rosaceae family members like apples or cherries. Moderation is sensible, and if you have specific health concerns, professional advice is the prudent route.

Rosehip beyond the cup: culinary and household uses

The fruit’s bright acidity makes it a surprising complement in savory dishes as well as sweets: a glaze for roast poultry, a tangy addition to vinaigrettes, or folded into a grain salad for depth. In the pantry, rosehip powder can be used as an acidic component in sauces or blended into smoothies for vitamin-rich complexity. Because the color carries through when cooked down, it can also add a pleasant hue to syrups and jellies. I once experimented by adding a spoonful of rosehip conserve to a turkey glaze; the result was an elegant fruitiness that cut through the meat’s richness without overpowering it. Treat the flavor like you would a fruity vinegar: sparingly but intentionally.

Combining rosehip with other botanicals

Rosehips play well with a variety of herbs and flowers, making blends worth exploring. Hibiscus increases tartness and deepens color, while chamomile softens edges and adds floral sweetness. Mint provides cooling contrast, and juniper gives a resinous backbone that echoes cocktail flavors. In my kitchen I often make a blend with equal parts rosehip and hibiscus, then add a third of chamomile to calm the sharpness—this mix works hot or iced and is endlessly adaptable. When blending, keep notes on proportions so you can reproduce combinations you like.

Cold and iced preparations

Cold-brewing preserves a different slice of the fruit’s character, yielding a cleaner, more subtle cup that is refreshing and less astringent than hot brews. Use a higher ratio of hips for cold infusion because extraction is gentler: two tablespoons per 250 milliliters and an overnight steep in the refrigerator usually does the trick. Strain in the morning and dilute to taste; the result is excellent over ice with a sprig of mint or a splash of sparkling water. I find cold-brewed rosehip especially pleasing in summer when you want flavor without heat, and it also makes a hydrating base for light mixers and mocktails.

Preserving local flavors and traditions

Rosehip use is often tied to local foodways, and preserving those recipes keeps cultural knowledge alive. In some regions, families pass down specific preparations—cordials steeped with particular spice blends or preserves made with neighboring berries. When I visited a small village market years ago, an elderly vendor handed me a sample of rosehip jelly and explained how her mother taught her to harvest after the first frost. Those small acts of transmission matter because they maintain an understanding of seasonality and place. Learning local methods can also introduce you to unexpected techniques that improve your own kitchen practice.

Practical troubleshooting

If your brew tastes dusty or bland, the likely causes are old hips or insufficient extraction; try a fresher batch or a longer steep. Overly astringent notes usually stem from too much exposure to heat combined with a coarse grind—strain earlier or reduce steep time. Cloudiness can occur when using hard water or when tiny seed hairs remain in the infusion; a fine sieve or paper filter will clarify the cup. I once ruined a batch by leaving seeds in during drying; the resulting sediment made the tea gritty and unpleasant. A little attention at each stage—harvest, clean, dry, brew—goes a long way toward consistent results.

Personal experiments and favorite rituals

My own relationship with this infusion grew out of winter walks followed by cups shared at home. On a cold evening I like to simmer hips gently with orange peel and a cinnamon stick, strain into a thermos, then sip while reading. For summer, I prefer a cold-brewed pitcher with a handful of fresh mint and sparkling water added before serving. I have experimented with fermenting rosehip water into a light shrub for cocktails, and I keep a jar of rosehip syrup in the fridge for quick breakfasts. These small rituals have made the drink part of my seasonal rhythm rather than just an occasional novelty.

Where to begin if you’re new to it

Start simple: a single beverage made from good-quality dried hips, steeped for 20 to 30 minutes, sweetened lightly if you like. Taste and take notes about what you want to change next—more tartness, more body, a spice to round it out. Try both hot and cold versions to see which suits your lifestyle and the season; many people discover different preferences when they switch between summer and winter. If you are inclined, make a small batch of syrup to extend the fruit’s flavor into other recipes. With a little practice you will quickly learn which preparations feel like a natural fit for your kitchen.

A last cup

Rosehip infusion occupies a quiet corner of herbal traditions, useful, flavorful, and surprisingly versatile when given a bit of attention. It links foraging practices, simple nutrition, and culinary curiosity into a single, warming cup that is equally at home on a snowbound morning or a breezy summer evening. Whether you approach it for wellness reasons, taste exploration, or as a way to preserve seasonal flavors, it rewards small experiments and honest ingredients. Make a pot, take the time to notice the color and aroma, and let it become, if only for a moment, the reason to slow down.

The Tart Elixir: A Deep Dive into Cranberry Juice and Its Many Faces

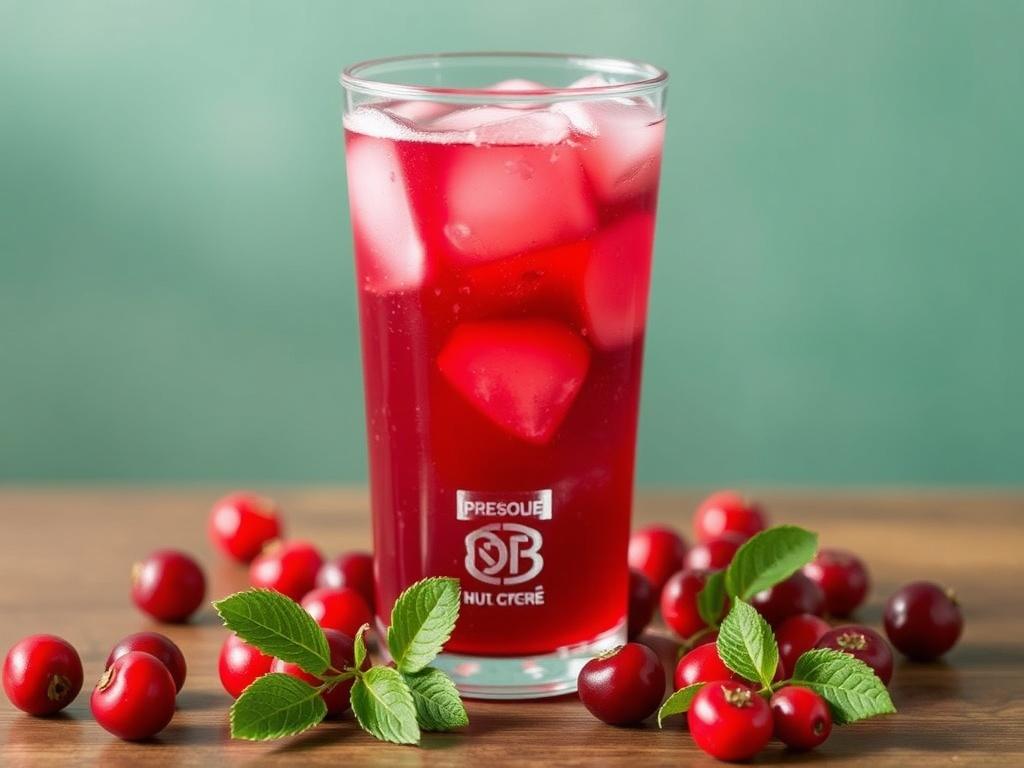
Cranberries have a way of sneaking into our kitchens and memory banks with a bright, tart note that wakes the palate. This article explores the beverage made from those small, ruby-red berries—from how they grow to how you can use them at home—without pretending there is a single, simple story. I will walk you through the plant’s journey from bog to bottle, explain what is actually in a glass, and separate marketing from science about health benefits such as vitamin C content and antioxidant activity. Along the way I’ll share practical tips for choosing, storing, and cooking with the drink, plus a few recipes I use when I want something refreshing or need a sauce that sings. Read on for a grounded, flavor-forward look at one of the most interesting fruit drinks out there.

Where cranberries come from: a short natural history

The cranberry plant is a low-growing evergreen vine that thrives in acidic, peaty soils and cool climates. Native peoples in North America discovered and used these berries long before Europeans arrived, incorporating them into foods, dyes, and even medicinal preparations. Commercial cranberry cultivation centers on flooded beds called bogs or marshes, where growers can harvest en masse using water and gentle agitation during the autumn. The bright color and firm skin of the berries are traits evolved for survival in harsh conditions, and those same traits give the fruit its characteristic tartness and robustness for processing. Knowing something of this origin helps explain why the berries are often transformed into drinks, sauces, and dried snacks rather than eaten raw in large quantities.

Cultivation is region-specific: in North America the major production states include Wisconsin and Massachusetts, while British Columbia and parts of eastern Canada are also notable suppliers. Growers alternate between dry and wet harvesting methods depending on intended use; wet harvesting makes it easy to collect the fruit but is not suitable when whole, firm berries are required. The seasonality of the crop concentrates activity in late summer and fall, which is why cranberries often land on holiday tables. Processing plants are usually located close to production areas to reduce the time between harvest and the first steps of extraction. This proximity matters because the berry’s flavors and volatile compounds are sensitive to time and handling.

There are different cranberry varieties, each with subtle changes in firmness, acidity, and sugar-acid balance, and processors blend accordingly to reach a targeted flavor for beverages or products. Those varietal differences are more about texture and processing performance than about dramatically different nutrient profiles, although terroir and growing conditions do play a role. If you ever visit a bog, you’ll notice how striking the plants look against the landscape; it’s a landscape shaped by centuries of human selection and modern agricultural engineering. That interplay between nature and technique is central to the story of the drink itself. Understanding how and where the berries are grown gives a useful lens for evaluating what ends up in a bottle.

From berry to beverage: how the drink is produced

The process starts with crushing the berries to release the juice and pulp, followed by pressing to separate liquid from solids. Depending on the desired final product, the liquid may be filtered, pasteurized, concentrated, or blended with other juices to soften the naturally sharp flavor. Producers selling “100% juice” often balance between straight, unsweetened extracts and versions where a base of water or sweeter fruit juices is added. Concentration is common because storing and shipping concentrate is more efficient; later the concentrate is reconstituted with water before bottling. Throughout this chain there are decisions that influence flavor, nutrient retention, and sugar content.

Standard commercial offerings fall into a few categories: pure pressed juice, juice from concentrate, cocktail blends, and fortified or enhanced versions. Cocktail blends typically contain added sugars and possibly other fruit juices to make the flavor more familiar and less puckery to consumers. Some manufacturers add vitamin C or other micronutrients, though the nutritional impact depends on formulation and serving size. Labels can be confusing, so learning to read them is one of the best habits for anyone who drinks this kind of product regularly. The difference between “from concentrate” and “not from concentrate” is less about quality and more about processing and logistics.

At the plant, pasteurization is the usual step to ensure safety and shelf stability, and it also affects the fragile aroma compounds and some heat-sensitive nutrients. Cold-pressed products exist and often carry a premium because they preserve more of the fresh, volatile flavors, but their storage requirements are stricter. Batches destined for longer shelf life may undergo additional clarification or stabilizing processes that alter mouthfeel and color. If you’re curious about freshness, look for packaging dates and storage instructions—those small details say a lot about how soon a product should be consumed. Those decisions by producers ultimately shape what you taste in a glass.

What’s in a glass: flavor chemistry and nutrition

Cranberry Juice. What’s in a glass: flavor chemistry and nutrition

The signature sensation of the beverage is its acid-driven tartness, primarily due to organic acids such as citric and malic acids. That sharpness is balanced in various products by added sugars or blending with sweeter juices like apple or grape, which smooth the palate and increase calories. The berry itself contributes polyphenolic compounds, including proanthocyanidins and flavonols, which are often discussed in scientific literature for their antioxidant potential. Nutrient-wise, a serving supplies small but relevant amounts of some vitamins and minerals; many commercial formulations also advertise vitamin C content as a selling point. The actual nutrient composition depends heavily on whether the product is pure, from concentrate, or sweetened and whether fortification has occurred.

Below is a simple comparative table to help visualize common commercial variations and their typical characteristics. The entries are qualitative to avoid presenting a misleading level of precision, since formulations differ across brands and products.

Type Typical Taste Sweetness/Sugar Vitamin C Common Uses
100% Cranberry (unsweetened) Very tart, sharp Low (natural fruit sugar only) Moderate Beverage for those who like tartness, culinary uses
Cocktail/Blend Balanced, less tart High (added sugars) Variable, often fortified Everyday drinking, mixers, cocktails
From Concentrate Varies with reconstitution Varies Depends on processing and fortification Commercial products, sauces, cooking
Cold-Pressed/Fresh Bright, aromatic Low to moderate Higher retention possible Premium beverages, special recipes

That table captures the trade-offs producers make between flavor, shelf life, and nutrient preservation. If vitamin C is a priority for you, look for labels that specify ascorbic acid content or show fortification claims, because unfortified products vary. Remember that sugars are often added to make the drink more palatable; the difference between a steeply sweetened cocktail and a pure juice is substantial in calorie terms. The antioxidant story is promising but complex, as the bioavailability and biological effects depend on the specific compounds and how the product is consumed. All of this matters when you choose a bottle at the store or decide to make your own.

Health claims and the science behind them

One of the most common claims associated with the drink is support for urinary tract health, tied to compounds called proanthocyanidins that may inhibit bacterial adhesion. Controlled trials and meta-analyses present mixed results: some studies find a modest preventive effect for certain groups, while others show little to no benefit for acute treatment. The nuance here is important: most positive findings relate to regular consumption over time to reduce recurrence, rather than as a cure for an existing infection. Speaking plainly, the beverage is not a substitute for antibiotics when an infection is established, but it might play a preventive role for some people under guidance from their healthcare providers. Robust expectations are necessary to avoid disappointment or inappropriate self-treatment.

Antioxidant activity is another frequently cited attribute, due to flavonoids and related phytochemicals present in the berry. Antioxidants measured in vitro do not always translate into direct disease prevention in humans because metabolism and absorption alter their form and effectiveness. Still, a diet that includes a variety of colorful fruits and vegetables, including cranberry-based drinks in moderation, contributes to a pattern associated with health benefits. Vitamin C, which is present in varying amounts depending on the product, supports immune function and collagen synthesis but is just one part of a complex nutrient cocktail. When evaluating health claims, context matters: portion sizes, added sugars, and overall diet determine whether the drink is beneficial or simply pleasant.

There are legitimate safety considerations to be aware of as well. Large amounts of sweetened beverages contribute to excess calorie and sugar intake, which has implications for weight and metabolic health. In some reported cases, concentrated cranberry products interacted with the blood-thinning drug warfarin, leading to altered clotting parameters, though evidence is not uniform and the mechanism remains unclear. Dental erosion is another realistic concern because the acidity and sugars in many formulations can wear enamel over time. For people with kidney stones, opinions differ: the citric and oxalic components interact in complex ways, so individual risk should be assessed with a clinician. These caveats underscore the importance of moderation and informed choices.

How to read labels and choose wisely

Labels tell a story if you pause to read them carefully; the front of the bottle is marketing, while the nutrition facts and ingredient list are where truth lives. Look for “100% juice” if you want minimal added sugars, and check the ingredient list for added sweeteners, corn syrup, or other fruit juices that dilute the tart character. Pay attention to serving size, because what looks like a single portion often contains more than one serving per container and can mislead about calories and sugar. If vitamin C is important to you, find products that list specific milligrams per serving or include ascorbic acid in the ingredient list. Finally, terms like “from concentrate” are not inherently bad, but they indicate additional processing steps; decide whether flavor, price, or shelf stability matters more for your needs.

For shoppers who prefer lower-sugar options, many brands now offer reduced-sugar or unsweetened versions; these retain the berry’s tang but often require mixing or dilution to be broadly appealing. Organic certifications and non-GMO labels matter to some consumers and reflect different production systems, though they don’t guarantee a better nutrient profile. Packaging can influence freshness—glass bottles often preserve aroma better than plastic, while cartons can be more recyclable depending on local services. Seasonal sales and local growers’ markets are good places to find cold-pressed varieties if you want a fresher expression. Finally, if you plan to use the product primarily as a mixer in cocktails or in cooking, prioritize flavor profile over fortification claims.

Making the drink at home: basic recipes and techniques

Making a fresh version at home is surprisingly straightforward and gives you control over sweetness and concentration. The basic approach is to simmer fresh or frozen berries with water until they soften, press the mixture through a fine mesh or cheesecloth, and then sweeten or dilute to taste. Simmering extracts flavor and color efficiently, while cold-press methods preserve volatile aromatics but require specialized equipment or a slow maceration process. A simple syrup made with honey or maple can sweeten more gracefully than refined sugar, and adding a splash of citrus brightens the profile while boosting vitamin C naturally. Home versions are also great because you can customize with spices like cinnamon or ginger for seasonal twists.

Here is a straightforward recipe I use when I want a tart, refreshing pitcher. Use the list as a basic roadmap and adjust proportions to your taste.

  • Ingredients: 3 cups fresh or frozen cranberries, 4 cups water, 1/2 to 3/4 cup sweetener of choice (honey, maple, or sugar), optional 1/4 cup orange juice for brightness.
  • Instructions: Combine berries and water in a pot and bring to a simmer, crushing berries with a spoon. Cook 10-15 minutes until softened, then remove from heat and press through a sieve or cheesecloth into a bowl. Stir in sweetener while warm so it dissolves, and add orange juice if using to round acidity. Chill thoroughly, then dilute with chilled water or sparkling water to taste before serving over ice.
  • Notes: For a smoother drink, run the strained liquid through a fine mesh again or use a blender before straining. Adjust sweetness gradually because the perception of tartness decreases as it cools.

Homemade versions also let you experiment with preservation: freezing concentrate in ice cube trays makes it easy to add a burst of flavor to drinks later. If you plan to can a batch, follow safe canning protocols because acidity and sugar levels influence heat-processing times. Fresh preparations will retain more of the delicate aromatics than long-processed commercial products, especially if you use a cold-press approach or avoid high heat. I find that adding a small amount of citrus not only enhances vitamin C but also harmonizes the berry’s acidity, making the drink more versatile as a mixer. Homemade drinks are, in short, a playground for flavor and a useful way to control sugar and fortification.

Uses in the kitchen: more than a drink

The berry’s concentrated flavor works beautifully in both sweet and savory contexts, from glaze to vinaigrette, and a little of the beverage goes a long way in most recipes. A reduction of the liquid concentrates flavor further and can be brushed on roasted meats or used as a base for barbecue sauces. For salads, mixing a small amount into a vinaigrette adds a pleasant fruity acidity that pairs especially well with bitter greens and goat cheese. In baking, the beverage can replace part of the liquid called for in recipes to contribute color and complexity, though you should account for added sweetness if using a sweetened product. Desserts such as sorbets or panna cotta benefit from the bright, tart edge provided by the berry extract.

Here are a few culinary pairings and applications I often return to: duck with a tart glaze, roasted root vegetables finished with a splash, and winter compotes that combine the berries with pears and spices. Bartending also loves the ingredient: it cuts through sweeter spirits and lends acidity to cocktails that would otherwise sit heavy on the palate. For a quick mocktail, mix a portion of the juice with sparkling water and a squeeze of lime for a refreshing low-alcohol option that highlights vitamin C when citrus is added. The drink’s versatility makes it a pantry tool as much as a beverage, and small amounts used strategically can elevate dishes without overpowering them. When cooking with it, always taste and adjust; the bottled products vary enough that recipes need real-time calibration.

Flavor pairing guide and serving suggestions

Pairing is partly about balance: the sharpness of the berries complements fatty textures, bitter greens, and aged cheeses by cutting through richness. Sweet elements like caramelized onions, roasted squash, and maple syrup can be countered attractively with a splash of the beverage. Spices such as star anise, cinnamon, and cardamom bring out different facets of the flavor, while herbs like thyme or rosemary ground it in savory preparations. For beverages, combine with ginger ale, tonic, or dry sparkling wine to create a layered drink where tartness, bitterness, and effervescence play together. Experiment with temperature too—cold spritzers are refreshing, and warm reductions are comforting in colder months.

When serving to guests, present a low-sugar or diluted option alongside a sweeter cocktail version so people can choose based on their palate and dietary needs. Garnishes like orange peel or a sprig of rosemary not only look festive but help aromatically frame the tart profile. For pairing with cheeses, look for tangy, tangy-salty varieties such as Manchego or aged cheddar that can stand up to the acidity. As an everyday practice, I keep a small bottle of concentrated homemade extract in the freezer for quick use; a tablespoon or two brightens sauces and drinks without needing a whole bottle. The more you play with pairings, the more you’ll find combinations that become personal favorites.

Children, athletes, and everyday drinking

For kids, the main concern is sugar. Sweetened commercial blends can be high in added sugars, making them an occasional treat rather than a daily staple. Diluting the drink with water or sparkling water stretches flavor and reduces sugar per serving while still delivering the bright character children enjoy. For active adults and athletes, the natural sugars can provide quick energy, and the tartness may be a pleasant contrast to typical sports drinks; however, the lack of electrolytes in most pure versions makes them an imperfect rehydration choice on their own. If vitamin C intake is a goal, pairing with other sources like citrus or fortified foods creates a more reliable plan than relying solely on the beverage. Moderation and thoughtful dilution are useful habits regardless of age or activity level.

School lunches and daycare settings often favor bottles with milder, blended versions because they appeal to broader tastes and reduce complaints. I recommend that parents check labels and prefer products with no high-fructose corn syrup and with clear ingredient transparency. For post-workout recovery, blending a controlled portion into a smoothie with yogurt and a banana supplies carbs and protein in a balanced way. The drink’s natural tartness can help with appetite modulation—some people feel satisfied with smaller portions when acidity is present. In short, adapt serving size and product type to age and activity rather than assuming all versions are equivalent.

Sustainability, production ethics, and the environment

Cranberry cultivation has environmental dimensions worth noting, particularly around water management and habitat considerations in bog systems. Many growers use managed flooding as part of harvest and winter protection strategies, which requires careful planning to avoid undue water consumption. On the positive side, properly managed bogs can support wildlife and maintain wetlands, and some farms are moving toward integrated pest management and reduced chemical inputs. Certification programs and producer transparencies are useful tools for consumers who care about these issues, though labels vary in what they actually ensure. When sustainability matters to you, seek producers who discuss their practices openly or buy from local growers when possible.

Transportation and processing also contribute to the product’s environmental footprint, which is why local, seasonal consumption has advantages for reducing embedded carbon. Concentrate-based supply chains reduce shipping volume but increase processing steps, so the environmental trade-offs are mixed. Packaging choices—from plastic bottles to glass and cartons—have different recycling and lifecycle impacts that vary by region. A small but effective consumer practice is to prioritize reusable packaging or buy in bulk where feasible, which reduces waste over time. Supporting producers with clear sustainability commitments encourages better practices across the industry.

Common myths and misunderstandings

One persistent myth is that the beverage is a miracle cure for urinary tract infections; as discussed earlier, the evidence is nuanced and prevention, not cure, is the only plausible benefit for some people. Another misunderstanding is that all commercial products are nutritionally equivalent—this is far from true given differences in added sugars, fortification, and processing. People sometimes assume “from concentrate” means lower quality, which is not automatically correct because modern concentration techniques can preserve much of the original flavor and nutrients. Finally, the idea that the drink is a major source of vitamin C in modern diets is overstated unless someone consumes it regularly and chooses fortified or fresh-pressed options. Clearing up these misconceptions helps set realistic expectations for taste and health impacts.

Marketing tends to simplify complex information, so skeptical reading is important: labels that promise many benefits often translate to small actual effects when you look at serving size and ingredient balance. Another frequent overstatement positions the beverage as an antioxidant superfood; while it contains beneficial phytochemicals, a diverse diet of fruits and vegetables is a more reliable strategy. Popular culture sometimes conflates historical use by Indigenous peoples with modern medicinal claims, which is an unfair leap without contemporary clinical proof. Respect for tradition is valuable, but translating that into modern health guidance requires scientific evaluation. A balanced, evidence-aware approach will serve consumers better than hype-driven choices.

Personal notes: what I’ve learned and how I use it

As someone who has made the drink at home and cooked with it seasonally, I find that its strengths are clarity and versatility rather than outright sweetness. My kitchen rituals include a winter batch of concentrate that becomes vinaigrettes, cocktail bases, and an occasional mixer for gin or sparkling wine. I’ve learned that a little citrus or a splash of sweeter juice goes a long way in taming raw acidity without erasing the character I want to keep. On taste tests, friends respond differently depending on their familiarity with tart flavors; some love the puckering intensity, while others prefer the softened blends you find in grocery aisles. These experiences taught me to tailor portions and formulations to my guests rather than offering a one-size-fits-all bottle.

I also keep an eye on labels now more than I did a decade ago, looking for honest statements about sugar and fortification rather than marketing buzzwords. When time allows, I opt for a cold-pressed small-batch or an unsweetened from-concentrate product to give the recipes a clearer fruit expression. For quick refreshment, diluting a spoonful of frozen concentrate in sparkling water with a wedge of lime has become my default. Small techniques—like adding the sweetener while warm during preparation—make a big difference in mouthfeel and integration. The drink has earned a regular, measured place in my pantry because it amplifies flavors in both drinks and dishes without dominating them.

Practical tips for everyday use and storage

Once opened, bottled products typically require refrigeration and should be used within the timeframe printed on the label; this helps preserve flavor and prevents spoilage. Freezing portions of homemade concentrate in ice cube trays is a convenient way to extend shelf life and make dosing easy for drinks or sauces. For long-term storage, some people opt to freeze the whole bottle if space allows, though glass needs careful handling to avoid breakage. Keep an eye on smell and appearance; a sour off aroma or unusual sediment can indicate fermentation or spoilage in sweetened products. Rotating your stock and using older bottles for cooking rather than drinking is a practical approach to avoid waste.

When serving, present chilled options for refreshment and gently warmed reductions for sauces—temperature shapes the perception of acidity and sweetness. For hosting, offer a diluted pitcher alongside a premixed cocktail so guests can choose intensity and sugar level. If you’re packing a lunch, include a small thermos of diluted beverage for better portion control than a full sugar-laden bottle. Finally, maintain small habits like reading back-of-bottle serving sizes and using measuring cups when mixing at home to keep calorie and sugar expectations realistic. These small practices let you enjoy the flavor without unintentionally overconsuming sugar or calories.

Final practical thoughts before you pour a glass

The beverage is a fascinating study in contrasts: intensely tart raw fruit, often softened by sweetness, with a complex profile of polyphenols that invite scientific curiosity rather than simplistic health claims. Choosing a product comes down to balancing flavor preference, health priorities like vitamin C intake, and sugar considerations, along with environmental or local-production concerns if those matter to you. If you make it at home, you gain precise control over sweetness and can experiment with pairings and preservation techniques that commercial products do not offer. Use the drink strategically in the kitchen rather than as an all-day stand-in for water, and remember that moderation maximizes enjoyment while minimizing potential downsides. With that approach, a glass becomes an ingredient, a refreshment, and a small culinary adventure all at once.

Berry Compote for Winter: Jarred Warmth and Bright Flavors

When frost nails the window and the fruit stalls are shuttered, a jar of berry compote can feel like a small, stored sun. This article walks through how to make, vary, preserve and use berry compotes so your winter breakfasts, desserts and drinks stay vivid and satisfying. I will share practical ratios, texture tricks, storage advice and a few recipes that travel easily from saucepan to bowl to glass. Expect hands-on tips, a little kitchen storytelling and clear troubleshooting so you won’t be left with a watery mess or an overcooked jam. Read on and you’ll leave with confidence to turn a handful of frozen berries into weeks of cozy, healthy treats.

Why make compote for winter

Preserving summer and autumn berries into compote is about more than convenience; it’s a way to bottle seasonality for cold months. Compote concentrates flavors while keeping the fruit’s identity intact — you still recognize the tartness of raspberries, the sweetness of blueberries, the pop of blackcurrants. Compared with jam, compote keeps more texture and needs less sugar, so it often feels lighter and closer to fresh fruit. For those who care about eating well in winter, a few jars of compote provide a shortcut to breakfasts, sauces and quick desserts without relying on heavy, processed options.

Beyond flavor and nutrition, compote is practical. It frees you from the tyranny of “what to serve” on busy mornings: spooned over porridge, stirred into yogurt, or warmed into a drink, it instantly elevates simple foods. Making compote also stretches a small investment in fresh or frozen berries into many servings, which is efficient both for the wallet and the pantry. Lastly, the process is forgiving; unlike strict canning, making compote doesn’t demand precision in boiling times or acidity as long as you plan to refrigerate or freeze your jars.

Choosing berries: fresh, frozen, or dried?

Choice of berries shapes both texture and flavor. Fresh berries from a reliable source give the brightest, most aromatic compote, particularly if they’re just-picked. Frozen berries are often the most practical option in winter because they are usually picked and flash-frozen at peak ripeness; they produce consistent results and are excellent for bulk compote. Dried berries can be rehydrated into a compote-like conserve and provide a deep, concentrated flavor, but their texture and sweetness profile differ markedly from fresh fruit.

Each option has trade-offs: fresh needs immediate use; frozen needs minimal prep and is often cheaper; dried requires soaking and a different water-to-fruit ratio. When choosing, consider the time you want to spend, the texture you prefer, and whether you plan to can, refrigerate, or freeze the finished product. For balanced everyday compotes I reach for frozen mixed berries in winter, and reserve fresh local berries for small-batch preserves when I want the brightest aroma.

Type Pros Cons
Fresh Brightest aroma and texture Seasonal, pricier, shorter shelf life
Frozen Reliable flavor, long storage, cost-effective Can release more water when thawed
Dried Intense flavor, shelf-stable Needs rehydration, different texture and sweetness

Basic recipe and ratios

A simple, dependable ratio removes guesswork and lets you scale the recipe to fit a single breakfast or a dozen jars. For most berry compotes I use roughly 4 parts berries to 1 part liquid, with sugar adjusted to taste. That might look like 800 grams of berries to 200 milliliters of water or fruit juice, plus 60–120 grams of sugar depending on tartness and how long you plan to store the compote. Acid helps balance sweetness and preserve color — a tablespoon of lemon juice per liter of compote is a good starting point.

Technique matters as much as ratios. Heat the berries gently, bring to a simmer so they release juices, and keep the pot at a low bubble while stirring occasionally. If you like more whole fruit, simmer briefly and cool; if you prefer a thick, spoonable sauce, cook longer until the mixture reduces and concentrates. For a puréed compote, give it a quick blitz with an immersion blender, but avoid overworking if you want seed and pulp textures preserved.

Ingredients for a basic 1-liter compote

Below is a practical ingredient list for a liter of finished compote, adequate for several breakfasts or a week of toppings. You can scale ingredients up or down proportionally while keeping the same technique. The listed sugar is a guideline; adjust to your berries’ sweetness and your dietary preference, substituting honey or maple if desired.

  • 800 g mixed berries (fresh or frozen)
  • 200 ml water or unsweetened fruit juice
  • 60–100 g granulated sugar or 50–80 g honey/maple syrup
  • 1 tbsp lemon juice
  • Optional: 1 tsp vanilla extract or a cinnamon stick

Variations: spices, sweeteners and add-ins

Berry Compote for Winter. Variations: spices, sweeteners and add-ins

Compote is a blank canvas. A cinnamon stick, a pod of vanilla, a strip of orange peel or a star anise will nudge the flavor toward autumn-winter warmth. For less sugar, use apple or pear juice as part of the liquid; its natural sweetness supports the berries without masking their character. Spices should be added early in the simmer for a subtle infusion, or late for a bright, fresh hit of aroma.

Add-ins open creative uses: chopped apples or quince extend volume and add body; citrus zest brightens; a spoonful of chia seeds thickens and makes the compote more jam-like without extra cooking. For an adult twist, finish with a splash of fortified wine or a spoon of marmalade for complexity. Keep in mind that alcohol alters shelf stability if you plan to preserve long-term — use it for small-batch, refrigerated jars.

Techniques for texture: whole berries, crushed, or purée

Texture defines how you’ll use the compote. Whole-berry compote is great for spooning over porridge or ice cream and offers pleasant bursts of fruit. Crushed compote, where some berries are broken down while others remain intact, serves as a versatile middle-ground for layering in parfaits. Puréed compote transforms into a coulis-like sauce useful for glazing meats or folding into batters.

To keep berries whole, add them to hot liquid and minimize stirring; cook just until they soften. To crush, use a potato masher during simmering and stop when you reach the desired consistency. For purée, briefly use an immersion blender; strain if you want a seed-free sauce. Temperature control is key: a vigorous boil will shred fruit and lose bright flavors, while a gentle simmer preserves color and aroma.

Long-term storage: jars, freezing, and canning

How you intend to store compote determines how you make it. For short-term use, sterilized jars in the refrigerator are fine for up to two weeks. Freezing is my preferred long-term option for most compotes; spoon into freezer-safe containers leaving headspace and thaw in the fridge or a warm pan. Water bath canning is possible if you want pantry-stable jars, but compote’s loose consistency and variable sugar levels mean you must follow tested canning recipes to ensure safety.

If you choose canning, boost acidity with lemon juice and follow a reputable recipe for processing times based on jar size. Label jars with the date and contents; rotating older jars to the front avoids waste. For freezing, portion into usable sizes — quarter- or half-liter containers — so you only thaw what you need. Proper storage preserves both flavor and most nutrients, keeping your winter dishes lively.

Method Typical Shelf Life Notes
Refrigeration Up to 2 weeks Keep in sterilized jar; use clean utensils
Freezing 6–12 months Best for texture and convenience; thaw gently
Canning (water bath) 12–18 months Requires tested recipe and careful processing

Using compote in winter meals

Compote’s versatility is one reason I make it in batches. For breakfast, spoon it over warm porridge or Greek yogurt and sprinkle with toasted nuts; it makes even plain oats exciting. In baking, use compote as a moist layer in cakes, a filling for tarts, or swirl it through muffin batter for quick fruit pockets. It also performs as a sauce for roasted poultry — the acidity and fruitiness brighten fatty meats.

Compote is easy to turn into a drink: warm a few spoonfuls with water and lemon for a cozy cup, or mix with sparkling water for a refreshing low-alcohol mocktail. For adults, a glug of rum or Madeira folded into warm compote becomes a simple mulled-fruit drink. As a finishing touch on desserts, a spoonful over ice cream or panna cotta reads like a professional flourish without the fuss.

Scaling up: making large batches and batch-cooking tips

When you plan to make several liters, workflow matters. Use a wide, heavy-bottomed pot so the berries heat evenly; stacking in tall narrow pots traps steam and slows reduction. Prepare your ingredients first: measure liquids, zest citrus, and portion spices into tied sachets to remove easily. Work in batches if your pot isn’t large enough — crowding the pan produces excess liquid and lengthens cook time.

Labeling is non-negotiable for large-scale batch cooking. Date and name jars clearly and note the sugar level or spice additions on the lid. Cooling jars on a towel rather than a metal rack prevents sudden temperature shocks. I also keep a simple ledger in the kitchen to track what’s in the pantry so I can rotate jars and avoid duplicates.

Troubleshooting common problems

Even simple recipes can give trouble. If your compote is too watery, reduce it longer over medium heat, stirring occasionally to prevent burning. Alternatively, thicken it with a slurry of cornstarch and cold water; add that toward the end and simmer briefly until glossy. If it’s overly thick, stir in a little water, fruit juice or a splash of alcohol to loosen the texture.

If pieces of fruit break down too much, lower the heat next time and shorten cooking time. For grainy or crystallized compote, the sugar may have been overheated or stored improperly; warming gently and stirring can sometimes re-dissolve crystals, but prevention is best: dissolve sugar into liquid before adding fruit. And if the flavor is flat, brighten the compote with a small amount of acid — lemon or orange juice often brings flavors back to life.

Nutritional notes: is compote healthy?

Compote can be a healthy addition to the winter diet when prepared thoughtfully. Berries are rich in vitamins, fiber and antioxidants that retain much of their benefit after light cooking. Compared with many sweet spreads, compote often contains less sugar and more fruit pieces, which increases satiety and provides a better nutritional profile. Using natural sweeteners or reducing added sugar keeps calories in check while letting fruit flavor lead.

Portion control matters: a few tablespoons of compote add considerable flavor with few calories, but spooning straight from the jar invites excess. Pair compote with protein-rich foods like yogurt, cottage cheese or ricotta to balance blood sugar and make meals more filling. For those watching sodium or processed ingredients, homemade compote beats many commercial sauces and syrups on transparency and ingredient simplicity.

Sustainability and sourcing

Sourcing fruit responsibly makes a difference in both taste and environmental impact. Buying local berries at the end of summer or autumn supports growers and reduces transport emissions, and the flavor often reflects the care taken in cultivation. When buying frozen, check labels for single-ingredient fruit without syrups or additives. Choosing organic or low-pesticide fruit matters if you’re preserving with skins and seeds intact, where residues can concentrate.

Leftovers and “ugly” fruit deserve a role in compote too. Overripe berries, bruised apples and almost-spoiled fruit are ideal candidates for preservation since cooking masks texture flaws but preserves flavor. Using imperfect produce reduces waste, saves money and results in delicious jars that outlive the season that produced them.

Quick recipes: three compotes to keep on hand

Here are three accessible recipes that cover most winter needs: a classic mixed-berry compote for breakfasts, a spiced cranberry-apple compote for holiday tables, and a honey-lavender raspberry compote for special breakfasts or desserts. Each recipe is written for approximately one liter of finished compote and follows the basic technique described earlier.

Classic mixed-berry compote

Ingredients: 800 g mixed berries (fresh or frozen), 200 ml water or apple juice, 70 g sugar, 1 tbsp lemon juice, 1 tsp vanilla extract. Method: Combine liquid and sugar in a pot and warm until the sugar dissolves. Add berries and lemon juice, bring to a gentle simmer, and cook uncovered for 10–15 minutes until the mixture thickens slightly. Stir in vanilla, cool a little, and jar. Use within two weeks refrigerated or freeze in portions.

Spiced cranberry-apple compote

Ingredients: 500 g cranberries, 300 g peeled and chopped apple, 250 ml water, 100 g sugar or maple syrup, peel of one orange, 1 cinnamon stick, 2 cloves. Method: Combine water, sugar, orange peel and spices in a saucepan and simmer to infuse. Add cranberries and apple, simmer until cranberries pop and apples soften, about 12–18 minutes. Remove spices and zest, mash lightly if desired, cool and store. This compote pairs well with roasted meats and holiday breads.

Honey-lavender raspberry compote

Ingredients: 800 g raspberries, 200 ml water, 50–70 g honey, 1 tsp dried culinary lavender (tied in muslin), 1 tbsp lemon juice. Method: Warm water and honey with lavender until aromatics bloom, then remove from heat and steep 5 minutes. Add raspberries and lemon juice, return to low heat and simmer 6–8 minutes, keeping fruit mostly intact. Strain out lavender, jar and chill. The floral notes work beautifully with yogurt or panna cotta.

How to turn compote into a winter drink

Compote is an easy starting point for warm or cold drinks. For a simple hot beverage, dissolve two tablespoons of compote in a cup of hot water, add a squeeze of lemon and sip slowly. For a mulled-fruit drink, heat compote with a cinnamon stick and a few slices of orange; strain if you prefer a clearer drink and add a splash of brandy for a warming adult version. For a cold mocktail, mix compote with sparkling water, a sprig of mint and crushed ice for a festive, low-sugar refresher.

Compote can also be blended into smoothies or used as a syrup for cocktails by reducing it slightly to intensify the sweetness and flavor. The high fruit content makes these drinks feel more substantial than plain cordials, and they bring a depth that simple syrups can’t match. Keep a jar in the freezer and you’ll always have the option to whip up a bright, fruit-forward drink on short notice.

A small kitchen story

I remember the winter I started making compote in earnest: a single, generous bag of mixed frozen berries on sale after the holidays. I experimented with a cinnamon stick and orange peel, then froze gift jars for friends. The feedback — a neighbor using it in pancakes, a friend spooning it over her morning porridge — convinced me this was worth the effort. Those jars lasted the season and kept appearing in unexpected ways: a glaze for roast chicken, a quick dessert with whipped cream. That year taught me how a simple, well-made preserve stitches warmth into ordinary days.

Since then, compote has been a staple in my kitchen routine. I learned to adapt recipes to what’s on hand and to value texture as much as sweetness. The practice of preserving fruit has become a small ritual that curbs winter monotony with bright, fruity moments that feel like a carried-over piece of summer.

Final practical tips and encouragement

Start small if you’re unsure: a single jar is less daunting than a whole canning session and still offers plenty of practice. Keep a thermometer if you’re moving into canning, and always prioritize cleanliness and fresh ingredients for the best flavor. Use clear jars so the color and texture are visible; seeing a vivid ruby compote is part of the pleasure.

Making berry compote for winter is both practical and generous: it saves money, reduces waste, and produces versatile food that brightens days. Whether you want a quick spoonful over breakfast, a glaze for dinner, or a warm compote-based drink on a cold afternoon, the jars you make now will repay the effort for months. Put on a kettle, take your best berries out of the freezer, and give it a try — you’ll be surprised how little it takes to bring light to gray winter mornings.

Warmth in a Mug: The Art of Spiced Cocoa with Cinnamon

There are drinks that simply warm the hands, and then there are ones that settle into you, like a familiar song. Spiced Cocoa with Cinnamon belongs to the latter group: it combines the deep, slightly bitter comfort of cocoa with the warm, floral heat of cinnamon to create a drink that feels like home. In this article I will walk you through the history, the ingredients, techniques, and a few reliable recipes so you can make this at home anytime. Along the way I will share small tips I picked up over years of experimenting in my kitchen, and suggest variations for different moods and occasions. Whether you are chasing a cozy winter evening or want a gentle pick-me-up, these ideas will help you make a cup that tastes intentional.

Why spiced cocoa matters

Hot chocolate has a long and surprising history, traveling from pre-Columbian Mesoamerica to European parlors and then into modern cafés. Early preparations of chocolate were often spiced, sometimes bitter and savory, and cinnamon was one of the first spices Europeans paired with cocoa. That historical link explains why the combination feels so natural: the spice brings brightness and aromatic lift to the dense, chocolatey base. Today, spiced cocoa has moved beyond mere nostalgia and become a tool for layering flavor, balancing sweetness, and adding a sensory dimension to simple drinks. For many, a cup signals ritual: it marks a break, a moment to breathe, and a way to make ordinary time feel better.

On a practical level, cinnamon performs multiple roles in the cup. It contributes warm aromatics, a subtle sweetness, and a lingering finish that helps the cocoa feel rounded rather than one-note. Cocoa itself comes in different personalities, from raw, bright natural cocoa to mellow, rounded Dutch-processed powders, so the choice of powder changes how much spice you need. The balance between chocolate, cinnamon, and sweetness determines whether the drink leans bright, rich, or spicy. Learning to read that balance is part of making a consistently excellent cup.

Key ingredients and their roles

Spiced Cocoa with Cinnamon. Key ingredients and their roles

Start with the cocoa: high-quality unsweetened cocoa powder gives the backbone of the drink, supplying both flavor and mouthfeel. Milk choices matter too; whole milk and cream provide a luxurious texture while plant milks offer unique notes and lighter body. Sugar or sweetener smooths out the cocoa’s acidity, and the type and amount you choose will change the character of the final drink. Cinnamon can be introduced either as ground spice for immediate flavor or as a stick for slow infusion; each method affects intensity. A pinch of salt is small but essential because it brightens the chocolate and ties the elements together.

Beyond those basics, a few optional players can lift the drink in specific directions. Vanilla adds sweetness perception and amplifies the cocoa’s natural flavors without adding sugar. A small amount of espresso or strong coffee deepens the chocolate profile and makes the beverage feel more adult. Cardamom, star anise, and toasted orange peel are classic companions if you want to expand the spice palette. Experimentation should be guided by restraint: a little goes a long way with potent spices, and balance is the goal rather than complexity for its own sake.

To help you visualize quantities and roles at a glance, here is a simple table that outlines common ingredient choices and their effects on the cup. This table is intended as a quick-reference guide when you are adapting recipes to the ingredients you have available.

Ingredient Typical Amount (per 1 serving) Effect on Flavor
Unsweetened cocoa powder 1.5 – 2 tbsp Primary chocolate flavor, bitterness, cocoa intensity
Milk or milk alternative 8 oz (240 ml) Body, creaminess, mouthfeel
Sugar or sweetener 1 – 2 tsp, adjust Sweetness, balances acidity and bitterness
Cinnamon (stick or ground) 1 stick or 1/4 – 1/2 tsp ground Warmth, aroma, spicy-sweet note
Vanilla extract 1/4 tsp Enhances chocolate, adds sweetness perception

Choosing your cocoa

Not all cocoa powders are created equal, and the differences show up in the cup. Natural cocoa tends to be brighter and more acidic, which can make a drink feel lively; it reacts with baking soda and acids in recipes, but for beverages it simply tastes zippier. Dutch-processed cocoa has been alkalized to reduce acidity and often tastes smoother and darker, lending a round, mellow profile that many people associate with classic hot chocolate. If you prefer a bold, slightly fruity cocoa note, pick a natural powder; if you want velvet and depth, Dutch-processed is a reliable choice. Single-origin powders exist too, and they can offer floral or nutty nuances worth exploring once you understand the base differences.

Cinnamon: types and how they affect flavor

Cinnamon comes predominantly in two forms: Ceylon and Cassia. Ceylon, sometimes called “true cinnamon,” is delicate, floral, and subtle. Cassia is more common in grocery stores, stronger and spicier, with a more assertive heat. For drinks, a Ceylon stick gives gentle, layered warmth while a small pinch of ground Cassia delivers a bold, immediate lift. The form you use matters: whole sticks provide a slow, infused flavor with less gritty texture, while ground cinnamon disperses quickly and coats the palate. I tend to keep both on hand and reach for a stick when simmering the milk, and a small pinch of ground cinnamon when making single-cup fixes.

Techniques for silky, well-balanced cocoa

The technique you choose changes not only texture but also how the spices express themselves. A classic stovetop method involves whisking a paste of cocoa and sweetener with a little hot water or milk before adding the remainder, which helps dissolve cocoa and prevents clumps. Low and slow simmering allows cinnamon sticks and other spices to infuse gently, producing a smooth, layered drink with subtle aromatic presence. If you are in a hurry, whisking in a small amount of hot milk to form a paste and then topping with steamed milk works well for single servings. For larger batches, a slow cooker is ideal because it melds flavors without attention, producing a consistent, well-rounded result.

Temperature control is surprisingly important. Bringing milk too quickly to a high boil can scald it and create off-flavors, so aim for gentle steaming or barely simmering. Use a whisk rather than a spoon when incorporating cocoa; the whisk breaks clumps and aerates the mixture for a lighter mouthfeel. If using ground spices, add them earlier so they have time to rehydrate and bloom. When you introduce a splash of cold dairy or alternative at the end, do it slowly to avoid shocking textures and ensure a harmonious final sip.

Another important technique is layering rather than dumping everything at once. Add cocoa, a little sweetener, and a tablespoon of liquid first to make a smooth paste. Heat the bulk of the milk with the cinnamon stick and any whole spices to extract aromatics. Strain if you used whole spices and then combine with the paste, finishing with vanilla or a small pinch of salt. This method reduces bitterness, improves texture, and gives you control over spice extraction. It also makes it easier to taste and adjust sweetness and spice before serving.

A reliable recipe: Classic spiced cocoa with cinnamon

This recipe is a dependable starting point that yields a rich, balanced cup with a recognizable cinnamon presence without overwhelming the chocolate. It is written for a single serving but scales up easily for a pot or a slow cooker batch. Use the stovetop whisking method for the best integration of dry cocoa and liquid, and choose whole milk for silkiness or a barista-style oat milk if you prefer a vegan option. I include small optional tweaks below for those who like a deeper flavor or a lighter texture. The technique and proportions are what give the drink its identity more than any single ingredient.

Ingredients:

  • 1.5 tbsp unsweetened cocoa powder
  • 1 to 2 tsp sugar or sweetener, adjust to taste
  • 1 tbsp hot water or a little warm milk to make a paste
  • 8 oz (240 ml) milk or milk alternative
  • 1 cinnamon stick or 1/4 tsp ground cinnamon
  • 1/4 tsp vanilla extract (optional)
  • Pinch of salt

This list gives you a clear starting point and leaves room to scale or alter according to what you prefer at the moment.

Step-by-step:

  • Warm a small saucepan over medium heat and add the milk and cinnamon stick. Heat until the milk is steaming and small bubbles form at the edges, do not boil.
  • Meanwhile, combine cocoa powder, sugar, and the hot water in your mug or a small bowl to form a smooth paste without lumps.
  • Remove the milk from heat and discard the cinnamon stick if you prefer no floaters. Pour about a quarter of the hot milk into the cocoa paste while whisking to loosen it, then add the rest and whisk until smooth.
  • Add vanilla and a pinch of salt, taste, and adjust sweetness. Serve immediately, perhaps with a light dusting of cinnamon or a small dollop of whipped cream.

These steps are straightforward but precise, and following them prevents common mistakes like grainy texture or overcooked milk.

Variations to match mood and occasion

The base recipe invites creative changes depending on the time of day and the company. For an adult version, add a splash of rum, bourbon, or dark liqueur at the end to give the drink a warm, rounded finish. For mornings when you want something with a caffeine lift, stir in a teaspoon of instant espresso or a shot of brewed espresso to deepen the chocolate notes. If you are after a lighter version, reduce the cocoa by a half tablespoon and use lower-fat milk; you still get the flavor but with less heaviness. Spices like cardamom and a tiny pinch of ground chili can make the drink exotic and interesting, but use them sparingly to avoid overshadowing the cocoa and cinnamon.

For a dessert-style treat, turn the drink into a hot chocolate affogato by pouring hot spiced cocoa over a scoop of vanilla ice cream. The contrast of hot and cold amplifies aroma, and a little sea salt on the ice cream brings out nuance in both cocoa and cinnamon. To make a frothy café-style cup at home, blend the finished drink briefly in a blender or use an immersion frother for a creamy head. If you expect guests, prepare a large batch in a slow cooker and provide toppings like whipped cream, toasted marshmallows, shaved chocolate, and extra cinnamon sticks for stirring. The presentation often matters as much as the liquid itself when you are sharing the experience.

If you are watching sugar, consider using less sweetener and emphasizing the aromatic spices to compensate. Natural sweeteners like maple syrup or honey add additional flavor layers; maple introduces a woody, caramel tone while honey brings floral notes that pair well with the gentle heat of cinnamon. For plant-based milks, oat and almond varieties work particularly well because they add body and complimentary flavors without competing with the cocoa. Taste often as you change elements and be prepared to tweak the quantities of cocoa or cinnamon by small increments until the cup sings for you.

Batch methods: slow cooker and oven

When you are making spiced cocoa for a group, the slow cooker is one of your best friends. Combine the dry ingredients with a portion of the milk to form a paste, then add the remaining milk and cinnamon sticks to the slow cooker. Keep it on low for an hour or more and the spices will become integrated while the cocoa loses any grittiness from the powder. A slow cooker also keeps the drink at serving temperature for extended periods without scorching, which is ideal for gatherings. If you do use a slow cooker, stir occasionally and taste before serving to fine-tune sweetness and spice level.

If you do not have a slow cooker an oven method can be surprisingly effective. Preheat the oven to a low temperature, place a heavy saucepan or oven-safe pot with the milk, cocoa paste, and cinnamon sticks inside, and let it warm slowly for 30 to 45 minutes. The dry heat of the oven provides even, gentle heat that extracts spice and melds flavors without the constant attention of stovetop heating. Strain before serving if necessary. Both batch techniques are forgiving and give you time to prepare toppings and accompaniments while the drink develops flavor.

Storage, reheating, and leftovers

Leftover spiced cocoa keeps in the refrigerator for up to 3 days when stored in a sealed container. It will thicken slightly as it cools because cocoa binds with proteins and starches in milk; shake or whisk well when reheating to restore smoothness. Reheat slowly on the stovetop over low heat or use a microwave at medium power in short increments, stirring between bursts. If the drink tastes muted after refrigeration, a fresh pinch of ground cinnamon and a splash of hot milk can revive its aroma and flavor. Avoid boiling on reheating, as that can scald the milk and produce an off-taste.

For make-ahead entertaining, prepare the spiced milk base without sweetener and cocoa; keep it warm in a slow cooker. When guests arrive, mix individual cocoa paste and sweeten to taste just before combining with the hot spiced milk. This approach lets people control their sweetness and helps maintain texture. If you want to freeze spiced cocoa, do so only if you used nondairy milk that freezes well, and expect some texture changes on thawing. In general, fresh is best, but careful reheating brings a second life to an overlooked fridge bottle.

Pairings and serving suggestions

Pairing spiced cocoa with bites enhances the experience and highlights different flavor aspects. Simple butter cookies or shortbread emphasize the drink’s chocolate notes, while citrus-based pastries echo the aromatic lift from cinnamon and any orange peel you might add. Savory snacks like toasted nuts or a mild cheese plate provide contrast and make a cup feel like part of a more substantial snack. For a cozy winter afternoon, serve spiced cocoa alongside an almond biscotti for dunking; the firm texture stands up nicely to the warm liquid. Presentation matters too: serving in thick-walled mugs keeps the drink warm and makes the act of holding it more satisfying.

Consider also beverage companions. If you are serving coffee and spiced cocoa together, put them in different part of a spread to allow guests to choose; the cocoa can be an alternative for those avoiding caffeine or seeking a richer, sweeter option. For holiday gatherings, offer a topping bar with ground cinnamon, cocoa nibs, and small pieces of dark chocolate. Cinnamon sticks double as stirrers and look festive when placed upright in mugs. Small touches like these make the serving ritual feel curated rather than improvised.

Common mistakes and how to avoid them

There are a few recurring errors people make that are easy to fix. One is adding cinnamon at the end as a powder without giving it time to rehydrate, which can result in a chalky mouthfeel. Adding whole cinnamon early in the heating process or whisking ground spice into a small amount of warm liquid first will prevent that. Another mistake is using low-quality cocoa and then trying to mask it with too much sugar; invest in a mid-range powder and you will need less sweetener to get depth and complexity. Overheating milk is a third common issue, and it is solved by avoiding high heat and stirring frequently. Finally, not tasting as you go means you lose control of balance; taste and adjust often, especially when you change ingredients or scale the recipe.

Personal notes from the kitchen

Over the years I learned to trust small experiments more than big recipe overhauls. One winter evening I forgot to add sugar to a batch I had been making for friends and had to improvise with a spoonful of condensed milk, which surprisingly gave the drink a caramel hint that everyone loved. That taught me two things: first, never be afraid to adapt to what you have, and second, some “mistakes” become the basis for new favorites. I also learned that the cinnamon stick you stir with becomes a keepsake of the evening, often slightly darkened and fragrant, and people enjoy the ritual more than you expect. These tiny human elements are part of why spiced cocoa feels like more than a beverage.

Another detail from my experiments is that simple equipment upgrades can elevate the cup. A small hand whisk makes a noticeable difference compared with a spoon, and a fine mesh sieve removes any spice particulates for a cleaner mouthfeel. I often make a larger pot and freeze portions in ice cube trays for quick single-cup reheats; a cube melted into steaming milk brings the flavor back to life faster than starting from scratch. These small efficiencies matter when you want to enjoy the drink regularly without treating it as an elaborate project each time.

Finally, sharing this drink has taught me that taste is personal and context-dependent. On a blustery evening outdoors, a cup that is boldly spiced and slightly sweeter feels perfect. In the middle of the day, a more restrained version with less sugar and a lighter milk seems more appropriate. The best recipe is one you can reliably reproduce and tweak, and the process of getting there is where most of the satisfaction lies.

Parting thoughts

Spiced cocoa with cinnamon is more than a simple combination of ingredients; it is a small ritual that you can shape to your life, season, and company. From selecting the right cocoa powder to deciding whether to stir in ground spice or steep a stick, every choice influences the final cup. The methods and variations outlined above give you a toolkit for making this drink consistently enjoyable, whether you want a quick solo cup or a slow cooker pot to share. Keep tasting, keep adjusting, and let the aroma guide your decisions. When you next cradle a mug and inhale that warm cinnamon-chocolate scent, you will understand why this drink feels like a tiny, reliable comfort.

Ginger Tea with Honey: Warmth, Flavor, and a Little Daily Magic

I remember the first time a steaming cup of ginger tea with honey settled into my hands on a rain-streaked afternoon; the warmth seemed to smooth the edges of a hectic day. This drink is more than a cozy habit for many people around the world. It combines the bright, peppery bite of fresh ginger with the smooth sweetness of honey to create a beverage that comforts, cleanses, and lifts the spirit. In this article I will walk you through the history, the science, and the art of preparing this simple elixir, plus practical recipes, tips, and safety notes. My goal is to give you everything needed to make an excellent cup at home and to understand why so many reach for it when they need a little care.

Where It Comes From: A Brief History of Ginger and Honey Together

Ginger has been cultivated and traded for thousands of years, prized across Asia, the Middle East, and Europe for its flavor and preservative qualities. Honey is even older as a human food, collected and used for ritual, medicine, and cooking in many ancient cultures. The combination of a warming root and a natural sweetener evolved in household remedies and teahouses, often with regional twists such as slices of lemon, spices, or fermented bases. Tea traditions in Asia favored the warming properties of ginger during cold months, while Mediterranean and Middle Eastern cuisines used honey to balance spice and bitterness. Over time this pairing migrated into modern kitchens and cafés as both a comfort drink and a gentle remedy.

The history matters because it explains the dish’s versatility: it appears as a straight infusion in one place, a spiced tonic in another, and as part of ceremonial hospitality in a third. When people speak of ginger tea, they rarely mean a single fixed recipe; they reference a family of preparations united by two ingredients and countless small local variations. Knowing that lineage helps when you experiment in your own kitchen—use it as permission to adjust proportions, try different honeys, or add complementary spices. Cooks and herbalists have always improvised with what they had, and that creative flexibility is part of the drink’s appeal.

What It Does: Benefits and How It Supports the Immune System

People often drink ginger tea with honey for relief from cold symptoms, mild digestive upset, and general malaise. Both ginger and honey contain compounds that have biologically active properties: ginger has gingerols and shogaols which are linked to anti-inflammatory and stomach-settling effects, and honey brings enzymes and antioxidants along with antimicrobial properties. Together they act on overlapping pathways—soothing irritated mucous membranes, gently easing nausea, and providing a mild antibacterial environment in the throat. This combination does not replace medical treatment for serious illness, but it can support comfort and recovery during everyday respiratory or digestive complaints.

When we talk about supporting the immune system, the phrase can be vague, so it helps to be specific. Regularly consuming nutrient-rich foods and maintaining sleep, hydration, and stress management are the backbone of immune health. Ginger tea with honey contributes by reducing local inflammation in the throat and gut and by offering antioxidant molecules that help cells cope with oxidative stress. In short bursts—when you feel a scratchy throat or an off stomach—this beverage can be a useful ally. Long-term immune resilience depends on broader habits, but small rituals like a calming cup can improve sleep and stress, which indirectly benefit immune function.

How Ginger and Honey Work: A Closer Look at the Chemistry

Fresh ginger contains volatile oils and phenolic compounds. Gingerols are predominant in fresh root and convert into shogaols when ginger is dried or heated; both groups have been studied for anti-inflammatory activity. These compounds interact with molecular pathways that modulate prostaglandins and cytokine signaling, which partly explains the reduction in soreness and irritation reported by many drinkers. Honey is a complex substance: its sugar profile promotes osmotic protection against microbes, and raw honey retains small amounts of enzymes, flavonoids, and organic acids that add antioxidant and mild antibacterial action. Together, the two create a combination that is soothing, mildly antiseptic in the throat, and supportive of recovery.

It’s important to emphasize the difference between lab findings and practical results. Clinical studies on isolated compounds show promising mechanisms, but a cup of tea is a complex mix with variable concentrations depending on preparation. The warmth and hydration alone improve mucus flow and comfort, and the sensory pleasure of sweetness can lower perceived discomfort. For some conditions, like severe infections or chronic inflammatory diseases, this drink is only supportive. Yet for everyday colds, sore throats, and minor digestive upsets, the combined chemistry and local effects offer tangible relief that aligns with both traditional wisdom and modern understanding.

Choosing Your Ingredients: Fresh Ginger, Types of Honey, and Water

Start with fresh ginger root when possible: it gives the clearest, brightest flavor and the most intact gingerols. Look for firm, unwrinkled knobs with a sharp, spicy aroma when cut. If fresh root is unavailable, high-quality frozen ginger preserves much of the flavor and functional compounds better than dried powder. For honey, decide whether you want raw or processed. Raw honey preserves enzymes, pollen, and nuanced flavors from specific flowers. Processed honeys are often milder and sometimes blended for consistency. Each choice affects flavor and small aspects of health benefits.

Water matters too. Use filtered water if your tap is heavily chlorinated or has a noticeable aftertaste; subtle flavors show up in a tea this simple. The temperature of the water will influence extraction: near-boiling water will extract more pungent compounds and volatile oils, while lower temperatures emphasize sweetness and softer aromatic notes. Also consider the quantity and form of ginger: thin slices give immediate aroma, grated or smashed root releases more juice and heat, and long simmering produces a deeper, sometimes slightly bitter brew. Taste as you go and adjust to match how intense and spicy you like your cup.

Basic Recipe: How to Make Classic Ginger Tea with Honey

This foundational recipe is flexible and quick. Start by slicing two 1/2-inch pieces of fresh ginger into thin rounds, or grate one tablespoon if you prefer stronger flavor. Bring two cups of water to a boil, add the ginger, then reduce the heat to a simmer for eight to twelve minutes depending on desired strength. Strain the liquid into a cup and stir in one to two teaspoons of honey to taste. If you like, add a squeeze of lemon for brightness; lemon pairs well and contributes vitamin C and acidity that balances sweetness.

Adjusting proportions is the real skill: for a gentler infusion halve the ginger and shorten the simmer. For a tonic-style brew aimed at congestion, increase the ginger and simmer longer for a more concentrated liquor. Use less honey if you intend to drink several cups during the day. Keep notes when you experiment—record ginger amount, simmer time, and honey type so you can recreate favorite combinations. Over time you’ll learn the specific ratios that suit your palate and your needs on a given day.

Variations to Try: From Lemon to Turmeric and Beyond

If you like to play with flavors, consider a few trusted variations that complement the core duo of ginger and honey. Lemon is the simplest addition: a wedge brightens the cup and adds a tart element that contrasts the peppery root. Turmeric is an excellent partner for people who want extra anti-inflammatory support; add a small teaspoon of ground turmeric or a thumb-sized slice of fresh turmeric during simmering. Black pepper improves turmeric absorption and adds warmth; a pinch will do. Cinnamon brings sweetness and aroma without additional sugar, and mint can cool and clarify the finish.

For a cold-weather spiced version, add a couple of crushed cardamom pods and a small piece of star anise during the simmer. For a lighter summer variant, steep the ginger briefly, chill the brew, and serve over ice with a few thin lemon slices and a drizzle of honey. If you enjoy layered sweet flavors, try orange zest instead of lemon or combine blossom-specific honeys such as clover, orange blossom, or buckwheat for markedly different characters. Each variation changes both taste and the subtle health profile of the cup, so keep an open mind and trust your palate.

Brewing Guide: How Long and How Strong

Ginger Tea with Honey. Brewing Guide: How Long and How Strong

Below is a simple table to help you judge steeping time and ginger quantity relative to the strength you want. These recommendations assume two cups of water as a baseline. Use them as starting points and modify according to the freshness of your ginger and your taste. Remember that grated ginger extracts faster than sliced, and longer simmering increases both heat and complexity. Honey is best added after the tea has cooled slightly, to preserve some of its beneficial enzymes if you are using raw honey.

Desired Strength Ginger (fresh) Simmer Time Honey
Mild 1/2 inch slice or 1/2 tsp grated 4–6 minutes 1 tsp
Medium 1 inch slice or 1 tsp grated 8–10 minutes 1–1.5 tsp
Strong 1.5–2 inch or 1.5–2 tsp grated 12–20 minutes 1.5–2 tsp

Practical Tips: Getting the Best Flavor Every Time

Peeling ginger is optional; for young ginger a quick scrub suffices because the skin is thin and flavorful. Use the edge of a spoon to remove skin from older knobs without wasting flesh. Grating over a fine microplane releases more juice and oils but can be messier to strain. If you dislike pulp, place the grated ginger in a tea infuser or tied cheesecloth to make cleanup simple. Always taste before adding honey—ginger’s intensity can vary dramatically, so aim to balance rather than drown the spice in sweetness.

Honey dissolves most readily in warm, not boiling, liquid; wait a minute after removing the pot from heat so you don’t damage delicate enzymes. If you plan to sip several cups through the day, keep a thermos with a slightly concentrated infusion and dilute per cup. For consistent results, weigh your ginger if you want reproducible strength. Small practices like a dedicated grater, a nice infuser, and a favorite mug make the ritual more pleasant and encourage regular use.

Honey Choices: Flavor Profiles and Functional Differences

Not all honeys are created equal. Lightweight honeys like acacia or clover have a mild, clean sweetness that will not compete with ginger’s assertive personality. Wildflower and orange blossom honeys add floral notes that accentuate the tea’s aromatic side. Darker honeys like buckwheat are richer and more robust, offering deeper caramel notes and higher antioxidant content in many cases. Raw honey retains pollen and enzymes that contribute to its character and perceived health benefits, but it can vary widely in texture and sweetness level.

When selecting honey, consider both flavor and context. If you want the cup to be soothing for a sore throat, a thicker, darker honey offers a syrupy coating sensation that feels comforting. For daily sipping, a milder honey keeps calories and sweetness in check while providing subtle floral complexity. Store honey at room temperature in a sealed jar away from direct sunlight; crystallization is natural and reversible by warming the jar gently in a pan of warm water. Choose honey you enjoy eating by the spoonful—that taste will translate into the tea.

Safety, Interactions, and When to Be Cautious

Ginger tea with honey is safe for most adults when consumed in moderate amounts, but there are a few considerations. Very high doses of ginger may interact with certain medications such as blood thinners; if you are on prescribed anticoagulants consult your healthcare provider before using concentrated ginger regularly. Honey should not be given to infants under one year due to the risk of botulism. People with diabetes should account for the sugars in honey when monitoring blood glucose; some prefer small amounts or to skip honey entirely. Pregnant people should check with their clinicians about any herbal supplements, though moderate culinary use of ginger is generally considered safe for nausea relief.

Allergic reactions to ginger or honey are uncommon but possible; stop use if you notice rash or swelling. If a sore throat is severe, accompanied by fever or swollen glands, or if symptoms worsen instead of improving after a few days, seek medical evaluation. Remember that while this beverage can ease symptoms, it is not a substitute for prescribed therapies in serious infections or chronic conditions. Used thoughtfully and with awareness of medical context, it remains a low-risk supportive drink for most households.

Storage, Batch Brewing, and Iced Versions

Making a larger batch and refrigerating it can save time while keeping versatility. Simmer a concentrated brew using three times the ginger to water ratio, cool, strain, and store in a covered pitcher in the refrigerator for up to five days. When serving, dilute to taste and add honey to each cup so you can control sweetness and preserve honey’s qualities. For iced ginger tea, brew slightly stronger than you would for hot drinking because ice melts and dilutes the flavor. Fresh herbs or citrus slices added to chilled tea give a lively finish that is refreshing rather than heavy.

If you prefer carbonated drinks, a chilled ginger concentrate can be mixed with sparkling water for a homemade ginger soda; add honey to the concentrate or use a syrup version and keep the fizz by adding carbonated water at the end. Avoid storing with honey already mixed in for long periods, especially if you want to retain raw honey’s enzymes. Glass containers are preferable for storage because they don’t retain odors and are inert; label with date and use within a few days for best freshness.

Pairings and Occasions: When to Drink Ginger Tea with Honey

This beverage suits many situations: as a morning pick-me-up when you want something warm but not caffeinated, as an afternoon restorative after a heavy meal, or as a pre-bedtime ritual to wind down. It pairs well with breakfasts that include citrus and yogurt, and it cleanses the palate after oily or fried foods. At social gatherings you can offer a pot as a caffeine-free option that still feels special; adjust sweetness and add a garnish like lemon peel or mint sprig for presentation. In my experience, offering this drink to guests often sparks conversation about family recipes and the small comforts that become habits.

For medicinal use during colds, sip frequently rather than drinking a single large mug. The act of sipping warm liquid helps maintain hydration and soothes inflamed tissues. During digestive upset, take small sips before and after meals to help with gastric comfort. Because it is versatile, treat it like a tool in your home-care kit—sometimes the simplest remedy is the most helpful because it is available, gentle, and pleasant to take.

Frequently Asked Questions and Quick Tips

Below are concise answers to common questions and a short list of practical tips to improve your practice. These are drawn from kitchen experience and common clinical guidance, intended to help you avoid common missteps. If your question relates to a medical condition, use this information as background and consult a professional for personalized advice. The quick tips are meant to be actionable and easy to remember so that the ritual becomes natural.

  • Can I use powdered ginger? Yes, but fresh is preferable. Use about one-third the amount of powdered ginger and steep briefly to avoid bitterness.
  • Is raw honey better than pasteurized? Raw honey keeps more enzymes and pollen, and many prefer its complex flavor. Pasteurized honey is milder and consistent.
  • How often can I drink it? For general use, one to three cups daily is reasonable. If using strong concentrates or consuming for therapeutic reasons check with a clinician about frequency.
  • Does it help with nausea? Many people find ginger effective for mild nausea, including motion sickness and pregnancy-related nausea, but always consult healthcare providers for persistent or severe symptoms.
  • Can I sweeten with other sugars? Yes, but honey contributes flavor and mild antimicrobial properties many people find desirable; use alternatives according to preference and dietary needs.

My Personal Ritual: How I Make It on Rainy Evenings

On rainy evenings I like a slightly stronger infusion with lemon and a touch of turmeric. I slice a 1-inch knob of ginger thinly, add a half-inch of fresh turmeric, and simmer in two cups of water for ten minutes. After straining, I stir in a teaspoon of local wildflower honey and a squeeze of lemon. The result is warming but not overpowering, with turmeric’s golden color and a citrus lift that feels comforting after a long day. Small rituals like this mark the transition from busy hours to slower time, and the ritual aspect is as important as the beverage itself.

I keep a small notebook of proportions and flavors that work, and when friends ask for a cup I can reproduce a version I know they will enjoy. Over the years I have learned to trust simple adjustments: more lemon for brightness, more honey for a throat-soothing effect, longer simmer for a deeper, soupier mouthfeel. These personal experiments are part of why the drink remains fresh and never formulaic—it adapts to moods, seasons, and company.

There is a quiet joy in making something small but thoughtful for yourself and for others. A good cup of ginger tea with honey is that kind of gift: immediate, inexpensive, and meaningful.

Final Thoughts

Ginger tea with honey sits at the intersection of taste and care. It is a kitchen remedy with historical roots and modern appreciation, offering warmth, comfort, and subtle functional benefits. Whether you drink it for pleasure, for a scratchy throat, or as part of a daily routine to support wellbeing, the drink rewards attention to quality ingredients and small technical choices like steeping time and honey selection. Start with the basic recipe, experiment gently, and document what you like. Over time you will have a repertoire of versions to suit different needs and occasions, and a simple ritual that can brighten ordinary days.

Velvet in a Mug: The Complete Guide to Making Memorable Hot Chocolate

There is something almost ceremonial about a steaming cup of hot chocolate—an invitation to pause, to soften the edges of a day and savor warmth that settles into the hands. This article walks through origins, ingredients, techniques and creative variations so you can make a cup that feels intentional, not rushed. Along the way I’ll share practical tips from my home kitchen that have saved mornings and rescued cold evenings. Expect concrete recipes, a short gear list, and troubleshooting advice so you can dial in texture and flavor every time. If you love chocolate, milk-based drinks, or a dessert-like treat in a cup, read on and prepare to experiment.

Where It Came From: A Short History of the Drink

The story of drinking chocolate begins long before ceramic mugs and whipped cream. Ancient Mesoamerican cultures cultivated cacao and prepared bitter, spiced beverages often reserved for ritual or elite consumption. Those early drinks were different from what most of us picture today; they emphasized complex, bitter notes with a foamy texture, and they were more about ceremony than comfort. When cacao reached Europe in the 16th century, sugar and dairy transformed its profile, nudging it toward the creamy, sweeter versions that became popular in cafés and royal courts. Understanding that lineage helps explain why some recipes aim for a rich, almost pudding-like density while others stay light and velvety.

As trade routes expanded, so did variations: Spain and Italy developed thick, luxurious versions, while France favored smoother, more refined preparations. The industrial age brought powdered cocoa and instant mixes, which democratized the beverage but also simplified its flavor and mouthfeel. In recent decades, there’s been a movement back toward whole ingredients—single-origin chocolate, real milk, and artisan spices—motivated by a desire for authenticity and depth. Tasting a well-made cup side by side with a mass-market sachet reveals how much texture and cocoa quality matter.

Culture continues to shape how people drink and think about hot chocolate. In some places it remains a breakfast accompaniment, in others it’s an afternoon indulgence or a wintertime ritual associated with holidays. Street vendors, chocolatiers and home cooks each approach it differently, prioritizing speed, ceremony or innovation. I find the best versions borrow from all three: quick enough for weekday comfort, special enough to make an evening feel like an event.

Core Ingredients: Choosing Chocolate, Milk and More

At its heart the beverage is a simple equation: chocolate plus milk plus heat. But each variable opens a wide field of options. Chocolate can be whole chocolate bars, couverture, unsweetened nibs, or powdered cocoa. Milk choices stretch from full-fat cow’s milk to plant-based alternatives like oat, almond, and coconut. Sweeteners and flavorings—sugar, honey, maple syrup, vanilla, or spices—round out the lineup and allow you to steer the final profile from bitter and dark to sensual and dessert-like. Knowing how each element influences body, sweetness and finish makes it easier to customize a recipe to your taste.

Choosing chocolate is the most decisive step. Real chocolate brings cocoa butter and emulsifiers that melt into a glossy, rich texture, while cocoa powder provides immediate chocolate intensity but may need additional fat or emulsification to feel luxurious. For a bar-based approach, aim for chocolate with 55–70 percent cacao for a balanced sweet-bitter character suitable for many palates. Darker bars push the beverage toward bitter depth, and milk chocolate will produce a softer, sweeter cup. If you want intense flavor without extra sweetness, combine unsweetened cocoa with a touch of sugar and a piece of high-quality dark chocolate for mouthfeel.

Milk is not merely a carrier; it contributes sweetness, fat and proteins that create body. Full-fat dairy produces a creamy, rounded cup, while skim or low-fat milk results in a lighter texture. Plant milks act differently—oat milk emulsifies well and yields a naturally creamy mouthfeel; almond milk is lighter and may need thickening; coconut milk adds tropical notes and richness. When substituting, be mindful of how heat and cocoa interact with each milk type. Stir, taste and adjust rather than assuming a one-to-one swap will yield the same result.

Chocolate Forms and When to Use Them

Bars and couverture melt into a silky gloss because they contain cocoa butter, which contributes to body and sheen. Use chopped chocolate for the most traditional, indulgent results when you want a smooth, luxurious mouthfeel. Cocoa powder is ideal when you need stronger, dryer chocolate flavor or when you want to avoid the extra fat from cocoa butter. Blend cocoa powder with a little butter or cream to mimic bar-based texture if you prefer that route. For speed and convenience, chocolate shavings or chips work well, though they may contain stabilizers designed for baking rather than melting.

Single-origin chocolate can introduce specific tasting notes—fruity, floral, nutty—which can be exciting but also fragile. Pair single-origin bars with minimal additional flavoring so the cocoa’s character remains discernible. For spiced or heavily flavored versions, use a reliable, balanced chocolate that supports rather than competes with added ingredients. When in doubt, choose a good-quality couverture because it melts cleanly and gives predictable results in stovetop and steam-based methods alike.

Another useful option is chocolate tablets or discs made specifically for drinking chocolate; they often include sugar and emulsifiers and are designed to melt smoothly in warm milk. These are excellent for replicating café-style thick drinking chocolate at home without a lot of fuss, and they work well when serving guests because they deliver consistent results. Keep at least one bar or pouch of good-quality drinking chocolate in your pantry for special occasions.

Milk & Dairy Alternatives: Matching Texture to Taste

Full-fat cow’s milk delivers reliable creaminess and natural sweetness thanks to lactose and milk fat. It’s the easiest path to a traditional hot chocolate with a velvety mouthfeel. If lactose is a concern, lactose-free dairy behaves similarly because the structural proteins remain; you lose little of the textural benefit. For a lighter profile, low-fat milk works but you’ll likely miss some body, so consider adding a splash of cream for balance. A small ratio adjustment can close the gap: three parts milk to one part cream makes a particularly lush base.

Plant-based milks create excellent results when chosen thoughtfully. Oat milk is my go-to for dairy-free velvety texture; its natural starches lend body and it froths well. Almond milk is lighter and subtly nutty; it pairs nicely with darker chocolate and a pinch of salt. Coconut milk adds silkiness and a tropical undertone, but it can compete with delicate cocoa flavors. Soy milk mixes between oat and almond in mouthfeel, though some brands separate under heat so choose one labeled barista-friendly if you plan to steam or froth it.

When using plant milks, stabilize them with a whisked paste of cocoa and a small fat if the mouthfeel feels thin. A teaspoon of coconut oil, a tablespoon of cream, or even a knob of butter can rescue a watery texture without adding overt richness. Heat gently and avoid boiling, which sometimes causes separation in nut-based milks. Taste as you go and adapt sweetness, because many plant milks already contain added sugars that affect the final balance.

Techniques: From Quick Cups to Slow Drinking Chocolate

Technique determines a great deal of the final experience: is the cup meant to be sipped slowly, spooned like a soft pudding, or finished in one sitting? For a quick weekday cup, whisk powdered cocoa into warm milk over medium heat, stirring until smooth and serving within minutes. For a richer, spoonable drinking chocolate, melt chopped bar chocolate into gently heated milk and simmer briefly to thicken. Steam or froth the milk for café-style microfoam if you want a creamy top layer, and finish with a small grating of cocoa or cinnamon for aroma. Each method requires attention to heat and emulsification so the cocoa blends into the milk rather than clumping or separating.

One common question is how hot to make the beverage. Aim for a temperature between 140°F and 160°F (60–71°C). Below that range the drink feels lukewarm; above it you risk scalding the milk, which flattens sweetness and can create a cooked flavor. If you don’t have a thermometer, heat until steam rises and small bubbles form around the pot’s edge, then remove from heat. Allow thicker recipes a minute to rest so the body develops and the flavors meld before serving.

Texture control comes down to emulsification. Cocoa particles are hydrophobic and resist dissolving, so you need either enough fat or an emulsifier such as lecithin present in chocolate bars, or a mechanical method like vigorous whisking or blending. A small immersion blender can transform a grainy mixture into a glossy liquid. Likewise, creating a chocolate paste first—mixing cocoa with a little hot water or milk to create a slurry—helps distribute particles evenly before adding the rest of the milk.

Ratios and Consistency: Finding Your Sweet Spot

Ratios offer a simple framework for consistent results. A basic starting point is 2 tablespoons unsweetened cocoa powder, 1 to 2 tablespoons sugar, and 1 cup of milk per serving, adjusted to taste. If using chopped chocolate, try 1 to 1.5 ounces of good chocolate per cup of milk for a robust, bar-driven cup. For an indulgent, spoonable drinking chocolate, use 2 ounces per cup and a touch of cornstarch or extra cream to encourage thickening. The best ratio depends on your chocolate source, the milk you use and how intense you want the final flavor to be.

For café-style richness, a ratio of roughly 1:4 chocolate to liquid by weight produces a substantial sipping experience. If precision matters, weigh ingredients: 25–35 grams of chocolate to 200–250 grams of milk usually yields a satisfying thickness without becoming cloying. Powdered mixes can vary wildly in recommended amounts, so treat packages as guidelines rather than rules and adjust toward personal preference. Keeping notes on favorite ratios is a practical habit if you replicate recipes often.

Sugar levels should be handled with care. Chocolate bars already contain sugar, so factor that into the total sweetness. Start with less sugar than you think you need, then taste and add. A pinch of salt brightens flavor and reduces the perception of bitterness, allowing you to use less sugar and still maintain balance. Small additions—vanilla extract, a dash of espresso, or a piece of orange peel—can shift a cup from ordinary to distinctive without heavy hand with sweeteners.

Frothing, Whisking and Foam Techniques

Foam transforms a drink from utilitarian to luxurious. If you have an espresso machine, steaming milk produces fine microfoam that clings to the chocolate and feels silky. A small handheld frother or a French press plunger also creates pleasing foam; simply heat the milk and pump vigorously until frothy and thick. For the no-equipment method, shake hot milk and chocolate in a tightly sealed jar for about 30 seconds, then pour through a fine mesh to catch airier bubbles. Each method influences foam stability and texture, so choose one that matches your desired presentation.

A smoothie-blender or immersion blender is useful for incorporating cocoa powder and creating smooth emulsion. Blend short bursts to avoid overheating. The high shear from blades disperses cocoa particles and integrates fats, resulting in a homogeneous, glossy liquid that looks and feels professional. When dealing with bar chocolate, melt it first in a small amount of milk over low heat before adding more milk; this ensures uniform melting and prevents graininess.

Presentation matters as much as technique in elevating the drink. Spoon a modest cloud of whipped cream on top, then use a microplane to grate dark chocolate over it for both aroma and visual appeal. Dust cinnamon, nutmeg or chili powder for complexity. A well-executed foam or cream layer invites slow sipping and small aromatic bursts between each mouthful, enhancing the perception of craft.

Recipes: Classic, Spiced, and Quick Versions

Below are recipes that cover the spectrum from simple weekday cups to decadent, spoonable preparations. Each recipe can be scaled and adapted to dietary needs or local ingredients, and I’ll point out where substitutions work best. Try the classic European style first to learn how chocolate and milk behave together, then experiment with the spiced and dairy-free versions to discover personal favorites. Keep notes about ratios and temperatures so you can reproduce successful experiments.

Small adjustments in technique or ingredient quality dramatically alter the result. Use a heavy-bottomed saucepan for even heat, chop chocolate finely for faster melting, and whisk continuously to avoid localized overheating. For syrupy spiced versions, infuse milk with whole spices over low heat and strain before adding chocolate, which lets flavor meld without drowning the cocoa. The more you practice, the better you’ll anticipate small changes—an extra minute on heat thickens, an extra tablespoon of cream rounds the finish.

These recipes are intentionally flexible. I encourage tasting as you go because a chocolate that tastes balanced on its own might behave differently when heated with milk. When inviting guests, prepare a base and allow them to customize garnishes; it creates an interactive element that makes a simple cup into a shared moment. Below you’ll find a list of core recipes in clear steps followed by a short equipment checklist for quick reference.

  • Equipment: heavy saucepan, whisk, fine grater, small thermometer (optional), immersion blender (optional)
  • Essentials: good-quality chocolate or cocoa, milk or milk alternative, sweetener, pinch of salt

Classic European Drinking Chocolate

Ingredients for one serving: 1 cup full-fat milk, 2 ounces good dark chocolate (60–70% cacao), 1 teaspoon sugar (adjust to taste), pinch of salt, 1/4 teaspoon vanilla extract. Chop the chocolate finely. Heat milk gently until steaming but not boiling, then add half the milk to the chocolate, whisking until smooth to form an emulsion. Return the mixture to the saucepan, stir over low heat for 1–2 minutes until slightly thickened, and finish with vanilla. Serve in a warmed cup and, if desired, top with lightly whipped cream.

This preparation emphasizes the chocolate’s profile and achieves a dense, decadent texture suitable for slow sipping. The small amount of sugar is optional depending on the chocolate used; many 60–70% bars need little to no added sweetener. Warming the cup beforehand prevents the beverage from cooling too quickly and helps preserve the texture. For a thicker variant, increase the chocolate to 3 ounces per cup and add a teaspoon of cornstarch dissolved in cold milk before heating.

Bar-based recipes deliver superior mouthfeel because the cocoa butter dissolves and integrates. If you only have cocoa powder, create a paste with a tablespoon of hot milk and 2 tablespoons of cocoa, then whisk into the remaining milk and proceed. That paste step reduces clumping and improves dispersion. Taste before adding sugar because the cocoa flavor will change as it warms and develops.

Mexican-Inspired Spiced Chocolate

Mexican-style preparations celebrate warm spices and a grittier texture that’s all about contrasts. Ingredients: 1 cup whole milk, 1.5 ounces dark chocolate or 2 tablespoons cocoa powder, 1 tablespoon brown sugar, 1/8 teaspoon ground cinnamon, pinch of smoked paprika or ancho chili powder, tiny pinch of salt. Warm the milk with the spices for several minutes to infuse, then whisk in chocolate or cocoa paste until smooth. Finish with the salt to elevate the flavors and serve with a sprinkle of cinnamon or a strip of orange zest for brightness.

In this iteration, the spice profile complements—not overwhelms—the cocoa. Use smoked paprika sparingly; its purpose is to add depth rather than heat. If you prefer a more pronounced smokiness or warmth, add a small fraction of chipotle or a few flakes of dried chili. For authenticity, some recipes include a bit of corn masa to thicken; use it only if you want a rustic, spoonable result. The interplay between chocolate and spice makes each sip intriguing and layered.

This version pairs well with desserts that are not overly sweet, such as shortbread or biscotti. The beverage’s warmth and slight heat cut through buttery textures and provide a counterpoint to sugar. I like to serve this at casual dinner parties because it feels festive yet relaxed, and it pairs nicely with flavored liqueurs if guests want to spike their cups.

Quick Weekday Cocoa (Powder-Based)

For speed and simplicity, prepare a powder-based cup in under five minutes. Ingredients: 1 cup milk, 2 tablespoons unsweetened cocoa powder, 1 tablespoon sugar or to taste, pinch of salt. Make a smooth paste by whisking cocoa and sugar with two tablespoons of hot water or milk. Heat the remaining milk until steaming, whisk in the paste, and bring just to the edge of a simmer. Pour into a mug and add a small dash of vanilla or a light dusting of cocoa.

This approach trades a little silkiness for convenience but can still be very satisfying if you use good-quality cocoa and heat gently. Instant mixes are convenient, but single-ingredient powder with your own sugar and salt yields superior flavor control. A quick home trick: add a tiny square of dark chocolate to enrich the mouthfeel without adding much time. The result is a bright, approachable cup that works for school lunches or a mid-afternoon pick-me-up.

If you prefer froth, transfer the finished cup to a jar, seal and shake vigorously for 20–30 seconds, then open carefully and top with foam. Alternatively, use a handheld frother to aerate the milk immediately after combining. This adds a café-like finish that elevates an otherwise simple preparation and makes it feel more deliberate.

Variations and Innovations: From Boozy to Vegan

Once you know core methods, the beverage becomes a playground. Alcoholic twists—rum, bourbon, orange liqueur or coffee liqueur—introduce warmth and complexity. Vegan versions swap dairy for plant milks and compensate for missing fat with coconut cream, nut butter, or a small amount of cocoa butter. Spiced blends explore cardamom, star anise, or even lavender for floral notes. Savory additions like a small grating of roasted sea salt or a smear of tahini can create unexpected yet delightful profiles.

Baristas and mixologists constantly invent hybrids: chocolate-infused espresso drinks, frozen blended chocolate beverages, and even chocolate cocktails paired with citrus foam. At home, focus on how additions interact with base flavors. Liquors should complement cocoa rather than mask it; a tablespoon or two added after the heat is removed is usually enough. For vegan folks who miss the richness of dairy, a blend of oat milk and a tablespoon of coconut cream brings back that comforting body without animal products.

Exploration is easy because the drink tolerates experimentation well. Try a small test cup when introducing strong or unusual elements so you can judge balance before committing a full pot. I frequently make a tiny batch with a novel spice or liqueur and taste it alongside a control cup to be sure the addition enhances rather than overwhelms. Small trials save time and prevent waste.

Vegan and Dairy-Free Strategies

For dairy-free versions, choose a base that naturally provides body. Oat milk is the best all-around choice because it froths and thickens without additional fat. Combine 1 cup oat milk with 2 ounces dark dairy-free chocolate or 2 tablespoons cocoa plus a teaspoon of coconut oil to mimic mouthfeel. Heat gently and whisk until emulsified, and add sweetener as needed. A touch of vanilla and a pinch of salt complete the profile without masking the chocolate.

If you prefer richer vegan options, use a mixture of full-fat coconut milk and almond or oat milk to balance richness and flavor. Coconut adds silkiness but strong coconut flavor, so consider the type of chocolate you use—dark, fruity single-origin bars often match well with coconut’s sweetness. For nut allergy considerations, soy or pea-protein milks can work as alternatives, though they may require formula adjustments to prevent separation.

Stabilizers like a small amount of cornstarch or tapioca starch can rescue thin plant-milk cups, especially when using cocoa powder. Dissolve a teaspoon of starch in cold liquid, then whisk into warm milk and cook until slightly thickened. This creates a pleasantly viscous mouthfeel that many people associate with high-quality drinking chocolate. Remember to whisk constantly to avoid lumps and to allow the starch to fully hydrate.

Boozy and Dessert-Style Concoctions

Adult variations can be as restrained or as indulgent as you like. A simple enhancement is a splash of dark rum or orange liqueur added after removing the cup from heat. For a richer dessert drink, blend hot chocolate with a shot of espresso, a tablespoon of mascarpone or cream, and a pinch of sea salt to create a layered, café-style treat. If serving as a dessert, present smaller portions in demitasse cups and garnish with a crisp cookie or biscotti to balance richness with texture.

Chocolate pairs beautifully with nutty, fruity and herbal spirits, so experiment with amaretto, pear brandy, or even herbal Chartreuse in minute quantities. The key is to add alcohol at the end so its volatile aromatics remain bright. If you plan to flambé, do so with caution and only in a controlled setting; flambé can concentrate flavor but also introduce safety risks. For party service, provide a small selection of liqueurs and let guests finish their own cups to taste.

Dessert-style presentations often include toppings like toasted marshmallow, whipped cream, caramel drizzle, or cookie crumbs. For a refined touch, use a thin shard of tempered chocolate perched on a cup rim or a tiny scoop of ice cream for an affogato-like contrast. These touches make the beverage feel curated and create memorable texture contrasts between steam, chew and melt.

Style Chocolate Form Typical Milk Texture Best Garnish
Classic European Chopped bar / couverture Full-fat cow’s milk Silky, thick Whipped cream, chocolate shavings
Mexican spiced Cocoa + dark chocolate Whole milk or water infusion Grainy to smooth, spicy Cinnamon stick, orange zest
Quick cocoa Unsweetened cocoa powder Any milk (oat recommended) Light, approachable Mini marshmallows, dusting of cocoa
Vegan Dairy-free chocolate / cocoa Oat, coconut, almond Creamy to thin Toasted coconut, nut crumble

Pairings and Serving Ideas

Hot Chocolate. Pairings and Serving Ideas

Serving hot chocolate alongside complementary foods enhances the experience. Fruits with natural acidity—orange segments or raspberries—cut through richness and refresh the palate. Biscuits, shortbread and buttery cookies provide a satisfying crunch that contrasts the liquid silk. For more structured desserts, pair a robust cup with a light tart, such as lemon or passionfruit, to offset sweetness and create a balanced finish. Pairing is about contrast as much as harmony.

When serving guests, presentation can be simple yet deliberate. Warm cups, coordinated garnishes, and small accompaniments like a piece of dark chocolate or a cinnamon stick make the beverage feel curated. For a communal touch, set out a small “toppings bar” with whipped cream, grated chocolate, spices, and liqueurs so people can personalize their cups. This is especially effective at holiday gatherings when variety and interaction elevate the occasion.

For pairing with dessert courses, consider the weight of both elements. A dense, spoonable drinking chocolate pairs beautifully with light meringue or citrus-forward desserts that provide lift. Conversely, a lighter cocoa drink complements richer desserts like flourless chocolate cake because the drink’s relative levity prevents the pairing from becoming overwhelmingly heavy. Serving size also matters: small, intensely flavored cups can function as dessert themselves, while larger, milkier cups feel like an accompaniment.

Troubleshooting and Storage

Common problems are graininess, separation and overheating. Graininess usually indicates cocoa particles that haven’t been fully incorporated; blending briefly or whisking a cocoa paste into warm liquid resolves that issue. Separation occurs when certain plant milks curdle under high heat; avoid boiling and choose barista-friendly varieties. Overheating scalds milk and produces a cooked flavor, so keep heat moderate and remove the pan from the burner when steam begins to rise. Small interventions early prevent larger problems later.

Leftovers can be stored but they rarely retain the same fresh texture. Pour cooled beverage into an airtight container and refrigerate for up to 48 hours. Reheat gently over low heat while whisking or blend briefly to re-emulsify. If the drink thickens in the fridge, thin it with a splash of warm milk or water while whisking. For long-term storage of prepared bases, freeze in ice cube trays and blend cubes with hot milk for quick service when needed.

For powdered mixes, keep them in a cool, dry place to avoid clumping. If your mix absorbs moisture and hardens, sift through a fine mesh and store with a desiccant packet in a sealed jar. When scaling up for events, prepare a concentrated base and hold it warm in a double boiler or small slow cooker set on low; finish cups individually with hot milk to preserve texture. That method keeps service efficient and the cups tasting freshly made.

Cultural Rituals and Seasonal Traditions

Across continents, the beverage plays roles in celebrations and daily rhythms. In Spain, a thick drinking chocolate accompanies churros at breakfast; in parts of Latin America, spiced variants appear at festivals and family gatherings. In Nordic countries, hot cocoa provides comfort through long winters, often shared after outdoor activities. These rituals underline how the drink functions as both warmth and social glue—something to gather around and pass between hands. Observing these traditions can inspire new ways to integrate the beverage into your own life.

Seasonal touches are easy to adopt. In autumn, incorporate warming spices like cardamom and cloves; in winter, emphasize thickness and richness, garnishing with toasted marshmallow; in spring, lighten the cup and add floral or citrus notes. Holiday rituals often blend tradition with nostalgia—recipes passed down, favorite mugs brought out of storage, and small rituals like a dash of nutmeg that signal comfort. Making the beverage part of a consistent ritual gives ordinary days a touch of ceremony.

Workplaces and cafes frequently adopt signature versions to distinguish themselves. A café might add a proprietary spice mix or use single-origin chocolate to create a signature profile. At home, find one or two signature twists you love and make them your go-to; it simplifies decision-making and creates a familiar pleasure you return to. The goal is to make the drink feel intentional and personal rather than another box to check.

Health, Nutrition and Mindful Consumption

Hot chocolate can be treated as a treat or a modest daily pleasure, depending on how you build it. Using whole chocolate and full-fat milk increases calories and saturated fat but also delivers satisfying flavor that can reduce the desire for larger portions. Using dark chocolate with a higher cocoa percentage provides antioxidants and a more intense flavor so you may use less sugar. If you want to lighten the cup, use lower-fat milk and less chocolate, but balance that with ingredients that preserve satisfaction, such as a pinch of salt or a small amount of cream.

For those monitoring sugar intake, replace refined sugar with natural sweeteners like stevia, erythritol, or modest amounts of maple syrup, adjusting for sweetness and mouthfeel. Note that some sweeteners do not caramelize or integrate the same way, which might alter texture. Keep portion sizes realistic; a small, rich cup can be more satisfying than a large, diluted one and thus contribute to mindful eating habits. The beverage can be part of a balanced approach when enjoyed intentionally rather than mindlessly.

Finally, consider ritual as part of health. The simple act of pausing for a cup, focusing on aroma and temperature, and savoring each sip contributes to stress reduction and present-moment awareness. Whether you drink a thick, spoonable serving on a cold evening or a lighter cup in the afternoon, the practice of making and drinking it can support well-being beyond nutrition alone.

Personal Notes from My Kitchen

I learned to respect temperature the hard way after a batch of milk scalded and ruined an otherwise gorgeous bar of single-origin chocolate. Since then I simmer gently and whisk with patience, and those small habits transformed ordinary attempts into reliably excellent cups. Over years of hosting, I discovered that a small toppings bar—whipped cream, grated chocolate, cinnamon, and a tiny jar of chili flakes—turns a simple gathering into an interactive ritual. Guests enjoy building their own cups and conversations flow more easily when people customize their comfort.

One memorable experiment was a winter brunch where I substituted part of the milk with brewed strong tea for a chocolate-tea hybrid. The results were unexpectedly complex and became a single-batch favorite among friends. Likewise, an impromptu addition of a spoonful of tahini to a dark, slightly bitter cup brought nuttiness and richness that surprised everyone. These small, fearless experiments usually yield the most memorable discoveries. Keep a playful spirit when you try new components—measure carefully, taste as you go, and accept that some combinations will teach you more than they please you.

Finally, I recommend keeping a tiny notebook by the stove for ratios and quick notes about what worked. Over time you’ll build a personal compendium of favorite variations, serving sizes, and guest preferences. That simple habit reduces repeat mistakes and accelerates learning. It’s how ordinary mugs turn into signature cups that friends ask for again and again.

Finishing Touches and Invitation to Experiment

Small details shape how a cup lands: the temperature at the first sip, a final pinch of salt, the aroma hit from grated chocolate on top. Choose garnishes and serving ware that match the moment. A rustic mug feels right for a thick, spiced version; a porcelain cup elevates a refined European drinking chocolate. Thinking about these details helps you move from making a quick beverage to crafting an experience worth remembering.

Now that you have techniques, recipes and a few anecdotes to guide you, the next step is practice. Start with a reliable classic, then try one variation each week until you find a handful that consistently delight you and your guests. Remember to note ratios and temperatures so you can reproduce successes. As you experiment, you’ll likely discover small regional influences, family traditions, or personal tweaks that become part of your own hot chocolate story.

Treat your next cup as more than fuel. Let it be a pause, an experiment, and an invitation to share. Whether you prefer a quick powder-based mug or a spoonable, decadent serving, the beverage rewards curiosity. Enjoy the process of refining your technique and flavor sensibilities, and don’t be afraid to stray from recipes—some of the best cups are the result of an inspired deviation.
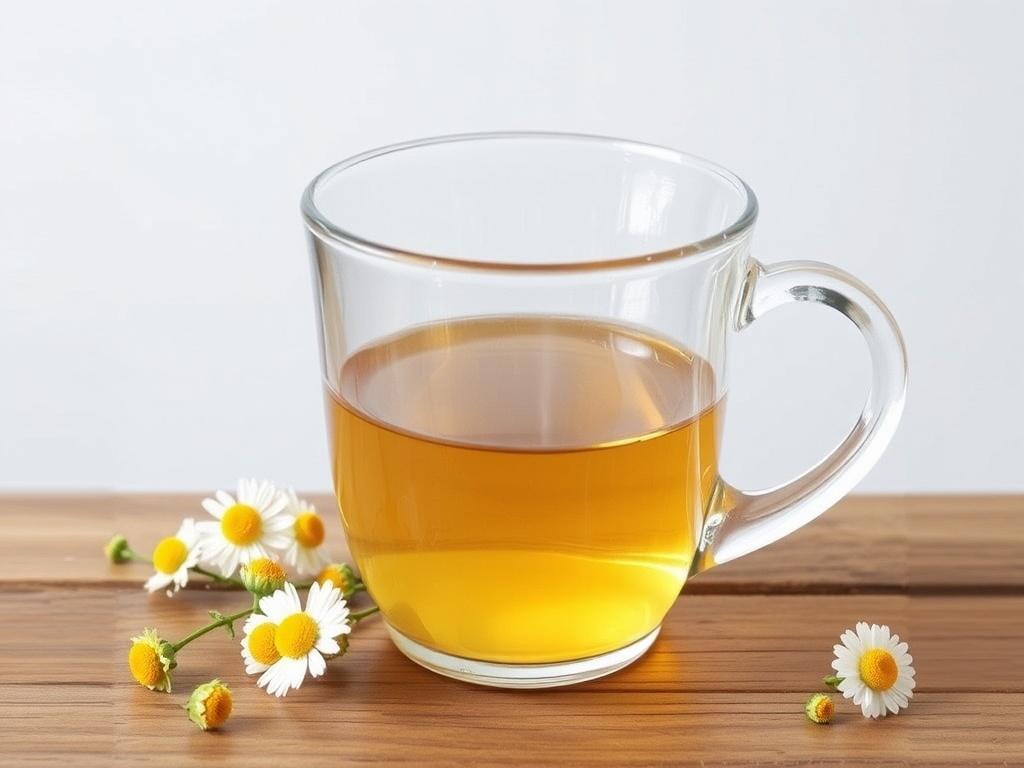
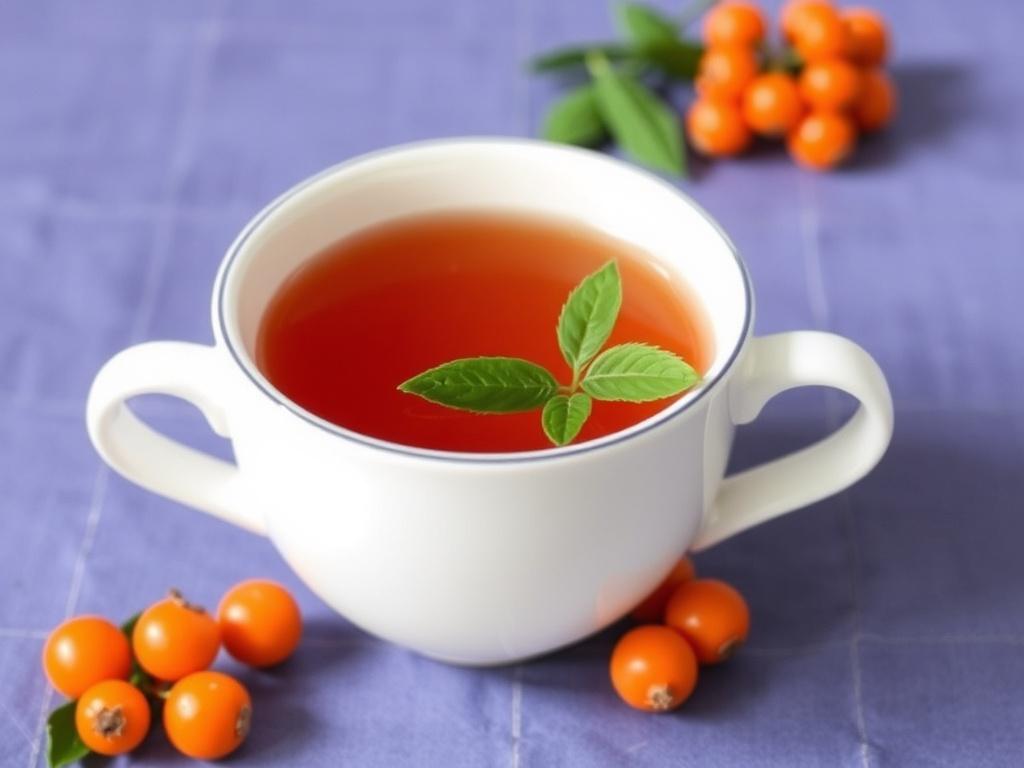
Classic Mulled Wine: Warmth in a Glass for Long Winter Nights

There is something quietly magical about a pot of spiced, gently heated wine filling a kitchen with scent: citrus, cinnamon and cloves weaving together while the light outside softens. That simple aroma can turn a cold evening into a ritual, a gathering into an event. In this article I want to take you through the origins, ingredients and techniques that make a proper Classic Mulled Wine, and share ways to adapt the drink for different moods and occasions. You will find practical steps, a reliable recipe, plus tips that come from years of experimenting at home and at small winter gatherings. Read on and you’ll have everything needed to brew a winter drink that feels both traditional and personal.

A Brief History of Spiced Wine

Mulled, spiced or heated wine is far from a modern invention; versions of it appear in medieval cookbooks and in the taverns of many cultures. Romans spiced warmed wine with imported aromatics and used it to banish the chill on military campaigns, while in northern Europe the practice evolved into distinct regional varieties. Over centuries the drink absorbed local ingredients and customs, which is why recipes from Scandinavia, Germany and Britain can feel familiar yet taste very different. Understanding this lineage helps when you adapt the drink today: you’re participating in a long, convivial thread of warming beverages meant to be shared.

By the eighteenth and nineteenth centuries, mulled wine became associated with winter festivities and markets, especially around Christmas. Its role as a festive beverage was practical as well as social; spices once expensive and luxurious became symbols of celebration when they appeared in household cooking. Modern interpretations have broadened the drink’s appeal, but the essential idea remains the same: take an everyday bottle of red, add aromatics, and coax brightness and body into a comforting, sociable beverage. Seeing that continuity makes it easier to treat the recipe as a framework rather than a rulebook.

What Makes a Classic: Core Ingredients

Classic Mulled Wine. What Makes a Classic: Core Ingredients

At the simplest level, a traditional version blends red wine with a modest array of aromatics: cinnamon, cloves, star anise, citrus peel and a sweetening agent such as sugar or honey. The balance is key. Too much sugar flattens the wine, while an excess of strong spices will dominate the palate and hide the grape’s character. Sugar, brown sugar or honey can bring both sweetness and texture, and each contributes subtly different flavors; honey adds floral notes, brown sugar brings caramel depth. The idea is not to mask the wine but to lift its warmer, fruitier edges and to create a rounded winter profile.

Another component you often see is a spirit addition — brandy, rum or fortified wine — used sparingly to increase body and alcohol content, especially if the wine’s character is light. A splash can also help preserve aromas when the pot is kept on very low heat for a long time. Fresh citrus is an essential brightener too: orange peel is classic for a reason, balancing the sweetness and echoing the fruit already present in many bottles. Finally, a few whole spices work better than ground ones because they release flavor more slowly and are easier to remove before serving.

Table: Typical Spice and Sweetener Ratios per 1 Liter of Red Wine

The table below gives a practical starting point for a liter of wine; treat these amounts as guidelines to tweak to taste.

Ingredient Amount
Cinnamon sticks 1–2 sticks
Whole cloves 4–6 cloves
Star anise 1–2 stars
Cardamom pods (slightly crushed) 2–4 pods (optional)
Orange peel (no white pith) Half an orange, peel only
Sugar or honey 40–80 g (2–4 tbsp) depending on sweetness
Brandy or rum (optional) 30–60 ml

Choosing the Right Red Wine

Not every bottle of red makes equally good mulled wine; think of the base as the canvas for the spices rather than the star of the show. You want a wine with decent fruit character and moderate tannins; very tannic wines can become bitter when heated, while ultra-light wines risk being washed out. Popular affordable choices include Grenache, Merlot, Zinfandel and some blends; they tend to have ripe fruit notes that stand up to citrus and warm spices. If you prefer something more aromatic, a Gamay or a lighter Shiraz can work well too, offering floral or peppery hints that add interest.

Price need not be excessive. Using a mid-range bottle gives both aroma and structure, but there’s no need to splurge on a special vintage because heating blurs many of the delicate varietal nuances. When picking a bottle aim for balance: acidity to keep it lively, some fruitiness to meld with the sugar and spices, and not too heavy a tannic backbone. If you’re experimenting for a party, make small batches with different wines to see which style you and your guests prefer; it’s an effective way to learn how base wines influence the finished winter drink.

The Role of Spices

Spices are the architecture of mulled wine: cinnamon gives warmth, cloves bring resinous depth, star anise offers a licorice top note and citrus peel injects lift and brightness. Using whole spices is recommended because they release aroma steadily without clouding the liquid or creating gritty textures. Toasting whole spices briefly in a dry pan before adding them to the pot deepens their flavor, much like toasting nuts enhances their richness. But a light hand is crucial; spices should frame the wine, not bury it.

Regional preferences often determine the specific spice mix. In northern Europe you’ll find heavier use of cloves and cardamom, whereas in some British recipes nutmeg and mace feature prominently. Adjust the spice mix to your taste and to the wine’s character: lighter wines tolerate more citrus and delicate warming spices, while fuller-bodied reds can absorb stronger aromatics. Small experiments — varying one spice at a time — teach you how each element changes the final profile, and that gradual learning is the most rewarding part of making mulled wine at home.

Step-by-Step Recipe for Classic Mulled Wine

The following recipe is a solid foundation that can be scaled up for a crowd or slightly reduced for two people. It is intentionally flexible so you can adjust sugar, spice, and alcohol additions to taste. Read the ingredients and method through once before starting; timing and gentle heat are the real determinants of success. The instructions emphasize simmering rather than boiling, because excessive heat will evaporate aromatics and can make the wine taste flat. With practice you’ll learn how low-and-slow yields the most layered, harmonious results.

  • 1 liter of red wine (see guidance above)
  • 1–2 cinnamon sticks
  • 4–6 whole cloves
  • 1–2 star anise
  • Peel of half an orange (avoid white pith)
  • 40–80 g sugar or 2–4 tbsp honey
  • Optional: 30–60 ml brandy, rum or fortified wine
  • Optional: 2–4 crushed cardamom pods or a small piece of fresh ginger

Begin by pouring the wine into a wide pot or a heavy-bottomed saucepan; this encourages even heating and helps release aromas. Add the sugar (or honey) and the whole spices, along with the orange peel. Warm the mixture very gently over low heat, stirring until the sweetener dissolves. Once it reaches a gentle steam but before it simmers, maintain that temperature for 15–25 minutes to allow the flavors to meld. If you’re adding a spirit, do so at the end to preserve its volatility and flavor.

Technique and Timing

Temperature control is the single most important technique when making mulled wine. Keep the heat well below boiling: aim for about 70–80°C (160–175°F) if you use a thermometer, or a barely perceptible shimmer on the surface if you rely on scent and sight. High heat blows off volatile aromatics and can leave the wine tasting thin; slow infusion keeps the fruitiness intact while encouraging spice extraction. If you allow the pot to sit on the stove for a long time, lower the heat further and cover it partially to prevent evaporation and preserve aromas.

Timing depends on spice intensity and the wine’s base qualities. Fifteen to twenty minutes is usually sufficient for whole spices and citrus peel to release their aroma; stronger or toasted spices may benefit from thirty minutes. Taste early and often: if you sense the spices are edging into dominance, remove the pot from heat and let it cool slightly before serving. For larger batches or for parties, keep the mulled wine warm in a slow cooker or on the lowest hob setting, checking flavor every hour and topping with a little water or more wine if the liquid reduces substantially.

Variations and Twists

One of the strengths of this drink is its openness to variation. You can take the classic template in many directions: add a slice of ginger for a sharper edge, stir in a spoon of jam (a British trick) for texture and fruit concentration, or use citrus juice for extra brightness. Fortified wines like port make a decadent, richer version when substituted partly for the red, while cider blended with red wine offers a lighter, fruitier result. Each variation shifts the mood: some feel rustic and cozy, others bright and festive.

For a non-alcoholic version, use unsweetened black grape juice or pomegranate juice as the base and treat it exactly like wine, adjusting sugar because non-alcoholic bases often differ in acidity. Add a cinnamon stick, cloves and orange peel and warm gently; the result is a spiced beverage that keeps the convivial spirit but is safe for all guests. Another twist is to add a tea infusion—black tea or rooibos—steeped separately then combined with the wine to add tannic structure and complexity without increasing alcohol.

For a modern, savory take, consider adding a few juniper berries and a sprig of rosemary—sparingly—to lend a piney, herbal counterpoint that pairs beautifully with roasted dishes. Alternatively, use exotic spices like cinnamon-coated star anise and Sichuan peppercorns in tiny amounts to introduce a citrusy, numbing warmth. Taste as you go: some ideas sound more surprising than they taste, but cautious additions can elevate the drink into something memorably different.

Serving, Pairing, and Presentation

Mulled wine is a social drink and presentation can heighten that sense of ceremony. Serve it in heatproof glasses, mugs, or enamel cups, garnished with a thin orange wheel, a cinnamon stick or a whole star anise for visual appeal as well as aroma. If you’re serving outdoors at a market-style gathering, consider serving in insulated mugs to keep the liquid warm longer. Ladling from a pot or slow cooker adds theater and encourages people to gather round and talk.

Pairings are straightforward: the spicy, warm profile of the drink complements roasted meats, strongly flavored cheeses and baked goods. Think roasted pork with apple sauce or a simple board of aged cheddar, bread and marmalade. For sweet pairings, ginger cookies, spice cake or citrus-based desserts mirror the drink’s flavors and make good partners. For a lighter bite, roasted chestnuts or marinated olives create contrast, making the mulled wine feel less like dessert and more like part of a balanced winter menu.

Safety, Storage, and Reheating

Because mulled wine is heated gently rather than boiled, it should be handled with the same food-safety awareness as any cooked drink. Keep it at a safe temperature if you intend to hold it for long periods; store leftovers in the refrigerator within two hours of cooking and consume within three days. When reheating, do so gently over low heat—never bring it to a hard boil—to avoid driving off flavor and to keep aromas intact. If you added fresh citrus or herbs, consider removing them before storage because they can develop off flavors over time.

Alcohol does not disappear through heating; the warming process reduces alcohol content slightly but not completely, so bear that in mind if serving to guests who avoid spirits. For larger events, label non-alcoholic versions clearly and keep them separate. Finally, if you plan to reheat several times, make small fresh batches instead, as repeated warming degrades both wine and spice qualities and leaves the drink tired and flat.

Pairing with Food and Occasions

Mulled wine is naturally suited to cold-weather occasions: holiday markets, intimate dinners, open-fire gatherings and festive brunches. Its warmth makes it a great welcome drink when guests arrive from the cold, and it holds up well as an aperitif before a heavier meal. For a more formal holiday dinner, present it as a pre-dinner sip to open appetites, or use it during the dessert course with spiced cakes or poached pears. The drink’s ability to bridge savory and sweet components gives it unusual pairing versatility for winter menus.

For menus, think in complementarities: a hearty stew needs a mulled wine with assertive spices and a touch more sweetness, while lighter fare benefits from a brighter, less sweet version. When planning for groups, provide a small selection—classic, citrus-intense, and non-alcoholic—so guests can choose. The simple act of offering these choices elevates hospitality, turning a single warmed pot into a thoughtful gesture that accommodates different tastes and dietary needs.

Personal Notes and Anecdotes

Making mulled wine became part of my family’s winter rhythm after a particularly cold December when a single bottle and a handful of spices stretched into a whole evening of conversation. I learned to adjust the spice mix based on the wine we had on hand, and over time I developed an intuition for how much orange peel the wine needed to sing. Those early experiments taught me a useful lesson: small, thoughtful tweaks often improve a recipe far more than following a strict list of ingredients.

One memorable experiment was using a fruity, peppery Zinfandel and adding a small spoonful of dark cherry jam as a sweetener. The result was surprisingly lush: the jam intensified the fruit without making the drink sticky, and guests asked for the recipe. In another season I accidentally left the pot too long on gentle heat and discovered that a little water added near the end could revive the aromatics without diluting flavor too much. These practical missteps turned into reliable rescue techniques that I now share with friends.

Over the years I’ve also hosted outdoor mulled-wine evenings around a fire pit, where the communal ladling and the glowing embers become part of the experience. In those settings I prefer a slightly sturdier, spiced version that can withstand the cold air and still feel warm in hand. The drink becomes a social glue: strangers chat across mugs while scents mingle and stories unfold. Those are the moments that convince me mulled wine is less about the perfect ratio and more about the event it helps create.

Tips and Common Mistakes

There are a few practical tips that save time and keep flavors clean. First, avoid boiling the wine; high heat dulls aromatics and can create a bitter edge. Second, use whole spices and remove them before serving to prevent bitterness and to make recycling the pot easier. Third, taste frequently during the slow infusion so you can pull it off the heat at the optimal point; a little patience pays off. These calibrations are simple but crucial to making a drink that feels balanced and inviting.

Common mistakes include over-sweetening, using overly tannic wines and neglecting acidity. If the drink tastes flat, a splash of fresh orange juice or a teaspoon of lemon juice can brighten it immediately. If spices become too strong, remove them and dilute slightly with more wine or a little water, then adjust sweetener. Learning these small corrective measures prevents a batch from becoming unusable and reduces waste, while giving you confidence to play with proportions and flavors.

Classic mulled wine is an invitation: to slow down, to gather people and to celebrate small domestic rituals even on the bleakest of winter evenings. The recipe itself is generous and forgiving, allowing you to make something reliably comforting with modest ingredients. Once you’ve practiced a couple of batches you’ll know how your preferred wine, spice mix and sweetness come together, and you’ll begin to improvise with assurance.

Take this as encouragement to experiment responsibly and with delight. Whether you keep the recipe strictly traditional or introduce bold additions, the goal is the same: to produce a warm, fragrant winter drink that brings people together. Make a pot, set out mugs and garnishes, and notice how quickly a simple beverage becomes the center of attention. In the end, the best measure of success is the shared conversation and the small smiles that follow the first sip.