Category: Recipes

Homemade Chicken Broth: The Savory Foundation That Transforms Everyday Cooking

There’s a particular comfort that comes from a pot simmering on the stove, the kitchen filling with warm, savory steam and the promise of something nourishing at the end of the day. Homemade Chicken Broth is more than a liquid base; it’s culinary insurance, a remedy when you’re feeling under the weather, and a secret ingredient that lifts simple dishes into memorable meals. In this article I’ll walk you through everything worth knowing about making, storing and using homemade broth at home, from choosing bones to coaxing out the best flavor. Expect practical tips, a few science-based notes about nutrition and immune support, and some real-world shortcuts I use myself on busy weeknights. Read on and you’ll never look at a store-bought carton the same way again.

Why Make Your Own: Taste, Nutrition, and Practical Reasons

Homemade Chicken Broth. Why Make Your Own: Taste, Nutrition, and Practical Reasons

Making broth at home pays off immediately in taste. A slow, controlled simmer extracts a rounded, deep flavor that canned or boxed broth seldom matches; the difference shows up in soups, sauces and grain dishes. Beyond flavor, preparing your own liquid lets you control salt, fat and any additives, so the finished product can align with dietary needs and personal preferences. There’s also a practical rhythm to it: a weekend batch becomes weekday shorthand, saving time and elevating simple meals with very little daily effort.

On the nutrition side, broth supplies small but meaningful amounts of minerals and amino acids released from bones, cartilage and meat during the simmer. While it’s not a miracle cure, broth supports hydration and can be gentle and nourishing when you’re recovering from illness. Many people reach for a cup of warm broth for immune support and comfort, and there’s moderate scientific backing for the idea that warm, savory liquids help relieve congestion and soothe sore throats. In short, homemade broth is both an ingredient and a resource—the sort of thing that quietly improves cooking and well-being over time.

The Ingredients and Why They Matter

At its core, good chicken broth requires three elements: bones or carcass, aromatics and water. Each component plays a specific role. The bones deliver body, collagen and subtle mineral notes when simmered long enough, while aromatics and herbs add the top notes that define the final flavor. Salt should be added carefully during the cooking process—better to season dishes later using the broth than to over-salt the stock itself.

Quality of ingredients matters. A fresh carcass or meaty bones from a whole roasted chicken produce a more savory base than bare necks and backs alone, though those parts are excellent when combined. Organic or pasture-raised chickens can change nuance but won’t automatically make a broth better; technique and time remain the decisive factors. Vegetables should be fresh or well-preserved, and herbs used judiciously since even a small amount of rosemary or thyme can dominate the pot.

Choosing the Right Chicken Parts

Deciding which chicken parts to use depends on three goals: economy, flavor and gelatin. If you want a rich, slightly gelatinous broth, include meaty bones with connective tissue such as wings, necks and backs. A whole roasting carcass after a Sunday dinner is perfect because it combines flavor-rich meat with bones that will release collagen. For a clearer, lighter broth, use fewer meaty parts and leaner sections, but accept that body and mouthfeel will be reduced.

Many cooks prefer a mix: a carcass or whole chicken combined with leftover parts like wings and drumsticks for extra collagen. If you roast a whole bird first, reserve or freeze the carcass immediately after carving to maintain freshness. For economical cooking, keep a small freezer bag labeled “bones” and add ends of raw or roasted chicken until you have enough for a batch. That practice cuts waste and builds stockpile without extra trips to the store.

Vegetables, Herbs and Aromatics

Vegetables are the chorus to the bones’ solo. The classical trio—onion, carrot and celery—adds sweetness, savory depth and aromatic lift. Use whole onions, rough-chopped carrots and celery stalks; there’s no need for fine dicing since the solids will be strained. Garlic is optional and adds character, particularly when you want a broth with a more pronounced savory edge. Avoid bitter vegetables like Brussels sprouts or cabbage, as they can impart off-notes during the long simmer.

Herbs should be used sparingly and added at different stages depending on their strength. Parsley stems give brightness and are traditionally added early. Bay leaves contribute subtle savory perfume; add them with the vegetables. Delicate herbs like dill or basil should be introduced at the end or reserved for the finished dish. Whole peppercorns work well for clean spice without clouding the broth with ground particles.

Step-by-Step: Making Homemade Chicken Broth

Making broth is a forgiving process but benefits from a clear sequence. Start with bones and any leftover meat, add vegetables and aromatics, cover with cool water and bring to a gentle simmer. Maintain a low, steady heat to avoid agitation that clouds the liquid, and skim foam occasionally. Simmer long enough to extract collagen, typically two to four hours for a light stock and up to 12 hours for a deeply concentrated result, then strain carefully and chill to remove fat.

Small procedural details matter. Using cool water at the start helps draw impurities out slowly for easier skimming, and breaking down large bones exposes more surface area for extraction. If you prefer a clearer finished product, strain through a fine-mesh sieve lined with cheesecloth or a coffee filter. Salt at the very end, adjusting on the fly for the recipes you plan to use the broth in later.

Basic Stove-top Method

The stove-top simmer is the most traditional route and gives you direct control. Place bones and vegetables in a large stockpot, fill with cold water to cover by about an inch, and bring to a slow simmer. Once the surface shows small bubbles, reduce heat so the liquid barely moves and set a timer for periodic skimming. Simmer gently; vigorous boiling drives off flavors and makes the broth cloudy. A typical light broth takes three to four hours, while deeper, gelatin-rich batches benefit from six to twelve hours.

During cooking, check for foam and impurities that rise to the surface and remove them with a ladle. If you see murky bits, a few careful skims will improve clarity. Toward the last hour, taste and make final aromatic adjustments such as adding more parsley stems or a cracked peppercorn. After simmering, strain the broth into a clean container, cool quickly in an ice bath if possible, and refrigerate; once cold, lift the fat cap for a cleaner broth or leave it for storage if you prefer the insulation it provides.

Slow Cooker and Instant Pot Variations

Both slow cookers and pressure cookers have their champions for making broth. A slow cooker offers convenience—set it and forget it for eight to twelve hours without babysitting the stove. It operates at low heat, yielding a steady extraction and usually produces a clear, flavorful broth if you use moderate bone-to-water ratios. The trade-off is longer cook time but minimal hands-on work, which suits busy household schedules.

Instant Pots and other electric pressure cookers drastically reduce cooking time while yielding a concentrated result. Under pressure, collagen and nutrients release faster, so a pressure-cooked batch can be ready in two hours or less. Because the liquid concentrates quickly, be cautious about salt and consider diluting the final stock if you plan to use it as a straight broth. Both methods deliver excellent results, and the choice comes down to how much time you have versus how hands-on you want to be.

Clarity, Gelatin and the Science Behind It

Two common descriptors of a good broth are clarity and gelatin. Clarity mostly depends on gentle cooking and careful skimming. When proteins and impurities are jolted by boiling, they disperse and cloud the liquid; simmering gently encourages them to coagulate at the surface where they can be removed. Straining through fine filters removes remaining tiny particles, producing a clear, attractive broth suitable for consommés and light soups.

Gelatin forms when collagen in bones and connective tissue breaks down into soluble gelatin during simmering. A broth that gels in the refrigerator is a sign of good extraction and adds mouthfeel to soups and sauces. Gelation requires sufficient time and the right cartilage-rich parts; short simmers or lean bones won’t produce a jelly-like set. Gelatin also helps the broth cling to starches and proteins, improving texture in risottos and stews.

Storage, Freezing and Safety

Proper storage preserves flavor and prevents spoilage. Refrigerate broth within two hours of cooking in shallow containers to cool it quickly. Stored in the fridge, well-sealed broth will keep for four to five days. For longer preservation, freeze in portions: ice cube trays for a tablespoon at a time, or quart-sized containers for soups and stews. Freezing not only extends shelf life but also makes it easy to grab the amount you need for a recipe.

When cooling broth, remove excess fat if you prefer less greasiness; the fat solidifies on top when chilled and can be lifted off easily. Label containers with the date so you can track freshness. For frozen broth, thaw in the refrigerator overnight or add frozen chunks directly to hot pots; avoid thawing at room temperature. If reheating, bring broth to a rolling boil and discard if you detect off-odors or unusual textures, as these can indicate bacterial growth.

Storage Times at a Glance

Below is a concise reference to help you manage your stockpile of homemade broth. Use shorter refrigeration times for lightly salted or low-fat broths and longer for freezes. These are practical recommendations to balance food safety and quality for typical home kitchens.

Storage Method Typical Duration Notes
Refrigerator 4–5 days Store in shallow containers, keep below 40°F (4°C)
Freezer (airtight) 4–6 months Use portioned containers; longer storage safe but flavor declines
Frozen cubes 6–12 months Best for small quantities and quick use

Nutritional Value and Immune Support

Broth contains modest amounts of protein, minerals and amino acids, and while it’s not a complete source of nutrition, it serves a useful role in a balanced diet. Amino acids such as glycine and proline come from collagen breakdown and may support gut health and tissue repair. The mineral content varies with the bones and cooking time, supplying small amounts of calcium, magnesium and potassium. These nutrients, together with the warmth and hydration broth provides, contribute to why people reach for a cup during illness.

Regarding immune support, broth offers several indirect benefits. Warm fluids soothe inflamed mucous membranes and improve hydration, both helpful during respiratory infections. The nutritional components of broth supply energy and easily digestible protein when appetite is low, aiding recovery. Scientific studies on chicken soup’s effect on colds suggest symptomatic relief rather than a direct antiviral action; still, for many households this comforting bowl functions as practical immune support during minor illnesses.

Culinary Uses: Where Broth Really Shines

Broth is an underrated multitasker in the kitchen. Beyond classic chicken soup, use it as the cooking liquid for grains like rice, quinoa and farro, or as the simmering base for legumes and beans. It elevates pan sauces and gravies by adding depth without masking primary ingredients, and braising meats in broth keeps them moist while infusing subtle savory flavors. In short, it’s a simple swap: replace water with broth and the dish usually gains complexity and richness.

In my kitchen, a batch of broth seldom lasts more than a week because I use it constantly. Leftovers become the base for a quick noodle bowl, a risotto late in the week, or even a reduction to finish with a splash of cream. Homemade broth shines when it is not the main event but the supporting player; it adds an invisible layer of flavor that cooks and diners notice as “something different” without being able to name it.

Recipes and Ideas for Using Leftover Broth

Here are a few simple directions to put your stockpile to work. For a fast lunch, simmer broth with scallions, a handful of shredded chicken and soba noodles, finishing with a little soy sauce and sesame oil. For richer meals, use concentrated broth to deglaze pans and build a sauce, or reduce it for a glossy glaze on roasted vegetables. You can also poach fish gently in warm broth for a light, fragrant main dish.

Broth also transforms baking and pantry cooking. Use it to add moisture and flavor to savory breads and to hydrate dried mushrooms or sun-dried tomatoes before adding them to sauces. When preparing legumes, start them simmering in broth rather than water to infuse each bean or lentil with savory backbone. These small adjustments are low-effort and deliver disproportionate returns in taste.

Troubleshooting Common Problems

Even the best-intentioned batch can run into simple issues: a cloudy appearance, lackluster flavor or too much fat. Cloudiness most often results from boiling too vigorously; keeping the simmer gentle and skimming regularly usually fixes this. If flavor is weak, you likely didn’t extract enough from bones or didn’t use a sufficiently concentrated ratio; cook a second batch with the same bones or reduce the broth by simmering until it concentrates. Too much fat is easily remedied by chilling and skimming the solidified layer off the top before reheating.

Salt balance is a frequent stumbling block. Add salt sparingly during cooking and correct seasoning in the finished dish; many recipes assume unsalted broth and will call for a measured amount of salt later on. If the broth is too salty already, dilute with unsalted water or add peeled potato chunks during a brief simmer to absorb some of the excess, removing them before serving. If your broth tastes bitter, it may have held onto overcooked vegetables; start anew with more restrained vegetable additions next time.

Flavor Variations and International Twists

Broth is a canvas for regional flavors. Add ginger, scallions and a splash of soy sauce to the base for an East Asian profile; toss in star anise and cinnamon for a faintly aromatic hint used in some Vietnamese stocks. For Mediterranean notes, introduce tomato paste and bay leaves and finish dishes with a squeeze of lemon. These small adjustments shift the broth’s direction without requiring a complete rework of technique.

Experimentation can be rewarding. I sometimes roast bones and vegetables before simmering to add caramelized depth, a trick that builds a roasted character without lengthening stove time. Another approach is to incorporate dried mushrooms for an umami boost, particularly useful when the broth will be used in vegetarian-styled preparations that still lean on chicken stock for body. Balance is key—strong spices should complement, not overwhelm, the chicken’s natural flavor.

Economics and Sustainability: Waste Not, Want Not

Making broth is inherently economical. Using leftover carcasses, trimmed bones and vegetable scraps minimizes waste and stretches the value of primary ingredients. Instead of discarding onion skins, carrot peels and celery leaves, collect them in a freezer bag; once full, add them to a pot with bones for a robust, no-cost broth. This practice reduces grocery bills and aligns with sustainable cooking principles that value the whole ingredient.

Beyond savings, homemade broth reduces packaging waste compared to store-bought cartons and offers flexibility: you can make exactly the amount you need and choose packaging that you reuse. Community kitchens and small restaurants often harness broth-making as part of a zero-waste effort, and home cooks can easily adopt similar habits by planning batches during meal prepping. The cumulative environmental benefit feels modest on its own but meaningful over a year.

Advanced Tips from Experience

Over years of making broth I’ve found that small routines make the process effortless. I always keep a labeled freezer bag for bones and another for vegetable scraps, and when either fills, I start a batch that same weekend. Roasting bones first adds an immediate depth that’s especially welcome in stews, and finishing a broth with a teaspoon of apple cider vinegar early in the cook can improve mineral extraction. These are minor steps but they change the yield and flavor in ways I prefer.

Another habit: portioning broth into different sizes before freezing. Quarter-cup cubes are great for deglazing a pan or finishing a sauce, while two-cup containers are perfect for a single serving of soup. Labelling with dates and intended use reduces decision fatigue later. These small organizational moves turn occasional broth-making into a seamless part of weekly kitchen life.

Safety Reminders and Best Practices

Food safety matters even with something as homey as broth. Always start with clean utensils and a sanitized workspace, especially when handling raw poultry. Cool cooked broth quickly and refrigerate within two hours to prevent bacterial growth; dividing into shallow containers speeds the process. When reheating, bring broth to a full boil for at least one minute to ensure safety, and discard any container that develops off-odors or strange textures.

Be mindful of allergen cross-contamination if you’re storing broths from different sources in one refrigerator, and never reuse single-use packaging for long-term storage. Proper lids, freezer-safe containers and accurate labeling make a surprising difference in both safety and convenience. These small standards protect both flavor and health.

Quick Recipes to Try with Your Broth

Start simple to appreciate the difference real broth makes. A classic chicken noodle soup needs little more than shredded chicken, carrots, celery and egg noodles simmered briefly in warm broth; finish with parsley and a squeeze of lemon. For a comforting weeknight dinner, make a one-pot risotto using broth warmed on the side, adding it ladle by ladle so each grain of rice absorbs the savory liquid. These are straightforward ways to show off the advantage of homemade stock.

If you want a bold first experiment, try poaching chicken breasts in a shallow pan of simmering broth with garlic and thyme, then shred the meat for tacos or salads. The poaching liquid becomes an instant sauce base. Small recipes like these integrate broth into the sorts of everyday meals most of us cook, making the effort to prepare stock feel relevant and rewarding rather than indulgent.

Final Thoughts: Make It a Habit

Homemade Chicken Broth is an ingredient that rewards consistency. Small, regular batches transform into a useful supply that changes the way you cook, improves flavor, and offers gentle nourishment when you need it. The time invested in simmering pays back many times over in convenience and improved taste across dozens of dishes. Adopt a few practical habits—freeze bones, portion finished broth, and label containers—and you’ll find that a warm, savory cup is seldom more than a few minutes away.

Start simple, learn from each batch, and let the broth become part of your routine. Whether you aim to support family meals, soothe a sore throat, or elevate everyday cooking, a homemade pot is one of the most versatile tools in a home kitchen. Over time you’ll develop your own preferences and shortcuts, and the result will be uniquely yours: a flavorful, nourishing base that turns ordinary recipes into something memorable.
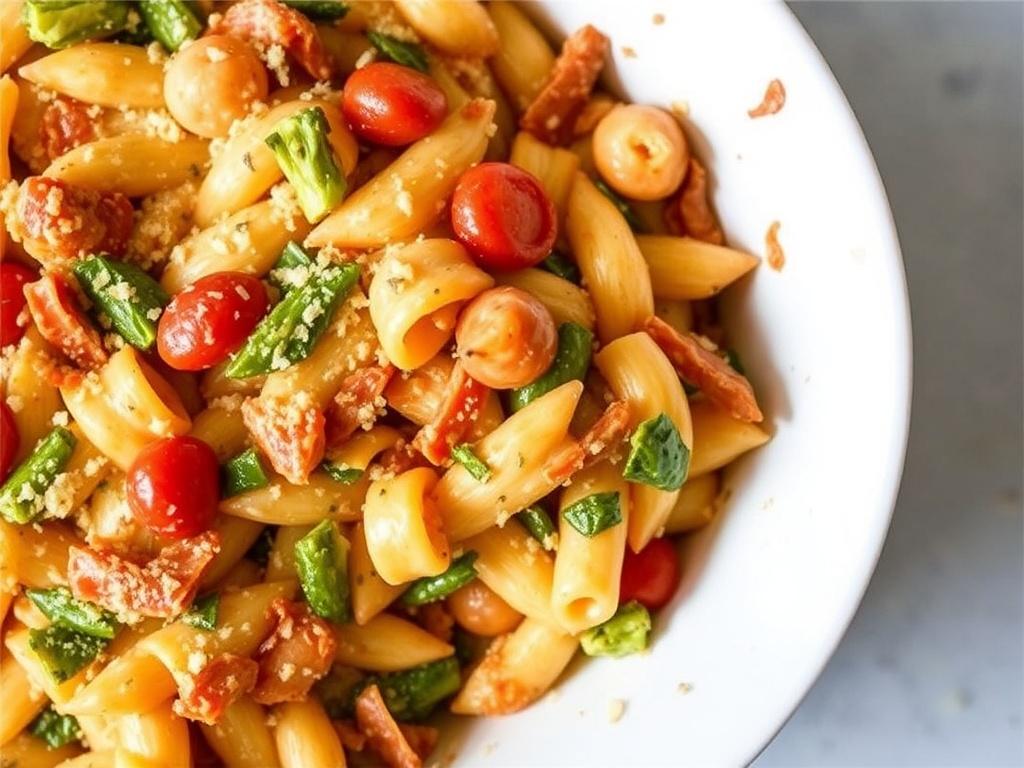
The Irresistible Comfort of a Vegetable Pasta Bake: Warm, Simple, and Full of Flavor

There is something quietly persuasive about a bubbling tray pulled from the oven, layers of tender pasta and roasted vegetables glistening under a golden crust of cheese. A Vegetable Pasta Bake is that rare dish which manages to be both comforting and inventive, easy enough for a weeknight and robust enough to feed a small crowd. In this article I’ll walk you through choices that matter: which pasta holds the sauce best, how to coax sweetness from vegetables, and how to balance textures so every forkful feels complete. Along the way I’ll share practical tips, a compact recipe that evolved in my kitchen, and variations to suit different diets. Read on if you want to learn how to turn humble pantry staples into a baked pasta dish that everyone asks about again and again.

Why a Vegetable Pasta Bake Works Every Time

A good oven-baked pasta hits several satisfying notes at once: soft yet toothsome pasta, concentrated vegetable flavors, a binding sauce, and a crisp or chewy top layer. When you roast or sauté vegetables first, their sugars caramelize and the mixture develops depth, which the sauce then carries through the dish. The baking step pulls everything together, melding flavors while evaporating excess liquid so the casserole has structure instead of becoming soupy. Also, the format is forgiving: you can swap vegetables, try different cheeses, add a protein or leave it plant-forward, and the result still feels intentional. These strengths make a baked pasta an ideal canvas for seasonal produce, leftovers, or a deliberate pantry raid.

Another reason this format is appealing is practical: it scales easily, transports well, and reheats cleanly for lunches. A family-size tray can feed several people and often improves after a day when flavors settle and marry. For cooks who dislike last-minute stovetop juggling, assembling a casserole ahead, refrigerating, and popping it into the oven before guests arrive removes stress and frees up time. Beyond logistics, there’s the emotional comfort of serving something warm from the oven; it signals effort and care without demanding Michelin-level technique. That balance of heartiness and simplicity explains why so many home cooks keep a go-to baked pasta formula on hand.

Choosing the Right Pasta Shape

Not all pasta shapes behave the same under heat, so choosing wisely matters for texture and sauce distribution. Large tubular pastas like rigatoni and penne capture chunks of vegetables and pockets of melted cheese inside their hollow centers, creating little flavor bursts. Shells do something similar on a smaller scale, nesting sauce and offering pleasing mouthfeel, while short twisted shapes such as fusilli or rotini trap thinner sauces along their ridges. Long pastas can work, but they need to be partially broken or carefully layered to avoid clumping into a single dense mass during baking.

For a casserole that aims to balance sauce and solids, I usually favor tube-like shapes or medium-sized twists; they frame the vegetables without overwhelming them. If you plan to make a creamier, gratin-style bake, consider shapes with more surface area so the top browns attractively and the sauce clings well. Whatever shape you choose, cook the pasta to about two minutes shy of al dente in salted water; this allows it to finish cooking in the oven while absorbing the surrounding flavors. Undercooking intentionally is a small step that prevents a mushy final texture.

Pasta Shape Best For Notes
Rigatoni / Penne Chunky sauces, vegetable pieces Tubes capture filling, great for casseroles
Fusilli / Rotini Thicker sauces, creamier bakes Ridges hold sauce well
Shells Fillings and bite-sized vegetables Smaller shells for single-bite balance
Short Spaghetti / Broken Long Pasta Rustic bakes Break before mixing to avoid clumps

Selecting and Preparing Vegetables

Vegetables are the heart of a veggie-forward bake, and the selection should reflect seasonality and texture contrast. Think about firmness: firm vegetables like carrots, butternut squash, and bell peppers hold up well and add substance, while softer items such as mushrooms, zucchini, or spinach collapse into creams that enrich the sauce. Balancing the two avoids a dish that feels either too structural or too saucy. Color matters too; deep green, bright orange, and ruby red bring visual appeal and subtle flavor differences that keep each bite interesting.

Preparation technique influences the outcome more than you might expect. Roasting vegetables concentrates sweetness and adds a smoky edge; sautéing with garlic and herbs layers savory notes quickly; and steaming keeps things light but risks diluting flavor. For a reliably flavorful bake, I roast dense vegetables until edges brown and toss tender greens into the sauce near the end so they wilt without becoming waterlogged. Chop vegetables into uniform pieces so they cook evenly, and season them while they’re hot from the pan to ensure the salt penetrates and enhances natural sugars.

Here is a short list of vegetables and how to treat them before assembly:

  • Aubergine / Eggplant: Salt briefly to remove bitterness, then roast or pan-fry until golden.
  • Bell peppers: Roast until skins blister, peel optionally, and chop into bite-sized strips.
  • Zucchini / Courgette: Sauté quickly to lose excess water, or grill for smoky notes.
  • Mushrooms: Brown in a hot pan to concentrate umami; avoid overcrowding.
  • Spinach / Kale: Add in the final stage of the sauce; wilt and squeeze out excess moisture.

Sauces: Tomato, Creamy, or Hybrid

The sauce is the glue that holds a baked pasta together and defines its character, so choose it according to the mood you want to set. A bright tomato sauce keeps the dish lively and acidic, cutting through richness and complementing roasted vegetables. A cream-based sauce gives a luxurious mouthfeel and pairs beautifully with roasted butternut squash, leeks, or tender greens. There’s also the hybrid option, a tomato-cream sauce that balances acidity and creaminess, offering the best of both worlds and an elegant color contrast under a browned top.

When making a tomato sauce, cook it down until it becomes concentrated; a thin, watery sauce will make a loose bake. For cream sauces, temper cream with a bit of stock and grated cheese so it doesn’t separate in the oven. Herbs are powerful: oregano and basil lift tomato-based mixes, while thyme and sage complement creamier bases and squash. Acidic touches like a splash of balsamic vinegar or a squeeze of lemon brighten flavors after baking when the palate can feel dulled by heat and cheese. The smart use of acid is a secret many cooks rely on to make a home casserole taste professionally finished.

Cheese Choices and Layering

Cheese is both flavor and architecture in a baked pasta: it binds, browns, and offers textural contrast. For melting performance and flavor, a combination often wins. Mozzarella gives that appealing, stringy melt and a mild backdrop, while Parmesan or Pecorino adds savory complexity and a nutty finish. Ricotta or cottage cheese can be folded through for pockets of creaminess, especially useful in vegetable-forward bakes where you want a lighter dairy note rather than a heavy blanket of cheese.

Layering techniques matter as much as cheese type. Sprinkle a thin layer of grated hard cheese between layers to encourage adhesion and depth; place a scattering of mozzarella or shredded fontina on top to create the coveted golden crust. If you prefer a crisp top, finish under a hot broiler for a minute or two, watching closely to avoid burning. For a slightly healthier approach, use less cheese but concentrate on flavor by using aged varieties sparingly; a little goes a long way and keeps the dish balanced.

Protein Boosts Without Overwhelming the Veg

Adding protein can round out a meal and make a vegetable bake more satisfying for those who want substance, but the goal is to enhance the vegetables rather than drown them. Canned beans, such as cannellini or chickpeas, are excellent options; they add creamy texture and blend easily with tomato and herb profiles. Small cubes of roasted tofu or tempeh can be marinated and browned beforehand to impart a meaty bite while staying plant-forward. If you include animal proteins, think of shredded rotisserie chicken, thin slices of Italian sausage, or small meatballs prepared separately and nestled among the pasta and vegetables.

Keep portion and seasoning in mind so the protein complements the overall dish. For beans and legumes, rinse and drain thoroughly to avoid adding extra starch to the sauce. For tofu or tempeh, pressing removes water and helps the pieces crisp, preventing them from becoming limp during the bake. When incorporating a protein, adjust cooking times and salt levels accordingly, and remember that adding more ingredients increases moisture, which you may need to manage by slightly reducing the sauce or increasing oven time for evaporation.

Steps to Assemble the Bake

Assembling a successful baked pasta is a methodical process, and following a sequence saves guesswork and prevents sogginess. Start by preparing components separately: cook the pasta just under al dente, roast or sauté vegetables until their flavors concentrate, and prepare the sauce to the desired thickness. Pre-mix cheeses that belong inside the layers and reserve some for the final browning. Combining these elements in a logical order ensures even heat distribution and a coherent texture once the casserole finishes in the oven.

  1. Preheat the oven to the recommended temperature, usually between 180 and 200 degrees Celsius.
  2. Cook pasta two minutes less than package instructions; drain and toss with a touch of oil to prevent sticking.
  3. Roast or sauté vegetables until edges are caramelized and flavor is concentrated; season while hot.
  4. Prepare your sauce and bring it to a simmer so flavors meld and liquid reduces slightly.
  5. Combine pasta, vegetables, and most of the sauce in a large bowl; stir in half of the cheese.
  6. Transfer mixture to a baking dish, top with remaining sauce and cheese, and add breadcrumbs if desired.
  7. Bake until bubbly and top is golden, then rest briefly before serving to allow the interior to set.

Baking Times and Temperatures

Temperature and time vary based on the volume of the casserole, depth of the dish, and how moist the components are, but a reliable range is 25 to 40 minutes at around 190 degrees Celsius. If the bake contains a lot of moisture from fresh tomatoes or watery vegetables, extend the time and tent the top with foil if it browns too quickly. A shallower dish will cook faster and produce a crisper surface, while a deep casserole needs more time for heat to penetrate and evaporate liquid. Using an oven thermometer helps; small differences in actual oven heat change outcome significantly.

For a perfect finish, remove foil for the last 5 to 10 minutes to brown and crisp the surface, and if you want an extra crunchy topping, sprinkle a mix of breadcrumbs and grated hard cheese before that final uncovered stage. Allow the bake to rest for at least ten minutes before serving so sauces thicken and slices hold together. This rest period also gives flavors a chance to settle, making the overall profile more integrated and less aggressively hot on the palate. If you’re unsure whether it’s done, poke with a knife: the center should be hot, and any liquid should be reduced and glossy rather than watery.

Make-Ahead and Freezing Tips

Vegetable Pasta Bake. Make-Ahead and Freezing Tips

One of the strengths of a baked pasta is its suitability for advance preparation and freezing, which turns the dish into convenient, high-quality meal prep. You can assemble the casserole fully, cover tightly, and refrigerate for up to 24 hours before baking; let it sit at room temperature for 20 to 30 minutes before placing it in the oven to reduce thermal shock. For freezing, assemble and flash-freeze uncovered for an hour, then wrap tightly in foil and freeze for up to three months. When ready to cook, thaw overnight in the refrigerator and bake as directed, adding a few extra minutes to reach the proper internal temperature.

Reheating portions is straightforward. Small individual servings warm well in a moderate oven or in a microwave for convenience, though the oven produces better texture. To maintain moisture, cover with a damp paper towel or a loose sheet of foil when microwaving. If you froze the bake with a crisp topping, re-crisp in the oven or under a broiler for a minute—just keep a close eye so it doesn’t burn. These steps let you enjoy the flavor benefits of a fresh-baked dish without spending time in the kitchen every day.

Serving Suggestions and Sides

A robust vegetable casserole pairs nicely with simple sides that add contrasting textures and temperatures. A crisp green salad dressed with a bright vinaigrette provides acidity and crunch that counterbalance the richness of cheese and baked pasta. Lightly steamed green beans or a platter of marinated olives and pickled vegetables offer palate-cleansing notes and variety. For a heartier meal, serve slices of crusty bread to scoop up sauce, or accompany the bake with a bowl of lemony roasted cauliflower for additional vegetable interest.

For beverages, keep it simple and complementary: a chilled white wine with citrus notes suits a creamier bake, while a medium-bodied red can stand up to a tomato-based version. Non-alcoholic options work just as well; sparkling water with a twist of lemon or a lightly brewed iced tea provides refreshment without masking flavors. The goal is balance: choose elements that refresh the palate and punctuate the hearty, comforting center of your meal rather than competing with it.

Dietary Variations: Gluten-Free, Vegan, Low-Carb

This format adapts well to dietary needs, and with a few swaps you can create satisfying alternatives without sacrificing flavor. For gluten-free versions, use a sturdy gluten-free pasta; some rice or corn blends handle baking well, though textures differ slightly. Choose gluten-free breadcrumbs for a crispy topping or skip the crumbs and use a toasted nut crust for extra flavor and crunch. Be mindful of sauces labeled “gluten-free” and read ingredient lists for hidden thickeners.

For a vegan approach, replace dairy with plant-based cheeses that melt, though results vary by brand; combining a creamy cashew sauce with nutritional yeast gives depth and a cheesy umami without dairy. Use olive oil or vegan butter for sautéing and avoid pre-made stocks that might contain animal derivatives. For lower-carb versions, swap pasta for cooked and lightly pressed shredded cauliflower or use firm zucchini ribbons layered like lasagna sheets; these alternatives reduce carbohydrate content but require attention to moisture management to prevent sogginess. Each variation benefits from thoughtful seasoning and texture contrast to maintain the sense of a full, satisfying casserole.

Common Mistakes and How to Fix Them

Even experienced cooks run into predictable pitfalls when baking pasta; knowing how to avoid and correct them saves frustration. A common error is using pasta cooked to fully soft, which results in a gluey casserole; the cure is to undercook the pasta slightly during the initial boil so it finishes in the oven. Another trap is adding too many watery vegetables without pre-cooking; prevent this by roasting or sautéing high-moisture items first and squeezing excess liquid from wilted greens before assembly. These steps concentrate flavor and preserve texture.

Over-salting is also a risk because ingredients like cheese and stock concentrate during baking. Season conservatively at first and adjust after the dish rests; a final sprinkle of finishing salt at the table brightens flavors without risking an overly salty outcome. If the top browns before the interior is hot, tent with foil and continue baking until the center reaches the appropriate temperature. Learning to read your oven and the dish by sight and smell makes troubleshooting easier over time, and each attempt sharpens intuition about balance and timing.

My Favorite Vegetable Pasta Bake Recipe

Below is a recipe that grew out of weekday dinners where I wanted something both nourishing and forgiving. I often double it for company and halve it for two nights of leftovers, and it became a staple after several small refinements in my kitchen. The quantities reflect a 9-by-13-inch casserole and feed four to six people depending on portion size. Feel free to swap in seasonal vegetables, tweak cheeses, or add a protein as described earlier to make it your own.

Ingredients:

  • 350 grams short pasta (penne, rigatoni, or fusilli)
  • 1 medium aubergine, diced
  • 1 red bell pepper, roasted and chopped
  • 1 medium zucchini, halved and sliced
  • 200 grams mushrooms, sliced
  • 1 onion, finely chopped
  • 3 cloves garlic, minced
  • 400 grams canned crushed tomatoes
  • 150 milliliters vegetable stock
  • 150 grams ricotta or 200 grams creamy tofu for vegan option
  • 150 grams shredded mozzarella and 50 grams grated Parmesan
  • Olive oil, salt, pepper, dried oregano, and fresh basil

Method:

Preheat the oven to 190 degrees Celsius and bring a large pot of salted water to a boil. Cook the pasta for two minutes less than package directions, drain, and toss with a tablespoon of olive oil to prevent sticking. While the water heats, sauté the onion in a wide pan with a splash of oil until translucent, add garlic and mushrooms and brown them well to develop umami. Add diced aubergine and zucchini, season, and cook until edges caramelize; finish with roasted pepper and stir to combine.

In the same pan, add crushed tomatoes and stock, bring to a simmer and reduce slightly so it thickens but remains saucy. Stir in ricotta or creamy tofu, adjust seasoning, and fold in half the mozzarella and most of the Parmesan, saving a little for the top. Combine the pasta with the vegetable-sauce mixture, transfer to a baking dish, and scatter the remaining cheeses on top. Bake uncovered for 20 to 30 minutes until bubbling and golden, rest for 10 minutes, then sprinkle with fresh basil before serving.

Serving, Storing, and Final Tips from My Kitchen

I often serve this dish with a simple peppery arugula salad and a lemon vinaigrette; the acidity cuts through the cheese and highlights roasted flavors. Leftovers reheat well and sometimes taste even better the next day after flavors have had time to coalesce. For storage, keep cooled portions in an airtight container in the refrigerator for up to three days, or freeze individual portions for convenience. When reheating from frozen, thaw overnight for best texture and warm slowly to avoid drying the edges out while the center heats through.

One practical tip I learned the hard way is that roasting vegetables until they carry a hint of char adds complexity comparable to a longer simmer. Another is that a modest amount of high-quality cheese can outperform a larger quantity of a bland, mass-produced option. Finally, trust your nose and the casserole’s appearance: a glossy, slightly reduced sauce and a fragrant top indicate a well-executed bake. These small cues will help you iterate and make the dish reliably delicious.

Takeaway

A Vegetable Pasta Bake is more than a recipe; it’s a flexible method that celebrates what’s in season, what’s in the pantry, and what your family prefers on the table. With mindful choices about pasta shape, vegetable preparation, sauce thickness, and cheese selection, you can build a dish that feels rooted in comfort yet versatile enough to showcase creativity. Make it ahead, freeze portions, or scale up for gatherings; the format rewards ingenuity and patience. Try the recipe, then tweak proportions and ingredients until it matches your taste—each small adjustment will teach you something about balance and texture, and soon you’ll have a personalized version you return to whenever you want dependable, nourishing food.

Braised Cabbage with Sausages: A Humble Skillet Feast That Warms the Kitchen

There are dishes that announce themselves with a shout and there are dishes that arrive like a warm hand on the shoulder; this recipe belongs to the latter. Braised Cabbage with Sausages is one of those homely meals that asks for nothing more than a sturdy pan and good company, yet rewards with layers of flavor and comfort. It sits at the crossroads of simple ingredients and slow, patient cooking, turning ordinary cabbage and links into something quietly memorable. In this article I will walk you through the why and how, share practical tips, and offer variations so you can make it your own. Expect clear technique, thoughtful choices for ingredients, and a handful of personal notes from my own kitchen experiments.

Why this dish works: the chemistry of slow cooking

Cabbage is an unassuming vegetable that responds beautifully to slow, moist heat because its cell walls gradually soften and sugars caramelize, providing depth that raw cabbage lacks. When you braise vegetables alongside sausages, the rendered fat and meat juices infuse the leaves, enriching the liquid and creating a savory backbone that lifts the entire pan. The process of braising combines searing, simmering, and gentle heat, which allows both the pork (or other meats) and the cabbage to reach perfect tenderness without falling apart. Acidity—vinegar, wine, or tomatoes—plays a vital role by balancing richness and helping to preserve color. The result is a dish layered with textures: browned edges, silky inner leaves, and meaty tender slices.

One technical point that often gets overlooked is timing. Sausages typically need a blast of heat to develop good color and flavor, while cabbage benefits from a longer, slower finish to reach silkiness. Staggering the steps—sear first, deglaze, then braise—lets you control Maillard reactions and avoids overcooking either component. Seasoning in stages is also important: salt early enough to draw moisture and amplify aromas, but reserve a little seasoning toward the end to adjust after reduction. Getting comfortable with these small moves makes the difference between a flat skillet and a deeply satisfying one-pot dinner.

Choosing ingredients: what to buy and why

Start with a fresh head of cabbage; green is classic, but savoy and pointed varieties bring more texture and a delicate leaf structure that can be attractive in this dish. Look for firm, heavy heads with tight leaves and no bruises, because damaged leaves break down faster when cooked. For sausages, quality matters: a coarse-textured pork sausage with a natural casing will give you juicy slices and a pleasant snap. If you prefer smokiness, choose smoked kielbasa or frankfurter-style links; for a spicier edge, go for chorizo or paprika-seasoned varieties.

Beyond the starring pair, the supporting cast matters. Onions add sweetness and body, garlic offers warmth, and a modest amount of apple or carrot can introduce subtle sweetness that balances tangy finishes. Liquids for braising run the gamut from stock to beer to dry white wine; each brings its own character—stock keeps things round and savory, beer brings malty notes, and wine lends brightness. Aromatics like bay leaves, caraway seeds, or mustard seeds can be used sparingly to introduce an undercurrent of flavor without dominating the dish.

Tools and cookware: what makes the job easier

Use a heavy-bottomed skillet or a Dutch oven with a tight-fitting lid for best results, because these vessels distribute heat evenly and hold moisture during a long simmer. If your pan isn’t oven-safe, keep to stovetop braises and maintain a gentle simmer to avoid scorching. A sharp chef’s knife and a sturdy cutting board will make quick work of the cabbage, and a slotted spoon is handy for lifting sausage pieces if you need to sear them in batches. A spoons-and-tongs combo helps to turn sausages and mix cabbage without shredding the leaves into mush.

Thermometers aren’t strictly necessary for this recipe, but a quick-read meat thermometer can be useful when you’re testing sausage doneness if you’re using whole links. A wide pan with lower sides is preferable to a tall pot in many cases because it encourages evaporation and yields better browning; but if you prefer more liquid and a softer texture, a deeper pot will give you a gentler steam and tender result. Choose your vessel with an eye toward the texture you want at the finish.

Step-by-step recipe: technique, timing, and quantities

Below is a reliable method for a family-style portion that serves four people. The aim is to balance browning with patient simmering so that sausages are well-seared and the cabbage becomes soft but retains shape. Read through the steps before starting and prep all ingredients; braising is forgiving, but a little organization goes a long way. Quantities are provided as guidance—adjust to taste, especially when it comes to aromatics and acidity.

Ingredient Quantity Purpose
Green cabbage 1 medium head (about 1.5–2 lb) Main vegetable; thinly sliced
Sausages (pork, smoked, or bratwurst) 4–6 links (about 1–1.5 lb) Protein and fat for flavor
Onion 1 large, thinly sliced Sweetness and base flavor
Garlic 2–3 cloves, minced Aromatic lift
Apple (optional) 1 small, peeled and sliced thin Bright sweetness
Chicken or vegetable stock 1–1.5 cups Liquid for braising
Apple cider vinegar or white wine 2 tbsp Acid to balance richness
Butter or oil 2 tbsp Fat for searing
Salt, pepper, caraway seeds (optional) To taste Seasoning

Method: Heat a large skillet over medium-high heat and add the fat. Prick or slice sausages slightly and sear until well browned on all sides; transfer to a plate. In the same skillet, add onions and cook until translucent and starting to brown, stirring to scrape up the fond. Add garlic and apple if using, cook briefly, then stir in half the cabbage and allow it to soften slightly. Return sausages to the pan, add stock and vinegar, nestle everything together, cover, and reduce to a simmer for 20–30 minutes until cabbage is tender.

Finish by removing the lid and simmering briefly if you want the braising liquid reduced into a glossy sauce; adjust salt and pepper and sprinkle caraway seeds or chopped parsley for freshness. If sausages were browned thoroughly at the start, they’ll maintain texture and flavor throughout the braise; if you prefer very soft, crumbly sausage, you can slice them before searing. Serve hot with a spoonful of sauce and perhaps a dollop of mustard alongside for an extra kick.

Timing and temperature notes

Maintain a gentle simmer rather than a rolling boil. Too much heat will make cabbage stringy and can cause the pan liquid to evaporate too quickly; a moderate, steady simmer ensures even cooking. For most stovetop braises, a total cooking time of 30–40 minutes yields tender leaves while preserving some texture; for very large or denser cabbages, add 10–15 minutes and keep an eye on moisture. If you finish the pan in an oven, use 350°F (175°C) and check after 20 minutes to prevent overcooking.

When searing sausages, don’t rush the browning stage; aim for a deep golden crust that immobilizes juices. If you’re short on time, slice sausages into rounds and sear them quickly, then set them aside and proceed with the braise. Keep in mind that slicing increases surface area so more juices will escape into the pan, which changes the texture of both the meat and the cabbage. Adjusting for these variables will help you control the final mouthfeel.

Flavor variations: small changes, big differences

This dish is a canvas; small swaps produce distinctive results. For example, swapping apple cider for brown ale introduces malty sweetness and a hint of bitterness that pairs well with smoked sausages. Adding a tablespoon of tomato paste during the onion-sweating phase brings umami and a subtle acidity that rounds the dish, making it feel richer without adding fat. Stirring in a handful of chopped dill or parsley right at the end brightens the plate and counters richness with herbaceousness.

If you want a spicier version, use kielbasa or Polish sausages and add a diced hot pepper or a pinch of crushed red pepper when you add the garlic. For a creamier finish, swirl in a few tablespoons of sour cream or crème fraîche off heat; this technique softens the vinegar’s edge and creates a silky coating. Vegetarians can substitute smoked tempeh or a hearty sausage alternative and use mushroom stock; the dish keeps its rustic soul while becoming plant-forward.

Regional touches and traditional pairings

Across Europe, variations on cabbage and sausage abound. In Central and Eastern Europe, caraway and dill are common companions, and sauerkraut variants appear where longer preservation traditions exist. In Germany, pairings with mustard and dense rye bread feel natural, while in Eastern Europe, a splash of tomato and paprika shifts the profile toward comfort stews. American adaptations sometimes include bacon or pancetta for extra fat and a pronounced smoky note.

For sides, consider potato-centric dishes—mashed, boiled, or pan-fried—as they absorb the braising juices and make the meal heartier. A crusty bread and a smear of mustard is an uncomplicated, satisfying option. For a lighter contrast, a crisp cucumber salad or a simple green salad with lemon vinaigrette cuts through the dish’s richness and keeps the plate from feeling heavy.

Serving suggestions and presentation

This is not a fussy dish, but a few presentation touches make it inviting. Serve straight from the skillet to preserve warmth and encourage communal dining; rustic serving always suits this style. If plating individually, arrange a bed of the cabbage, slice sausages on a bias, and spoon the reduced braising liquid over everything. A scattering of fresh herbs or a light dusting of cracked black pepper gives a bright finish and invites the first bite.

For gatherings, transfer everything to a shallow, warm dish and place it at the center of the table with small bowls of condiments—grainy mustard, pickles, and chopped raw onions work nicely. If you’re serving leftovers, press the slices into a shallow baking tray and reheat gently in a 350°F oven to revive some texture and melt the fats back into the cabbage. Cold slices on dense bread also make an excellent sandwich the next day, often tasting even better after the flavors meld.

Make-ahead, storage and reheating

Braised cabbage and sausages reheat very well because the flavors continue to marry in storage. Cool the dish to room temperature, then refrigerate in a sealed container for up to four days. For longer storage, freeze portions in airtight containers for up to three months; slightly undercook the cabbage before freezing to preserve texture. When reheating from chilled, warm gently in a skillet with a splash of water or stock to loosen the sauce and prevent drying.

To reheat from frozen, thaw overnight in the refrigerator and follow the same gentle reheating method. Avoid microwave reheating when possible because it can make the cabbage rubbery and the sausages unevenly heated. If you need to microwave, do so in short intervals, stirring between bursts to ensure even temperature. A low oven finish often restores more pleasing textures than a blast in the microwave.

Troubleshooting: common problems and fixes

If the cabbage turns mushy, it was likely overcooked or exposed to too much direct heat; next time use a lower simmer or shorten the braising time. Another frequent issue is flat flavor—if the finished dish tastes dull, finish with an acid (a teaspoon of vinegar or a squeeze of lemon) and a pinch of salt to brighten it. If sausages dry out or harden, they were either overcooked or skimped on fat; choose a fattier sausage or reduce searing time and rely more on the braise for color.

Excess liquid at the end is easily remedied by uncovering the pan and increasing the heat briefly to evaporate and reduce the sauce to a glossy finish. Conversely, if the pan dries out too much during cooking, add warm stock in small amounts and lower the heat to continue gentle simmering. Small adjustments during cooking—tasting and correcting seasoning—are the best way to avoid these pitfalls.

Nutrition and health considerations

Braised Cabbage with Sausages. Nutrition and health considerations

This dish offers a balance of fiber from the cabbage and protein from the sausages, but the nutritional profile depends largely on the type of sausage and fat used. Choosing leaner sausages reduces saturated fat, while using olive oil instead of butter slightly improves the fat profile. Cabbage itself is rich in vitamin C, vitamin K, and several phytonutrients that support digestion and inflammation control, making this meal more than just comfort food.

For those watching sodium, use low-sodium stock and check the labels on sausages, as processed meats often contain significant salt. Adding a generous handful of vegetables like carrots or bell peppers increases volume and micronutrients without much added energy. If you want to reduce caloric density while maintaining flavor, increase the ratio of cabbage to sausages and finish with herbs and acid rather than additional fats.

Wine and drink pairings

Drink pairing is about balance: the dish is savory with a hint of sweetness and acidity, so look for beverages that can meet that profile. A dry Riesling or Grüner Veltliner complements the cabbage’s natural sweetness and cuts through the fat with brisk acidity. For red options, a light to medium-bodied Pinot Noir or a Beaujolais gives fruitiness without overwhelming the palate. If you prefer beer, a malty amber ale or a crisp pilsner makes an approachable companion.

Non-alcoholic choices include tart apple cider or a sparkling mineral water with lemon to refresh the palate between bites. For a regional vibe, pair with kefir or a fermented drink to echo the dish’s slightly tangy elements and add a probiotic touch. The idea is to choose a drink that echoes the dish’s rustic heart while cleansing the mouth for the next delicious mouthful.

Personal notes and kitchen experiments

I learned some of my favorite tricks for this dish from a crowded family kitchen where braises were a weekly ritual. One winter, pressed for time, I tossed in sliced smoked applewood sausage and a handful of dried cranberries; the sweet-tart notes surprised everyone and became an instant staple at holiday tables. Another time I swapped a portion of the stock for a bottle of dark beer, which added a toasty backbone and made the sauce almost gravy-like in its satisfaction.

In my experience, the easiest way to make this dish feel special is small, intentional additions rather than overhaul. A scattering of toasted caraway seeds can elevate the aroma, and finishing with a single spoon of unsalted butter can bring a sheen and roundness that feels indulgent without being heavy-handed. Try different sausages across seasons—summer bratwurst, autumn smoked links—and you’ll see how the dish adapts while staying unmistakably comforting.

Quick reference: variations and swaps

  • Smoked kielbasa + beer + mustard seeds: smoky, robust, ideal for hearty appetites.
  • Spicy chorizo + tomatoes + paprika: bold, vibrant, best with crusty bread.
  • Vegetarian: smoked tempeh or plant-based sausage + mushroom stock + soy for umami.
  • Light version: turkey sausages + olive oil + lemon finish to reduce fat and brighten flavor.
  • Sweet twist: add apple slices and a touch of brown sugar for a sweet-sour balance.

These swaps let you tailor the recipe to what’s in your pantry and to the meal’s purpose. Each variation shifts the dish’s personality but keeps the central idea intact: cabbage slow-cooked with savory links until everything coalesces into warmth.

Shopping list and weeknight timing

If you aim to make this on a weeknight, plan 10–15 minutes of active prep and 30–40 minutes of cooking. Here’s a compact shopping list and a suggested timeline that makes the dish achievable on busier evenings. Shopping smart means choosing a sausage you enjoy and a cabbage that looks fresh; once you have those, the rest falls into place quickly.

Item Buy Notes
Cabbage 1 medium head Green, savoy, or pointed
Sausages 1–1.5 lb Pick preferred flavor profile
Onion & Garlic 1 large onion, 2–3 garlic cloves Essential aromatics
Stock & Acid 1–1.5 cups stock, 2 tbsp vinegar or wine For braising liquid
Oil/Butter & Spices Small amounts Salt, pepper, caraway optional

Timeline: 10 minutes prep for slicing and gathering, 10 minutes to brown sausages and soften onions, and 20–30 minutes to braise. If you’re especially pressed for time, slice sausages before searing and reduce simmer time by 5–10 minutes; if you have time to spare, let the mixture simmer longer for even deeper flavor development.

When a weeknight calls for warmth and simplicity, this combination of cabbage and sausages feels like a small, confident act of care. It’s forgiving, adaptable, and—most importantly—consistently satisfying. Try one of the variations, make little notes as you cook, and within a few tries you’ll have your own signature version that friends and family will ask for again.

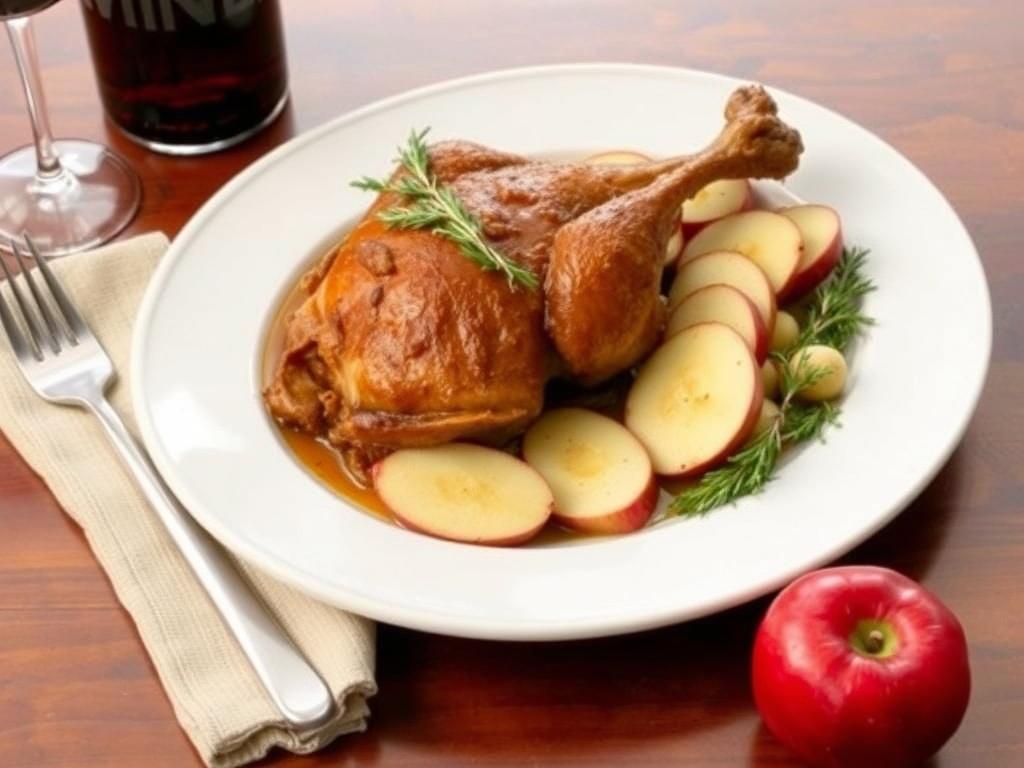
Roast Duck with Apples: A Crisp, Fruity Centerpiece for the Holiday Table

The idea of a whole bird browned until the skin shatters and the cavity filled with fragrant fruit feels like a small culinary triumph. Roast Duck with Apples brings together two simple elements—rich, fatty meat and slightly tart, juicy fruit—and turns them into something celebratory without being fussy. Whether you are planning a holiday meal or an intimate weekend feast, this dish rewards patience with texture and depth of flavor. I’ve learned over many seasons that success lies less in complicated ingredients and more in timing, small techniques and the right balance of sweet and savory. Read on for practical tips, a reliable recipe, variations, and the little tricks I use to get the skin crackly every time.

Why Duck and Apples Work So Well Together

One reason the pairing is timeless is chemistry: duck is oily and richly flavored, and apples bring acidity, sweetness and moisture that lift that richness. The fruit helps cut through the fat while adding a clean, aromatic counterpoint that refreshes the palate between bites. Texture plays a role too—a caramelized apple wedge softens in the oven and makes a pleasant contrast to crispy skin and dense meat. Historically, fruit-with-fowl combinations are common across cuisines because fruit’s acidity and sugar both preserve and balance fat. In short, the apple acts as both foil and partner to the duck, so the two feel complete together rather than competing.

Beyond flavor, the combination looks appealing on a table: glossy skin, roasted apple slices with browned edges, and a few sprigs of herbs make a rustic centerpiece. The aroma that fills the kitchen as the bird roasts—brown sugar, cinder-like caramel notes from the fruit, and savory notes from thyme or rosemary—has a way of pulling people into the room. That sensory draw is part of what makes this an excellent holiday dish. It signals warmth, effort and comfort, without requiring precise plating skills. For hosts who want a statement without stress, duck with apples strikes a useful balance.

Choosing Your Duck: Size, Breed and Fresh Versus Frozen

Not all ducks are created equal for roasting. Pekin (or Long Island) ducks are common in supermarkets and roast beautifully; their size is manageable—usually between 4 and 6 pounds—and the meat has a mild, familiar flavor. Muscovy ducks are leaner and meatier; they can be excellent if you prefer firmer texture and less overt fattiness. If you can source a heritage bird from a farmer, expect deeper flavor but sometimes a longer roasting time. For most home cooks, a standard supermarket whole duck will give you consistent results and predictable cooking times.

Fresh versus frozen is largely about convenience and availability. Frozen ducks are often flash-frozen shortly after processing and can be just as good once fully thawed in the refrigerator. If you buy frozen, plan 24 to 48 hours for thawing depending on size. Always check the cavity for any accumulated ice and pat the cavity dry before seasoning. A dry skin is one of the prerequisites for crisp roasting. Whatever the origin, choose a bird with unbroken skin and no strong odor; a mild, slightly sweet smell is normal.

Selecting Apples and Aromatics

Apple choice matters. Firmer varieties that hold shape under heat—Braeburn, Honeycrisp, Pink Lady or Granny Smith—work well because they won’t dissolve into mush during the long roast. If you prefer sweeter notes, Gala and Fuji add honeyed flavors but may break down faster. For a holiday vibe, try mixing a tart apple like Granny Smith with a sweeter variety to get complexity in the cavity and pan juices. Aromatics should be simple: onion or shallot, a few sprigs of thyme or rosemary, and perhaps a citrus half for brightness. A small knob of butter or a drizzle of honey over the apples can promote caramelization without making the pan sticky.

The aromatics that go into the cavity matter almost as much as the fruit. Fresh herbs infuse subtle perfume; bay leaves add an earthy undertone; whole spices like star anise or a cinnamon stick whisper spice without becoming dominant. If you want a slightly boozy, deeper glaze, a splash of apple brandy or calvados poured over the apples before roasting will reduce into glossy, fragrant juices. Keep the additions modest so the natural flavor of the duck remains center stage. The goal is a harmonious chorus rather than a jam session.

Preparing the Duck: Trimming, Scoring and Seasoning

Start with a cold, dry bird. Remove giblets and neck, then pat the skin thoroughly with paper towels. For crisp skin, my consistent trick is to leave the duck uncovered in the refrigerator overnight—this dries the skin and helps the fat render cleanly. If you don’t have time, patting and letting it sit on a rack for a few hours works too. Before roasting, prick the skin all over with a small, sharp skewer or the tip of a knife, taking care not to pierce the meat. This creates channels for fat to escape and prevents the skin from ballooning during cooking.

Scoring the breast skin in a diamond pattern can encourage even fat rendering and gives an attractive finish once browned. Salt liberally—coarse salt under the skin and on top enhances texture and flavor. A light sprinkle of pepper and a dusting of smoked paprika or ground coriander provide subtle warmth without coating the meat in heavy spices. Avoid heavy marinades that lock moisture under the skin; the technique here relies on dry seasoning and open heat to make skin crisp. If you plan to brine, be gentle and short; duck is delicate and over-brining can distort texture.

Set-Up for Success: Equipment and Oven Considerations

You do not need exotic tools, but a few basics make a big difference. A shallow roasting pan with a rack allows fat to drip away and air to circulate around the bird. A meat thermometer is essential; duck breasts are thick and can move from perfect to dry quickly. A heavy baking sheet nearby will catch drips from the apples and prevent flare-ups if you happen to finish the skin under the broiler. If you have a convection oven, use it sparingly—convection aids crisping but can also dry the breast meat if you overdo it. Learn your oven’s hot spots and rotate the pan once or twice during roasting for even color.

Control of heat matters more than fancy gadgets. I roast most ducks at a moderate temperature to allow fat to render slowly and uniformly, then finish at higher heat to crisp. A two-step roast—moderate for most of the time, then hot for the last 20 to 30 minutes—gives a clarified, crackly skin and succulent interior. If you’re starting from chilled rather than room temperature, add ten to fifteen minutes to the cooking time. Keep a shallow pan with some water or stock beneath the rack if you prefer steam to reduce smoke in the oven, but know that too much moisture will blunt crispiness.

Ingredients: A Practical Shopping List

To make a classic roast with apples for six people you’ll need a manageable set of items. The list below includes basics plus a few enhancements I use for better color and flavor. Most items are pantry-friendly or easy to source at any market. If you prefer a lighter interpretation, swap the butter for a neutral oil and reduce the honey.

Ingredient Amount Notes
Whole duck 4 to 5 pounds Fresh or thawed
Apples 3 to 4 medium Firm variety, mixed if possible
Onion or shallot 1 medium Sliced or halved
Fresh thyme 6 to 8 sprigs Or rosemary if preferred
Salt and pepper To taste Coarse salt recommended
Honey or maple syrup 1 to 2 tablespoons Optional glaze
Apple cider or stock 1 cup For pan sauce or basting

Step-by-Step Method: From Prep to Carving

Begin by preparing the bird as described earlier: dry, lightly pricked, and generously salted. Preheat the oven to a moderate temperature—around 325°F (160°C). Stuff the cavity with apple wedges, onion, and herbs; do not overpack as air must circulate. Place the duck breast-side up on a rack set in a roasting pan. Arrange additional apple wedges and any onions around the bird so they roast in the rendered fat and take on color.

Roast the duck for roughly 18 to 20 minutes per pound at the initial moderate temperature, basting once or twice with rendered fat if you like. For a 5-pound bird expect approximately 90 to 100 minutes before the final high-heat finish. Increase the oven to 425°F (220°C) for the last 20 to 30 minutes to brown and crisp the skin. Use an instant-read thermometer to check doneness: the thickest part of the thigh should read 165°F (74°C) and breast meat 135–140°F (57–60°C) for medium; it will rise slightly while resting.

Pan Sauce and Glaze

While the bird rests, pour the pan juices through a fine sieve into a small saucepan. Spoon off most of the fat and leave a tablespoon or two to sauté any browned bits. Deglaze the pan with apple cider, white wine or a splash of madeira, scraping up fond for flavor. Reduce to concentrate; add a knob of butter to finish for gloss and a lick of honey or a splash of apple brandy for sweetness if desired. Adjust seasoning with salt and a squeeze of lemon to lift the sauce; serve warm alongside carved slices for an elegant, fragrant finishing touch.

For a sticky, glossy finish on the skin, brush the bird lightly with a honey-maple mixture during the last ten minutes of roasting and return it to the oven. Be careful: sugars burn quickly, so watch closely. If you prefer a savory glaze, reduce the sugars and emphasize cider vinegar and mustard to build a balanced, tangy coating. Either way, the glaze should enhance rather than mask duck’s natural flavor. The pan sauce provides moisture to the plate and carries the apple note forward.

Timing and Temperature Guide

Cooking times are not exact science; they depend on oven calibration and bird size. Below is a practical guide to help you plan. Remember that the two-step method—slow then hot—gives both rendered fat and crisp skin without overcooking the breast. Always rely on internal temperature rather than clock time alone for safety and best texture.

  • 3 to 4 lb duck: Roast 18–20 min/lb at 325°F, finish 20–25 min at 425°F.
  • 4 to 5 lb duck: Roast 18–20 min/lb at 325°F, finish 25–30 min at 425°F.
  • 5 to 6 lb duck: Roast 18–20 min/lb at 325°F, finish 30–35 min at 425°F.

Internal target temperatures: thigh 165°F (74°C), breast 135–140°F (57–60°C). After removing the duck from the oven, tent loosely with foil and rest for 15 to 20 minutes. Resting allows juices to redistribute and ensures cleaner slices when you carve. If you cut too soon, the juices run out and the meat will be drier.

Carving and Presentation

Carving a roasted duck looks dramatic but is straightforward with a sharp knife. Begin by removing the legs and thighs with a clean slice at the joint. Separate drumsticks from thighs if you plan individual portions. Cut along both sides of the breastbone to release the breast meat in one or two large pieces, then slice thinly across the grain for tenderness. Arrange slices on a warm platter alternating with roasted apple wedges and scatter fresh herbs for color. Spoon pan sauce just before serving so the skin keeps its crunch.

Think about texture on the plate: a crisp green vegetable or a velvety puree complements the duck’s richness. I often place a smear of parsnip purée beneath the breast slices, then heap roasted apples and a few braised red cabbage shreds to one side. The visual contrast of caramelized fruit next to glossy meat makes the dish feel both rustic and refined. For a holiday spread, add a few pomegranate seeds or toasted walnuts for color and crunch.

Sauces and Sides: Pairings that Shine

A light pan sauce based on apple cider and stock is the obvious partner, but there are several directions you can take. A citrus-based sauce with orange and a touch of Grand Marnier brings brightness and echoes classic duck à l’orange. For deeper flavors, a red wine reduction with a hint of juniper or star anise complements the meat’s density. If you prefer something rustic, mash roasted apples with butter and a pinch of nutmeg to serve as a chunky, sweet accompaniment. The key is to choose sides that contrast rather than compete with the duck’s weight.

  • Starches: buttery mashed potatoes, parsnip purée, or wild rice pilaf.
  • Vegetables: honey-roasted carrots, braised red cabbage, or sautéed Brussels sprouts.
  • Greens: simple arugula salad with mustard vinaigrette, to cut the fat.

I favor simple vegetable preparations like roasted root vegetables tossed with thyme and a drizzle of rendered duck fat for extra flavor. A crisp salad with a tart vinaigrette serves as a palate cleanser between rich bites. For a genuine holiday feeling, include a warm grain like barley risotto or apple and chestnut stuffing on the side. These choices keep the meal balanced and let the apple note run through multiple elements.

Wine and Beverage Pairings

Roast Duck with Apples. Wine and Beverage Pairings

With a rich roast and fruity notes, medium-bodied reds and aromatic whites both work well. Pinot Noir is a classic red pairing: its bright acidity and cherry notes cut through the fat without overwhelming the duck. For white wine lovers, a dry Riesling or a slightly off-dry Gewurztraminer complements the apple and spice notes. Hard cider—especially a dry or semi-dry style—echoes the apple theme and is an often overlooked, delightful match. If you prefer beer, an amber ale or a saison offers both maltiness and carbonation to freshen the palate.

When in doubt, think about acidity and aroma: acidic drinks will balance fat, and aromatic ones will harmonize with the fruit and herbs. For holiday gatherings, consider offering both a red and a white so guests can choose. Serve the wine slightly cooler than room temperature for red and chilled for white. The right drink elevates the dish and can make each bite feel more lively.

Variations and International Twists

The basic concept adapts easily across cuisines. Add Chinese five-spice and use hoisin and soy glaze for an East Asian spin, pairing with steamed bok choy and jasmine rice. For a French approach, incorporate prunes and Armagnac in the cavity and serve with a red wine reduction. If you want a Middle Eastern flavor, add pomegranate molasses and a sprinkle of sumac, and serve alongside jeweled rice. Each variation keeps the apple or fruit element as the balancing partner while shifting spices and sauces to create a distinct identity.

Vegetarian adaptations can borrow the technique: roast a whole cauliflower or a tray of thick roasted apples and root vegetables, glaze with honey and mustard, and use a rich mushroom or walnut-based sauce to mimic the umami of duck. The idea is to mimic contrast—fatty richness versus bright fruit—rather than replicate the protein. These variations make the dish accessible for different dietary preferences without losing the core theme of savory roast and caramelized fruit.

Make-Ahead Strategies and Leftovers

Roast duck is forgiving for make-ahead planning. You can prep the bird the day before: clean, salt, and refrigerate uncovered so the skin dries for a crisper finish. You can also roast the duck fully a few hours ahead, then reheat gently in a moderate oven to restore some crispness before serving. Keep the pan juices separately and reheat them with a splash of stock to refresh the sauce. If you plan to serve at a specific time, time the carving so it happens after the short rest period and right before guests sit down; that keeps juices bright and the presentation handsome.

Leftover duck is an underrated treasure. Shred or slice and use in salads, sandwiches with crisp apple slices and horseradish mayo, or folded into fried rice with scallions. The rendered duck fat can be strained and refrigerated for future use in roasting potatoes—nothing beats roast potatoes cooked in duck fat. Store meat in an airtight container in the refrigerator for three to four days, or freeze in portions for up to two months. Reheat gently to avoid drying the breast meat.

Troubleshooting Common Problems

If your duck turns out greasy or the skin never crisps, the usual culprit is insufficient fat rendering. Try pricking the skin more thoroughly and use a lower initial temperature to render fat before blasting with high heat. If the breast is overcooked while the legs reach temperature, allow the bird to rest on its side for a few minutes during roasting or tent the breast with foil after the thighs reach temp, then finish the legs. Soggy apples mean they were cut too thin or relied too much on steam; choose firmer varieties and leave wedges larger so they caramelize rather than vanish.

  • Soggy skin: increase drying time in refrigerator, prick skin, render fat longer at lower heat.
  • Dry breast: monitor internal temperature closely; remove at lower breast temp and let rest.
  • Burned glaze: apply sweet glazes only during the last 10 minutes and watch carefully.

Smoke in the oven can be managed by catching excess fat in a lower pan or adding a shallow pool of water beneath the rack to prevent fat from contacting the pan too intensely. If you notice a metallic taste, check whether the bird was packaged with any solutions or additives, and buy a different source next time. Many issues are fixable with small adjustments rather than scrapping the whole meal; the important thing is to observe and adapt while the bird cooks.

Personal Notes and a Story from My Table

I remember one holiday when I roasted a duck for a mixed crowd of friends and family who expected turkey. The kitchen filled with apple and herb scent; people kept drifting in, drawn by aroma rather than obligation. One guest, a self-declared skeptic of anything gamey, asked for a small slice and then returned later for a second portion, surprised at how approachable the flavor was. That evening the fruit softened and tasted almost like caramelised jam, and the pan sauce, brightened with a spoonful of mustard and a splash of cider, became a quiet star. Small victories like that—changing minds with a well-cooked plate—are what keep me making this holiday dish year after year.

Another practical lesson: the first time I tried glazing with honey early in the roast, the sugars scorched and left a bitter edge; now I wait until the end. I also learned the value of duck fat for potatoes, a secret shortcut to convincing guests this is a holiday worthy of seconds. These are the sorts of incremental discoveries that turn an acceptable dinner into a memorable one. Cooking this bird has taught me to respect patience, temperature and the odd bit of bravado that comes with finishing a whole roast.

Final Notes Before You Roast

Taking on a whole roast with fruit might feel ambitious, but the steps are straightforward and the outcome forgiving. Prioritize preparation: a dry bird, proper seasoning, firm apple choices and a thermometer will get you most of the way. Think through timing so sides and sauces come together without last-minute stress. Keep an eye on the glaze at the end and rest the bird properly before carving to preserve tenderness. Above all, enjoy the process—the aromatic kitchen, the gathering of people and the small satisfaction of serving a dish that looks and tastes like care.

Roast Duck with Apples is a recipe that rewards personal tweaks and seasonal adjustments. Let your palate guide additions like spice or liquor, and make sides that reflect your table’s personality. When you carve the first slice and watch the skin break and juices bead, you’ll understand why this pairing is such a beloved holiday dish. May your oven be steady, your apples crisp and your guests hungry for one more helping.

Sweet Potato Mash Secrets: How to Make a Silky, Flavorful Side That Steals the Show

There is a particular comfort in a bowl of creamy mashed sweet potato that goes beyond mere taste. It can be a humble weeknight companion or the star the holiday table leans on when everything else is competing for attention. In this long read I will walk you through the full story of sweet potato mash — from picking the right tubers to finishing touches that lift the dish from adequate to unforgettable. Along the way you will find practical tips, flavor combinations, troubleshooting advice, and several recipes that cover classic, vegan, and spiced variations. Whether you cook for family dinners or want a reliable side for guests, these techniques and ideas will help you make consistently great results.

Origins and a Little Culinary Context

Sweet potatoes have fed people across continents for thousands of years, showing up in diets from West Africa to the Americas and Asia. Their natural sweetness and soft texture when cooked made them easy to incorporate into both savory and sweet preparations, so mashing them quickly became a universal technique. The version we think of today — a smooth, richly flavored mash often enriched with dairy, oils, or spices — gained traction as butter and cream became widely used in Western cuisines. Still, many cultures keep simpler approaches, relying on minimal seasoning and the tuber’s flavor as the centerpiece. Understanding this background helps you appreciate the mash not just as a side dish but as a versatile canvas.

Nutritional Bright Side: Why Sweet Potato Mash Can Be a Healthy Choice

Sweet potatoes are packed with vitamins and fiber, making a mashed preparation more than comfort food. A single medium sweet potato provides a generous portion of vitamin A in the form of beta-carotene, plus vitamin C and potassium. When prepared wisely — with moderate amounts of fat and salt — a mash becomes a healthy, nutrient-dense side that complements lean proteins and salads. The glycemic impact of mashed sweet potato depends on cooking method and additions; roasting can preserve texture and flavor while limiting rapid sugar release. If you want a lower-calorie version, swapping butter for olive oil or using a milk alternative keeps the dish satisfying but lighter.

Choosing the Right Sweet Potato: Varieties and What They Bring to the Mash

The term sweet potato covers several varieties that differ in texture, sweetness, and moisture. Some are bright orange and very moist, some pale and dry, and a few have purple flesh with a firmer starch profile. For a velvety mash, the classic orange-fleshed varieties — often labeled Beauregard, Garnet, or Jewel — are ideal because they cook soft and yield a naturally sweet, creamy result. If you prefer a denser, less sweet mash for savory preparations, choose a pale or Japanese sweet potato, which holds structure better and takes on seasonings in a restrained way. Knowing what each type does to texture and flavor helps you plan the dish before you even light the stove.

Simple Table: Common Varieties and Their Characteristics

Variety Typical Flesh Color Texture When Cooked Best Use
Beauregard / Garnet Deep orange Moist, soft Classic creamy mash, sweet preparations
Jewel Orange Silky, slightly firmer Mash with herbs and savory add-ins
Japanese (Satsumaimo) Pale yellow Dry, dense Savory mash, roasting, frying
Stokes Purple Purple Firm, colorful Visual dishes, roasted mash

Selecting and Storing: Buying Smart for Best Results

Look for sweet potatoes with smooth, unblemished skin and a firm feel; soft spots are a sign of age or spoilage. Smaller, medium-sized tubers tend to cook more evenly than very large specimens whose centers sometimes take longer to soften. Avoid those with greenish patches or multiple sprouts if you want maximum freshness. At home, store them in a cool, dry, dark place rather than the refrigerator; cold temperatures can alter texture and flavor. Proper storage will keep them usable for several weeks and preserve the starches you want for a good mash.

Preparation Basics: Peeling, Cutting, and Pre-treatments

Peeling sweet potatoes is optional and depends on your tolerance for texture and whether you want the plushest possible mash. Thin, clean skins can remain on for a rustic mash that keeps extra fiber, but if you aim for silkiness, peel. Cut the tubers into uniform chunks so they cook evenly; about 1 to 1.5 inch pieces work well for boiling. If you prefer to roast for a deeper flavor, leave pieces larger and roast until very tender. A quick tip: if you soak cut pieces briefly in cold water it removes excess surface starch and can make the mash slightly lighter in texture after cooking.

Cooking Techniques: Boiling, Roasting, Steaming and Pressure Cooking

There are four popular ways to get a sweet potato soft enough for mashing, and each imparts a different flavor profile. Boiling is fast and reliable; it yields a clean, straightforward sweetness but can dilute some flavor if overdone. Roasting concentrates sugars and creates caramelized notes that deepen the mash flavor; it’s my go-to when I want richness without excessive butter. Steaming preserves nutrients and gives a focused sweet profile with minimal water contact, which helps if you are aiming for a thicker texture. Pressure cooking is the speed demon — fast and thorough — but requires care to avoid an overly wet finish.

Boiling: When and How to Do It Right

To boil properly, place even chunks in a pot and cover with cold water, then bring to a simmer; starting in cold water ensures even cooking. Add a pinch of salt to the cooking water to season from within, and avoid a violent boil that breaks the pieces apart. Cook until a knife slides through with little resistance, usually 12 to 20 minutes depending on size and variety. Drain thoroughly — a wet mash is an unhappy mash — and return to the warm pot for a minute to evaporate residual moisture before mashing. This method is straightforward and perfect when you want a neutral, dependable base for many flavor directions.

Roasting: Flavor First

Roasting caramelizes the surface and deepens the sweetness, which means you can use less added sugar or fat later. Cut the tubers into larger wedges, toss with a little oil and salt, and roast at 400 to 425 F until tender and browned in spots; that takes about 35 to 50 minutes depending on size. For an even richer outcome, roast the potatoes whole; a slower bake intensifies sugars and produces a very flavorful interior. Scoop the flesh from the skins for mashing, which minimizes excess water and concentrates taste. Roasted mash pairs beautifully with mustardy or smoked accents that contrast the sweetness.

Steaming and Pressure Cooking: Gentle and Fast Options

Steaming is gentle on nutrients and texture, making it a good choice for a light, healthy mash. Place evenly cut potatoes in a steamer basket over boiling water and steam until tender, roughly 15 to 25 minutes. Pressure cookers cut that time dramatically; a manual release after 8 to 12 minutes usually does the trick. Both methods require drainage and a brief rest to let excess steam escape before mashing. They are particularly useful when you want to minimize water absorption and retain more natural flavor.

Tools and Techniques for the Perfect Texture

Which tool you use to mash determines the final mouthfeel more than most people realize. A sturdy potato masher gives a rustic, slightly chunky texture and is forgiving when you want some body. A ricer or food mill produces the silkiest results because it forces cooked flesh through fine holes, eliminating lumps without overworking starches. Using a hand mixer can be tempting for speed, but beaters whip air into the mash and can turn it gluey if you overdo it. The golden rule: mash gently and taste as you go so you add liquid or fat only to reach the desired consistency.

Balancing Ingredients: Fats, Liquids, and Seasonings

The choice of fat and liquid shapes the character of your mash. Butter brings richness and a familiar comfort; olive oil adds a fruity, slightly peppery edge and is a good plant-based swap for a healthier finish. Dairy like cream or milk creates lusher texture, while coconut milk introduces a tropical note that works surprisingly well with certain spices. Add liquids slowly — a quarter cup at a time — to avoid a runny mash. For seasoning, salt is essential to coax out sweet potato flavor, while acids like lemon juice or apple cider vinegar can brighten and balance the sweetness.

Flavor Pairings That Work Wonders

Sweet potato mash is an adaptable partner that plays well with herbs, spices, acids, and proteins. Classic companions include sage, thyme, and rosemary for savory versions, and cinnamon or nutmeg for sweeter profiles. Fresh herbs added at the end preserve aroma, while toasted spices release deeper flavors when warmed in oil before mixing in. For contrast, ingredients like mustard, horseradish, or preserved lemons cut through sweetness and create interest. Think beyond the obvious: toasted sesame oil, miso, or anchovy paste can add umami and complexity without making the dish overtly fishy or foreign.

Recipe: Classic Creamy Sweet Potato Mash

This is the version many people picture when they think about mashed sweet potatoes: smooth, buttery, and comfortingly familiar. Start by boiling evenly cut orange-fleshed tubers until tender, then drain and return to the pan to steam dry for a minute. Mash using a ricer or masher and add softened butter and warm milk or cream a little at a time until you reach velvet-like consistency. Season well with salt and a whisper of black pepper, taste, and add a squeeze of lemon if it feels too sweet. Serve warm with a small pat of butter on top for presentation and an extra glossy finish.

Recipe: Maple and Cinnamon Mash for a Slightly Sweet Twist

For a mash that leans toward dessert but still functions as a side, maple syrup and cinnamon are a harmonious pair. Roast sweet potatoes until caramelized, scoop out the flesh, and mash with a couple of tablespoons of pure maple syrup, a knob of butter or coconut oil, and a pinch of ground cinnamon. Salt is crucial here; a little salt balances the sugar and makes flavors pop. This variation is perfect for autumn meals or as a Thanksgiving side when you want a familiar sweetness without cloying sugary toppings. Add chopped toasted pecans for crunch and texture contrast.

Recipe: Savory Herb and Garlic Mash with Olive Oil

Sweet Potato Mash. Recipe: Savory Herb and Garlic Mash with Olive Oil

When you want the mash to support savory mains, reduce sweetness with herbs and garlic and use extra virgin olive oil as the fat. Steam or boil the tubers until tender, then mash with a generous drizzle of olive oil, roasted garlic, and a handful of chopped parsley or chives. Finish with lemon zest and a small splash of white wine vinegar to brighten the dish. This version is great alongside roasted fish, grilled chicken, or vegetable mains that need a flavorful but not sugary bed. It also reheats well if you make it a day ahead.

Vegan and Lower-Fat Options That Don’t Compromise Taste

Vegan mashes can be just as indulgent as dairy versions when you choose the right ingredients. Full-fat coconut milk creates a lush texture and plays nicely with warm spices like ginger or turmeric. For something lighter, use unsweetened almond milk with a drizzle of high-quality olive oil and a small amount of tahini for creaminess. Nutritional yeast adds a buttery, savory note without adding dairy, and it pairs well with chives or smoked paprika. The key is layering flavors so the absence of butter or cream is barely noticed.

Spiced Variations from Around the World

Different cuisines offer interesting ideas to reinvent a basic mash. In Latin American kitchens, a touch of cumin and lime can make the mash feel vibrant and tropical. West African influence might add ginger, chili, and peanut butter for a rich, nutty result. In Japan, a little miso blended with sesame oil forms a deeply savory profile that contrasts the tuber’s sweetness in a pleasant way. Experimenting with a few spoonfuls of regional condiments transforms the mash into a travelogue without leaving your kitchen.

Serving and Pairing Ideas

Sweet potato mash is incredibly friendly to proteins and vegetables; roast turkey, pork loin, grilled tofu, or braised greens all find a natural companion in its warmth. Consider texture balancing — pair smooth mash with crunchy or acidic elements like a cabbage slaw, pickled onions, or crisp roasted Brussels sprouts. For plated meals, pipe the mash for a refined look or spread it on the plate as a rustic bed for saucy mains. If you make a savory mash, top with toasted seeds or fried shallots for an attractive finish and extra crunch.

Troubleshooting Common Problems

If your mash turns out gluey, it is usually overworked or mixed with a high-speed mixer for too long; switch to a masher and incorporate liquids gently. A watery mash often follows boiling pieces that sat in the pot or were not drained well; drain and return to the pot over low heat to let steam escape. Lumps? A ricer or food mill is the rescue tool — push the cooked flesh through while it is still warm. And if the dish is too sweet, a small splash of acid, such as lemon juice or cider vinegar, will rebalance the flavor without destroying the profile.

Make-Ahead, Freezing, and Reheating

Sweet potato mash keeps well in the refrigerator for three to four days and freezes with care for up to three months. When storing, cool it quickly and seal in airtight containers or freezer bags, removing as much air as possible. Reheat gently on the stovetop with a splash of liquid and stir often, or use a low oven if you prefer baked reheating with a topping. Avoid microwave reheating on high for long stretches, which can dry the mash out; instead, use lower power and stir regularly to maintain texture. Planning ahead with these methods makes the mash a practical dish for busy weeks and entertaining.

Presentation Ideas That Make a Difference

Simple plating techniques can transform the mash from everyday to elegant. Spread the mash into a shallow pool and spoon a glossy herb oil or browned butter into the center so it radiates outward. For dinner parties, pipe rosettes using a large star tip and finish with toasted seeds or microgreens. If you want a homier look, spoon into a rustic dish and sprinkle chopped toasted nuts and some flaky salt on top. Visual contrasts — color, texture, and height — matter as much as flavor in how people remember a dish.

Personal Notes: How I Learned to Respect the Sweet Potato

Early in my cooking life I dismissed sweet potato mash as predictable until a weeknight experiment changed my mind. I roasted tubers whole to coax out sugars and mixed them with a splash of miso and a drizzle of sesame oil — the result was unexpectedly savory and deeply satisfying. Since then I approach the mash with curiosity, treating it like a blank canvas rather than a fixed recipe. That mindset lets me play with international flavors while always returning to a few technical rules that guarantee success.

Quick Reference: Essential Tips and Equipment

  • Cut tubers uniformly for even cooking.
  • Choose ricer or food mill for silky texture, masher for rustic appeal.
  • Roasting intensifies flavor; boiling is neutral and reliable.
  • Add liquids gradually to control consistency.
  • Balance sweetness with salt and a touch of acid if needed.

Final Thoughts and an Invitation to Experiment

Sweet potato mash is deceptively simple yet richly rewarding when treated with attention to detail. The right variety, cooking method, and finishing choices determine whether the dish is merely serviceable or truly memorable. Use the techniques and recipes here as a foundation and make them your own — try a bold spice, swap fats, or fold in roasted vegetables for texture. The real joy comes from discovering combinations you love and returning to them again and again in different seasons. So gather a few good tubers, choose your approach, and let the mash become one of those reliable pleasures you never tire of making.

Creamy Comfort: How to Make the Perfect Cauliflower Cheese Bake

The moment a kitchen fills with a warm, nutty aroma of roasted cauliflower mingled with bubbling, golden cheese, something simple becomes unforgettable. This cauliflower cheese bake is one of those dishes that feels like a hug on a plate: familiar, forgiving, and endlessly adaptable. In the paragraphs that follow I’ll walk you through choosing the right head of cauliflower, building a luscious cheese sauce, assembling and baking so the top crisps while the vegetables stay tender, and offering variations that suit seasons, diets, and moods. Expect practical tips, a clear ingredient table, troubleshooting advice and a few personal notes from my own kitchen experiments. Whether you want a weeknight side or a centerpiece for a relaxed dinner, this guide will help you get it right every time.

Why a Cheesy Cauliflower Casserole Deserves a Place on Your Table

Cauliflower has quietly become a superstar in home kitchens precisely because it’s so cooperative: it roasts, steams, purees and soaks up flavors with equal cheer. When you combine it with a rich cheese sauce, the vegetable’s mildness turns into a creamy canvas that highlights the character of whatever cheese you choose. This particular bake balances texture and flavor — tender florets enveloped in velvety sauce, finished with a crisp topping for contrast. It works as a vegetable side that feels indulgent, a vegetarian main when paired with grains or pulses, and even as a comfort food for chilly evenings. The technique is straightforward, but small decisions — salt, timing, the way you blanche or roast the cauliflower — determine whether the result is memorable or merely serviceable.

Ingredients: What to Buy and Why

Good results start with good ingredients, and for this dish the list is short but worth attending to. A fresh, firm head of cauliflower gives the best texture: look for tight florets and a bright, creamy stem. In the dairy aisle, pick cheeses that melt smoothly; a combination of a sharp cheese for flavor and a milder, creamier cheese for body works well. Milk and butter are the backbone of the sauce, though cream can be used for extra silkiness. Beyond that, aromatics like a shallot or garlic, a little mustard for lift, and a sprinkle of nutmeg or black pepper can make the difference between bland and brilliant.

Below is a simple table with quantities for a standard family-sized bake that serves four to six people. Feel free to scale up or down; the method remains the same. If you prefer metric or want precise calorie counts, adapt the quantities proportionally.

Ingredient Quantity (approx.) Notes
Cauliflower 1 large head (about 900–1,200 g) Cut into medium florets
Butter 3–4 tbsp For the roux and flavor
All-purpose flour 3 tbsp Thickens the béchamel
Milk 2–2½ cups (500–600 ml) Whole milk preferred; swap for plant milk in vegan versions
Cheese (total) 200–300 g Mix of sharp cheddar + melting cheese like gruyère or mozzarella
Mustard 1 tsp Dijon adds depth
Breadcrumbs (optional) ½–1 cup For crunchy topping; mix with butter
Salt & pepper To taste Season at each stage

Choosing and Preparing the Cauliflower

How you prepare the vegetable influences texture more than any other single factor. I prefer to blanch cauliflower briefly and then finish in the oven because it guarantees tender interiors without soggy exteriors. To blanch, break the head into evenly sized florets and simmer them in salted water for 3–5 minutes until just fork-tender, then plunge them into ice water to stop cooking. Alternatively, if you enjoy a bit of caramelized flavor, roast the florets with a little oil and salt at 200°C (400°F) for 15–20 minutes until golden at the edges before assembling. Both approaches work; blanching gives a more uniform softness, while roasting adds nuttiness and extra texture to the final bake.

When florets are uneven, some pieces will overcook while others stay firm, so take a moment to cut them into similar sizes. Reserve any small stems or core pieces; they can be simmered with the florets or chopped and added to salads or stocks. Seasoning early matters: a light sprinkle of salt during blanching or roasting ensures the vegetable itself contributes to the overall savory profile rather than relying solely on the sauce. Once prepared, spread the florets on a baking dish with a splash of the sauce to prevent drying while you finish the cheese mixture.

Building the Cheese Sauce: Technique and Choices

The sauce is the heart of this dish, and its success lies in a classic béchamel turned into cheese sauce. Start by melting butter over medium heat, then stir in flour to form a paste and cook it briefly so the raw flour taste disappears. Slowly whisk in cold milk to avoid lumps, and keep stirring until the mixture thickens into a smooth, glossy sauce. From there, remove it from the heat and add grated cheese in batches, stirring so it melts evenly and the sauce stays silky. Season with salt, freshly ground pepper, a touch of mustard and a pinch of nutmeg if you like; these small additions elevate the flavor without overpowering the cauliflower.

Cheese selection determines the final personality of the bake. Sharp cheddar gives assertive tang and color, gruyère brings a nutty sophistication, and mozzarella contributes stringy, gooey stretch. For a more rustic, smoky flavor, a bit of smoked cheddar or mature red Leicester works well. If lower-fat is a concern, use less cheese and compensate with a spoonful of crème fraîche or Greek yogurt stirred in off-heat for richness. For a vegan alternative, make a béchamel with plant butter and milk and use a cashew-based or commercial vegan cheese designed to melt.

Assembly: Layering for Best Texture

Assembly is where control and intention matter: how you arrange florets, how much sauce you pour, and whether you add a topping will shape the bake’s mouthfeel. Spread the prepared cauliflower florets evenly in an ovenproof dish so heat distributes uniformly. Pour the cheese sauce over the florets, using a spatula to ensure every crevice is blessed with creaminess; avoid drowning them, though, because excess liquid can lead to a gloopy center. If you like pockets of extra-melty cheese, tuck a few handfuls of grated cheese between florets rather than mixing all of it into the sauce.

Toppings create contrast and compel you to come back for another spoonful. A simple mix of buttered breadcrumbs gives a satisfying crunch, while a scattering of chopped nuts like toasted hazelnuts or almonds adds a fragrant lift. For a golden crust, sprinkle a little grated hard cheese like Parmesan across the top. Feel free to scatter fresh herbs after baking rather than before, preserving their bright color and flavor. Once the dish is assembled, it’s ready for the oven; the timing depends on whether you pre-roasted the cauliflower and how bubbling you want the top.

How Long to Bake and What to Watch For

Baking time varies with oven temperature and the dish’s depth, but a reliable starting point is 20–30 minutes at 180–190°C (350–375°F) until the sauce is bubbling and the top turns golden. If you started with raw florets, extend the time by ten minutes and cover the dish with foil for the first half to ensure even cooking. If you prefer a deeply browned crust, finish under the broiler for 1–3 minutes, watching carefully because cheese can go from perfect to burnt quickly. The visual cues matter: bubbling at the edges, a glossy surface, and a golden top signal readiness, but testing with a knife to feel fork-tender florets is the final reassurance.

Resting the bake for five to ten minutes after it comes out of the oven helps the sauce settle and makes serving cleaner. During that brief interval you can prepare garnishes, set plates, or toast a loaf of crusty bread to mop up any excess. If you plan to make the dish ahead, assemble it, cover, and refrigerate; add a few extra minutes to the baking time when reheating to bring the center up to temperature. Freezing is possible but changes texture slightly; freeze unbaked or fully cooled and bake from frozen at a lower temperature until cooked through.

Variations: Make It Your Own

This recipe is a starting point, not a rulebook. Swap cheeses to suit taste: blue cheese for a piquant twist, smoked mozzarella for depth, or a mature cheddar for classic comfort. Add vegetables like leeks or spinach for color and flavor complexity; just sauté any high-moisture additions first to avoid releasing water into the sauce. If you want protein, cook and add shredded chicken, flaked salmon, or browned pancetta — each shifts the dish toward a main course. Herbs and aromatics transform it: thyme and bay lend country restraint, while a touch of curry powder or smoked paprika can bring unexpected warmth.

For a lighter approach, use a roux with less butter and substitute half the milk with stock; then thicken and finish with a modest amount of cheese. To make it dairy-free, try a cashew cream base blended until utterly smooth, seasoned with nutritional yeast to emulate cheesy umami. For those who enjoy contrasting textures, create a layered bake with mashed potato or cauliflower mash beneath the florets and sauce, turning it into a gratin-meets-casserole hybrid. Each tweak invites a new set of textures and flavors without complicating the basic technique.

Common Problems and How to Fix Them

Cauliflower Cheese Bake. Common Problems and How to Fix Them

Even experienced cooks hit snags, and knowing quick fixes will save dinner. If the sauce is lumpy, remove the pan from heat and whisk vigorously, or strain through a fine sieve; next time add milk slowly and whisk constantly when combining with the roux. Should the sauce be too thin, simmer gently to reduce it or whisk in a slurry of flour and water, cooking a minute to eliminate raw taste. If the top browns too quickly while the center remains cool, tent with foil and lower the oven temperature; finishing under the broiler can occur once the internal temperature is adequate.

When flavor feels flat, salt in stages — a pinch during blanching, adjust after the sauce is made, and taste again after baking. Texture problems like sogginess often stem from under-roasted or under-drained cauliflower; pat florets dry after blanching and avoid overcrowding in the dish. If the cheese separates and looks oily, it may have overheated or contained too much moisture; use higher-quality cheeses known for melting behavior and add them off the heat. These adjustments will rescue a near-miss and teach reliable habits for future bakes.

Serving Ideas and Pairings

This cheesy cauliflower dish pairs with simple foods that let its richness shine. A crisp green salad with acid — think lemon or vinegar — provides a counterpoint that keeps the meal balanced. For heartier dinners, roast chicken, grilled sausages or flaky fish complement the creamy texture without competing for attention. Wine and beer choices depend on the cheese profile: a bright, acidic white like Sauvignon Blanc cuts through cream, while a light red with gentle tannins like Pinot Noir works with earthier cheeses. For non-alcoholic options, sparkling water with lemon or a tart iced tea will refresh the palate.

Presentation matters less than the experience, yet small touches elevate the plate: scatter chopped chives or parsley for color, drizzle a little olive oil for sheen, or sprinkle lemon zest to brighten. Serve family-style from the baking dish so everyone digs in together, encouraging conversation and second helpings. Leftovers reheat well in a moderate oven or under the broiler for a few minutes to revive the crust; on busy nights I sometimes reheat a portion in a hot skillet for a crisp bottom layer that feels newly created.

Nutritional Notes and Healthier Alternatives

Cauliflower itself is low in calories and high in vitamins, fiber, and antioxidants, making it a good base for a richer dish. Cheese and butter increase calories and saturated fat, so portion control and ingredient choices matter if you’re watching intake. Lighter swaps include using part-skim milk, reducing the total cheese by 25–30 percent, or finishing with a sprinkle of parmesan instead of a full cheesy top. Incorporating other vegetables or a layer of legumes stretches the dish, boosting fiber and protein while lowering the per-serving fat content.

For those tracking macros, a typical serving might contain moderate protein from the cheese and modest carbohydrates from any breadcrumb topping; adjust portion sizes according to dietary goals. If sodium is a concern, use low-sodium milk, avoid overly salty cheeses, and season conservatively, relying on aromatics like mustard and herbs for flavor. Dietary needs like gluten-free or vegan are easy to address by selecting appropriate thickeners, plant-based milks and cheeses, and gluten-free breadcrumbs or nut-based toppings.

Make-Ahead, Freezing and Batch Cooking

This casserole lends itself well to planning ahead. Assemble the dish up to a day in advance, cover tightly and refrigerate; bake straight from chilled, adding 10–15 minutes to the usual bake time. For true batch cooking, portion into individual ramekins before freezing; they thaw quickly and reheat evenly for lunch or single-serving dinners. If you prefer to freeze whole, bake first, cool completely, wrap well and freeze; reheat covered at a moderate temperature until piping hot, then uncover to crisp the top.

When freezing uncooked, pack tightly to minimize freezer burn and note that the texture of thawed cauliflower may be slightly softer. To maintain the best quality, consume frozen casseroles within two to three months. For everyday convenience, I often prepare the sauce and roast cauliflower in separate batches, combining and baking when needed; this approach keeps the sauce texture intact and gives the assembled dish just enough oven time to develop a fresh top.

Tips from My Kitchen: Little Things That Make a Big Difference

Over years of experimenting I’ve learned a few habits that consistently improve results. Always grate cheese yourself when possible; pre-shredded blends include anti-caking agents that can affect melt and texture. I toast breadcrumbs with a little butter until golden rather than sprinkling them raw: the color and nuttiness make the topping sing. When making a béchamel, patience is a virtue; whisking steadily and simmering briefly guarantees a glossy sauce that clings to the cauliflower rather than pooling in the dish.

One practical trick I use is to reserve a small amount of sharp cheese to scatter on top in the last five minutes of baking so it crisps attractively. Another is to include a teaspoon of mustard in the sauce — it sounds odd but it brightens the cheesy notes without imparting mustard flavor. On a cold evening I sometimes fold in cooked pearl barley for a nutty chew that turns the bake into a stand-alone meal; my family loved this variation so much it became a regular rotation. These small choices differentiate a decent bake from a memorable one.

Recipe: A Reliable Method to Follow

Below is a concise method that ties together the techniques described earlier. It is written for clarity so you can follow it the first time and then modify based on taste and experience. Aim to read through once before you start so everything flows and you’re not searching for tools mid-recipe.

1. Preheat the oven to 180°C (350°F). Break a large cauliflower into medium florets. Blanch in salted boiling water for 3–4 minutes until just tender, then plunge into ice water and drain thoroughly. 2. Make the béchamel by melting butter, stirring in flour, then gradually whisking in milk until thickened; remove from heat and stir in 180–220 g grated cheese, mustard, salt and pepper. 3. Place florets in a buttered baking dish, pour over the sauce, scatter remaining cheese on top and sprinkle with buttered breadcrumbs if using. 4. Bake for 20–30 minutes until bubbling and golden; rest for five minutes before serving. These steps produce a reliable, crowd-pleasing gratin with a creamy interior and an inviting top.

Final Serving Notes and Inspiration

This cauliflower and cheese casserole is at its best when shared — a side that complements roast dinners, a vegetarian main with a crisp salad, or a comforting plate for someone under the weather. The joy comes not only from the flavors but from the flexibility: it adapts to what’s in your fridge and to the palettes around your table. Keep experimenting with cheeses and toppings, and don’t be afraid to make it your own; the core technique is forgiving and will reward thoughtful tweaks. Next time you crave something warm and satisfying, you’ll have a dependable, delicious option ready to go.

Chickpea Stew with Spinach: A Cozy, Flavorful Bowl for Every Season

There are dishes that warm you up and dishes that make you feel seen; this Chickpea Stew with Spinach does both at once. It’s the sort of meal you can pull together on a weeknight, yet it has enough character to serve to friends without apology. Nutty chickpeas, bright spinach, and a fragrant broth combine into something deeply satisfying and simple to adapt, whether you follow a vegan lifestyle or just want more vegetables on the table. In the pages that follow I’ll walk you through ingredients, technique, variations and storage tips, and share the small habits that turn a good stew into a reliably great one. Expect practical guidance rather than bluster, with tips I actually use when I cook this pot at home.

Why this chickpea and spinach stew works every time

At its heart the dish relies on texture contrasts and clear flavors: creamy legumes against tender greens, a silky broth lifted by acidity and spice. Chickpeas bring body and subtle sweetness, while spinach adds a vegetal freshness that keeps the stew from feeling heavy. This balance makes the recipe forgiving; if you overcook the greens a little or the broth reduces more than planned, the dish still tastes well composed. The technique mirrors that balance, with saffron or smoked paprika optionally nudging the profile toward Mediterranean or North African notes, and lemon juice providing the bright finish that ties everything together.

Beyond taste, this stew is efficient. A single pot delivers protein, iron, fiber and a comforting texture that works as a main or as a component alongside grains. For people who cook once and eat twice, it reheats cleanly and develops even more depth after a day in the fridge. The stew scales easily for a small family dinner or a batch to freeze; I often double the recipe and portion it into tubs for busy evenings. Those practical advantages are why it’s become a weekday staple for many home cooks who want a quick, nutritious meal without sacrificing flavor.

Essential ingredients and smart substitutions

Successful cooking starts with a clear, manageable ingredient list. For a classic version gather canned or cooked chickpeas, a generous handful of fresh spinach, onions, garlic, a good quality tomato base, vegetable stock, and a few supporting spices like cumin, smoked paprika or coriander. Olive oil and a finishing squeeze of lemon lift all the flavors, and a touch of sweetness from a grated carrot, roasted red pepper or a small amount of tomato paste keeps the acidity from feeling sharp. These components are flexible: use what you have and adjust quantities to taste, but keep the trio of chickpeas, greens and a flavorful liquid as the backbone.

Substitutions and pantry hacks matter when you’re cooking on the fly. If you only have dried chickpeas, soak and cook them ahead of time or simmer them longer in the stew until tender; canned beans are fine and cut the time dramatically. For greens, baby spinach is fast and mild, while tougher leaves like kale or collard greens need a bit more cooking and shredding. If you want a creamier mouthfeel without dairy, swirl in a spoonful of tahini or a splash of coconut milk near the end. Below is a compact ingredient table to help you plan quantities for four servings and consider swaps you might make.

Ingredient Approx. amount (4 servings)
Cooked chickpeas 2–3 cups (1–2 cans or 400–500 g cooked)
Fresh spinach 6–8 cups loosely packed (200–250 g)
Onion 1 medium, finely chopped
Garlic 3–4 cloves, minced
Tomato base 1 cup crushed tomatoes or 2 tbsp paste + water
Vegetable stock 3–4 cups
Olive oil 2 tbsp
Spices (cumin, paprika, coriander) 1–2 tsp each depending on taste
Lemon 1, juiced

Step-by-step: How to cook Chickpea Stew with Spinach

Begin by building an aromatic base: sauté the chopped onion in olive oil until it becomes translucent and slightly sweet, then add garlic and your ground spices, toasting briefly so they become fragrant. This short toasting step releases essential oils in the spices and prevents them from tasting raw in the finished stew. Add tomato paste or crushed tomatoes and let the mixture simmer for a few minutes; this softens the tomato acidity and integrates it with the onion-spice base. At this point add the chickpeas and stock, bring to a gentle simmer, and allow the flavors to marry for at least 15 minutes. Simmering longer deepens the taste, so if you have time, an extra 20–30 minutes is welcome.

Finish the pot by stirring in the spinach in batches so it wilts evenly, then adjust seasoning with salt, pepper and lemon juice to brighten the dish. If you prefer a thicker stew, use a spoon to mash some chickpeas against the side of the pot or pulse a cup in a blender and stir the purée back in. For a smoother texture you can also add a dollop of tahini or coconut milk at the end, but keep these additions light so the chickpeas and greens remain the stars. Plate the stew with a drizzle of oil, a scatter of fresh herbs and a wedge of lemon for squeezing at the table.

  1. Heat oil, sauté onion until soft, then add garlic and spices and cook briefly.
  2. Stir in tomato paste or crushed tomatoes, cook 2–3 minutes.
  3. Add chickpeas and stock, bring to simmer and cook 15–30 minutes.
  4. Wilt spinach into the pot in batches; mash a few chickpeas if desired for thickness.
  5. Season with salt, pepper and lemon; finish with oil or tahini if using.

Flavor building: spices, acidity and texture

Spices determine the stew’s personality. Cumin gives warmth and earthiness, smoked paprika adds a gentle smoky note that pairs beautifully with chickpeas, and coriander supplies citrusy brightness. For a North African feel introduce ras el hanout or harissa to the base; for an Italian-leaning version go with oregano and a bay leaf. The key is restraint: spices should sing in support of the main ingredients rather than shouting over them. When you add spices to hot oil they bloom and become more fragrant, which is why the sauté step is crucial.

Acidity and texture are equally important. A tablespoon or two of lemon juice added at the end wakes up the whole pot, balancing the starchiness of the beans and the richness of any oil or tahini. Texturally, include a mix of whole chickpeas and a few mashed for body, and try to avoid overcooking the greens so they keep a slight bite. Charring a shallot or roasting a red pepper to fold in at the end introduces a smoky counterpoint that can transform an otherwise gentle stew into something bold and memorable. Small finishing touches make a disproportionate difference.

Variations and regional twists

This stew behaves like a culinary chameleon: with modest tweaks you can shift it to many cuisines. For a Mediterranean profile add olives, capers and a bay leaf, finishing with fresh parsley and lemon. If you lean toward North African flavors, stir in harissa, cumin and cinnamon, and top with toasted almonds and cilantro. An Indian-inspired version benefits from garam masala, turmeric and a splash of coconut milk, served over rice or with flatbread. Each approach uses the same base of chickpeas and spinach but changes the supporting cast to create something new.

Dietary needs are easy to accommodate. Make it fully vegan by skipping any dairy garnish and using coconut milk or tahini for creaminess; if you’re not strictly vegan, a spoonful of Greek yogurt at the end adds a pleasant tang. To bulk up the protein for heartier appetites, add cubed seitan, tempeh or a handful of cooked quinoa. Swap spinach for other greens to vary texture and flavor — shredded kale, Swiss chard or even beet greens work well if given a little extra cooking time. These adjustments keep the core comforting while offering plenty of variety.

Serving suggestions and pairings

Think of this stew as both the centerpiece and a versatile companion. It sits beautifully over a scoop of steaming couscous, brown rice or farro, soaking into grains and making every spoonful more substantial. For lighter meals serve it with thick slices of toasted country bread or a warm flatbread to scoop and sop. Garnishes matter: a scattering of chopped parsley or cilantro, a spoonful of plain yogurt or tahini, and a drizzle of good olive oil finish the bowl with freshness and richness.

When planning a full menu around the stew, aim for contrast. A crunchy, acidic salad—think cucumbers, radishes and a lemony vinaigrette—cuts through the stew’s warmth. Roasted seasonal vegetables provide a complement with caramelized notes. For a shared meal, present the stew in a shallow serving dish surrounded by small plates of pickles, olives and toasted nuts; this creates a casual, friendly spread where guests can customize their bowls. These pairing ideas turn a simple pot into a satisfying, balanced meal.

Make-ahead, freezing and reheating tips

This recipe is friendly to advance prep. Cook the base and chill it in the fridge for up to four days, then add fresh spinach when you reheat so the greens stay bright and vibrant. If you plan to freeze portions, undercook the greens slightly and cool the stew quickly before transferring to freezer-safe containers; it will keep well for two to three months. When reheating from frozen, thaw overnight in the refrigerator or reheat gently over low heat, adding a splash of stock to loosen the texture if necessary.

Reheating can actually improve the flavor, as time allows the spices and chickpeas to meld. To refresh leftovers, brighten the pot with an extra squeeze of lemon and a pinch of salt before serving. If the stew thickens during storage, stir in warm stock or water when reheating until it reaches the desired consistency. These small steps make leftovers taste intentional and alive, rather than a reheated afterthought.

Nutrition and health benefits

Chickpea Stew with Spinach. Nutrition and health benefits

Chickpeas provide a robust nutritional profile: they are an excellent source of plant-based protein, fiber and complex carbohydrates, which support steady energy and digestion. Spinach contributes iron, folate, vitamin K and a range of antioxidants, while the olive oil and lemon add healthy fats and vitamin C that aid nutrient absorption. The whole pot, when assembled with minimal added fat and reduced-sodium stock, makes a balanced meal for most dietary needs. It’s particularly well-suited to anyone following a vegan diet who wants variety in protein sources.

Beyond individual nutrients, the stew supports broader eating patterns that emphasize plant diversity and regular pulses. Frequent consumption of legumes is associated with heart health and improved blood sugar control, and green leafy vegetables bring micronutrients that are often underrepresented in daily meals. Combining chickpeas with whole grains like barley or farro creates a complementary amino acid profile that more closely resembles complete protein. Small, consistent choices like this pot of stew add up over time.

Troubleshooting: common problems and quick fixes

If the stew tastes flat, check salt and acid first; a little extra salt or lemon juice often brightens the whole pot and corrects muddiness. If the flavors feel one-dimensional, add a small spoon of tomato paste or a splash of vinegar to introduce depth. Too thin a broth can be remedied by simmering uncovered to reduce and concentrate flavors, or by mashing a portion of chickpeas into the liquid to thicken naturally. Conversely, if it’s too thick, stir in warm stock until it loosens to your liking.

Greens can be a sticking point: overcook them and they become pasty, undercook and they remain tough. Wilt spinach in batches and remove from heat as soon as it’s collapsed but still vibrant, which usually takes a minute or two. If the spices taste raw, cook them a little longer at the beginning on low heat with the onions so their harshness evaporates. Finally, overly sharp tomato acidity benefits from a pinch of sugar or a small grated carrot to round it out without adding sweetness that feels out of place.

Personal notes from my kitchen

I’ve made versions of this stew on rainy evenings and sunlit weekends, tweaking it little by little until it felt inevitable. Once, while traveling in Andalusia, I tasted a village stew where smoked paprika and preserved lemon transformed simple chickpeas into something bright and haunting; that memory influenced my choice of finishing acids and smoky notes. At home I often stir in a spoonful of tahini or swirl in plain yogurt for guests who prefer a creamier finish, and I keep a jar of harissa on the counter to push the heat when company arrives.

One habit I recommend is prepping a basic spice mix to keep on hand—cumin, coriander and smoked paprika in equal parts—so the flavor backbone is always ready. Another small ritual: reserve a few whole chickpeas to garnish the bowl for texture contrast; the visual cue tells people this is homemade. These are tiny acts, but they make the stew feel like something crafted rather than assembled, and they’re the sorts of details my friends remember when they ask for the recipe.

Bringing it to the table

Chickpea stew with spinach occupies a practical but special place in the kitchen: it’s accessible enough for a busy weeknight and flexible enough to host a relaxed dinner. Each time you make it you can emphasize a different note—smoky, spicy, lemony—so it never becomes routine. Serve it with grains, toasted bread or a simple salad, and remember the little touches that lift the bowl at the end: lemon, fresh herbs, or a scattering of toasted seeds for crunch. Those finishing gestures turn a nourishing pot into a meal people want to return to.

Try a small experiment the next time you cook it: make a double batch, serve one pot as written and the other with a small twist, such as coconut milk or harissa, and notice which elements your friends or family gravitate toward. Through those experiments you’ll refine the version you prefer and build a personal repertoire of variations. The result is a dependable, delicious dish that reflects your pantry, taste and the way you like to eat—simple, soulful, and wholly satisfying.

Crisp Comfort: The Art of Savory Potato Cakes

There is something quietly persuasive about a hot, golden potato cake straight from the skillet: the crisp edges, the tender interior and the scent that fills a kitchen like a small, delicious promise. These bites sit somewhere between humble and heroic — simple ingredients elevated by technique and timing into a snack or main that feels like a warm invitation. In this article I want to walk you through the why and how of making savory potato cakes so they turn out reliably crisp on the outside and soft inside, whether you call them patties, fritters or little hash brown pancakes. I’ll share ingredient thinking, step-by-step methods, flavor variations, storage tips and a few honest mistakes I learned the hard way. Expect practical guidance and a few small stories from my own kitchen, plus options that cover everything from weeknight quick snack needs to weekend brunch projects.

Why potato cakes have such wide appeal

Savory Potato Cakes. Why potato cakes have such wide appeal

Potatoes are forgiving in a way few ingredients are; they absorb flavors, crisp beautifully and satisfy on a fundamental level, which makes them ideal for a broad range of cooks and occasions. A savory potato cake can be dressed up with herbs and cheese or pared down to three ingredients and still deliver comforting texture and taste, so they work equally well as an easy snack or plated course. They are also economical and flexible: leftover mashed potatoes, boiled new potatoes or grated raw tubers all become platforms for something more than their original form. Beyond practicality, there’s a sensory pleasure at play — the contrast between a crackling exterior and a yielding inside, the way a fork reveals steam and fragrance. This combination of texture, flavor and adaptability explains why variations exist across cuisines and why home cooks keep rediscovering them.

Another reason these cakes endure is cultural familiarity; almost every cuisine has a version and that creates a built-in nostalgia that makes them comforting. When you taste a well-made potato cake you’re not only eating starch and fat, you’re connecting to family breakfasts, impromptu gatherings or late-night repairs in the fridge that turned leftovers into something celebratory. For day-to-day cooks they offer low-risk creativity: swap a herb, fold in some scallions, add a handful of shredded cheese or collapse them into smaller fritters for dipping, and you’ve effectively created a new dish. They’re also easy to scale, which matters if you’re feeding a family or entertaining friends — a single batter becomes dozens of rounds with minimal extra work. Finally, their relatively neutral base makes them a perfect canvas for bright condiments and sauces, letting each culture or cook stamp a personal identity onto the finished cake.

Core ingredients and what each one does

At the heart, potato cakes need four things: a potato base, a binder, a fat for cooking and seasoning to lift the flavors. The potato provides texture and body; the type and prep method will determine whether the cake is dense and pillowy or light and fluffy. The binder — often egg and a small amount of flour or breadcrumbs — holds the mixture together, preventing a sad crumble when you flip the cakes in the pan. Fat, usually oil or butter with a high smoke point, creates the desirable caramelized crust while contributing richness, and salt plus an acid or herb brightens the overall profile. Understanding the role of each component helps you tweak recipes with confidence instead of guessing, which is the difference between a successful batch and a pan of greasy mush.

Different potato forms call for different binder strategies; for example, mashed potatoes already have a smooth texture and bind well with just an egg, while grated raw potatoes often require a bit more flour or starch to remove excess moisture and prevent collapse. You can use russets for a fluffier interior or waxy potatoes for a more cohesive bite; each choice nudges the outcome in a specific direction. Cheese contributes fat and flavor but also affects moisture, so add it sparingly unless you want very soft centers. Fresh herbs, scallions and spices are where individuality comes through, lifting basic starch into something memorable. Once you grasp these building blocks, you can improvise confidently — a valuable skill when you’re turning a few pantry items into a satisfying plate.

Classic recipe: basic savory potato cakes

This is the go-to method I return to when I want something dependable: cooked potatoes, a binding egg, a little flour, salt, pepper and a neutral oil for frying. Start by grating cooled, cooked potatoes or mashing them coarsely; the texture you prefer will determine which technique to use. Gently fold in one beaten egg for every two cups of prepared potato, then stir in one to two tablespoons of flour or fine breadcrumbs to reach a consistency that holds shape when scooped. Season generously at this stage with salt, pepper and, if you like, a teaspoon of minced garlic or chopped parsley for freshness. Shape into patties and fry in hot oil over medium heat until each side is deeply golden, which usually takes about three to four minutes per side for medium-sized cakes.

The quantities below represent a typical batch that serves three to four people; feel free to scale up. Use a skillet that gives even heat and don’t overcrowd the pan — crowding drops the oil temperature and prevents that coveted crust. Once fried, transfer the cakes to a rack over a baking sheet to keep them crisp while you finish the rest; paper towels can help briefly but will soften the underside over time. These cakes are wonderful plain, but a quick dollop of Greek yogurt or a tangy mustard sauce turns them into an effortless, balanced bite. For a lighter finish, finish them in a 350°F oven for five to seven minutes after pan-searing, which reduces oil while preserving color and texture.

Ingredient table for the classic batch

Below is a simple table showing amounts for a standard small batch; adjust based on appetite and number of mouths to feed.

Ingredient Amount
Cooked potatoes (mashed or grated) 3 cups
Egg 1 large
Flour or breadcrumbs 1–2 tbsp
Salt 1 tsp
Black pepper 1/2 tsp
Neutral oil or clarified butter 3–4 tbsp for frying

Alternative bases and clever swaps

Leftover mashed potatoes are the easiest route — they already contain fat and seasoning which reduces the amount of added binder and salt needed, while boiled and grated new potatoes give a brighter, more textured cake. For a lighter version, combine grated raw potato with a small amount of steamed, mashed sweet potato to balance starch and moisture. You can also substitute part of the potato with shredded cauliflower or parsnip for a lower-starch variation, though the texture will change and you may need more binder. For gluten-free needs, swap flour or breadcrumbs for rice flour, ground oats or a small amount of potato starch; these alternatives manage moisture differently but can produce equally satisfying results. Don’t be afraid to experiment: small proportions of cooked quinoa or finely chopped roasted vegetables can add flavor and nutritional value without derailing the pan-sear.

Many savory potato cakes benefit from a second ingredient that brings contrast — think grated Parmesan for umami, diced chorizo for spice, or corn kernels for sweetness and pop. These mix-ins should be drained and patted dry to keep the batter from becoming soggy. Herbs like chives, dill or cilantro introduce brightness and should be added last to retain their fresh aroma. If you want a crisp edge that shatters pleasantly, toss the shaped patties in a thin layer of panko just before frying. The important principle is balance: add enough extras to change the profile, but not so many that the cake loses structural cohesion and refuses to flip cleanly.

Technique: managing moisture and texture

Moisture control is the single most important technical point with potato cakes; too wet and they won’t crisp, too dry and they’ll be mealy. With grated raw potatoes, squeeze out as much liquid as possible using a clean kitchen towel or cheesecloth; capture that starchy water and let it settle if you like — the sediment can be returned to the mix as a binder in small amounts. With boiled or steamed potatoes, cool them completely before combining with egg and flour so the binder doesn’t scramble and the mixture isn’t too loose. When shaping the cakes, use a light touch — compress enough to hold together but avoid overworking which results in dense, gluey interiors. Finally, temperature matters: a hot, well-seasoned pan ensures immediate crust formation which seals in moisture rather than allowing the interior to leak fat and become greasy.

If you’re after a cloudier interior, handle the potatoes gently; if you want a more uniform, cohesive bite, a bit more mashing and a slightly tighter squeeze will do the trick. Always taste your mixture before frying for seasoning — when cooled, the flavors will be muted once fried, so compensate slightly. The oil temperature should be around medium-high; too hot and the outside burns before the inside cooks, too cool and the cakes soak up oil like sponges. After frying, rest them briefly on a wire rack so steam escapes and the crust remains crisp. These small but deliberate steps turn a mediocre batch into consistently good results.

Cooking methods: skillet, oven and air fryer

Pan-frying is the classic approach, offering direct contact for caramelization and the easiest control over color and doneness, which is why I default to it for small batches. Use a heavy skillet to distribute heat evenly and a neutral oil with a smoke point above 375°F so you can get color without burnt flavor. If you prefer to reduce oil, oven-baking on a greased sheet or an oiled rack at 400°F produces a crunchy surface with less fat, though you’ll miss the same degree of sear that a pan gives. The air fryer is a modern compromise: it crisps well using little oil and is excellent for reheating leftovers without soggy results, but sizes are limited and you may need to work in batches for larger gatherings.

For thicker cakes, consider a two-stage method: sear in a skillet to build color and then finish in a moderate oven to ensure the interior cooks through without excessive browning. This technique is especially helpful when you’ve stuffed the cakes with fillings that need more time to heat evenly. When using an air fryer, a light spray of oil helps promote color; place cakes in a single layer and flip halfway through cooking. Whatever method you choose, keep an eye on the cakes — small variations in thickness or potato type change the timing significantly. The goal is a consistently crisp exterior and a moist, not greasy, inside.

Flavor directions: where to take your cakes

One of the joys of working with potatoes is how readily they accept additions, so deciding on a flavor profile starts with the sauce you imagine serving alongside them. For Mediterranean notes, fold in crumbled feta, chopped oregano and lemon zest, then serve with tzatziki; for a heartier, brunch-friendly direction, mix in diced ham and cheddar and top with a fried egg. An Asian-inspired version might include scallions, toasted sesame oil and soy in the batter, paired with a spicy mayo or a soy-citrus dip. If you want smoky, add smoked paprika or a touch of chipotle and finish with a lime crema; for something bright and herblike, basil and peas folded in with a squeeze of lemon work wonders. These choices remind us that potato cakes are not merely a carbohydrate delivery system but a flexible carrier for many culinary moods.

Seasoning thoughtfully is part of the craft: salty cheeses and cured meats reduce the need for additional salt, while fresh herbs often need a small counterpoint — a splash of acid — to avoid flattening the palate. Texture contrasts elevate each bite, so even in a simple herb potato cake, consider a crunchy topping such as fried shallots or a scattering of toasted seeds. Experiment with international condiments: a dollop of chimichurri, a smear of romesco, or a quick curried yogurt can change the whole experience. Keep proportions balanced; too many strong flavors can overwhelm the delicate potato. The best combinations taste effortless, as if they were always meant to be together.

Serving ideas and pairings

Think about scale when serving — small cakes become finger food for sharing, medium ones stand in for burger patties or vegetarian mains, and large cakes can anchor a plate with a salad or poached egg. For breakfast or brunch serve them with eggs, smoked salmon or a bright salad to cut richness; as an appetizer, arrange them on a platter with several dipping sauces to offer variety. For dinner, pair a stack with lean protein like roasted chicken or pan-seared fish and a green vegetable to balance the plate. Beverage-wise, crisp white wines, dry ciders or a lively, hoppy beer complement the fried and starchy character well. Remember that a vivid condiment — tart, acidic or herbaceous — often makes the difference between good and memorable.

When presenting, visual contrast matters: a scattering of microgreens, a drizzle of herb oil or a spot of bright chutney gives the eye an entry point and signals flavor contrast. Portions depend on the occasion; three medium cakes per person is satisfying as a main when accompanied by sides, while two smaller ones might be perfect as a starter. For family dinners, create a build-your-own plate setup with toppings and sauces so everyone can customize. Leftovers reheat well in a skillet or air fryer and can even be transformed into sandwiches with a slice of melted cheese and crisp greens. Serving thoughtfully lets these humble cakes punch above their weight on any table.

Make-ahead strategies and freezing

Potato cakes are surprisingly friendly to make-ahead cooking, which is why they’re a go-to when planning meals for busy weeks or entertaining. You can form the patties and refrigerate them covered for a day; this rest firms them up and often improves the crust because slightly drier cakes brown more readily. For longer storage, flash-freeze the shaped raw cakes on a sheet until solid and then transfer to a labeled bag; they will keep well for a few months and you can fry or bake them from frozen, adding a couple of minutes to the cooking time. Fried cakes can be cooled completely and stored in the refrigerator for two to three days, then reheated in a skillet or air fryer to recover crispness.

Reheating from frozen works best if you avoid microwaving, which makes them limp; instead, place frozen cakes in a preheated oven or air fryer at a high temperature and flip once to achieve even color. If you fry from frozen, be cautious of oil splatter caused by residual ice crystals; use a splatter screen and moderate the heat. Consider batching: make a double or triple recipe, freeze portions, and you’ll have quick snack solutions when time is short. Part of the pleasure of these cakes is their ability to be practical without losing character, and smart storage is the key to that convenience.

Common problems and how to fix them

If your cakes fall apart, it’s almost always a binder or moisture issue; add a spoonful more flour or a second egg and chill the formed patties briefly before cooking. Soggy results usually mean the oil was too cool or the mixture had excess water — for grated potatoes, wring harder or add a bit more starch; for cooked potatoes, let them cool and dry in the refrigerator if possible. Overly dense, gluey interiors come from overworking the mixture or using too much binder; ease the pressure and use just enough binder to hold shape. Burnt exteriors with raw centers indicate heat too high or patties too thick; sear briefly then finish in the oven, or lower the heat and accept a longer cooking time for even doneness.

Another predictable issue is seasoning — potatoes need salt, and without it they taste flat even if the texture is good, so season at multiple stages and taste a small fried sample before finishing the whole batch. If you find they stick to the pan, ensure the oil is hot and the pan well-seasoned, and don’t try to flip too early; a properly formed crust will release naturally. When adding extra ingredients like onions or peppers, pre-cook or dry them first to avoid excess moisture. These simple adjustments keep the process forgiving and consistent, so you spend more time enjoying the results than troubleshooting them.

Health and nutrition considerations

Potatoes are an excellent source of potassium and provide vitamin C and fiber when skins are included, but how they’re prepared changes the nutritional profile significantly. Frying adds calories from fat, so if you’re watching intake consider pan-searing with minimal oil, baking, or air frying to achieve crispness with less fat. Substituting part of the potato with vegetables such as cauliflower or grated carrot increases fiber and micronutrients while reducing starch, though texture will differ. Use whole eggs and olive oil for a healthier fat profile, and prefer herbs and spices for flavor rather than excessive salt. These adjustments allow you to enjoy the comfort of potato-based dishes while aligning with dietary goals.

For gluten-free diets, simple swaps like rice flour or almond meal stand in for wheat flour, and many commercial breadcrumbs have gluten-free options that hold up well. If sodium is a concern, choose low-sodium cheeses or omit cured meats and increase aromatic herbs to compensate. For plant-based versions, an aquafaba or flaxseed binder can replace egg, though you may need additional starch to maintain structure. Thinking through choices in advance helps preserve the sensory pleasure of the dish while accommodating nutritional preferences.

My kitchen confessions and small experiments

I learned one lesson about potato cakes the long way: never rush the drying step with grated raw potatoes. Years ago I squeezed them with inadequate pressure and ended up frying a pan full of soft blobs that tasted fine but lacked crispness. Since then I treat moisture as a non-negotiable step, wrapping the grated potatoes in a towel and wringing until the liquid runs clear and the mass feels almost dry. Another discovery came from curiosity: folding in a tablespoon of finely grated Parmesan transformed ordinary cakes into something with savory backbone, and a squeeze of lemon at the end brightened the flavor in ways I hadn’t anticipated. Small experiments like these — a new herb, a different cheese, a dash of spice — have taught me more than any recipe ever could.

I also enjoy making tiny versions for parties, which I call “potato coins.” Shaped smaller and fried slightly faster, they become excellent carriers for bite-sized toppings like smoked trout and dill or roasted cherry tomato with basil. This approach changed how I think about scale and texture: crispness is easier to achieve on a smaller surface area, and presentation becomes playful. Hosting with these coins has become a personal tradition; friends leave asking for the recipe, which always starts a conversation about family versions and childhood memories. Those shared stories are as much a part of the dish’s appeal as the flavors themselves.

Quick snack ideas and on-the-go tweaks

For a real quick snack, form small, thin cakes and pan-sear them for just a couple of minutes per side — they cook fast and satisfy the craving for something crunchy and warm. Keep a jar of quick sauces nearby: an herby yogurt, a lemon-tahini drizzle or a simple hot sauce mixed with mayo all make excellent companions and transform a plain cake into a handheld delight. If you’re packing them for lunch, cool them completely and separate layers with parchment to preserve crispness; reheat briefly in a toaster oven for best results. Another fast strategy is to roast a tray of tiny cakes and keep them in the fridge; they’re ready within minutes for unexpected guests or a three-o’clock hunger pang.

Street-food style serving works particularly well if you want speed and convenience: tuck a warm potato cake into pita or flatbread, add greens and a squeeze of sauce, and you have a portable meal that’s both satisfying and transportable. These portable versions are especially useful for picnics, commutes and after-school snacks because they travel well and reheat neatly. Keep portion sizes modest if your goal is a light snack rather than a full meal. The quick snack versatility is one reason these cakes deserve a place in your repertoire — they’re fast, adaptable and deeply comforting.

Pairing with condiments and dips

Good condiments create balance: creamy and acidic elements cut through richness while spicy and fermented components add complexity, so assemble a small palette of dips to accommodate varied tastes. Classic pairings include sour cream with chives, a mustard-based remoulade, or a cilantro-lime crema; each offers a distinct counterpoint to the potato’s roundness. For global inspiration, try a smoky harissa yogurt, a bright chimichurri, or a cooling cucumber raita, which all demonstrate how a single sauce can refocus the dish toward another cuisine. Even a simple compound butter — garlic and parsley whipped into butter — melts onto hot cakes and elevates them instantly.

When choosing a dip, consider texture as well as flavor: a chunky relish contrasts the smooth interior, while silky sauces highlight the cake’s crisp exterior. Present small bowls so guests can combine sauces and discover favorite pairings; this interactive element adds pleasure and variety to a meal. In my experience, people appreciate options and the social aspect of tasting different combinations, which often leads to unexpected but delightful matches. The right condiment can make a potato cake feel like a refined plate rather than just fried starch.

Troubleshooting specific scenarios

If your cakes brown unevenly, check your pan for hot spots and rotate it during cooking; thin pans heat unevenly and often need more careful management. When the interior is gummy or undercooked despite a golden crust, reduce the heat and give them a few extra minutes, or finish in the oven to allow residual heat to penetrate without burning the exterior. For cakes that break when you flip them, chill briefly on a tray to firm up the binder and try flipping with a thin spatula close to the pan rather than lifting from the center. If they stick regularly, evaluate the pan seasoning and oil temperature and make sure to wait until a crust forms before attempting to turn them.

Sometimes a batch simply won’t cooperate; in those moments, rescue strategies include shredding a failed mass and turning it into hash browned on a sheet pan, or crumbling cooked cakes into a gratin with cheese and cream. Creativity in the moment preserves the effort and often leads to unexpectedly good results. Cooking teaches resilience this way: a misstep isn’t always failure, it’s material for another version of the dish. Keep a small toolkit of rescue ideas and your kitchen confidence will grow accordingly.

Final thoughts and an invitation to experiment

Savory potato cakes are a lesson in modest ambition: with a few pantry staples and some attention to technique you can create food that is simultaneously comforting, versatile and impressive without much fuss. They reward thoughtful choices about moisture control, seasoning and heat management, and they invite personalization through herbs, cheeses and condiments. Whether you need a quick snack after work, a shareable appetizer for friends or a satisfying brunch centerpiece, these cakes adapt readily to the moment. I encourage you to start simple, master the basic crust-and-crumb approach, then branch out with the flavors that speak to you and your table.

Try making a small batch tonight: experiment with one unexpected addition and a new dip, and notice how a humble potato transforms into something memorable. Keep notes on what worked and what you adjusted, because those little records become the backbone of reliable household recipes. If you enjoy learning by doing, treat each variation as a short experiment — tweak one variable at a time and you’ll quickly map how texture and flavor respond. Above all, have fun with the process; the best savory potato cakes come from cooks who balance intention with curiosity and who share the results with people they enjoy feeding.

A Hearty Bowl for Chilly Nights: Mastering Barley and Meat Soup

There is something almost ceremonial about ladling a steaming bowl of barley-and-meat soup when the wind is rattling the windows and the day has gone gray. This dish sits at the crossroads of comfort and craft: humble ingredients elevated by patient technique. In the pages that follow I will walk you through the choice of barley and cuts of beef, explain the cooking sequence that yields deep flavor, and share practical tips for serving, storing, and varying the recipe. Expect clear method, a few personal notes from my own kitchen experiments, and a handful of simple variations to keep the soup interesting season after season. Whether you are cooking for one or feeding a hungry family, this is a recipe that rewards attention and slow heat.

Why this soup belongs on every cold-weather menu

The first reason barley-and-meat soup becomes indispensable in cold weather is its ability to warm both body and mood. The grain swells and softens in the broth, making each spoonful feel substantial, while the meat contributes savory depth that lingers. Beyond comfort, it offers practical benefits: the dish reheats beautifully, often tasting better on day two as flavors marry, and it stretches well when you need to feed more mouths without spending hours more in the kitchen. Nutritionally, the combination of whole-grain barley and protein-packed meat creates a balanced, satiating meal that stabilizes blood sugar and supports energy through chilly days. Finally, the soup is versatile: slight changes in herbs, vegetables, or acid can shift it from rustic to bright without losing its soul.

On a personal note, I came to rely on this soup during winters when I commuted home late and needed something forgiving in the pot. A slow-simmered pot of stock, some browned beef, and a cup of pearl barley would see me through multiple dinners with minimal fuss. That practical convenience, paired with genuine taste, is why I return to this recipe every year. It pairs well with crusty bread, a simple salad, or even a spoonful of tangy preserved vegetables to cut the richness. For the rest of this article, I will use both practical kitchen language and small tricks that turn a good batch into a memorable one.

Essential ingredients and how to select them

Great soup begins with good raw materials, but “good” varies with your goals. If you want a cleaner broth, choose leaner cuts and trim excess fat; if you crave richness, a bit of marbled beef or a bone-in roast will contribute gelatin and mouthfeel. For the grain, pearl barley is the most common: it cooks faster and yields tender plump kernels. Hulled barley is more nutritious and nutty but needs longer cooking. Vegetables that build flavor are simple: onion, carrot, celery, and garlic. Fresh herbs, coarse salt, and cracked black pepper are the final notes that bring everything together.

Here is a practical ingredients table for a family-sized pot. Quantities can be scaled up or down according to appetite and available equipment. I include both metric and imperial measures because cooks work with both.

Ingredient Amount (metric) Amount (imperial) Notes
Beef (chuck, brisket, or short ribs) 800–1000 g 1.75–2.2 lb Bone-in adds depth; cut into 2–3 cm pieces
Pearl barley 200 g 1 cup Rinse before use; hulled needs longer cook time
Onion 2 medium 2 medium Yellow or sweet
Carrots 2–3 2–3 Chopped into rounds or dice
Celery stalks 2 2 Optional, for classic mirepoix
Garlic 3–4 cloves 3–4 cloves Minced
Stock or water 2.5–3 L 10–12 cups Beef stock preferred for deeper flavor
Bay leaves 2 2 Subtle aromatics
Fresh parsley or dill 1 small bunch 1 small bunch Chopped to finish

The role of barley: types and preparation

Barley is central to the soup’s texture and character. Pearl barley has the bran removed and cooks relatively quickly, giving a soft, slightly chewy bite that most people expect. Hulled barley retains the bran and an earthy flavor, but it requires a longer simmer and benefits from pre-soaking. You can also substitute quick-cooking barley for time-pressed cooks, though the texture will be softer and less pronounced. Rinse the grain to remove dust and any starch that could cloud the broth; a quick soak of 30 minutes is optional but can shorten simmering time.

Cooking timing with barley matters. Add pearl barley when the broth is simmering but not furious, because a vigorous boil can break the grains apart and create a cloudy, gluey texture. If you want individual, intact kernels, maintain a low simmer and stir gently. At the end of cooking, a short rest off heat helps the barley settle and absorb residual flavors. For batch cooking, remember that the grain continues to swell after refrigeration, so the soup will appear thicker when cooled.

Choosing the right meat: cuts, bones, and alternatives

Beef is the classic choice and pairs naturally with barley, but not every cut will yield the same result. Tougher, collagen-rich cuts like chuck, brisket, or short ribs are ideal because slow cooking melts connective tissue into gelatin, enriching the broth. Lean sirloin or round can work if you prefer less fat, but the soup may lack depth unless boosted with bones or stock. Bone-in pieces — a marrow bone or beef shank — add a roasted note and substantial mouthfeel that’s hard to replicate with boneless meat alone.

If you want to change the protein, lamb adds a distinct, slightly gamey profile that suits Middle Eastern or Mediterranean variations. For a lighter version, cubed pork shoulder cooks well with barley and herbs. Vegetarian eaters can substitute mushrooms and smoked tofu while using vegetable stock; use pearl barley and introduce umami with soy sauce or miso. Each protein path slightly shifts the seasoning and cooking times, but the basic technique of browning, deglazing, and long, gentle simmer remains the same.

Step-by-step method: turning ingredients into a soulful broth

Good soup follows a straightforward sequence: flavor base, brown the meat, build liquid, simmer gently, finish with herbs and acid. Start by preparing all vegetables and meat so there are no interruptions once heat is on. Heat a heavy-bottomed pot and use a neutral oil with a high smoke point for browning. Season the meat ahead with salt and pepper to encourage a flavorful crust. The brown bits left in the pan after searing are the backbone of the broth; don’t skip the deglaze step with a little stock or wine to lift those caramelized fragments into the liquid.

After deglazing, add the remaining stock, barley, and aromatics, then bring the pot to a simmer. Reduce heat so the surface barely moves; vigorous boiling can make the meat tough and the barley disintegrate. Stir occasionally to prevent sticking, and skim any foam that rises to the surface for a clearer broth. Cook until both meat and barley are tender, which for pearl barley is often around 45–60 minutes depending on the cut and age of the grain. Taste and adjust seasoning near the end rather than early, because reduction concentrates saltiness.

Browning and building flavor

Browning is not optional if you want a deep, savory soup. It creates Maillard reactions that produce complex, roasted flavors absent in a simple boiled stew. Work in batches so the meat cubes brown rather than steam; overcrowding the pan leads to gray, flavorless surfaces. Use the drippings to sauté onions and vegetables briefly before adding liquid. A splash of dry white wine or a little balsamic vinegar during deglazing can add acidity and lift, though water or stock will do the job if you prefer to keep things simple.

Deglazing also prevents bitter burnt bits from dominating the pot. Scrape gently with a wooden spoon and let the alcohol reduce if you used wine. From there, add stock slowly, stirring to incorporate all the fond. Temperatures matter: transfer from high heat to a lower setting so the meat relaxes into tenderness rather than tightening up. Patience here transforms the final bowl.

Simmering and timing for perfect texture

Simmer time depends on your chosen barley and meat. With pearl barley and cubed chuck, expect 45 to 60 minutes of gentle cook time after the pot comes to a simmer. If you use hulled barley, add at least 20 to 30 minutes more and consider pre-soaking for a few hours. Bones and larger pieces of beef may require longer; the test is always texture: the meat should yield with little resistance and the grain be tender but not mushy. Stir sparingly to avoid breaking kernels and allow occasional rest periods for flavors to marry.

Watch liquid levels and add hot stock or boiling water if the pot reduces too aggressively. If the soup becomes too thin, remove the lid during the last 15 minutes to concentrate flavors. Conversely, cover and lengthen cook time for gentler reduction when you prefer more broth. Final seasoning should include salt, pepper, and an acid component—lemon juice or a dash of vinegar—to brighten the complexity of long-simmered flavors.

Step-by-step recipe: one-pot method

Below is a practical one-pot approach that balances clarity with flavor. It is designed for home kitchens without specialty equipment and yields a soup that feels both rustic and refined. Follow the sequence rather than fixating on times; listen and look for doneness rather than relying solely on the clock.

  1. Pat meat dry and season lightly with salt and pepper. Heat 2 tablespoons of oil in a large heavy pot over medium-high heat and sear meat in batches until deeply browned. Remove and set aside.
  2. Sauté onion, carrot, and celery in the same pot until they begin to soften and take on color. Add garlic in the last minute to avoid burning.
  3. Deglaze with 100 ml of dry white wine or 2 tablespoons of vinegar, scraping browned bits from the bottom of the pot. Reduce for a minute.
  4. Return beef to the pot, add barley, bay leaves, and enough stock to cover by about 2–3 cm. Bring to a gentle simmer, then lower the heat.
  5. Simmer uncovered for 45–60 minutes for pearl barley and tender cuts; longer for hulled barley or bone-in pieces. Top up liquid as necessary.
  6. Adjust seasoning with salt and pepper, stir in chopped parsley or dill, and finish with a squeeze of lemon or a splash of vinegar to brighten the flavors.

Serve hot with a side of crusty bread or a simple green salad. Leftovers benefit from a short reheat and sometimes an extra splash of stock if the barley has soaked up too much liquid overnight.

Variations, spices, and regional twists

This basic framework accepts a wide range of adaptations. For a Mediterranean twist, add tomatoes, smoked paprika, and finish with chopped oregano. Eastern European versions often include root vegetables, a bay leaf, and dill at the end for a traditionally familiar profile. In the Middle East, consider lamb, cumin, and a touch of cinnamon. South American palates might appreciate some cumin and oregano with a wedge of lime at the table. The key is balancing the grain, protein, and aromatic backbone while avoiding competing flavors.

Spices and herbs deserve careful thought: fresh parsley or dill at the end brings brightness, while rosemary or thyme during simmering provides deeper, pine-like notes. Smoked salt or a little soy sauce can add umami where beef stock is light. For a heartier, stew-like outcome, reduce the liquid near the end and serve the thicker mixture over mashed potatoes or alongside buttered noodles.

Serving, garnishes, and my favorite pairings

Presentation need not be fussy. A deep bowl, a scattering of fresh herbs, and a drizzle of good olive oil send a clear message that this is food to savor. I like finishing the soup with chopped parsley and a grind of black pepper. For contrast, a spoonful of plain yogurt or a few pickled vegetables on the side cuts through the richness and refreshes the palate. For bread, choose something with chew and a firm crust to mop up broth: sourdough, rye, or a country loaf works beautifully.

In my home, I often pair the soup with a shaved fennel and apple salad dressed simply with lemon and olive oil. The sweet-crisp salad complements the warm, savory bowl. On more casual nights, a slab of buttered rye and a handful of sharp cheese make for a perfect, uncomplicated pairing. When serving guests, set out lemon wedges, chopped herbs, and crushed red pepper so everyone can adjust the bowl to their liking.

Storage, reheating, and freezing

Barley-containing soups are forgiving in refrigeration but change in texture after cooling. The grain swells and tightens, so leftovers will be thicker. Store in airtight containers in the refrigerator for up to four days. To reheat, add a splash of hot stock or water and warm gently on the stove until the soup loosens and simmers; finish with a fresh herb to revive flavors. Avoid reheating in a microwave without additional liquid, as the barley can become gummy.

For longer storage, freeze portions in shallow containers to speed thawing and preserve texture. Freeze for up to three months. Thaw in the refrigerator overnight, then reheat on the stove with extra liquid. If you plan to freeze, slightly undercook the barley initially so it finishes during reheating and keeps a pleasant bite. Label containers with date and contents to avoid culinary mysteries later on.

Nutritional benefits and why it suits cold weather

The pairing of barley and beef makes nutritional sense as well as culinary sense. Barley is a whole grain rich in soluble fiber, which helps maintain steady energy and supports digestion. Combined with beef, which supplies iron, zinc, and complete protein, the soup becomes a meal that refuels without feeling heavy in the way fried or overly creamy dishes can. In cold weather, when appetites seek warmth and sustenance, this balance is particularly useful: it comforts, satisfies, and replenishes essential nutrients.

Another practical advantage is hydration. Hot broth helps maintain fluid intake on chilled days when people often drink less water. The sodium in stock can be moderated by using low-sodium versions and seasoning to taste, letting individuals control salt while still benefiting from the warming qualities of a savory bowl. For families with children or older adults, small changes—softer vegetables, shorter simmer for tender meat—make the soup accessible and nourishing across ages.

Common mistakes and how to avoid them

The most frequent errors are hurrying the browning step, overboiling the pot, and mis-timing the barley. Rushing the sear means you miss complex flavors; skipping the deglaze loses the browned bits that make the broth interesting. Boiling the soup too hard can break the grain into a starchy slurry and toughen the meat, leaving you with a less appealing texture. Finally, adding too much barley too early will soak up all the liquid and give you a gluey result.

Practical fixes are simple: brown in batches, deglaze thoroughly, reduce to a gentle simmer, and add barley at the correct stage for your chosen type. Taste toward the end and adjust acid, salt, and herbs rather than seasoning aggressively at the start. If the soup thickens too much, thin it with hot stock or water and re-season. If it lacks depth, a teaspoon of soy sauce or a small pat of butter can bridge the gap subtly.

Serving suggestions for different occasions

Barley and Meat Soup. Serving suggestions for different occasions

For a casual family dinner, serve the soup with buttered bread and keep garnishes simple. For a dinner party, present the bowl with a small plate of pickled vegetables or a fresh herb salad to cut through richness. If you are packing lunches, cool the soup quickly and seal in a thermos to retain heat; include a small container of lemon wedges to add acidity just before eating. For a lighter meal, reduce the meat and increase seasonal vegetables such as kale, leeks, or parsnips to boost fiber and color.

When hosting a crowd, cook in large pots and keep the soup at a gentle simmer on a back burner. Offer toppings—chopped herbs, grated cheese, chili flakes—so guests can personalize their bowls. This soup scales well and retains character even in large batches, making it a reliable choice for communal meals during the holidays or informal gatherings.

Final notes and a small recipe tweak I love

A small habit I picked up years ago improves the finish every time: a splash of acid at the very end. A teaspoon of sherry vinegar or a squeeze of lemon brightens the whole pot and balances the long-cooked sweetness of carrots and the umami of beef. I typically finish with finely chopped parsley for freshness and sometimes a few threads of lemon zest if I want a hint of lift without overt citrus. These tiny adjustments transform a good soup into a memorable one without adding work.

Another tweak for texture lovers: reserve a portion of cooked barley and return it to the pot at the end rather than cooking all the grain in the same pot from the start. This approach keeps some kernels distinct and creates contrast between softer and firmer grain. It’s a small trick I learned when trying to make the soup appeal both to my partner, who prefers soft textures, and my teenage kid, who likes some chew. It works reliably and adds a subtle restaurant-style detail to a homey dish.

Take this recipe as a flexible framework. Respect the basics of browning, simmering, and finishing, but be willing to adapt according to what’s in your pantry and who you are cooking for. The soup is forgiving, generous, and deeply rewarding—qualities that suit any kitchen and most appetites. When the weather outside turns cold, a pot of barley and beef soup can be both practical and nourishing, delivering warmth in every spoonful.

Winter Vegetable Borscht: A Hearty, Bright Bowl for Cold Evenings

There is a particular comfort in a deep red bowl that smells of earth, vinegar and caramelized onions. Winter Vegetable Borscht offers that kind of comfort while staying light enough for everyday meals and robust enough for a weekend supper with friends. This version relies on root veggies, cabbage and a careful balance of acidity to turn humble ingredients into something memorable. Read on for a thoughtful approach to ingredient choices, technique, variations and storage—everything you need to make a borscht that feels both traditional and fresh.

What makes this borscht uniquely a winter dish

Not every soup qualifies as a winter standby. This recipe leans on what root cellars and winter markets provide: beetroot, carrots, parsnips and cabbage. These vegetables store well through cold months and gain a concentrated sweetness that works beautifully in a long-simmered broth. The result is a soup that warms you from the inside out while offering substantial nutrition and satisfying textures.

Beyond the produce, the cooking methods—roasting beets for depth, sautéing aromatics for sweetness, and simmering slowly—are all about coaxing flavor when fresh garden herbs are scarce. That slow development of taste is what gives this dish its character: complex, layered, and utterly seasonal. It’s reliable, inexpensive, and forgiving, which makes it perfect for winter evenings when you want something restorative but uncomplicated.

Roots and leaves: choosing the winter veggies

Winter Vegetable Borscht. Roots and leaves: choosing the winter veggies

Choosing the right vegetables is the simplest way to improve a pot of borscht. Beetroot is the anchor, but it plays best when paired with other roots and sturdy greens. Think carrots and parsnips for sweetness, rutabaga or turnip for a peppery edge, and savoy or green cabbage for body. Small waxy potatoes bring creamy bites, while celery root adds a savory, nutty note that lifts other flavors.

To keep the soup balanced, avoid overloading with delicate summer vegetables. Use hearty components that survive long simmering without disintegrating. If you find odd varieties at the market—like kohlrabi or black radish—add them sparingly. Their stronger flavors can be interesting but should not drown the beetroot, which should remain discernible both in taste and in color.

A short shopping list of ideal ingredients

Here’s a compact list to guide your market run. It focuses on produce that stores well and develops flavor in the pot: beetroot, yellow onion, carrots, parsnips, rutabaga or turnip, cabbage, potatoes, garlic, and a handful of fresh dill or parsley. For the broth, a good vegetable stock is fine; for a deeper profile, use a mushroom or kombu infusion. Pantry staples like tomato paste, apple cider vinegar, and bay leaves will help round the soup.

Salt and a touch of sugar are tools to balance acidity and sweetness. Sour cream, yogurt or a plant-based crema offer a cooling contrast when serving, while rye bread or boiled potatoes make the meal more substantial. If you want to add protein, white beans or lentils are easy and keep the soup vegetarian-friendly.

Ingredient table for a six-serving pot

The table below gives a clear set of quantities if you want to cook for a small crowd. Adjust as needed for taste or availability—borscht is forgiving.

Ingredient Amount Notes
Beetroot 1.2–1.5 kg (about 3–4 medium) Roasted or boiled, peeled
Yellow onion 2 medium Finely diced
Carrots 2–3 medium Julienned or diced
Parsnip or rutabaga 1 medium Optional, for depth
Cabbage 400–500 g Sliced thinly
Potatoes 3–4 medium Waxy variety
Garlic 3 cloves Minced
Tomato paste 2 tbsp Concentrates flavor
Vegetable stock 2.5–3 L Low-sodium preferred
Apple cider vinegar 2–3 tbsp Adjust to taste
Fresh dill Handful For garnish

Core technique: building depth without meat

Many recipes rely on meat to provide umami and richness, but a winter vegetable approach crafts that complexity through heat and layering. Roast the beetroot to caramelize its sugars and concentrate flavor; sauté the onions until they take on a brown edge to develop savory notes; simmer the broth slowly so the vegetables exchange their tastes without falling apart. Tomato paste adds glutamates and a subtle acidity that makes the soup sing.

Another useful trick is browning a pinch of sugar with the tomato paste before adding liquid. This small Maillard reaction deepens color and taste and is especially helpful when you want a meaty mouthfeel without animal stock. Toss in a dried mushroom or two if you have them—reconstituted porcini gives a foresty umami that translates well into vegetarian borscht.

Stepwise cooking approach

Work in stages to avoid a flat, boiled-together soup. First, roast or boil and then cool the beetroot; peeling is easier after cooking. Second, sweat and brown onions, then add carrot and parsnip to let their sugars surface. Third, add tomato paste and briefly cook it to intensify flavor. Fourth, pour in stock and add potatoes and cabbage to simmer until tender. Finally, fold in the beetroot and finish with vinegar and fresh herbs.

Finishing is as important as cooking. Taste for salt and acidity when the soup is nearly done; a bright splash of vinegar or lemon will lift the whole pot. Letting borscht rest for a few hours or overnight often improves it, as the ingredients have time to marry. Reheating gently preserves texture and keeps the soup glossy instead of dull.

Step-by-step recipe for Winter Vegetable Borscht

Below is a clear recipe that follows the technique above and produces six servings. It emphasizes beetroot as the focal point while using other winter veggies to build a balanced profile. Read the steps through before you begin so everything moves smoothly when you cook.

  1. Preheat oven to 200°C (400°F). Wrap beetroot individually in foil and roast until tender, about 45–60 minutes depending on size. Allow to cool, then peel and grate or dice.
  2. In a large heavy pot, heat 2 tablespoons of oil. Add diced onion and a pinch of salt; cook over medium heat until soft and browned, about 10–12 minutes. Add carrots, parsnip or rutabaga and continue to cook for another 6–8 minutes.
  3. Stir in 2 tablespoons of tomato paste; cook for 2–3 minutes to remove rawness. Add minced garlic and cook 30 seconds more.
  4. Pour in 2.5–3 liters of vegetable stock. Add potatoes and bay leaves. Bring to a simmer, reduce heat and cook 10–15 minutes until potatoes are nearly tender.
  5. Add sliced cabbage and grated beetroot. Simmer gently for another 10–15 minutes so flavors meld. Season with salt, pepper and 2–3 tablespoons apple cider vinegar, adjusting to taste.
  6. Finish with a handful of chopped fresh dill and a swirl of sour cream or plant-based yogurt when serving.

Timing will vary with the size of your vegetables and the strength of your stove. The key is patience: allow each stage to develop flavor rather than rushing everything into the pot. If you like a clearer broth, don’t over-stir once the beets are added, and skim foam as needed during the initial simmer.

Substitutions and additions that work

White beans—cannellini or great northern—make an excellent protein addition and thicken the soup slightly. Lentils are another good choice, especially brown ones that keep their shape. If you prefer smokiness, add a small smoked paprika or a few drops of liquid smoke when you add the tomato paste. For a tangier profile, swap part of the vinegar for a spoon of sauerkraut juice and adjust other seasonings downwards.

Dairy options range from a dollop of sour cream to a smear of crème fraîche or a spoonful of Greek yogurt, each bringing a different richness and tang. For vegan creaminess, blend a scoop of cooked white beans with a splash of the hot broth and swirl this into the borscht at the end.

Serving suggestions and pairing

Serve borscht hot or at room temperature, depending on preference. A classic presentation is a ladle of soup topped with a generous spoonful of sour cream and a sprinkle of fresh dill. Rye bread, buttered and toasted, is almost obligatory; its dense crumb soaks up the liquid and complements the soup’s earthiness. Boiled or roasted beets on the side, or a platter of pickles, can add contrasting textures and acidity.

For wine pairings, lean toward an off-dry white or a light red with soft tannins: think Riesling or a young Pinot Noir. If serving with protein like roasted sausages or smoked fish, choose a fuller-bodied red. For a purely vegetarian meal, a crisp herbal tea or a small glass of kvass—if you can find it—makes an authentic and pleasant accompaniment.

Storage, freezing and meal planning

Borscht stores exceptionally well, and that makes it ideal for batch cooking. Refrigerate in an airtight container for up to five days. When the soup cools, the flavors continue to develop; many cooks prefer it the second day. Reheat slowly on the stove to preserve texture—rapid boiling can make cabbage and potatoes mushy.

Freezing is also practical. Portion into freezer-safe containers, leaving headspace for expansion. Frozen borscht keeps well for three months. Thaw overnight in the refrigerator and reheat gently. Note that dairy garnishes do not freeze well, so add sour cream or yogurt only when serving. If you intend to freeze, consider undercooking the potatoes slightly so they don’t break down after reheating.

Nutrition: why this recipe is healthy winter food

This borscht is a nutrient-dense bowl. Beetroot supplies folate, manganese and nitrates that support circulation; cabbage brings vitamin C and fiber; root vegetables contribute complex carbohydrates and beta-carotene. Using a vegetable stock keeps the dish lower in saturated fat while still permitting a rich mouthfeel through caramelization and umami-rich tomato paste.

Adjust portions and add legumes for more protein if you want a complete meal in one bowl. For those monitoring sodium, make your own stock or use low-sodium commercial versions and taste before salting. The bright vinegar finish helps you use less salt while maintaining a lively flavor profile, which is a small but meaningful way to keep this winter dish healthy.

Troubleshooting common issues

If your borscht tastes flat, it most often needs acid. A tablespoon of apple cider vinegar or a squeeze of lemon can revive a dull pot. Conversely, if it’s too sharp, a small pinch of sugar will round it out. When color turns muddy instead of bright crimson, it could be from overcooking or using certain varieties of potatoes; roasting the beets before adding them preserves their vivid hue.

Another common problem is a watery texture. If the broth feels thin, simmer briskly uncovered to reduce and concentrate. You can also blend a cup of cooked vegetables from the pot and return the purée to thicken naturally. Finally, avoid adding all seasonings at the beginning; taste as the soup cooks and adjust at the end when flavors are fully developed.

Variations that keep it interesting

There is no single “correct” way to make borscht, which is part of its charm. Try a smoky mushroom version by adding rehydrated porcini and a splash of smoked salt. For Mediterranean notes, stir in roasted red peppers and finish with lemon zest and chopped mint. If you want a protein-forward winter stew, add chunks of roasted tempeh or seared smoked tofu near the end.

Regional takes also inspire creativity: a Ukrainian-style bowl might include a meat broth and be served with pampushky (garlic buns), while a Polish variation could feature more cabbage and a firmer finish. Experiment with garnishes—crispy shallots, toasted seeds, or a smear of horseradish cream each bring a distinct character to the same basic pot.

My kitchen epilogue: a personal note

I first learned to coax borscht from an older neighbor who treated the dish like a slow conversation. She roasted beets on Sundays and always left a jar of beet kvass in the fridge for when the pot needed a brightening. Over winters I adopted her patience—roasting beets, caramelizing onions, tasting for vinegar at the end—and it changed how I cook other soups too. Borscht became my default when the days were short and the pantry predictable.

One evening, after a long walk in a sharp wind, I brought home a pot of this soup to share with friends. We sat around the table with bowls that steamed against the cold and found that simple gestures—breaking bread, passing a jar of chopped dill—made the meal feel like a small celebration. That memory keeps me returning to this recipe whenever the season calls for something both humble and consoling.

Final notes and encouragement to experiment

Winter Vegetable Borscht is forgiving, adaptable and richly rewarding. Use the framework here as a guide rather than a rulebook: roast the beetroot for clarity of flavor, layer in caramelized aromatics, and finish with bright acid and fresh herbs. Keep notes on what you change so the versions you prefer become repeatable. Little adjustments—an extra parsnip, a dash of smoked paprika, a handful of beans—will personalize the soup without betraying its essence.

Once you make a pot, share it, freeze it, and tweak it. The beauty of borscht lies in its willingness to reflect your pantry and mood. On a bleak winter evening, a ladle of this soup is a practical comfort and a reminder that good food can lift ordinary days into something quietly satisfying.