Chocolate Lovers’ Favorite Brownies: The Ultimate Guide to Fudgy, Glossy Bars

Chocolate Lovers’ Favorite Brownies: The Ultimate Guide to Fudgy, Glossy Bars

Chocolate Lovers’ Favorite Brownies: The Ultimate Guide to Fudgy, Glossy Bars

There are few pleasures as reliably comforting as a warm square of rich chocolate, the kind that melts on the tongue and makes you forget deadlines for a moment. This article walks you through everything I’ve learned chasing that perfect bite — from ingredient choices to tiny technique tweaks that determine whether your batch comes out fudgy or cakey. You’ll find a clear, dependable recipe, smart variations for different moods, and practical fixes for common problems. I’ll also share small rituals I use when I bake that help the process feel less like chemistry and more like a celebration. Whether you bake weekly for friends or keep a secret stash in the freezer, these notes aim to make your brownies reliably irresistible.

Why these brownies deserve a place in your repertoire

Not all brownie recipes are created equal, and part of the charm lies in their versatility. A base that favors butter and chocolate over flour and leavening produces that dense, fudgy texture many people reach for; swap the ratios and you get something lighter and more cake-like. For anyone who identifies as a chocolate devotee, mastering one dependable formula opens a hundred doorways: you can riff with nuts, swirl in caramel, or fold in espresso for a grown-up edge. The brownies described here prioritize glossy tops, fudgy interiors, and a balanced chocolate flavor that doesn’t overwhelm. These qualities make them useful both as a simple midweek treat and as a show-stopping finish to a dinner party.

Beyond taste and texture, there’s comfort in knowing exactly how a recipe reacts to changes. I often experiment with single adjustments — a minute longer in the oven, a different type of sugar, a pinch more salt — and watch how the results shift. Over time you internalize which variables are forgiving and which demand attention. That understanding lets you be creative without being anxious. The rest of this guide aims to transfer that confidence so you can improvise with purpose.

Ingredients and what each one actually does

Before you reach for the bowl, it helps to know why the standard ingredients are there. Butter and chocolate contribute fat and flavor; eggs provide structure and moisture; sugar sweetens and helps produce the shiny crust; flour offers the starch that binds everything together. Salt enhances the chocolate’s depth, and a touch of vanilla rounds the aroma. Small changes among these elements lead to big differences in mouthfeel and taste, so I’ll explain the roles so you can modify intelligently.

Ingredient Typical Amount Primary Role
Unsalted butter 170–225 g (3/4–1 cup) Fat and flavor; helps create fudginess
Dark chocolate (60–70%) 170–200 g (6–7 oz) Main chocolate flavor and texture
Granulated sugar 200–300 g (1–1 1/2 cups) Sweetness and glossy crust
Eggs 2–3 large Structure, richness, and moisture
All-purpose flour 90–120 g (3/4–1 cup) Stabilizes and sets the brownie
Cocoa powder (optional) 1–2 tbsp Boosts chocolate intensity without extra fat
Salt 1/4–1/2 tsp Enhances and balances sweetness

That table reflects the core components and typical ranges I use. If you prefer a denser bar, increase butter and chocolate while keeping flour low. Want a more pronounced cocoa flavor without additional fat? Add a tablespoon or two of unsweetened cocoa powder. These adjustments don’t require new techniques, only an awareness of proportions.

Step-by-step method for reliably fudgy brownies

Technique matters as much as ingredients. I recommend using an approach where you melt chocolate and butter together, then whisk in sugar and eggs off the heat. This method helps maintain a glossy top and prevents the eggs from curdling. Gently fold in flour just until it disappears; overworking the batter develops gluten and leans toward cake. Spread the batter in a lined pan, tap once to remove large air pockets, and bake until a thin crust forms but a tester with a few crumbs comes out mostly clean.

Working in stages keeps things simple and predictable. Melt chocolate and butter in a heatproof bowl over a pot of simmering water or in short bursts in the microwave, stirring between bursts. Once smooth, take the bowl off the heat, then whisk in sugar — some bakers add sugar after cooling slightly to preserve that sheen. Add eggs one at a time, whisking until smooth after each addition. Fold in flour with a flexible spatula until you see no streaks; don’t paddle at high speed.

  1. Preheat oven to 175°C (350°F) and line an 8×8-inch pan with parchment.
  2. Melt 170 g butter and 170–200 g chopped dark chocolate until glossy.
  3. Whisk in 200 g granulated sugar until combined and slightly cooled.
  4. Add 2–3 large eggs, one at a time, whisking until silky.
  5. Fold in 90–120 g all-purpose flour, 1–2 tbsp cocoa if using, and 1/4 tsp salt.
  6. Pour into pan, bake 20–30 minutes depending on desired fudginess.

The exact baking time varies with oven and pan type, so watch the surface and use a gentle tester. For very fudgy centers aim for the lower end, removing the pan when the edges are set and the middle still jiggles fractionally. Let the pan cool to room temperature before slicing for cleaner edges; cutting too soon often results in a messy, molten-looking slab. These simple timing decisions are what separate “good” from “wow” brownies.

Fudgy versus cakey — how to steer the outcome

Texture is a controllable feature. If your goal is a fudgy, almost brownie-truffle interior, emphasize fat and chocolate while keeping flour low and avoiding extra leaveners. For a cakier result, increase flour and add a small amount of baking powder or separate and beat the eggs to introduce more air. Small changes have large effects, so make one adjustment at a time to learn what each does. I prefer fudgy bars for their concentrated chocolate whisper, but cakier versions have their place, especially when serving alongside lighter accompaniments.

Another variable is mixing intensity. Vigorous mixing raises the chance of gluten development, which creates a more breadlike crumb. Conversely, gentle folding keeps the structure loose and dense. The temperature of your ingredients matters too: slightly warmed eggs incorporate more smoothly into melted chocolate, whereas cold eggs can cause the chocolate to seize or the batter to appear grainy. Once you control these factors, you can dial your texture precisely.

Flavor variations and inspired mix-ins

Chocolate Lovers’ Favorite Brownies. Flavor variations and inspired mix-ins

Brownies are a blank canvas for flavor. A personal favorite is a swirl of salted caramel folded into the top before baking; it cures the sweetness with a saline note that pairs beautifully with dark chocolate. Adding chopped toasted pecans or walnuts gives a pleasing contrast of texture without disrupting the fudgy interior. For a modern twist try a scattering of toasted coconut or a handful of dark chocolate chunks to create pockets of molten richness.

  • Espresso powder: intensifies chocolate without tasting like coffee.
  • Orange zest: brightens the chocolate, especially with 60% cocoa chocolate.
  • Chili or cayenne: adds a gentle warmth that elevates the flavor.
  • Hazelnut spread swirl: creates a marbled, nutty layer inside the bar.

When adding mix-ins, keep proportions modest to avoid upsetting structure. A cup of nuts or chocolate chunks is usually the maximum I recommend for an 8-inch pan. For swirls, dollop mixture on top and drag a knife through once or twice — over-swirl breaks the crust and lets batter settle unevenly. These small habits make the difference between a pretty brownie and an exceptional one.

Troubleshooting: common problems and how to fix them

Surface cracks and thin crust

A shiny, cracked top is a hallmark of well-made brownies, but excessive cracking or a dry crust can signal overbaking or too much sugar. If your crust is too brittle try reducing the oven time by a few minutes or lowering the temperature by 10–15°C. Another approach is to use a mix of granulated and brown sugar; brown sugar contributes moisture and chew. If you want the shiny crust without excessive fissures, ensure that sugar is fully dissolved into the warm melted chocolate and butter before adding eggs.

Ovens vary, and an oven thermometer is a cheap way to know what’s happening inside. If your oven runs hot the exterior will set long before the interior, producing deep cracks and dryness. Adjust bake times and consider placing the pan on a middle rack away from direct heat. Humidity in the kitchen also plays a subtle role, so expect slightly different outcomes between winter and summer baking sessions.

Dry, crumbly brownies

Dryness usually points to too much flour, overmixing, or overbaking. Revisit your measuring technique: spoon flour into the cup and level it rather than scooping directly with the cup, which packs in too much flour. Keep mixing gentle and stop as soon as the last streak of flour disappears. If overbaking is the culprit, aim for a shorter time; the brownies should still have a small jiggle in the center when you pull them from the oven.

Ingredient substitutions can also introduce dryness. Using low-fat substitutes or excessive cocoa powder without compensating with additional fat will produce a drier texture. If you must make swaps, consider adding a tablespoon of oil or an extra egg yolk to restore moisture. These small corrections are often enough to rescue a batch.

Gooey center that never sets

If your brownies remain overly loose after cooling, the issue may be underbaking, an oversized pan, or too much butter or liquid. Check that you used the recommended pan size; a larger pan spreads batter thinner and reduces bake time, sometimes to the point of underdone centers. Reduce liquids slightly or bake a little longer next time, testing frequently after the minimum bake time. Remember that the brownies will firm as they cool, so removing them at the right visual cue is more reliable than timing alone.

For particularly stubborn goo, a brief rest in the refrigerator helps — chilling firms up fats and makes slicing neater. If you prefer a molten center intentionally, serve immediately after a short cool-down and treat them like warm, spoonable desserts. Both approaches are valid, but clarity about your goal before baking prevents disappointment.

Serving, storing, and gifting

Presentation matters even for a humble bar. Dusting with fine powdered sugar, scattering flaky sea salt, or laying a few fresh raspberries brightens the plate and balances richness. Warm brownies pair beautifully with ice cream or a dollop of mascarpone, while room-temperature bars reveal more nuanced chocolate notes. Think about the company and occasion when choosing accompaniments; a tart fruit compote lifts up very chocolatey bars for lighter palates.

Storage is forgiving: keep cooled brownies in an airtight container at room temperature for 2–3 days, or freeze individual squares for up to three months. To freeze, wrap pieces tightly in plastic and tuck them into a freezer bag; thaw slowly in the refrigerator or at room temperature. When gifting, stack squares between layers of parchment in a decorative tin; add a ribbon and a small note with reheating instructions if you include a chilled or frozen item.

My tried-and-true Chocolate Lovers’ Favorite Brownies recipe

I’ve landed on a formula that consistently produces a glossy top and dense, fudge-like center. The proportions below suit an 8×8-inch pan and are forgiving enough for home bakers. I often halve or double the recipe depending on the crowd, and I’ll note small optional swaps as I go. Follow the method and then feel free to personalize with one of the variations suggested earlier.

  • 170 g unsalted butter (6 oz)
  • 170–200 g dark chocolate, chopped (6–7 oz, 60–70% cocoa)
  • 200 g granulated sugar (1 cup)
  • 2 large eggs at room temperature
  • 90 g all-purpose flour (3/4 cup)
  • 1 tbsp unsweetened cocoa powder (optional)
  • 1/4 tsp fine salt and 1 tsp vanilla extract

Method: Preheat oven to 175°C and line an 8×8-inch pan with parchment, leaving an overhang for easy removal. Melt butter and chopped chocolate together until smooth, then remove from heat and whisk in sugar until integrated. Let the mixture cool slightly, then whisk in the eggs one at a time, followed by vanilla. Fold in flour, cocoa, and salt just until blended; add any mix-ins by folding gently. Pour into the prepared pan and bake 20–28 minutes, testing at 20 minutes; the top should be set but the center still slightly soft. Cool completely on a rack before slicing into squares.

Final thoughts and next steps

Mastering a single, reliable brownie recipe opens up endless possibilities. Once you understand how ingredient ratios and technique affect texture, you can confidently adjust for different preferences and built-in surprises. Try baking one batch as written and keep notes on small tweaks so you can repeat what worked. Invite a friend over to taste-test variations; feedback from other chocolate lovers often reveals pleasant surprises you hadn’t anticipated. Above all, enjoy the process — brownies are forgiving, fast, and immensely satisfying, and that’s why they remain a beloved pillar among dessert recipes.

The Art of the Runny Yolk: Perfect Soft-Boiled Eggs Every Time

The Art of the Runny Yolk: Perfect Soft-Boiled Eggs Every Time

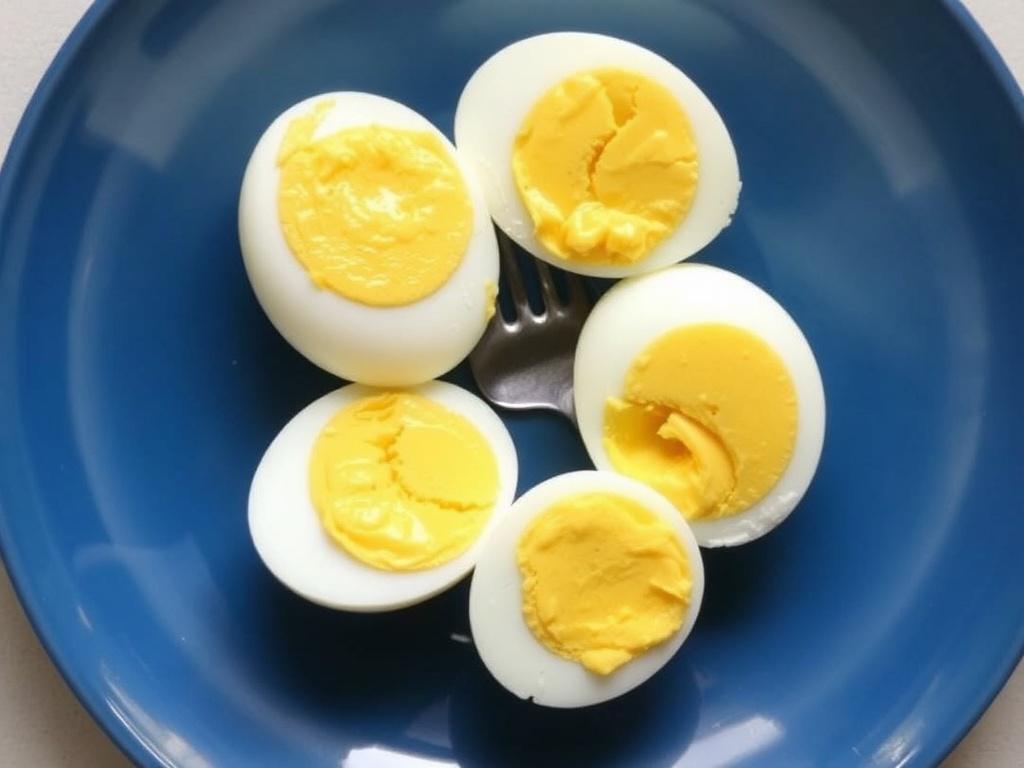
Soft-boiled eggs are one of those small culinary victories that make a morning feel deliberately crafted rather than merely endured. The ideal egg has a gently set white and a glossy, pourable yolk that clings to toast or bathes noodles in gold. Achieving that perfect balance is less mystical than it seems and more about reliable technique than luck. This article walks through every detail that matters: egg selection, water management, exact timings, peeling methods, serving ideas and fixes for the troublesome moments. Read on and you’ll be turning out consistent, restaurant-worthy soft-boiled eggs that elevate breakfasts and midweek dinners alike.

Why timing and temperature matter

The texture of a soft-boiled egg hinges on two variables: how quickly the protein in the white coagulates and how gently the yolk thickens. Whites firm at roughly 62–65°C (144–149°F) while yolks begin to thicken at higher temperatures, so small shifts in heat and duration produce noticeable differences. Once you treat eggs as a precise thermal experiment rather than a casual boil, results stop being random. That focus on temperature explains why methods that rely only on “boil for X minutes” without controlling water temperature or the starting state of the egg often fail.

Equally important is consistency: using the same pan, same amount of water and the same stove setting leads to repeatable outcomes. Starting eggs in cold water vs. plunging them into already boiling water changes the math because one approach heats eggs gradually while the other exposes them to immediate high heat. Both routes can work, but each requires an adjusted time table. When you aim for perfect soft-boiled eggs every time, treat the process as a simple routine with a couple of calibrated habits.

Choosing the right eggs

Freshness affects both flavor and peeling. Very fresh eggs have tighter whites and a firmer membrane, which makes them harder to peel but yields a cleaner texture when cooked. Eggs a week to ten days old are often easiest to peel while still tasting fresh; the slight increase in air pocket under the shell helps the membrane separate. Look for eggs stored properly in the fridge and avoid ones with cracks or slimy spots. Room-temperature eggs reduce shock when placed in hot water and tend to cook more evenly, so pull them out of the fridge 20–30 minutes before cooking when possible.

Size matters; a large egg is the kitchen standard, but smaller or larger eggs change the time you should cook. Organic or free-range eggs don’t differ much in cooking behavior, though yolk richness can vary. If you prefer a particularly unctuous yolk, seek eggs with deep-orange yolks, often an indication of a diet rich in carotenoids. Handling and storage are part of the selection: keep eggs in their carton to protect them from absorbing odors and to preserve moisture.

Essential equipment and setup

You don’t need fancy gear to make excellent soft-boiled eggs, but a few simple tools make the job easier and more consistent. A medium saucepan with a snug fit prevents eggs from rolling around and allows water to cover them by about an inch. A slotted spoon is indispensable for gentle lowering and quick retrieval. A kitchen timer is more reliable than guessing, and a thermometer is handy if you want to dial in water temperature precisely. Finally, a bowl of ice water for an immediate cool-down halts cooking and makes peeling simpler.

Small adjustments to your setup yield big benefits. Use a pan with straight sides to keep water depth predictable. Keep a lid nearby to bring water to a uniform simmer faster and to recover heat quickly if you briefly cover the pot. If you cook eggs often, consider marking a specific pot for them; familiar equipment develops predictable behavior and reduces variables. Consistency in tools translates directly into consistent eggs.

Step-by-step method for Perfect Soft-Boiled Eggs Every Time

This method aims for a glossy, slightly jammy yolk with set whites for a large egg starting at room temperature. Begin by filling your saucepan with enough water to cover eggs by about 2.5 cm (1 inch). Bring the water to a full simmer, not a violent boil—small, steady bubbles are ideal because they circulate heat without jostling the eggs. If you prefer starting from cold water, add the eggs gently, bring to a simmer, then begin timing; that approach needs slightly longer total time but yields good results too.

Use the slotted spoon to lower eggs into the simmering water one at a time to prevent cracking. Once all eggs are in, set your timer according to the desired yolk consistency and maintain a gentle simmer. When the timer rings, transfer the eggs immediately to the ice bath for at least one minute to stop further cooking. Cold shock also helps separate the membrane from the shell, which eases peeling.

  1. Bring water to a gentle simmer in a medium saucepan.
  2. Lower room-temperature large eggs into the water with a slotted spoon.
  3. Simmer gently for 5 to 7 minutes depending on texture preference.
  4. Transfer to ice water for 1–2 minutes to halt cooking.
  5. Crack and peel under running water or serve halved immediately.

Small variations in time change the result: 5 minutes gives a very runny yolk with barely set whites, 6 minutes produces a creamier yolk and better-formed whites, and 7 minutes moves toward a custardy yolk with firmer whites. Adjust according to egg size and your stove’s heat; make one test egg, record the timing, and repeat to establish a reliable baseline. That single calibration step is one of the most useful tips for getting consistent soft-boiled eggs.

Timing table and altitude adjustments

Altitude affects boiling temperature: water boils at lower temperatures at higher elevations, which means eggs cook more slowly. If you live above 1,000 meters (about 3,300 feet), increase cooking time by 30–60 seconds for each minute listed in standard tables. Keeping good records of your adjustments prevents re-learning the same lesson on different mornings. Below is a simple reference for large eggs at sea level starting in simmering water, which you can adapt to your personal stove and pan.

Desired Yolk Time (minutes)
Very runny 5:00
Jammy 6:00
Soft, slightly thick 7:00

For eggs straight from the fridge add about 30 seconds to each listed time. Smaller eggs require slightly less time and extra-large eggs a touch more. If you use a thermometer, aim to remove eggs when the white reaches a core temperature near 70°C (158°F) for the most consistent soft-set white while leaving the yolk luscious. Those numbers make the process more scientific and less guesswork, and the payoff is stable, repeatable results.

Peeling like a pro

Peeling soft-boiled eggs can be the most frustrating step, but a few proven techniques simplify the task. After the ice bath, gently tap the wider end first; that area usually contains the air pocket and gives a useful entry point. Rolling the egg lightly against a countertop creates a network of small cracks that you can peel away gradually. Running cold water over the shell while peeling helps slide the membrane off and washes away small shell fragments.

Another reliable trick is to peel eggs under shallow running water or submerged in a bowl—water slips between the membrane and the white and reduces sticking. For very fresh eggs that cling stubbornly, piercing the shell at the wider end before cooking can introduce a small controlled break that later eases peeling. Practice with different egg ages and try these variations to find the technique that works best in your kitchen; consistent peeling comes from understanding the egg’s condition as much as the method.

Serving ideas and breakfast tricks

A soft-boiled egg is versatile: it dresses up toast, transforms a simple bowl of ramen, and crowns salads with richness. For a classic combination, serve a halved soft-boiled egg over buttered soldier toast—thin strips of crisped bread ideal for dipping into the yolk. Another favorite is to nestle an egg into steamed greens and drizzle with a splash of soy sauce and toasted sesame oil for an easy savory lunch. These breakfast tricks are about pairing textures: creamy yolk with something crisp or gently acidic creates a balanced bite.

Soft-boiled eggs also integrate seamlessly into salads and grain bowls, bringing immediate comfort and protein to the plate. For a brunch platter, present eggs alongside smoked salmon, pickled vegetables and crusty bread; the egg’s runny yolk acts as an improvised sauce. When planning a continental-style breakfast, include a small ramekin of coarse salt or flavored oils so guests can season their eggs precisely. These small serving ideas let the egg shine without overwhelming its delicate flavor.

  • Soldier toast with butter and flaky sea salt
  • Ramen or soba topped with a halved soft-boiled egg
  • Salad with lemon vinaigrette and an egg as dressing
  • Grain bowl with roasted vegetables and a soy-ginger drizzle

Common mistakes and troubleshooting

Perfect Soft-Boiled Eggs Every Time. Common mistakes and troubleshooting

Two frequent pitfalls are overcooking and rough handling. Overcooked yolks develop a mealy texture and sometimes a thin gray ring around the white; the fix is stricter timing and an immediate ice bath. Rough handling—banging eggs into the pot or subjecting them to a violent boil—creates cracks and uneven cooking. Keep the water at a gentle simmer and lower eggs carefully to maintain integrity.

Another common issue is inconsistent results from different pans and stoves. If your eggs vary from batch to batch, standardize your process: use the same pan, measure the same water depth and note how long it takes the water to return to a simmer after adding eggs. Tiny procedural notes, once recorded, remove guesswork on busy mornings. When problems persist, run controlled tests: cook a single egg at varied times and document the texture differences to pinpoint the sweet spot for your setup.

My experiments and practical tips from the kitchen

Over the years I’ve run small experiments that saved me time and frustration. I keep a dedicated “egg pot” that I use only for eggs; it’s a mid-sized saucepan whose behavior I know well. That consistency removed one variable and made it much easier to fine-tune timing. I also learned to trust a quick test egg—sacrifice one to reach the desired texture, then repeat the timing for a full batch. That small upfront work prevents ruined breakfasts.

Another personal tip: mark a little note on the inside of a cupboard door with your ideal time for large and extra-large eggs. It sounds trivial, but having the number visible when sleepy-eyed in the morning reduces mental load and helps maintain the ritual. I also favor a 6-minute jammy yolk for most uses; it’s forgiving and partners well with many breakfast tricks. Over time, these small habits built a reliable routine that turns an ordinary egg into something memorable.

Troubleshooting specific problems

If your whites are rubbery while yolks remain runny, you’ve likely overcooked at too high a temperature; shorten the time and lower the simmer. If eggs crack immediately on contact with water, they need gentler entry or a bit longer at room temperature before cooking. If peeling remains hard despite all tricks, try aging eggs a few days in the fridge or using the small pre-cook pinprick method to prevent stubborn membranes.

When serving warm eggs for a group, timing is everything: stagger starts so eggs finish in manageable batches and keep finished eggs in a warm water bath (not boiling) to hold them briefly without overcooking. For larger gatherings, peel a fraction in advance and rewarm gently in hot water for a minute to freshen them. These practical adjustments make soft-boiled eggs scalable for entertaining without sacrificing quality.

Mastering soft-boiled eggs is largely a matter of turning an intriguing technique into a simple, repeatable ritual. With a reliable timing system, a couple of modest tools, and attention to the egg’s starting temperature and age, you can produce the same glossy, spoonable yolks day after day. Use the timing table and adjust for your altitude, keep a bowl of ice water ready to stop the cooking, and experiment once to find your personal sweet spot. The next time you reach for bread, noodles or a green salad, a perfect soft-boiled egg will transform the whole dish—simple, precise, and undeniably satisfying.

Sweet and Savory Brunch Recipes That Actually Make Mornings Feel Like a Celebration

Sweet and Savory Brunch Recipes That Actually Make Mornings Feel Like a Celebration

There’s a special kind of pleasure in bringing sweet and savory together on the same table, watching guests reach for a flaky scone and then pause for a bite of syrup-drizzled pancake. This collection of ideas and recipes is built for those mornings when you want to linger, laugh, and eat well without spending the whole day in the kitchen. I’ll walk you through menu planning, a handful of tested recipes, timing strategies, and tips for pairing drinks and sides so your brunch flows smoothly. Whether you’re hosting a casual weekend crowd or a small holiday gathering, you’ll find practical ways to balance flavors and present dishes that look as good as they taste. Let’s explore breakfast ideas that make brunch feel effortless and memorable.

Why combine sweet and savory at brunch?

At its best, brunch is a playground for contrasts—warm and crisp against cool and creamy, salty against sweet, rich against bright. Combining sweet and savory elements keeps the palate curious: a bite of smoked salmon yields to a spoonful of lemon curd, the way a fried egg lifts a maple-glazed vegetable fritter. There’s also a social advantage: a varied spread accommodates different appetites and dietary preferences, encouraging sharing and conversation. From a practical standpoint, mixing flavor profiles helps you use ingredients in multiple ways, stretching time and budget without sacrificing sophistication. In short, playing both sides of the flavor track turns a simple meal into an event.

Building a balanced menu

Start by choosing one showpiece dish, one sweet item, one savory side, and two small extras—like fruit and a spreadable component. This framework keeps your table interesting without overwhelming you with cooking tasks. Consider textures as much as flavors: pair a custardy centerpiece with something crisp, and a doughy element with something light. For drinks, offer at least one alcoholic and one non-alcoholic choice; a simple sparkling option and a well-made coffee cover most bases. Below is a quick template to follow when sketching a menu.

  • Main dish: the item that requires most hands-on time (shakshuka, Dutch baby, or strata)
  • Sweet item: pancakes, French toast, or pastries
  • Savory side: roasted vegetables, bacon, or a cheesy bake
  • Small extras: fresh fruit, yogurt, chutney, or pickles
  • Drinks: coffee/tea, a pitcher cocktail, sparkling water

Essential techniques for stress-free brunch

Timing is everything, and a bit of mise en place goes a long way: measure dry ingredients, chop vegetables, and set out equipment the night before. Choose one element to cook fresh and relegate others to make-ahead status—scones and compotes travel well; egg dishes often do not. Use your oven and stovetop together; while something bakes, you can finish a skillet dish. If you’re short on helpers, pick one recipe that can be reheated without losing texture, such as a strata or a baked frittata. Finally, think in layers: hot items first, then cold, then condiments and garnishes last so everything looks tidy at service time.

Sweet recipe: Lemon Ricotta Pancakes with Blueberry Compote

These pancakes are bright and tender, thanks to ricotta and lemon zest; they feel indulgent without being heavy. For the compote, simmer blueberries with a touch of sugar and a splash of orange juice until they release juices and thicken slightly—this can be made ahead and warmed. The batter comes together quickly: ricotta, eggs, flour, milk, and baking powder whisked until just combined; do not overmix. Cook on a medium-hot skillet so the pancakes brown gently and remain pillowy inside. Serve with a scattering of toasted almonds for crunch and a little honey or maple for anyone who prefers a sweeter touch than the compote provides.

Sweet recipe: Oven-baked French Toast Casserole with Vanilla Cream

Sweet and Savory Brunch Recipes. Sweet recipe: Oven-baked French Toast Casserole with Vanilla Cream

This French toast is a great performer for a crowd because it bakes in a dish and keeps its texture overnight in the fridge. Cube day-old brioche or challah, toss with cinnamon, vanilla, and a custard made from eggs and milk, then let it soak for a few hours or overnight. If you want a crunchy top, sprinkle a mixture of brown sugar and butter over the surface before baking. Serve the slices with a light vanilla-infused crème fraîche that complements the custard without cloying. I often add poached pears or a citrus compote on the side when entertaining—those bright notes cut through the richness beautifully.

Sweet recipe: Rustic Stone Fruit Galette

A galette is a forgiving pastry that looks impressive but requires little precision, making it ideal for brunch hosts who don’t want to fuss. Use ripe peaches, plums, or nectarines tossed with a bit of sugar and lemon zest, pile them onto rolled pastry, fold the edges up, and bake until golden. The exposed fruit caramelizes at the edges and the crust bakes to a satisfying crunch, offering both texture and sweetness. Serve warm with a scoop of vanilla ice cream or a spoonful of yoghurt to balance the sugar. I like to sprinkle flaky salt over the fruit just before serving—it’s a small trick that amplifies flavor.

Savory recipe: Shakshuka with Feta and Fresh Herbs

Shakshuka is a brilliant communal dish: eggs poached in a robust tomato and pepper sauce, finished with crumbled feta and a scatter of herbs. Start by slowly cooking onions, peppers, and garlic until soft, then add chopped tomatoes, smoked paprika, and a pinch of cumin for depth. Make wells in the sauce and crack eggs into each; cover briefly so the whites set while yolks remain silky. Serve directly from the skillet with crusty bread for dipping—no extra plates needed. For a brunch twist, add cubes of roasted eggplant or a handful of wilted spinach to give the dish more body and a subtle earthiness.

Savory recipe: Cheddar and Chive Scones with Crispy Pancetta

Scones work as both a savory vehicle and a beautiful side. Use chilled butter for a flaky crumb, fold in sharp cheddar and plenty of fresh chives, and shape into rounds for even baking. While scones are hot from the oven, crisp pancetta or bacon in a skillet and keep it warm on a paper towel to drain; the salty crispness pairs perfectly. Offer a compound butter—think lemon zest and chive or honey and mustard—so guests can decide on sweet or savory. Leftovers reheat well in a toaster oven for a few minutes to restore their crisp edges.

Savory recipe: Herbed Dutch Baby with Smoked Salmon

A Dutch baby provides dramatic presentation with minimal hands-on time; it puffs impressively in the oven and settles into a tender base that holds toppings well. Whisk a batter of eggs, flour, and milk until smooth, pour into a hot buttered skillet, and bake until puffed and golden. Once out of the oven, top with crème fraîche, thinly sliced smoked salmon, capers, and a shower of dill or chives. The contrast between the warm, slightly eggy pancake and the cool, silky salmon is a revelation and fits the sweet and savory theme nicely. For variation, you can swap salmon for sautéed mushrooms and Gruyère for a vegetarian option.

Drinks to pair with mixed-flavor menus

A thoughtful drink program enhances both sweet and savory plates. Offer freshly brewed coffee and a strong black tea for traditionalists, plus a citrusy mocktail like sparkling water with lemon and elderflower for those avoiding alcohol. For something celebratory, a light sparkling cocktail—prosecco with a splash of Aperol or a simple grapefruit spritz—pairs especially well with richer dishes. Consider a pitcher of cold-brew coffee with milk and a separate jar of flavored simple syrup for a DIY coffee bar. Keeping one or two beverage options versatile means they’ll complement rather than compete with your menu.

Small sides and condiments that elevate

Simple sides can transform a good brunch into a great one. A bright salad of arugula with lemon vinaigrette cuts through buttery pastries, while pickled red onions or quick-pickled cucumbers add a crisp, acidic note to heavy egg dishes. Yogurt mixed with honey and sesame seeds works as both a topping for pancakes and a dip for savory scones. I always include a small dish of chili oil or a harissa-based spread for guests who enjoy heat; it pairs well with eggs and roasted vegetables alike. Think of condiments as conversation starters—different jars encourage tasting and sharing.

Make-ahead checklist

A little planning the evening before slashes morning stress. Prepare compotes, scone dough, and pancake batter (thicker batter can be loosened before cooking) and store them covered in the fridge. Chop vegetables and herbs and keep them in separate containers to preserve freshness; assemble salads right before serving to avoid soggy leaves. Pre-portion garnishes like crumbled cheese and toasted nuts so you can drop them out on the table quickly. The morning-of should be about finishing, warming, and plating, not starting from scratch.

Serving logistics and flow

Set a serving station that follows a logical sequence: plates at one end, main and side dishes in the middle, and condiments plus drinks at the other. If space allows, offer a hot dish on a trivet so guests can help themselves without crowding the stove. Use serving utensils that match the size of the dish to avoid spills and to make portions clear. Label any items that contain common allergens like nuts or shellfish. When hosting my own brunches, arranging items in this order reduced traffic jams and kept the vibe relaxed.

Pairing combos that work every time

Some combinations consistently please a mixed crowd: smoked salmon with a lemony Dutch baby, ricotta pancakes with berry compote, and baked eggs with roasted tomatoes. For cheese-forward items, choose accompaniments with acid—pickled vegetables or citrusy salads—to cut the richness. Sweet pastries are happiest with a boldly flavored coffee or a bright tea, while tomato- or spice-forward mains beg for sparkling or slightly bitter cocktails. Below is a small table of suggested pairings to make menu decisions easier.

Dish Best Pairing
Lemon Ricotta Pancakes Blueberry compote and light roast coffee
Shakshuka Herb salad and sparkling water with lemon
Cheddar Chive Scones Crispy pancetta and tea

Feeding different appetites and diets

To accommodate vegetarian or gluten-free guests, include at least one option that fits those needs without calling attention to it. A baked vegetable strata can be made with gluten-free bread, and savory scones can be swapped for a grain-free frittata. Label dishes and place a small note about ingredients so guests with restrictions can serve themselves confidently. For dairy-free desserts, rely on fruit-driven sweets like poached stone fruit or a spiced chia parfait. A little forethought keeps everyone included and reduces last-minute substitutions.

Leftovers: creative second acts

Brunch leftovers are gifts that reward creativity. Extra compote becomes an excellent topping for yogurt or ice cream; day-old scones can be transformed into a bread pudding or toasted and served with savory toppings. Leftover shakshuka sauce makes a great pasta sauce for lunch the next day—stir in greens and finish with a fried egg. Store components separately when possible to preserve texture: keep condiments in small jars and refrigerate baked goods in paper bags to retain crust. My family often enjoyed a “brunch reprise” the following day, which felt like a little bonus meal.

Presentation tips that don’t demand perfection

Good presentation starts with clean lines and contrasting colors. Use white or neutral dishes to make vibrant food pop and move garnishes off to the side rather than scattering them haphazardly. A single herb sprig or a small drizzle of oil can make a dish look composed without requiring fine dining skills. When serving family-style, vary heights by placing dishes on cake stands or stacked books covered with a cloth to create visual interest. These small touches signal care and elevate the experience while keeping the focus on taste.

Personal notes from hosting brunches

Over the years I learned that the most memorable moments aren’t the most elaborate dishes but the way food brings people together. Once I hosted a late-summer brunch where a simple galette and a pan of eggs slowly baked in tomato sauce became the center of conversation for hours. Guests delighted in sampling little bites—some sweet, some savory—and the casual swapping of plates felt warmer than a formal sit-down would have. That taught me to prioritize shareable, approachable dishes; they invite participation and reduce the pressure on the host.

Quick variations and swaps

When you need to adapt recipes quickly, think in categories: swap one starch for another, one herb for another, or one protein for another. Pancakes can become waffles; a sweet compote can stand in as a sauce for a savory tart; yogurt can replace crème fraîche. These swaps keep your pantry flexible and your menu interesting without demanding unusual ingredients. Keep a mental list of go-to substitutions so you can adjust on the fly when a guest arrives with a dietary request or you realize an item is missing.

Final appetizing thoughts

Creating brunch that balances sweet and savory is less about perfection and more about rhythm. Choose a handful of reliable recipes, stage your work so most of it is done ahead, and focus on at least one hot item to anchor the table. Small details—contrasting textures, a bright condiment, a well-chosen drink—make a big difference and let guests tailor each plate to their taste. Above all, keep the mood convivial: brunch is meant to be savored slowly, with good company and plenty of conversation to match the food.

BBQ Grill Meals Made Simple: Easy, Flavorful Dinners from Your Backyard

BBQ Grill Meals Made Simple: Easy, Flavorful Dinners from Your Backyard

There’s something persuasive about the smell of smoke and the sight of food sizzling over an open flame. This article will take you through practical, no-fuss approaches so you can turn the grill into a reliable weeknight and weekend cooking station. I’ll show straightforward recipes, essential gear, timing tips, and a few tricks I learned the hard way to help you build confidence at the barbecue. Whether you have a charcoal kettle, a gas grill, or a simple portable smoker, you’ll find techniques and meal ideas that keep flavor high and complexity low. Read on and imagine the ease of feeding friends and family without being chained to the kitchen.

Why Grilling Feels Right: Quick Wins for Every Cook

Grilling shortens the gap between effort and reward. Direct heat caramelizes sugars and crisps outside layers while keeping the interior tender, producing textures hard to replicate in a pan. On top of that, outdoor cooking reduces cleanup, raises the social quotient of meal prep, and invites creative, seasonal ingredients—corn, peaches, fresh herbs—straight onto the grates. For beginners, the magic lies in keeping techniques simple: control heat, respect resting times, and let smoke contribute rather than dominate.

Another practical advantage is time. Many grill-centered dishes require minimal hands-on time once the food is on the surface, freeing you to prep sides, toss a salad, or enjoy company. That’s why BBQ and the idea of simple meals pair so well: you can create memorable plates with a handful of components if you plan slightly ahead. Embrace recipes that scale easily and focus on a couple of well-executed items rather than an overcomplicated menu.

Essential Gear and Ingredients for Stress-Free Grilling

You don’t need a garage full of gadgets, but a few reliable tools make a big difference. A good thermometer, a pair of long-handled tongs, and a sturdy spatula are non-negotiable. For charcoal cooks, a chimney starter eliminates lighter fluid flavors and speeds up startup. Gas grill owners will benefit from a grill brush for keeping heat distribution even and a spray bottle for taming flare-ups. A folding cutting board and a set of heatproof gloves round out a practical kit that keeps you organized and safe.

Ingredients matter less than technique, but some pantry staples will turn basic proteins into standout bites. Olive oil, kosher salt, coarse black pepper, a neutral sweetener (honey or brown sugar), and citrus can transform marinades and dressings. Fresh herbs, garlic, and a jar of mustard or soy sauce are versatile shortcuts. Keep a small stash of wood chips or chunks if you want to add a smoky note to fish or chicken without owning a dedicated smoker.

Item Purpose
Instant-read thermometer Check doneness quickly and avoid guesswork
Long tongs & spatula Flip food safely and preserve juices
Chimney starter (charcoal) Fast, clean ignition without lighter fluid
Wood chips Add subtle smoke to quick-cooking items

Techniques That Make the Grill Reliable

Understanding two heating zones—direct and indirect—equips you to handle almost anything. Direct heat is where you sear and get grill marks; indirect heat is cooler and ideal for finishing thicker cuts or cooking vegetables through without burning. Establishing these zones on both gas and charcoal grills is simple: push coals or burners to one side, keep the other side empty. Use the hot side to build color and the cooler side to complete cooking gently.

Mind the small rituals: oil the grates, preheat the grill to the right temperature, and pat meats dry before seasoning to promote browning. Rest proteins after cooking so juices redistribute—five to ten minutes for chicken breasts, ten to fifteen for pork chops and steaks. Small habits like these eliminate a lot of common problems and make your results consistent enough that you can improvise confidently.

Five Simple Meals to Start With

1. Classic Burger: A Template for Success

A great burger is the quickest route to backyard credibility. Use ground chuck with about 20% fat for juiciness, form loose patties rather than overworking the meat, and salt only right before they hit the grill to avoid drying them out. Sear the patties over direct heat two to three minutes per side for medium-rare to medium, then move them briefly to the cooler side if they need a few more minutes without charring.

Top with a slice of cheese in the last minute so it melts, and assemble on toasted buns with a smear of mayo, crisp lettuce, and a thin onion ring. Serve with a simple slaw or oven fries for a complete, crowd-pleasing meal. Burgers are forgiving and scale easily—double the batch for a group and keep the grill busy, not frantic.

2. Honey-Lime Chicken Skewers: Fast Flavor

Cubed chicken thighs threaded onto skewers take minimal time to prepare and absorb marinades quickly. A basic mix of honey, lime juice, garlic, and a splash of soy or fish sauce creates brightness and depth without long marination. Grill skewers over medium heat for six to eight minutes, turning frequently to create even char and a sticky glaze.

Serve over a bed of rice or tucked into warm tortillas with pickled red onion for contrast. I often make a double batch of skewers, chill one tray raw, and keep it for a next-day quick dinner; the leftovers cook just as well and taste even better after the flavors have settled. This meal demonstrates how simple marinades can deliver restaurant-like results.

3. Grilled Salmon with Herb Butter: Elegant and Uncomplicated

Fish benefits from a light touch. Choose salmon fillets of even thickness, season simply with salt, pepper, and a splash of oil, and sear skin-side down over medium-high heat until the skin crisps. Flip once and finish on the cooler side or in a tented foil to avoid overcooking—aim for an internal temperature of about 125–130°F for moist, gently flaky flesh.

A compound herb butter—softened butter mixed with lemon zest, chopped dill, and a touch of capers—melts over the hot fillet and rounds the dish. Serve with grilled asparagus or a barley salad for a balanced plate. Salmon is quick, impressive, and a reliable way to show that grilling isn’t only about red meat.

4. Vegetable and Halloumi Kebabs: Meatless That Feels Like a Treat

Grilled vegetables gain sweetness and texture that change the whole experience of a meal. Use hearty vegetables—peppers, zucchini, cherry tomatoes, red onion—along with thick slices of halloumi cheese that won’t melt away. Toss with olive oil, smoked paprika, and a pinch of salt, then arrange on skewers and cook over medium heat until vegetables are tender and cheese has golden edges.

Finish with a squeeze of lemon and chopped parsley. These kebabs are a favorite at mixed-diet gatherings because they appeal to everyone—meat eaters and vegetarians alike. Pair with a simple grain like couscous or quinoa tossed with lemon and olive oil for a satisfying, low-effort meal.

5. Steak and Grilled Corn Salad: Rustic, Seasonal, Ready

A modest steak, handled properly, can headline an uncomplicated dinner. Choose a cut you enjoy—flank, skirt, or a simple sirloin—marinate or rub lightly, then sear hot and rest. Grill fresh corn alongside or after the steak and let the kernels char slightly before cutting them off the cob to fold into a salad with tomatoes, herbs, and a tangy vinaigrette.

The contrast of smoky meat and sweet charred corn is a summer classic that needs few extras. I often prepare this when I want to impress without fuss: steaks sear quickly and the salad comes together in one bowl, leaving you time to pour drinks and socialize rather than fuss with garnishes.

Sauces, Rubs, and Marinades Made Quick

Simple seasonings often trump elaborate sauces. A well-balanced rub of brown sugar, smoked paprika, garlic powder, salt, and pepper creates instant depth on pork or chicken. For a brighter profile, a marinade of citrus, oil, and herbs infuses fish and poultry in as little as thirty minutes. The goal is to enhance, not overwhelm, the ingredient’s natural flavors.

Store-bought sauces are fine when chosen carefully; use them sparingly and finish with a fresh element like chopped herbs or lemon. Making a big batch of a flexible dressing—olive oil, mustard, honey, and vinegar—keeps weeknight grilling efficient because it doubles as a marinade, a finishing drizzle, or a dip for vegetables.

Mix Use For
Brown sugar, smoked paprika, garlic powder Pork, chicken rub
Lemon zest, olive oil, chopped dill Fish finish or marinade
Soy, honey, ginger Chicken skewers or salmon glaze

Timing, Prep, and Serving: Keep the Flow Calm

The best backyard meals happen when timing is planned, not rigid. Do prep—chop vegetables, assemble marinades, set out toppings—before the grill is hot. Start components in the order that matches their cooking time: items that take longest go first, delicate things last. If you’re hosting, serve simple finger foods or a composed salad while the main items finish so guests aren’t waiting with empty plates.

One approach I use is a loose timeline: 30–45 minutes before serving, season proteins and heat the grill; 15–20 minutes before, start sides and vegetables; five minutes before serving, finish and rest the proteins. That little buffer gives you time to account for flare-ups or an extra minute of char, and keeps the service relaxed. Good mise en place makes a grill session feel like a performance with a comfortable rehearsal, not a frantic sprint.

When What to Do
45 min before Preheat grill, season meats, prepare sauces
20 min before Start sides, skewers, and vegetables
5–10 min before Sear proteins, finish with rest period

Troubleshooting Common Grilling Problems

BBQ Grill Meals Made Simple. Troubleshooting Common Grilling Problems

Flare-ups, sticking, and uneven cooking are the usual suspects. To prevent flare-ups, trim large pockets of fat and keep a spray bottle of water nearby for brief control. When food sticks, it’s usually because the grill or the food wasn’t hot or oiled enough—give the grates time to heat and lightly oil the item rather than the surface to avoid dripping oils that cause flames. A clean grate also reduces sticking and improves sear lines.

If things cook unevenly, create clearer heat zones and use a thermometer to check internal temperatures. For particularly thick cuts, sear over high heat and then move to indirect heat to finish without burning the exterior. And if you overcook, use compound butters or sauces to add moisture and richness; they won’t undo dryness but can rescue texture and flavor enough to keep the meal enjoyable.

Building Confidence: Small Experiments, Big Payoffs

Start small and repeat. Make one dish until you can reliably cook it to your preferred doneness, then add variations. Try swapping herbs, using different wood chips, or grilling the same protein with two glazes to learn how small changes shift flavor. These mini-experiments keep grilling fresh and surprisingly educational without disrupting family dinners.

On a personal note, my backyard style evolved from burnt steaks and nervous flipping into a ritual I now look forward to. A simple habit—checking temperature rather than guessing—changed everything. I recommend keeping a small notebook or phone note to record timing and temperatures; after a few tries you’ll have a set of go-to adjustments perfect for your grill and your taste.

Parting Tips before You Light the Coals

Embrace simplicity and seasonal ingredients. A modest menu executed well will outshine an ambitious spread done half-heartedly. Keep your refrigerator stocked with flexible staples—limes, garlic, yogurt, lemons, and sturdy greens—so you can assemble quick sides or marinades any day of the week. Remember that serving is part of the experience: warm plates, tidy presentation, and a few thoughtful condiments make even humble grilled fare feel special.

Finally, view your grill as an extension of the kitchen where experimentation is welcome. The more you cook outdoors, the more you’ll recognize patterns: what sears fast, what tolerates smoke, and which combinations hit the spot for your household. With a little practice and the straightforward recipes here, BBQ, the grill, and simple meals can become the foundation of many easy, flavorful dinners.

A Symphony of Spice: Discovering Flavorful Indian Vegetarian Meals

A Symphony of Spice: Discovering Flavorful Indian Vegetarian Meals

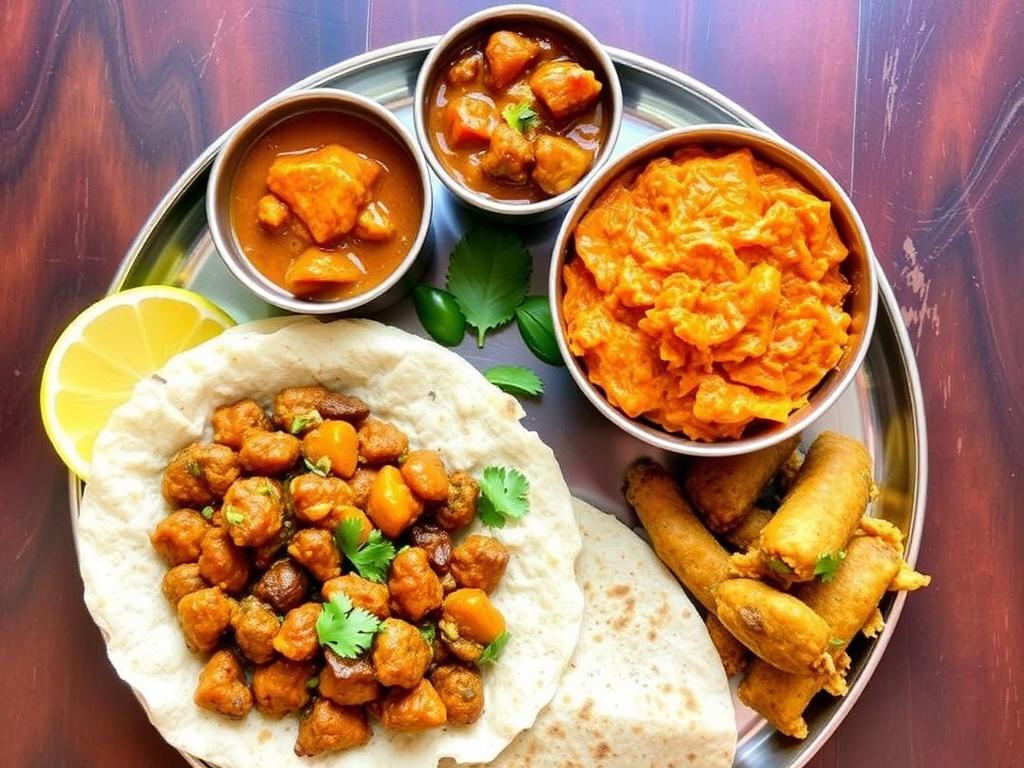
There is a particular kind of joy in a kitchen filled with the smell of cumin sizzling in hot oil, steam rising from a pot of lentils, and a bowl of bright chutney waiting on the counter. This article invites you into that sensory world and shows how Flavorful Indian Vegetarian Meals can be made approachable, nutritious, and endlessly varied. You do not need a long list of rare ingredients to capture the character of Indian food; a handful of spices and a few techniques unlock remarkable depth of taste. Over the next sections I will walk you through essential pantry items, regional signatures, practical recipes, and thoughtful pairing ideas so you can build balanced, plant-based meals that sing. Whether you cook for one or host a small gathering, the aim is to help you create food that tastes alive and memorable.

Why Indian Vegetarian Cooking Feels So Alive

Indian cuisine is rooted in centuries of regional adaptation, trade, and culture, and that history shows up on the plate in surprising ways. From mountain valleys to coastal towns, local produce and climate shaped dishes that highlight texture and contrast as much as spice. Many traditions emphasize vegetarian cooking not as a limitation but as an invitation to coax richness from vegetables, legumes, dairy, and grains through technique. The emphasis on layering spices, using acidic elements like tamarind or yogurt, and finishing with fresh herbs gives food a dynamic sense of movement on the palate. When you taste Indian food at its best, you notice not only warmth and pungency but a careful balance of sweet, sour, salty, and bitter notes working together.

Essential Spices and Pantry Staples

To cook authentic-tasting vegetarian dishes, stock a modest spice shelf and a few staple items that reappear in many recipes. Cumin, coriander, turmeric, red chili powder, garam masala, and mustard seeds form the backbone; whole spices like cardamom, cloves, and cinnamon elevate slow-cooked dishes. Apart from spices, keep dried lentils, basmati rice, chickpea flour, tamarind paste, jaggery or brown sugar, and a couple of types of oil—neutral oil for high-heat frying and ghee for finishing—on hand. Fresh ingredients such as ginger, garlic, green chilies, cilantro, and onions are minor investments with major returns: they form the aromatic base for most sauces and dals. Properly stored, these staples last through many meals and let you improvise when a recipe calls for a specific flavor.

How to Build Balance: Texture, Heat, and Tang

Great vegetarian meals rely on contrast: creamy and crunchy, soft and firm, muted and bright. Think of a bowl where silky dal meets crisp roasted cauliflower and a scattering of toasted nuts; the interplay keeps the diner interested. Heat should be a seasoning, not a mask; use chilies and pepper to enhance other flavors rather than dominate them. Acidic and sweet elements—in the form of lemon, tamarind, or a pinch of jaggery—bring out savory notes and prevent a dish from tasting flat. Lastly, finishing touches such as tempering spices in hot oil, adding a dollop of yogurt, or sprinkling fresh herbs amplify aroma and make simple ingredients feel luxurious.

Regional Signatures: A Tour Around the Subcontinent

Flavorful Indian Vegetarian Meals. Regional Signatures: A Tour Around the Subcontinent

India’s vegetarian repertoire is regionally distinct, and each area has its own techniques and flavor priorities that translate beautifully to home cooking. In the north, robust gravies with dairy and bread-based accompaniments create comforting, hearty plates that soothe the palate. The south emphasizes rice, tangy tamarind, and coconut or curry leaves, producing bright, layered flavors with a coastal sensibility. Western regions favor bold, often sweet-and-spicy combinations, while eastern cooking highlights mustard oil, poppy seeds, and freshwater fish traditions adapted into vegetarian variants. Understanding these regional tendencies helps you mix approaches and invent new combinations while staying true to the cuisine’s spirit.

North: Rich Gravies and Hearth-Baked Breads

Northern Indian food often uses dairy to build creamy textures—paneer, yogurt, and ghee appear alongside slow-simmered tomato-onion-based sauces. Dishes like chana masala and rajma deliver deep, savory notes that pair perfectly with warm flatbreads such as roti or naan. Toasting whole spices and frying a base of onions and tomatoes is a common method to extract layered flavors over time. This region’s vegetarian recipes are satisfying on cold evenings and lend themselves well to communal meals, where a pot of dal and fresh bread feed a crowd. Learning to balance creaminess with citrus or fenugreek leaves prevents richness from becoming cloying.

South: Coconut, Curry Leaves, and Tangy Stews

In the south, the culinary voice favors bright, fermented, and sour elements—tamarind and unripe mango are common palate sharpeners—paired with the mellow texture of coconut. Dosas, idlis, and rice-based biryanis showcase fermented batters and aromatic rice techniques that give meals a light, complex mouthfeel. Tempering mustard seeds and curry leaves in hot oil releases instant fragrance that signals authenticity, especially in simple vegetable preparations and dals. Coconut milk and grated coconut add a silky, cooling counterpoint to hot chilies and spicy chutneys, creating a balanced experience even when the spice level climbs. These methods are ideal for bringing out subtle sweetness in vegetables like eggplant and pumpkin.

West and East: Sweet-Spicy Western Plates and Delicate Eastern Flavors

Western cuisines from Gujarat and Maharashtra often play with a sweet heat—jaggery and chilies coexist in many snacks and main dishes—while eastern states like Bengal use mustard and panch phoron blends to create nuanced, delicate flavors. Western vegetarian plates may include small, spiced vegetable fritters alongside savory stews, and an emphasis on pickles and farsan adds crunch. Eastern cooking can be lighter, relying on mustard oil’s sharpness and subtle fish-free adaptations of classic preparations, where vegetables and legumes are treated with great respect to preserve their texture. Exploring these areas shows how a few technique changes dramatically alter the character of similar ingredients.

Region-to-Dish Quick Reference

Region Example Dish Main Ingredients Characteristic
North Chana Masala Chickpeas, tomato, garam masala Robust, tangy, hearty
South Sambar Toor dal, tamarind, vegetables, curry leaves Sour, aromatic, versatile
West Pav Bhaji (veg version) Mixed vegetables, butter, spice blend Bold, buttery, street-food style
East Shukto (vegetarian) Bitter gourd, vegetables, mustard paste Layered, slightly bitter, refined

Practical Recipes and Templates for Home Cooks

Rather than hand you rigid recipes, I offer flexible templates you can adapt to ingredients on hand. For a classic chickpea stew, sauté a base of cumin seeds, onions, ginger, and garlic until golden, add tomato and spice powder, then simmer soaked or canned chickpeas until tender. Finish with a pinch of garam masala and a squeeze of lemon to brighten the pot. For a vegetable biryani template, marinate vegetables in yogurt and spices briefly, layer with par-cooked basmati rice, and steam together for aromatic depth; roasted nuts and fried onions make a satisfying topping. These templates work for many seasonal vegetables and different spice levels, so you can scale and adjust without losing the soul of the dish.

Chana Masala—A Reliable Weeknight Star

Chana masala is a believer’s dish: simple pantry staples become something much more through slow flavor development. Start with oil and whole spices, build an onion-tomato base until the oil separates, then add chickpeas and simmer until the sauce is thick and glossy. Crack a few green chilies or a pinch of red chili powder to taste, and finish with fresh cilantro and lemon. This dish stores well and often tastes better the next day as flavors meld, making it perfect for meal prep. Serve with rice or flatbread for a complete, satisfying meal.

Vegetable Biryani—Layered Comfort with Crisp Edges

Biryani might sound elaborate, but the core ideas are straightforward: aromatic rice, spiced vegetables, and a gentle steam to marry them. Par-cook the rice until it retains a bite, cook vegetables with a spice mix and yogurt, then layer and steam briefly to let tricky steam pockets form. A small amount of saffron or turmeric in warm milk adds color and scent, while fried onions and toasted nuts provide texture. Control moisture carefully to avoid soggy rice. The result is a celebratory dish that gives you rich flavor without meat.

Saag Paneer—Greens Made Luxurious

Greens are transformed when pureed with spices and balanced with cubes of paneer or firm tofu for a vegetarian twist. Wilt spinach and mustard greens gently, blend to a silky consistency, and then simmer with tempered spices and a touch of cream or coconut milk if desired. Pan-fried cubes of paneer create a pleasant chew that contrasts with the velvety sauce. Adjust salt and acidity to let the greens’ natural sweetness shine through. Saag pairs beautifully with roti and a side of pickled vegetables to cut richness.

Planning Meals and Pairings

Constructing a meal is like composing a short piece of music: include a melody, harmony, and a percussive element. For a balanced vegetarian Indian plate, pair a dal or legume-based main for protein, a vegetable dish for texture, a grain such as rice or bread for substance, and a small salad or raita for cooling contrast. Chutneys and pickles add sharp, concentrated notes that awaken the palate and can be made ahead in jars. For drinks, salted buttermilk or a simple spiced tea works well to complement spice, while a light, citrusy drink can refresh between bites. Planning a week’s menu becomes easier when you rotate one-pot dals, a rice-based dish, and a quick stir-fry, using leftovers creatively in wraps or bowls.

Nutrition: Protein, Iron, and How to Balance a Vegetarian Plate

Vegetarian Indian meals are naturally well suited to meeting many nutritional needs when composed with intention. Legumes such as lentils, chickpeas, and mung beans provide a reliable source of protein and fibre, while dairy supplies calcium and additional protein for those who include it. Combining grains with pulses across the day ensures varied amino acids and better overall protein quality in a plant-based diet. Pay attention to iron sources—leafy greens, lentils, and seeds—and pair them with vitamin C rich foods like lemon or tomato to aid absorption. Simple practices like including roasted nuts or seeds for healthy fats and ensuring variety across the week keep meals satisfying and nutritionally rounded.

Lessons from My Kitchen: A Personal Note

Years ago, I learned to make a humble dal from a neighbor who refused to measure anything and relied entirely on feel and smell. The process taught me more than a recipe; it taught me patience and attention to aroma. I still remember the moment the tempered spices hit the pot and the whole room seemed to brighten—an olfactory signal that the dish had turned. Since then I’ve adapted those intuitive instincts into repeatable steps, but I always keep space for improvisation. That blend of structure and freedom is what makes cooking Indian vegetarian food both reliable and endlessly creative.

Practical Tips for Beginners

Start small and build confidence with a few repeatable techniques: tempering spices in hot oil, simmering lentils until creamy, and balancing acidity with a little sweetener when a sauce tastes flat. Toast whole spices briefly before grinding to release oils and magnify aroma, and always taste at each stage to adjust seasoning gradually. Keep chopped aromatics like onions, ginger, and garlic in the fridge for quick weeknight dishes, and use leftover vegetables in a spiced hash or wrap to avoid waste. When it comes to heat, add chillies incrementally; you can always increase spice but cannot remove it. Finally, document small successes and favorite combinations—your personal reference will grow into a reliable rotation of go-to meals.

Where to Go Next in Your Culinary Journey

Once you feel comfortable with basic templates, experiment with lesser-known legumes, regional spice blends, and fermentation techniques like dosa or idli batter. Try substituting paneer with grilled tofu, or experiment with roasted vegetables tossed in panch phoron to discover new textures. Visiting local markets for seasonal produce can inspire dishes you might not create otherwise, and sharing food with friends encourages refinement through feedback. Above all, embrace curiosity: small experiments often lead to the most memorable meals. With a few core skills and an open mind, you can bring the vivid, layered flavors of Indian vegetarian cooking into everyday life and make every meal feel intentional.

Mediterranean Diet Dishes to Try: Flavor-Forward, Heart-Healthy Meals for Everyday Cooking

Mediterranean Diet Dishes to Try: Flavor-Forward, Heart-Healthy Meals for Everyday Cooking

The Mediterranean Diet Dishes to Try that follow are not a list of rigid rules but a collection of tastes and rituals that make eating enjoyable and sustainable. I want to take you through plates that are bright with citrus, fragrant with herbs, and generous with olive oil — foods that reward patience at the market and simple attention in the kitchen. Expect practical ideas, small recipes you can actually make on weeknights, and notes on how to adapt classics for busy lives. Along the way I’ll point out pantry staples, swaps for lighter versions, and a few personal favorites I return to again and again. Whether you are curious about heart-healthy eating or just want fresher, more vibrant meals, these dishes give you a gentle, delicious entry point.

Why the Mediterranean Approach Works

Scientific studies have repeatedly linked the Mediterranean diet with lower rates of heart disease, better metabolic health, and increased longevity, and the reasons are straightforward. The emphasis falls on whole, minimally processed ingredients — vegetables, fruits, legumes, whole grains, nuts, fish, olive oil and moderate dairy — which together create a nutrient-dense pattern rather than a calorie-counting scheme. This is not about deprivation; it is about reshuffling what fills your plate so that flavor and health reinforce each other. The combination of healthy fats, fiber, lean protein and antioxidants supports steady energy and satiety, making it easy to sustain over months and years. In practice, it becomes a kitchen philosophy: savor more vegetables and fish, let herbs and citrus carry the seasoning, and treat meat as an accompaniment rather than the centerpiece.

Another reason the Mediterranean approach endures is cultural: meals are social, slow, and often shared, which reduces rushed eating and promotes smaller portions in a pleasant way. Wine appears modestly in many regional traditions, but everything centers on plant-forward plates and thoughtful fats like extra virgin olive oil. For people who have tried strict diets and failed, this pattern feels less punitive because it allows pleasure — bread to dip, yogurt for dessert, seafood grilled simply and celebrated. The shift toward these tastes is a practical path to consistent wellbeing rather than a temporary fix. Try thinking of it as a new baseline for everyday cooking, not an occasional splurge.

Core Ingredients and Pantry Staples

Stocking a Mediterranean-style pantry makes it effortless to assemble healthy recipes at a moment’s notice. Essentials include extra virgin olive oil for dressing and cooking, canned tomatoes and beans for quick stews, whole grains like farro or brown rice, and small jars of preserved lemons or good anchovies for instant umami. Fresh herbs — parsley, dill, oregano, basil — transform simple dishes and reward a little pruning. Nuts and seeds add crunch and a boost of healthy fats, while plain yogurt and a block of feta provide creamy, savory possibilities across meals.

  • Olive oil — the cornerstone for dressings, roasting and finishing dishes.
  • Canned tomatoes and chickpeas — base for countless stews and salads.
  • Whole grains — farro, bulgur, brown rice, or whole-wheat couscous.
  • Fresh citrus and garlic — quick acidity and aroma reset almost any dish.
  • Herbs and spices — parsley, mint, cumin, smoked paprika.
  • Fish and shellfish — fresh when possible, frozen when needed.
  • Plain yogurt and olives — for sauces, dips and quick snacks.

When I travel or host friends, I notice these staples almost always make an appearance; they are flexible and forgiving. A jar of chickpeas can turn into hummus, a salad, or a warm stew depending on how you season them. Learning to rely on a few high-quality basics reduces waste and keeps weekday cooking lively without being complicated. Keep those staples visible on open shelves and you’ll find inspiration strikes more often.

Star Dishes to Try

Appetizers and Salads that Start a Meal Well

Appetizers in the Mediterranean world are meant to open conversation and appetite — small, bold, and herb-forward. Think hummus swirled with olive oil and paprika, a chunky white bean dip studded with rosemary and lemon, or tzatziki cooled with cucumber and garlic. Salads like the classic Greek salad bring texture contrasts: crisp cucumber, juicy tomato, briny olives and creamy feta dressed simply with oil and vinegar. Tabbouleh offers a fresh, minty alternative built around bulgur, parsley and lemon that’s surprisingly satisfying on its own or alongside grilled meats.

These starters are also perfect examples of how healthy recipes can be both easy and showy; a bowl of olives, marinated feta and warm pita requires little hands-on time but feels indulgent. For hosting, assemble a small meze platter: roasted red peppers, marinated artichokes, a scoop of hummus and a pile of lightly dressed greens. The variety invites sharing and reduces overeating because people nibble and talk instead of digging impatiently at a single plate. That social rhythm quietly improves portion sense and makes meals linger in the best way.

Hearty Main Courses for Everyday and Special Nights

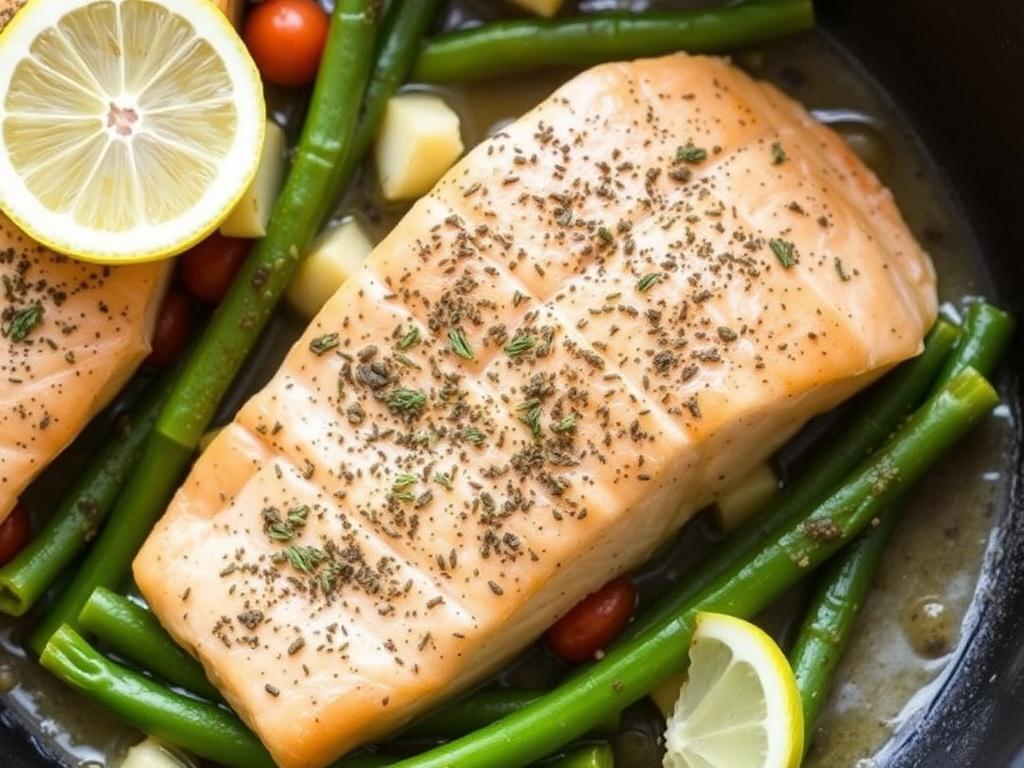
Main dishes in Mediterranean cooking often highlight seafood, poultry, or legumes as central players while vegetables take up a generous portion of the plate. A simple grilled lemon-herb salmon combines olive oil, crushed garlic, lemon zest and parsley, then goes on the grill for a few minutes per side until the flesh flakes; serve with steamed greens and farro for a balanced meal. Shakshuka — eggs poached in a spiced tomato-pepper sauce — is equally at home for breakfast or dinner and can be made in one skillet for fast cleanup. In coastal regions, fish stews and seafood sagans are long-simmered and aromatic, a reminder that slow, gentle cooking often yields the most satisfying results.

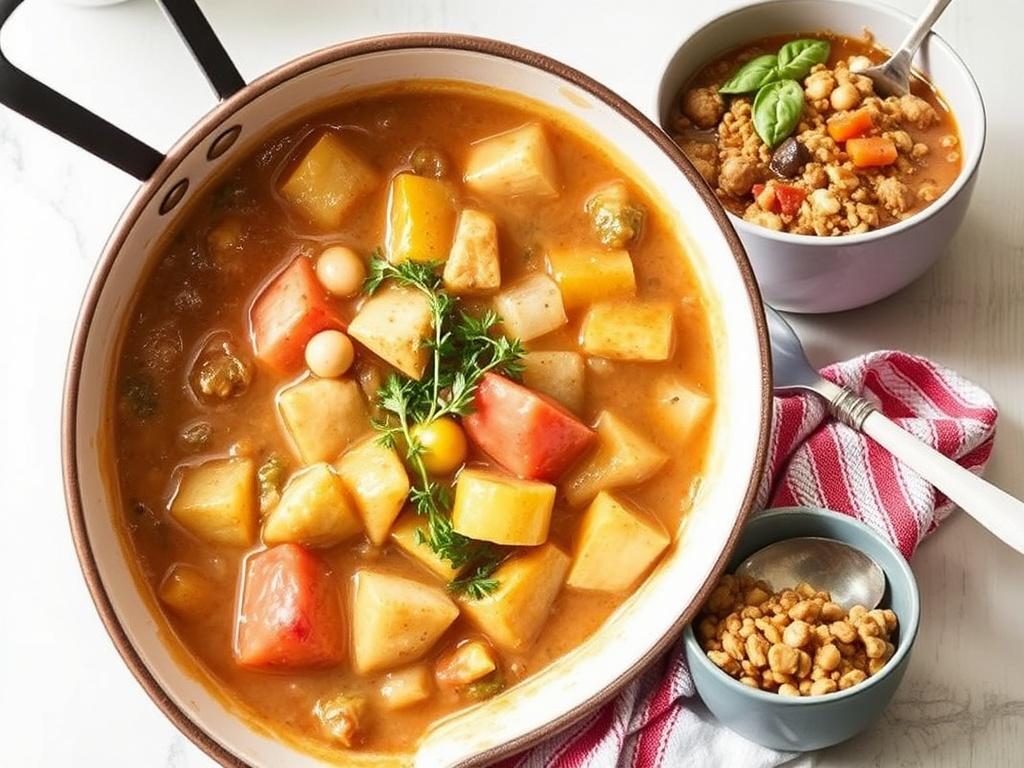
For those who prefer meat, chicken souvlaki or turkey keftedes seasoned with oregano and lemon feel lighter than many red-meat dishes while packing plenty of flavor. Lentil stews with smoked paprika and greens provide hearty vegetarian options that stand up to shareable meals and fill you without heaviness. One of my routines is to cook a big pan of tomato-braised chickpeas on Sunday; it becomes lunches, a pizza topping and a quick dinner component during the week, which keeps me from reaching for less wholesome convenience foods.

Sides, Grains and Vegetables that Steal the Show

Sides in Mediterranean cuisine are rarely afterthoughts; roasted vegetables, braised greens and grain salads are often the reason people return to this style of eating. Roasted eggplant with tahini and pomegranate seeds is fragrant and silky, balancing fat and brightness in a single bite. Whole grains like farro or barley tossed with toasted almonds, lemon and parsley make an ideal accompaniment to fish and grilled meats, adding chew and nutrition without excess calories. A simple lentil salad with capers and sun-dried tomatoes stores well and provides a plant-based protein boost to any plate.

Vegetables roasted until golden and finished with lemon or a drizzle of vinaigrette become the star of a meal rather than a side note. I like to roast a tray of mixed vegetables and keep them in the fridge for three days; they reheat into lunches or tuck into wraps for travel-friendly meals. A Mediterranean way of cooking elevates routine ingredients through texture and seasoning rather than heavy sauces, which keeps the dishes light but deeply satisfying.

Breakfast and Brunch Ideas that Keep You Full

Breakfast in the Mediterranean tradition often balances protein, healthy fat and fruit to create energy that lasts until lunch. Greek yogurt thickened with a spoonful of honey, walnuts and a scattering of fresh figs or berries feels both indulgent and purposeful, offering probiotics along with texture. Shakshuka’s warm tomatoes and eggs are an excellent savory option, as is labneh spread thickly on toast with olive oil and za’atar for a tangy, creamy start. Savory grain bowls with leftover farro, greens and a soft-boiled egg are an efficient way to reuse dinner components while keeping breakfast varied.

These breakfasts double as solid examples of how diet meals can still be pleasurable and full-flavored; the trick is pairing modest portions of higher-calorie items like nuts or olive oil with a larger base of vegetables or whole grains. Over time, this habit trains appetite toward sustaining combinations instead of quick sugar spikes. I remember a trip to Crete where every morning began with a small spread: bread, honey, olives, cheese and fresh fruit, and I still emulate that ritual because it felt balanced and welcoming.

Desserts and Sweet Finishes without Excess

Sweet endings in the Mediterranean tend to be modest and centered on fruit, nuts and dairy rather than dense creams and heavy icings. Fresh figs drizzled with honey and sprinkled with pistachios embody the principle of letting natural sweetness shine with a small lift. A simple olive oil cake keeps texture light and uses good oil for moisture, while Greek yogurt with citrus marmalade and a few toasted almonds offers a creamy and crunchy conclusion without excess. Even sorbets flavored with blood orange or lemon slot neatly into this scheme as refreshing, low-calorie treats.

By emphasizing quality over quantity, these desserts show that you can satisfy a sweet tooth while keeping meals aligned with health goals. I often serve a bowl of fruit with a tiny plate of aged cheese and a few nuts for guests; the contrast of flavors feels sophisticated and prevents the slippery slope into overindulgence. That small, deliberate portioning is part of the culinary intelligence behind many Mediterranean meals.

Practical Tips to Turn Tradition into Everyday Diet Meals

Transforming classic dishes into diet-friendly versions is mostly a matter of technique and proportion rather than fundamentally changing the flavors. Swap creamy sauces for yogurt-based dressings, replace some butter with extra virgin olive oil, and increase the vegetable-to-protein ratio on your plate. Small changes, like roasting instead of deep-frying and using whole grains in place of refined products, reduce caloric density without compromising satisfaction. Thinking in ratios — half your plate vegetables, a quarter whole grains, a quarter protein — makes decisions simple and keeps meals balanced without constant weighing or tracking.

Dish Simple Swap Why It Helps
Creamy pasta Use yogurt + lemon instead of cream Reduces saturated fat and keeps creaminess
Fried fish Grill or roast with herbs Less oil, more flavor from charring and citrus
Rich desserts Fresh fruit with nuts or olive oil cake Lower sugar, fibers and healthy fats
Sandwiches Whole-grain bread + hummus + grilled veg More fiber and plant protein, better satiety

Meal planning helps too: batch-cook legumes and grains at the start of the week, make a big jar of simple dressing, and roast seasonal vegetables in one pan for several meals. Those small investments in prep make weekday choices automatic and aligned with healthy recipes rather than last-minute convenience. I keep a notebook with three rotation menus I enjoy, which reduces decision fatigue and keeps flavors varied enough to avoid boredom.

How to Explore and Personalize Flavors

Part of the joy of Mediterranean cooking is its regional diversity: Greece’s lemon-and-oregano brightness differs from Morocco’s warm spices or Italy’s herb-and-tomato simplicity. Treat recipes as starting points rather than strict formulas: swap basil for mint in a salad, use smoked paprika in a tomato stew, or fold in a handful of arugula for peppery depth. Tasting as you go and adjusting acidity or salt incrementally will teach you how subtle shifts transform a dish from flat to memorable. Keep a small spice kit with a few unexpected items — sumac, preserved lemon, Aleppo pepper — and you’ll be surprised how quickly meals gain character.

My own experimentation started with a single pantry trial: adding chopped olives to a lentil salad and realizing how the briny contrast brightened the whole bowl. From there I kept testing small swaps and learned to adapt recipes to what was fresh at the market. Cooking this way trains intuition and makes it easier to improvise when you are low on time or ingredients. The best dishes often come from playful constraints rather than perfect grocery runs.

Practical Recipe: Quick Lemon-Herb Salmon (One-Skillet, Weeknight Friendly)

Mediterranean Diet Dishes to Try. Practical Recipe: Quick Lemon-Herb Salmon (One-Skillet, Weeknight Friendly)

This is a straightforward recipe I rely on when I want something fast, healthy and satisfying. Pat salmon fillets dry, rub lightly with olive oil, garlic, lemon zest and chopped parsley, then season with salt and black pepper. Heat a skillet over medium-high heat until shimmering, place the fillets skin-side down for three to four minutes until crisp, flip and cook one to two more minutes depending on thickness; finish with a squeeze of lemon and a scattering of fresh herbs. Serve with a side of blistered cherry tomatoes and cooked farro or a simple arugula salad dressed with olive oil and red wine vinegar. The technique is forgiving and the result always feels restaurant-level even on a hectic night.

Bringing It All Together

Trying these Mediterranean Diet Dishes to Try gives you a practical toolkit: prioritize plants, choose good fats, keep protein lean and local when possible, and let herbs and citrus carry the flavor instead of heavy sauces. The pattern is flexible enough to fit vegetarian weeks, quick family dinners, or weekend entertaining without feeling like a sacrifice. Start small — pick two dishes from this list to test this week — and notice how your energy and enjoyment change when meals are fresher and more varied. Over time, small, consistent swaps create lasting habits that taste good and support your health without requiring willpower to maintain.

Finally, cooking this way should feel like an invitation rather than a mandate; adapt recipes to your palate and schedule, savor the process of assembling simple ingredients, and share the results when you can. The Mediterranean approach rewards curiosity and community, and the dishes you try can become the foundation of a more flavorful, sustainable way of eating.

Creative Uses for Leftover Chicken: Turn Last Night’s Dinner into New Favorites

Creative Uses for Leftover Chicken: Turn Last Night’s Dinner into New Favorites

Inevitably, some of us end up with cooked chicken sitting in the fridge after a dinner that went a little heavy on portion sizes. That modest pile of meat is culinary gold if you know how to treat it — it saves time, stretches your grocery budget, and keeps you from tossing food. Here I’ll walk you through practical, flavorful ways to reinvent those leftovers into dishes that feel fresh, not tired. Expect clear techniques, pantry pairings, and real-life tricks I use when I don’t want to start from scratch but still want a meal worth remembering. Sprinkle in a few simple recipes and you’ll have enough inspiration to plan a week’s worth of meals around one roast or roasted breasts.

Start with safety and storage — the groundwork for success

Creative Uses for Leftover Chicken. Start with safety and storage — the groundwork for success

Before creativity, there must be care. Proper storage keeps leftover chicken safe and tasty: cool it within two hours of cooking and store in shallow airtight containers to speed chilling. Refrigerated cooked chicken generally lasts three to four days; if you won’t use it in that window, freeze portions right away. Thaw frozen pieces in the fridge overnight rather than at room temperature to preserve texture and minimize bacteria risk. These small habits maximize the number of meal ideas you can reliably pull off during the week.

How you store leftovers also affects the flavors you can coax out later. Keep any pan juices or sauces with the meat when possible — they’re concentrated flavor that rescues a bland salad or quick pasta. Label containers with dates so nothing lingers too long, and portion the chicken in sizes suitable for single meals to avoid repeated reheating. With good habits, leftover chicken becomes a dependable ingredient rather than a gamble.

Flavor foundations: sauces, acids, and textures that wake up leftovers

Repurposed chicken needs contrast: an acid, a fat, and a texture. A squeeze of lemon or a splash of vinegar brightens the richness; a drizzle of olive oil or a knob of butter adds silkiness; and a crunchy element — toasted seeds, panko, or crispy greens — gives life to soft meat. Think of these components as small additions that transform, rather than mask, the original protein. With these building blocks you can turn a plain shredded breast into a compelling bowl or sandwich in five minutes.

Sauces deserve special attention because they reintroduce moisture and cohesion. Quick vinaigrettes, yogurt-based dressings, chimichurri, or peanut sauce all pair well with different spice profiles. If you’re making Asian-style stir-fry, toss the chicken with a little sesame oil and soy before reheating. For Mediterranean twists, garlic, oregano, and a citrus finish are reliable. Once you internalize these flavor families, repurposing meat becomes a fast creative exercise instead of a chore.

Quick weeknight meal ideas that start with what’s already cooked

When time is short, the goal is a satisfying plate in under thirty minutes. Leftover chicken excels in quick salads, frantic stir-fries, and sandwiches that sing. Assemble a simple grain bowl with warm quinoa, shredded chicken, roasted vegetables, and a spoonful of tahini dressing for an instantly balanced dinner. If you need to feed a crowd, toss the meat into a big pan of tomato sauce and serve over pasta; everyone thinks you’ve slaved for hours.

Below are compact ideas you can riff on depending on what’s in your fridge. Keep a few staples — lemon, soy sauce, canned tomatoes, tortillas, and a sturdy green — and you’ll have countless ways to rework leftovers into new meals. These practical meal ideas save time and reduce waste while keeping dinners interesting.

  • Shredded chicken salads with citrus vinaigrette
  • Chicken and vegetable stir-fry over rice or noodles
  • Stuffed tortillas or quesadillas with cheese and salsa
  • Hearty soup with chopped chicken, beans, and greens
  • Baked pasta with cream sauce and breadcrumbs

Salads and bowls: bright, balanced, and fast

Salads are the simplest way to make leftover chicken feel deliberate. Use a mix of textures: peppery arugula or romaine for crunch, roasted beets or sweet potatoes for body, and toasted nuts for bite. Top with the chicken, rather than mixing it in, so guests can appreciate the protein as a star, not filler. A well-composed bowl hits sweet, salty, acidic, and crunchy, making reheated or cold leftovers shine.

Grain bowls offer more heft and travel well as lunches. Combine farro or brown rice with beans, chopped herbs, and a punchy dressing; the warm grain softens the chicken’s chill and melds flavors. I often toss leftover chicken with a bit of chili oil and soy, then serve it over warmed rice with scallions and a fried egg for a twenty-minute meal that feels restaurant-worthy. These bowls are flexible and keep your meal rotation from going stale.

Wraps, sandwiches, and sliders: portable food with personality

Transform shredded or sliced chicken into handheld delights. A quick slaw, a smear of mustard or mayo, and a soft roll make a classic sandwich. For Mexican-inspired options, toss the chicken with cumin, lime, and chopped cilantro, then fill warm tortillas with avocado and pickled onions. The secret is contrast: creamy avocado, crisp veg, and aromatic herbs elevate the meat and make each bite exciting.

Sliders are perfect for using small amounts of leftover chicken at once. Mix chopped meat with a binder like egg and panko, season confidently, and pan-sear tiny patties for party snacks or a fun family dinner. I remember turning two cups of diced chicken into eight sliders one rainy evening; they disappeared so quickly I barely had time to taste one. Portability and inventive fillings turn routine leftovers into memorable meals.

Soups, stews, and comforting dishes

Soups are forgiving and amplify the mild flavor of leftover chicken. Add it at the end of simmering to preserve tenderness, or use it straight from the fridge for quick reheating. Chicken and vegetable soup, tortilla soup with shredded meat, and creamy chowders all benefit from pre-cooked poultry — the base comes together faster without sacrificing depth.

Stews and curries absorb spices beautifully, so let the chicken warm gently in a simmering sauce to take on flavor. A coconut curry with tomatoes and spinach turns a few handfuls of meat into a satisfying bowl over jasmine rice. I often make a big pot and portion it for lunches; reheated, the flavors meld even more, proving that leftovers can improve with time rather than lose their charm.

Stir-fries, fried rice, and noodle bowls

In pan dishes, leftover chicken shines because the quick, high-heat cooking focuses on texture and seasoning rather than further cooking the protein. For fried rice, cold day-old rice is ideal; toss it with diced chicken, scrambled egg, scallions, and a splash of sesame oil and soy for a complete meal in ten minutes. Chop the meat into uniform pieces so it reheats evenly and mixes well with the other ingredients.

Noodle bowls are equally flexible: warm the chicken briefly in a hot skillet with garlic and ginger, then add quick-cooking greens and pre-cooked noodles tossed with a savory sauce. The result is a bowl with layered textures and a punch of aromatics. These dishes are most successful when you think in terms of balance — acid, fat, and texture — rather than simply heating meat.

Bakes, casseroles, and pies: comfort that stretches further

Casseroles are classic ways to convert leftover protein into an economical family meal. Combine chicken with cooked pasta, a creamy or tomato-based sauce, vegetables, and a crunchy topping for a filling dish that reheats well. A little grated cheese tucked under breadcrumbs creates a golden finish that tempts even picky eaters.

Chicken pot pie is another satisfying transformation: fold the meat into a rich filling with carrots, peas, and a glossy gravy, then bake under a flaky crust. Freezing portions of uncooked pie for later is a brilliant use of leftovers: you get a homemade freezer meal without extra cooking on the day you serve it. These oven-based dishes reward a bit of time with generous leftovers for lunches or quick dinners later in the week.

Snacks and party bites: small plates, big flavors

Leftover chicken is a party asset. Make bite-sized crostini with thinly sliced meat, fig jam, and soft cheese, or blend chicken into a spread with cream cheese and herbs for crackers. Buffalo-style chicken dip with shredded meat, hot sauce, and melted cheese is reliably popular and requires minimal effort. These small plates stretch quantities and pair well with vegetables or bread for easy entertaining.

Another angle: turn chicken into coated bites by dipping shredded meat in beaten egg, rolling in panko or crushed cornflakes, and baking or frying until crisp. Serve with a tangy dipping sauce to counter the richness. These morsels are addictive and demonstrate that leftover chicken can be a star at any casual gathering.

Techniques to change texture and perception

How you handle the meat dictates how it will perform in new dishes. Shredding gives surface area for sauces, diced pieces offer bite, and thin slices are great for sandwiches. Crisping in a hot pan adds crunch and caramelization, which tricks the palate into thinking the dish is freshly cooked. Even quick broiling with a glaze can revive a bland piece of chicken.

Temperature matters too: cold chicken works in salads, while warm chicken integrates better into hot dishes. Consider marinating briefly if you’re trying to add a new flavor profile — even a ten-minute soak in citrus or soy can make a difference. Small technique tweaks let you produce wildly different meal ideas from the same starting point.

Technique Purpose Best for
Shredding More surface for sauces Salads, tacos, soups
Dicing Even texture Fried rice, casseroles, pies
Crisping in pan Caramelized flavor and texture Sandwiches, bowls, toppings
Short marination Introduce new spices quickly Wraps, grilled skewers, salads

Smart meal planning to reduce waste and save money

Thinking ahead prevents the fridge-scavenger panic. If you cook a whole bird, plan two meals from it: a roast dinner followed by at least one repurposed dish during the next three days. Portion chicken into meal-sized containers as soon as it cools; frozen single-serving packs are lifesavers for busy nights. A simple weekly framework — roast, bowl, and one freezer-ready produce like a soup or pie — ensures the protein gets used without stress.

Using leftover chicken deliberately helps reduce waste and keeps your grocery bill lean. Small lists of favorite pantry shortcuts — canned beans, frozen veggies, grains — paired with chicken maximize flexibility. I’ve found that a predictable rotation of three or four repurposes eliminates decision fatigue and makes it easy to eat well every night while minimizing thrown-out food. It’s practical and, frankly, satisfying to see a whole bird provide multiple meals.

Personal experiments and real-life tricks that worked for me

I often cook a chicken on Sunday and plan the week around it. One habit that transformed my leftovers was always keeping a jar of zesty dressing ready: lemon, honey, mustard, and olive oil. A couple of spoonfuls revived cold chicken for salads and sandwiches in moments. Another trick is freezing shredded chicken in small zip-top bags with labeled sauces — a bag of “BBQ” or “Thai” ready to thaw cuts prep time dramatically on busy weeknights.

Once, after a dinner party, I turned the remaining meat into three entirely different meals: a bright salad with oranges for lunch, a coconut curry for dinner, and chicken croquettes that became an unexpected midnight snack. That variety kept meals interesting and saved hours of cooking time. Treat leftovers as deliberate ingredients rather than remnants; the mindset alone opens up more creative uses.

Pantry pairings and last-minute shopping lists

Stocking a few reliable pantry items makes reinventing leftover chicken effortless. Keep basics like soy sauce, canned tomatoes, coconut milk, tahini, lemon, and good mustards on hand. Fresh aromatics — garlic, onion, ginger — and sturdy greens such as kale or spinach extend meals without much effort. With these staples, one batch of cooked chicken can turn into at least three distinct dinners.

When shopping, choose versatile items that work across cuisines: limes and cilantro for Mexican and Southeast Asian dishes, oregano and olives for Mediterranean meals, and curry powder or paste for Indian-style stews. This small investment in pantry staples will multiply the number of useful meal ideas and help you reduce waste in the long run. The payoff is fewer trips to the store and more satisfying dinners built from what you already have.

Final practical tips to keep your leftover game strong

Label, portion, and plan; those three actions solve most leftover headaches. Use clear containers so you can see what’s inside and arrange the fridge so ready-to-eat items are front and center. When reheating, add a splash of liquid or sauce to prevent drying out; gentle warming preserves tenderness better than aggressive, repeated heating. A little attention goes a long way in keeping meals enjoyable.

Above all, experiment without fear. Mix cuisines, swap sauces, and try crisping the meat for texture contrasts. Leftover chicken is not a nuisance but a foundation for creativity, whether you’re assembling weekday lunches or whipping up a last-minute dinner. Treat it as an asset, and you’ll find the most satisfying meals often come from small, thoughtful reinventions rather than elaborate plans.

Classic French Toast Upgrades: Elevating a Familiar Favorite

Classic French Toast Upgrades: Elevating a Familiar Favorite

French toast is comfort on a plate, but a few thoughtful tweaks can turn a weekday staple into something approaching culinary mischief. In this article I walk through sensible, surprising and seasonal ways to upgrade that familiar dish. You will find technique adjustments, ingredient swaps, savory and sweet combinations, and practical tips so every bite feels intentional. The aim is simple: keep what you love about French toast while adding layers of flavor, texture, and polish. Along the way I share personal shortcuts that saved weekend mornings in my own kitchen.

Why bother upgrading French toast?

Classic French Toast Upgrades. Why bother upgrading French toast?

At first glance, French toast seems already perfect. Bread, eggs, milk, butter and syrup — what more is needed? Yet small changes alter the experience dramatically. A richer custard, a toastier surface, or a bright citrus ricotta can transform the dish from cozy to remarkable. Upgrades are not about complicating breakfast; they are about focusing on contrasts: crisp exterior versus tender interior, sweet versus acidic, creamy versus crunchy. When you think in contrasts, simple elements start to sing together.

Another reason to revisit the recipe is occasion. A lazy home breakfast calls for quick comfort. A celebratory brunch deserves a little theater. With a handful of intentional choices you can tailor the outcome: make it elegant for guests, hearty for family, or allergy-friendly when needed. These tweaks are practical, repeatable and designed to slot into a real kitchen rhythm rather than require professional gear.

Foundations: the custard and technique that matter most

Custard is the backbone of good French toast; its composition dictates texture. A classic mix of eggs and milk works, but ratios and additions change the result. For a custard that yields a custardy center rather than a soggy middle, I use two large eggs for every cup of dairy, and include a tablespoon of cream or mascarpone when available. Salt and a touch of vanilla are non-negotiable; a pinch of sugar is optional depending on how sweet the toppings will be.

Soaking and cooking technique are equally important. Thick slices need longer soak times but short, gentle rests often work if you press the custard into the bread with your fingers. Cook over medium heat in butter until the outside is golden and crisp. If the pan is too hot, the exterior will brown before the interior cooks; too cool and you get oil-saturated texture. A heavy skillet or cast-iron pan and moderate heat are forgiving allies for reliable results.

Choosing the right bread

Not all bread behaves the same. Crusty country loaves, challah, brioche, sourdough and sandwich bread give different textures and flavors. Thick, sturdy loaves absorb custard without collapsing; soft, egg-enriched breads like brioche yield an almost bread pudding quality that many people adore. For a toothsome contrast, day-old country bread or pain de campagne provides structure and a nice chew. If you use very soft white sandwich bread, reduce the soak time to avoid mushiness.

Below is a quick guide to help you choose depending on the final mood you want to create. The column labeled “Soak time” assumes 1-inch slices; adjust for thinner or thicker cuts. This table is meant as a practical reference rather than strict rules.

Bread Texture After Cooking Soak Time Best For
Brioche Custardy, rich 30–60 seconds per side Decadent brunch, special mornings
Challah Soft yet structured 45–60 seconds Classic sweet toppings
Pain de campagne / country loaf Chewy, rustic 1–2 minutes Hearty savory versions
Sourdough Tangy, firm 45–90 seconds Balance sweet toppings with acid

Custard variations and flavor infusions

Beyond eggs and milk, small additions make a big difference. Citrus zest brightens and prevents everything from tasting flat. Spices such as cinnamon, cardamom or a pinch of nutmeg add warmth without overpowering. For richness, replace a portion of the milk with heavy cream or yogurt; both give a silkier interior. If you like a subtle floral note, a teaspoon of orange blossom water or a splash of almond extract works well, used sparingly.

Another smart trick is flavor layering. Instead of mixing all aromatics into the custard, infuse the milk with citrus peels or vanilla bean first, then strain before combining with eggs. This keeps the custard smooth and intensifies the aroma. For a savory spin, omit sugar and fold in grated Parmesan or finely chopped fresh herbs to the egg mixture. These small changes lead you toward entirely different profiles while preserving the essential technique.

Sweet upgrades: sauces, spreads and toppings

Syrup is the obvious choice, but think broader. Fruit compotes, browned-butter maple sauce, citrus mascarpone and spiced compotes turn French toast into an assembled dish rather than mere bread with liquid. Fresh fruit adds brightness and texture: sliced stone fruit in late summer, stewed apples in fall, citrus segments in winter. Combine textures by adding nuts or granola for a satisfying crunch against a soft center.

Here are a few high-impact finishing ideas that I reach for when I want to impress without fuss. Dollop a lemon ricotta sweetened lightly with honey and scatter toasted almonds over slices; the acidity lifts the richness. For cool months, a warm pear-maple compote with a sprinkle of toasted pecans feels like a hug. On busy mornings, a spoonful of jam heated briefly in a pan with a splash of orange juice becomes a fast, glossy sauce.

Quick sauce recipes

Browned butter maple sauce is a staple for me because it takes minutes and tastes sophisticated. Melt butter in a pan until it turns golden and smells nutty, add maple syrup and a pinch of salt, then simmer briefly until slightly thickened. Finish with a splash of cream if you like a silkier texture. This sauce clings to the toast and gives a toffee-like edge that pairs well with bananas or toasted walnuts.

A simple fruit compote requires fruit, a little sugar, and a squeeze of citrus. Cook fruit gently with a tablespoon or two of water, add sugar to taste, and finish with lemon juice to balance sweetness. For berries, a quick maceration works if you are short on time. The freshness offsets the custard and adds an immediate visual lift that makes the plate feel seasonal and careful.

Savory reworks for a different kind of breakfast

Savory French toast is underrated and wonderfully practical. By removing sugar and upping the seasoning, you create a blank canvas for cheeses, herbs, smoked fish and cured meats. Think of this as a hybrid between French toast and a croque-monsieur. Use stale country bread or sourdough for structural integrity, soak in an egg-cream mixture seasoned with salt, pepper and mustard, and pan-fry until golden.

Top savory slices with tangy goat cheese, sautéed mushrooms, or a thin slice of prosciutto. Fresh herbs and a drizzle of high-quality olive oil finish the dish with finesse. When serving for brunch, offer pickled vegetables or a quick herb salad alongside to cut through richness. I once served a savory tray to a group of skeptical friends and they declared it a revelation; the contrast between salted proteins and the soft custard was unexpected and welcome.

Dietary adaptations without losing soul

Adapting the recipe for dietary needs does not mean sacrificing enjoyment. For gluten-free versions, dense gluten-free brioche or thick polenta-cooked slices work well when handled gently. Use a higher egg-to-dairy ratio to ensure binding and structure. For vegan French toast, chickpea flour or silken tofu combined with plant milk and a little oil creates a custard-like batter that browns nicely. Coconut milk adds richness while almond milk keeps things lighter.

Reducing sugar is simple: omit sweeteners in the custard and rely on naturally sweet toppings like baked fruit or a light compote. For those avoiding dairy, use a neutral-tasting oil for frying and swap dairy cream for full-fat coconut milk in the custard. The goal with every adaptation is to maintain at least two of the three contrasts that make French toast satisfying: a crisp exterior, a soft interior, and a counterpoint topping for balance.

Presentation and plating: small things that read as deliberate

How you present French toast changes perception. Stacking slices creates height and invites sauces to cascade down; arranging them fanned out highlights a glossy compote. Sprinkle textures on top—crushed nuts, coarse sugar, or toasted seeds—to catch light and add a satisfying crunch. A few green herb leaves or microgreens on savory plates signal intention and freshness without being fussy.

Serve on warmed plates to help the custard stay tender longer. If you are building a brunch platter for a crowd, keep sauces separate and set out toasted bread so guests can assemble to their preference. Small ramekins of honey, jam, or lemon curd go a long way toward customization and avoid soggy trays. These gestures read as care and make the meal feel like an occasion.

Brunch hosting strategies and make-ahead tricks

Hosting a relaxed brunch means preparing the night before wherever possible. Custard can be mixed and stored in the refrigerator for up to 24 hours; thicker breads often benefit from an overnight soak in the fridge when planning ahead. For a build-your-own station, pre-cook the toast lightly, keep it warm in a low oven, and finish to order in a hot pan for that perfect crispness. This approach avoids frantic frying at the last minute.

An assembly line helps: arrange bowls of toppings, sauces, fruits and proteins on the counter. Label the elements if you have guests with dietary restrictions. I learned early on that small bowls of toasted nuts, pickles, and fresh herbs give people something to pick at and reduce the urge to over-serve syrup. These small logistics make hosting feel calm and considered rather than chaotic.

Shopping and prep checklist

A simple checklist ensures you have the essentials without overbuying. Pick your bread with purpose, choose high-quality eggs, and decide on two contrasting toppings—one sweet and one acidic or salty. Pre-chop fruit and toast nuts ahead of time. Keep butter and oil at hand for cooking, and have a heavy skillet ready. This minimizes decision fatigue and streamlines the morning.

Three recipes to try this weekend

Below are three tested recipes that showcase different directions for upgrading French toast. They are intentionally approachable and use pantry-friendly ingredients where possible. Each recipe includes ingredients and steps presented clearly so you can follow along without fuss. I often rotate between them depending on mood and what’s in the fridge.

Orange Ricotta Brioche French Toast

Ingredients:

  • 6 slices brioche, about 1 inch thick
  • 3 large eggs
  • 1 cup whole milk
  • 1/3 cup ricotta
  • Zest and juice of one orange
  • 1 teaspoon vanilla
  • Butter for frying
  • Maple syrup and toasted almonds to serve

Method:

  • Whisk eggs, milk, ricotta, orange zest, juice and vanilla until smooth.
  • Dip brioche briefly, 30–60 seconds per side, allowing custard to saturate.
  • Cook in a medium-hot buttered skillet until golden on both sides.
  • Serve with maple syrup and a scatter of toasted almonds for crunch.

Savory Herb and Goat Cheese Toast with Prosciutto

Ingredients:

  • 6 slices pain de campagne
  • 4 large eggs
  • 3/4 cup cream or milk
  • Salt, pepper, 1 teaspoon Dijon mustard
  • 2 tablespoons chopped chives and parsley
  • 4 oz goat cheese
  • Prosciutto, arugula, olive oil to finish

Method:

  • Whisk eggs, milk, mustard, salt, pepper and herbs. Crumble goat cheese and set aside.
  • Soak slices briefly, cook until golden; spread goat cheese on warm toast.
  • Top with prosciutto, a handful of arugula and a light drizzle of olive oil.

Vegan Cinnamon-Maple Almond French Toast

Ingredients:

  • 6 slices sturdy vegan bread
  • 1 cup unsweetened almond milk
  • 1/4 cup chickpea flour
  • 2 tablespoons ground flaxseed mixed with 6 tablespoons water
  • 1 teaspoon cinnamon, pinch salt
  • Maple syrup and toasted almonds to serve

Method:

  • Mix almond milk, chickpea flour, flax slurry, cinnamon and salt until smooth.
  • Soak bread briefly, then pan-fry in neutral oil over medium heat until crisp.
  • Serve with warm maple syrup and toasted almonds for texture.

Tools and small investments that pay off

A few modest tools change the game. A heavy skillet provides even browning and a consistent surface temperature. A wire rack for resting cooked slices keeps them from steaming and becoming soggy. An inexpensive thermometer helps when making custards or sauces so you avoid overcooking dairy. Lastly, a microplane for zest and a small nonstick spatula for careful flipping are simple items that make the process smoother and more enjoyable.

Investing in quality butter and pure vanilla extract also contributes more to flavor than many specialty gadgets. The hardware matters, but so do the basics. I tend to reach for ingredients I trust because, in the end, they carry the dish more than technique alone. That is the essence of thoughtful breakfast upgrades: modest inputs, multiplied by good decisions.

Final thoughts and everyday inspiration

Upgrading French toast is less about complexity and more about choices. Choose a custard that suits your desired texture, select a bread that holds up, and pair the plate with a topping that balances richness. Little flourishes—a sprinkle of flaky salt on a savory slice, a ribbon of citrus zest over a sweet serving, a handful of toasted nuts—signal intention and lift the whole meal. These are the kinds of details that turn a routine breakfast into something you look forward to.

Make it your own. Try one new variation each weekend until you build a small repertoire you love. Personally, I keep a mental notebook of combinations that worked: brioche plus citrus ricotta for celebrations, sourdough with smoked salmon for a light weekend brunch, and a quick berry compote for weekday mornings. These upgrades keep the dish fresh and make the ritual of breakfast feel like a quietly generous act.

Cozy Winter Stews and Casseroles: Slow Comfort for Cold Nights

Cozy Winter Stews and Casseroles: Slow Comfort for Cold Nights

There is something almost ritual about the way a pot simmers on a chilly evening, the kitchen filling with warm, savory smells that feel like a hug. Cozy Winter Stews and Casseroles pull together humble ingredients and long, gentle cooking to produce food that is both practical and indulgent. These dishes are not just about feeding the body; they steady the rhythm of a winter week, offering leftovers that taste better each day. Below I explore how to build deeply flavored stews and layered casseroles, share pantry tricks, and offer recipes and serving ideas that make home feel warmer.

Why Stews and Casseroles Work for Winter

Stews are the essence of slow cooking: tougher cuts of meat and dense vegetables transformed into silk and softness through time and low heat. Casseroles, on the other hand, are about composition, making one baking dish do the work of an entire meal. Both formats embrace economical ingredients and scale easily for family dinners or freezing. They also reward patience: flavors meld, textures harmonize, and what starts as simple components finishes rich and complete.

From a practical standpoint, these dishes are ideal for busy lives. Put a pot on in the morning, and you get hours of unattended flavor development. Bake a casserole and leave it to rest while you wrap gifts or take a walk, then come back to a golden top and a fragrant kitchen. This low-effort, high-reward aspect is why stews and casseroles have anchored winter menus across cultures.

Key Ingredients and Pantry Essentials

Stocking a winter pantry means thinking ahead about the building blocks of flavor. A good stock or broth is the backbone of a winter stew; if homemade isn’t possible, a quality low-sodium store-bought version is fine. Canned tomatoes, dried beans, and hardy grains such as barley or farro sit well in the pantry and turn casseroles into complete meals.

Herbs and aromatics deserve their own shelf space: onions, garlic, bay leaves, and thyme elevate the simplest pot. A jar of preserved lemons, good mustard, and an assortment of vinegars can brighten long-cooked dishes. Don’t forget butter and olive oil for sautéing, and a splash of table wine or sherry for deglazing pans and adding depth.

Here is a concise pantry checklist to keep you ready:

  • Stock or broth (beef, chicken, vegetable)
  • Canned tomatoes and tomato paste
  • Dried beans and lentils
  • Barley, rice, and baking potatoes
  • Onions, garlic, carrots, celery
  • Basic spices: bay leaves, thyme, smoked paprika
  • Butter, olive oil, and a cooking wine or vinegar

Building Flavor: A Layered Approach

Flavor in stews and casseroles is cumulative; each step should add something distinct. Start with browning proteins and vegetables to create caramelized bits that lift the whole dish. Deglazing with wine or stock captures those fond bits and pulls them into the sauce, so never skip this stage if you want depth.

Next, use aromatics and concentrated pastes—tomato paste or miso, for instance—to provide umami. Add your liquid but resist overwatering; a slow reduction concentrates flavor and improves texture. Finish with acid and fresh herbs at the end to brighten the sometimes-heavy mid-winter profile.

Techniques That Make the Difference

Braising, simmering, and baking bring different virtues to a winter meal. Braising is perfect for tough cuts like beef chuck or lamb shoulder: a short sear followed by gentle, moist heat yields tender, shreddable meat. Simmering suits bean-based winter stew; the even, steady heat softens legumes without falling apart when tempered correctly.

Casseroles benefit from an initial browning or sauté step as well as a restful period after baking. Resting lets the juices redistribute and often improves slicing and serving. For both formats, low-and-slow is a reliable mantra; it develops complexity without risking dryness or separation of fats.

Thickening and Texture: How to Get It Right

Texture matters as much as flavor. A thin, watery sauce feels unfinished, while overly thick stews can become cloying. Classic methods for thickening include reduction, the addition of roux, or using starchy ingredients like potatoes and beans. Another modern trick is to blend a portion of the stew and return it to the pot to thicken naturally while preserving flavor.

For casseroles, a custardy binder—milk and eggs or a béchamel—helps set fillings into a cohesive slice. Breadcrumbs or grated cheese on top add a pleasing contrast to creamy interiors. Experiment with different starches, but always taste as you go; the right texture is a balance between body and silk.

Vegetarian and Vegan Winter Options

Vegetarian casseroles and winter stews can be as satisfying as meat-based versions when built on hearty vegetables and legumes. Root vegetables, winter squash, mushrooms, and lentils supply both texture and umami. Roasting vegetables first intensifies their flavor and adds a caramelized note that stews need.

To replace meat’s savory depth, use miso, soy sauce, nutritional yeast, or a paste made from dried porcini mushrooms. Grains like farro and barley bring chew, while creamier elements such as coconut milk or cashew cream add richness. A well-made vegetarian winter stew can leave everyone content and warmed through.

Family-Friendly Casseroles and Crowd-Pleasing Ideas

Casseroles shine for feeding a crowd. Layered dishes like shepherd’s pie, baked ziti, or a chicken-and-rice bake scale well and are forgiving with timing. They’re also forgiving with substitutions, which makes them ideal when feeding picky eaters or adapting to what’s in the fridge.

A tip from my kitchen: assemble a casserole the night before and refrigerate it overnight. The flavors meld, and the top browns better because the surface has time to dry slightly. On a weeknight, simply slide it into a hot oven and set a timer—this is one of my favorite shortcuts for cozy meals with minimal last-minute fuss.

Freezer-Friendly Cooking and Batch Cooking

Winter stews and casseroles are some of the best candidates for batch cooking. Large pots of stew freeze well in portion-size containers, and assembled-but-unbaked casseroles can usually go straight from freezer to oven if thawed gently first. Freezer meals mean nights when you want comfort without the prep.

Label containers with contents and date; a small note about reheating temperature saves future headaches. Also, consider freezing components separately—stock, cooked beans, roasted vegetables—to recombine them later for fast assembly. This method maintains texture and allows more flexibility with meal selection midweek.

Simple Rules for Freezing

Cool food quickly before freezing to preserve texture and safety. Use airtight containers or heavy-duty freezer bags and remove as much air as possible. For casseroles with dairy or egg-based binders, flash-freeze the assembled dish uncovered for a couple of hours, then wrap tightly before long-term storage to prevent condensation damage.

Serving Suggestions and Sides

Cozy Winter Stews and Casseroles. Serving Suggestions and Sides

Stews benefit from contrasting textures: crusty bread, a simple green salad with sharp vinaigrette, or roasted Brussels sprouts all complement a dense pot of stew. Casseroles pair well with lighter sides to balance richness—think quick pickled vegetables or a citrusy slaw. Even small finishing touches, like a drizzle of good olive oil or a sprinkle of flaky salt, make a big difference.

For beverages, a bright white wine or a malty beer often pairs nicely with winter profiles. Non-alcoholic options include spiced cider or a sparkling water with a squeeze of lemon to cut through creaminess. Serving temperature matters too: always let baked dishes rest so flavors settle and the casserole slices neatly.

Recipes to Try: Classics and New Variations

Below are three recipes that capture different aspects of winter comfort: a long-simmered winter stew, an easy vegetarian casserole, and a cheesy family bake. These are starting templates; once you understand the balance of flavor, substitute freely.

Recipe Main Ingredients Cook Time Difficulty
Hearty Beef Winter Stew Beef chuck, carrots, parsnips, barley, red wine 3 hours Moderate
Root Vegetable & Lentil Casserole Lentils, sweet potato, parsnip, tomato, thyme 1 hour 15 minutes Easy
Creamy Chicken and Rice Bake Chicken thighs, rice, mushrooms, cream, cheddar 1 hour 20 minutes Easy-Moderate

Hearty Beef Winter Stew (Outline)

Cut beef into generous cubes and season well. Brown in batches, then remove and sauté onions, carrots, and parsnips until soft. Stir in tomato paste, add wine to deglaze, return beef, cover with stock, and add barley and bay leaf. Simmer gently until beef is tender and barley plump, then finish with parsley and a splash of vinegar.

This stew benefits from overnight resting; flavors settle and the texture improves. Serve with thick-cut bread and a simple mustard butter for spreading. It’s one of those recipes that feels like an event but is mostly waiting time.

Root Vegetable & Lentil Casserole (Outline)

Roast a selection of root vegetables until browned, then layer them with cooked lentils and a lightly seasoned tomato-cream mixture in a baking dish. Top with breadcrumbs mixed with herbs and olive oil, then bake until the top is golden and the filling bubblеs. It’s an excellent vegetarian anchor for a family meal and freezes well for future quick dinners.

When I first tried this, I doubled the herbs and added a scattering of toasted walnuts on top, which introduced a lovely crunch. Little adjustments like that personalize a recipe and make it memorable.

Common Mistakes and How to Avoid Them

Avoid over-salting early; flavors concentrate as liquids reduce, and it’s easier to add salt at the end. Similarly, under-browning proteins results in a flatter flavor profile. Take time at the beginning to develop color and fond for the best outcome.

Overcooking delicate vegetables is another frequent error. Add soft vegetables later in the simmering process to retain texture. Finally, don’t rush the resting period for both stews and casseroles; patience pays off in texture and flavor integration.

Tools Worth Investing In

A heavy-bottomed Dutch oven is the workhorse for stews: it holds heat evenly and goes from stovetop to oven. For casseroles, a sturdy baking dish with even heat distribution prevents hotspots and ensures a uniform bake. A good chef’s knife and a reliable wooden spoon make prep and cooking smoother and more enjoyable.

Slow cookers and pressure cookers also have their place—use a slow cooker when you want hands-off comfort and a pressure cooker to speed up long braises without sacrificing tenderness. Each tool brings a different convenience and texture, so choose based on time and desired result.

Seasonal Variations and Global Inspirations

Stews and casseroles adapt beautifully to seasonal produce and international flavors. In autumn and winter, add squash, apples, or late-season greens for variety. Borrow techniques and seasonings from global cuisines—Moroccan spice blends, French bourguignon methods, or Japanese miso-rich stocks—to reinvent familiar frameworks.

One of my favorite experiments paired kimchi with pork shoulder in a slow braise, finishing with a ribbon of sesame oil. The cultural crossover created a vibrant, comforting bowl that surprised everyone at the table. Small twists like these keep a winter menu lively and new.

Planning a Week of Cozy Meals

Map out two large pots of stew and one casserole for the week to minimize cooking time while maximizing variety. Use one night for a big batch of beans or braised meat that can become tacos, shepherd’s pie, or a salad topper later. Rotate sides—roasted greens, simple salads, and different breads—and you’ll never get bored.

Prep tasks such as chopping a week’s worth of mirepoix or roasting a tray of vegetables on Sunday shorten daily work. Store prepped items in labeled containers so you can combine components quickly when hunger strikes. This approach turns winter cooking into a manageable, even joyful routine.

Stews and casseroles are more than seasonal staples; they are a way to gather, slow down, and savor both food and company. With a few pantry staples, basic techniques, and willingness to experiment, winter becomes a season of built-up flavor and simple pleasures. Try a new recipe, tweak it to your taste, and notice how these dishes anchor long evenings and busy weeks alike.

Midday Fuel That Works: Creative Low-Carb Lunch Ideas for Busy Lives

Midday Fuel That Works: Creative Low-Carb Lunch Ideas for Busy Lives

Finding a satisfying midday meal that keeps energy steady without a carb crash is easier than it looks. In this article I share practical, flavorful low-carb lunches that are doable on a weekday and elegant enough for weekends. You will get concrete recipes, smart pantry choices, a sample weekly plan and tips for eating out or at the office. My goal is to give you a toolbox of healthy meals that save time and taste great, whether you cook for one or feed a family. Read on and pick the ideas that fit your schedule, appetite and pantry.

Why a Low-Carb Lunch Can Be a Better Choice

Reducing refined carbohydrates at midday often leads to steadier blood sugar, clearer focus and fewer cravings in the afternoon. Replacing white bread, rice or sugary dressings with leafy greens, healthy fats and protein helps maintain energy without that familiar slump. Many people discover that a low-carb approach improves satiety: a lunch centered on protein and fiber keeps you full longer and reduces the urge to snack on empty calories.

Beyond energy, choosing reduced-carb options can simplify decision-making around food. A plate with sensible portions of vegetables, protein and fat is straightforward to assemble and to scale up for leftovers. For anyone tracking macros or aiming for weight control, meals designed this way are easier to measure and adapt. At the same time, low-carb does not mean boring—herbs, spices, bold dressings and roasted vegetables turn simple ingredients into a lunch you look forward to.

Stocking a Low-Carb Pantry and Fridge

A small set of reliable staples transforms last-minute lunches into thoughtful meals. Keep a few high-quality proteins on hand, such as canned tuna, smoked salmon, eggs and a pack of chicken breasts. For vegetables, prioritize quick-cooking choices: spinach, mixed salad greens, bell peppers, cucumbers and zucchini; they store well and require minimal prep. Healthy fats like olive oil, avocado, olives and a jar of tahini extend both flavor and satiety.

Spices and condiments play a larger role than people expect: lemon, mustard, apple-cider vinegar, chili flakes and garlic powder turn basic components into interesting plates. Nuts and seeds add crunch and calories where needed without relying on bread. A short list of frozen items—shrimp, riced cauliflower, mixed stir-fry vegetables—bridges busy days without sacrificing nutrition or taste. Below is a compact shopping matrix you can print or save to your phone.

Category Staples
Proteins Eggs, canned tuna, chicken breast, smoked salmon, Greek yogurt
Vegetables Spinach, mixed greens, bell peppers, cucumber, zucchini, cauliflower
Fats & Extras Olive oil, avocado, nuts, seeds, olives, tahini
Pantry & Condiments Mustard, vinegar, lemon, spices, low-carb wraps

Quick Salad Concepts That Won’t Leave You Hungry

Salads often get a bad reputation for being skimpy, but when built thoughtfully they become the perfect low-carb lunch. Start with a base of mixed greens or baby spinach, add a generous protein, include a vegetable for texture and finish with fat and acid to bind the flavors. For protein, roasted chicken, hard-boiled eggs, salmon or chickpeas (in moderation for carbs) work well depending on your target carbs. A tablespoon of olive oil plus a squeeze of lemon or vinegar amps flavor without sugar; add seeds for crunch and extra calories if needed.

Consider rotations rather than new recipes every day: one day a Mediterranean bowl with olives and feta, the next an Asian-inspired salad with sesame oil and sliced radish. Pick three dressings you like and reuse them—this reduces decision fatigue and ensures consistent flavor. Below are approachable salad templates that scale easily and keep carbs modest.

  • Greek-style: mixed greens, grilled chicken, cucumber, cherry tomatoes, olives, feta, lemon-oregano dressing.
  • Salmon & avocado: smoked or baked salmon, baby spinach, avocado, thinly sliced red onion, dill, olive oil.
  • Egg Nicoise-lite: halved hard-boiled eggs, steamed green beans, olives, capers, mixed leaves, mustard vinaigrette.
  • Asian crunch: shredded cabbage, grilled shrimp, sliced cucumber, toasted sesame, lime-soy dressing (use low-sugar tamari).
  • Warm roasted: roasted zucchini and bell peppers, seared halloumi, arugula, balsamic reduction.

Protein Bowls and Warm Lunches

When the weather calls for warmth or you need something heartier, protein bowls combine comfort and nutrition in a low-carb format. Build a base of roasted or steamed low-carb vegetables: cauliflower rice, sautéed greens, roasted broccoli or zucchini noodles. Add a protein source—grilled steak, turkey meatballs or baked cod—and finish with a flavor booster like chimichurri, pesto or tahini sauce. These bowls are easy to reheat and present well in a container for work lunches or a quick family dinner.

For busy weeks, I often double a roasted tray of vegetables and cook enough chicken to last three lunches. That makes assembly a matter of mixing and matching components rather than full cooking sessions. Below is a compact table of bowl combinations that balance fats, protein and vegetables while keeping net carbs controlled.

Bowl Components
Pesto Chicken & Cauliflower Grilled chicken, riced cauliflower, roasted cherry tomatoes, basil pesto
Beef & Broccoli Sliced flank steak, steamed broccoli, sesame oil, garlic, scallions
Spicy Shrimp Bowl Sautéed shrimp, zucchini noodles, avocado, lime-chili dressing
Tofu Stir Bowl Firm tofu, mixed stir-fry vegetables, soy-ginger sauce, sesame seeds

Wraps and Sandwich Alternatives That Skip the Bread

Not everyone wants to give up handheld lunches, so there are excellent substitutes for traditional sandwiches that cut carbs without sacrificing convenience. Use large lettuce leaves, collard greens or low-carb tortillas as wraps. Fill them with richly flavored mixtures like curried chicken salad, turkey and avocado, or tuna with Greek yogurt and capers. Rolling a wrap tightly and slicing it on a diagonal makes the meal portable and visually appealing, which matters when you’re packing for work or travel.

Another sandwich alternative is the open-face stack on toasted slices of roasted eggplant or portobello mushroom caps. These bases provide structure and absorb sauces, adding umami depth to the filling. Keep a balance: one protein portion plus generous vegetables and a fat source creates a meal that travels well and satisfies for hours. I often prepare wraps the night before and store them in parchment to preserve texture until lunchtime.

Meal-Prep Strategy and a 5-Day Sample Plan

Meal-prep is about small, repeatable routines rather than elaborate Sunday marathons. Choose two proteins to rotate across the week, roast or grill them in batches, and prepare two salad dressings to change the flavor profile daily. Cook one starchy substitute—like cauliflower rice or roasted squash—and a handful of raw vegetables that need no cooking. When components are ready, assembly takes minutes and you avoid last-minute takeout temptations.

Here is a straightforward five-day plan to illustrate how components combine without culinary fatigue. Portions can be adjusted depending on appetite and activity level; keep cheeses and nuts as optional add-ons if you want more calories. This plan emphasizes simplicity, variety and reusing a few elements in different ways to stay interesting.

Day Lunch
Monday Grilled chicken on mixed greens, avocado, lemon vinaigrette
Tuesday Salmon bowl with cauliflower rice, roasted asparagus, dill-yogurt sauce
Wednesday Egg salad in lettuce cups, sliced cucumber, olives
Thursday Beef and broccoli stir-fry, small side of kimchi or pickles
Friday Roasted vegetable and halloumi plate, pesto drizzle

Smart Snacks and Sides to Pair with a Low-Carb Lunch

Even with a strong main dish, small sides and snacks can complement the meal and prevent mid-afternoon dips. Choose low-carb options that add fiber, protein or healthy fats: a handful of almonds, a small serving of Greek yogurt with cinnamon, sliced bell pepper with hummus or a hard-boiled egg. Fermented vegetables like sauerkraut or kimchi are excellent for digestion and provide bold flavor with minimal carbs.

Portion control matters when adding snacks, as nuts and cheeses are calorie-dense. A simple habit that works for me is to pre-portion snacks into small containers for the week—this eliminates overeating and keeps the lunch routine smooth. Sides can also be small vegetable plates dressed simply with lemon and olive oil; these feel generous on the plate without a carb load.

Reinventing Leftovers and Reducing Waste

Leftovers are an underused asset for low-carb lunches. Roast an extra chicken thigh or two and repurpose the meat into salads, lettuce wraps or protein bowls. Vegetables that survive roasting are versatile: chop and toss them into an omelet, blend some into a creamy soup or use them as a base for a warm grain-free bowl. Treat leftovers as new components, not repeats—different dressings or spices create a fresh experience.

Transforming dinner into lunch also saves time and money. I often rework last night’s proteins into cold salads with a contrasting dressing, which brightens flavors and reduces monotony. When reheating, add a fresh element like herbs, citrus or a crunchy topping to revive texture. With a little creativity, what seems like leftovers becomes the easiest and most reliable low-carb lunch of the week.

Tools, Containers and Small Equipment That Help

Low-Carb Lunch Ideas. Tools, Containers and Small Equipment That Help

A few practical tools reduce friction and increase the likelihood you’ll stick to healthier lunches. Good containers that seal well and are microwave-safe make transporting and reheating simple. A small salad dressing container prevents sogginess and keeps greens crisp; glass jars work nicely for layered salads. Sharp knives and a decent skillet speed up prep, and a sheet pan makes roasting multiple vegetables effortless and low-effort to clean.

Investing in a compact blender or immersion blender expands your options: quick tahini dressings, herb sauces or creamy soups take minutes and add variety. A digital kitchen scale is helpful if you follow precise portions, though eyeballing is fine for most people. Thoughtful, minimal gear pays off because it shortens prep time and reduces the excuses to order takeout.

Eating Out and Office-Friendly Strategies

Eating low-carb away from home can be straightforward with the right mindset. Many restaurants will swap fries or grains for extra salad or steamed vegetables—ask for that substitution and request dressings on the side. Choose dishes with clear proteins and vegetables as the foundation: grilled fish, rotisserie chicken, steak salads or omelet plates are usually safe bets. Avoid sauces that appear sweet or heavily breaded coatings unless you can ask for those on the side.

At the office, keep a basic kit in your drawer—small olive oil packets, a jar of mustard, a few nuts and a tea bag. These simple items rescue a bland meal and help you avoid high-sugar vending-machine options. When ordering lunch delivery, look for phrases like “grilled,” “roasted” or “bowl” rather than “crispy,” “breaded” or “fried.” With modest adjustments, you can maintain your approach without making eating out feel restrictive.

Personal Notes from the Kitchen

Cooking for a family taught me that low-carb lunches must be flexible and flavorful to gain traction. Early on I tried imposing strict lists that nobody enjoyed; the switch that finally worked was to keep one favorite element and rotate the rest. For example, my partner loves roasted peppers, so those appear in salads, bowls and even as sandwich toppers. That single insistence keeps everyone happy while we reduce carbs elsewhere.

Another practical habit I developed is “combo prep”: cook one protein in three ways across the week. Roasted chicken becomes a salad on Monday, a wrap on Wednesday and a warm bowl on Friday. This approach prevents culinary boredom and makes it much easier to maintain a pattern of healthy meals. Little routines like these turned low-carb choices from a chore into an enjoyable part of weekly rhythm.

Final Thoughts and Next Steps

Adopting low-carb lunch habits doesn’t require perfection, only a few reliable building blocks and a willingness to experiment with flavors. Start by picking three go-to proteins and two dressings, keep a small set of vegetables that you enjoy, and practice assembling meals rather than following complex recipes. Over time you’ll build a personal repertoire that aligns with your tastes and schedule, making healthy meals the default rather than a rule to follow.

Use the ideas in this article as a framework rather than strict instructions: adapt portion sizes, spice levels and components to your needs. With basic planning, minimal prep and a couple of thoughtful pantry items, midday meals can become the most dependable part of your day. Try one new recipe each week and notice how sustained energy and reduced cravings change how you approach the afternoon. Enjoy cooking, and let these low-carb lunch ideas simplify your life while keeping flavor front and center.