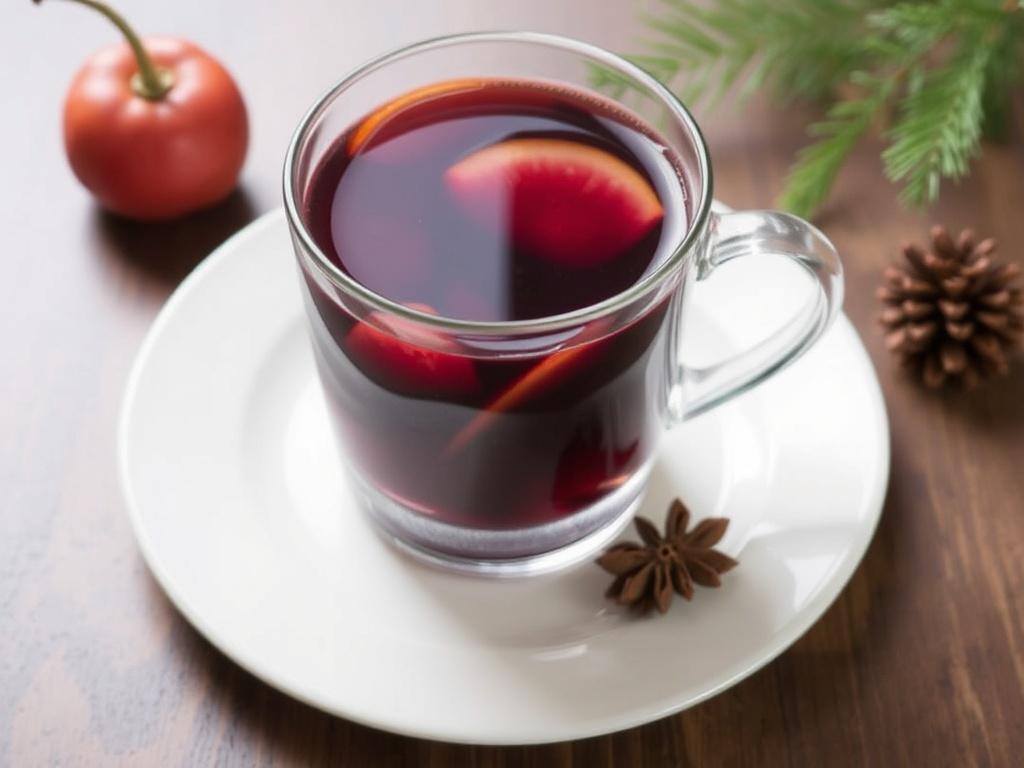
There is something almost ceremonial about a steaming cup of hot chocolate—an invitation to pause, to soften the edges of a day and savor warmth that settles into the hands. This article walks through origins, ingredients, techniques and creative variations so you can make a cup that feels intentional, not rushed. Along the way I’ll share practical tips from my home kitchen that have saved mornings and rescued cold evenings. Expect concrete recipes, a short gear list, and troubleshooting advice so you can dial in texture and flavor every time. If you love chocolate, milk-based drinks, or a dessert-like treat in a cup, read on and prepare to experiment.
Where It Came From: A Short History of the Drink
The story of drinking chocolate begins long before ceramic mugs and whipped cream. Ancient Mesoamerican cultures cultivated cacao and prepared bitter, spiced beverages often reserved for ritual or elite consumption. Those early drinks were different from what most of us picture today; they emphasized complex, bitter notes with a foamy texture, and they were more about ceremony than comfort. When cacao reached Europe in the 16th century, sugar and dairy transformed its profile, nudging it toward the creamy, sweeter versions that became popular in cafés and royal courts. Understanding that lineage helps explain why some recipes aim for a rich, almost pudding-like density while others stay light and velvety.
As trade routes expanded, so did variations: Spain and Italy developed thick, luxurious versions, while France favored smoother, more refined preparations. The industrial age brought powdered cocoa and instant mixes, which democratized the beverage but also simplified its flavor and mouthfeel. In recent decades, there’s been a movement back toward whole ingredients—single-origin chocolate, real milk, and artisan spices—motivated by a desire for authenticity and depth. Tasting a well-made cup side by side with a mass-market sachet reveals how much texture and cocoa quality matter.
Culture continues to shape how people drink and think about hot chocolate. In some places it remains a breakfast accompaniment, in others it’s an afternoon indulgence or a wintertime ritual associated with holidays. Street vendors, chocolatiers and home cooks each approach it differently, prioritizing speed, ceremony or innovation. I find the best versions borrow from all three: quick enough for weekday comfort, special enough to make an evening feel like an event.
Core Ingredients: Choosing Chocolate, Milk and More
At its heart the beverage is a simple equation: chocolate plus milk plus heat. But each variable opens a wide field of options. Chocolate can be whole chocolate bars, couverture, unsweetened nibs, or powdered cocoa. Milk choices stretch from full-fat cow’s milk to plant-based alternatives like oat, almond, and coconut. Sweeteners and flavorings—sugar, honey, maple syrup, vanilla, or spices—round out the lineup and allow you to steer the final profile from bitter and dark to sensual and dessert-like. Knowing how each element influences body, sweetness and finish makes it easier to customize a recipe to your taste.
Choosing chocolate is the most decisive step. Real chocolate brings cocoa butter and emulsifiers that melt into a glossy, rich texture, while cocoa powder provides immediate chocolate intensity but may need additional fat or emulsification to feel luxurious. For a bar-based approach, aim for chocolate with 55–70 percent cacao for a balanced sweet-bitter character suitable for many palates. Darker bars push the beverage toward bitter depth, and milk chocolate will produce a softer, sweeter cup. If you want intense flavor without extra sweetness, combine unsweetened cocoa with a touch of sugar and a piece of high-quality dark chocolate for mouthfeel.
Milk is not merely a carrier; it contributes sweetness, fat and proteins that create body. Full-fat dairy produces a creamy, rounded cup, while skim or low-fat milk results in a lighter texture. Plant milks act differently—oat milk emulsifies well and yields a naturally creamy mouthfeel; almond milk is lighter and may need thickening; coconut milk adds tropical notes and richness. When substituting, be mindful of how heat and cocoa interact with each milk type. Stir, taste and adjust rather than assuming a one-to-one swap will yield the same result.
Chocolate Forms and When to Use Them
Bars and couverture melt into a silky gloss because they contain cocoa butter, which contributes to body and sheen. Use chopped chocolate for the most traditional, indulgent results when you want a smooth, luxurious mouthfeel. Cocoa powder is ideal when you need stronger, dryer chocolate flavor or when you want to avoid the extra fat from cocoa butter. Blend cocoa powder with a little butter or cream to mimic bar-based texture if you prefer that route. For speed and convenience, chocolate shavings or chips work well, though they may contain stabilizers designed for baking rather than melting.
Single-origin chocolate can introduce specific tasting notes—fruity, floral, nutty—which can be exciting but also fragile. Pair single-origin bars with minimal additional flavoring so the cocoa’s character remains discernible. For spiced or heavily flavored versions, use a reliable, balanced chocolate that supports rather than competes with added ingredients. When in doubt, choose a good-quality couverture because it melts cleanly and gives predictable results in stovetop and steam-based methods alike.
Another useful option is chocolate tablets or discs made specifically for drinking chocolate; they often include sugar and emulsifiers and are designed to melt smoothly in warm milk. These are excellent for replicating café-style thick drinking chocolate at home without a lot of fuss, and they work well when serving guests because they deliver consistent results. Keep at least one bar or pouch of good-quality drinking chocolate in your pantry for special occasions.
Milk & Dairy Alternatives: Matching Texture to Taste
Full-fat cow’s milk delivers reliable creaminess and natural sweetness thanks to lactose and milk fat. It’s the easiest path to a traditional hot chocolate with a velvety mouthfeel. If lactose is a concern, lactose-free dairy behaves similarly because the structural proteins remain; you lose little of the textural benefit. For a lighter profile, low-fat milk works but you’ll likely miss some body, so consider adding a splash of cream for balance. A small ratio adjustment can close the gap: three parts milk to one part cream makes a particularly lush base.
Plant-based milks create excellent results when chosen thoughtfully. Oat milk is my go-to for dairy-free velvety texture; its natural starches lend body and it froths well. Almond milk is lighter and subtly nutty; it pairs nicely with darker chocolate and a pinch of salt. Coconut milk adds silkiness and a tropical undertone, but it can compete with delicate cocoa flavors. Soy milk mixes between oat and almond in mouthfeel, though some brands separate under heat so choose one labeled barista-friendly if you plan to steam or froth it.
When using plant milks, stabilize them with a whisked paste of cocoa and a small fat if the mouthfeel feels thin. A teaspoon of coconut oil, a tablespoon of cream, or even a knob of butter can rescue a watery texture without adding overt richness. Heat gently and avoid boiling, which sometimes causes separation in nut-based milks. Taste as you go and adapt sweetness, because many plant milks already contain added sugars that affect the final balance.
Techniques: From Quick Cups to Slow Drinking Chocolate
Technique determines a great deal of the final experience: is the cup meant to be sipped slowly, spooned like a soft pudding, or finished in one sitting? For a quick weekday cup, whisk powdered cocoa into warm milk over medium heat, stirring until smooth and serving within minutes. For a richer, spoonable drinking chocolate, melt chopped bar chocolate into gently heated milk and simmer briefly to thicken. Steam or froth the milk for café-style microfoam if you want a creamy top layer, and finish with a small grating of cocoa or cinnamon for aroma. Each method requires attention to heat and emulsification so the cocoa blends into the milk rather than clumping or separating.
One common question is how hot to make the beverage. Aim for a temperature between 140°F and 160°F (60–71°C). Below that range the drink feels lukewarm; above it you risk scalding the milk, which flattens sweetness and can create a cooked flavor. If you don’t have a thermometer, heat until steam rises and small bubbles form around the pot’s edge, then remove from heat. Allow thicker recipes a minute to rest so the body develops and the flavors meld before serving.
Texture control comes down to emulsification. Cocoa particles are hydrophobic and resist dissolving, so you need either enough fat or an emulsifier such as lecithin present in chocolate bars, or a mechanical method like vigorous whisking or blending. A small immersion blender can transform a grainy mixture into a glossy liquid. Likewise, creating a chocolate paste first—mixing cocoa with a little hot water or milk to create a slurry—helps distribute particles evenly before adding the rest of the milk.
Ratios and Consistency: Finding Your Sweet Spot
Ratios offer a simple framework for consistent results. A basic starting point is 2 tablespoons unsweetened cocoa powder, 1 to 2 tablespoons sugar, and 1 cup of milk per serving, adjusted to taste. If using chopped chocolate, try 1 to 1.5 ounces of good chocolate per cup of milk for a robust, bar-driven cup. For an indulgent, spoonable drinking chocolate, use 2 ounces per cup and a touch of cornstarch or extra cream to encourage thickening. The best ratio depends on your chocolate source, the milk you use and how intense you want the final flavor to be.
For café-style richness, a ratio of roughly 1:4 chocolate to liquid by weight produces a substantial sipping experience. If precision matters, weigh ingredients: 25–35 grams of chocolate to 200–250 grams of milk usually yields a satisfying thickness without becoming cloying. Powdered mixes can vary wildly in recommended amounts, so treat packages as guidelines rather than rules and adjust toward personal preference. Keeping notes on favorite ratios is a practical habit if you replicate recipes often.
Sugar levels should be handled with care. Chocolate bars already contain sugar, so factor that into the total sweetness. Start with less sugar than you think you need, then taste and add. A pinch of salt brightens flavor and reduces the perception of bitterness, allowing you to use less sugar and still maintain balance. Small additions—vanilla extract, a dash of espresso, or a piece of orange peel—can shift a cup from ordinary to distinctive without heavy hand with sweeteners.
Frothing, Whisking and Foam Techniques
Foam transforms a drink from utilitarian to luxurious. If you have an espresso machine, steaming milk produces fine microfoam that clings to the chocolate and feels silky. A small handheld frother or a French press plunger also creates pleasing foam; simply heat the milk and pump vigorously until frothy and thick. For the no-equipment method, shake hot milk and chocolate in a tightly sealed jar for about 30 seconds, then pour through a fine mesh to catch airier bubbles. Each method influences foam stability and texture, so choose one that matches your desired presentation.
A smoothie-blender or immersion blender is useful for incorporating cocoa powder and creating smooth emulsion. Blend short bursts to avoid overheating. The high shear from blades disperses cocoa particles and integrates fats, resulting in a homogeneous, glossy liquid that looks and feels professional. When dealing with bar chocolate, melt it first in a small amount of milk over low heat before adding more milk; this ensures uniform melting and prevents graininess.
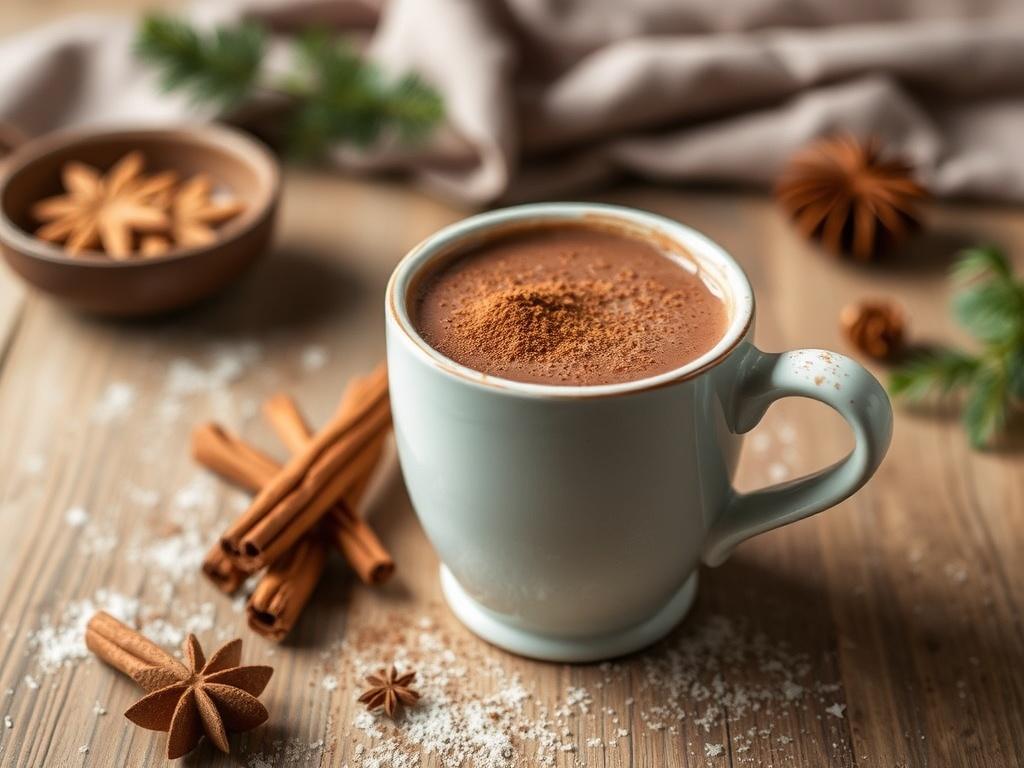
Presentation matters as much as technique in elevating the drink. Spoon a modest cloud of whipped cream on top, then use a microplane to grate dark chocolate over it for both aroma and visual appeal. Dust cinnamon, nutmeg or chili powder for complexity. A well-executed foam or cream layer invites slow sipping and small aromatic bursts between each mouthful, enhancing the perception of craft.
Recipes: Classic, Spiced, and Quick Versions
Below are recipes that cover the spectrum from simple weekday cups to decadent, spoonable preparations. Each recipe can be scaled and adapted to dietary needs or local ingredients, and I’ll point out where substitutions work best. Try the classic European style first to learn how chocolate and milk behave together, then experiment with the spiced and dairy-free versions to discover personal favorites. Keep notes about ratios and temperatures so you can reproduce successful experiments.
Small adjustments in technique or ingredient quality dramatically alter the result. Use a heavy-bottomed saucepan for even heat, chop chocolate finely for faster melting, and whisk continuously to avoid localized overheating. For syrupy spiced versions, infuse milk with whole spices over low heat and strain before adding chocolate, which lets flavor meld without drowning the cocoa. The more you practice, the better you’ll anticipate small changes—an extra minute on heat thickens, an extra tablespoon of cream rounds the finish.
These recipes are intentionally flexible. I encourage tasting as you go because a chocolate that tastes balanced on its own might behave differently when heated with milk. When inviting guests, prepare a base and allow them to customize garnishes; it creates an interactive element that makes a simple cup into a shared moment. Below you’ll find a list of core recipes in clear steps followed by a short equipment checklist for quick reference.
- Equipment: heavy saucepan, whisk, fine grater, small thermometer (optional), immersion blender (optional)
- Essentials: good-quality chocolate or cocoa, milk or milk alternative, sweetener, pinch of salt
Classic European Drinking Chocolate
Ingredients for one serving: 1 cup full-fat milk, 2 ounces good dark chocolate (60–70% cacao), 1 teaspoon sugar (adjust to taste), pinch of salt, 1/4 teaspoon vanilla extract. Chop the chocolate finely. Heat milk gently until steaming but not boiling, then add half the milk to the chocolate, whisking until smooth to form an emulsion. Return the mixture to the saucepan, stir over low heat for 1–2 minutes until slightly thickened, and finish with vanilla. Serve in a warmed cup and, if desired, top with lightly whipped cream.
This preparation emphasizes the chocolate’s profile and achieves a dense, decadent texture suitable for slow sipping. The small amount of sugar is optional depending on the chocolate used; many 60–70% bars need little to no added sweetener. Warming the cup beforehand prevents the beverage from cooling too quickly and helps preserve the texture. For a thicker variant, increase the chocolate to 3 ounces per cup and add a teaspoon of cornstarch dissolved in cold milk before heating.
Bar-based recipes deliver superior mouthfeel because the cocoa butter dissolves and integrates. If you only have cocoa powder, create a paste with a tablespoon of hot milk and 2 tablespoons of cocoa, then whisk into the remaining milk and proceed. That paste step reduces clumping and improves dispersion. Taste before adding sugar because the cocoa flavor will change as it warms and develops.
Mexican-Inspired Spiced Chocolate
Mexican-style preparations celebrate warm spices and a grittier texture that’s all about contrasts. Ingredients: 1 cup whole milk, 1.5 ounces dark chocolate or 2 tablespoons cocoa powder, 1 tablespoon brown sugar, 1/8 teaspoon ground cinnamon, pinch of smoked paprika or ancho chili powder, tiny pinch of salt. Warm the milk with the spices for several minutes to infuse, then whisk in chocolate or cocoa paste until smooth. Finish with the salt to elevate the flavors and serve with a sprinkle of cinnamon or a strip of orange zest for brightness.
In this iteration, the spice profile complements—not overwhelms—the cocoa. Use smoked paprika sparingly; its purpose is to add depth rather than heat. If you prefer a more pronounced smokiness or warmth, add a small fraction of chipotle or a few flakes of dried chili. For authenticity, some recipes include a bit of corn masa to thicken; use it only if you want a rustic, spoonable result. The interplay between chocolate and spice makes each sip intriguing and layered.
This version pairs well with desserts that are not overly sweet, such as shortbread or biscotti. The beverage’s warmth and slight heat cut through buttery textures and provide a counterpoint to sugar. I like to serve this at casual dinner parties because it feels festive yet relaxed, and it pairs nicely with flavored liqueurs if guests want to spike their cups.
Quick Weekday Cocoa (Powder-Based)
For speed and simplicity, prepare a powder-based cup in under five minutes. Ingredients: 1 cup milk, 2 tablespoons unsweetened cocoa powder, 1 tablespoon sugar or to taste, pinch of salt. Make a smooth paste by whisking cocoa and sugar with two tablespoons of hot water or milk. Heat the remaining milk until steaming, whisk in the paste, and bring just to the edge of a simmer. Pour into a mug and add a small dash of vanilla or a light dusting of cocoa.
This approach trades a little silkiness for convenience but can still be very satisfying if you use good-quality cocoa and heat gently. Instant mixes are convenient, but single-ingredient powder with your own sugar and salt yields superior flavor control. A quick home trick: add a tiny square of dark chocolate to enrich the mouthfeel without adding much time. The result is a bright, approachable cup that works for school lunches or a mid-afternoon pick-me-up.
If you prefer froth, transfer the finished cup to a jar, seal and shake vigorously for 20–30 seconds, then open carefully and top with foam. Alternatively, use a handheld frother to aerate the milk immediately after combining. This adds a café-like finish that elevates an otherwise simple preparation and makes it feel more deliberate.
Variations and Innovations: From Boozy to Vegan
Once you know core methods, the beverage becomes a playground. Alcoholic twists—rum, bourbon, orange liqueur or coffee liqueur—introduce warmth and complexity. Vegan versions swap dairy for plant milks and compensate for missing fat with coconut cream, nut butter, or a small amount of cocoa butter. Spiced blends explore cardamom, star anise, or even lavender for floral notes. Savory additions like a small grating of roasted sea salt or a smear of tahini can create unexpected yet delightful profiles.
Baristas and mixologists constantly invent hybrids: chocolate-infused espresso drinks, frozen blended chocolate beverages, and even chocolate cocktails paired with citrus foam. At home, focus on how additions interact with base flavors. Liquors should complement cocoa rather than mask it; a tablespoon or two added after the heat is removed is usually enough. For vegan folks who miss the richness of dairy, a blend of oat milk and a tablespoon of coconut cream brings back that comforting body without animal products.
Exploration is easy because the drink tolerates experimentation well. Try a small test cup when introducing strong or unusual elements so you can judge balance before committing a full pot. I frequently make a tiny batch with a novel spice or liqueur and taste it alongside a control cup to be sure the addition enhances rather than overwhelms. Small trials save time and prevent waste.
Vegan and Dairy-Free Strategies
For dairy-free versions, choose a base that naturally provides body. Oat milk is the best all-around choice because it froths and thickens without additional fat. Combine 1 cup oat milk with 2 ounces dark dairy-free chocolate or 2 tablespoons cocoa plus a teaspoon of coconut oil to mimic mouthfeel. Heat gently and whisk until emulsified, and add sweetener as needed. A touch of vanilla and a pinch of salt complete the profile without masking the chocolate.
If you prefer richer vegan options, use a mixture of full-fat coconut milk and almond or oat milk to balance richness and flavor. Coconut adds silkiness but strong coconut flavor, so consider the type of chocolate you use—dark, fruity single-origin bars often match well with coconut’s sweetness. For nut allergy considerations, soy or pea-protein milks can work as alternatives, though they may require formula adjustments to prevent separation.
Stabilizers like a small amount of cornstarch or tapioca starch can rescue thin plant-milk cups, especially when using cocoa powder. Dissolve a teaspoon of starch in cold liquid, then whisk into warm milk and cook until slightly thickened. This creates a pleasantly viscous mouthfeel that many people associate with high-quality drinking chocolate. Remember to whisk constantly to avoid lumps and to allow the starch to fully hydrate.
Boozy and Dessert-Style Concoctions
Adult variations can be as restrained or as indulgent as you like. A simple enhancement is a splash of dark rum or orange liqueur added after removing the cup from heat. For a richer dessert drink, blend hot chocolate with a shot of espresso, a tablespoon of mascarpone or cream, and a pinch of sea salt to create a layered, café-style treat. If serving as a dessert, present smaller portions in demitasse cups and garnish with a crisp cookie or biscotti to balance richness with texture.
Chocolate pairs beautifully with nutty, fruity and herbal spirits, so experiment with amaretto, pear brandy, or even herbal Chartreuse in minute quantities. The key is to add alcohol at the end so its volatile aromatics remain bright. If you plan to flambé, do so with caution and only in a controlled setting; flambé can concentrate flavor but also introduce safety risks. For party service, provide a small selection of liqueurs and let guests finish their own cups to taste.
Dessert-style presentations often include toppings like toasted marshmallow, whipped cream, caramel drizzle, or cookie crumbs. For a refined touch, use a thin shard of tempered chocolate perched on a cup rim or a tiny scoop of ice cream for an affogato-like contrast. These touches make the beverage feel curated and create memorable texture contrasts between steam, chew and melt.
| Style |
Chocolate Form |
Typical Milk |
Texture |
Best Garnish |
| Classic European |
Chopped bar / couverture |
Full-fat cow’s milk |
Silky, thick |
Whipped cream, chocolate shavings |
| Mexican spiced |
Cocoa + dark chocolate |
Whole milk or water infusion |
Grainy to smooth, spicy |
Cinnamon stick, orange zest |
| Quick cocoa |
Unsweetened cocoa powder |
Any milk (oat recommended) |
Light, approachable |
Mini marshmallows, dusting of cocoa |
| Vegan |
Dairy-free chocolate / cocoa |
Oat, coconut, almond |
Creamy to thin |
Toasted coconut, nut crumble |
Pairings and Serving Ideas
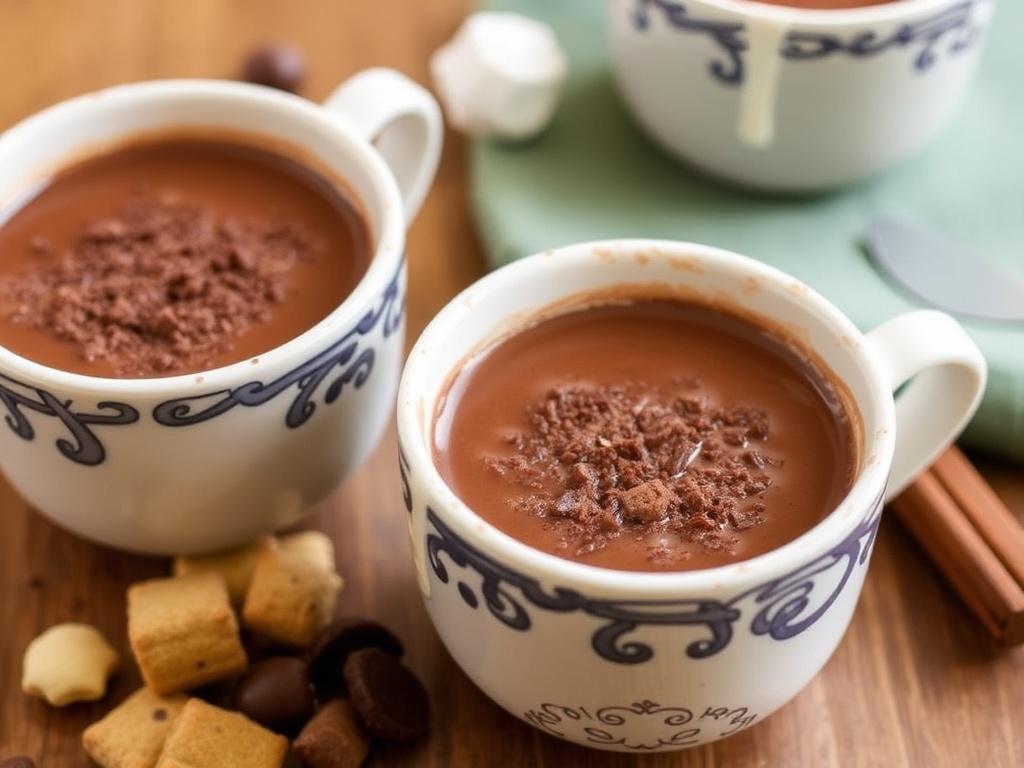
Serving hot chocolate alongside complementary foods enhances the experience. Fruits with natural acidity—orange segments or raspberries—cut through richness and refresh the palate. Biscuits, shortbread and buttery cookies provide a satisfying crunch that contrasts the liquid silk. For more structured desserts, pair a robust cup with a light tart, such as lemon or passionfruit, to offset sweetness and create a balanced finish. Pairing is about contrast as much as harmony.
When serving guests, presentation can be simple yet deliberate. Warm cups, coordinated garnishes, and small accompaniments like a piece of dark chocolate or a cinnamon stick make the beverage feel curated. For a communal touch, set out a small “toppings bar” with whipped cream, grated chocolate, spices, and liqueurs so people can personalize their cups. This is especially effective at holiday gatherings when variety and interaction elevate the occasion.
For pairing with dessert courses, consider the weight of both elements. A dense, spoonable drinking chocolate pairs beautifully with light meringue or citrus-forward desserts that provide lift. Conversely, a lighter cocoa drink complements richer desserts like flourless chocolate cake because the drink’s relative levity prevents the pairing from becoming overwhelmingly heavy. Serving size also matters: small, intensely flavored cups can function as dessert themselves, while larger, milkier cups feel like an accompaniment.
Troubleshooting and Storage
Common problems are graininess, separation and overheating. Graininess usually indicates cocoa particles that haven’t been fully incorporated; blending briefly or whisking a cocoa paste into warm liquid resolves that issue. Separation occurs when certain plant milks curdle under high heat; avoid boiling and choose barista-friendly varieties. Overheating scalds milk and produces a cooked flavor, so keep heat moderate and remove the pan from the burner when steam begins to rise. Small interventions early prevent larger problems later.
Leftovers can be stored but they rarely retain the same fresh texture. Pour cooled beverage into an airtight container and refrigerate for up to 48 hours. Reheat gently over low heat while whisking or blend briefly to re-emulsify. If the drink thickens in the fridge, thin it with a splash of warm milk or water while whisking. For long-term storage of prepared bases, freeze in ice cube trays and blend cubes with hot milk for quick service when needed.
For powdered mixes, keep them in a cool, dry place to avoid clumping. If your mix absorbs moisture and hardens, sift through a fine mesh and store with a desiccant packet in a sealed jar. When scaling up for events, prepare a concentrated base and hold it warm in a double boiler or small slow cooker set on low; finish cups individually with hot milk to preserve texture. That method keeps service efficient and the cups tasting freshly made.
Cultural Rituals and Seasonal Traditions
Across continents, the beverage plays roles in celebrations and daily rhythms. In Spain, a thick drinking chocolate accompanies churros at breakfast; in parts of Latin America, spiced variants appear at festivals and family gatherings. In Nordic countries, hot cocoa provides comfort through long winters, often shared after outdoor activities. These rituals underline how the drink functions as both warmth and social glue—something to gather around and pass between hands. Observing these traditions can inspire new ways to integrate the beverage into your own life.
Seasonal touches are easy to adopt. In autumn, incorporate warming spices like cardamom and cloves; in winter, emphasize thickness and richness, garnishing with toasted marshmallow; in spring, lighten the cup and add floral or citrus notes. Holiday rituals often blend tradition with nostalgia—recipes passed down, favorite mugs brought out of storage, and small rituals like a dash of nutmeg that signal comfort. Making the beverage part of a consistent ritual gives ordinary days a touch of ceremony.
Workplaces and cafes frequently adopt signature versions to distinguish themselves. A café might add a proprietary spice mix or use single-origin chocolate to create a signature profile. At home, find one or two signature twists you love and make them your go-to; it simplifies decision-making and creates a familiar pleasure you return to. The goal is to make the drink feel intentional and personal rather than another box to check.
Health, Nutrition and Mindful Consumption
Hot chocolate can be treated as a treat or a modest daily pleasure, depending on how you build it. Using whole chocolate and full-fat milk increases calories and saturated fat but also delivers satisfying flavor that can reduce the desire for larger portions. Using dark chocolate with a higher cocoa percentage provides antioxidants and a more intense flavor so you may use less sugar. If you want to lighten the cup, use lower-fat milk and less chocolate, but balance that with ingredients that preserve satisfaction, such as a pinch of salt or a small amount of cream.
For those monitoring sugar intake, replace refined sugar with natural sweeteners like stevia, erythritol, or modest amounts of maple syrup, adjusting for sweetness and mouthfeel. Note that some sweeteners do not caramelize or integrate the same way, which might alter texture. Keep portion sizes realistic; a small, rich cup can be more satisfying than a large, diluted one and thus contribute to mindful eating habits. The beverage can be part of a balanced approach when enjoyed intentionally rather than mindlessly.
Finally, consider ritual as part of health. The simple act of pausing for a cup, focusing on aroma and temperature, and savoring each sip contributes to stress reduction and present-moment awareness. Whether you drink a thick, spoonable serving on a cold evening or a lighter cup in the afternoon, the practice of making and drinking it can support well-being beyond nutrition alone.
Personal Notes from My Kitchen
I learned to respect temperature the hard way after a batch of milk scalded and ruined an otherwise gorgeous bar of single-origin chocolate. Since then I simmer gently and whisk with patience, and those small habits transformed ordinary attempts into reliably excellent cups. Over years of hosting, I discovered that a small toppings bar—whipped cream, grated chocolate, cinnamon, and a tiny jar of chili flakes—turns a simple gathering into an interactive ritual. Guests enjoy building their own cups and conversations flow more easily when people customize their comfort.
One memorable experiment was a winter brunch where I substituted part of the milk with brewed strong tea for a chocolate-tea hybrid. The results were unexpectedly complex and became a single-batch favorite among friends. Likewise, an impromptu addition of a spoonful of tahini to a dark, slightly bitter cup brought nuttiness and richness that surprised everyone. These small, fearless experiments usually yield the most memorable discoveries. Keep a playful spirit when you try new components—measure carefully, taste as you go, and accept that some combinations will teach you more than they please you.
Finally, I recommend keeping a tiny notebook by the stove for ratios and quick notes about what worked. Over time you’ll build a personal compendium of favorite variations, serving sizes, and guest preferences. That simple habit reduces repeat mistakes and accelerates learning. It’s how ordinary mugs turn into signature cups that friends ask for again and again.
Finishing Touches and Invitation to Experiment
Small details shape how a cup lands: the temperature at the first sip, a final pinch of salt, the aroma hit from grated chocolate on top. Choose garnishes and serving ware that match the moment. A rustic mug feels right for a thick, spiced version; a porcelain cup elevates a refined European drinking chocolate. Thinking about these details helps you move from making a quick beverage to crafting an experience worth remembering.
Now that you have techniques, recipes and a few anecdotes to guide you, the next step is practice. Start with a reliable classic, then try one variation each week until you find a handful that consistently delight you and your guests. Remember to note ratios and temperatures so you can reproduce successes. As you experiment, you’ll likely discover small regional influences, family traditions, or personal tweaks that become part of your own hot chocolate story.
Treat your next cup as more than fuel. Let it be a pause, an experiment, and an invitation to share. Whether you prefer a quick powder-based mug or a spoonable, decadent serving, the beverage rewards curiosity. Enjoy the process of refining your technique and flavor sensibilities, and don’t be afraid to stray from recipes—some of the best cups are the result of an inspired deviation.
