All posts by cookassist_h

Sunday Comfort: How to Make a Perfect Roast Chicken with Potatoes Every Time

There’s a reason a golden bird and a bed of browned tubers show up on so many family tables: the combination is simple, honest and deeply satisfying. In this article I’ll walk you through everything I’ve learned about turning a raw chicken and a few humble potatoes into a feast that looks impressive and tastes like slow, careful cooking. You’ll find practical techniques, ingredient choices, timing guides and flavor variations so you can adapt this to weeknights or a relaxed weekend meal. Read on and you’ll gain confidence in carving, resting, and coaxing the crispiest skin while keeping the meat juicy. By the end you’ll see how this one-pan roast can become a reliable centerpiece for dinners that deserve attention but not stress.

Why this combination works so well

White meat and golden potatoes complement each other in texture and flavor: the bird offers savory, lightly perfumed flesh while the spuds soak up pan juices and caramelize at the edges. When you roast them together the potatoes benefit from rendered fat and herbs, which creates a depth of flavor impossible to achieve when they’re cooked separately. There’s also a practical logic: both components thrive at similar oven temperatures, which simplifies timing and cleanup. Finally, the dish scales easily — a small joint for two, or a large bird for a gathering — and adapts to different cuisines depending on the aromatics you add. This versatility is why many cooks turn to it as a reliable weeknight solution or a centerpiece for casual entertaining.

Choosing the bird and the spuds

Picking the right chicken makes all the difference. For most home cooks a 3–4 pound (1.4–1.8 kg) whole chicken is ideal: large enough to feed several people yet small enough to cook evenly. Free-range or pasture-raised birds often deliver better texture and flavor, but a conventional chicken can turn out delicious if it’s fresh. Consider whether you want bone-in and skin-on — these elements retain moisture and create the caramelized skin most of us crave. If time is short, spatchcocking (butterflying) the bird reduces roasting time and promotes even browning.

Potatoes are not interchangeable; their starch content changes how they roast. Waxy varieties like Yukon Gold hold their shape and develop crisp edges while staying creamy inside, which makes them my go-to for roasting alongside poultry. Russets will crisp beautifully but can fall apart if left to stew in juices, so cut them larger if you prefer a Russet. If you want a mix of textures, combine a waxy potato with a floury one for contrast. Size matters too: aim for even pieces so everything finishes at the same time.

Ingredients and equipment you’ll need

Good technique starts with straightforward ingredients. At minimum you need a whole chicken, a kilo or so of potatoes, olive oil or rendered butter, salt, black pepper, and one or two aromatics such as garlic, lemon, or fresh herbs. From there you can build flavor with smoked paprika, thyme, rosemary, or a mustard rub. Freshness matters for herbs and citrus; dried versions work, but use them sparingly to avoid overpowering the dish. A versatile approach is to season boldly on the skin and more gently on the potatoes, allowing each element to express itself without clashing.

Equipment is simple but worth investing in the right pieces. A sturdy roasting pan with low sides encourages airflow and browning; a rack can keep the bird elevated so air circulates under the skin. A meat thermometer is indispensable — it removes guesswork and prevents overcooking. If you spatchcock, a sharp chef’s knife or poultry shears are essential. Finally, a wide ovenproof skillet or sheet pan makes cleanup easier and helps the potatoes crisp uniformly under high heat.

Ingredients table

Below is a compact ingredients guide with suggested quantities and optional swaps to personalize the flavor profile. Use it as a starting point; adjust salt and aromatics to taste.

Ingredient Quantity (serves 4) Alternatives / Notes
Whole chicken 3–4 lb (1.4–1.8 kg) Spatchcock for faster cook; bone-in parts if preferred
Potatoes 1–1.5 kg Yukon Gold or a mix of waxy and floury
Olive oil / Butter 2–4 tbsp Use clarified butter for a richer flavor
Garlic, herbs, lemon 2–4 cloves; handful of herbs; 1 lemon Rosemary, thyme, sage are all good choices
Salt & pepper To taste Sea salt or kosher salt for better control

Step-by-step method that actually works

Start with the chicken at room temperature; an hour out of the fridge helps the meat cook evenly. Pat the skin dry with paper towels — moisture is the enemy of crispness — then season the cavity with coarse salt and a few aromatics like a halved lemon and a couple of smashed garlic cloves. Tuck the wing tips under and, if you’re not spatchcocking, tie the legs with kitchen twine to encourage even roasting. For the skin, rub a mixture of oil and seasoning all over, getting into the crevices but allowing the skin surface to stay relatively dry so it browns properly.

Prepare the potatoes while the bird relaxes: wash and cut into even chunks, then toss with a little oil, salt, pepper and herbs. Spread them in a single layer in the roasting pan, leaving space for airflow so they crisp rather than steam. Place the chicken on top of the potatoes or on a rack above them depending on whether you want the tubers to bathe in juices or to stay firmer. Slide the pan into a preheated oven — a common approach is 220°C (425°F) for the first 15–20 minutes to kick-start browning, then reduce to around 190–200°C (375–400°F) until the chicken reaches the safe internal temperature.

Concise recipe steps

An ordered list helps keep the process clear when you’re cooking. Follow these steps and consult the timing table later for exact minutes based on weight.

  1. Bring chicken to room temperature; preheat oven and prepare potatoes.
  2. Dry and season the bird; stuff cavity with aromatics if desired.
  3. Toss potatoes with oil and seasonings; arrange in pan.
  4. Roast at high heat briefly, then lower temperature and continue until done.
  5. Rest the chicken before carving; finish potatoes under the broiler if needed.

Seasoning ideas and flavor profiles

Seasoning isn’t just salt and pepper — it’s your chance to steer the dish toward different culinary territories. Classic Mediterranean flavors use lemon, garlic and oregano or thyme for a bright, herbal profile. A North African twist brings cumin, smoked paprika and preserved lemon into play. For an autumnal scent, rub the bird with butter blended with sage and roasted garlic. Mustard, honey and rosemary create a sticky, savory-sweet glaze that pairs beautifully with roasted potatoes. Choosing one clear flavor direction prevents the dish from becoming muddled and ensures that both the chicken and spuds sing in harmony.

Herbs can be used fresh or dried; fresh herbs give vibrancy when added near the end, while dried herbs can be rubbed on at the beginning for deeper penetration. Spice rubs should be balanced with fat — oil or butter helps spices adhere and bloom in the heat. If you like a crust with some sweetness, a light sprinkle of brown sugar or honey in the last 10–15 minutes of roasting will caramelize the skin without burning. Taste as you go with simple trials — a pinch of smoked paprika on a potato slice or a smear of mustard on a small chicken breast — to find the combination you prefer.

Timing and temperature: the numbers you need

Cooking time varies with weight and whether you spatchcock. The safest and most reliable method is to use an instant-read thermometer: the thickest part of the thigh should reach 74°C (165°F). As a guideline, allow about 20 minutes per pound (45 minutes per kilogram) at a moderate oven temperature after the initial high-heat period, but treat this as a starting point rather than a rule. Keep in mind altitude, oven accuracy and whether you’re using convection settings — these factors affect timing. Checking early and often near the anticipated finish time prevents drying out and ensures juicy results.

While the chicken cooks, the potatoes should brown and develop crisp edges. If they aren’t browning fast enough, increase heat briefly or move the pan onto a higher rack, watching carefully so they don’t burn. If the bird is done before the potatoes, remove it, tent with foil and let it rest; the carryover heat will lift the chicken a few degrees while the potatoes finish. Conversely, if the potatoes are done too early, remove them and keep warm under foil. Flexibility and staging are the secrets to synchronized finishing.

Timing reference table

Use this table as a quick reference, then rely on your thermometer for the final decision.

Chicken weight Estimated roasting time after initial high heat Internal temp target
2–3 lb (0.9–1.4 kg) 40–60 minutes 74°C / 165°F
3–4 lb (1.4–1.8 kg) 60–80 minutes 74°C / 165°F
4–5 lb (1.8–2.3 kg) 80–100 minutes 74°C / 165°F

Tips for crispy skin and fluffy potatoes

Crisp skin is a product of dryness, heat and minimal interference. Patting the skin thoroughly with paper towels removes surface moisture that would otherwise steam the skin instead of browning it. Coating the bird lightly with oil or clarified butter helps heat conduct evenly and promotes the Maillard reaction that produces brown, savory flavors. Avoid a heavy saucing early in the roast; apply glazes near the end to preserve crispness. Finally, resting the bird uncovered briefly before serving helps the skin retain texture while the meat redistributes its juices.

For potatoes, preheating the pan or using a hot roasting surface jump-starts crust formation. Give the cut potatoes enough space to breathe; overcrowding causes steaming rather than roasting. Parboiling is an optional technique if you want ultra-fluffy interiors — a short simmer before dabbing dry and finishing in the oven gives a tender inside and a perfectly puckered exterior. Tossing with a little flour or semolina before roasting can add extra crunch, but I reserve that trick for when I want an especially textural contrast.

Vegetables and side options beyond potatoes

While potatoes are traditional, you can roast other vegetables alongside the chicken for variety and color. Carrots, parsnips and fennel add sweetness and aromatic depth; Brussels sprouts and shallots provide savory bite. Harder root vegetables need longer to cook, so cut them slightly smaller than the potatoes or parboil briefly. If you add softer veg like zucchini, wait until the last 20–25 minutes so they don’t disintegrate. The goal is to create a balanced pan where each item finishes at the same time with complementary textures.

If you want a lighter accompaniment than starch, a citrusy salad or simple buttered greens refreshes the palate and offsets the roast’s richness. Spoon some of the pan juices over a bed of greens for a quick warm dressing. For a heartier menu, add roasted garlic mashed potatoes or a grain like farro tossed with herbs and lemon. The key is coherence: match the intensity of flavors so the sides support the bird rather than compete with it.

Quick side dish list

Here are a few reliable pairings that match different cooking moods. Choose one or two to round out the meal easily.

  • Simple lemon-parsley salad with olive oil and shaved fennel
  • Roasted root vegetable medley with thyme
  • Garlic mashed potatoes finished with browned butter
  • Steamed green beans tossed with toasted almonds
  • Warm farro salad with herbs and roasted cherry tomatoes

Making this an easy dinner

This roast can be an excellent “easy dinner” if you plan a little. The night before, dry-brine the bird with salt and leave it uncovered in the fridge — this improves flavor and skin texture with minimal active effort. Chop the potatoes ahead and keep them in cold water to prevent browning. On the day, assembly takes about 15–20 minutes, then the oven does most of the work. While it roasts you can set the table, prepare a quick salad, or simmer a simple pan sauce from the drippings. Small investments in prep turn a potentially stressful dinner into a relaxed routine.

Leftovers are a gift: shredded chicken makes excellent sandwiches, and diced potatoes transform into hash for breakfast. You can also use the carcass to make an impromptu stock for soup, which stretches the meal further and reduces waste. For weeknight variations, try roasting chicken thighs with baby potatoes for quicker cooking and less carving. These approaches keep the spirit of the dish while making daily cooking approachable and efficient.

Pan juices, sauces and gravy

Pan juices are flavor gold — don’t let them go to waste. After the chicken rests, pour off most of the fat, leaving the browned bits and a small amount of juice in the pan. Deglaze with wine, stock or water, scraping up browned bits with a wooden spoon to make a quick sauce. Simmer to concentrate, then finish with a knob of butter and chopped herbs for gloss and richness. If you prefer a thicker gravy, whisk in a beurre manié (equal parts flour and butter) or a cornstarch slurry and allow it to cook briefly to thicken.

If you want to prepare a classic gravy while the bird roasts, reserve the neck and giblets and simmer them with aromatics to build a stock. Strain and reduce the liquid, then use it as the base for a gravy finished with pan drippings. For a lighter option, a simple lemon-herb vinaigrette spooned over sliced chicken brings brightness without the heaviness of a traditional gravy. The choice of sauce should reflect the seasoning direction you used on the bird for harmony.

Common mistakes and how to fix them

Overcooking is the most frequent error; it dries the meat and toughens the texture. Prevent it by relying on temperature rather than time, and remove the bird from heat a few degrees shy of the final target to allow for carryover cooking. Undercooked potatoes happen when pieces are uneven; counter this by cutting them uniformly and checking for doneness with a fork before serving. Another common issue is limp skin, usually caused by moisture — dry the surface thoroughly and avoid covering the bird during roasting if you want crispy results.

Too much herb or spice can overwhelm the natural flavors, especially if the seasoning is highly pungent. If you’ve over-salted or over-spiced, bright accents like lemon juice or a splash of vinegar in the sauce can help balance the dish. If the potatoes become too greasy, drain them briefly on paper towels and return to the oven on a hot pan to crisp up. Troubleshooting is mostly about small corrections and staging; in many cases a quick adjustment will bring the roast back on track.

Storage, reheating and using leftovers

Roast Chicken with Potatoes. Storage, reheating and using leftovers

Store leftovers in an airtight container in the refrigerator for up to four days. Separate meat and potatoes if possible to preserve textures; potatoes absorb moisture and soften faster when kept with the meat. To reheat without losing crispness, use a hot oven or an air fryer set to a high temperature for a few minutes — this refreshes the skin and crisps the potato edges. Avoid microwaving if texture matters, unless you plan to finish the pieces under a broiler or in a hot skillet afterward.

Leftover roast chicken is versatile: shred for tacos, fold into a creamy pasta, or toss with a quick curry sauce. Potatoes find second lives as hash with onions and peppers or as a base for a shepherd-style pie. Even the carcass has value: simmering it for stock creates a foundation for soups and risottos. Treat leftovers as planned second meals rather than afterthoughts and you’ll multiply the value of your cooking time.

Wine, beer and drink pairings

Pairing drinks with this dish depends on seasoning and roast intensity. For a lemon-and-herb profile, a crisp white such as Sauvignon Blanc or a light unoaked Chardonnay complements the citrus and cut through the fat. If you go for smoky paprika or a spiced rub, a medium-bodied red like Grenache or a malty amber ale can stand up to the flavors. For richer, butter-based preparations, consider a fuller Chardonnay or a saison beer that offers spice and effervescence to cleanse the palate. Sparkling water with lemon is a simple, elegant non-alcoholic option that refreshes between bites.

When in doubt, choose a beverage with moderate acidity to balance richness. Rosé is remarkably flexible and suits many seasoning approaches, from Mediterranean to North African. Local beers often pair wonderfully with roasted poultry, especially if you prefer casual dinners. Think about how the drink’s weight and acidity will interact with pan juices, potatoes and any added sauces to make a thoughtful match instead of a distracting contrast.

Personal notes from my kitchen

I’ve roasted this meal dozens of times for different audiences: quick weeknight suppers, relaxed Sunday lunches and the occasional small celebration. One memorable evening involved a spatchcocked bird roasted with garlic and preserved lemon while children raced through the garden; the ease with which I carved and served the meal turned a chaotic afternoon into a warm, unhurried dinner. Another time I learned the value of resting when a crowded table nearly derailed the timing — tenting the bird and finishing the potatoes under the broiler saved the day and taught me to plan for buffer time.

My favorite ritual is the pause after removing the chicken from the oven: the house fills with roasted aromas, and preparing the simple pan sauce feels almost ceremonial. Over the years I’ve adapted techniques — sometimes parboiling potatoes for extra creaminess, sometimes rubbing the skin with a paste of butter and crushed garlic for indulgence — but the core idea remains the same. A well-roasted bird and potatoes reward patience and modest effort, and sharing it is one of the easiest ways I know to turn ordinary food into a meaningful meal.

Roasting a whole bird with potatoes is more than a recipe; it’s a practical lesson in timing, texture and flavor balance. With the guidance above you can approach the oven with confidence, adjust for your household’s needs and discover small variations that become your signature. Invite some simple sides, pick a drink that complements the seasonings, and let the oven do the heavy lifting while you enjoy the company around the table. The result will be a satisfying, comforting meal that feels both familiar and special.

Root Vegetable Puree Soup: A Cozy Bowl That Tastes Like Home

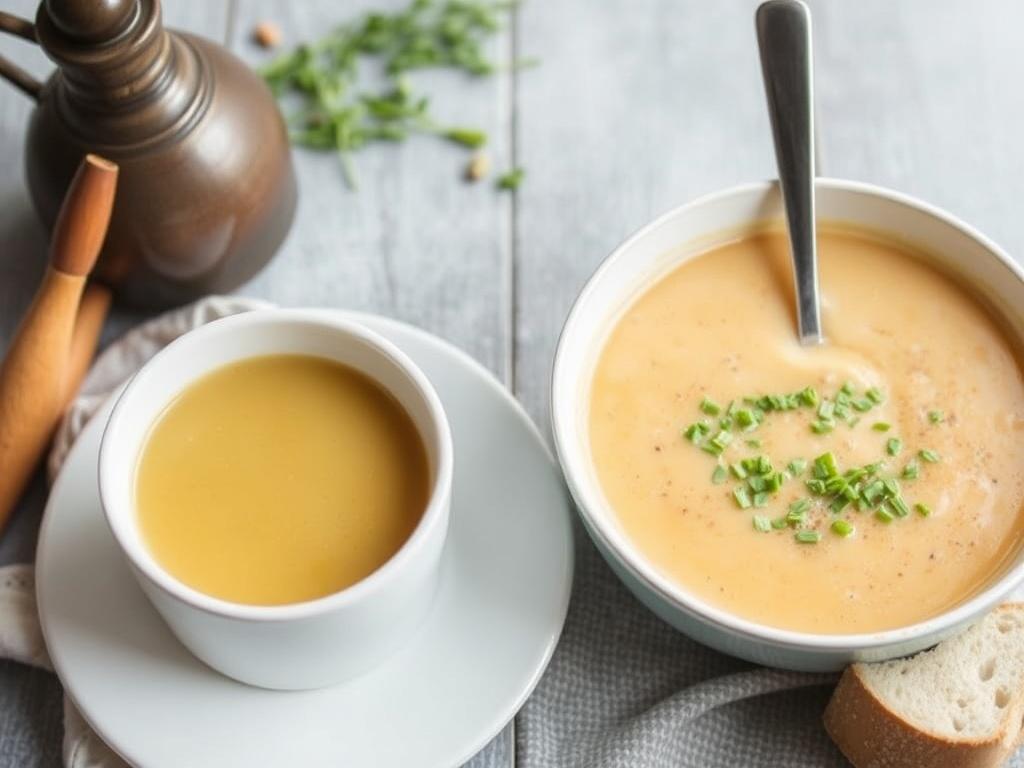
When the air turns crisp and the light softens, nothing settles my mood like a steaming bowl of Root Vegetable Puree Soup. The idea is simple: take humble, earthy vegetables, coax out their sweetness, and blend them into a silky, warming soup that feels both nourishing and indulgent. This essay takes you through choices, techniques, flavor tweaks, storage tips, and a few recipes so you can make a version that suits your pantry and palate. I will share practical tips learned from years of cooking, including mistakes that taught me what matters. By the end you should be able to make a bowl that passes for weeknight comfort food and for company when you want to impress with minimal fuss.

Why Root Vegetable Puree Soup Deserves a Spot in Your Repertoire

Root vegetables are forgiving ingredients that reward attention without demanding precision, which is why they are perfect for both novice cooks and seasoned home chefs. They store well through the colder months and bring a stable, earthy backbone to any broth or stock. The puree technique highlights their natural sweetness while giving you control over texture, from rustic and grainy to ultra-smooth. As a category of dishes, these soups are versatile; you can dress them up with cream and herbs or keep them simple and light depending on the occasion. They also slot into a range of diets; with a few swaps you can make this a vegan, gluten-free, or low-fat comfort meal.

Choosing the Best Root Vegetables

Root Vegetable Puree Soup. Choosing the Best Root Vegetables

Picking the right mix of root vegetables defines the character of your soup more than any single spice. Classic combinations include carrots, parsnips, and potatoes for a familiar, mildly sweet profile, while beets and turnips introduce sharper, more assertive notes. Sweet potatoes and squash lean into sweetness and creaminess, delivering a velvety finish without much added fat. Celeriac offers a celery-like aroma with a nutty depth that balances sweeter roots, and rutabaga adds a slightly bitter, savory tone that prevents a soup from tasting cloying. Think of composing a melody: choose a dominant root, a supporting root, and one to add counterpoint, and adjust proportions until the balance sings.

Carrots and Parsnips: The Classic Duo

Carrots bring bright, floral sweetness and vivid color that lightens any bowl, while parsnips contribute an earthier, almost nutty sweetness with a hint of spice. When roasted, both develop caramelized edges that deepen flavor and add complexity to the puree. For texture, carrots break down cleanly when cooked well, whereas parsnips can lend a slightly denser body, so account for that when estimating liquid. They pair beautifully with warm spices such as coriander or cumin and with fresh herbs like dill or parsley. If you want to emphasize brightness, finish the soup with a squeeze of lemon or a dash of vinegar to lift the sweetness.

Beets and Turnips: Bold Flavors for Adventurous Eaters

Beets give the soup a show-stopping color and an earthy, sweet profile that can be intense if untreated. Roasting beets with a little oil and salt tamps down the raw beet character and brings forward a candy-like sweetness. Turnips introduce a peppery, slightly bitter edge that can make the soup more savory and less one-dimensional. Beets and turnips work well with goat cheese or plain yogurt swirls and a finishing sprinkle of toasted walnuts for texture. Because beets stain utensils and clothing, I recommend using gloves and choosing blending containers that are easy to wash.

Sweet Potatoes and Celeriac: Creamy Foundation and Subtle Aromatics

Sweet potatoes are fast favorites for purees thanks to their intrinsic creaminess and honeyed flavor; they create a silky mouthfeel without much added fat. Celeriac is a subtle workhorse—its flavor is reminiscent of celery but richer and more rustic, and it gives the soup a layered savory note. Use sweet potatoes as the base when you want a decadent feel, and add celeriac for depth that prevents the soup from becoming cloying. These two also respond well to mild aromatics like shallots and thyme, which accentuate their natural qualities. When cooked until tender, they blend into a texture that feels luxurious even when made with simple stock.

Rutabaga and Potatoes: Stabilizers and Body

Potatoes act as stabilizers for purees by giving body and a creamy texture without masking other flavors, and they are especially helpful if you want to stretch a soup to feed more people. Rutabaga carries a slightly bitter, turnip-like taste and brings a firm texture that softens into a pleasant bite after long simmering or roasting. Combining rutabaga and potato yields a balanced mouthfeel where sweetness gets tempered by earthiness. These roots tolerate hearty seasoning and can take on smoked elements such as bacon or smoked paprika for a rustic twist. If you need a foolproof base, start with potato and adjust with a sharper root to taste.

Techniques: Roasting, Boiling, or Sautéing?

How you cook your root vegetables matters more than many cooks expect. Roasting concentrates sugars and adds a toasty, slightly caramelized flavor that translates beautifully into a rich puree. Boiling or simmering in stock keeps the flavors clean and bright, which is ideal when you want a lighter bowl or are planning to introduce delicate finishing herbs. Sautéing in butter or oil with aromatics builds a flavorful base quickly and works best for thinner-cut roots. I often combine techniques: roast the heartier roots for depth, then simmer everything briefly in stock to marry flavors before blending. Choosing a technique depends on time, desired intensity, and the texture you aim to achieve.

Roasting for Depth

Roasting concentrates natural sugars and adds caramelized notes that a simple boil cannot achieve. Cover root pieces in a thin film of oil and a pinch of salt, then roast until they show golden edges and a pleasant aroma; this usually takes between 30 and 50 minutes depending on size and vegetable. Use convection or a hot, dry oven to encourage browning rather than steaming. After roasting, deglaze the pan with a splash of stock or wine and transfer the mixture to a pot for finishing. Roasted roots are particularly useful when making a puree that aims to be rich without relying on cream.

Simmering for Purity

Simmering is straightforward and preserves the lighter, cleaner flavors of the vegetables, which I prefer when serving the soup with bold garnishes or acidic finishes. Start with cold stock to allow flavor extraction and heat gently to avoid breaking down delicate components too aggressively. Cook just until tender; overcooking can turn some roots gluey, particularly starchy potatoes. Simmering also gives you control over the soup’s color and helps retain subtle aromatics. If you keep the simmer gentle and brief, you’ll notice a fresher, more layered taste after blending.

Sautéing Aromatics and the Maillard Boost

Begin many soups by sweating or lightly browning aromatics such as onions, leeks, shallots, or garlic to add savory complexity. Sautéing in butter or oil triggers Maillard reactions in the vegetables, building flavor without the need to roast every component. Use low heat and take your time to avoid burning; translucent onions are often better than heavily browned ones when you aim for a balanced, sweet-savory profile. After sautéing, add the roots and a small amount of liquid, then finish in the oven or on the stovetop as desired. This hybrid approach lets you combine the advantages of sautéing and roasting for nuanced results.

Stock, Liquid Ratios, and Texture Control

The liquid you choose and how much you add determines whether the soup feels like a broth with pureed vegetables or a thick, creamy bisque. Use homemade chicken or vegetable stock for depth, but do not shy away from water if your roots are especially flavorful; an over-reliance on stock can muddy the vegetable notes. Apply a conservative ratio at first—enough liquid to cover the vegetables plus a small margin—and adjust after blending. For a silky finish, strain through a fine sieve or chinois after blending, but if you prefer a more rustic texture, skip straining. For dairy-free creaminess, add a small amount of starchy potato or a splash of full-fat coconut milk if that flavor suits the dish.

Balancing Thickness and Silkiness

Thickness depends on both solids and liquid, so adjust either side to achieve the mouthfeel you want. For a spoonable, hearty puree, keep a higher vegetable-to-liquid ratio and use starchy roots like potato or sweet potato. For a lighter, sip-able soup, thin with additional stock or water, tasting as you go. Silkiness comes from good emulsification—blend at high speed, then finish with a fat such as olive oil, butter, or a dollop of cream. If the puree feels grainy, pass it through a fine-mesh sieve and stir with a small amount of warm cream or stock to smooth it further.

Seasoning and Acid: The Final Balancing Act

Seasoning is the difference between bland and memorable. Salt opens up flavors, and white pepper or black pepper adds quiet heat without dominating. Acid is the secret weapon; a splash of apple cider vinegar, lemon juice, or even a tart white wine brightens the natural sugars in root vegetables. Add acid in small increments at the end and taste between additions, because too much can flatten the profile. Fresh herbs such as chives, parsley, and tarragon add freshness when sprinkled right before serving, and toasted seeds or nuts provide texture contrast that keeps the bowl interesting.

Essential Tools and Equipment

A few basic tools make this soup far easier and improve consistency. A good chef’s knife and a sturdy cutting board save time and reduce frustration during prep. A heavy-bottomed roasting pan ensures even browning without crowding the vegetables, and a wide, heavy pot gives you room to simmer and finish flavors. Blending options range from an immersion blender for convenience to a high-speed countertop blender for the creamiest results; if you use a countertop blender, blend in batches to avoid overfilling. A fine mesh sieve and a ladle are handy for finishing textures and presentation.

A Reliable Base Recipe

Below is a basic, adaptable formula that you can treat as a canvas rather than a strict rule. Use the proportions as a starting point and adjust based on the roots you prefer and the supplies on hand. This recipe yields a silky, balanced soup that you can turn vegetarian or enrich with dairy or animal fat. The instructions emphasize technique at each stage so you understand why things are done a certain way. Once you make this base a couple of times, you’ll instinctively tweak it for desired sweetness, body, or savory depth.

Ingredients (serves 4–6)

Use a mix of roots that totals about 2.5 to 3 pounds; aim for a dominant one for character and others to complement. Include two medium onions or a large leek for aromatics, and one to two cloves of garlic depending on taste. Start with about 4 cups of stock and add more as needed to reach your desired texture. Add salt conservatively during cooking and finish seasoning after blending. For finishing, consider 2 tablespoons of butter or 3 tablespoons of olive oil and one tablespoon of acid such as lemon juice or apple cider vinegar.

Method

Preheat your oven to 425°F and toss peeled, roughly chopped root vegetables in one to two tablespoons of oil and a pinch of salt. Roast until the pieces show golden edges and are tender when pierced, usually 30 to 45 minutes depending on the root. Meanwhile, sweat the onions in a heavy pot with a little oil until soft and lightly golden, then add garlic for the last minute. Add roasted vegetables to the pot, cover with stock, and simmer gently for 10 minutes to marry flavors. Blend until smooth, pass through a sieve if desired, warm gently, and finish with fat and acid to taste before serving.

Variations to Explore

Root Vegetable Puree Soup thrives on variation, so consider these directions when you want different moods from the same base. For a vegan, silky bowl, substitute coconut milk for cream and use vegetable stock, then finish with toasted coconut flakes as garnish. To make a heartier, dinner-ready soup, stir in cooked lentils or top with shredded roasted chicken. Add spices such as ginger and turmeric for an Asian-inspired profile, or smoked paprika and cumin for Spanish echoes. Each tweak changes the soup’s personality, and small adjustments—different oil, a new herb, a single spice—can produce dramatically different results.

Vegan and Dairy-Free Options

When removing dairy, focus on textural substitutes that mimic richness without adding milk. Coconut milk gives creaminess and a faint sweetness, while pureed cashews provide a neutral, velvety lift. Finish with a swirl of quality olive oil and crisp sautéed mushrooms or fried shallots for an umami boost. Make sure the stock is vegetable-based and well-seasoned so the soup remains layered and satisfying. A squeeze of citrus right before serving does wonders to sharpen the flavors when the fatty component is plant-based.

Spiced and Aromatic Variants

Introduce warming spices like nutmeg, cinnamon, or star anise sparingly for a seasonal, aromatic twist. Ground cumin and coriander work especially well with parsnips and carrots and pair nicely with a dollop of yogurt or a sprinkle of toasted cumin. For a smoky profile, use smoked salt, smoked paprika, or a few drops of liquid smoke, but be cautious—these elements can quickly dominate a delicate puree. Fresh herbs added at the end maintain their vibrancy, so reserve them for finishing rather than cooking them in.

Greens and Brightness: Balancing Sweet Roots

If your puree leans too sweet, introduce bitter greens or acidic components to restore balance. A small handful of sautéed kale, mustard greens, or spinach stirred in at the end gives contrast and color. A sharp vinaigrette drizzle or chopped pickled vegetables on top can cut through richness and refresh the palate. Herbs like tarragon or chervil inject an aniseed lift that complements sweet roots, while capers or preserved lemon offer saline brightness. These small counterpoints keep the dish lively and prevent it from feeling one-note.

Presentation and Garnishes

How you finish the soup affects how it is perceived; garnishes add texture, color, and flavor contrast that make each spoonful interesting. A swirl of cream or olive oil, a scattering of toasted seeds, a few herb leaves, or a spoonful of crunchy pickled vegetables elevates a plain puree into something memorable. Consider plating in wide shallow bowls to showcase color and allow garnishes to remain visible. For dinner parties, serve with warm, crusty bread and a small plate of salted butter or herbed oil to make the meal feel complete. Even simple bowls become restaurant-worthy with a thoughtful finishing touch.

Garnish Ideas

Choose one or two contrasting elements rather than many minor ones to avoid clutter and confusion on the plate. For crunch, toasted pumpkin seeds or walnuts work well and add complementary flavor notes. For richness, finish with a tablespoon of crème fraîche, plain yogurt, or a swirl of browned butter. Fresh herbs such as parsley, chives, or dill provide brightness and color contrast, while a few drops of chili oil or crushed red pepper add heat for those who want it. Keep proportions modest; garnishes should enhance, not hide, the soup’s base character.

Storage, Freezing, and Reheating

Root Vegetable Puree Soup stores and freezes reliably, which makes it an excellent make-ahead meal for busy weeks. Cool the soup quickly and refrigerate in airtight containers for up to four days; for longer storage, freeze in portions for up to three months. If freezing, leave a little headspace in the container since liquids expand when frozen. Reheat slowly on the stovetop, adding a splash of stock or water if the puree has thickened. Avoid boiling vigorously during reheating to preserve texture and flavor; gentle warming keeps the emulsion stable and the mouthfeel intact.

Nutritional Benefits and Considerations

Root vegetables are nutrient-dense, offering fiber, vitamins, and minerals that contribute to overall health. Carrots supply beta-carotene, sweet potatoes are high in vitamin A, and beets provide folate and potassium. Celeriac and parsnips add fiber and subtle micronutrients that support digestion and satiety. Making the soup with moderate fat and vegetable-based stock yields a balanced meal that keeps you full longer. Pay attention to sodium levels if you use commercial stock; homemade or low-sodium versions allow you to control salt and keep the soup healthy without sacrificing flavor.

Troubleshooting Common Problems

If the soup feels bland, first check the salt and acidity; both can transform muted flavors into vibrant ones with small additions. A grainy texture usually means the mixture was under-blended or the solids-to-liquid ratio was off, so try blending longer or passing the puree through a sieve. If the soup is too thin, return it to the pot and simmer gently to reduce, or add a cooked potato or a spoonful of puréed lentils to thicken without changing the flavor profile much. Overly sweet soups can be balanced with vinegar or lemon, while an overly acidic bowl benefits from a small pat of butter or a pinch of sugar to round edges.

Personal Notes and Lessons from the Kitchen

I remember the first time I intentionally roasted a mix of roots for soup and thought I had overdone the caramelization until the blend revealed layers of flavor I had never coaxed out before. That batch taught me patience; a slow roast and a quick simmer afterward made the difference between flat and fascinating. Another lesson came from serving a beet-based puree without any acid; guests described it as heavy and cloying until a squeeze of lemon turned it into something vibrant and bright. Over the years I have learned to taste constantly, trust simple techniques, and let the vegetables lead the composition rather than forcing them with too many competing elements.

Serving Suggestions and Pairings

Root Vegetable Puree Soup pairs well with rustic breads, crisp salads, and simple proteins. A dense country loaf or slices of sourdough are excellent for dipping and mop up every last silky spoonful. For a composed meal, serve with a light green salad dressed with vinaigrette to cut through the soup’s richness. For heartier pairings, add roasted or grilled chicken, seared scallops, or a spoonful of braised lentils to convert the bowl into a full entrée. Drinks can range from a crisp white wine to a warm herbal tea depending on whether you want to enhance the soup’s warmth or refresh the palate.

Final Thoughts on Making the Soup Your Own

Root Vegetable Puree Soup is forgiving, adaptable, and endlessly personal. It rewards experimentation and responds well to small changes, so make it often and keep notes on what appeals to you. Use the basic formula to build confidence, then alter ingredients, techniques, and garnishes to match seasons and moods. The best bowls are those that reflect both the produce at hand and the person stirring the pot. With a few simple tools, a modest pantry, and attention to balance, you can create a soup that feels like comfort, nourishment, and a little bit of culinary pride all at once.

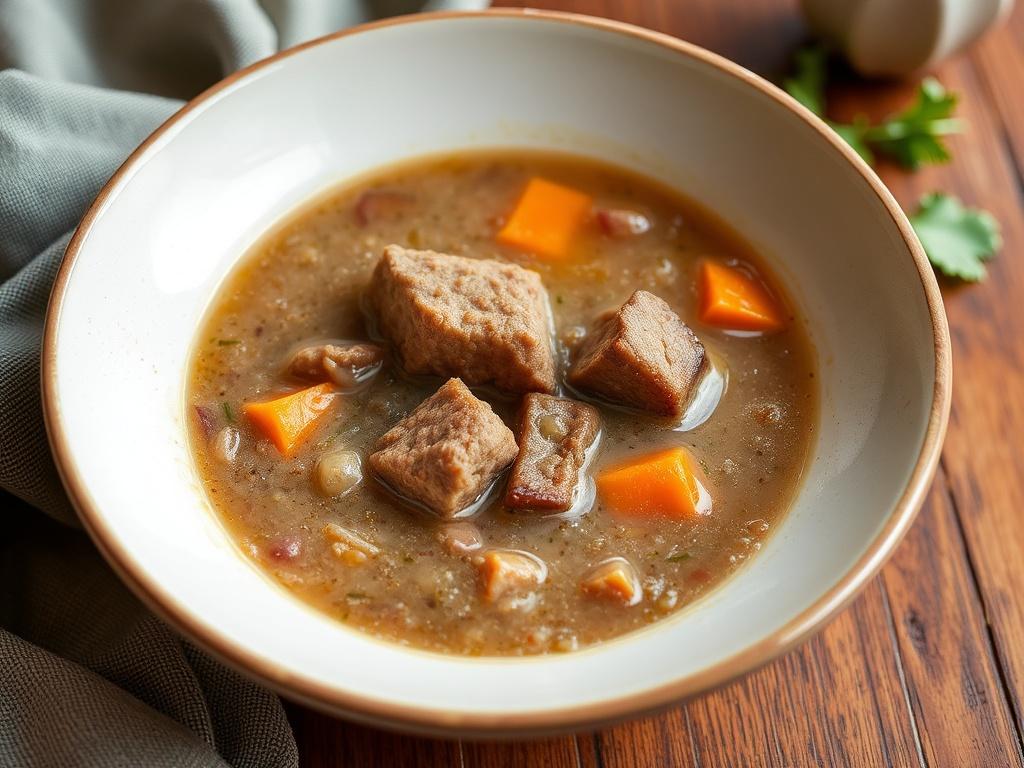
Buckwheat and Meat Soup: hearty grain, humble beef, endless comfort

This dish sits somewhere between a bowl of memories and a practical weekday supper. It combines the nutty warmth of buckwheat with browned meat and fragrant vegetables to create a soup that feels both simple and nourishing. In cold months when the city streets sting and you want something that steadies you from the inside, this meal answers without fuss. I’ll walk you through where it comes from, why ingredients matter, how to cook it well, and a few variations so it never grows stale. Expect clear technique, honest tips, and enough detail to make a reliably delicious pot every time.

Origins and cultural roots of the recipe

Buckwheat has a long history across Eurasia: in Eastern Europe it is a pantry staple, in parts of Asia it appears in noodles and pancakes. The idea of combining toasted groats with meat and broth isn’t a single regional invention but a family of approaches—one pot meals that stretch protein and deliver depth of flavor. In peasant kitchens, resourcefulness shaped recipes: fatty cuts were simmered slowly, root vegetables were added for sweetness, and grains like buckwheat provided bulk and a pleasing, slightly bitter counterpoint to rich meat. Over time these practical dishes became comfort food; each household kept its private tweaks—bay leaf here, smoked ham there.

When we talk about the soup’s specific lineage, think of cross-pollination. Russian and Ukrainian kitchens favor buckwheat groats for kasha, but here they’ve been adapted to a liquid form that reads like a stew and a soup at once. In mountainous regions or colder climates, such a bowl was not luxury but necessity—calories and minerals were packaged into something spoonable. That practical origin is important: the recipe is forgiving, designed to work with different cuts of beef or even pork, and to be scaled up when guests arrive unexpectedly.

Why buckwheat, why beef — the ingredient logic

Buckwheat is not a cereal grain; it’s a seed, and that gives it a distinctive texture and flavor. Toasted groats develop a toasty, almost caramelized note that balances fatty meat and the aromatics of mirepoix. Nutritionally, buckwheat brings complex carbohydrates, a respectable protein profile, and minerals like magnesium and manganese—useful in a winter diet when green veg may be scarce. Importantly for soup, the groats hold their shape without turning to mush if treated properly, providing body and mouthfeel.

Beef brings umami and structure. You can choose brisket, chuck, or short ribs depending on your aim: chuck breaks down into silky strands when simmered, while brisket offers a denser bite and a glossy finish in the broth. Using some bone-in pieces enriches the stock with collagen, which lends body and a satisfying mouth-coating texture. If you brown the meat first, you lock in flavor and add caramelized notes that play nicely against buckwheat’s nuttiness.

Essential ingredients and suggested quantities (serves 6)

Below is a practical list to keep on hand. It assumes ordinary American or European kitchen measurements and that you want a soup both filling and balanced. Quantities can be nudged—less broth for a thicker result, more buckwheat for a stew-like finish. If you change the meat or scale the recipe, aim to preserve the ratio of aromatic vegetables to liquid so the final flavor remains robust.

Ingredient Quantity Notes
Beef (chuck or short ribs) 1.2–1.5 kg (about 2.5–3 lb) Bone-in preferred for stock; trim excess fat if desired
Buckwheat groats (toasted) 300 g (1.5 cups) Rinse briefly; toast if not pre-toasted
Onion 2 medium Yellow or white, finely chopped
Carrots 2–3 medium Cut into rounds or small dice
Celery stalks 2 stalks Optional but recommended for depth
Garlic 3–4 cloves Crushed or thinly sliced
Bay leaves 2 Add later and remove before serving
Peppercorns 8–10 whole Or freshly ground pepper to taste
Water or beef stock 2.5–3 L (10–12 cups) Use stock for extra flavor; water works with good browning
Salt To taste Season gradually

Preparation overview: build flavor with sequence

Cooking this soup is about layering. Begin by rendering flavor from the beef through browning, then build an aromatic base with onions, carrots, and celery. Toasting the buckwheat either in a dry pan or in the pot with a little fat reinforces its nuttiness and avoids any flat, grainy taste later. Add liquid to deglaze, simmer gently until the meat gives, then introduce the groats toward the mid-point of cooking so they cook through but keep a pleasing bite. This staged approach keeps the soup lively rather than a homogeneous mush.

Timing is forgiving but not irrelevant. If you add buckwheat too early the grains will overcook and disintegrate. If you skip the initial browning you’ll miss the Maillard flavors that lift the broth. Pay attention to skim and clarity: a brief skim at the start makes the final broth clearer; gentle simmering keeps the meat tender instead of stringy. The aim is a soup with depth and textural contrast, where every spoonful has meat, grain, and vegetables in harmony.

Step-by-step: trimming and browning the beef

Start by patting the beef dry—moisture prevents effective browning. Cut large pieces into manageable chunks, leaving some on the bone if possible. Season lightly with salt and pepper, then sear in batches in a heavy pot with a splash of oil, allowing a good crust to form on each face. Don’t overcrowd; crowded meat steams rather than caramelizes. The fond left on the bottom is flavor gold and should be loosened with liquid later.

Once the beef has a deep brown color, transfer it to a plate and reserve. In the same pot, add the diced onion, carrots, and celery and cook until softened and lightly browned on the edges. That caramelization is essential—those browned bits and softened veg create a savory backbone for the broth. If the pot looks dry, add a spoonful of water or stock to coax up any stuck bits before returning beef to the pot.

Step-by-step: simmering, adding buckwheat, and finishing

Pour in your stock or water to cover the meat by an inch or two. Add bay leaves, peppercorns, and a whole garlic clove if you like a milder garlic presence. Bring to a gentle simmer and skim off any foam that rises during the first 15–20 minutes. Then lower the heat, partially cover the pot, and cook slowly until the beef becomes tender when pierced—this can take from one to two hours depending on the cut and size of pieces.

When the meat is nearly tender, toast the buckwheat briefly in a dry pan or in the oven if you prefer, then rinse it under running water to remove any loose husk. Add the groats to the pot about 25–30 minutes before serving so they soften but retain texture. Taste and adjust seasoning toward the end; a splash of vinegar or a spoon of mustard can brighten the broth if it tastes flat. Finish with chopped fresh herbs—parsley works beautifully—and remove bay leaves before serving.

Variations and substitutions

There’s flexibility here without losing the soul of the dish. Swap beef for pork shoulder or use a mix of beef and smoked ham for a different smoky profile. For a lighter version, pick leaner cuts and reduce simmer time, adding a knob of butter at the end for richness. Vegetarians can replace meat with mushrooms and vegetable stock; use toasted buckwheat and add a splash of soy sauce for umami. The structure of the recipe remains the same: brown (or caramelize), simmer, introduce groats late, finish bright.

If gluten-free or grain alternatives are needed, you can try quinoa in place of buckwheat, though the flavor will shift toward a more neutral, slightly grassy note. Barley can also work, but it will need longer cooking and will yield a chewier texture. For a spicier take, introduce smoked paprika or a couple of dried chilies when sautéeing the vegetables. Keep in mind that each substitution alters cooking times and liquid ratios, so adjust accordingly.

  • Smoked ham or bacon: add at the beginning for smoky depth.
  • Pork shoulder: similar technique, slightly shorter simmer for tenderness.
  • Mushrooms and miso: vegetarian umami substitute.
  • Quinoa or barley: textural alternatives; adjust cook times.

Cooking techniques that make a better bowl

Small techniques add up. Toast buckwheat briefly to coax oils and a toasty aroma; this step transforms the grain from bland to expressive. When browning meat, don’t be tempted to rush—true caramelization takes time and rewards patience. Deglazing with stock rather than water grabs those flavor pockets and folds them into the broth. Simmer gently rather than boiling hard; turbulence breaks collagen into stringy pieces and can make the meat chalky.

Another tip: control salt as you go. Stock may be salty already, and as liquid reduces, flavors concentrate. Add most of the salt near the end. If your broth ends up under-seasoned, a little acidity—vinegar, lemon juice, or even a spoon of tomato paste—can wake up the entire pot. And if you want a clearer broth for presentation, skim early and strain through a fine sieve when ladling into bowls.

Serving suggestions and pairings

Buckwheat and Meat Soup. Serving suggestions and pairings

This soup is a meal in itself but can be dressed up. Serve with hearty rye or sourdough bread to sop up the broth, or go lighter with a crisp leaf salad dressed simply in lemon and oil. Pickles—sour or fermented—are a classic companion in northern cuisines: their acidity cuts through richness and complements the grain’s earthiness. For wine, choose a medium-bodied red with gentle tannins or a dry white with good acidity depending on whether the soup leans toward beefy or more vegetal flavors.

Make bowls interesting by offering toppings: a dollop of sour cream, chopped fresh dill or parsley, or thinly sliced scallions. A drizzle of chili oil or a scattering of toasted seeds adds texture. If you’re serving this at a casual dinner, place a small tray of condiments—pickled onions, mustard, or chopped herbs—and let guests personalize their bowls. These finishing touches transform a humble pot into something convivial and memorable.

Nutritional profile and why this soup suits the winter months

From a nutritional perspective, the combination of buckwheat and beef gives a balanced profile: complex carbohydrates, quality protein, and essential minerals. Buckwheat contributes fiber and magnesium, which supports muscle and nerve function; beef supplies iron and B vitamins, important during darker, colder months when energy and stamina are needed. The warmth of the broth supports circulation and has psychological comfort value—eating warm food in winter helps regulate body temperature and mood.

Many cultures rely on soups during winter because they’re efficient: large batches provide multiple meals, and simmering breaks down tougher, cheaper cuts of meat into tender, satisfying pieces. If you’re conscious of sodium or fat, you can tailor the pot—use leaner cuts, remove excess fat after chilling, and control added salt. For those focused on gut health, adding fermented condiments or serving alongside sauerkraut introduces probiotics that complement a nutrient-dense winter regimen.

Storage, freezing, and reheating without losing texture

This soup stores well and in many cases tastes better the next day after flavors meld. Cool it promptly and refrigerate for up to three days. If you plan to freeze, it’s best to undercook the buckwheat a touch so it doesn’t turn completely mushy after thawing; freeze in meal-sized portions for convenience. When reheating, do so gently on the stove; a vigorous boil will degrade the texture of both meat and groats.

If excess fat rises to the surface, chill the pot and remove the solidified fat for a leaner broth. Add fresh herbs and perhaps a squeeze of acid when reheating to revive brightness. For long-term storage, remove bay leaves and any delicate herbs before freezing; they break down and become bitter. Thoughtful reheating preserves structure and keeps the soup lively even days after the initial cook.

Troubleshooting common problems

If your buckwheat cooks to a porridge consistency, it was likely added too soon or you used too much liquid. Rescue it partially by lifting some of the groats out with a slotted spoon and serving the remainder as a separate accompaniment. If the meat is tough, it needs more gentle time; lower the heat and continue simmering until it becomes fork-tender. Toughness can also come from insufficient collagen; choose braising cuts when you can.

Broth that tastes flat often lacks either time or acidity. Simmer longer for concentration, or add a small amount of vinegar, lemon, or a touch of tomato paste. If the pot tastes too salty, dilute with water and adjust aromatics, then simmer to re-concentrate. For cloudy broth, a short rest and gentle skimming usually clears it up; otherwise, strain through a fine mesh before serving. These fixes are simple and get your soup back on track without scrapping the whole pot.

Personal notes and kitchen memories

I remember the first time I made this kind of soup in earnest: a cold, wet evening when I wanted something to warm the small apartment and lift spirits. There was no ceremony, just a stubborn, fatty piece of beef bought cheaply and a packet of buckwheat from the market. The apartment smelled like roasting meat and caramelized onions for hours; when I finally sat down to eat, the mixture of toasty grain and rich broth felt like a private victory. That first bowl taught me to trust slow cooking and to appreciate the quiet alchemy of simple ingredients.

Since then, I’ve adapted the recipe for guests, for quick lunches, and for a vegetarian version that swaps mushrooms for meat. One winter I made a giant pot before a blizzard and sent neighbors over with slices of bread—small acts of sharing turned the dish into a social glue. These recipes are as much about community as they are about sustenance: a common pot invites conversation and makes even ordinary evenings feel attended to.

Final encouragement and practical checklist before you start

Before you begin: select a good cut of beef, get toasted groats or plan to toast them, and assemble your aromatics and herbs. Decide whether you want a lighter, clearer broth or a richer, stew-like finish and adjust liquid ratios accordingly. Allocate time for slow simmering; most of the work is passive and the payoff is large. Finally, think about small finishing accents—fresh herbs, acid, or pickles—to give your bowl a lift at the last minute.

This soup rewards patience and small attentions. Follow the sequence, taste as you go, and remember that substitutions are welcome as long as the balance between savory meat, nutty grain, and bright finishing touches is preserved. Pull a chair, set a warm bowl down, and enjoy the comforting, honest flavor of buckwheat paired with meat: it’s simple food done well, and it carries the warmth of the kitchen straight to the table.

Homestyle Solyanka: A Hearty Russian Stew That Feels Like Home

There are soups that soothe and soups that fortify; homestyle solyanka belongs to the latter. Rich, slightly tangy and densely flavored, this Russian classic has a way of turning a simple meal into something memorable. My version leans into the generous, meaty side of the dish while keeping bright notes from pickles and lemon—elements that give solyanka its unmistakable personality. If you love stews that demand attention and reward patience, you will find much to admire here. Read on for the history, step-by-step technique, ingredient choices and tips that make a true homestyle solyanka sing.

Where Solyanka Came From: A Short Culinary Story

Solyanka’s history is as layered as the soup itself. It emerged in Russia and Eastern Europe as a way to stretch leftovers and create something comforting from whatever meats and vegetables were on hand. Over time it became its own distinct dish, recognized by the tang of brine and the balance between savory and sour. Unlike strictly codified recipes, solyanka is flexible; regional cooks and grandmothers each kept their own secrets. That improvisational spirit is what I aim to capture when I say “homestyle”—not a museum piece, but a living, adaptable comfort food.

Another reason solyanka survived and thrived is practical: its flavors improve with time. Day-old solyanka tastes deeper because the acidic and smoky notes have had a chance to marry with the meat and vegetables. This made it a favorite for family gatherings and for preparing ahead when feeding a crowd. The soup also reflects social history: households that had access to cured meats and pickles used them to enrich broths, while those without relied on mushrooms or fish. That variety is why you will find solyanka with different personalities in different homes and regions.

Understanding the Core Elements

At its heart, solyanka builds on three pillars: a rich stock, a combination of meats (or an alternative like fish or mushrooms), and a pronounced acidic counterpoint—usually pickles plus lemon. The broth should be flavorful and robust so it can stand up to the assertive tastes of smoked sausage or pickled cucumbers. The meat provides depth and texture; I often use a mix of boiled beef, smoked sausage and a few cured cuts for contrast. Acidic elements cut through the fat, preventing the soup from feeling heavy and making it refreshingly lively.

Other recurring players include sauteed onions, tomato paste for sweetness and color, capers or olives as briny accents, and dill for herbal brightness. The whole is greater than the sum of its parts: each ingredient plays a precise role. When assembled thoughtfully, solyanka is layered rather than muddled, with every spoonful offering a little smoke, a little tang, and a lot of comfort. That balance is what separates a casual pot from a genuinely memorable homestyle dish.

Types of Solyanka: Meat, Fish, and Mushroom Variants

Solyanka comes in several established forms, each with its own charm. The meat version is the most widely recognized outside Russia; it is hearty and often served with a slice of lemon and a dollop of sour cream. Fish solyanka uses smoked or salted fish and tends to be lighter, though still tang-forward thanks to pickled additions. There is also a mushroom solyanka, beloved by people who prefer a vegetarian option; it leans on earthy fungi, sometimes with smoked components for depth.

Choosing between them depends on mood and pantry. If you want something robust to stand up to winter weather, pick meat-based ingredients. For a coastal twist or lighter meal, choose fish. The mushroom version suits those who want forest flavors and a lighter protein profile. All three follow the same structural rules—rich broth, acidic counterpoint, and layered aromatics—so learning one method teaches you how to adapt to the others.

Essential Ingredients for a Homestyle Solyanka

You don’t need exotic supplies to make this soup; mostly rely on pantry staples and a few pickled items. Key ingredients for the meat version include beef (preferably a cut that benefits from long simmering), smoked sausages, pickled cucumbers, onions, tomato paste, lemon, capers or green olives, and bay leaves. Quality matters: good smoke in the sausage and proper pickles make a big difference. Fresh dill and sour cream at the table add finishing touches that feel almost ceremonial in the best family-style way.

For the fish variant, replace the meats with smoked trout, salmon or whitefish, and consider adding a bit of fish stock in place of some of the meat broth. The mushroom style calls for a mix of fresh and dried mushrooms to deliver both texture and deep umami notes. Across all styles, control of acidity and salt is crucial; pickles vary widely in saltiness and sourness so tasting as you go is essential. Below is a practical table listing typical ingredients for a homestyle meat solyanka to help you plan shopping and mise en place.

Category Ingredients (meat solyanka) Notes
Broth base Beef shank or chuck, water, onion, carrot, bay leaf Simmer several hours for depth
Main proteins Smoked sausage, cured ham, boiled beef Mix textures and smoke levels
Acid & brine Pickled cucumbers, pickle brine, lemon Adjust to taste
Seasoning & aromatics Onion, garlic, tomato paste, bay leaves, black pepper Sauté onion and tomato paste for base
Finishing Olives or capers, fresh dill, sour cream Serve individual bowls with garnishes

Preparing the Broth: Foundation of Flavor

Good broth is the backbone of homestyle solyanka and worth the time. Start by simmering beef shank or chuck with an onion, carrot and a bay leaf for at least two to three hours. Avoid boiling hard; gentle simmering extracts flavor while keeping the broth clear. Skim as necessary to remove impurities and keep the liquid clean. If you are short on time, a combination of store-bought beef stock and a small piece of smoked bone or a smoked sausage can mimic the slow-cooked depth.

Salt later rather than early, because pickles and smoked meats contribute saline components. If using fish for the fish solyanka, simmer the fish bones briefly—fish stock doesn’t need long and benefits from a delicate hand. For mushroom solyanka, rehydrate dried mushrooms and simmer them alongside fresh ones to extract the most flavor. The idea here is economy of effort: invest time only where it yields a tangible difference in complexity.

Step-by-Step Homestyle Solyanka Recipe

Below I give a detailed method for the meat solyanka—the version I return to most frequently. Quantities are flexible depending on how many you serve, but proportions are important: a balance between broth, meat and pickled elements keeps each spoonful interesting. Follow the sequence: prepare stock, cook meats if needed, sauté aromatics and tomato, combine everything and finish with bright, acidic notes. This sequence ensures textures and flavors develop separately and then come together harmoniously in the pot.

Before you start, have all ingredients chopped and ready. Sautéing the onions properly and blooming the tomato paste in oil is a small step that yields big aromatic payoff. Add the meats and pickles late enough so they keep good texture—sausages shouldn’t be overcooked to the point they fall apart. Taste repeatedly: the salt-pickle-sour balance can shift as the soup reduces. Garnish liberally with dill and a lemon wedge to let each diner dial in their preferred brightness.

Ingredients (serves 6)

To create a generous pot, you will need: 1.5–2 liters of beef broth, 400–500 g of cooked beef (shredded), 300 g smoked sausage (sliced), 2 medium onions, 2 large pickled cucumbers (sliced), 2 tablespoons tomato paste, 2 bay leaves, 1 tablespoon pickle brine, 2 tablespoons capers or chopped green olives, juice of half a lemon, fresh dill, sour cream for serving, salt and pepper to taste. These proportions give the soup a meaty backbone while allowing pickles and lemon to cut through the richness. Adjust according to the intensity of your pickles and the smokiness of your sausage.

Method

1. Prepare the broth: simmer beef with an onion and carrot for 2–3 hours, then strain and return to the pot. 2. While the broth simmers, slice smoked sausage, dice the cooked beef, and slice pickles. 3. Sauté diced onions in oil until translucent, add tomato paste and cook until the paste darkens slightly—this step adds caramelized sweetness. 4. Add the meats to the sauté, then pour in the broth and bring to a gentle simmer. 5. Stir in pickles, pickle brine, capers or olives, and bay leaves, simmer 10–15 minutes to marry flavors. 6. Finish with lemon juice, adjust salt and pepper, then ladle into bowls, adding a spoonful of sour cream and a sprinkle of dill to each serving. These steps prioritize texture and balance, keeping the pickles lively and the meat pleasantly firm.

Cooking Techniques and Little Tricks

A few techniques make a big difference. First, reserve some of the pickle brine and add it sparingly; it’s concentrated and can overpower the soup if used in excess. Second, do not overcook the sliced sausages—aim for gentle heat so they release flavor without disintegrating. Third, if your broth lacks depth, a small piece of smoked bacon or a smoked bone simmered briefly will add that elusive smoky note. Finally, use lemon at the end rather than during long cooking to preserve its bright acidity.

Another tip regards texture: for a more rustic feel, leave some meat in thicker chunks and some shredded. That variety is pleasing to the palate and engages the eater. When you sauté onion and tomato paste, allow a few browned bits to form—those carry savory complexity. If you like heat, a few crushed black peppercorns or a pinch of smoked paprika can add warmth without stealing the dish’s identity. Small, considered choices like these lift a homemade pot beyond mere sustenance.

Variations and Substitutions

Homestyle cooking welcomes substitutions. Swap beef for lamb for a different kind of richness; the gamey note pairs nicely with cucumber brine. Use kielbasa or chorizo if you want a spicier or smokier profile. For a lighter solyanka, use chicken broth and leaner cooked chicken breast, then rely on olives for briny contrast. If you are vegetarian, double down on mushrooms and use vegetable stock plus smoked paprika to suggest the missing meatiness.

On the pickle front, experiment with different pickled vegetables—pickled tomatoes or sauerkraut work well in a pinch. Fresh cucumbers do not replace pickles because the acidity and brine are essential; however, quick-pickled cucumbers can be made ahead and used to mimic the preservation flavor. Olive substitutes can be capers or salted anchovies in tiny amounts, though anchovies will move the soup toward a pronounced umami lane. Each swap shifts the dish’s personality but the structural logic remains unchanged: broth, protein, brine, aromatics, brightness.

Serving Suggestions and Accompaniments

Solyanka is noble enough to be the centerpiece of a meal and unpretentious enough to be served with bread. Thick rye or crusty country loaves are ideal for mopping up the broth and balancing the soup’s acidity. A dollop of sour cream softens the tang and adds silkiness; some people like a little smetana mixed directly into their bowl. Fresh dill or parsley on top brightens each bite and gives a final herbal aroma that contrasts with the smoky-salty elements below.

Pairing drinks depends on how heavy the meat is: a robust black tea brewed strong is the traditional, cozy companion that cuts through richness. For wine, choose something with bright acidity to match the pickles—an unoaked Riesling or a dry rosé work nicely. Beer fans will appreciate a lager or pilsner with clean bitterness that refreshes the palate between spoonfuls. These small choices—bread, sour cream, beverage—shape the meal’s rhythm and how the solyanka is experienced.

Storage, Reheating and Freezing

Solyanka stores and reheats well, and I often make a double batch because it improves overnight. Cool the soup quickly to avoid bacterial growth, then refrigerate for up to three days. When reheating, do so gently over medium-low heat; vigorous boiling can toughen meats and dull the pickles. If the soup tastes a touch flat after refrigeration, brighten it with a squeeze of lemon or a dash of fresh pickle brine before serving.

Freezing is possible but with caveats. Pickles lose some crispness after freezing and thawing, so if texture matters, remove pickles before freezing and add fresh or quick-pickled cucumbers when you reheat. Frozen solyanka will keep for up to three months; thaw in the refrigerator overnight and reheat slowly. These storage strategies let you enjoy a homemade pot even on busy days without compromising the bowl’s signature balance.

Common Mistakes and How to Avoid Them

Beginners often make a few predictable missteps. The first is underseasoning the broth early; it’s better to wait until the end because pickles and smoked meats contribute salt. Another mistake is using fresh cucumbers instead of pickles—the result is a soup that tastes unfinished. Overcooking smoked sausage until it falls apart removes the pleasing bite that balances softer beef pieces. Finally, skipping the tomato paste step loses a vital sweet-acid counterpoint that rounds the flavor profile.

To avoid these traps, taste repeatedly and add acidity last. Keep pickles prominent but measured; their presence should be felt, not shouted. Think in layers of texture as well as flavor—let some components remain solid while others soften. These considerations will make your solyanka structured and lively rather than muddied or flat. They are small adjustments but they multiply into a markedly better final result.

Health and Nutrition Notes

Solyanka is indulgent and nourishing in equal measure, though it can be high in sodium due to pickles and cured meats. If you are watching salt intake, choose low-sodium broths and rinse brined elements lightly, then compensate with fresh lemon for perceivable brightness. Increasing the proportion of lean meats or adding more vegetables will shift the balance toward a lower-fat profile. For more fiber, serve with whole grain bread or a side salad of beet and cabbage to complement the bowl.

Vegetarian versions, particularly mushroom solyanka, can be surprisingly light while delivering umami satisfaction. Use a vegetable stock enriched with dried mushrooms for depth and omit sour cream if dairy is a concern; a swirl of unsweetened yogurt or a spoonful of coconut cream can act as alternatives in a pinch. The key to making solyanka feel wholesome is keeping it balanced rather than heavy—acid, protein, and vegetables in thoughtful proportions create a satisfying yet not guilt-inducing meal.

Personal Memories and How I Learned to Make It

I first encountered solyanka at a small family kitchen where my friend’s grandmother served it from an enamel pot that had known decades of hands. The room smelled of smoked meat, dill and lemon; the soup was hearty and conversational, drawing people back for seconds and stories. Watching her, I noted how she added pickles at the last minute and how she always offered lemon wedges at the table so guests could shape their own final bite. Those moments taught me that solyanka is as much about ritual and hospitality as it is about ingredients.

My early attempts were clumsy—too salty or too flat—but gradually I learned to respect the timing of additions and the importance of tasting. Attempting different sausages, fiddling with the amount of pickle brine, and making broth from various cuts taught me subtleties few recipes explain. Each attempt improved the next, and now I often make solyanka for weekend gatherings where the kitchen fills with chatter while the pot simmers. That communal atmosphere is why I treasure homestyle versions; the soup carries memories and invites conversation.

When to Make Solyanka and Who It’s For

Solyanka suits cold evenings, celebratory winter meals, and any time you want something substantial without fussing over many dishes. It’s ideal for feeding a family or group because it scales well and can be prepared ahead. The soup appeals to people who like bold flavors and varied textures—those who enjoy smoky sausage, tangy pickles, and the comfort of a slow-simmered broth. It also works well for potlucks where a big, aromatic pot can anchor the spread and invite sharing.

Solyanka is forgiving for home cooks of different skill levels. A novice can follow the basic steps and produce a crowd-pleasing pot; an experienced cook can tweak proportions and technique for a refined outcome. The dish respects both improvisation and precision, depending on how you approach it. That flexibility is part of its enduring charm and why it remains a reliable, beloved entry in the repertoire of homestyle cooking.

Pairing with Sides and Simple Menus

Complement solyanka with sides that echo or contrast its flavors. A crisp cucumber and dill salad echoes the pickle notes without adding brine. Roasted root vegetables make a cozy, autumnal pairing while a plate of buttered new potatoes rounds the meal with gentle starch. Keep desserts simple and palate-cleansing: a citrusy tart or a light berry compote finishes the meal on a bright note without competing with the soup’s bold profile.

For a complete menu, consider starting with small rye toasts topped with herring or cream cheese, followed by the pot of solyanka as the main, and finish with a modest lemon pudding or fruit. Drinks should refresh: strong tea, a light beer, or a crisp white wine will keep the palate lively. These pairings create an evening that feels intentionally put together yet comfortable—exactly what homestyle cooking should be.

Final Thoughts on Making It Your Own

Homestyle solyanka rewards curiosity more than rigid adherence to a single recipe. Try different combinations of smoked and cured meats, experiment with the proportion of pickles to meat, and adjust acidity to suit your palate. Keep notes so you remember which swaps produced the best results; over time you will develop a personal version that reflects your pantry and preferences. The goal is not to replicate someone else’s bowl perfectly but to craft a version that feels like your kitchen and your hospitality.

Above all, make the soup with patience and intention. Slightly caramelized onions, the right degree of simmer, and the final squeeze of lemon are small actions that compound into something warm and memorable. Whether you are cooking for a quiet night in or a lively family dinner, homestyle solyanka offers a delicious way to gather people around the table. It’s the kind of dish that rewards the cook and comforts the eater, and that combination is a rare and welcome thing in any cuisine.

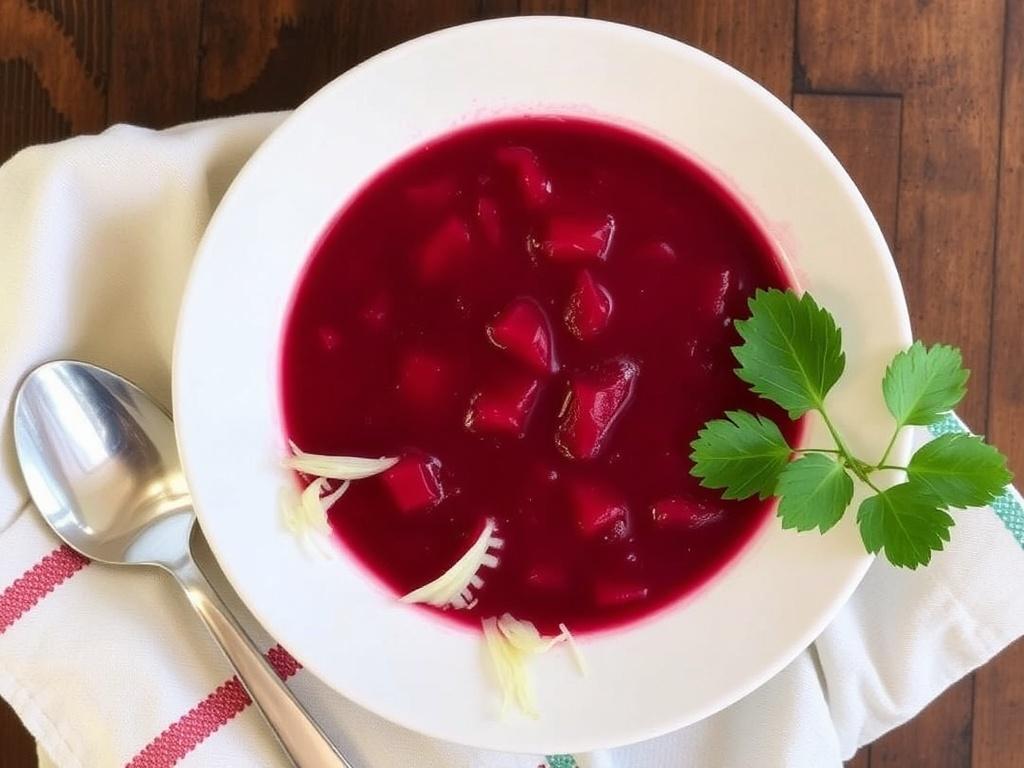
Red Gold and Tang: Mastering Beet Borscht with Sauerkraut

There are soups that simply fill a bowl, and then there is beet borscht with sauerkraut — a dish that arrives like a story, layered, sour, sweet and deeply soulful. This version borrows from Eastern European kitchens, where beetroot and fermented cabbage meet in winter pots to warm family tables and sharpen appetites. In the paragraphs that follow I will walk you through history, flavor science, a practical recipe, and the little tricks that turn a good borscht into something you want to make again and again. Expect concrete measurements, thoughtful substitutions, and notes from my own experiences tuning acidity and texture. If you like your food with character and a bit of tang, keep reading: this winter dish earns its reputation the old-fashioned way, by demanding attention and rewarding it richly.

Where Borscht Comes From and How Sauerkraut Joined the Pot

Beet Borscht with Sauerkraut. Where Borscht Comes From and How Sauerkraut Joined the Pot

Borscht has roots in the broad swath of Eastern Europe where beets grew easily and people needed soups to stretch modest ingredients into satisfying meals. While Ukraine and Russia claim the most famous variants, versions exist in Poland, Lithuania and even the Balkans, each with its own local twist. Historically, the addition of preserved cabbage like sauerkraut was practical: fermentation allowed families to store vegetables through harsh winters and to add acidity and probiotics to otherwise starchy, calorie-heavy diets. The tang of sauerkraut brightens beetroot’s earthy sweetness and helps the flavors travel through the palate, which is why many households learned to combine them by habit rather than design. Over time, the mixture became more than sustenance; it carried seasonal memory — bowls passed around after church on holiday mornings or ladled into thermoses for workers heading out into the cold.

Food cultures rarely stay still, and sauerkraut’s presence in borscht illustrates cross-pollination between neighboring peoples. In Polish cooking, fermented cabbage and beets are comfortable collaborators, while Jewish kitchens developed meatless red borscht variants that often used vinegar or sauerkraut to achieve the bright finish. In German-influenced regions, smoked pork or sausages might appear alongside the sauerkraut, adding a smoky backbone to the soup. These adaptations show how one basic idea — beets plus an acidic counterpoint — becomes a family fingerprint once local ingredients and preferences take hold. When I think about borscht, I think less about rules and more about those small regional signatures that keep the dish alive and evolving.

What Sauerkraut Does: Flavor and Chemistry

Sauerkraut contributes three essential things to this borscht: acidity, texture and microbiological complexity. Through lactic acid fermentation, cabbage develops sharp, lemony notes and a firm yet pleasantly yielding bite, which cuts through beetroot’s sugary depth and creates balance in each spoonful. The acidity also helps preserve color — contrary to what many fear, the right acid shield actually brightens beets and prevents them from turning dull when cooked with iron-rich ingredients. Besides taste and appearance, the naturally occurring bacteria in properly fermented kraut offer probiotic benefits, which is a welcome bonus in a heavy winter dish where gut-friendly components are often scarce.

Understanding these effects helps you control the final pot. Too much sourness can flatten subtle aromatics, so plan your additions: add some sauerkraut early during the simmer to meld flavors, and reserve a small portion to stir in just before serving if you want a fresher tang. If you rely on store-bought kraut, taste it first and adjust amounts; homemade sauerkraut varies widely in intensity. Personally, I prefer a kraut that’s firm, not mushy, and with a flavor profile that leans toward mild lactic tang rather than vinegary sharpness, because when it’s balanced it harmonizes with beets instead of fighting them.

Essential Ingredients and Reasonable Variations

There is a simple core to this soup: beets, broth, aromatic vegetables, and sauerkraut. Beyond those anchors you can build a meat-forward version with beef or pork, a light vegetarian soup with beans or mushrooms, or a silky vegan bowl that leans on root vegetables and smoked salt for depth. Key aromatics include onion, carrot and celery; some cooks add parsnip or celeriac for earthiness. For seasoning, bay leaves and black pepper are classic, while dill and sour cream (or a plant-based alternative) finish the dish at the table. It’s useful to regard these elements as a toolkit rather than rigid rules — adjust according to what’s available and the intensity of your kraut.

Below is a straightforward ingredient table for roughly six generous servings, which you can scale without much trouble. Quantities assume mid-sized beets and moderately tangy sauerkraut; I list both fresh and pantry options so you can adapt based on what’s in your kitchen. For meat eaters, smoked ribs or beef shank join at the start; for vegetarians, use a rich vegetable broth and consider adding white beans for body and protein. When in doubt, prioritize quality of the beetroot and the character of the sauerkraut — they determine most of the soup’s personality.

</

Ingredient Amount (approx. for 6 servings)
Beetroot (fresh, medium) 6–8 (about 1.5–2 kg / 3.5–4.5 lb)
Sauerkraut (drained) 500–700 g (1.1–1.5 lb)
Onion 2 medium
Carrot 2 large
Celery stalks 2–3
Potatoes (optional) 3–4 medium
Broth (vegetable or meat) 2.5–3 L (10–12 cups)
Bay leaves, peppercorns 2–3 bay leaves, 6–8 peppercorns
Fresh dill and sour cream for serving To taste

Step-by-Step: Making Beet Borscht with Sauerkraut

Good technique matters in borscht because color, texture and balance all emerge from simple steps done properly. Start by roasting or simmering the beets whole to preserve their color and concentrate flavor, then peel and shred or slice them for the pot. If you choose to roast, wrap beets individually or place them on a tray and roast until knife-tender; this adds caramel notes that deepen the soup. For a cleaner, more traditional flavor, simmer beets in lightly salted water until tender, then cool, peel and slice. Either method works; the choice affects sweetness and aroma more than anything else.

Prepare your aromatics while the beets cook: sweat onions, carrots and celery until soft and slightly caramelized, which develops sweetness to balance the kraut’s acidity. Add chopped beets and a portion of sauerkraut, then pour in hot broth, add bay leaves and peppercorns, and bring to a gentle simmer. If you’re including potatoes, drop them in early so they cook through and thicken the soup a bit; if you prefer a clearer broth, omit them. Let the pot simmer until all flavors merge, taste for salt and acid, and remember you can always add a splash of vinegar or more sauerkraut at the end to lift the soup if it tastes flat.

  1. Cook beets: roast or boil until tender, peel and shred or dice.
  2. Sauté aromatics: onion, carrot, celery in oil until fragrant.
  3. Add beets and a portion of sauerkraut, sauté briefly to combine flavors.
  4. Pour in broth, add potatoes if using, bay leaves, and peppercorns.
  5. Simmer gently for 30–45 minutes, then adjust seasoning and acidity.
  6. Serve with chopped dill and sour cream, offering extra kraut at the table.

Timing and Order: Why It Matters

Cooks often ask whether to put sauerkraut in at the beginning or near the end; the short answer is both can be right depending on intent. Adding most of the kraut early in the simmer helps the flavors meld and softens overly sharp edges, creating cohesion in the soup. Reserving a cup or so to stir in at the finish supplies a fresher, brighter acidity that livens the bowl just before serving. If you’re using strongly vinegary kraut, add a smaller portion early and taste as the soup reduces; strong acetic notes amplify when heated, so moderation is useful. I follow this two-stage approach almost every time, because it preserves complexity and avoids a one-note finish.

Meat, Smoke and Vegetarian Options

For meat lovers, beef shank, smoked pork ribs, or kielbasa can be the backbone of the broth and add savory weight to the borscht. Brown the meat to develop caramelized flavor, simmer it long and slow, and skim fat if you prefer a cleaner look in the final bowl. Smoked elements pair particularly well with sauerkraut because smoked fat harmonizes with the kraut’s fermented tang, creating a well-rounded mouthfeel. Vegetarians should aim for a richly flavoured broth made from roasted vegetables and dried mushrooms, and consider white beans for heft; a splash of soy sauce or liquid smoke can substitute missing savory notes without overwhelming the beets. Whichever route you take, keep the proportions balanced so the beetroot remains the star.

Finishing Touches: Herbs, Dairy and Acid

Fresh herbs and a creamy finish transform the soup from rustic to memorable; dill is the classic choice and brings a bright herbaceousness that complements both beet and kraut. Parsley can be used if you want a milder green note, while a very small amount of chopped chives offers a delicate oniony lift at the end. Sour cream is traditional on many tables — it softens acidity and adds a silky contrast to the broth — but plain yogurt or a plant-based crème fraîche work fine for those avoiding dairy. Lemon juice, a teaspoon of sugar, or a dash of balsamic can be used to fine-tune the balance between sweet and sour, and it’s worth tasting carefully because small adjustments have a large effect in a concentrated soup.

Presentation and Garnishes

How you present borscht influences how it is perceived; a neat dollop of cream and a scatter of dill make even a humble bowl look intentionally composed. For family-style meals, serve extra sauerkraut and sour cream at the table so guests can personalize their bowls. Rye bread or buttery potato pancakes are excellent accompaniments that soak up broth and temper acidity. If you want to be playful, add a few roasted pumpkin seeds or a drizzle of good olive oil for texture and subtle richness. Presentation needn’t be fussy — the goal is to invite the eater to taste the layers, not to distract from them.

Serving Suggestions and Pairings

Beet borscht with sauerkraut is versatile and pairs well with robust breads, pickles and simple salads that echo its rustic origins. Dense rye or sourdough is perfect for mopping up broth, while boiled new potatoes or small pierogi offer heft for heartier lunches. On the beverage side, a crisp lager, a tart kvass or a light, dry white wine like Grüner Veltliner complements the soup’s acidity. For a festive table, smoked meats or cold cuts served alongside add a communal feel, especially in winter when people gather for long meals. At home I often pair borscht with warm soda bread; the soft crumb and slight sweetness create a comforting counterpoint to the soup’s tang.

Storage, Reheating and Freezing

Borscht is one of those soups that often tastes better the next day because time allows flavors to knit together; I frequently make a large pot specifically to enjoy over several days. Cool the soup to room temperature before refrigerating, store in airtight containers and use within four days for best texture and flavor. If you plan to freeze, remove any sour cream or fresh herbs first and freeze the broth in portioned containers; the texture of potatoes changes after freezing, so consider adding fresh cooked potatoes when reheating if desired. Reheat gently on the stove to preserve color and prevent beets from overcooking; a short simmer is usually sufficient to bring the bowl back to life without breaking down components.

Nutritional Notes: Why This Winter Dish Feels Right

This soup ticks many nutritional boxes for cold months: beetroot provides folate, manganese and betalains — pigments with antioxidant activity — while sauerkraut supplies vitamin C and live cultures when unpasteurized. The combination supports immunity and digestion, which is useful in winter when fresh produce is scarcer. Adding beans or meat increases protein and makes the meal more filling, while potatoes deliver comfort through complex carbohydrates. That said, balance the sodium: sauerkraut and commercial broths can both be salty, so taste before adding extra salt to avoid an oversalted pot.

Common Mistakes and How to Fix Them

Several pitfalls recur in home borscht making, and most are easy to correct once you know them. One common error is overloading the pot with heavy sauerkraut, which can dominate the beets; if your kraut is intense, dilute by rinsing briefly or add less at the outset and more at serving. Another mistake is overcooking beets until they collapse and turn the broth muddy; cook beets until just tender and handle them gently in the pot. If the soup tastes flat, a modest splash of vinegar or a spoon of sauerkraut juice often brightens it; if it’s too sharp, a tiny pinch of sugar or a dollop of cream calms the edges. Keeping these quick fixes in mind saves hours of second-guessing and preserves the integrity of the bowl.

Regional Variants Worth Trying

If you want to explore beyond a single recipe, try these regional takes and note how small changes alter the character of the soup. Polish barszcz often shines with clear broth and less cream, sometimes served with mushroom-filled uszka dumplings; Lithuanian versions may include smoked ribs and barley for a heartier texture. Jewish borscht can be served cold with a dollop of sour cream or warm with knaidlach dumplings, and it often uses vinegar instead of kraut for acidity. Each version teaches something about balance: whether you prefer clear, bright broths or robust, stew-like pots, the core idea of beets paired with an acidic counterpoint remains central.

Homemade Sauerkraut Versus Store-Bought

Making your own sauerkraut is satisfying and gives you control over texture and salt, but it requires time and a basic tolerance for the fermentation process. Homemade kraut often has a fresher, less vinegary profile because it relies on lactic acid rather than added vinegar; this can be ideal for borscht where a gentle tang is preferable. Store-bought sauerkraut is convenient and consistent, but quality varies: some brands are pasteurized and lack live cultures, while others are sharply vinegary. Taste before using and consider rinsing if the flavor is too assertive; personally I keep both options on hand depending on how much time I have and how bold I want the soup to be.

How I Learned to Balance the Bowl: Personal Notes

I remember the first time I tried adding sauerkraut to borscht at home, feeling unsure whether the fermented cabbage belonged in a beet-based soup. That first attempt was a revelation: the kraut cut through the natural sweetness and made the bowl sing in a way plain beet soup hadn’t. Over the years I experimented with roast versus boiled beets and learned that roasting adds a caramel warmth I sometimes prefer in winter, while boiling keeps the color vivid and the flavor more root-like. I also discovered the two-stage kraut approach by accident, tasting the soup at the end and adding a fresh spoonful to brighten it; now it’s part of my routine and it reliably lifts the flavors. These small experiments are why cooking this winter dish never feels like repetition — each pot teaches something new.

Serving for a Crowd: Scaling and Timing

Scaling this soup for gatherings is straightforward because it holds well and can be made ahead; double or triple the recipe with confidence and use large stockpots to ensure even simmering. When cooking for groups, cook beets separately in oven pans or large pots to free stovetop space for other tasks like browning meat or sautéing aromatics. Keep extra sauerkraut on the side so guests can adjust tang according to personal taste, and offer toppings like hard-boiled egg halves, chopped dill and extra sour cream to let people customize their bowls. Timing is forgiving: start early in the day, let the pot sit and develop, then gently reheat before serving to preserve brightness and texture.

Dietary Tweaks and Allergy-Friendly Ideas

This soup adapts easily for allergies and dietary preferences: for dairy-free bowls, use coconut yogurt or a cashew-based cream instead of sour cream; for low-sodium diets, make your own broth with minimal salt and rinse sauerkraut before using. If gluten is a concern, avoid thickening with flour and choose naturally gluten-free breads or potato sides. For ketogenic adaptations, reduce potatoes and add more fatty elements like a swirl of schmaltz or a spoon of rendered pork fat. The core flavors — beetroot’s earth and sauerkraut’s acid — remain enjoyable across most dietary choices if you adjust supporting ingredients with care.

Recipes to Try Next: Spin-Offs from the Pot

Once you’ve mastered the basic borscht, spin-offs will present themselves: try cold summer borscht with pickled beets and cucumbers, a beet and sauerkraut stew thickened with barley, or a blended cold beet soup with yogurt for a lighter take. Leftover borscht can be used as a braising liquid for root vegetables or as a base for a robust sauce to glaze roasted meats. You can also reduce the soup and use it as a vibrant marinade for grilled vegetables, where its acidity and color make a noticeable difference. These variations keep the technique fresh in your repertoire and help avoid mealtime boredom.

Final Bowl: An Invitation to Experiment

Beet borscht with sauerkraut is more than a winter dish; it’s a lesson in balance between sweetness and sourness, softness and bite, tradition and personal taste. The recipe I’ve described aims to provide structure while leaving room for adjustments according to your kraut’s character and the beets’ intensity. Cook it for a quiet weeknight, scale it for a gathering, or use it as a springboard to regional experiments — in every case, pay attention to seasoning and timing, protect the beets’ color, and reserve a touch of fresh kraut for the finish. If you let the pot teach you, it will repay you with a bowl that comforts, surprises and lingers on the palate.

A Cozy Bowl of Pumpkin Cream Soup That Warms More Than Hands

The first spoonful of this pumpkin cream soup is like finding a woolen blanket forgotten at the back of a closet on the coldest morning of winter; it smooths out the chill and settles you. Imagine roasted squash notes turning sweet and earthy, melded with a soft dairy richness that coats the tongue without weighing it down. This article walks the reader through thoughtful ingredient choices, techniques that make the texture sing, and creative variations for different diets and occasions. I’ll share hands-on tips I learned from trial and error in my own kitchen, so you can skip common missteps and enjoy consistently velvety results. Read on to discover how a humble vegetable can become the centerpiece of a comforting meal, seasonal celebration, or a simple weekday dinner ritual.

Why this dish fits the season: seasonal appeal and origins

Pumpkin-based soups are deeply tied to harvest culture and cold-weather cooking, when root vegetables and hardier gourds are at their peak. Across regions, people developed creamy soups to stretch small harvests into filling fare that comforts and restores body heat; the addition of cream or alternative fats evolved both for flavor and satiety. In modern kitchens, this kind of soup sits at the crossroads of nostalgia and technique: it’s rustic in ingredient list but demands attention to balance and texture to reach its potential. For winter menus, this soup performs double duty, offering warmth and a concentrated sweetness that pairs well with sharper or bitter accompaniments. Understanding that background helps in choosing the right spices, cooking times, and presentation so each bowl feels purposeful rather than perfunctory.

Selecting the squash: which pumpkin to use and why it matters

Not every pumpkin is equally suited for a smooth, rich soup; sugar pumpkins and certain winter squashes offer denser flesh and a more complex flavor than the large carving varieties. When shopping, look for moderate-sized, firm-skinned fruits with a dull sheen rather than gloss; the flesh should feel heavy for its size, indicating a higher solids content and less watery pulp. If you prefer a slightly nutty profile, seek out kabocha or butternut as alternatives; both blend into a silky texture and bring their own nuanced sweetness. Fresh is usually best for depth of flavor, but high-quality canned squash can be a practical shortcut without sacrificing much if you choose brands that list only pumpkin or squash and water. Whatever form you use, trimming fibrous strands and seeds thoroughly helps achieve a truly smooth finish after blending.

Complementary ingredients: building a balanced flavor profile

A bowl doesn’t depend solely on squash and cream; it’s the supporting cast that creates interest and balance. Aromatics like onion, leek, and a small amount of garlic provide a savory backbone, while a cooked apple or a touch of carrot can introduce acidity and sweetness complexity without clashing. For body, use a good stock—chicken for richness, vegetable for a lighter, plant-forward bowl—and add cream or a dairy-free alternative at the end to preserve texture and shine. Acid is crucial: a splash of lemon juice, apple cider vinegar, or sherry brightens the flavors and prevents the final dish from tasting flat. Finally, spices should be judicious: warm notes like nutmeg, coriander, and a pinch of smoked paprika can enhance the squash’s character without turning the soup into a spice showcase.

Essential tools and techniques for a silky texture

Texture separates home cooks from professionals when it comes to cream-based vegetable soups, and the right tools make that difference accessible. A heavy-bottomed pot helps regulate heat and avoid scorching; a good immersion blender allows you to purée directly in the pot, which preserves aroma and reduces transfers. If you prefer an ultra-smooth finish, strain the blended soup through a fine-mesh sieve or chinois using a ladle to push it through; this step removes any remaining fibrous bits that resist blending. Controlling heat is equally important: simmer gently to coax flavors without evaporating your stock into bitterness, and avoid boiling vigorously after adding cream to prevent curdling. With these methods you’ll create a soup with body and silk, not gluey thickness or grainy fragments.

Recipe: classic pumpkin cream soup (detailed guide)

Below is a practical recipe scaled for four servings that focuses on technique as much as ingredients, letting each step contribute to a cohesive result. Start early enough to roast the squash if you choose that method; roasting concentrates sugars and deepens color in ways boiling cannot. Use a modest amount of cream at the finish so the dish remains elegantly lush rather than cloying. The directions prioritize patience—sweating aromatics, deglazing the pan, and allowing a gentle simmer to develop flavor—since rushing here is the fastest path to weak, thin soup. Measurements are flexible for experienced cooks who like to judge seasoning by taste; for beginners, follow them closely until you develop confidence in the balance of sweet, savory, and acid.

Ingredient Amount
Pumpkin or winter squash (peeled, cubed) 1.5 kg (about 3 lb)
Unsalted butter or olive oil 2 tbsp
Onion, finely chopped 1 medium
Garlic, minced 2 cloves
Chicken or vegetable stock 900 ml (about 4 cups)
Single cream or heavy cream 120 ml (1/2 cup)
Salt and black pepper To taste
Fresh lemon juice or cider vinegar 1-2 tsp
Optional spice (nutmeg, ground coriander, or smoked paprika) 1/4–1/2 tsp

Method

Begin by preparing your squash either by roasting at 200°C for 30–40 minutes until deeply caramelized, or by cooking it directly in the pot with a splash of stock until tender; roasting gives a sweeter, deeper flavor, while direct cooking is faster and cleaner. In the same cooking vessel, warm butter or oil and sweat the onion gently until translucent and soft, then add garlic for the last minute to release aroma without burning. Add the cooked squash back to the pot with stock, bring to a gentle simmer, and let the components marry for 10–15 minutes so starches integrate with liquid. Remove the pot from heat and blend until very smooth, using an immersion blender or pulsing in batches in a countertop blender with a towel over the lid to vent steam safely. Return the soup to low heat, stir in the cream, adjust seasoning, and finish with acid to brighten the bowl; serve immediately with chosen garnishes.

Finishing touches: garnishes, textures, and plating

A garnish transforms a bowl from everyday to memorable; think beyond a sprinkle of pepper and aim to contrast the velvety base with crunch and brightness. Toasted pepitas or a drizzle of browned butter provide nutty, toasty notes and tactile interest, while finely chopped herbs like chives or flat-leaf parsley add a green lift. A swirl of crème fraîche or a spoonful of kefir can give a tangy counterpoint that cuts through the fat of cream. For plating, serve in pre-warmed bowls to maintain temperature and add a small side of pickled vegetables or crisp bread to offer bite variation. These finishing choices should amplify the soup’s personality rather than mask it, so pick one bold accent and one subtle element rather than layering many competing flavors.

Variations to suit any table: vegan, spicy, and lighter versions

There’s a version of this soup that fits nearly every diet and mood without losing the central idea of lush squash comfort. For a vegan take, replace dairy cream with full-fat coconut milk or a cashew cream: both provide richness, but coconut introduces its own sweetness, while cashews remain neutral and buttery. If you want heat, incorporate harissa, a pinch of cayenne, or a roasted chili purée; add complexity slowly and taste as you go so the spice complements rather than overpowers the squash. For a lighter bowl, reduce cream and use more stock, finish with a small pat of cultured butter at the end for silkiness, and serve with a tangy relish to compensate for lower fat content. Each variation changes the soup’s character, so choose one that aligns with the rest of your menu and the preferences of your guests.

Wine and food pairings: what to serve with each spoonful

Pairing a drink with a creamy squash soup requires balance: the beverage should either cut through the richness or echo the dish’s warmth without creating cloying synergy. Crisp, acidic white wines—such as a dry Riesling or a unoaked Chardonnay—work well because their acidity refreshes the palate between spoonfuls. For a heartier pairing, a lightly chilled Beaujolais or a medium-bodied Grenache provides fruit and spice that dovetail with roasted squash flavors. Non-alcoholic options can be elegant too: sparkling water with a lemon twist or a tart apple shrub complements the sweetness and adds texture. Consider the garnishes when pairing; if you’ve added smoked elements, lean toward wines with subtle oak or a smoky character to harmonize the plate.

Common pitfalls and how to avoid them

Two mistakes routinely derail a promising squash soup: underseasoning and overthickening. Because pumpkin flesh can be mildly sweet, salt is the primary tool for bringing out its savory aspects; season gradually and taste repeatedly, especially after adding cream. Overthickening occurs when too little liquid remains after blending, or when excessive starchy vegetables are used without enough stock; correct this by adding warm liquid in small increments rather than water, and adjust the final texture with a splash of cream or an extra ladle of stock. Flavor imbalance is another trap—too much sweet spice can make the bowl one-note, so introduce warming spices in small amounts and balance them with a bright acid at the end. Adopting these corrective habits will produce reliable, nuanced results every time.

Nutrition snapshot: what a bowl provides

While indulgent in texture, a properly portioned bowl of pumpkin soup offers nutritional benefits: it is a source of beta-carotene, vitamin A precursors, and fiber from the squash, with protein and fat from added dairy or nut-based creams. Caloric content varies widely depending on the cream type and quantity; a modest serving with light cream or a plant-based alternative can be quite moderate in calories while still feeling satisfying. For those monitoring sodium, making your own stock and limiting added salt gives full control over the final numbers. The table below offers an approximate breakdown for a typical serving using whole cream and chicken stock, intended as a general reference rather than a precise analysis.

Nutrient (per serving) Approximate amount
Calories 280–360 kcal
Fat 18–24 g
Protein 4–6 g
Carbohydrates 24–30 g
Fiber 3–5 g

Storage, reheating, and freezing tips

Properly stored, this soup keeps well and can simplify future meals, but technique matters for texture and safety. Cool the soup quickly to room temperature within two hours, then refrigerate in a sealed container for up to three days; reheating gently over low heat with a splash of stock or water prevents the consistency from becoming gluey. Freezing is possible, but dairy-containing soups can separate on thawing: to freeze successfully, omit cream and add it when reheating, or use a stable plant-based cream like canned coconut milk if you plan to freeze. When thawing, move the soup to the refrigerator overnight and reheat slowly, whisking as it warms to recombine any separated fats and liquids into a smooth whole.

Using leftovers creatively

Leftover squash soup is versatile beyond reheating—think of it as a base for other dishes instead of waste. It can be reduced and used as a sauce for roasted meats or drizzled over cooked grains to introduce coherence to a composed bowl. Mixing a small amount with beaten eggs and baking creates savory custard muffins, while blending with cooked lentils thickens it into a hearty stew-like topping for toasted bread. For an unexpected breakfast, swirl a ladle into porridge or oatmeals in place of sweet additions; the savory-sweet interplay is surprisingly pleasing. These ideas stretch the original preparation and make a single pot serve multiple meals with minimal extra work.

Personal notes from the author: lessons learned in my kitchen

I remember the first time I roasted a whole sugar pumpkin and watched the kitchen fill with caramelized scent; that bowl of soup felt like a small triumph after a long day. Over several seasons I learned that patience with low heat, modest seasoning increments, and finishing with a precise acid splash consistently elevated results. Once I began toasting seeds and adding a tiny smear of browned butter, guests started asking for the recipe rather than just compliments, which taught me how much garnish matters. I also discovered that different creams change the mouthfeel dramatically—single cream keeps the texture light, while heavy cream creates a more indulgent, clingy finish. Those hands-on experiments are why my approach favors incremental adjustments and tasting at each stage rather than following a recipe blindly.

Hosting and menu ideas featuring this soup

Pumpkin Cream Soup. Hosting and menu ideas featuring this soup

This soup works beautifully as a starter for a seasonal dinner, a main for a casual lunch, or a comforting course at a small winter gathering where simplicity matters. Pair it with a composed salad of bitter leaves and citrus to cut richness, or serve alongside a platter of roasted vegetables and grain for a sharing-style meal. For a dinner party, present the soup in shallow bowls with a single bold garnish so each guest can personalize with seeds, herbs, or oils at the table. If you need a make-ahead option, prepare through the blending stage and finish with cream and garnishes right before serving to preserve texture and color. Thoughtful pacing and complementary dishes will let this bowl shine without overwhelming the palate.

Final spoonfuls: bringing it all together

Making a memorable bowl of pumpkin cream soup is less about following a single recipe and more about understanding how each element—pumpkin, liquid, fat, acid, and texture—interacts to create harmony. Invest in quality squash or a reliable canned alternative, pay attention to aromatics and gradual seasoning, and choose garnishes that contrast rather than duplicate the soup’s richness. Whether you aim for a traditional cream finish, a vegan iteration, or a spicy accent, the core principles of patience, balance, and thoughtful texture control remain the same. Let this dish be a small ritual in your winter repertoire: a way to slow down, feed others with warmth, and enjoy a simple luxury spoon by spoon.

Warm the Bowl, Warm the Soul: A Deep Dive into Warming Soups

There are few things as immediate and honest as a hot bowl on a cold evening. Warming Soups aren’t merely about calories and hydration; they are about ritual, memory, and the particular kind of comfort that creeps up your spine and settles in your chest. In this article I want to walk you through the craft of making soups that do more than fill — they restore, cheer, and revive. You’ll find practical techniques, ingredient science, templates you can adapt, and a few anecdotes from my own kitchen experiments. Read on whether you’re a seasoned home cook or someone who simply wants a better, more nourishing bowl this winter.

Why warming soups matter: more than a quick meal

Soup is often dismissed as starter fare, something to clear the way to the main event. In reality, a well-made bowl can be the main event itself — substantial, balanced, and complete. Warming soups in particular perform a kind of culinary triage: they provide heat, immediate comfort, and layered nutrition that’s easy to digest when appetites are spotty or days are long. The act of ladling soup is calming on a human scale; watching steam rise from a pot has a therapeutic rhythm that matches the slow work it takes to simmer flavor into depth.

Beyond emotion and ritual, soups are efficient from a practical standpoint. They stretch small amounts of meat or vegetables into several meals, make use of preserved items in the pantry and can be adapted to whatever produce is in season. For people who cook for family or friends, a large pot becomes an invitation — you feed bodies and gather voices around the table. That social element is part of why soup has such a long history in cultures around the world, a shared antidote to cold nights and lean times.

What makes a soup truly warming

There are two ways to think about warmth in a bowl. One is literal: spices, fats, and proteins that raise palate heat and give sustained energy. The other is psychological: texture, aroma, and finish that convince the eater they’re being cared for. A handful of toasted spices can wake the nose; a spoonful of butter or tahini at the end adds a feeling of richness that clings. Balance those elements and the bowl becomes both lively and soothing, not just hot.

In practical terms, warming components include root vegetables, long-simmered bones or legumes, aromatic alliums, and spices such as ginger, black pepper, cinnamon, and cumin. Fats are crucial: a drizzle of olive oil, a pat of butter, or a spoon of cream will carry flavors and leave a lingering sensation of warmth. Texture also matters. A chunky, bite-filled broth feels hearty in a different way than a silky purée, so choose the structure that matches your appetite and the mood you want to set.

Key ingredients that add heat and depth

Warming Soups. Key ingredients that add heat and depth

Think of warming ingredients in three categories: flavor catalysts, body-builders, and finishes. Flavor catalysts are spices and aromatics that provide immediacy — ginger, garlic, black pepper, and chili. Body-builders are the ingredients that sustain you: legumes, barley, root vegetables, and meats with collagen. Finishes are what round the experience: dairy, nut pastes, acidic brighteners like lemon or vinegar, and herb oils. A successful soup usually includes at least one from each group.

It helps to know why these ingredients work. Collagen from bones breaks down into gelatin and gives a silky mouthfeel; starch from potatoes and grains thickens and satiates; toasted spices release essential oils that survive simmering and continue to perfume the bowl. Consider your pantry and choose combinations that complement rather than compete — cumin and coriander pair naturally; ginger and lemongrass amplify each other in Asian broths; rosemary and thyme are more suited to beefy, slow-cooked bases.

Table: Common warming ingredients and their roles

Ingredient Role Why it warms
Ginger Flavor catalyst Sharp, spicy heat that stimulates circulation and the palate
Bone broth Body-builder Gelatin and minerals provide depth and mouthfeel
Barley / Lentils Sustaining starch/protein Slow-digesting carbohydrates keep you full and warm
Cumin / Cinnamon Warm spices Low floral notes and warmth, boost aroma and perception of heat

Building a warming broth: stocks, bones, and alternatives

Start with a stock that fits your intention. A long-simmered bone broth gives a gelatinous body that feels luxurious; vegetable stock lends brightness and lets spices sing. I often alternate between both depending on what’s in the refrigerator. If you’re short on time, use good-quality store-bought stock and concentrate it by reducing; a reduced broth multiplies flavor without extra effort. For vegetarian warming soups, roast your vegetables first to add caramelization and depth that mimic the umami-rich profile of meat stocks.

Technique matters as much as ingredients. Cold water bloom for bones helps extract collagen; starting vegetables in cold water changes the sweetness and clarity of the final broth; skimming scum is less about perfection and more about aesthetics — a light skim yields a cleaner presentation, while leaving it lends rustic character. Simmer gently; an active boil will emulsify fat into the broth and can carry bitter or harsh flavors. Patience here pays off in a broth that feels like an embrace rather than a flash of heat.

Broth variations and quick fixes

Not every warm night allows for an all-day stock. For midweek soup that still comforts, consider these quick strategies: toast bones and roast vegetables to add depth, then simmer for ninety minutes instead of eight hours. Add umami boosters such as soy sauce, miso, or anchovy paste to a lighter stock to create perceived depth without the wait. Another trick is to reduce a modest volume of stock to concentrate both salt and flavor, then dilute to serving strength when you finish the soup.

For plant-based cooks, kombu and dried shiitakes are potent umami sources that don’t require long cooking. Rehydrate mushrooms and use the soaking liquid as part of your broth, then thicken with red lentils or puréed squash for body. Coconut milk is an excellent finishing agent in many Asian-inspired warming broths, providing a creamy coating sensation that carries spices like turmeric and galangal beautifully.

Classic warming soup styles from around the world

There is a global language of warmth expressed in regional soups. Eastern Europe answers cold with borscht and thick pea or bean stews; North Africa offers harira, rich with tomatoes, pulses, and spices; South Asia gives daal and mulligatawny with spice and creaminess. Each of these approaches uses local produce and techniques to deliver sustained heat and comfort. Reading these regional recipes gives a toolbox of methods rather than rigid rules.

To give a few examples: French onion soup relies on slow caramelization to produce sweetness that pairs with sharp cheese and crusty bread; Thai tom yum uses lime and chiles for bright heat that warms via the senses; Moroccan harira layers tomatoes, lentils, and warming spices like cinnamon and ginger to create a dense, satiny stew. In every case, the composition balances immediate sensations with longer-lasting satisfaction — acidity or spice to open the palate and starches or proteins to sustain.

European comfort bowls

European warming soups often prioritize depth and mouthfeel: think slow-braised meats, marrow, and root vegetables. In countries with long winters, soups served as the centerpiece combine preserved meats, dried legumes, and hearty grains. The technique of sweating vegetables until they release their sugars is common, producing a base that is rich without being heavy. Adding a splash of vinegar or a spoon of mustard at the end brightens these denser bowls and keeps them from feeling one-dimensional.

One personal memory is my grandmother’s cabbage soup, a deceptively simple pot loaded with onions, smoked ham hock, and heady caraway. It simmered for hours until the cabbage became silk and the broth tasted of wood smoke and anise. That soup taught me that time is a key ingredient and that simple elements, when given space, amplify each other into something far greater than their parts.

Asian broths and fragrant bowls

Asian warming soups often rely on concentrated aromatics and a balance of pungency and acidity. Ginger, garlic, lemongrass, and chilies are used not only to add heat but to clear and invigorate the senses. A miso soup, though light, can be profoundly comforting when paired with toasted sesame oil and wakame; Vietnamese pho layers spice and umami so that each slurp reveals a new note. The key is restraint: powerful aromatics should be in conversation with the broth, never overpower it.

In my kitchen, I use an infusion method: bruise ginger and lemongrass to release oils, simmer them briefly, and remove them before serving so the soup smells alive but is easy to sip. This is especially effective on cold mornings when a full-bodied, pungent bowl is precisely the kick the household needs. Small rituals like this create consistent results and make the cooking feel like a practiced craft rather than a chore.

Middle Eastern and North African warmth

Spice blends like ras el hanout and baharat offer aromatic complexity that reads as cozy and exotic at the same time. Harira, a Moroccan classic, combines tomatoes, chickpeas, lentils, and lamb with cinnamon and ginger for a robust stew that’s often served to break fast. These cuisines demonstrate that warmth doesn’t have to mean heat in the chiles-and-steam sense; it can come from fragrant spices and hearty pulses that deliver sustained energy.

When I cook harira-style soups at home, I toast the spices in a dry pan until they bloom, then grind them fresh. The result is a far more vivid aroma than pre-blended spices. Finish such bowls with fresh herbs and lemon to create contrast, and you’ll find the soup feels both nourishing and lively — a complex experience suited to long evenings or restorative lunches.

Techniques to make soups hearty and satisfying

If your aim is a hearty bowl, focus on three technique clusters: building body, layering flavor, and finishing with intent. Building body includes using legumes, starchy vegetables, grains, or protein that release body into the broth. Layering flavor means adding ingredients at different stages so each one contributes a distinct note — caramelized onions early, mid-simmer herbs, and bright finishers at the end. Finishing with intent could be a fat, acid, or crunchy element that ties everything together.

Practical techniques include roasting vegetables first to add caramelization, toasting spices to release essential oils, and using a hand blender for partial purée to create texture while retaining bite. A roux or beurre manié can thicken without clouding the flavor; pureeing a portion of the soup and returning it adds body while preserving the textural interest of whole pieces. Small interventions like blooming spices in oil at the beginning make an outsized difference in the final depth of flavor.

Thickening and textural strategies

Different soups call for different textures. A velvety squash purée benefits from cream or coconut milk to carry its sweetness. A bean soup gains heft and silkiness when a third of the beans are mashed or puréed into the broth. Grains like farro and barley add chew and a rustic character while releasing starch to thicken the liquid. Decide early what mouthfeel you want and plan your technique accordingly rather than improvising without a goal.

Another tip is to think about contrasts: a spoonful of tangy yogurt provides lift to a dense legume bowl; crisp croutons or toasted seeds give bite to otherwise soft soups. Texture keeps each spoonful interesting and prevents even the most comforting bowl from becoming monotonous over the course of a meal.

Seasonal choices: winter vegetables and pantry staples

Warming soups benefit from seasonal thinking. In winter, choose root vegetables, brassicas, late-season squashes, and hardy greens. These hold up to long cooking and deliver concentrated flavors that stand up to spices and rich broths. Pantry staples like dried beans, lentils, canned tomatoes, and jars of preserved broth are your allies; they allow you to build substantial meals without last-minute shopping.

Stock your pantry with a few key items: good-quality canned tomatoes, a selection of legumes, grains like barley and farro, and a jarred concentrate or bouillon for emergency depth. Keep preserved aromatics such as garlic confit or chili oil to finish bowls quickly. When it’s particularly cold, having these building blocks available lets you transform a handful of veg into something comforting in under an hour.

Table: Winter vegetables and how to use them

Vegetable Best use in soup Storage tip
Carrots Mirepoix base, roasted for sweetness Keep in cool, dark place; last 4-6 weeks
Parsnips Purée for velvety body or roast for sweetness Store like carrots; remove green tops
Cabbage Chunky stews, sour variants, long simmer Cold, crisper drawer; lasts several weeks
Winter squash Purées and creamy bowls, roast first Cool, dry; can last months

Templates and recipes you can adapt

Rather than strict recipes, I prefer templates — flexible frameworks you can adapt to whatever you have. Start with a base (broth + aromatics), add body (legumes, grains, or proteins), build flavor (spices, roasted elements), and finish with a bright or fatty element. Below are three templates that cover different needs: a quick weeknight pot, a slow-simmering weekend stew, and a plant-based purée that feels indulgent without dairy.

Templates encourage experimentation. In winter I often lean on a lentil-vegetable template for weekday dinners because it reheats well and grows even more interesting on the second day. On the weekend I’ll make a bone-based barley stew that simmers all afternoon while I read or work. Changing a single variable — swapping barley for farro, adding smoked paprika, or finishing with a lemon-herb salsa — gives you dozens of different bowls from the same starting point.

Template: Hearty Lentil-Vegetable Soup

Base: Sautéed onions, carrots, and celery sweated until soft; add garlic and your warming spices (cumin, black pepper, a pinch of chili). Body: Brown lentils or red lentils depending on desired texture; add broth and simmer until tender. Flavor layering: Add roasted tomatoes or a spoon of tomato paste for umami, and a splash of vinegar near the end to brighten. Finish: Stir in olive oil and chopped parsley or cilantro, and serve with crusty bread.

Proportions are flexible. For a single pot meal, I use roughly 1 cup lentils to 4 cups broth, add two cups of mixed vegetables, and season generously. Lentils do the heavy lifting, so adjust liquids based on how soupy or stew-like you want the final dish. This template keeps well and tastes even better after a night in the fridge.

Template: Roasted Squash Purée with Spice

Base: Roast halved squash with onion and garlic until deeply caramelized. Body: Scoop flesh into a pot with a cup of broth and simmer briefly. Flavor layering: Bloom spices like cinnamon, coriander, and a hint of smoked paprika in butter or oil, then whisk into the purée. Finish: Add cream or coconut milk for silkiness, and top with toasted seeds and a drizzle of browned butter or nut oil.

To make it more substantial, fold in white beans or serve the purée over a bed of farro. The roasting step is critical here; it develops the sugars that create a satisfying sweetness balanced by spices and acid. This is the kind of bowl that feels like a warm blanket and works beautifully as both lunch and intimate dinner.

Template: Spiced Meat and Barley Stew

Base: Brown chunks of beef or lamb, remove, and sauté onions until golden. Body: Return meat with barley, bay leaf, and good stock; simmer slowly until barley is tender and meat falls apart. Flavor layering: Add tomato paste, a spoon of harissa or smoked paprika, and finish with chopped herbs and lemon zest. Finish: A spoonful of yogurt or crème fraîche softens the spice and adds acidity.

This stew requires time, but the slow braise converts connective tissue into gelatin for a rich mouthfeel. Barley absorbs flavor and releases starch that thickens the liquid. If you want to shorten the cook time, use a pressure cooker for quick results without sacrificing depth.

Serving, storing, and reheating—get the best from leftovers

Soup often improves with rest because flavors have time to meld. For storing, cool soups quickly to preserve texture and safety, and refrigerate within two hours of cooking. Most soups will keep in the fridge for three to five days; freeze in portions for up to three months. When reheating, do so gently: avoid aggressive boiling which can break emulsions or make dairy curdle. A slow simmer brings the flavors back alive without overcooking delicate components.

To refresh leftovers, add acid or fresh herbs to brighten a bowl that’s become dull. A squeeze of lemon, a splash of vinegar, or a scattering of fresh parsley can resurrect a week-old pot. If frozen soup separates on thawing, blend gently or whisk while warming to reintegrate fats. Small finishing touches like a drizzle of herb oil or toasted seeds can also restore texture and make reheated soup feel special.

Pairings: what to serve with your winter bowl

Warming soups are at their best with simple companions that offer contrast. Crusty bread provides crunch and soakability; bright, pickled vegetables cut through richness; a light green salad keeps the meal balanced. For more substantial pairings, grain salads, cheese boards, or roasted vegetables extend the meal into multiple courses without competing with the soup’s character.

Consider beverages too: a steaming cup of tea or a dry cider complements many winter bowls, while a bold red wine pairs well with meat-based stews. For family dinners, make a small spread of toppings—croutons, grated cheese, chili oil, lemon wedges—so people can tailor each bowl. These little choices elevate a humble pot into a memorable ritual.

Final thoughts: make the bowl your own

Warming soups are forgiving and inventive; they reward curiosity more than precision. Start with the templates and ideas here, then tweak according to what you love and what your pantry offers. Keep a notebook of combinations that work for you; over time you’ll develop a shorthand that allows you to produce spectacular bowls without consulting a recipe. That knowledge — the ability to toss together a satisfying pot on a weekday night — is seriously empowering.

My last piece of advice is a practical one: treat soup-making as both science and play. Measure and learn at first, then grant yourself permission to improvise. The best bowls are the ones you share, and the rituals around them — stirring, tasting, passing the ladle — are as important as the ingredients. There will be nights when you need a quick, restorative pot and others when you slow-roast and simmer into something luxurious. Either way, a well-made bowl will warm more than your hands; it will warm everyone who gathers to eat it.

5 Refreshing Non-Alcoholic Cocktails (Mocktails) to Try at Home

Refreshing Non-Alcoholic Mocktails

If you’re looking for delicious, alcohol-free drinks that are just as exciting as their boozy counterparts, these mocktail recipes are perfect for any occasion. From fruity to herbal, here are five must-try zero-proof cocktails!


1. Sparkling Watermelon Basil Cooler

A refreshing, fruity mocktail with a herbal twist.

Ingredients:

  • 1 cup fresh watermelon (blended)
  • ½ oz fresh lime juice
  • 4-5 fresh basil leaves
  • 1 oz honey or agave syrup
  • Sparkling water
  • Salt or Tajín for rimming (optional)

Instructions:

  1. Rim a glass with salt or Tajín (if desired).
  2. Muddle basil leaves in a shaker.
  3. Add watermelon juice, lime juice, and honey. Shake with ice.
  4. Strain into a glass over ice and top with sparkling water.
  5. Garnish with a basil leaf and watermelon wedge.

2. Spicy Pineapple Ginger Mule

A tropical, zesty, and slightly spicy mocktail.

Ingredients:

  • 3 oz pineapple juice
  • ½ oz lime juice
  • ½ oz ginger syrup (or 1 oz ginger beer)
  • 2 slices jalapeño (adjust for spice)
  • Ginger beer (to top)
  • Mint leaves for garnish

Instructions:

  1. Muddle jalapeño slices in a copper mug or glass.
  2. Add pineapple juice, lime juice, and ginger syrup. Stir.
  3. Fill with ice and top with ginger beer.
  4. Garnish with mint and a pineapple wedge.

3. Lavender Lemon Fizz

A floral, creamy, and citrusy mocktail.

Ingredients:

  • ½ oz lavender syrup (or 1 tsp dried lavender + simple syrup)
  • ¾ oz lemon juice
  • 1 oz coconut milk or cream (for frothiness)
  • Soda water

Instructions:

  1. Shake lavender syrup, lemon juice, and coconut milk with ice.
  2. Strain into a chilled glass.
  3. Top with soda water.
  4. Garnish with a lemon twist or lavender sprig.

4. Iced Coconut Espresso Tonic

A bold, energizing coffee mocktail with tropical vibes.

Ingredients:

  • 1 oz cold brew or chilled espresso
  • 1 oz coconut milk
  • ½ oz vanilla syrup
  • Tonic water
  • Ice

Instructions:

  1. Fill a glass with ice.
  2. Add cold brew, coconut milk, and vanilla syrup. Stir.
  3. Top with tonic water.
  4. Garnish with a coffee bean or coconut flakes.

5. Cucumber Mint Sparkler

A crisp, ultra-refreshing mocktail for hot days.

Ingredients:

  • 4 slices cucumber
  • 5-6 mint leaves
  • ¾ oz lime juice
  • ½ oz honey or simple syrup
  • Sparkling water

Instructions:

  1. Muddle cucumber and mint in a shaker.
  2. Add lime juice and honey. Shake with ice.
  3. Strain into a glass with fresh ice.
  4. Top with sparkling water.
  5. Garnish with cucumber slices and mint.

Final Thoughts

These mocktails prove that alcohol-free drinks can be just as flavorful and fun as cocktails. Perfect for designated drivers, sober-curious folks, or anyone who wants a refreshing drink without the buzz!

5 Unique and Delicious Cocktail Recipes to Try at Home

Summer unique cocktail recipes

unique cocktail recipes

If you love experimenting with flavors and enjoy a good drink, these unique cocktail recipes will impress your guests—or simply make your evening more enjoyable. From fruity to herbal, here are five must-try cocktails!


1. Watermelon Basil Margarita

A refreshing twist on the classic margarita with a herbal touch.

Ingredients:

  • 2 oz tequila
  • 1 oz triple sec
  • 1 oz fresh lime juice
  • 1 cup fresh watermelon (blended)
  • 4-5 fresh basil leaves
  • Salt or Tajín for rimming (optional)

Instructions:

  1. Rim a glass with salt or Tajín.
  2. Muddle basil leaves in a shaker.
  3. Add tequila, triple sec, lime juice, and blended watermelon. Shake well with ice.
  4. Strain into the glass over ice.
  5. Garnish with a basil leaf and a small watermelon wedge.

2. Spicy Pineapple Mezcal Mule

A smoky, spicy, and tropical take on the Moscow Mule.

Ingredients:

  • 2 oz mezcal
  • 1 oz lime juice
  • ½ oz ginger syrup (or 1 oz ginger beer)
  • 3 oz pineapple juice
  • 2 slices jalapeño (adjust for spice level)
  • Ginger beer (to top)

Instructions:

  1. Muddle jalapeño slices in a copper mug or glass.
  2. Add mezcal, lime juice, ginger syrup, and pineapple juice. Stir.
  3. Fill with ice and top with ginger beer.
  4. Garnish with a pineapple wedge and jalapeño slice.

3. Lavender Gin Fizz

A floral and creamy cocktail with a delicate aroma.

Ingredients:

  • 2 oz gin
  • ½ oz lavender syrup (or 1 tsp dried lavender + simple syrup)
  • ¾ oz lemon juice
  • 1 egg white (or aquafaba for a vegan option)
  • Soda water

Instructions:

  1. Dry shake (without ice) gin, lavender syrup, lemon juice, and egg white to create foam.
  2. Add ice and shake again.
  3. Strain into a chilled glass and top with soda water.
  4. Garnish with a lavender sprig or lemon twist.

4. Espresso Martini with Coconut Rum

A tropical twist on the classic coffee cocktail.

Ingredients:

  • 1 ½ oz vodka
  • 1 oz coconut rum
  • 1 oz coffee liqueur (e.g., Kahlúa)
  • 1 oz freshly brewed espresso (chilled)
  • ½ oz simple syrup (optional)

Instructions:

  1. Add all ingredients to a shaker with ice.
  2. Shake vigorously until well-chilled.
  3. Strain into a martini glass.
  4. Garnish with coffee beans or a sprinkle of cocoa powder.

5. Cucumber Mint Gimlet

A crisp, refreshing cocktail perfect for summer.

Ingredients:

  • 2 oz gin
  • ¾ oz lime juice
  • ½ oz simple syrup
  • 4 slices cucumber
  • 5-6 mint leaves
  • Soda water (optional)

Instructions:

  1. Muddle cucumber and mint in a shaker.
  2. Add gin, lime juice, and simple syrup. Shake with ice.
  3. Strain into a glass with fresh ice.
  4. Top with soda water if desired.
  5. Garnish with cucumber slices and mint.

Final Thoughts

These cocktails offer a mix of sweet, spicy, herbal, and tropical flavors—perfect for any occasion. Whether you’re hosting a party or just relaxing at home, these recipes will elevate your mixology game.

Which one will you try first? 🍹

Grill recipes

5 Mouth-Watering Grilled Chicken Recipes to Try This Summer

Summer is the perfect time to fire up the grill and enjoy some delicious meals with family and friends. And what better way to do that than with some mouth-watering grilled chicken recipes? Grilled chicken is not only a healthy and versatile protein option, but it also adds a smoky and flavorful touch to any dish. In this article, we will share five delicious grilled chicken recipes that are sure to be a hit at your next summer gathering.

First on our list is the classic grilled chicken breast. This simple yet delicious recipe is perfect for those who prefer a lighter and healthier option. To make this dish, start by marinating chicken breasts in a mixture of olive oil, lemon juice, garlic, and your choice of herbs and spices. Let the chicken marinate for at least 30 minutes, or even overnight for maximum flavor. Then, grill the chicken over medium-high heat for about 6-8 minutes on each side, or until it reaches an internal temperature of 165°F. Serve with your favorite side dishes for a complete and satisfying meal.

Next up, we have a crowd-pleasing recipe for grilled chicken skewers. These skewers are not only delicious but also fun to make and eat. To prepare the chicken, cut boneless, skinless chicken breasts into bite-sized pieces and marinate them in a mixture of soy sauce, honey, garlic, and ginger. Thread the chicken onto skewers, alternating with your choice of vegetables such as bell peppers, onions, and mushrooms. Grill the skewers for about 10-12 minutes, turning occasionally, until the chicken is fully cooked. Serve with a side of rice or quinoa for a complete and balanced meal.

For those who love a little kick in their food, our next recipe for spicy grilled chicken is a must-try. To make this dish, mix together a marinade of hot sauce, honey, lime juice, and garlic. Marinate chicken breasts in the mixture for at least 30 minutes, then grill over medium-high heat for about 6-8 minutes on each side. The result is a flavorful and spicy chicken that pairs well with a cool and creamy side dish like coleslaw or potato salad.

If you’re looking for a unique and flavorful twist on grilled chicken, our next recipe for Greek-style grilled chicken is sure to impress. To make this dish, marinate chicken breasts in a mixture of olive oil, lemon juice, garlic, oregano, and thyme. Grill the chicken over medium-high heat for about 6-8 minutes on each side, or until fully cooked. Serve with a side of tzatziki sauce and a Greek salad for a complete Mediterranean-inspired meal.

Last but not least, we have a recipe for grilled chicken thighs that will have your taste buds dancing. To make this dish, marinate chicken thighs in a mixture of balsamic vinegar, honey, garlic, and rosemary. Grill the chicken over medium-high heat for about 8-10 minutes on each side, or until fully cooked. The result is a tender and flavorful chicken that pairs well with a side of roasted vegetables or a fresh summer salad.

In conclusion, these five mouth-watering grilled chicken recipes are perfect for any summer gathering or weeknight dinner. They are not only easy to make but also packed with flavor and nutrition. So, fire up the grill and give these recipes a try. Your taste buds will thank you. Happy grilling!

The Ultimate Guide to Perfectly Grilled Vegetables: Tips and Recipes

Grilling is a popular cooking method that adds a unique smoky flavor to food, making it a favorite among many food enthusiasts. While grilling is often associated with meats, vegetables can also be perfectly grilled to create delicious and healthy dishes. In this ultimate guide, we will share some tips and recipes for perfectly grilled vegetables that will elevate your grilling game.

First and foremost, it is important to choose the right vegetables for grilling. Vegetables that are firm and can hold their shape when cooked are ideal for grilling. Some great options include bell peppers, zucchini, eggplant, onions, mushrooms, and corn on the cob. It is also important to make sure that the vegetables are fresh and of good quality.

Before grilling, it is recommended to marinate the vegetables to enhance their flavor. A simple marinade of olive oil, garlic, herbs, and a splash of lemon juice can do wonders. You can also experiment with different marinades such as balsamic vinegar, soy sauce, or even a spicy marinade for a kick of heat. Marinating the vegetables for at least 30 minutes before grilling will allow the flavors to infuse and make them more tender.

When it comes to grilling vegetables, the key is to cook them over medium heat. Too high heat can cause the vegetables to burn on the outside while remaining raw on the inside. It is also important to oil the grill grates before placing the vegetables to prevent them from sticking. You can use a brush or a paper towel dipped in oil to coat the grates.

One of the most common mistakes when grilling vegetables is cutting them too small. This can cause them to fall through the grates or cook too quickly, resulting in a mushy texture. It is recommended to cut the vegetables into larger pieces, about 1-inch thick, to ensure even cooking and a nice char on the outside.

Another tip for perfectly grilled vegetables is to use skewers. Skewering the vegetables not only makes them easier to handle on the grill but also prevents them from falling through the grates. If using wooden skewers, make sure to soak them in water for at least 30 minutes before grilling to prevent them from burning.

Now, let’s move on to some delicious grilled vegetable recipes that are sure to impress your family and friends. Grilled vegetable skewers are a classic and easy dish to make. Simply alternate your favorite vegetables on skewers, brush them with a marinade, and grill for about 10-15 minutes, turning occasionally. You can also add some protein such as tofu or shrimp to make it a complete meal.

Grilled vegetable sandwiches are another great option for a quick and tasty meal. Slice your favorite vegetables, brush them with oil, and grill until tender. Then, assemble the vegetables on a crusty bread with some cheese and grill for a few more minutes until the cheese is melted. You can also add some pesto or hummus for extra flavor.

For a side dish, grilled vegetable salad is a perfect choice. Grilling the vegetables adds a smoky flavor to the salad, making it more interesting and flavorful. Simply grill your favorite vegetables, chop them into bite-size pieces, and toss them with some greens, a vinaigrette dressing, and some nuts or seeds for crunch.

In conclusion, grilling vegetables is a simple and delicious way to add more flavor and variety to your meals. With the right vegetables, marinades, and grilling techniques, you can create perfectly grilled vegetables that will impress your taste buds. So, fire up your grill and try out these tips and recipes for a tasty and healthy grilling experience.

From Burgers to Kabobs: 10 Creative Ways to Use Your Grill for Delicious Meals

Grilling is a popular cooking method that has been around for centuries. It involves cooking food over an open flame, giving it a unique smoky flavor and crispy texture. While burgers and hot dogs may be the go-to options for grilling, there are so many other delicious meals that can be made on the grill. From kabobs to pizzas, here are 10 creative ways to use your grill for delicious meals.

1. Grilled Pizza
Pizza lovers, rejoice! Grilling your pizza gives it a crispy crust and a smoky flavor that you can’t achieve in the oven. Simply roll out your pizza dough, add your toppings, and place it on the grill. Cook for a few minutes on each side until the crust is crispy and the cheese is melted. You can even try grilling individual pizza slices for a fun and customizable meal.

2. Grilled Fish Tacos
Tacos are a crowd-pleasing meal, and grilling the fish adds a delicious twist. Marinate your fish of choice in a mixture of lime juice, garlic, and spices, then grill until cooked through. Serve in warm tortillas with your favorite toppings like avocado, salsa, and cilantro for a fresh and flavorful meal.

3. Grilled Vegetable Skewers
Vegetables are often overlooked when it comes to grilling, but they can be just as delicious as meat. Cut your favorite vegetables into bite-sized pieces and thread them onto skewers. Brush with olive oil and season with salt and pepper before grilling. The heat of the grill will caramelize the vegetables, giving them a sweet and smoky flavor.

4. Grilled Chicken Caesar Salad
Take your Caesar salad to the next level by grilling the chicken. Marinate chicken breasts in a mixture of olive oil, lemon juice, and herbs, then grill until cooked through. Slice and serve on top of a bed of romaine lettuce, croutons, and Caesar dressing for a hearty and flavorful salad.

5. Grilled Fruit
Grilling isn’t just for savory dishes, it can also be used to make delicious desserts. Grilling fruit brings out its natural sweetness and adds a smoky flavor. Try grilling pineapple slices and serving them with a scoop of vanilla ice cream for a simple and delicious dessert.

6. Grilled Kabobs
Kabobs are a classic grilling option, but you can get creative with the ingredients. Mix and match your favorite meats, vegetables, and fruits on skewers for a colorful and flavorful meal. Don’t forget to brush them with a marinade or sauce for added flavor.

7. Grilled Portobello Mushroom Burgers
Vegetarians and meat-lovers alike will enjoy these grilled portobello mushroom burgers. Marinate the mushrooms in a mixture of balsamic vinegar, garlic, and herbs, then grill until tender. Serve on a bun with your favorite toppings for a hearty and satisfying meal.

8. Grilled Corn on the Cob
Corn on the cob is a summer staple, and grilling it adds a delicious smoky flavor. Simply brush the corn with butter and season with salt and pepper before grilling. You can also try adding different seasonings like chili powder or parmesan cheese for a twist on this classic side dish.

9. Grilled Shrimp Scampi
Shrimp scampi is a classic Italian dish that can easily be made on the grill. Marinate shrimp in a mixture of olive oil, garlic, and lemon juice, then grill until cooked through. Serve over pasta or with crusty bread for a delicious and easy meal.

10. Grilled Stuffed Peppers
Stuffed peppers are a hearty and flavorful meal, and grilling them adds a delicious smoky flavor. Cut the tops off of bell peppers and remove the seeds. Stuff with a mixture of cooked rice, ground beef, and your favorite seasonings. Grill until the peppers are tender and the filling is heated through.

In conclusion, grilling is not just limited to burgers and hot dogs. With these 10 creative ideas, you can use your grill to make a variety of delicious and flavorful meals. So next time you fire up the grill, think outside the box and try one of these tasty options. Your taste buds will thank you.