All posts by cookassist_h

Classic Homemade Pizza Variations That Actually Work: From Neapolitan to Deep-Dish

Classic Homemade Pizza Variations That Actually Work: From Neapolitan to Deep-Dish

There’s a particular thrill in pulling a blistered crust from a household oven and watching the cheese bubble like a small, edible pond. In this article I’ll walk you through Classic Homemade Pizza Variations that are realistic for a home cook, useful across different ovens, and forgiving enough for experimentation. You’ll find guidance on dough, sauce, and cheese, along with several distinct pizza styles to try — each explained with practical tips rather than vague platitudes. I’ll also share little hacks that saved my dinners on more than one occasion, and a few recipes you can attempt this weekend. Read on if you want to move beyond frozen pies and understand what makes a pizza feel right in the mouth.

The Foundation: Dough, Sauce, and Cheese

A good pizza begins with a few basic decisions: what flour you use, whether you want a thin or thick crust, and how you treat the dough. Flour type defines texture — high-protein bread flour gives chew, 00 flour softens and allows for those characteristic charred bubbles on a very hot surface, while all-purpose is a fine compromise for everyday home-baking. Hydration matters too; a wetter dough yields larger holes and a lighter crumb but can be trickier to shape. For sauce, simplicity wins: crushed San Marzano or good canned plum tomatoes, a pinch of salt, and a little olive oil let the tomato sing without fighting the crust. Cheese choices are decisive: fresh mozzarella for Neapolitan-style, low-moisture mozzarella for New York-style, and blends with provolone or asiago for richer, meltier finishes.

How you treat the dough during fermentation changes everything. A slow, cold rise in the fridge develops flavor and digestibility, and a short room-temperature proof gives speed when you’re in a hurry. I usually make a large batch and freeze portions — it saves time and improves consistency. Basic technique is straightforward: mix, rest, fold a few times, then chill. You don’t need a fancy mixer; hand-kneading or a gentle stretch-and-fold routine gets you there. Below are common dough approaches to choose from depending on the pizza style you want to try:

  • Neapolitan: 00 flour, 60-65% hydration, short yeast, very high heat.
  • New York-style: bread flour, 58-62% hydration, slightly longer fermentation, tossed thin.
  • Chicago deep-dish: dough enriched with butter or oil, pressed into a pan, thicker crust.
  • Roman/Sheet: lower hydration, rolled thin and baked on a sheet for crispness.

Classic Pizza Styles to Make at Home

Neapolitan

Neapolitan pizza is about contrast: a tender interior with a charred rim and a few bright ingredients. Authentic versions cook at extremely high heat, but at home you can approximate the effect by preheating a pizza stone or steel at maximum oven temperature for at least an hour. Keep toppings minimal — crushed tomatoes, a few basil leaves, and slices of fresh mozzarella — because moisture and weight will prevent the crust from puffing properly. Stretch dough gently by hand; don’t use a rolling pin or you’ll lose the air pockets that make the crust sing. Finish with a drizzle of extra-virgin olive oil after baking to lift the flavors.

New York-style

The New York slice is the working-class hero of pizza: foldable, substantial, and built to travel. The dough is slightly chewier than Neapolitan thanks to higher gluten content and a bit less hydration. A pan or pizza stone preheated thoroughly helps recreate the crisp yet yielding base; bake at the highest temperature possible in your oven, then slide the pie directly onto the rack if you want extra bottom browning. Use low-moisture mozzarella to reduce sogginess and add toppings in moderation to preserve that characteristic fold. This style rewards a bit of grease from quality cheese and a good crust, so don’t be shy about finishing with a light oil brush if the pie looks dry.

Chicago Deep-Dish

Deep-dish pizza is essentially a savory pie, with a buttery crust that needs to hold its own against generous layers of cheese, sauce, and toppings. Use a sturdy pan and press the dough up the sides so it forms a firm shell; blind-baking the crust a little before filling can prevent a soggy bottom. Layer cheese directly on the dough, add meats or vegetables next, and top with chunky tomato sauce so the sauce remains upfront when served. Baking is slower than other styles — expect 30 to 45 minutes depending on depth — and the result is a comforting, knife-and-fork affair rather than a foldable slice. This is the pizza to make when you want something more like dinner than a snack.

Roman and Pizza al Taglio

Roman-style pizzas often come in two tracks: the ultra-thin, crisp Roman tonda, and the rectangular, airy pizza al taglio sold by weight. The latter uses a high-hydration dough and long cold fermentation to produce an open crumb and crisp base when baked on a sheet. Baked in oiled pans, these rectangular pies take toppings that can be a little heavier, and they’re ideal for feeding a crowd because you can cut them into generous squares. For home cooks, the sheet approach is forgiving: you can par-bake the crust, add toppings, and finish under the broiler for a glossy finish. It’s a flexible format for creative toppings and brunch-ready combinations.

Margherita — The Quintessential Classic Pizza

Margherita is a lesson in restraint: the simplicity tests your core technique more than any elaborate topping arrangement. Tomato, fresh mozzarella, and basil must be in balance — too much cheese or sauce hides subtleties in the crust. At home, aim for a thin center and a puffed, blistered edge; use a hot stone or steel and bake quickly to trap steam and create those airy pockets. Finish with fresh basil and a whisper of olive oil to keep the herbs fragrant. When I first mastered a Margherita at home, I realized that the dish reveals mistakes immediately, which is why it’s so useful as a barometer of your pizza-making skills.

Pepperoni and Classic Toppings

Pepperoni is a ubiquitous favorite for a reason: its fat renders and crisps at the edges, seasoning the entire pie. For consistent results, use thinly sliced, moderately fatty pepperoni and place it evenly so each bite has a little curl. Classic toppings like mushrooms, onions, and bell peppers work best when sliced thin and pre-cooked or lightly sautéed to remove excess moisture. Meats such as Italian sausage or pancetta benefit from a quick brown before hitting the dough, which concentrates their flavors and prevents greasiness. Keep the sauce and cheese proportionate so toppings complement rather than overwhelm the crust.

White Pizza and Alternative Bases

White pizza skips tomato sauce and focuses on cheeses, herbs, and often garlic or cream — a treat for cheese lovers. Ricotta dollops, mozzarella, and a drizzle of olive oil create a luscious mouthfeel, while bitter greens like arugula or sautéed spinach add counterpoint. Consider non-tomato sauces too: pesto, olive tapenade, or even a thin béchamel offer new directions for familiar dough. For a lighter eating experience, add fresh arugula or citrus-finished fennel after baking. These alternatives show how a base change transforms the whole eating experience without dramatic technique shifts.

Vegetarian and Seasonal Pizza Variations

Vegetarian pizzas flourish when you match vegetable textures to cooking times: quick-roasted cherry tomatoes, caramelized onions, and grilled zucchini all bring different mouthfeels. Seasonal produce can make a pizza sing — think roasted butternut and sage in autumn, or asparagus and lemon in spring. Briny accents like capers or olives add depth, while a finishing splash of aged balsamic cuts richness and adds brightness. I like to experiment with a “market” pizza: whatever looks best at the farmers market becomes the centerpiece, with a restrained hand on sauce and a thoughtful cheese pairing.

Style Oven Temp (approx) Bake Time Key Feature
Neapolitan 450-500°C (wood-fired) / 500°F (home oven on steel) 90s–7 mins (depending on heat) Puffed, charred cornicione
New York 500–550°F 7–12 mins Thin, foldable slice
Chicago Deep-Dish 375–425°F 30–45 mins Thick, buttery crust
Roman/Sheet 475–500°F 12–20 mins Crisp bottom, airy interior

Techniques and Tools That Elevate Homemade Pizza

Classic Homemade Pizza Variations. Techniques and Tools That Elevate Homemade Pizza

A few tools will significantly improve outcomes: a steel or stone for thermal mass, a peel for handling, and a good oven thermometer to know what your thermostat is actually doing. A steel transfers heat faster than a stone, which helps emulate pizzeria conditions in a domestic oven; it’s worth the investment if you bake frequently. A perforated pizza peel prevents excess flour from burning under the pie, and a bench scraper makes portioning dough simple. But technique matters as much as equipment: preheat thoroughly, handle dough gently, and resist the urge to overload with toppings. Mastering these basics is the fastest route from adequate to excellent homemade pizza.

Small refinements pay off disproportionately. Stretch dough by gravity and hand, not the rolling pin, to preserve air. Use a timer for fermentation phases and write down results so you can repeat successes. If your oven lacks high heat, try a cast-iron skillet on the stovetop to start the crust, then transfer to the oven to finish. Rotate pies midway for even color, and let cooked pizzas rest a minute before slicing to let the cheese set slightly. These habits reduce common errors and make your process predictable, which is invaluable when feeding others.

Toppings, Balancing Flavors, and Pairings

Toppings should create layers of contrast: creamy vs. acidic, fatty vs. bitter, crisp vs. tender. For example, a classic Margherita pairs tangy tomato with creamy mozzarella and peppery basil; a barbecue chicken pie pairs sweet sauce with smoky meat and sharp red onion. Think in threes — acid, fat, and salt — to achieve balance. Fresh herbs and finishing oils are small touches that make a pizza feel finished and intentional. Below are a few reliable topping combinations that work across multiple pizza styles.

  • Margherita: crushed tomato, fresh mozzarella, basil, olive oil.
  • Pepperoni Classic: low-moisture mozzarella, pepperoni, optional grated parmesan.
  • White Mushroom: ricotta, fontina, sautéed mushrooms, thyme.
  • BBQ Chicken: shredded chicken, barbecue sauce, red onion, smoked gouda.
  • Prosciutto & Arugula: thin prosciutto after baking, fresh arugula, lemon zest.

Troubleshooting Common Home Pizza Problems

Soggy center, dense crust, or lack of browning are the usual culprits. A soggy center often comes from too much sauce or wet toppings; try draining watery vegetables and using less sauce, or par-bake the crust briefly before topping. Dense crust usually stems from under-proofing or too much flour when shaping; let dough rest and avoid aggressive pressing. Lack of browning points to insufficient surface temperature, so preheat a stone or steel for a long time — the oven dial rarely reflects actual surface heat. Adjusting these variables systematically will quickly solve most problems.

Another common issue is uneven bake: edges done, center raw. This often means the pie was overloaded or the oven heat distribution is uneven. Use a pizza peel to slide the pie closer to the heat source and rotate the pie during baking. If you consistently see hot spots, a baking steel provides a more uniform conduction. Finally, keep notes: record oven settings, bake times, and dough formulas so you can replicate what worked and avoid what didn’t.

Recipes to Try This Weekend

Simple Margherita

Start with a 250g dough ball, stretched thin and placed on a well-floured peel, or parchment for a sheet. Apply crushed tomatoes lightly, dot with slices of fresh mozzarella, and add a sprinkling of salt. Slide onto a preheated steel or stone in the oven set as high as possible and bake until the rim is puffed and spotted, about 6-8 minutes in a 500°F oven. Finish with torn basil and a drizzle of extra-virgin olive oil. Eat immediately; the contrast of hot cheese and cool basil is the point.

New York-style Slice

Use a dough made from bread flour with a slightly longer fermentation for chewiness; shape thin and wide on a peel dusted with semolina for texture. Top with a modest layer of sauce and low-moisture mozzarella, leaving a small rim bare. Bake at 500–550°F for 8–12 minutes until the crust is golden and the cheese has tiny pools of oil. Slice into wedges, fold in half, and enjoy while still warm for the classic street-slice experience. This pizza rewards a firm hand when topping — restraint equals biteability.

Quick Pan Deep-Dish (Home-Friendly)

Press enriched dough into a well-oiled round pan, letting it come up the sides to create a sturdy shell. Layer mozzarella first, followed by cooked sausage or vegetables, and top with a chunky tomato sauce seasoned with oregano. Bake at 400°F for 30–40 minutes until the crust is deeply golden and the filling bubbles. Let the pie rest briefly before slicing so the layers settle. This is a slower but deeply satisfying variation when you want something heartier.

My Personal Notes and Experiments

When I first started, my pizzas were either underbaked or burned — a classic beginner’s swing. Over time I learned to trust a long, cool fermentation and to measure water temperature and yeast carefully. One memorable experiment involved adding a small percentage of whole-wheat flour to a standard dough; the flavor added complexity without wrecking texture when I adjusted hydration upward. I also discovered that letting dough come to room temperature for an hour before shaping makes a big difference in extensibility. These little empirical adjustments turned occasional decent pizzas into reliably good ones for family dinners and casual get-togethers.

Serving, Storage, and Reheating

Serve pizza within minutes of baking if you want the best texture — crust crisp, cheese glossy, toppings vibrant. If you need to store leftovers, cool quickly and refrigerate in an airtight container for up to three days or freeze for longer. Reheating on a skillet over medium heat with a tight-fitting lid restores crispness better than a microwave; alternatively, a hot oven or toaster oven for 5-8 minutes will refresh slices nicely. For frozen pies, thaw overnight in the fridge and re-crisp in a very hot oven. Proper reheating preserves both texture and flavor so your second night is nearly as good as the first.

Experimentation is the most reliable path to making pizza your own. Use the guidelines here as a map rather than a bible: try one style at a time, take notes, and tweak hydration or bake time to match your oven. Above all, enjoy the process — pizza is forgiving, sociable, and endlessly adaptable. With a few practice pies and a willingness to adjust, you’ll find the versions that become your household classics, ready to share with friends and family.

Weeknight Magic: Easy One-Pot Dinner Recipes That Actually Save Time

Weeknight Magic: Easy One-Pot Dinner Recipes That Actually Save Time

There are evenings when the last thing anyone wants is a sink full of dishes or a recipe that requires a dozen steps. This collection of Easy One-Pot Dinner Recipes is written for those nights when you still want a satisfying meal, but without the culinary marathon. One pot meals let ingredients mingle, flavors concentrate, and cleanup shrink to almost nothing, which is a relief after a long day. I cooked and refined many of these dishes in a small apartment kitchen, where counter space was precious and patience even more so, and they held up under real-life weeknight pressure. Read on for practical techniques, five reliable recipes, storage tips, and small tricks that make these meals genuinely doable and delicious.

Why one-pot dinners deserve a place in your rotation

One-pot cooking simplifies both the process and the mindset around dinner, turning a complicated chore into a focused, creative act. When ingredients go into the same vessel, you skip the juggling of pans and the repeated heating and cooling that dulls flavor; instead, you coax depth from a single workflow. This approach is particularly good for busy households where time and attention are limited, because the task becomes about layering flavors rather than stage-managing multiple components. Nutritionally, one-pot meals encourage balanced meals naturally, since you can add grains, proteins, and vegetables together and control portions without extra effort. Over time, you also build confidence — those small wins make cooking feel accessible rather than intimidating.

Another practical advantage is versatility: a basic method adapts to what you have on hand, so food waste drops and creativity increases. I often start with a protein and a grain and then pivot based on the vegetables in the crisper drawer, which yields surprising, pleasant combinations. For people who meal plan, these meals scale well and reheat superbly, keeping texture and taste intact with minimal fuss. If you aim for fewer pots and less mess while maintaining satisfying weeknight dinners, one-pot techniques become an indispensable tool in your culinary kit. They are not a compromise, but a smarter way to feed yourself and the people you care about.

Essential tools and pantry staples for success

You do not need a kitchen full of gadgets to make great single-pot meals, but a few reliable items make a big difference. A heavy-bottomed Dutch oven or a deep skillet with a tight-fitting lid will cover most bases, because it holds heat evenly and tolerates both stovetop and oven. A wooden spoon, a heatproof spatula, and a good sharp knife speed up prep and reduce frustration; invest in those and you will notice the workflow improve. A splatter screen or lid with a strainer feature also helps when you want to reduce mess while simmering sauces or frying aromatics.

On the pantry side, keeping these staples on hand will let you improvise when the clock is ticking: long-grain rice, orzo or pasta, canned tomatoes, a few dried beans or lentils, shelf-stable broths, and a collection of dried herbs and spices. Extra-virgin olive oil, soy sauce, and a jar of stock concentrate or bouillon are flavor anchors that rescue many a last-minute decision. Having frozen vegetables and a couple of ready proteins like chicken thighs or a pack of frozen shrimp removes the need for a grocery run and makes it easy to assemble a meal that feels intentional. These items are small investments that pay off every week.

Flavor-building techniques that transform simple into memorable

The secret to one-pot richness lies in technique rather than complexity. Start by browning proteins and toasting aromatics; caramelization creates savory notes you cannot fake with shortcuts. Deglazing the pan with wine, broth, or even a splash of vinegar lifts browned bits off the bottom and folds them into the sauce, which amplifies depth. Layering is key: add ingredients in a sequence that respects cook time, so vegetables retain texture and grains absorb flavor evenly. Adjust seasoning at the end after reduction so you can calibrate salt and acid without overshooting.

Finish with fresh elements to brighten the dish — lemon zest, fresh herbs, a drizzle of good oil, or a scatter of cheese can make the outcome feel polished. Acid balances richness and makes flavors pop, so don’t skip a bright component. Texture matters too, so include something crunchy or herbaceous if the main body of the dish is soft; toasted seeds, chopped parsley, or a crisp green salad on the side accomplish that without extra pots. Over time you will learn which small tweaks elevate a simple pot supper into something that draws compliments.

Five reliable recipes to keep in your weeknight arsenal

1. Chicken, Rice, and Lemon Herb Skillet

This classic one-pot chicken and rice cooks through in a single vessel and yields a comforting, fragrant meal with minimal hands-on time. Brown bone-in chicken pieces in a heavy skillet until the skin has a golden crust, then remove and sauté onion and garlic in the same pan to capture those flavorful browned bits. Add long-grain rice and briefly toast it, pour in warm chicken broth and lemon juice, return the chicken to the pan, and simmer until the rice is tender and the chicken is cooked through. Finish with chopped parsley, a little grated lemon zest, and a scatter of toasted almonds for contrast. This method is forgiving, so it adapts well to boneless breasts, thighs, or even turkey pieces when you need a pantry-friendly substitution.

I learned this version while cooking for a partner who preferred simple flavors but disliked leftovers with lifeless texture, so I kept the sauce slightly loose and brightened it with lemon to keep each bite lively. Leftovers reheat well in a covered dish with a splash of broth to bring the rice back to life. If you want to stretch the meal, stir in frozen peas or baby spinach at the end and let residual heat wilt them gently. The result is a family-friendly, one-pot comfort dish that looks more sophisticated than the effort invested.

2. Creamy One-Pot Pasta Primavera

Pasta that cooks in a single pot with vegetables and a light cream sauce is a fast, satisfying option for nights when everyone in the house wants something slightly different. Begin by sautéing shallot or onion in olive oil, then add a mix of seasonal vegetables — bell pepper, zucchini, asparagus tips — and a pinch of red pepper flakes for warmth. Pour in broth and an amount of pasta that will absorb the liquid as it cooks, stirring periodically to prevent sticking. When the pasta nears al dente, stir in a splash of cream or crème fraîche, a handful of grated Parmesan, and finish with lemon to cut through the richness.

I often double up vegetables in this dish to make the meal more colorful and to reduce the need for a side salad. Using short pasta shapes like penne or fusilli allows sauce to cling, and the single-pot approach yields a slightly starchy sauce that feels indulgent without heavy cream. For a lighter variation, use a mix of Greek yogurt and a little pasta water instead of cream; add yogurt off the heat to prevent curdling. This recipe works wonderfully with leftover roasted vegetables or a tin of artichoke hearts for extra depth.

3. Rustic Lentil and Vegetable Stew

Lentils are a one-pot hero: they cook relatively quickly, hold shape, and provide robust texture and protein for vegetarian dinners. Start by frying carrots, celery, and onion until softened, then add garlic, cumin, and smoked paprika to build a warm spice profile. Add rinsed lentils, diced tomatoes, and vegetable broth, then simmer gently until the lentils are tender but not mushy. Finish with a splash of vinegar or lemon to brighten the stew and a handful of chopped herbs like parsley or cilantro for freshness.

This stew is forgiving and portable; I have served it over rice, polenta, or with toasted bread on the side depending on what’s in the pantry. If you want more heft, stir in a can of chickpeas or some chopped kale to increase both volume and nutrition. Leftovers develop flavor overnight, making the next-day lunch even better than the first-night dinner. It’s a dependable, cozy recipe that delivers a lot of satisfaction for relatively little effort.

4. Shrimp, Tomato, and Orzo Skillet

Seafood cooks quickly, which makes shrimp a smart choice for fast one-pot dinners that still feel special. Sauté garlic and shallot until fragrant, add crushed tomatoes and a pinch of red pepper for warmth, then stir in orzo and enough broth to cook it through. After the orzo has absorbed most of the liquid and is nearly tender, nestle shrimp into the sauce and cook for a few minutes until they turn pink and firm. Finish with a flourish of basil, a drizzle of olive oil, and a little lemon to balance the tomato’s acidity.

I first made this dish for guests on a humid summer night when I wanted something bright but effortless; it disappeared from the table fast. Using orzo keeps the comfort factor high while the tomato-shrimp combination reads like a quick coastal supper. If shrimp is expensive or you prefer a plant-based switch, replace it with cannellini beans and a handful of chopped spinach for the last few minutes. This recipe proves one-pot can be both fast and restaurant-worthy.

5. Skillet Beef, Potatoes, and Spinach

This all-in-one skillet combines browned ground beef or diced sirloin with small potatoes, onions, and a handful of greens for a hearty, stovetop roast feel. Sear the meat to develop color, set it aside, then sauté potatoes and onion in the rendered fat until edges turn crisp. Return the meat to the pan, add broth and herbs, then cover and simmer until the potatoes are tender. Stir in baby spinach or chard at the end to wilt it gently and finish with a spoonful of mustard or a few drops of Worcestershire sauce for complexity.

It’s a practical, satisfying meal for cooler nights when you want something robust without an oven involved. I’ve used this recipe after long hiking days when the group needed calories fast and no one wanted to fuss with sides. For variety, swap the beef for smoked sausage, turkey, or mushrooms to change the flavor profile while keeping the method identical. Serve with a simple green salad if you want something crisp to offset the hearty skillet.

Quick reference table: cooking times and substitutions

A small table can save time when deciding which recipe to make and how to swap ingredients without losing the essence of the dish. Below is a compact reference that I use when planning weeknight meals to estimate total cooking time and appropriate protein swaps. Keep a printed copy near your recipe stash for fast decisions on busy evenings.

Dish Approx. Cook Time Easy Swaps
Chicken, Rice, and Lemon 35-45 minutes Chicken thighs for breasts; couscous for quick grains
One-Pot Pasta Primavera 20-30 minutes Gluten-free pasta; yogurt instead of cream
Lentil Stew 30-40 minutes Split peas or chickpeas; add barley for chew
Shrimp and Orzo 15-20 minutes White beans for plant-based option; quinoa for GF
Beef, Potatoes, Spinach 30-35 minutes Sausage or mushrooms; sweet potatoes for variety

Meal planning, leftovers, and storage

Easy One-Pot Dinner Recipes. Meal planning, leftovers, and storage

One-pot meals are naturally suited to batch cooking and planned leftovers because they hold up well in the refrigerator and often taste better the next day. Cool food quickly, portion into shallow containers, and refrigerate within two hours to maintain quality and safety. Most of these dishes will keep for three to four days chilled; lentil and tomato-based meals sometimes last a day longer thanks to their acidity and fiber content. For longer storage, freeze portions in airtight containers for up to three months, thawing gently in the fridge overnight before reheating.

Reheating is straightforward: warm gently on low with a splash of water or broth to restore moisture, or heat in the oven at moderate temperature if you prefer even warming. Avoid overheating shellfish or delicate greens during reheating; add them fresh or reintroduce briefly at the end of reheating to preserve texture. I often pack one-pot leftovers for work lunches because they travel and reheat well, and the single-container habit makes commuting easier. This practicality is one reason these dishes become staples for people balancing many demands.

Small habits for truly easy cleanup

The phrase easy cleanup is accurate only if you build tiny habits around cooking and put them into practice, so the final washup feels quick rather than punitive. Wipe as you go: clean chopping boards and collapse used bowls into the sink while something simmers, return measuring cups to their place immediately, and soak the pan if something’s stuck while you tend to a salad. Use a lid to limit splatter, and line toaster or oven racks with foil when broiling components to cut back on scrubbing. A good dish brush and a squirt bottle with hot, soapy water make the initial scrub less annoying and shorten the time needed at the sink.

Another tip is to serve directly from the pot when appropriate, which reduces the number of serving dishes that need washing and creates a casual, family-style atmosphere. I adopted this habit early on when hosting small dinners in a tiny kitchen and found it not only cut cleanup time but also made the meal feel warmer and less formal. Paper towels or compostable napkins reduce dishwashing further when acceptable, though I reserve them for casual weeknight meals. With these habits, the promise of one-pot cooking — delicious food with minimal mess — becomes entirely achievable.

Final thoughts and starting points for experimentation

One-pot cooking is less about strict recipes and more about a flexible method that respects time, ingredients, and appetite. Start with the five recipes above and then test substitutions based on what you like and what is available; the technique stays the same even when flavors shift. Keep pantry staples accessible and practice a couple of flavor-building moves like browning and deglazing, and you will be surprised how quickly your confidence grows. These meals are designed to be practical, adaptable, and rewarding each time you make them.

Cooking with fewer pots changes the dynamic in the kitchen: it reduces cleanup, encourages improvisation, and makes weeknight dinners feel manageable again. When you need a satisfying meal without the fuss, reach for these methods and adapt as you go. Over time, you will assemble a personal rotation of trusted one-pot dinners that reflect your tastes, schedule, and the small kitchen hacks you’ve picked up along the way. Enjoy the process, and let the pot do most of the work.

Ultimate Guide to Vegan Baking: Mastering Plant-Based Desserts at Home

Ultimate Guide to Vegan Baking: Mastering Plant-Based Desserts at Home

This guide is written for anyone who wants to make bakery-worthy sweets without animal products, from curious beginners to experienced bakers exploring dairy-free desserts. I will walk you through the essentials — ingredients, techniques, equipment, and troubleshooting — so that each loaf, cake or cookie comes out with the texture and flavor you expect. Along the way you’ll learn practical swaps and small adjustments that transform ordinary recipes into reliable plant-based baking successes. Expect clear explanations, a few personal tips from my kitchen experiments, and a compact substitution table to keep on hand. By the time you finish reading, you should feel confident adapting most traditional recipes to a vegan format and making them your own.

Why plant-based baking is more than a trend

Switching to plant-based baking is often framed as a lifestyle choice, but it also opens creative possibilities: different flours, oils and natural binders create textures and flavors that are simply not possible with butter and whole eggs. Many people discover new favorites — olive oil cakes with a fruity, tender crumb, or aquafaba-made meringues that surprise even the most skeptical guests. Health, ethics and allergies are common motivations, yet the practical upside for home bakers is consistency: vegan components like shelf-stable oils and plant milks behave predictably, reducing last-minute scrambling for forgotten butter. Over the years I’ve seen home recipes improve when bakers focus on technique and ingredient function rather than trying to mimic animal-based items exactly. That shift in mindset is the real power of plant-based baking.

Another practical reason to learn dairy-free desserts is versatility. A reliable egg replacement or buttery alternative means you can keep baking when you run out of dairy, host guests with allergies, or prepare treats ahead of time for events. Commercial vegan ingredients have improved dramatically — non-dairy spreads, aquafaba powders and neutral vegetable shortenings are more available and of higher quality than a decade ago. This market maturity makes it easier to reproduce textures from traditional baking without sacrificing taste. The knowledge you gain here will also help you scale recipes up or down, improvise in a poorly stocked pantry, and approach dessert-making with curiosity rather than caution.

Essential pantry ingredients for vegan bakers

A well-stocked pantry is the backbone of consistent baking. Start with neutral oils (rapeseed or light olive oil), a sturdy vegetable shortening or vegan butter for flaky pastries, and at least two kinds of flour: all-purpose and a higher-protein option like bread or whole wheat for structure. Stock multiple sweeteners — granulated sugar for creaming, brown sugar for moistness and molasses notes, and a liquid sweetener such as maple or agave for glazes and dressings. Leaveners (baking powder and baking soda), a neutral plant milk, and binders like flax or chia seeds are small items that make a huge difference in final texture. Finally, keep vanilla extract, citrus zest, cocoa powder and a few spices on hand to elevate simple batters into memorable desserts.

Below is a compact substitution table I keep near my counter; it’s useful when converting recipes or improvising.

Ingredient Vegan Substitute Best Use
Egg (1 whole) Flax egg (1 tbsp ground flax + 3 tbsp water) or 3 tbsp aquafaba Muffins, quick breads, pancakes
Milk (1 cup) Almond, soy, oat or oat milk (unsweetened) Cakes, batters, custards
Butter (1/2 cup) Vegan butter or coconut oil (solid) Cookies, pie crust, laminating dough
Heavy cream (1 cup) Coconut cream or blended silken tofu Frostings, ganaches, custards
Gelatin Agar-agar Jellies, cheesecakes

How egg replacers actually work

Eggs play several roles in recipes: binders, leavening agents, emulsifiers and sources of moisture. Picking the right replacer starts with identifying the egg’s purpose in the original recipe. For binding and moisture, flax or chia eggs (ground seed + water) are inexpensive and easy to make, forming a gel that helps hold crumbs together. Aquafaba — the liquid from cooked chickpeas — is exceptional when you need aeration or meringue-like properties because it traps air much like egg whites. In recipes that rely on eggs for structure, such as sponge cakes, a combination of aquafaba and additional leavening often produces the best result.

Commercial egg replacers based on starches or potato protein can be useful in gluten-free or highly structured applications. Another handy trick is to use mashed fruit or vegetables — applesauce, mashed banana, or pumpkin — which add moisture and a little binding, while contributing flavor. Be mindful that fruit-based replacements alter taste and color, so they’re best in recipes that complement those notes. In my kitchen I alternate methods depending on mood: flax eggs for simplicity, aquafaba when I need a glossy meringue, and silken tofu for dense, rich cheesecakes.

Fats and dairy-free butters: balancing flavor and texture

Fats influence mouthfeel, crumb structure and shelf life; the choice between oil and solid fat is crucial. Oils like canola and refined sunflower produce tender cakes and moist brownies because they remain liquid at room temperature, while solid fats such as vegan butter or coconut oil contribute layered flakiness in pastries and crispness in cookies. Many vegan butters are formulated to behave similarly to dairy butter in creaming methods and flavor; try a few brands to find one you prefer. When making laminated doughs or puff pastry, use a solid vegan butter with a high fat content to achieve lift and layers.

For fillings and frostings, coconut cream and blended cashews make excellent dairy-free alternatives with silky textures. Coconut imparts a distinct flavor unless you use refined coconut cream; cashew cream is neutral and adapts to sweet or savory applications. A personal tip: when swapping butter for oil in pound-cake-style recipes, reduce liquid slightly because oil contributes more moisture. In the early days of my experiments I learned that small adjustments like this prevent soggy bases and encourage even baking.

Sugars and natural sweeteners: performance in the oven

Not all sweeteners behave the same in heat. Granulated sugar contributes to structure through creaming with fat, which incorporates air and helps cakes rise. Brown sugar brings moisture and a deeper caramel note due to molasses, which is excellent for cookies and spiced breads. Liquid sweeteners like maple syrup and agave hydrate batters and can accelerate browning; when using them, lower other liquids and slightly reduce oven temperature to prevent over-browning. Date paste and puréed fruit are wholesome options that add fiber and flavor, but they also darken the crumb and can weigh down delicate batters.

Some substitutes, such as erythritol or non-caloric sweeteners, can alter texture and cooling properties, causing graininess or a dry finish. For most home bakers aiming for familiar textures, mixing natural and granulated sugars or using coconut sugar in small proportions provides a balance between flavor and performance. I often use a blend: cane sugar for structure, a touch of maple for complexity, and brown sugar when I want a moist, chewy crumb. Tasting and adjusting are part of the craft — sweetness levels and aroma can be tuned to match your palate.

Flours, structure and gluten considerations

Ultimate Guide to Vegan Baking. Flours, structure and gluten considerations

Flour choice determines crumb openness, chew, and strength. All-purpose flour is the workhorse for many vegan recipes, delivering predictable results. Higher-protein flours like bread flour add chew and structure, useful in yeast breads and dense cakes, while low-protein cake flour or a mix with cornstarch yields a delicate crumb for layered cakes. Whole-grain flours contribute nuttiness and moisture but absorb more liquid, so increase hydration accordingly. Combining flours — for instance, mixing whole wheat with all-purpose — can give you complexity without sacrificing tenderness.

For gluten-free baking, a reliable blend matters more than any single flour. A typical GF mix includes rice flour, tapioca starch and potato starch with a binder such as xanthan gum to mimic gluten’s elastic properties. These mixes often require different hydration and longer resting times to hydrate starches fully. I recommend testing small batches when switching to unfamiliar flours: note how much liquid the batter or dough accepts and whether additional binder improves texture. Over time you’ll build intuition about how each flour behaves in plant-based recipes.

Leavening, steam and air: producing lift in vegan cakes

Getting lift in vegan baking is not mysterious; it’s chemistry. Baking powder and soda are your primary leaveners, but their effectiveness depends on acidity, mixing method and oven temperature. Acidic ingredients like vinegar, buttermilk alternatives (plant milk + vinegar), or cocoa combined with baking soda provide quick reactions that help batters rise. Mechanical aeration — creaming fat and sugar or whipping aquafaba — introduces air bubbles that expand during baking. For light, sponge-like textures, gentle folding and minimal overmixing preserve those bubbles until they set.

Steam is also a powerful leavening ally in items like popovers, certain breads and choux. Ensuring a hot oven at the start and avoiding opening the door early lets steam inflate the structure. For recipes where eggs traditionally trap air, replace them with a combination approach: a chemical rise from leaveners plus a whipped component, often aquafaba, to simulate the aeration. One practical trick I use with cupcakes is to preheat pans briefly; a well-warmed tin helps batter jump and reduces surface cracking.

Technique adjustments when adapting recipes

Adapting a conventional recipe to be vegan requires more than swaps; it needs small technique changes too. When replacing butter with oil in creamed cakes, skip the long creaming step because oil does not hold air the same way; instead, whisk eggs or aquafaba for aeration, then gently fold in dry ingredients. When using plant milks, mix them with an acid and let them sit for a minute to create a buttermilk substitute that reacts with baking soda. If a recipe depends on cold butter for flakiness, choose a solid vegan butter and keep everything chilled to preserve layers.

Timing matters: vegan batters sometimes set faster or slower depending on moisture and fat type. Keep an eye on bake times and use textual cues rather than relying solely on the clock. For example, a vegan loaf might still be moist but fully cooked; check with a skewer and consider residual heat when removing from the oven. Over time, these adjustments become second nature — I often tweak oven temperature by 10–15°F and shave a few minutes off times for cakes made with oil instead of butter.

Troubleshooting common problems and quick fixes

Even with care, issues happen. Dense cakes are often a result of overmixing, insufficient leavening, or using too heavy a flour. The fix can be as simple as folding less and ensuring baking powder is fresh; if the recipe is heavy on whole grains, add a little extra liquid or an additional leavener. Cookies that spread too much usually have too warm a fat or too little flour; chilling the dough or adding a tablespoon of extra flour often corrects the spread. For dry, crumbly muffins, increase the wet ingredients or reduce flour by small increments to restore moistness.

Below are some quick troubleshooting tips presented as straightforward remedies that I use frequently:

  • Problem: Cake sinks in the middle. Remedy: Lower oven temperature slightly and avoid opening the door during initial set; check leavening amounts.
  • Problem: Frosting splits or becomes grainy. Remedy: Use a neutral, room-temperature non-dairy milk; reblend with a tiny splash and whisk until smooth.
  • Problem: Meringue weeps or collapses. Remedy: Use chilled aquafaba whipped with a small acid (cream of tartar), and avoid high humidity during drying.

Simple recipes and inspiration to get started

Start with forgiving recipes that welcome experimentation: banana bread, brownies, simple cookies and quick muffins are ideal because they tolerate swaps and highlight technique rather than precision. A basic banana bread using oil or vegan butter, flax eggs, and a mix of all-purpose and whole-wheat flour is a great first project — it teaches hydration, binding and flavor balance. Brownies made with olive or coconut oil and melted dark chocolate produce rich, fudgy results without dairy, and they’re an excellent vehicle for add-ins like nuts or espresso.

For a more advanced but rewarding project, try choux pastry with aquafaba-based pastry cream or a vegan laminated dough for croissants using high-fat vegan butter. In my experience, the first croissants took patience, but once I dialed in butter consistency and folding technique, the layers were memorable. Keep a baking journal: note substitution ratios, oven quirks and timing so you can reproduce successes and learn from missteps. This record becomes a personalized recipe bank over time.

Storage, freezing and finishing touches

Proper storage extends the life of dairy-free desserts and often improves flavor. Many vegan cakes and quick breads stay moist longer because plant oils do not solidify at refrigerator temperatures the way dairy fats do; store cakes at room temperature in an airtight container for 2–3 days, or freeze slices individually wrapped for up to three months. For frostings made with coconut cream or nut bases, refrigeration is necessary to maintain stability; bring them to room temperature before serving to restore spreadability. Labeling frozen items with date and contents saves time and reduces waste.

Small finishing touches elevate presentation and flavor: a sprinkle of flaky sea salt balances sweetness on brownies, toasted nuts add contrast to muffins, and a light dusting of powdered sugar or cocoa powder makes a plain loaf look deliberate. Glazes made from powdered sugar and citrus juice drizzle beautifully and keep well for transport. When freezing filled pastries, flash-freeze on a tray before bagging to prevent sticking and maintain shape.

Tools and investments that pay off

You don’t need a professional kitchen to bake well, but a few tools make plant-based baking easier and more consistent. A reliable digital scale is the single best investment; weighing ingredients removes ambiguity and improves repeatability. An oven thermometer is indispensable because many ovens deviate from their set temperature, and vegan batters can be sensitive to heat. A stand mixer or a sturdy hand mixer speeds up whipping tasks like aquafaba meringues and creaming, while silicone spatulas and folding tools help incorporate air without overmixing.

Other useful items include a good set of measuring spoons, a bench scraper for handling dough, and quality nonstick bakeware or a well-seasoned sheet pan. For those who bake bread or laminated doughs frequently, consider a plastic bench scraper and a dough scraper set; they make shaping neater and faster. I still use the same wooden spoon I bought years ago for initial mixing — some things never need replacing — but accurate measuring and reliable bakeware truly change outcomes.

Plant-based baking rewards curiosity more than conformity. Start small, keep notes, and gradually try bolder substitutions and new techniques; the learning curve is forgiving and often delicious. Taste as you go, adjust for texture and moisture, and don’t be afraid to make the recipe yours by experimenting with spices, extracts and add-ins. Over time you’ll compile a set of go-to formulas that deliver the results you want, whether you’re making quick dairy-free desserts for family weeknights or crafting showstopping cakes for guests.

Baking is a hands-on craft that benefits from repetition and reflection. With the fundamentals outlined here — smart ingredient choices, purposeful technique modifications and a few well-chosen tools — you can approach any traditional recipe and adapt it with confidence. Keep a sense of play: some experiments will surprise you, others will teach you something practical about structure or flavor. Most importantly, enjoy the process; the best desserts are those shared with people who appreciate the effort and care behind them.

Sweet Potato & Black Bean Enchiladas: Cozy, Smoky Comfort for Any Night

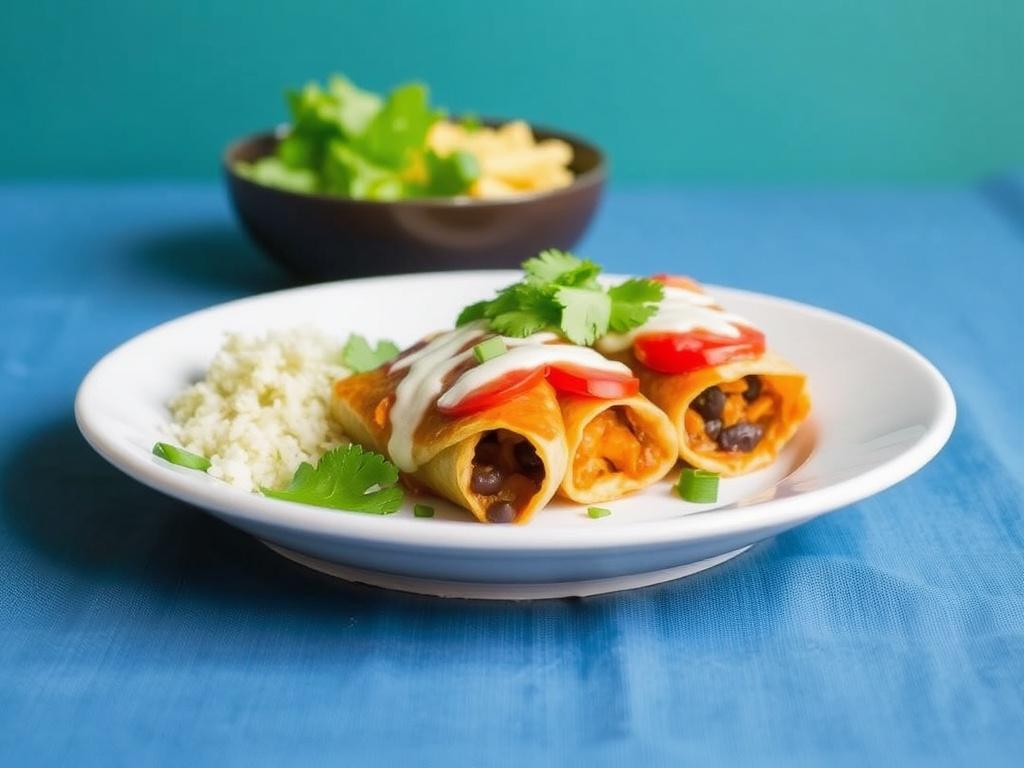
There is something quietly irresistible about a tray of enchiladas that come out of the oven bubbling and aromatic, and this version pairs roasted sweet potato with tender black beans to deliver both heart and soul. Here I will walk you through the reasoning behind the flavors, precise ingredients, clear steps, and ways to make the dish your own, whether you cook for two or a hungry group. You will find tips on texture, balance, and timing so the filling isn’t soggy and the tortillas stay tender but not falling apart. Along the way I’ll share small habits from my kitchen that help every bake come out vivid and satisfying. This article is organized to be a practical resource and a little bit of a love letter to simple, vegetable-forward comfort food. Read more

Warm Bowl, Cooler Days: The Art and Soul of Chicken Noodle Soup

There are few dishes that feel as immediate and intimate as a steaming bowl of chicken noodle soup. It arrives at the table not as a spectacle but as comfort: warm, familiar, and honest. In this article I will walk you through history and technique, ingredient choices and troubleshooting, plus a reliable, flavorful recipe you can rely on. Along the way I’ll share practical tips from my kitchen and explain why a good broth can change everything. Read on and you might end up with a new favorite method for making this classic dish. Read more

Earthy Comfort: Crafting the Perfect Meat Pie with Root Vegetables

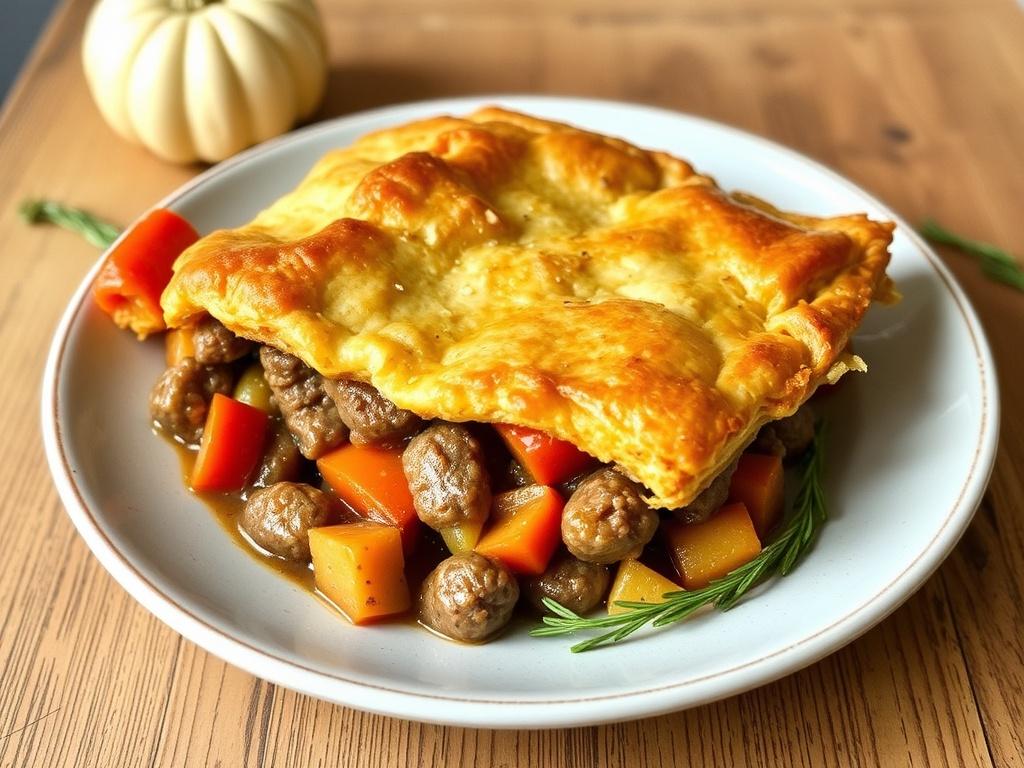
There is something elemental about a warm pie plated beside a wooden table, steam curling up and a scent that promises comfort. This article walks you through building a meat pie with root vegetables that is at once rustic and thoughtfully composed. I will cover ingredient choices, technique, pastry options, seasoning strategies and practical tips for make-ahead and freezing. Expect concrete guidance, a few personal notes from my kitchen experiments and recipe variations so you can adapt the dish to seasons and pantry constraints. Read on if you want a pie that feeds a family and rewards patience. Read more

Caramelized Onions Side: The Sweet, Savory Upgrade Your Plate Has Been Waiting For

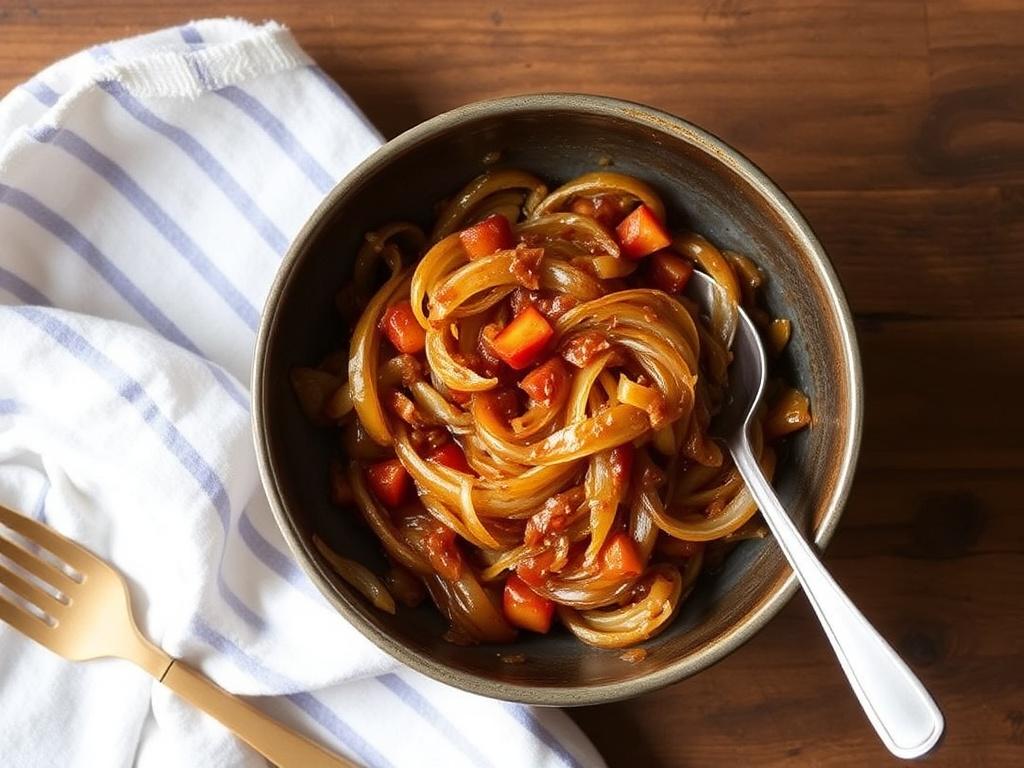
There are few things in the kitchen that transform a simple meal into something unexpectedly glorious like a well-made bed of caramelized onions. This side elevates humble ingredients—plain sliced onions, a bit of fat and time—into a glossy, sweet-tasting accompaniment that works with everything from roasted meat to creamy polenta. In this article I’ll walk you through why these onions matter, how to make them reliably, and dozens of ways to use them so they never become just “that thing in the corner” on your plate. Expect practical technique, flavor ideas, storage tips, and a couple of personal habits I’ve picked up over years of cooking. Read more

Homemade Biscotti: How to Bake the Perfect Crunchy Cookie at Home

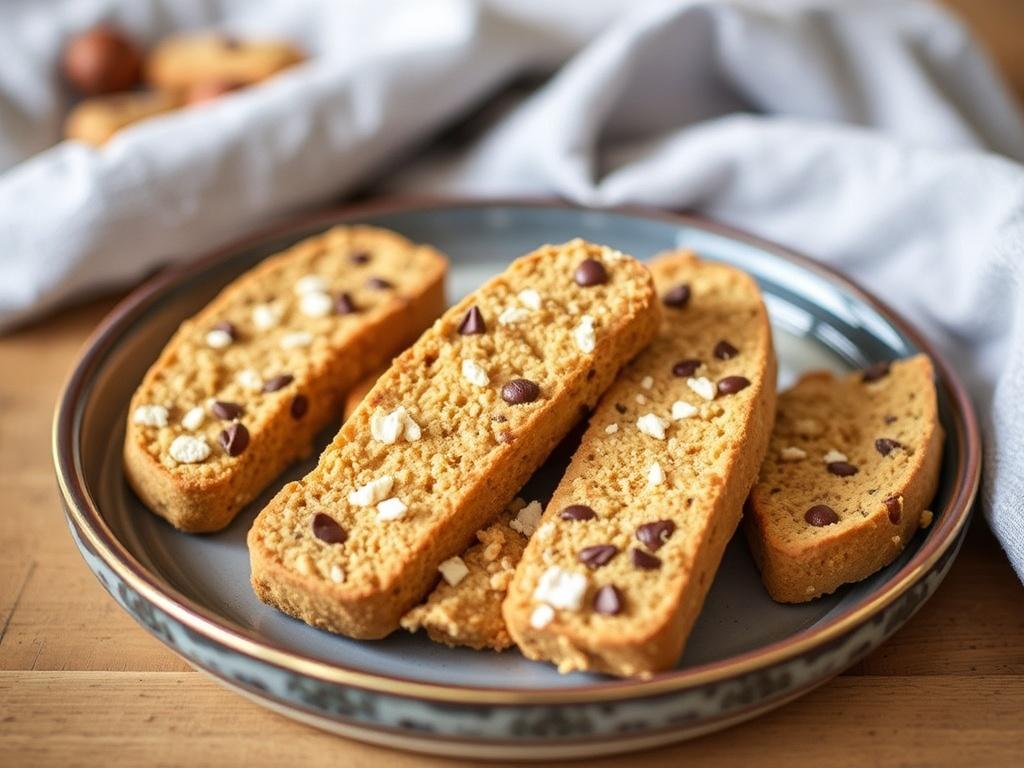
There is something quietly satisfying about pulling a tray of crisp, golden biscotti from the oven and watching steam rise as the kitchen fills with a toasty, almond-scented aroma. These twice-baked Italian cookies have a personality all their own: dry enough to dunk, sturdy enough to last, and versatile enough to welcome a dozen different flavor ideas. In this piece I will walk you through the practical steps, ingredient choices, and creative variations so you can confidently make your own batch at home. Along the way I’ll share small tricks learned from real hands-on baking, the reasons behind each technique, and ways to adapt the recipe for different diets. Whether you see them as a simple coffee companion or an elegant dessert offering, the goal here is to make the process approachable and rewarding. Read more

Roasted Pumpkin Salad That Makes You Look Forward to Fall

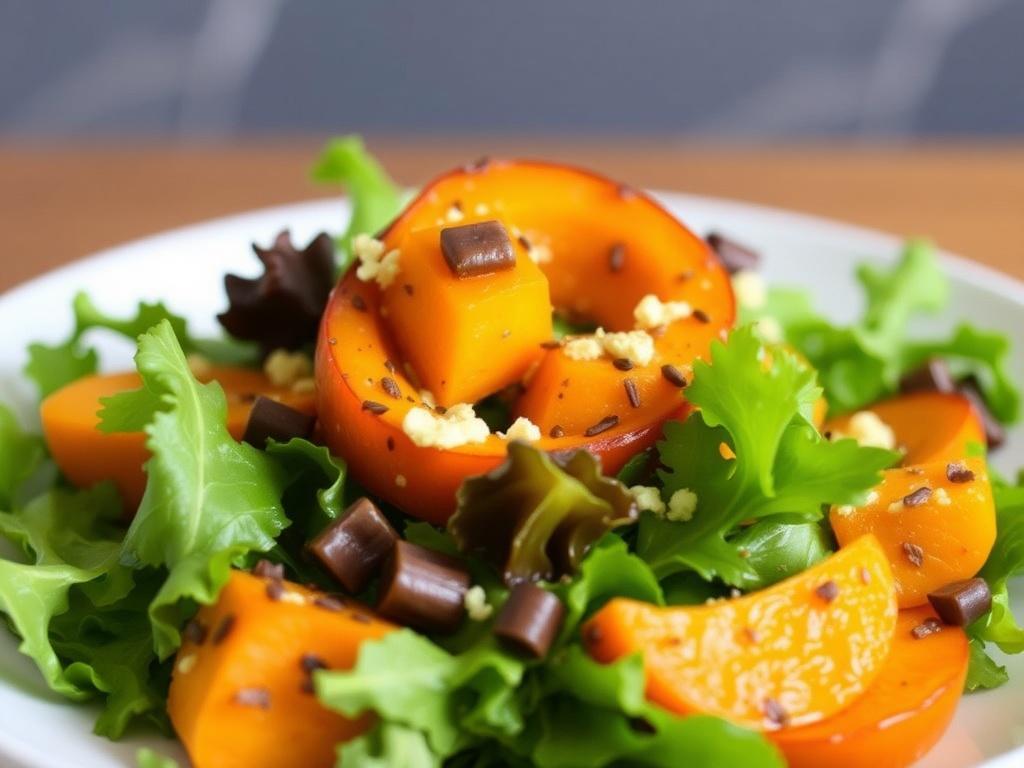
There is a certain alchemy that happens when pumpkin meets high heat and a confident hand with spices. This Roasted Pumpkin Salad is not a mere side dish, it is a centerpiece idea for dinners that want warmth, color and crisp contrast. In the paragraphs that follow I will walk you through choosing the right squash, mastering the roast, building dressings, and balancing textures so the finished salad feels complete and memorable. I will share practical timings, flavor combinations that actually work, and a reliable recipe you can follow tonight. If you have a craving for seasonal food that feels both grounded and a little inventive, stay with me. Read more

Warm Apple Cider: the Cozy Elixir for Crisp Evenings

There is something quietly persuasive about a steaming mug held between cold hands, its surface sending up curls of fragrant steam. Warm Apple Cider sits in that sweet spot between simple comfort and culinary possibility, a drink that invites conversation, slow afternoons, and the kind of nostalgia that arrives without warning. Whether made quickly on a weekday evening or simmered for a gathering of friends, this apple-forward beverage carries layers of spice, body, and warmth that make it more than the sum of its parts. In the pages that follow I’ll walk through history, practical recipes, regional twists, and tips drawn from years of making this drink for family and for friends. Expect concrete measures, troubleshooting advice, and ideas for pairing, storage, and subtle experimentation to make your own signature mug of mulled cider.

Roots and rituals: where warm apple cider comes from

Apple-based drinks have accompanied human gatherings for centuries, long before refrigeration or modern supermarkets. Cider in its many forms originated as a practical way to use apples after harvest; pressed and fermented or left fresh, it became a staple in households across Europe and North America. The practice of warming and spicing apple juice predates commercial bottling, tied to seasonal celebrations where heat and spices served both to preserve and to transform humble fruit into something festive. Over time, the spices—most commonly cinnamon and cloves—came to signal hospitality and seasonal change, a shorthand for Autumn and early winter gatherings. Understanding this history helps when you begin to customize recipes, because the techniques you use echo practices refined over generations.

The spices that define the profile

The backbone of a classic mug is the trio of apple, cinnamon, and cloves. Cinnamon contributes warmth and a clean sweetness without adding sugar, while cloves bring depth and a faint astringency that balances the cider’s natural sugars. Cardamom, star anise, and nutmeg are frequent companions, each nudging the flavor in a distinct direction—cardamom brightens, star anise gives herbal licorice notes, and nutmeg rounds the finish. When you begin experimenting, treat these additions as accent ingredients rather than equals; the goal is to let the apple character lead while spices provide structure. Fresh whole spices will always deliver a clearer, more layered perfume than ground versions, especially when the drink simmers slowly.

What to buy: selecting apple cider and spices

Choosing the right base liquid is the simplest decision that changes everything. In many parts of the world apple cider refers to unfiltered, unfermented apple juice; in others it can mean hard cider, which contains alcohol. For a classic warm apple cider meant for all ages, look for fresh-pressed, unfiltered apple juice in the refrigerated section or from a local orchard. Read labels: avoid sweeteners and preservatives if you want a purer apple flavor to build on. For spices, prioritize whole cinnamon sticks and whole cloves; they last longer and release oils more gently than ground powders when simmered.

Proportions that work

Here’s a reliable rule of thumb I return to: for every 4 cups of apple cider use 1 or 2 cinnamon sticks and 6 to 8 whole cloves, adjusted to taste. That ratio yields a balanced spicing that highlights the apple rather than overpowering it with heat or astringency. If you like it sweeter, add a tablespoon or two of maple syrup or brown sugar per quart, rather than relying on overly ripe or concentrated ciders which can taste cloying. For smaller batches a single cinnamon stick and three or four cloves in a pint is sufficient. Keep in mind that extended simmering concentrates both sugars and spice oils, so taste as the cider reduces and make small adjustments.

Step-by-step: the essential stovetop recipe

The stovetop method is the most forgiving and the one that produces the fullest aromatic profile, making it my go-to on cold evenings. Start by pouring your cider into a wide pot—wider pots allow faster evaporation and richer concentration if you want a more intense flavor. Add your cinnamon sticks and cloves, and any secondary spices like a split vanilla bean or a few cardamom pods. Heat gently until no more than a bare simmer; avoid boiling, which drives off delicate aromatics and can introduce bitterness.

Simmer for twenty to forty minutes depending on the depth of flavor you want, checking periodically and skimming any foam. Before serving, strain out the solids, and finish each mug with a thin slice of fresh apple or an orange twist for brightness. If you plan to serve a crowd, keep the cider warm in a crockpot or insulated pot set to low, replenishing spice sticks if the fragrance fades over a long stretch. This method gives you control and produces consistently pleasing results.

Quick version for busy nights

When time is short, you can still make a satisfying cup in ten minutes. Warm the cider gently with one small cinnamon stick and three cloves, allow it to infuse off heat for a few minutes, then reheat briefly and serve. This technique relies on maximum surface contact and fresh spices; chop or lightly crush whole cloves to speed extraction if necessary. Add a splash of lemon juice to brighten flavor and prevent the drink from feeling too heavy. Quick versions won’t have the same depth as a long simmer, but they deliver comforting warmth and the core notes we associate with spiced apple beverages.

Variants: non-alcoholic, spiked, and beyond

Warm apple cider is wonderfully adaptable. The non-alcoholic version suits children and anyone abstaining from booze, and its ease makes it an excellent party option where everyone can enjoy the same base drink. To spike a batch for adults, choose a spirit that complements rather than competes: rum adds molasses warmth, bourbon brings vanilla and oak notes, and dark beer can lend a surprisingly pleasing roasted complexity. Add alcohol at the end of heating to preserve aromatics and limit alcohol loss to evaporation.

There are also cider-based cocktails that use a hot-mulled base as a component; think hot toddy variations swapped for cider instead of water. For a lighter option, mix warm cider with a splash of seltzer and serve in a tall glass with lots of ice for a fizzy fall cooler—this works well on transitional weather days. Vegetarian or vegan guests are generally fine with most ciders, but those served commercially could contain added preservatives; if in doubt, choose locally pressed juice or labeled vegan products.

Table: quick comparison of popular spiking options

Spirit Flavor contribution Suggested amount (per 1 liter cider)
Dark rum Caramel, molasses, warmth 100–150 ml
Bourbon Vanilla, oak, gentle heat 80–120 ml
Apple brandy (Calvados) Intensified apple notes, fruity depth 60–100 ml
Dark beer (small amount) Roasted, bitter balance 50–100 ml

Pairings: what to serve with a mug

Because apple cider is modestly sweet and richly aromatic, it’s a versatile companion for both savory and sweet fare. Cheese boards with sharp cheddar, aged gouda, or tangy blue cheese echo the apple’s acidity and provide texture contrast. Savory pastries—sausage rolls, empanadas, or meat pies—work particularly well when you serve cider at a hands-on gathering because the drink cleanses the palate. For dessert, think spice-forward choices like ginger cookies, a dense apple cake, or a slice of sharp cheddar-topped pie for a classic regional pairing.

One of my favorite pairings is a bowl of roasted root vegetables tossed with a cider reduction: the shared flavor notes make each sip and bite reinforce the other. If you’re serving brunch, pair warm cider with pancakes, smoked salmon, or a simple frittata. For a crowd, set up a small self-serve station with garnishes—cinnamon sticks, orange slices, star anise—so guests can personalize their mugs.

Storage, reheating, and food safety

Proper storage keeps your cider tasting fresh and prevents bacterial growth. If you’ve simmered a large batch, cool it within two hours and refrigerate in airtight containers for up to four days. For longer storage, freeze portions in sealed containers for up to three months; thaw overnight in the refrigerator before reheating. When you reheat, do so gently over low heat to avoid over-concentrating flavors or boiling off aromatics. If the cider tastes flat after refrigeration, a short fresh infusion with a cinnamon stick and a few cloves will revive its bouquet.

Do not leave hot cider on a counter overnight at room temperature; bacteria can proliferate in sugary liquids. If you’re serving a crowd over an extended period, keep the drink at a safe `keeping` temperature above 60 degrees Celsius (140 degrees Fahrenheit) in a proper insulated vessel. For large public events, label spiked and unspiked versions clearly to avoid surprises.

Regional adaptations and international echoes

Every culture interprets warm apple beverages through its ingredients and spice traditions. In parts of Northern Europe, warm spiced drinks may include juniper or black peppercorn for a savory edge. In the American South, cider is often enlivened with ginger and a touch of molasses or maple syrup to reflect local sweetening traditions. Scandinavian versions might add aquavit for a pronounced caraway layer, while in places with strong tea cultures, brewed tea is sometimes blended with apple juice and spicing for complexity.

Exploring these variations is a low-commitment way to learn how small changes shift the balance of a drink. I’ve returned from travels with ideas as simple as swapping orange peel for lemon when citrus is in season, and those small substitutions often become staples at home. Use them to design a regional-themed evening—serve Northern European style with hearty breads and smoked fish, or pair a Southern take with biscuits and slow-roasted pork.

Vegetarian and dietary notes

Most homemade versions are naturally vegetarian and vegan, provided you avoid adding honey or certain sweetened condiments. Many commercial apple ciders contain no animal products, but preservatives and clarifying agents used in some hard ciders may be non-vegan; check labels if this concerns you. For low-sugar diets, choose a fresh-pressed cider with no added sugar and dilute slightly with sparkling water to reduce sweetness without sacrificing aroma. If you’re serving people with allergies, be mindful: some spices like nutmeg or star anise may trigger sensitivities in a few individuals.

Making it your own: advanced techniques and flavor layering

Warm Apple Cider. Making it your own: advanced techniques and flavor layering

Once you’ve mastered the basic formula, play with extraction methods and sequencing to build complexity. Toast spices lightly in a dry pan before adding them to cider to release more volatile oils; this amplifies the aroma without adding heat. Cold-infusing spices in cider overnight in the refrigerator will yield a cleaner, more floral profile, which you can then warm gently before serving. Another method is to ferment a small portion of your cider slightly and blend it back in for a touch of acidity and sparkle—this requires care but produces interesting depth.

Barrel-ageing small batches in oak chips or finishing with a splash of aged spirits creates additional texture and nuance. I once steeped a liter of cider with a few charred applewood chips wrapped in foil for a subtle campfire quality that paired beautifully with smoked meats. Keep notes: small changes like a minute longer of simmering or adding a different citrus peel can produce dramatic results, and recording ratios and timings will help you replicate favorites.

Troubleshooting common problems

Occasionally cider can become too tart, too bitter, or overly spiced. If the drink tastes overly tart, a small spoonful of brown sugar or maple syrup will round it out; if bitterness develops from over-simmering, dilute with additional fresh cider and briefly reheat. Over-spiced batches can be mellowed by adding more base liquid and a few slices of raw apple to absorb excess oils. If the aroma fades during a long service, add fresh spice sticks and a strip of citrus peel to revive the fragrance without making the beverage taste raw or astringent.

Personal reflections and memories tied to cider

For me, warm apple cider is a sensory bookmark of seasons and people. I remember bringing a thermos of spiced cider to a late-night bonfire where the first snowfall of the year started gently, and strangers became friends over shared mugs. Another time, a simple pot of cider simmered in a small apartment warmed the whole place while I baked bread, and that combination of yeasty loaf and spiced apple smell felt like domestic magic. These memories inform how I cook it now: I prioritize aroma and conviviality over complexity, because the true value of the drink is how it brings people together.

When I make cider for guests, I always keep the spice jar handy and let them choose a garnish—sometimes the smallest participatory touch makes a gathering feel shared. Over seasons I’ve learned that restraint is often the best choice: let the apple sing, let cinnamon and cloves support that melody, and use extras sparingly to avoid drowning the core flavor. That balance has become my personal standard and a yardstick I recommend to others.

Practical checklist before you start

Before you begin, assemble your ingredients and tools: fresh-pressed apple cider, whole cinnamon sticks, whole cloves, a wide pot, a fine-mesh strainer, and optional spices or spirits. Decide whether you’ll serve immediately, keep warm for guests, or store extra for later; this choice dictates quantity and container types. If serving guests, prepare garnishes and labels ahead of time—simple details like a small tray of orange slices and cinnamon sticks make the presentation matter. Finally, allow yourself a tasting period during cooking so adjustments can be made early, and avoid overcompensating at the very end.

Simple ingredient checklist

  • 4 cups fresh-pressed apple cider (or more, scaled to guests)
  • 1–2 cinnamon sticks per 4 cups
  • 6–8 whole cloves per 4 cups
  • Optional: star anise, cardamom pods, nutmeg
  • Optional sweeteners: maple syrup, brown sugar

Final thoughts and encouragement

Making warm apple cider is one of those culinary projects that rewards both precision and play. Start with a straightforward recipe, learn how your chosen cider behaves under heat, and then layer in small experiments: a toasted spice here, a splash of rum there, a slow cold infusion to brighten flavors. Over time you’ll build a repertoire of versions suited to different moods and gatherings, and you’ll likely develop a favorite that becomes part of your seasonal routine. Above all, remember that the most important element is the company you share it with—a well-made mug of spiced apple drink is the sort of thing that invites conversation and makes ordinary evenings feel a little more intentional.