Archive: 5 September 2025

Vegetable Fried Rice: The Colorful, Comforting One-Pan Meal You’ll Make Again and Again

There’s a special kind of comfort in a bowl of steaming rice tossed with bright vegetables, a glossy sauce, and the faint char from a hot pan. Vegetable Fried Rice sits at the intersection of thrift and pleasure: it rescues leftover rice, transforms modest produce into something celebratory, and arrives on the table fast enough for weeknights. In this article I’ll walk you through everything that turns a simple skillet dish into a repeatable favorite, from ingredient choices and technique to variations that suit every appetite. Expect practical tips you can use tonight, a clear recipe to follow, and a few ideas born from my own kitchen experiments. By the end you’ll know how to produce reliably good results and how to tweak the dish to make it your own.

Where this dish comes from and why it works

Stir-fried rice dishes have a long history across East and Southeast Asia, growing out of the need to use leftovers efficiently and introduce texture and heat to bland grains. The basic idea is elegantly simple: cold, dry rice fried quickly over high heat with a selection of vegetables and seasonings. That quick contact with a very hot surface caramelizes bits of starch and sugar, building aromas that raw rice or boiled rice lacks. The technique elevates humble staples into something with depth and movement on the palate. Understanding that foundation helps you focus on heat control, timing, and ingredient order, which are the true secrets of success.

One reason this recipe is beloved is its flexibility. It can be made entirely plant-based, or enriched with eggs, tofu, or shrimp; it suits low-effort weeknights and also scales up for a crowd. Texture plays a starring role: tender-crisp vegetables, separated grains that don’t clump, and occasional browned bits make each forkful interesting. Economically, it stretches small amounts of protein and uses seasonal produce without demanding exotic pantry items. In practice, that means you can create something delicious with what’s already in your refrigerator.

Core ingredients and why each matters

The three pillars of a successful bowl are rice, vegetables, and flavoring liquids. Each pillar has its own rules. Rice needs to be dry and cooled so grains remain separate when tossed in the pan; fresh, steamy rice tends to clump and steam rather than fry. Vegetables should be cut according to their cooking time: dense roots need longer, delicate greens only seconds. Sauce ingredients—soy sauce, sesame oil, oyster sauce or equivalents—must be added in judicious amounts to season without turning the dish salty or soggy. Treating every element deliberately yields a balanced result rather than a watery, overwhelmed stir-fry.

Fat and heat are equally important. A neutral oil with a high smoke point, such as vegetable or canola oil, allows you to push the pan hot enough to build color without burning the aromatics. A small late addition of toasted sesame oil supplies aroma rather than acting as the cooking medium. Eggs, when used, not only add protein but contribute silkiness and help coat grains when scrambled into the rice. Texture contrast—chewy rice, crisp vegetables, soft egg—keeps the dish lively and satisfying.

Choosing the right rice

Long-grain rice like jasmine is the classic choice for many stir-fried rice recipes because its individual grains tend to separate after cooking and chilling. Medium-grain rice can work too, but short-grain varieties often become sticky and gluey unless handled with exceptional care. Whatever rice you choose, cook it slightly underdone if you plan ahead, then spread it on a tray to cool quickly and refrigerate; the drier, cooler grains take on a better mouthfeel when fried. Using day-old rice is not a strict rule, but it does make the process more forgiving and the outcome superior.

If you find yourself with only freshly cooked rice, try rinsing it under cool water to remove excess surface starch, then spread it out to cool rapidly. Another option is to par-cook extra and freeze portions on a tray; frozen rice, thawed briefly, fries well because the freezing breaks up starch bonds and reduces stickiness. Ultimately, the aim is the same: grains that slip past one another in the pan rather than forming a compact mass.

Vegetables: which ones to use and how to prep them

Vegetable Fried Rice. Vegetables: which ones to use and how to prep them

The choice of plant ingredients defines the dish’s character. Classic combinations include carrots, peas, scallions, and bell peppers, but don’t feel limited. Broccoli florets, snap peas, thin-sliced cabbage, corn, mushrooms, and diced zucchini all bring useful textures and flavors. Aim for a mix of colors and cooking times so the final dish has visual appeal and each vegetable retains its identity. Cut everything into uniform sizes to ensure even cooking and an attractive bite.

Prep matters more than people realize. Slice sturdy vegetables thinly so they cook through quickly; cut mushrooms in quarters or thin strips; chop scallions and garlic finely to integrate them without burning. If you like a softer result, briefly blanch or microwave dense veg like broccoli before stir-frying. For a sharper crunch, toss raw vegetables straight into the wok at the beginning of the stir-fry. Learning how each vegetable reacts to heat lets you layer them in the pan with confidence.

  • Quick-cook vegetables: scallions, bean sprouts, bell pepper, snow peas.
  • Medium-cook vegetables: carrots (julienned), broccoli florets, green beans.
  • Slow-cook or pre-cook: beets, dense root vegetables, whole sweet potato pieces.

Sauces, oils, and seasonings that lift the dish

Seasoning is where the dish moves from bland to memorable. Soy sauce provides saltiness and depth; a little dark soy or mushroom soy can deepen color and add umami without extra salt. Toasted sesame oil is powerful even in small doses—add it at the end for aroma rather than using it as the primary cooking fat. Rice vinegar, a touch of sugar, or a splash of Shaoxing wine can round the flavors and introduce a subtle acid-sweet balance.

For those avoiding soy, tamari or coconut aminos are good substitutes. Chili paste or flakes make the meal lively for spice lovers, and white pepper gives a delicate heat different from black pepper. Fresh aromatics—garlic, ginger, and scallions—should be treated carefully: add them early for fragrance that infuses the oil, or late for a bright, raw edge. A thoughtful blend of these components keeps the seasoning layered rather than one-dimensional.

Technique: wok basics and stir-frying principles

Heat control is the single most important skill for a good pan-fried rice. Preheat the wok or skillet until it is very hot, so contact with the pan immediately starts to color the food. Use a high smoke-point oil, add aromatic ingredients briefly to perfume the oil, and then work quickly. Frying in small batches prevents the pan from cooling down, which leads to steaming rather than browning. The goal is speed and agitation: toss or stir constantly so everything cooks evenly and acquires little toasted bits.

Order of operations matters. Cook any proteins first and set them aside, especially if they need browning. Next, start with denser vegetables and add more delicate items later. Rice is best added in clumps that you break apart with a spatula, letting each portion hit the hot surface so grains get a chance to toast. Finish by reincorporating proteins, tossing in sauces, and giving the mixture a quick final sear. This sequence keeps texture distinct and flavors concentrated without overcooking.

Tools help but don’t make you a cook. A heavy-bottomed wok or a large skillet that holds heat works well, and a wide spatula or flat turner lets you scrape and toss efficiently. If your pan is too small, the ingredients will steam and clump. A small splash of neutral oil between batches keeps the surface slick and prevents sticking. With practice, your wrist and timing will build a comfortable rhythm: a few minutes of intense focus produce a dish that looks and tastes like it took longer to prepare.

Step-by-step recipe: a reliable weeknight method

This recipe reflects what I use most often when I want something quick, colorful, and flexible. It serves two to three as a main or four as a side. You can double it for more servings, though I recommend cooking in slightly larger batches rather than crowding one pan. The instructions emphasize a straightforward sequence so even cooks who aren’t used to high-heat work can follow along and get consistent results.

Before you start, have everything chopped, measured, and within arm’s reach. Stir-frying moves quickly, so mise en place is not optional. If you like a little char, let the rice sit untouched for 20-30 seconds after adding it to the hot oiled pan to develop color before stirring. That pause produces those tasty brown bits that make the dish sing.

Ingredient Amount
Cooked jasmine rice (preferably chilled) 3 cups
Neutral oil (vegetable or canola) 2 tablespoons
Mixed vegetables (carrot, peas, bell pepper, scallions) 2 cups total, chopped
Garlic, minced 2 cloves
Ginger, minced (optional) 1 teaspoon
Soy sauce 1.5 tablespoons
Sesame oil 1 teaspoon
Eggs (optional) 2, beaten
Salt and pepper To taste
Optional protein (tofu, shrimp, chicken) 1 cup, pre-cooked

Cooking method

Warm your wok or large skillet until it begins to shimmer, then add the neutral oil. Toss in garlic and ginger for a few seconds until fragrant; do not let them brown. Add vegetables in the order of their cooking times, starting with carrots and broccoli, then bell peppers and peas. Stir constantly so each piece picks up heat and color without burning. If you’re adding eggs, push the vegetables to the side and quickly scramble them in the open space, then combine with the vegetables.

Next, add rice in clumps and let each cluster kiss the pan briefly before spatulaing it apart and turning it through the vegetables. Pour the soy sauce around the edges of the pan so it hits the hot surface and reduces slightly before mixing in; this helps avoid soggy rice. Toss in any pre-cooked proteins, season with salt and pepper, and finish with a drizzle of sesame oil for brightness. Taste and adjust, then serve immediately while the grains are still slightly crisp and warm.

Variations to keep things interesting

One appealing aspect of this dish is how well it adapts. Swap jasmine for basmati for a drier, less sticky grain, or use brown rice for a nuttier flavor and more fiber. Add pineapple for a sweet contrast, or toss in kimchi for tang and a spicy kick. For a richer mouthfeel try a spoonful of butter stirred in at the end, or fold through small cubes of pan-fried tofu for a protein boost that soaks up flavors beautifully. Seasonal vegetables influence texture and aroma, so rotate what you use through the year.

If you want to focus on proteins, try a version with marinated tofu or thin-sliced beef. For a brunch-style twist, include a runny fried egg on top and a scattering of scallions and toasted sesame seeds. There’s also a trend of making “cauliflower rice” versions for lower-carb diets; while the texture will differ, the same principles—high heat, layered cooking, and finishing touches—still apply. Each variation invites a small tweak in timing or seasoning, but the backbone of the technique remains constant.

Vegan, vegetarian, and allergen-friendly swaps

Making the dish vegan is straightforward: omit eggs and use a plant-based protein like tempeh, firm tofu, or edamame for substance. Use tamari if gluten is a concern, and replace oyster sauce with a mushroom-based vegan oyster sauce or a little miso mixed with water for umami. For nut allergies, avoid sesame oil if it’s an issue; you can add aroma with a splash of toasted sunflower oil or a few drops of toasted coconut oil for a different character. Small changes to the sauce often make the biggest impact on accommodating dietary needs without losing depth.

Some readers worry about sodium. Lighten the load by using low-sodium soy sauce and brightening with a squeeze of lime or a splash of rice vinegar. Herbs like cilantro or basil at the end add freshness that fools the palate into perceiving more complexity even with reduced salt. Balancing umami, acid, and fat keeps the dish satisfying while respecting dietary constraints.

Make-ahead, leftovers, and freezing

This dish is ideally suited to meal prep. Cook a large batch of rice and chop vegetables in advance, storing components separately in airtight containers. When you’re ready to eat, a hot wok and a few minutes are all you need to bring everything together. Leftovers reheat well in a skillet with a little oil; avoid the microwave when possible because it can make rice gummy. When reheating, spread the rice thin in the pan and let it sit for short intervals to restore some toasted texture.

Freezing is also possible: cool food completely, portion into shallow containers, and freeze. Thaw in the refrigerator overnight and reheat in a pan until steam rises and the dish is hot throughout. Note that delicate vegetables like bell pepper and scallions will soften after freezing, so if texture matters, reserve those to add fresh at the time of reheating. Planning ahead in this way means you can have a homemade easy dinner on hand with minimal last-minute work.

Serving suggestions and pairing ideas

A bowl of savory fried grains pairs well with crisp, acidic sides that cut through richness. A simple cucumber salad dressed with rice vinegar and a pinch of sugar brightens the plate, and pickled vegetables provide a sharp counterpoint. For protein, lightly seared fish or soy-glazed tofu complement the flavors without overpowering them. A scattering of toasted sesame seeds or chopped herbs at the end adds visual contrast and a final layer of flavor.

Consider textures when you compose the rest of the meal. Something crunchy—like a quick slaw or toasted nuts—creates balance. For beverages, a crisp lager or a green tea works beautifully; the carbonation or tannins cleanse the palate between bites. Keeping contrasts in mind helps the rice remain the star while the accompaniments enhance rather than compete.

Troubleshooting common problems

If your rice turns out mushy, it’s usually due to excess moisture: either the rice was too freshly cooked, you added too much sauce, or the pan wasn’t hot enough and the ingredients steamed. Fixable approaches include reducing liquid in the sauce, letting components fry longer to evaporate moisture, or using a spatula to press clumps and let them toast. For sticky rice, try rinsing grains after cooking to remove surface starch or using slightly less water next time.

When vegetables are limp or overcooked, they were likely added too early or sliced too thinly for the heat level. Reset by blanching sturdy vegetables briefly and shock-cooling them in ice water before stir-frying, which preserves color and texture. If you face blandness, add a bright acid like rice vinegar or citrus at the end and a pat of butter or a drizzle of sesame oil to round the flavor. Small corrections often rescue a dish that seems only mild at first.

Nutrition, portions, and making it balanced

A typical serving of this dish provides a mix of carbohydrates, fiber from vegetables, and modest protein. You can adjust macronutrients easily: add more tofu, a couple of eggs, or diced chicken for protein; increase vegetable volume to boost fiber and reduce calorie density. Using brown rice raises fiber content but requires a little extra liquid and a longer initial cooking time. Portion sizes depend on appetite and whether the rice is a main course or a side, but a bowl of two to three cups cooked rice with vegetables and protein will generally satisfy most adults as a main.

For those tracking nutrients, soy sauce contributes sodium, so low-sodium versions are worth considering. Using more vegetables and less rice reduces calories per serving while increasing vitamins and minerals. Simple swaps—like swapping oil types or increasing legumes—allow you to customize the meal’s nutritional profile without losing taste. In my household, we often bulk up the veg to keep portions generous but light.

Final tips and a personal note

Over the years I’ve learned that the most reliable path to a great pan-fried rice is consistency in small details: uniformly cut vegetables, chilled rice, and a hot pan. These three habits turn a grab-bag of ingredients into something consistently delicious. I also recommend tasting as you go and making micro-adjustments; sometimes a scant teaspoon of sugar or a squeeze of lime at the end makes all the difference. Keep your pantry stocked with a few key sauces, and you’ll be able to improvise a satisfying meal whenever time is short.

When I teach friends, I emphasize confidence: don’t be afraid to let food sit on the pan for a few seconds to develop color, and don’t crowd the surface. Once you master the rhythm of high heat and quick turns, creating different versions becomes playful rather than stressful. The dish rewards experimentation—mix in what you love, scale flavors to suit your household, and treat it as both a weeknight workhorse and a canvas for culinary personality. Serve it hot, and enjoy the way simple ingredients can turn into a memorable meal.
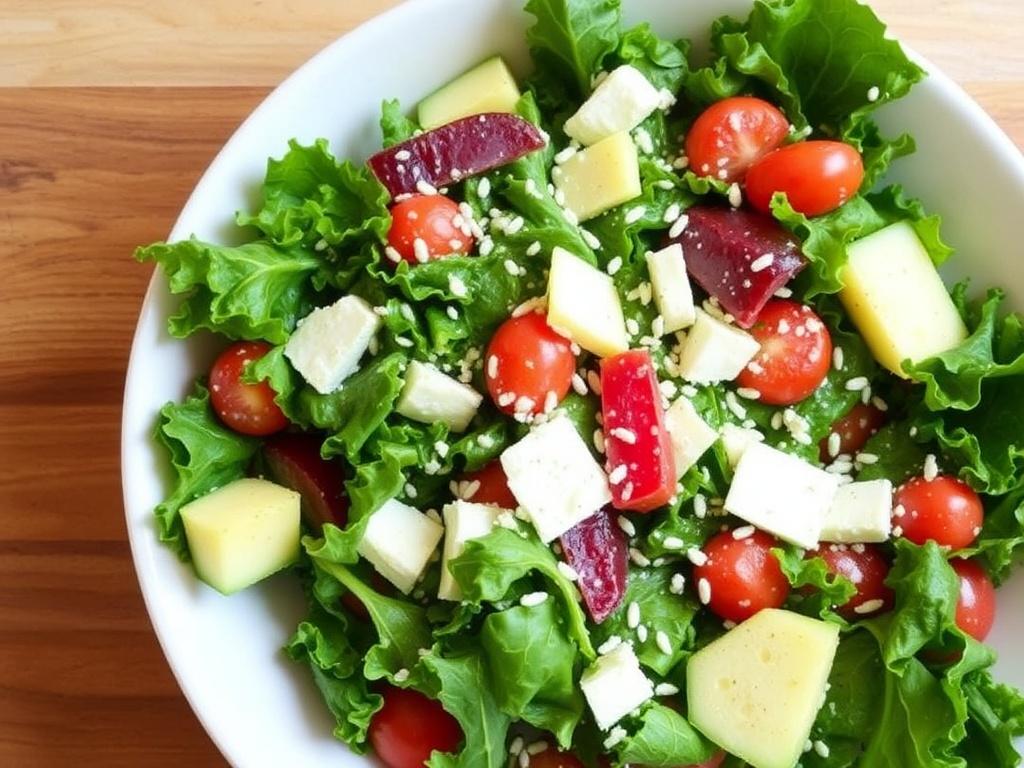
Kale Caesar Salad: A Bold Twist on a Timeless Classic

The idea of turning a familiar Caesar into a leafy, nutrient-packed dish thrills me every time I walk into the kitchen. This version replaces fragile romaine with sturdy kale, creating a salad that stands up to bold dressing, toasty croutons and richer proteins without collapsing into a soggy mess. If you love the savory, garlicky comfort of a traditional Caesar but want something heartier and more satisfying, this approach delivers. Throughout the piece I will share practical techniques, a reliable dressing recipe, crouton tips and variations that let you tailor the salad to mornings, weeknight dinners or dinner parties. Consider this a working guide: tested ideas, small experiments and the occasional personal note so you can make the salad your own.

From Tijuana to Your Table: A Short History of the Caesar

Kale Caesar Salad. From Tijuana to Your Table: A Short History of the Caesar

The original Caesar salad traces back to the 1920s kitchen of Caesar Cardini, an Italian-born restaurateur working in Tijuana who assembled a table-side mix of romaine, Parmesan, egg, lemon and Worcestershire for hungry guests. That improvisational spirit is part of the dish’s charm. Over decades the recipe migrated north and diversified; chefs added anchovies, swapped raw egg for mayonnaise and toasted up elaborate croutons. Each alteration honored the balance of salty, acidic and creamy that defines the Caesar while making room for local preferences.

When kale entered the conversation, the goal was not to replace tradition but to expand it. Kale brings structure and a green, bitter counterpoint that interacts differently with the dressing than romaine does. People who prefer a salad that feels substantial through the last bite find this leafy green a natural fit. I like to think of it as a cousin to the classic rather than a rival; the bones are the same, but the personality shifts.

Why Kale Is a Better Base for Some Occasions

Kale has a texture that tolerates vigorous tossing, heavy dressings and warm toppings without wilting quickly. That resilience makes it ideal for lunches that travel, potlucks and plates where the dressing doubles as sauce. Nutritionally, kale offers more vitamin K, vitamin C and fiber than romaine, which can matter if you eat the salad frequently and want some extra micronutrients. The difference also shows up in mouthfeel: kale fibers require a little chewing, which makes the salad feel more like a composed dish than a prelude to the main course.

There are several varieties to consider: curly kale has a peppery bite and frilly leaves, lacinato or dinosaur kale offers a smoother texture and slightly sweeter notes, and red Russian kale tends to be tender with a subtle nuttiness. For this salad I often choose lacinato because its long, flat leaves hold dressing elegantly, but I switch depending on what’s fresh at the market. Picking the right leaf is akin to choosing the right hairstyle for the face of a dish; it changes the overall impression.

Mastering the Massaging Technique

Raw kale can be tough and bitter if you don’t treat it. Massaging is the simplest way to soften the leaves, coax out sweetness and make them more tender while reducing volume so your bowl looks abundant rather than unruly. To do it, strip the leaves from the stem, stack and slice into bite-size ribbons, add a pinch of salt and a small drizzle of olive oil or lemon juice, then rub with your fingertips for two to three minutes until the leaves darken and relax. The salt draws out liquid while the oil and acid break down fibers, creating a more pleasant texture.

I often massage kale while I prep other components so the leaves have time to mellow. It’s a small act that rewards you with a silkier mouthfeel and better flavor harmony with the dressing. If you’re short on time, thinly slicing with a sharp knife works too; you will lose some tenderness but keep plenty of character. The key is to avoid shredding or pulverizing the leaves; you want chew and resilience, not limpness.

The Perfect Caesar Dressing: Ingredients and Technique

A great Caesar dressing balances acid, fat, umami and a hint of heat. Anchovy paste or filets provide the savory backbone, garlic adds bite, lemon gives acidity and good oil carries the flavors. Emulsification—turning oil and vinegar or citrus into a stable, creamy mixture—is essential so the dressing clings to the kale rather than puddling at the bottom. I favor a small whisking bowl or a blender for convenience, but the method matters less than the order: start with the flavoring agents and binders, then drizzle the oil slowly to build emulsion.

Food safety is also important. Traditional recipes call for raw egg yolk for richness and emulsifying power. You can use pasteurized eggs, gently coddled yolks, or high-quality mayonnaise if you prefer a safe shortcut. Vegan or dairy-free versions substitute cashew cream or silken tofu with nutritional yeast and capers for depth. The goal is to reach a dressing that tastes bright, savory and slightly tangy without overwhelming the kale.

Classic Anchovy-Garlic Dressing Recipe

Below is a practical ingredient table for the anchovy version I go back to most often. The quantities serve four as a main course salad or six as a side. Measure, taste and adjust; acid and salt levels can vary depending on the anchovies and Parmesan you use.

Ingredient Quantity Notes
Anchovy filets 3-4 filets Or 1 teaspoon anchovy paste
Garlic 1 clove Crushed to a paste
Egg yolk 1 large (pasteurized optional) Or 2 tablespoons mayonnaise
Lemon juice 2 tablespoons Freshly squeezed
Dijon mustard 1 teaspoon Helps emulsify
Olive oil 1/3 to 1/2 cup Extra virgin for flavor
Parmesan cheese 2 tablespoons grated Finely grated
Black pepper To taste Freshly ground

To assemble, mash the anchovy and garlic into a paste, whisk in the yolk, lemon and mustard, then add oil in a slow stream while whisking until the dressing thickens. Stir in grated cheese and adjust salt and acidity. If the mixture looks too sharp, a teaspoon of honey smooths it without changing the character. For a lighter dressing, substitute half the oil with plain yogurt and increase the lemon slightly.

Croutons That Make People Notice

Croutons are not an afterthought. They contribute warmth, texture and a toasty smell that transforms the salad from cold to compelling. Use day-old country bread, sourdough or a rustic boule; their open crumb soaks up flavor without turning to mush. Cut the bread into uniform cubes, toss with olive oil, salt and a little cracked pepper, then roast on a sheet pan until golden and crisp. Add grated Parmesan before the last five minutes to create a savory crust that echoes the dressing.

For a faster stovetop method, heat a skillet over medium, add oil and fry cubes until golden, turning often. If you want a flavored crouton, toss the bread cubes with a little garlic oil or smoked paprika before roasting. Homemade croutons elevate the plate noticeably compared with store-bought versions and they store well in a sealed container for several days. Keep them separate from the kale until just before serving so they stay crunchy.

Step-by-Step Assembly: From Components to Plate

Assembling this salad is about timing. Have your dressing ready, kale massaged and croutons cooled. Layer the components gently: place the kale in a large bowl, drizzle a little dressing and toss to coat, then taste. You rarely need the full amount of dressing; add more in small increments until the leaves are glossy but not drenched. This gradual approach keeps the salad balanced and prevents the dressing from overpowering the kale’s natural flavor.

Next add croutons and a shower of freshly grated Parmesan, then finish with a crack of black pepper and a light squeeze of lemon if you like extra brightness. If you plan to add proteins such as grilled chicken or roasted salmon, warm them slightly and place on top so they mingle with the greens without wilting the leaves. Serve on plates rather than family-style if you prefer a composed presentation; this helps the prosciutto, egg or other toppings remain distinct rather than sinking into the bowl.

Proteins and Extra Toppings: Make It a Meal

Kale Caesar adapts well to protein additions, turning it from side to main. Sliced chicken breast, charred shrimp, seared tuna or roasted chickpeas all make sensible choices. For a hearty, comfort-handling version, add warm roasted root vegetables and a soft-boiled egg. For a lighter plate, crumble white beans or toss in citrus-marinated shrimp. Think of proteins as anchors; they add weight to the plate and complement the salty, tangy dressing.

Cheese and extras can push the flavor in different directions. Pecorino Romano offers a sharper edge compared to Parmesan, while smoked Gouda introduces a savory, almost barbecued note. Nuts such as toasted pine nuts or slivered almonds add crunch and fat, while pickled red onions bring a sweet acidity. Use a single strong accent rather than several competing ones so the salad keeps its Caesar identity even as it grows richer.

Vegan and Dairy-Free Approaches

If you avoid animal products, you can still capture the deep umami of Caesar. Cooked white beans or soaked cashews blended with lemon, olive oil, Dijon and a little tamari or capers produce a creamy base. Nutritional yeast brings cheesiness without dairy while capers and a small spoonful of miso add the anchovy-like savory note. Texture matters; blend until very smooth so the dressing clings to kale in the same way as the classic version.

Top a vegan kale Caesar with roasted chickpeas for crunch and scatter toasted sunflower seeds for additional fat and texture. For a smoky, meaty element, thin slices of grilled king oyster mushrooms or store-bought smoked tempeh work well. Balancing acidity, salt and fat is slightly different without dairy, so taste frequently and adjust lemon and umami elements until the dressing sings.

Practical Tips for Weeknight Prep and Make-Ahead

Prepare components separately if you want a quick assembly during the week. Massage and store kale in a sealed container for up to three days; it will stay tender and ready to dress. Keep croutons and cheese in separate jars and make the dressing several days ahead; the flavor often improves after a day as ingredients meld. If you plan on adding protein, roast or grill in batches and portion them for two or three meals to save time later.

If you need a grab-and-go lunch, layer in a mason jar: dressing on the bottom, hearty toppings like beans or grains next, then kale on top. When ready to eat, shake the jar vigorously onto a bowl or plate so the dressing coats leaves and croutons added last stay crisp. These small habits reduce morning friction and make it easy to enjoy a well-balanced salad without last-minute stress.

Storing Leftovers and Reheating

Leftover dressed kale holds up better than a dressed romaine salad, but croutons will soften. Store leftovers in an airtight container; they will keep in the refrigerator for one to two days without significant loss of texture. If you want to refresh the salad, re-toast croutons for a few minutes in a hot oven and add them just before serving. Warm proteins can be reheated gently in a skillet or finished under the broiler for a minute to bring back crisp edges.

A practical trick I use: keep a small container of extra dry ingredients like extra Parmesan and a lemon wedge in the fridge to brighten and revive the salad when reheating. If the dressing tightens after refrigeration, stir in a teaspoon of warm water or olive oil and whisk to restore creaminess. These fixes are small but make leftovers feel deliberate rather than last night’s quick fix.

Nutrition: What Kale Adds to the Classic

Kale improves the vitamin profile of a traditional Caesar by adding more vitamin K, vitamin C, A, fiber and plant-based compounds like lutein. That said, calorie density depends heavily on dressing, cheese and added proteins. A lightly dressed kale version can be quite lean and nutrient-dense while a version with abundant oil, cheese and crostini is more indulgent. The key to healthful eating is portion control and thoughtful ingredient swaps rather than avoiding certain foods entirely.

If you want to reduce calories without sacrificing flavor, cut back on oil in the dressing and replace some Parmesan with nutritional yeast or a smaller amount of a more intensely flavored cheese. Use high-protein, low-fat toppings such as grilled shrimp or poached chicken, and keep croutons moderate. Small changes preserve the salad’s character while aligning it with dietary goals.

Wine and Side Pairings

This salad’s bright acidity and savory backbone make it versatile with drinks and sides. Crisp, unoaked white wines such as Sauvignon Blanc or a dry Vermentino complement the lemony dressing and cut through richer proteins. If you prefer red, a light-bodied Pinot Noir with bright acidity works with roasted chicken or salmon. For a non-alcoholic option, a sparkling water with a lemon twist or a dry apple cider provides refreshing contrast.

As for sides, simple roasted vegetables or a grain pilaf balance the plate without competing. A bowl of minestrone or a small antipasti board with olives and marinated artichokes makes for a satisfying starter. Keep the rest of the meal straightforward so the salad remains the focus rather than forcing flavors to compete.

Common Problems and How to Fix Them

If your kale tastes overly bitter, try massaging with lemon instead of oil and rinsing briefly under cold water before drying. Sometimes bitterness comes from stems left in the mix, so remove them carefully. If the dressing splits, whisk in a teaspoon of warm water or an additional spoonful of mustard to help re-emulsify. Over-salted dressings respond well to a squeeze of lemon or a little neutral oil to rebalance.

Soggy croutons happen when they meet warm dressing too early. Add them at the last minute or keep extra on the side for people who like textural contrast. If the salad feels dry, drizzle a tiny bit more dressing and toss gently; if it seems greasy, a few pinches of shaved Parmesan or a spritz of lemon lifts the flavors. Small adjustments during assembly save a meal from being merely edible to genuinely enjoyable.

Creative Variations to Try

Simple swaps can transform the salad. Swap croutons for roasted chickpeas for protein and crunch, add thin apple slices for sweetness and crunch, or scatter roasted beets for color and earthiness. For a Mediterranean spin, fold in roasted red peppers and kalamata olives and replace anchovies with a tablespoon of caper brine for umami. Seasonal vegetables work particularly well with kale; roasted squash and pomegranate arils in autumn are sublime.

For a smoky version, toss the kale with a small amount of smoked oil or add a few drops of liquid smoke to the dressing. Citrus zest elevates brightness in a subtle way, while a dusting of smoked paprika gives the salad a warm undertone. These tweaks let you adapt the basic idea to any season or craving without abandoning the essence of the dish.

Equipment I Rely On

Certain tools make this salad easier to prepare and more consistent. A sharp chef’s knife helps create clean kale ribbons and even crouton cubes. A sturdy mixing bowl with room to toss prevents spills and ensures even coating. For dressing, I alternate between a small whisk and a personal blender; the whisk gives control and the blender speeds up morning prep. A rimmed baking sheet is indispensable for croutons and roasted proteins alike.

Investing in a digital kitchen scale pays off if you cook often because it reduces guesswork for dressings and proteins. A microplane grater for fresh Parmesan and lemon zest is one of my favorite small appliances because it adds aroma and texture in a way pre-grated cheese cannot. These tools are modest in cost and deliver disproportionate returns in quality and speed.

My Personal Notes from the Kitchen

I first tested this version on a rainy Sunday when I needed something comforting but not heavy. I remember massaging the kale while the oven filled the apartment with the smell of garlic and toasted bread. That salad turned into a weekend repeat; friends asked for the recipe and later adapted it with roasted chickpeas when one became vegetarian. Small experiments like reducing the oil by a quarter or adding a touch of anchovy paste instead of filets came from those informal iterations at home.

What surprised me was how often people who claimed they disliked kale ended up enjoying this twist. The combination of texture, salt and bright acid reshaped their expectation of what a salad could be. It reinforced the idea that technique matters: a simple massage, the right balance in dressing and a crisp crouton can change an ingredient’s reputation. Those little discoveries keep me testing new variations even now.

Quick Checklist Before Serving

Before you bring the salad to the table, do a quick run-through of five things: taste the dressing for salt and acid, make sure the kale is tender but not mushy, warm the protein slightly, ensure croutons are crisp and finish with fresh Parmesan and black pepper. A final lemon wedge or a quick sprinkle of flaky sea salt can make a big difference. These finishing touches are the equivalent of tightening the straps on a well-made dress; they help everything look and taste intentional.

  • Taste and adjust dressing one last time
  • Check kale texture after massaging
  • Warm proteins briefly if using
  • Add croutons just before serving
  • Finish with cheese, pepper and a lemon wedge

Keeping this checklist handy has saved dinners and improved consistency. It’s a small ritual that turns hurried cooking into a confident plate you want to share.

Final Thoughts and an Invitation

Kale Caesar salad shows how a familiar recipe becomes renewed when you pay attention to texture, balance and timing. It is forgiving, adaptable and honest; it rewards small acts like massaging, toasting and tasting. Whether you make a light weekday bowl with grilled shrimp or a richer weekend version with roasted chicken and extra cheese, the dish keeps its identity while accommodating your tastes.

Try the core recipe, then experiment. Switch the kale variety, test a vegan dressing, or add seasonal produce until you find the combination that feels like yours. Cooking evolves in iterations, and this salad is the perfect canvas for that process. Enjoy the tactile pleasure of tossing leaves and the satisfaction of a plate that looks as good as it tastes.

Comfort in a Pot: Rediscovering Chicken Creole for Cold Evenings

There are dishes that feel like an embrace, and for me a steaming bowl of Chicken Creole belongs to that category. It is straightforward food that carries layers of flavor, history and practicality, the sort of meal you can make on a weeknight yet present to company without embarrassment. In this article I will walk you through the background of the dish, the pantry essentials, a reliable recipe and sensible variations that respect both tradition and a busy life. Expect practical tips, timing guides and personal notes from my own kitchen experiments. Whether you know the basics or are approaching this for the first time, the goal is to turn humble ingredients into something memorable.

Tracing Roots: Where Creole Cooking Comes From

Creole cuisine grew in a crossroads of cultures — African, French, Spanish, Caribbean, Native American and more — and each influence left a distinct mark on the methods and ingredients. In port cities like New Orleans, spices and techniques mixed freely, creating dishes that balance boldness with restraint, seasoning with respect for the primary ingredients. Unlike a single nation’s cuisine, Creole food is defined by this fusion and by an emphasis on layered cooking: building flavor in stages through aromatic vegetables, careful browning and slow simmering. Understanding that context helps when you consider how to adapt recipes; the goal is not to imitate a museum piece, but to capture the spirit of resourceful, flavor-forward cooking. The result is food meant to be shared, lively without being precious.

What Makes Chicken Creole Distinct?

At its heart, the dish pairs browned pieces of chicken with a tomato-based sauce loaded with aromatic vegetables and spices, then simmers until the flavors marry and the meat is tender. The so-called “holy trinity” — onion, celery and green pepper — often forms the base, a Creole parallel to mirepoix that sets the savory backbone. Tomatoes bring acidity and body, while garlic, bay leaf and cayenne or hot sauce add lift and warmth; some cooks finish with fresh herbs or a squeeze of lemon to brighten the whole. Texture matters: tender chicken, silky sauce and a bed of rice or crusty bread to scoop up every bit. This combination makes the dish both comforting and lively, ideal for colder months when the body craves warmth and the senses appreciate deep, layered flavors.

Essential Ingredients and Pantry Staples

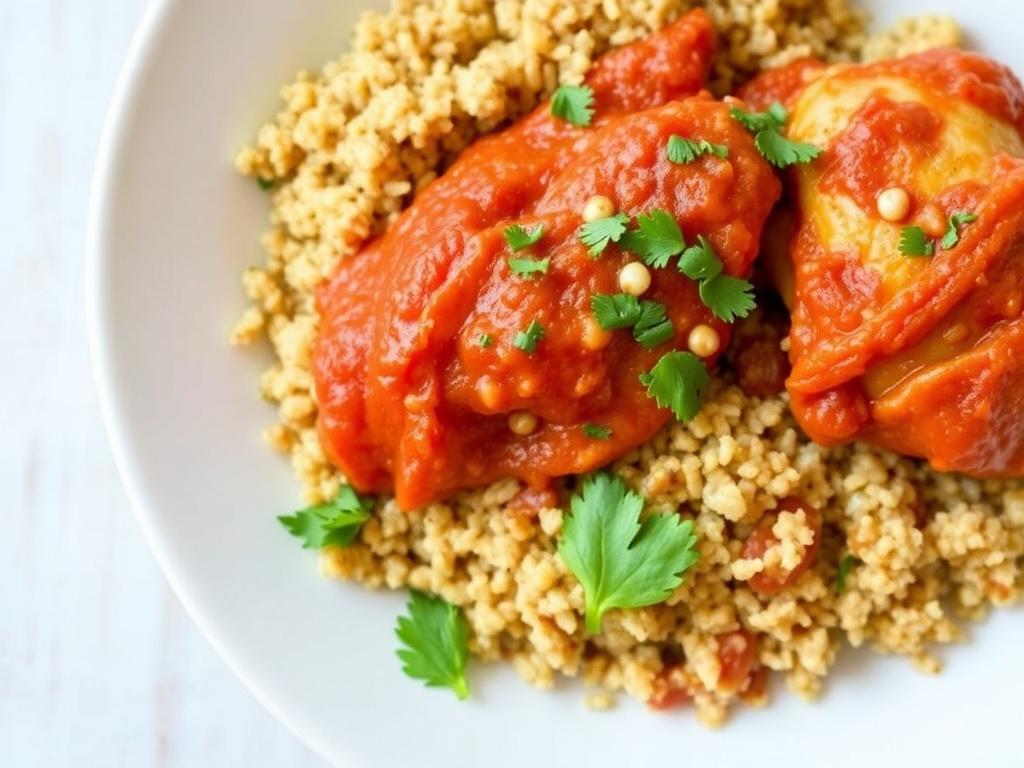
Chicken Creole. Essential Ingredients and Pantry Staples

A reliable pantry will make executing this recipe effortless. Stock up on good-quality canned tomatoes, preferably whole peeled for texture control, long-grain rice for serving, and a selection of dried herbs such as thyme and bay leaves. Fresh produce is equally important: onions, green bell peppers, celery and garlic should be on hand, along with lemons if you like a final bright note. For protein, bone-in chicken thighs deliver both flavor and moisture, though boneless pieces work when time or convenience matters. Lastly, keep neutral oil or rendered bacon grease, salt, and black pepper available; these basics form the foundation upon which the rest of the dish stands.

Spices, Heat and How Much Is Enough

Balancing spice and heat is a matter of taste, and Creole flavors tolerate boldness, but restraint often pays dividends. Start with black pepper, a pinch of cayenne or a few dashes of hot sauce, and adjust during cooking as the sauce concentrates. Smoked paprika can add depth without overwhelming, while a small amount of sugar sometimes helps tame overly acidic tomatoes. Fresh herbs like parsley and green onions used at the end bring clarity and contrast to heavier flavors. In my experience, seasoning in layers — once during browning, again during simmering, and finally at the finish — results in a more nuanced final dish than seasoning all at once.

Classic Chicken Creole Recipe — Ingredients at a Glance

Below is a compact ingredient table to help you shop and prepare. Quantities assume four servings and can be scaled with minimal adjustment in cooking times. The goal here is clarity: enough detail to allow confident substitutions without losing the integrity of the dish. If you prefer a spicier version, consider adding more cayenne or an extra jalapeño. For a milder winter variation, reduce the heat and lean on herbs and citrus to provide interest.

Ingredient Amount Notes
Chicken thighs (bone-in) 1.5–2 lb (700–900 g) Skin-on for browning; use boneless to save time
Onion 1 large Yellow or sweet onion, diced
Green bell pepper 1 large Diced
Celery stalks 2–3 Thinly sliced
Garlic 3–4 cloves Minced
Canned tomatoes 28 oz (800 g) Crushed or whole, drained if very watery
Chicken stock 1–1.5 cups Adjust for desired sauce thickness
Bay leaf and thyme 1 bay leaf, 1 tsp dried thyme Or use fresh thyme sprigs
Cayenne or hot sauce To taste Start small, finish after tasting
Rice 2 cups cooked Serve as the base

Step-by-Step: Building the Dish

Begin by patting the chicken dry and seasoning it lightly with salt and pepper; drying ensures a proper sear that adds color and complexity. Heat oil over medium-high heat in a heavy skillet or Dutch oven, then brown the chicken in batches, leaving a fond — browned bits stuck to the pan — which will enrich the sauce. Remove the chicken and reduce the heat slightly before adding the holy trinity: onion, celery and pepper; cook until softened but not caramelized. Add garlic briefly, then deglaze the pan with a splash of stock or water, scraping up the fond to release flavor. Stir in tomatoes, thyme and bay leaf, return the chicken to the pot, cover and simmer gently until the meat is tender and the sauce has thickened to your liking.

Timing and Technique Details

Manage heat with patience: too-high temperatures produce tough meat and a burnt sauce, while too-low heat prolongs cooking without improving texture. Simmering with the lid slightly ajar often yields an optimal balance, allowing steam to escape so the sauce concentrates while keeping the chicken moist. Bone-in thighs typically require 30 to 40 minutes of gentle simmering after returning to the pot; boneless pieces may be done in 20 to 25 minutes. If the sauce reduces too far before the chicken is cooked, a splash of stock restores the desired consistency without diluting flavor. Taste as you go, because the degree of acidity in canned tomatoes varies and may require a small correction near the end.

Finishing Touches and Serving

Finish with a flourish: chopped parsley or green onions scattered on top, a squeeze of lemon, and a final grind of black pepper elevate the dish from good to memorable. Serve the Creole over a fluffy mound of white rice, which absorbs the sauce and balances the heat. For crunch and texture contrast, cornbread or warm crusty bread works beautifully. If you like more richness, a spoonful of butter stirred into the sauce at the end adds silkiness. Presentation need not be fussy: a shallow bowl with rice in the center and chicken arranged on top makes for rustic, inviting plating.

Variations to Suit Your Pantry and Season

One of the strengths of this dish is its adaptability. Swap tomatoes with fire-roasted varieties for a smoky note, or add sliced okra during simmering for a traditional textural element and natural thickener. Seafood can replace chicken for a coastal twist, though the cooking time will be shorter; shrimp, for example, is best added in the last few minutes. Vegetarians can use firm tofu or a mix of mushrooms and eggplant in place of meat, increasing the umami factor with soy or mushroom broth. In winter, root vegetables such as carrots and parsnips make pleasant additions that bulk up the meal and bring earthy sweetness.

  • Swap proteins: turkey legs or thighs in colder months.
  • Spice options: smoked paprika, chipotle, or Creole seasoning blends.
  • Texture play: finish with roasted peanuts or fried shallots for crunch.

Regional Tweaks and Personal Favorites

Across households and cities, the dish shifts subtly. Some cooks embrace a lighter, tomato-forward sauce while others favor a darker, roux-thickened base; both paths have merit depending on context. Personally, I like to brown the chicken a bit longer to build color and introduce char notes, then balance the sauce with a teaspoon of brown sugar if tomatoes pull too acidic. On brisk winter nights I add a few slices of Andouille sausage during the final simmer for smokiness and extra depth. These small, deliberate choices let you create a version that feels distinctly yours while remaining faithful to the Creole approach.

Practical Tips from My Kitchen

Having cooked variations of this dish for years, a few habits improved results consistently. First, invest time in proper browning; that step is not negotiable if you want a complex sauce. Second, taste at multiple stages: after browning, mid-simmer, and right before serving; seasoning needs will change as the sauce reduces. Third, use a heavy-bottomed pot to prevent hot spots and scorching, which can ruin the sauce and force a risky rescue attempt. Finally, rest the dish briefly off heat with the lid on for five to ten minutes before serving; this allows flavors to settle and the liquid to redistribute in the meat.

Pairings: What to Serve with Chicken Creole

The traditional pairing is plain white rice, which provides a neutral platform for the sauce. Rice varieties such as jasmine or long-grain lend different textures and aromas, and a simple pilaf with a bay leaf can add subtle nuance. Vegetables work as balancing partners: sautéed greens, roasted Brussels sprouts, or a crisp cabbage slaw bring freshness and contrast to the warm, savory main. For bread lovers, buttered cornbread or a split baguette offer satisfying mopping tools. In terms of drinks, a medium-bodied white wine or a refreshing beer complements the spices without clashing.

Comfort Sides for Cold Weather

In winter, I gravitate to sides that reinforce the feeling of comfort: creamy mashed potatoes instead of rice, or a gratin for a richer meal. Slow-roasted root vegetables harmonize with the tomato base and give the plate extra heft. A simple kale salad dressed with lemon and a touch of honey brightens the meal and cuts through richness, making the overall experience less heavy on the palate. These pairings turn a single pot into a full, satisfying dinner designed to warm both body and spirit during colder months.

Storing, Reheating and Freezing

Chicken Creole stores well and often tastes better the next day as flavors meld. Cool the dish quickly, transfer to airtight containers and refrigerate for up to four days. For longer storage, freeze in portioned containers for up to three months; defrost overnight in the refrigerator before reheating. Reheat gently over low heat on the stove with a splash of stock or water to loosen the sauce and avoid drying the meat. Microwaving works in a pinch but tends to break texture; use short bursts and stir between cycles for more even warming.

Storage Method Time Tip
Refrigerator Up to 4 days Store in shallow containers to chill quickly
Freezer Up to 3 months Label with date and portion sizes
Reheating N/A Gently on stove with added liquid

Common Mistakes and How to Avoid Them

Overcooking the chicken is a frequent error; maintain a gentle simmer rather than a rolling boil to keep meat tender. Another misstep is under-seasoning early on and then trying to over-correct at the end; seasoning in stages yields a more balanced dish. Using watery canned tomatoes without reducing sufficiently results in a thin, diluted sauce; either drain excess liquid or extend the simmering time. Finally, skipping the browning step for speed sacrifices a major layer of flavor, so even when pressed for time, a quick sear is worth the few extra minutes.

Adapting the Recipe for Busy Weeknights

If time is limited, start by using boneless skinless chicken thighs and reduce simmer time accordingly; they cook faster and require less babysitting. Frozen pre-chopped mirepoix or a pre-made Creole seasoning blend can cut prep time, as can using crushed tomatoes and a bit more stock to manage sauce thickness without long reduction. A pressure cooker or Instant Pot can also speed the process: brown the chicken on sauté, then pressure-cook the combined ingredients for about 10 minutes plus natural release. These shortcuts preserve the essence of the dish while making it accessible on hectic evenings.

Scaling Up for a Crowd

When cooking for a group, scale ingredients proportionally and use the largest heavy pot you own to maintain even heat distribution. Brown the chicken in batches to avoid overcrowding, which prevents the proper sear. Longer, gentler simmering helps when quantities are large because large volumes retain heat differently and need more time for flavors to harmonize. Serve family-style in a wide, shallow dish to keep portions warm and allow guests to help themselves comfortably. A doubled recipe freezes well, so consider making a full batch if you like having ready meals during winter weeks.

Nutrition and Comfort

This dish balances protein, vegetables and a modest amount of fat, making it nutritious without being heavy. Skin-on chicken provides flavor and moisture, but you can remove skin before serving to cut calories while maintaining texture. Tomatoes contribute vitamins and a pleasing acidity, and the vegetable base adds fiber and micronutrients. For diets that require lower sodium, use low-sodium stock and avoid added salt during browning, adjusting only at the end. Overall, Chicken Creole fits well into a seasonal approach to eating that favors heartiness in colder months and lighter fare as temperatures rise.

Why This Dish Works Especially Well in Winter

There is an instinct to seek warmth and fullness in winter, and this recipe answers both: the simmering process releases comforting aromas through the house, while the thick, warmly spiced sauce delivers a satisfying mouthfeel. The use of preserved tomatoes is practical during months when fresh produce is less vibrant, and root vegetable additions extend the meal’s heartiness. On a cold evening, a bowl of this over rice provides immediate comfort and energy, making it a reliable go-to when the days are short and the air is sharp. Making a pot on the weekend also feeds several meals, reducing weekday cooking stress and leaving you more time for other comforts.

FAQ — Quick Answers to Common Questions

Is bone-in chicken necessary? No, but bones add flavor and help the meat stay juicy; choose according to time and preference. Can I make it spicy? Absolutely; increase cayenne, use spicy sausage, or finish with hot sauce. What rice pairs best? Long-grain white rice absorbs sauce nicely, though brown rice adds a nutty flavor and more fiber. How long does it take? Active prep is about 20 to 30 minutes, with simmering depending on the cut of meat, typically 25 to 40 minutes. Can I prepare components ahead? Yes; chop vegetables and brown chicken a day ahead to reduce final assembly time.

Closing Thoughts on Cooking and Sharing

Cooking Chicken Creole is as much about process as it is about ingredients: alchemy occurs when simple elements are combined with patience and small adjustments. The dish invites experimentation but rewards attention to foundational techniques like browning and layered seasoning. For me, the best moments come when friends arrive, drawn by the scent spilling from the kitchen, and the pot becomes a focal point for conversation. Keep a jar of hot sauce and a wooden spoon nearby; both will see use. Make a pot, share it, and let the comfort of this Creole-inspired meal become part of your cold-weather routine.

Sunshine in a Bowl: A Vibrant Greek-Inspired Pasta Salad for Every Occasion

This bowl of flavors catches the eye before the first forkful reaches the lips, combining bright vegetables, briny olives and tangy cheese with tender pasta. The idea is simple yet satisfying: take the comforts of a traditional Mediterranean salad and let the pasta carry textures and dressings across the plate. In this article I will walk you through ingredients, techniques and variations so you can make a dish that works as a weeknight side or a centerpiece for summer gatherings. Expect practical tips, a full recipe, and notes from my kitchen experiments over several seasons. Let’s explore how a few deliberate choices transform a humble salad into something you want to serve on repeat.

Origins and Flavor DNA: Why This Salad Feels Like the Mediterranean

The combination of tomatoes, cucumber, olives and feta has roots in classic recipes from the eastern Mediterranean, where bright, fresh produce meets bold, preserved flavors. When you swap or add pasta, the concept becomes more substantial, borrowing the same spice and herb vocabulary but offering more bite. The dressing—olive oil, acid, herbs, and a bit of garlic—carries the character of regional cooking; it is the silent partner that makes the vegetables sing. Calling it Greek is shorthand: the components reflect Mediterranean profiles rather than a strict, traditional dish. Understanding that lineage helps when you begin adapting ingredients based on seasonality and pantry staples.

What defines the taste are contrasts: crisp cucumber versus soft pasta, salty olives against creamy cheese, a lemony lift offset by a touch of sweetness from ripe tomatoes. Those opposites create the addictive tension you notice in the first forkful and then search for in every subsequent bite. The base flavors are simple, but balance matters—too much oil soaks and muffles, too much acid puckers everything shut. Once you learn the ratios and texture play, you can make the salad sing under different conditions, whether you are feeding kids at a picnic or assembling a composed plate for guests. Keep that interplay in mind while we break down the building blocks.

Key Ingredients and What Each Brings to the Table

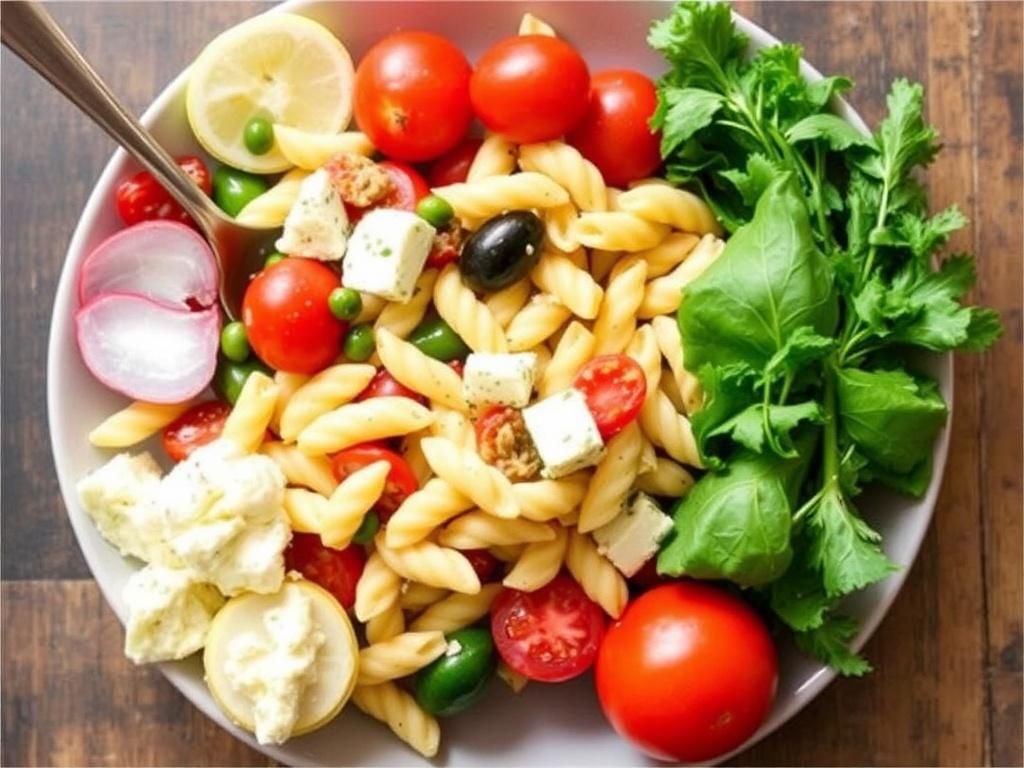
Greek Pasta Salad. Key Ingredients and What Each Brings to the Table

Start with pasta that holds dressing and carries ingredients without overwhelming them. Medium shapes work best because they trap small cubes of vegetables and cling to vinaigrette, making sure each bite contains a little of everything. Fresh produce provides crunch and moisture; choose ripe tomatoes and firm cucumbers for the most satisfying texture. Olives and cheese add salinity and richness, while fresh herbs inject an immediate aromatic lift. The dressing is critical—good oil, bright acid and a balance of seasoning turn disparate components into a unified salad.

Beyond the basics, some optional players can deepen flavor: capers or pickled peppers introduce a vinegary punch, roasted red peppers bring sweetness and smoke, and toasted pine nuts offer a buttery crunch. Proteins such as grilled chicken, shrimp or chickpeas are easy ways to turn the salad into a main course without losing the Mediterranean feel. Thinking about roles rather than recipes helps you swap intelligently when ingredients are missing. Below is a compact table to visualize ingredients and their roles in the dish.

Ingredient Role Suggested Swap
Pasta (fusilli, penne, farfalle) Texture carrier; traps dressing and small bits Gluten-free pasta, orzo
Tomatoes Juice and sweetness; acid balance Roasted cherry tomatoes if out of season
Cucumber Fresh crunch; cooling element Celery or bell pepper for crunch
Olives (Kalamata) Briny counterpoint; aroma Capers or chopped cornichons
Feta Creamy-salty finish Ricotta salata, halloumi
Olive oil & lemon Dressing backbone; brightens flavors Sherry vinegar or red wine vinegar

Choosing the Right Pasta Shape

The shape determines how the dressing and bits of produce behave in your mouth. Twists and spirals like fusilli catch oil and small chunks so every forkful feels purposeful, while short tubes such as penne create hollow pockets that trap dressing. Avoid overly thin long pasta that separates the ingredients into different bites. For gatherings where you want the salad to look homogenous, mid-sized shapes deliver the best visual and textural balance. When in doubt, pick a shape you enjoy eating—this is a low-risk, high-return choice that pays off immediately.

Cook the pasta to al dente, leaving a slight bite so it does not dissolve after sitting with the dressing. Rinse only if you plan to serve the salad chilled and want to stop cooking; otherwise, toss hot pasta briefly with a little oil to prevent clumping and let it cool. Salt the cooking water generously; this is the only chance to season the interior of the noodles. If you want to add whole-wheat or legume pasta for nutritional reasons, account for slight differences in texture. Those alternatives can turn the dish into a heartier fare without losing the original Mediterranean spirit.

Vegetables, Herbs and Cheese: Building Brightness and Depth

Fresh vegetables should be crisp and well-drained so they don’t water down the salad. I like to remove cucumber seeds if they’re watery, and to deseed large tomatoes to prevent excess moisture. Herbs change everything: parsley and oregano give a classic note, mint or basil brings a fresher edge depending on the mood. Use firm cheese that holds up to tossing; crumbled feta is traditional, but small cubes of aged pecorino or ricotta salata work if you want a different profile. Chop items to similar sizes so every bite delivers balance and a pleasing mouthfeel.

When washing vegetables, dry them well. Excess water dilutes dressing and shortens the salad’s useful life. Think about color as well as flavor—red, green and purple make the bowl appealing and appetizing. If you like a smokier touch, charred peppers or grilled eggplant add complexity without crowding the main ingredients. For crunch, toasted nuts such as almonds or pine nuts taste excellent and contrast with softer elements. Small finishing accents, used sparingly, elevate the salad from everyday to memorable.

Dressing: The Glue That Brings It All Together

A balanced dressing blends oil, acid, seasoning and aromatics to tie components into a cohesive whole. Olive oil is the natural choice, offering fruitiness and body; pair it with lemon juice or a gentle vinegar for acidity. A teaspoon or two of mustard can help emulsify the dressing and add a faint sharpness, while a touch of honey smooths edges and balances aggressive acidity. Add garlic finely minced or rubbed as a paste for a deeper savory dimension, but use it sparingly to avoid overpowering more delicate ingredients. Salt and pepper are vital, but taste as you go because olives and cheese will bring their own salinity.

For a classic update, whisk together extra virgin olive oil, fresh lemon juice, red wine vinegar, a teaspoon of Dijon mustard, crushed garlic and a pinch of dried oregano. Adjust seasoning based on how salty your feta and olives are. A good trick is to whisk the dressing separately, taste, and then add it gradually to the salad so you control saturation. Leftover dressing stores well in the fridge for several days and makes a quick base for other salads. The right vinaigrette lifts the whole bowl, so invest time in simple, precise seasoning.

Basic Lemon-Oregano Vinaigrette (Small Batch)

Mixing a small batch of dressing allows for easy adjustments and ensures the flavors remain vivid rather than muted by excess oil. Combine three tablespoons of extra virgin olive oil with two tablespoons of lemon juice and one tablespoon of red wine vinegar. Add one teaspoon of Dijon mustard, half a teaspoon of dried oregano and a clove of garlic mashed to a paste. Season with salt and freshly cracked black pepper, then whisk until slightly emulsified. Taste and tweak—more lemon for brightness, a touch more oil if it feels too sharp.

This recipe is intentionally flexible; use less oil for a lighter coating or increase acidity for a punchier profile. If you prefer a creamier dressing, add a spoon of Greek yogurt or a splash of olive brine to emulate a richer texture. Herbs can be fresh rather than dried; add them at the end to keep their color and aroma. Experimenting with these small swaps will help you develop a signature dressing that complements your preferred ingredient mix. Keep in mind that the dressing should enhance, not mask, the salad’s components.

Step-by-Step Recipe: Mediterranean Pasta Salad

This practical recipe yields approximately six to eight servings and is sized for sharing at a small gathering. Prepare the pasta and let it cool slightly before combining with other ingredients so the dressing adheres but vegetables remain crisp. Chop vegetables into bite-sized pieces and measure salty elements like cheese or olives to maintain balance. Toss gently but thoroughly to distribute dressing without breaking fragile ingredients. Taste and adjust seasoning before chilling or serving so the flavors settle into a harmonious blend.

Below you will find the ingredient list and step-by-step instructions. The method emphasizes timing and technique to keep textures distinct and flavors bright. If you plan to prepare ahead, follow the make-ahead tips later in the article to preserve freshness. This recipe is deliberately modular so you can scale quantities up or down depending on the number of guests. Treat it as a template rather than a rigid formula; small personal touches often make the dish more memorable.

Ingredients

1 pound (450 g) short pasta such as fusilli or penne, 2 cups cherry tomatoes halved, 1 large cucumber diced, 1 red bell pepper diced, 1/2 cup pitted Kalamata olives halved, 1 cup crumbled feta, 1/4 red onion thinly sliced, 1/4 cup chopped fresh parsley, 1/4 cup chopped fresh oregano or mint optional, and dressing from the vinaigrette recipe above. For optional protein add 2 cups of chopped grilled chicken or a can of drained chickpeas. Salt and freshly ground black pepper to taste. Extra virgin olive oil for finishing if needed. Lemon wedges to serve for additional brightness.

Method

Bring a large pot of salted water to a boil. Cook the pasta according to package instructions until al dente, then drain and rinse under cool water to stop cooking. While the pasta cools, prepare vegetables, herbs and cheese, keeping them in a large mixing bowl. Whisk the vinaigrette in a separate bowl and season it to taste. Add the drained pasta to the mixing bowl, pour dressing gradually and toss gently to combine; adjust seasoning and add more oil or vinegar if necessary.

Fold in the olives and crumbled cheese last so they remain distinct and do not dissolve into the dressing. If adding grilled protein, toss it in during the final stage so it warms through without wilting vegetables. Let the salad rest at room temperature for 15 to 30 minutes to allow flavors to marry, or chill it for an hour for a well-set salad. Before serving, taste for salt and acidity and sprinkle fresh herbs on top for a lively finish. Serve with lemon wedges and an extra drizzle of olive oil if desired.

Variations: Tailoring the Salad to Your Needs

This recipe is a starting point. For a vegan adaptation, omit cheese or substitute with cubed marinated tofu or a plant-based cheese that mimics brininess. For a gluten-free version, choose pasta made from rice, corn or legumes—chickpea pasta works well and adds protein. If you prefer a warm salad, toss slightly warm pasta with roasted vegetables and a lighter dressing so it does not congeal. Seasonal fruits like diced peaches or pomegranate seeds add a pleasant sweetness in summer and winter respectively. The idea is to preserve the balance of salty, fresh, and acidic while playing with textures.

Another popular makeover includes swapping feta for halloumi, searing the cheese until golden and serving it on top for a contrasting hot-cold element. For a smoky angle, add strips of charred bell pepper and a splash of smoked paprika to the dressing. To make it heartier for a main dish, add grilled prawns, sliced sausage or a generous portion of roasted chickpeas. These variations let you design a bowl that fits dietary needs, available ingredients, and the season, all while retaining the Mediterranean spirit at the core.

Picnic and Potluck Friendly Adaptations

At outdoor events you want the salad to stay fresh without refrigeration for a short period. Use sturdy vegetables and omit ingredients that break down quickly, like juicy heirloom tomatoes. Consider packing dressing separately and tossing right before serving to avoid soggy noodles. Use firm cheeses instead of soft ones, and avoid leafy herbs that wilt easily; chopped parsley is more resilient. Choose a vessel that keeps the salad shaded and cool to preserve texture during transport.

For potlucks you can scale the recipe easily and transport components in separate containers for last-minute assembly. Layer pasta, vegetables and cheese in a large bowl, with dressing in a jar on the side so guests can add as much as they like. This approach reduces the chance of an overly oily or under-seasoned batch. Label the dish if there are allergies or dietary modifications. Little logistical choices like these reduce stress and keep the salad tasting as intended.

Storage, Make-Ahead and Reheating

Stored properly, the salad will keep in the refrigerator for up to three days, though textures shift slightly over time as pasta absorbs dressing and vegetables soften. To maximize freshness, store the dressing separately when possible. If you must refrigerate the fully dressed salad, add an extra splash of acid and a drizzle of olive oil before serving to revive brightness. Containers with tight lids help prevent odors from other foods altering the salad. For best quality, enjoy the salad within the first 48 hours.

To make ahead for a party, prepare the pasta and dressing a day in advance and chop vegetables the morning of the event. Combine everything a couple of hours before guests arrive to allow flavors to meld without allowing the pasta to go limp. If the salad becomes cold and firm, let it sit at room temperature for 20 minutes before serving to bring flavors forward. Reheating is rarely necessary; if you want a warm variation, heat the pasta and toss quickly with roasted vegetables and a lighter amount of dressing. Small timing adjustments preserve longevity and taste.

Serving Suggestions and Pairings

This salad pairs well with grilled proteins—think lemon-herb chicken or garlicky shrimp—and also complements simple mains like roasted fish or lamb. It works as a side to sandwiches at backyard gatherings or as a bright counterpoint to richer mains such as meatballs or braised dishes. For a complete Mediterranean spread, serve it with hummus, warm pita bread and a platter of grilled vegetables. Wine pairings lean toward crisp whites like Assyrtiko or a light rosé which echo citrus and herb notes without overpowering the salad.

Think about temperature and contrast when plating: a cool salad alongside a hot skewer increases pleasure, while citrus wedges and a pitcher of iced water dressed with cucumber slices refresh the palate. For a buffet, use shallow bowls so guests can serve themselves without crushing the ingredients. Garnish with whole herbs, lemon zest and a little extra crumbled cheese to make the dish appear intentional and fresh. These small staging choices influence perception as much as ingredients.

Troubleshooting Common Issues

If the salad tastes flat, it usually needs more acid or salt—add lemon juice or a splash of vinegar and a pinch more salt, stirring and tasting slowly. If it is too oily, a squeeze of lemon brightens and disperses excess oil; a spoonful of mustard can also help emulsify and bind the dressing to the pasta. To fix a watery salad, drain any excess liquid with a slotted spoon and let the mixture sit so ingredients settle. If vegetables have gone limp, refresh with crisp additions like radish or toasted nuts. Keeping a small reserve of raw, crunchy ingredients on hand is a practical fix when textures go soft.

When the pasta absorbs too much dressing overnight, add a few tablespoons of fresh dressing or an extra drizzle of good olive oil before serving. If the salad seems over-salty because of olives and cheese, toss in extra pasta or a handful of blanched, cooled snap peas to dilute the intensity. For an under-seasoned batch, taste and correct in small increments; flavors deepen as the salad rests, so wait a bit after adjustments. These remedies are small but effective and will rescue a lot of situations that can arise in busy kitchens.

Nutritional Notes and Smart Substitutions

The salad can be tuned to various nutritional goals. For higher protein, use legume-based pasta or add grilled chicken, tuna or beans. To increase fiber, include more vegetables and swap refined pasta for whole-grain or bean-based alternatives. For lower fat, reduce oil and increase lemon juice, but keep some fat to carry flavors and aid nutrient absorption. If managing sodium intake, rinse canned olives and reduce the amount of cheese, then compensate with fresh herbs and citrus for flavor. Small swaps maintain the spirit of the dish while aligning it with dietary needs.

For a nutrient-dense bowl keep the vegetable-to-pasta ratio high and incorporate colorful produce to broaden vitamin profiles. Seeds like pumpkin or hemp sprinkled on top add healthy fats and a different crunch. Be mindful of portion sizes if serving with additional rich dishes at a meal. The flexibility of the recipe means you can build a satisfying plate that suits both flavor preferences and health considerations. Clear intentions at the start make the right substitutions easier to choose.

Personal Notes: How I Make This Salad My Own

I first started riffing on a Mediterranean salad years ago after a beach trip where a simple pasta bowl felt like the perfect post-swim meal. Over time I learned to scale back the dressing slightly and to add extra herbs because my family craved brightness. One memorable variation included charred peaches and grilled halloumi at a summer barbecue; the smoky-sweet combination was unexpectedly good and quickly became a favorite. Another small habit I’ve kept is to toss the salad with half the dressing, let it rest, then add more if needed—this prevents oversaturation and keeps textures lively. These little habits developed through trial and improve the dish without complicated techniques.

At home I often make a smaller portion as a weeknight side, doubling up the vegetables and halving the pasta to keep things light. For larger gatherings I scale up and keep components separate for last-minute assembly, which reduces stress and preserves quality. Friends learned to expect this salad at potlucks because it travels well and suits a range of palates. Sharing these experiments has led to further tweaks based on feedback, which is the fun part of developing any recipe. Food evolves when it’s shared, and this salad is no exception.

Final Thoughts

Creating a Mediterranean-inspired pasta salad is less about strict adherence to a single recipe and more about assembling the right balance of texture, acidity and salt. With a few core ingredients and an adaptable dressing, you can produce a dish that feels fresh, bright and satisfying. Small technical choices—pasta shape, timing when to add cheese, how to store leftovers—have an outsized impact on the final result. Once you internalize the basic ratios and texture goals, improvisation becomes a strength rather than a risk. Enjoy the process of making it your own and serving it often; good salads reward repetition and thoughtful tweaks.

Whether for a casual lunch, a family dinner or a larger gathering, this style of pasta salad is a dependable crowd-pleaser. Keep a list of your favorite swaps and revisit the recipe across seasons to capture produce at its best. Expect subtle changes each time you make it; that variety keeps it interesting while the core flavors remain distinct and appealing. Pack the bowl for a picnic, slide it onto the table for a weeknight supper, or present it as part of a Mediterranean spread—either way you’ll find it versatile and reliable. The real joy is in watching ingredients come together into something that tastes of sun and company.

Warm Hearth, Cold Nights: Sourdough Bread for Winter Comfort

There is something elemental about a loaf that comes out of the oven while snow drifts past the window. Sourdough bread for winter is not only about calories or crust; it is a ritual that warms hands and slows the mind. In cold months, the rhythm of feeding a starter, mixing dough, and waiting through long fermentations becomes a comforting calendar, a way to mark days that otherwise blur together. This article lays out practical strategies, recipe adaptations, and small rituals to help you keep baking reliably when the kitchen is chilly. Expect clear timelines, sensible troubleshooting, and a few of my own habits learned over many winters at a modest home oven.

Why Sourdough Works Especially Well in Winter

Sourdough thrives on time, and winter gives you that gift. Slower fermentation in cooler air deepens flavor, encouraging the complex acids and aromatics that make a loaf taste like the season itself. The same slower pace means you can stage bread-making around life: mix in the evening, shape the next morning, bake before dinner. Additionally, the tang of sourdough pairs beautifully with winter foods — stews, roasted vegetables, sharp cheeses — enhancing meals rather than competing with them. Embracing sourdough in winter is less about forcing speed and more about leaning into a gentle, patient process that fits the season.

There is a practical side too. Flour and water behave differently in cold rooms. Dough firms up, hydration feels lower, and yeast activity drops. That forces you to refine technique: adjust hydration, lengthen folds, and manage a starter that becomes sluggish. The payoff is a loaf with better structure and nuanced flavor, provided you respect the slower fermentation. In short, winter rewards patience; small adjustments produce consistent, deeply flavored bread.

How Cold Affects Your Starter and Dough

Temperature is the main variable that shifts when season changes. A starter that doubles in four hours at 24°C may need a full day at 16°C. That affects timing for builds, levain strength, and the schedule for mixing. Cold also changes the balance between lactic and acetic acid production — cooler, longer ferments favor acetic notes, which can give bread pleasant sharpness but risk excessive sourness if uncontrolled. Recognizing these shifts is the first step toward mastering winter sourdough.

Practically, you will see differences in dough feel. It may seem slack at first or stiff once flour fully hydrates. Gluten development can be slower; dough may require a few more folds or extended autolyse. Fermentation windows widen, and proofing times lengthen. These are not problems but clues: read the dough rather than the clock, and you will bake more predictably.

Managing Starter in Low Temps

Keeping a lively starter in winter requires small interventions that preserve flavor and vigor. If your kitchen drops below 18°C, consider keeping your jar in a warmer microclimate — oven with light on, near a radiator, or inside an insulated cooler with a warm bottle. Feed more frequently with slightly warmer water to compensate for the chill. Alternatively, work with a cooler rhythm: build a levain with multiple refreshments to boost microbial activity before mixing the dough.

Another approach is to adjust feeding ratios. A higher inoculation of fresh flour (lower starter percentage) shortens lag time. Conversely, using a fully ripe, mature starter for the levain can add robust acidity and strength without rushing fermentation. I often move my main jar to a counter spot that holds 20–22°C for a few hours after feeding during deep winter; that small habit keeps the starter predictable without artificial heating.

Adjusting Hydration and Proof Times

Hydration feels subjective in the cold. A 75% hydration dough in summer may behave like 72% in a chill kitchen. Start by treating hydration as a flexible parameter rather than a fixed target. Add water gradually during mixing and stop when the dough feels cohesive and slightly tacky. You can maintain the same weight ratios while allowing slight adjustments that account for flour absorption differences and room temperature.

Proof times are longer, often two to three times what they are in warm months. Plan your schedule with that in mind: mix in the evening to take advantage of overnight bulk fermentation, or retard in the fridge for texture and flavor control. When retarding, anticipate that a cold dough will require a warm-up period before going into the oven. Remove from the fridge 60 to 90 minutes before baking so the crumb can rebound and the oven spring improves.

Flour Choices and Winter Flavors

Winter invites heartier flours and bolder flavors. Whole grains, rye, and toasted seeds bring warmth to the palate and help the loaf stand up to saucy winter fare. Rye, in particular, adds malty depth and moisture retention, useful when heating air dries bread faster. Blending 10–30% whole grain into a base of strong white flour creates aromatic complexity without overburdening gluten development.

Experiment with toasted additions like sunflower, pumpkin, or sesame seeds for a nutty note. Cooked grains such as barely or rolled oats can add body and keep crumbs tender. Be mindful that whole grain flours absorb more water and can speed up fermentation somewhat due to available enzymes, so recalibrate hydration and proofs. In my practice, a 20% rye-supplemented dough in winter produces a loaf that feels both rustic and decisive, perfect for long soups and midday smears of butter.

Techniques for Reliable Winter Loaves

Technique becomes the lever you use to control inconsistent conditions. Autolyse gains importance in cold months: mixing flour and water and letting the mixture rest 30 minutes to two hours jumpstarts enzymatic activity and eases gluten formation later. During autolyse, protein and starch undergo transformation that reduces the need for forceful kneading — helpful when the dough is cold and reluctant to develop.

Another essential is a methodical folding schedule. Instead of one long knead, use a series of gentle stretch-and-folds spaced every 30 to 45 minutes during bulk fermentation. This builds strength gradually, improves gas retention, and keeps dough temperature from rising too quickly. With colder doughs, fewer but more deliberate folds are sometimes better than frantic handling. The goal is a structure that supports a lively oven spring despite lower ambient heat.

Autolyse and Longer Ferments

Extending autolyse in winter is a practical way to compensate for sluggish activity. An extended 60 to 120 minute autolyse softens the dough, develops flavor, and reduces oxidation from excessive mixing. It increases extensibility, which helps shaped loaves expand rather than tear. If you include whole grains, add them later to minimize their enzyme effect on gluten, or reserve a portion of flour for final incorporation.

Longer ferments enhance complexity but require careful timing. If you extend bulk fermentation at cool temperatures, watch for signs like dough doming, increased softness, and a subtle tang. Resist the clock; instead, follow these sensory cues. When bulk fermentation has built volume and visible gas but still retains tension, it is time to shape. That balance leads to crumb texture that is open but not gummy.

Cold Retardation and Oven Spring

Cold retardation — proofing shaped loaves in the refrigerator overnight — is one of winter baking’s superpowers. It slows fermentation, concentrates flavor, and improves scoring definition. When done right, it also helps with scheduling: bake in the morning or evening when you have time without losing quality. Use a well-floured basket and a snug cover to prevent skinning, and be mindful that a chilled dough benefits from a brief warm-up before baking.

To maximize oven spring, preheat thoroughly and use steam during the first 10–15 minutes of bake. Cast-iron Dutch ovens or cloches trap moisture and give the crust a shiny sheen. If your oven struggles with consistent heat in winter, preheat for a longer period and consider heating baking stones or steel plates. Even small improvements in initial heat retention translate to noticeably better lift and crust.

Shaping, Scoring, and Baking Surface

Shaping becomes more deliberate in cold weather. Slightly tighter shaping builds surface tension, which helps the loaf hold gas during a slow, cold proof. Avoid over-tightening, though, as that can cause tearing or dense crumb. Rest shaped loaves on well-floured couche or banneton to maintain form while they slowly ferment — a neat trick to ensure even expansion when they finally hit the hot oven.

Scoring is essential to guide the oven expansion that leads to an attractive loaf. In winter, scoring slightly deeper can help because chilled dough sometimes has a firmer surface. Use a sharp lame and confident strokes to create predictable eruptions. Bake on a hot surface to promote spring, and if you do not have a Dutch oven, introduce steam by adding boiling water to a preheated tray or using a spray bottle in the first minutes of baking.

Recipes and Timelines

Below are two reliable recipes adapted for cold kitchens, with schedules you can follow. The first is a simple white-strong sourdough that balances consistency and flavor. The second brings rye and seeds into the mix for a heartier loaf. Each recipe emphasizes timing over temperature: watch the dough rather than the clock. The table following outlines a sample timeline for an overnight method that works well when the kitchen is cool.

Action Approx Time Notes
Feed starter / build levain 6–10 hours before mix Use slightly warm water; ensure active, bubbly levain
Mix + autolyse 30–90 minutes Autolyse helps gluten in cool conditions
Bulk fermentation with folds 4–8 hours Longer in winter; perform 3–5 folds spaced out
Pre-shape and rest 15–30 minutes Short bench rest before final shaping
Final shape and cold retard Overnight 8–14 hours Refrigerate in banneton-lined proofing container
Bake 35–45 minutes Start covered for first 20–25 minutes, then uncovered

Simple Country Sourdough (adapted for winter)

Ingredients for a 900–1000 g loaf scale: 500 g strong white flour, 100 g whole wheat flour, 375–400 g water (75–78% hydration adjusted), 100 g active levain, 10 g salt. For cold kitchens, aim for 75% hydration and change a little based on flour brand and feel. The levain should be active, but if your kitchen is cold, you can boost activity by refreshing it twice before mixing or using slightly warmer water during the build.

Method: mix flour and most of the water, reserving 25 g to adjust, and autolyse 45–90 minutes depending on how cold the dough feels. Add levain and salt, then incorporate through gentle pinching and folding. Perform 3 to 4 stretch-and-folds every 30–45 minutes over 3–5 hours until the dough shows mid fermentation rise and windowpane signs. Pre-shape and rest for 20 minutes, final shape into a boule or bâtard, and retard in the fridge overnight. Bake next morning with steam, starting at 240°C covered for 20 minutes, then uncovered at 220°C until crust is deep brown. Allow cooling before slicing to set crumb.

Seeded Rye-Wheat Winter Loaf

Ingredients: 400 g strong white flour, 100 g medium rye, 300–320 g water (68–72% total hydration), 80–100 g active levain, 10 g salt, 50 g mixed toasted seeds and nuts, 10 g honey or molasses (optional). A bit of rye adds savory depth and moisture, while toasted seeds keep the crumb interesting and satisfying for winter meals. Lower hydration than the white loaf helps control stickiness from the rye.

Method: toast seeds lightly, mix flours and water for a 45–60 minute autolyse, then add levain and salt. Incorporate with gentle folding, and fold in seeds during the second fold to distribute evenly. Bulk ferment 4–6 hours with 3 folds, shape, and retard overnight. This loaf benefits from a slightly longer bake to develop color and caramelized interior flavors. The molasses is optional but provides a rounded sweetness that pairs well with rye’s earthiness.

Equipment and Oven Tricks for Cold Kitchens

Sourdough Bread for Winter. Equipment and Oven Tricks for Cold Kitchens

Certain tools make winter baking far more predictable. A digital thermometer helps you understand the real temperature of starter and dough, which is more useful than guessing from ambient conditions. A heavy Dutch oven or cloche traps steam and keeps loaf edges from drying too quickly, producing better oven spring. Baking steels or stones store and radiate heat steadily, compensating for ovens that struggle with cold ambient temperatures.

Simple oven tricks also improve results. Preheat longer than usual, ideally 45–60 minutes if using a stone. Introduce steam by placing a tray of boiling water in a lower rack or by tossing a few ice cubes onto a heated pan; both techniques protect crust formation during the initial oven period. If you have an oven thermometer, check its accuracy — small differences in actual temperature show up as poor color or underbaked interiors in winter.

  • Essential: digital thermometer for dough and oven
  • Useful: Dutch oven or cast-iron pot for steam retention
  • Helpful: baking steel/stone and a lame for scoring
  • Nice-to-have: proofing basket (banneton) and couche

Storage, Refreshing, and Using Leftover Loaves

Winter air can dry out bread quickly, so storage matters. For day-to-day use, keep loaves in a cotton bag or wrapped in a clean kitchen towel at room temperature; this balances crust and crumb so the crust stays crisp without the interior collapsing. For longer storage, cut and freeze in slices; this preserves crumb quality and makes quick breakfasts easy. Thaw at room temperature or toast slices directly from the freezer.

Reviving a stale loaf is straightforward and satisfying. Lightly sprinkle the cut side with water and reheat in a hot oven for 5–10 minutes to restore crust texture and soften the crumb. Stale sourdough also excels turned into croutons, breadcrumbs, or a bread pudding — uses that transform rather than lament older loaves. I keep a small box in the freezer specifically for slices intended for toast and another for thick slabs used in savory bread pies during holiday cooking.

Troubleshooting Common Winter Problems

Cold months introduce a handful of recurring issues: slow rising, dense crumb, over-acidic flavor, and under-browning. Start with temperature checks — if your starter is sluggish, warm it briefly; if the dough isn’t rising, shorten levain build or use warmer water in the mix. Dense crumb often results from insufficient gluten development or over-retardation; increase folds or reduce fridge time slightly to preserve oven spring. Watch for signs rather than alarms.

The table below pairs common winter symptoms with straightforward fixes so you can act quickly without second-guessing.

Problem Likely Cause Fix
Slow or no rise Low dough temperature or weak levain Warm starter, use slightly warmer water, prolong levain build
Excessive sourness Long cold ferment favoring acetic acids Shorten cold retard, increase levain inoculation, use warmer final proof
Gummy crumb Underbaked or too-high hydration for cold conditions Extend bake time slightly, reduce hydration by 2–4%
Poor oven spring Weak surface tension or chilled loaf not warmed Tighten shaping, warm loaf 45–75 minutes before bake

Personal Notes and Seasonal Rituals

Baking through winters has shaped small rituals that anchor my day. I feed my starter mid-afternoon and leave it near the kettle, where heat from brewing tea keeps it lively. On long cold nights I favor an extended autolyse and slow ferment; this gives me morning bread for the table. These small adjustments feel less like workaround and more like collaboration with the season, a way of letting winter influence the process rather than fight it.

A memorable winter ritual in my kitchen is the Saturday bake. I mix a dough late in the evening, shape and retard overnight, bake the loaf in the morning, and share warm slices with neighbors. That loaf becomes the hub for social contact during months when staying inside tends to isolate. Sourdough in winter is therefore a practical comfort and a social one; bread built slowly is easy to share.

Plan for a Winter Baking Routine

Consistency benefits from a simple repeatable plan. Choose two base recipes — a white country loaf and a whole-grain loaf — and rotate them through the week. Keep your starter schedule aligned with these recipes so you always have an active levain ready. Set fixed times for mixing and for shaping, adapting only when your schedule forces you otherwise. This routine turns baking from an occasional event into a steady part of life in cold months.

Here is a sample weekly rhythm that balances effort and results: two larger bakes on the weekend to cover daily needs through the week, with a midweek refresh loaf for sandwiches. Use cold retard for scheduling flexibility and freeze surplus slices. This reduces daily pressure while keeping your household supplied with fresh, flavorful bread. Adopt the cadence that fits your life and modify hydration or proofs as your kitchen temperature changes through the season.

Winter sourdough is a conversation between patience and technique. Accept the slower pace, learn to read dough rather than the clock, and use tools and schedule tricks to support your process. The result is a string of loaves that taste like the season — rich, robust, and suited to warm kitchens and cold nights. Bake often, share freely, and let the rhythm of sourdough carry you through the winter months with warmth and steady satisfaction.

Hearty, Hands-Off Comfort: Slow Cooker Quinoa Chicken Cacciatore That Wins Weeknights

Imagine the warm, familiar flavors of a rustic Italian stew transformed into a lighter, grain-forward dish that practically cooks itself. This Slow Cooker Quinoa Chicken Cacciatore brings tender chicken, bright tomatoes, earthy mushrooms and protein-rich quinoa together in one pot, yielding a comforting meal with less fuss and more texture. It is designed for busy evenings when you want something nourishing on the table without standing at the stove. In the paragraphs that follow I will explain how this dish works, why quinoa is an inspired pairing, the best techniques for slow cooker success and a reliable recipe you can adapt to your pantry. Expect practical tips, a clear method and a few small shifts that lift the result from good to memorable.

What cacciatore really is and why it pairs with quinoa

Cacciatore translates as hunter style and traditionally features chicken braised in tomatoes, wine, onions, peppers and herbs. The classic has a rustic, saucy character that loves good bread or pasta, but it also welcomes grains and lighter sides. Quinoa, with its slightly nutty flavor and fluffy texture, absorbs saucy flavors while adding protein and a pleasant bite, making it a great alternative to pasta or polenta in this context. Because quinoa cooks differently than wheat-based starches, it changes how you approach the stew; timing and liquid balance matter. Understanding those differences is the key to a satisfying quinoa-enhanced cacciatore.

Quinoa is a seed, not a grain, and contains all nine essential amino acids, which makes it valuable in meals centered on lean protein like chicken. When paired with simmering tomato sauce and aromatic herbs, quinoa helps turn the dish into a complete plate without feeling heavy. The texture contrast — silky shredded chicken against the slightly toothsome quinoa — is pleasant and keeps each bite interesting. Nutritionally, you get fiber, plant-based protein, and a lower glycemic profile than white pasta. For anyone looking to make meals that feel indulgent but are steady and nourishing, this swap pays off.

Why a slow cooker works for this recipe

A slow cooker excels at gentle, long braises and extracting flavor without constant attention, which suits the stew aspect of chicken cacciatore. Low, steady heat breaks down connective tissue in darker cuts of chicken, rendering meat succulent and falling-apart tender. The appliance also concentrates aromas, allowing tomatoes, garlic, and herbs to knit together while you go about your day. However, quinoa does not benefit from extended, all-day simmering. It becomes pasty if exposed to too much heat and liquid for too long. That tension is easily resolved by timing; let the chicken and sauce cook slowly, then introduce the quinoa near the end.

Another slow cooker advantage is volume control: you can make a large batch, refrigerate portions, and reheat without losing much quality. Sauces often taste better after resting because flavors continue to marry in the cold and revive on reheating. If you are feeding a family or preparing lunches for the week, this trait turns the slow cooker into an ally rather than just a convenience. With modest planning, the slow cooker yields both depth of flavor and efficient meal prep.

Key ingredients and what each brings to the pot

Choosing the right components matters more here than in some faster recipes, because slow cooking amplifies every flavor. Start with bone-in, skin-on chicken thighs if you want the most forgiving texture and greatest depth; the bones and skin add gelatin and mouthfeel. If you prefer boneless breasts, trim them and watch the cooking time to avoid dryness. San Marzano or other plum tomatoes give a balanced acidity; diced tomatoes with their juices create the body of the sauce. Bell peppers and onions provide sweetness while mushrooms add umami and a meaty counterpoint to the quinoa.

Garlic, crushed red pepper flakes and a mix of herbs make the sauce sing: oregano and thyme are traditional, but a bay leaf contributes a subtle, rounded background note. A splash of dry red wine lifts and deepens the sauce, although it is optional; a little balsamic vinegar can stand in if you prefer not to cook with alcohol. For quinoa, pick a white or tri-color variety that is well rinsed to remove saponins, which can taste bitter. Finally, chicken broth in place of plain water enhances savory depth and helps the quinoa absorb flavor as it finishes cooking.

Suggested ingredient list

  • 2.5 to 3 pounds chicken thighs (bone-in, skin-on recommended) or 2 pounds boneless chicken
  • 1 large onion, thinly sliced
  • 1 red bell pepper, sliced
  • 8 ounces cremini or button mushrooms, quartered
  • 3 cloves garlic, minced
  • 1 28-ounce can crushed tomatoes or diced tomatoes with juices
  • 1/2 cup dry red wine or 1 tablespoon balsamic vinegar
  • 1 cup quinoa, rinsed
  • 1.5 to 2 cups low-sodium chicken broth
  • 1 bay leaf, 1 teaspoon dried oregano, 1/2 teaspoon dried thyme
  • Salt and pepper to taste, olive oil for searing

Equipment and prep: getting the most from your slow cooker

A basic 6-quart slow cooker is ideal for this recipe; it comfortably holds chicken, vegetables and room for quinoa added toward the end. If you own a smaller model, reduce quantities to avoid overfilling. A heavy skillet for searing is optional but recommended: browning chicken and sautéing aromatics first develops deep flavor that the slow cooker alone cannot easily produce. You will also need a fine-mesh sieve for rinsing quinoa and a wooden spoon or tongs for handling ingredients safely. Thermometer use is wise: target an internal chicken temperature of 165 degrees Fahrenheit to ensure safety without overcooking.

Prep steps are simple but important. Rinse quinoa under cold running water until the water runs clear to remove any residual bitter coating. Pat chicken dry and season liberally; if you have time, lightly season under the skin as well to distribute salt. Chop vegetables uniformly so they cook evenly in the long braise. If using wine, measure and set it aside. Little rituals like these save time during the cooking stage and improve the final texture and flavor.

Step-by-step method: assembly, timing and finish

The overall flow is: build flavor through searing, slow-braise the chicken with vegetables and tomatoes, then finish with quinoa for the final stretch. Begin by seasoning and searing the chicken in batches in a hot skillet with a tablespoon of olive oil. Browning need not be perfect, but a golden crust adds complexity to the sauce. Reserve the browned chicken and use the same skillet to soften onions, peppers and mushrooms, scraping up browned bits to incorporate into the sauce. Deglaze with wine, if using, then transfer everything to the slow cooker along with tomatoes, herbs and a portion of the broth.

Cook on low for three to five hours for boneless thighs and four to six hours for bone-in thighs, depending on your slow cooker and how tender you like the meat. About 30 to 45 minutes before serving, remove the chicken briefly, shred or chop to your preference, and skim excess fat if desired. Stir the rinsed quinoa into the saucy base with the remaining broth — aim for roughly 1.5 parts liquid to 1 part quinoa in the slow cooker environment — cover and let it simmer for 30 to 45 minutes until the quinoa is tender and has absorbed liquid. Return the chicken to the pot to meld, adjust seasoning, then serve immediately.

Cooking times at a glance

Component Cooking Temperature Approximate Time
Bone-in chicken thighs (slow cooker low) Low 4 to 6 hours
Boneless chicken thighs Low 3 to 5 hours
Quinoa (added at end) Low 30 to 45 minutes

Practical tips for perfect texture

Timing is the most reliable lever to control texture. Add the quinoa late rather than throughout the full cook time to avoid a mushy result. If you prefer the quinoa slightly firmer, shorten its final cook to 25 minutes and let it rest covered off heat; residual steam finishes it without overcooking. Keep an eye on liquid volume when you return the chicken; if the sauce is very runny, remove the lid for the last 30 minutes to concentrate flavors. Conversely, if it seems too thick, add hot broth a little at a time to reach your desired consistency.

Searing the chicken and sautéing aromatics are optional but impactful steps. They create Maillard flavors that become the backbone of the sauce; skipping them results in a lighter but flatter profile. Salt gradually and taste as you go. Slow cookers vary widely; if yours runs hot, shorten the primary cook time and check earlier. Investing a little attention to these choices rewards you with a nuanced, satisfying meal.

Flavor variations and substitutions

This template is forgiving. Swap bell peppers for roasted red peppers for a softer, sweeter element. Add green olives or capers near the end for briny brightness, or stir in a handful of chopped spinach in the final minutes for leafy freshness. For a smokier note, include a few slices of chorizo at the beginning; its fat will enrich the sauce. If you prefer a gluten-free or lower-carb option, quinoa is already suitable, but you can also finish with cauliflower rice for a very light version.

For vegetarian adaptations, replace chicken with firm, meaty mushrooms and use vegetable broth. Add cooked chickpeas or white beans to keep the dish protein-rich; in that case, add quinoa earlier since there is no chicken to braise. Herbs can be tailored to taste: rosemary works well with mushrooms and chicken, while basil adds a brighter, almost summer-like lift. Small changes like these allow you to pivot the same basic approach to different dietary needs and seasonal ingredients.

Serving suggestions and pairings

Serve this quinoa chicken cacciatore straight from the pot with a scattering of chopped parsley or basil and a drizzle of extra virgin olive oil. The dish stands alone nicely because quinoa provides body and protein, but it also pairs well with simple sides. A green salad with lemon vinaigrette cuts through the richness, and roasted vegetables add texture contrast. For an Italian-inspired table, offer crusty bread for soaking up sauce, although you will find it optional if you are controlling carbs.

Beverage pairings are flexible. A medium-bodied red wine like Chianti or Sangiovese complements the tomato base, while a crisp white such as Vermentino or Pinot Grigio works if you prefer white. Non-alcoholic options include sparkling water with a twist of lemon or an iced herbal tea like mint, which refreshes the palate. Think balance: pick beverages that will either echo the acidity of the tomatoes or contrast them with freshness.

Make-ahead, storage and reheating

This dish is forgiving when it comes to storage. Cool it to room temperature within two hours of cooking and refrigerate in shallow, covered containers for up to four days. The quinoa will continue to absorb sauce during storage, so plan to add a splash of broth or water when reheating to loosen the texture. Freezing is also possible: portion into airtight containers and freeze for up to three months. Thaw overnight in the refrigerator before reheating gently on the stove or in a microwave, stirring occasionally to distribute heat.

Reheating slowly preserves texture better than blasting in a high-heat setting. If you have a large batch, reheat on low in a pot on the stovetop with a lid, stirring every few minutes until hot. Add a tablespoon of olive oil at the end for shine and mouthfeel, especially if you removed skin or excess fat before storing. Proper reheating is more than food safety; it restores the dish’s original character.

Troubleshooting common pitfalls

If the quinoa turns out gummy, it likely spent too long in the cooker or absorbed too much liquid. Salvage it by stirring in hot broth and cooking uncovered for a few minutes, or serve the stew over freshly cooked quinoa instead. If the chicken is dry, it was overcooked; in future batches choose dark meat or shorten the primary cook time for breasts. For a thin sauce, simmer uncovered to reduce, or thicken it with a slurry of cornstarch and cold water added in the last 15 minutes.

When flavors feel flat, small adjustments revive the dish quickly. A teaspoon of salt or a splash of acid, such as lemon juice or vinegar, brightens the sauce. Fresh herbs added at the end restore aromatic lift that dried herbs cannot. Remember that slow cooker cooking can mellow seasoning, so taste before serving and compensate with small, thoughtful additions.

My kitchen notes and a few real-life tweaks

In my own kitchen I often make this dish with bone-in thighs and a handful of sliced black olives added at the end; the briny bite cuts through the tomato richness in a way my family enjoys. There was one week when I doubled the recipe for a potluck and learned the hard way that quinoa mixed in too early turned gluey, so now I always add it at the very end. Another practical trick I use is to sear the chicken and caramelize the onions the night before, refrigerate them separately and assemble the slow cooker in the morning. That split approach preserves weekday convenience while maintaining flavor depth.

When adapting portions, I have found that small changes in liquid scale nonlinearly: adding more chicken does not mean you need to increase broth by the same proportion. Taste, texture and the slow cooker size guide your adjustments. Over the years I have also swapped in a cup of pearl barley on occasion for a chewier profile, but that requires longer cooking time and more broth. These experiments taught me to treat the recipe as a framework rather than a rigid rule.

Complete recipe: Slow Cooker Quinoa Chicken Cacciatore (serves 4 to 6)

Below is a straightforward, reliable recipe that follows the method described above. Quantities are balanced for a 6-quart slow cooker and favor dark meat for forgiving texture. If you prefer breasts, reduce the initial cook time and monitor doneness carefully. The recipe assumes basic pantry staples and suggests optional additions so you can customize the dish to your taste.

  • 2.5 to 3 pounds bone-in, skin-on chicken thighs, trimmed and patted dry
  • Salt and freshly ground black pepper
  • 2 tablespoons olive oil
  • 1 large yellow onion, thinly sliced
  • 1 red bell pepper, sliced
  • 8 ounces mushrooms, quartered
  • 3 cloves garlic, minced
  • 1/2 cup dry red wine (optional) or 1 tablespoon balsamic vinegar
  • 1 28-ounce can diced tomatoes with juices
  • 1 bay leaf, 1 teaspoon dried oregano, 1/2 teaspoon dried thyme
  • 1 cup rinsed quinoa
  • 1.5 to 2 cups low-sodium chicken broth
  • Chopped parsley or basil for serving

Season the chicken with salt and pepper. Heat the oil in a large skillet over medium-high heat and brown the chicken on both sides in batches, about 3 to 4 minutes per side; transfer to the slow cooker. In the same skillet, add onion, bell pepper and mushrooms and sauté until softened, about 5 minutes. Add garlic and cook 30 seconds, then deglaze with wine if using and scrape up browned bits. Transfer vegetables and pan juices to the slow cooker, add tomatoes, herbs and 1 cup of broth. Cook on low for 4 to 5 hours for bone-in thighs.

About 45 minutes before serving, remove the chicken, shred or chop it, and skim excess fat from the surface if desired. Stir rinsed quinoa into the slow cooker along with the remaining 1/2 to 1 cup broth, cover and cook for 30 to 45 minutes until quinoa is tender. Return chicken to the pot, taste and adjust seasoning with salt, pepper and a splash of vinegar or lemon if needed. Serve topped with fresh herbs and a drizzle of olive oil.

Finishing touches that elevate the meal

Slow Cooker Quinoa Chicken Cacciatore. Finishing touches that elevate the meal

Small final actions create big impressions. A handful of chopped fresh parsley or basil brightens the plate and contrasts the deep tomato flavors. For a silky finish, whisk in a tablespoon of cold butter or a splash of heavy cream just before serving; it gives the sauce richness without overpowering the balance. Toasted pine nuts or slivered almonds provide crunchy contrast when sprinkled on top. Finally, warm lemon wedges at the table offer diners the chance to add acid if they prefer a zesty lift.

Presentation matters less for this kind of rustic stew than the comfort it provides, but a simple garnish and neatly plated quinoa make the dish feel intentional. If you are serving guests, consider plating on warm shallow bowls so the sauce stays lively. These small gestures make weeknight dinners feel a little more ceremonious without adding complexity.

Where this recipe fits into everyday cooking

This approach sits comfortably between pantry-friendly weeknight cooking and slow-simmered weekend meals. It suits meal prep, family dinners and times when you want to maximize yield without compromising flavor. The ability to adapt proportions, swap vegetables and alter herbs makes it a template you will return to often. If you are building a repertoire of reliable one-pot meals, a quinoa-forward cacciatore is worth mastering because it balances nutrition, convenience and satisfying texture.

Think of it as a dependable blueprint: comfortable enough for routine dinners, flexible enough for improvised variations, and resilient across reheating and storage. Once you understand the timing of quinoa relative to the slow-cooked protein, you can translate these techniques across other dishes. The result is a practical, tasty recipe that earns a regular spot in the rotation.

Try the method as written the first time, then make small adjustments to match your preferences. Over time you will learn which tweaks — more olives, fewer mushrooms, a different herb combination — become your signature. With a bit of practice, this Slow Cooker Quinoa Chicken Cacciatore will feel less like following a recipe and more like returning to a familiar, satisfying home-cooked favorite.

Comfort in Every Spoon: Reinventing Potatoes with Mushroom Sauce

There are dishes that feel like an embrace, and this one sits near the top of that list. Potatoes paired with a deeply flavored mushroom sauce marry humble starch with forest aroma, producing a combination that works as weeknight solace or a centerpiece for company. In the paragraphs that follow I’ll walk you through ingredient choices, cooking techniques, and creative variations so you can make the dish your own. I aim to keep the instructions practical and the flavors bold, whether you want a quick skillet meal or a slow-cooked, luxurious plate. Expect clear steps, useful tips, and some personal notes from my kitchen experiments.

Why this pairing captures attention

Potatoes are a versatile canvas: they absorb butter, oil, herbs, and spices in ways that feel forgiving yet rewarding. Mushrooms bring umami — an earthy, savory depth that lifts plain starch into something memorable. When you turn mushrooms into a sauce, that concentrated flavor coats each bite and makes simple potatoes sing. Beyond taste, the dish fits many needs: budget-friendly, adaptable to diets, and easy to scale up for guests. Its appeal spans cultures, appearing in forms from creamy gratins to rustic skillet plates.

The texture contrast also matters. Tender potatoes with a silky, sometimes slightly velvety mushroom sauce create a satisfying mouthfeel most people enjoy. Aromatics like garlic and shallot add brightness while herbs provide freshness, preventing the plate from feeling heavy. A drizzle of acid — lemon, vinegar, or a splash of wine — lifts the whole composition, revealing layers rather than flattening them. That balance of richness, earthiness, and brightness is what turns a side dish into the evening’s highlight.

Choosing the right ingredients

Good food starts with sensible choices. For this recipe, invest in decent mushrooms and pick potatoes that suit your intended texture: waxy for pieces that hold shape, starchy for mash. Freshness matters more for mushrooms than price; firm, dry caps without dark spots are what you want. The other components — butter or oil, aromatics, stock or cream, and a finishing acid — are tools to coax out flavor. Use quality stock when possible because it contributes depth without masking the mushrooms’ character.

Salt, pepper, and timing are small decisions with big consequences. Salt early when boiling potatoes, but season in stages for the sauce so you avoid over-salting. Butter gives richness and better mouthfeel, while a splash of olive oil can prevent dairy from burning during higher-heat steps. Finally, herbs and finishing touches should be added near the end so their aromas remain vivid. The following table helps match mushroom types to how they behave in the pan and what they bring to the sauce.

Mushroom types at a glance

Different varieties lend distinct personalities to your sauce: some are meaty, others delicate. Choosing a mix can add complexity, but a single well-handled type often yields excellent results. Consider texture, availability, and the rest of your menu when selecting mushrooms. Below is a concise table to guide you through common options and their strengths in a mushroom sauce.

Mushroom Flavor Profile Best Use in Sauce
Button / Cremini Mild to medium earthy Affordable base, sautés evenly
Portobello Deep, meaty Great for bold, hearty sauces
Shiitake Pronounced umami, smoky hints Adds richness and Asian-leaning notes
Chanterelle Fruity, delicate Elegant sauces, light finishes
Oyster Subtle briny-umami Silky texture, pairs well with cream

Picking potatoes: waxy vs starchy

If your plan is roasted cubes or sliced rounds that hold their shape, reach for waxy types such as Yukon Gold or red potatoes. They keep structure under heat and offer a creamy interior. For mashed or smashed potatoes that should be fluffy and absorb sauce, starchy varieties like russets are preferable. Yukon Gold sits in a sweet middle ground: it holds together reasonably well while delivering nicely tender flesh. Deciding on the potato variety early informs salt, cooking time, and final texture choices.

Don’t ignore the skin when it’s clean and thin — it adds texture and nutrients. When serving skin-on potatoes, scrub well and remove any eyes or bruises. Uniform sizing is essential for even cooking, especially for roasted or boiled pieces. If time is tight, cut the potatoes into similar-sized chunks; small pieces cook more quickly and develop more caramelized edges when roasted or pan-fried. These small steps streamline the process and improve consistency.

Mushrooms: buying, cleaning, prepping

Mushrooms are mostly water, so avoid washing them under running water unless necessary; a quick brush or a damp paper towel usually suffices. Overly wet mushrooms won’t brown properly in the pan and will steam instead. Trim stems only as needed and slice according to the cooking method: thinner slices for quick sauces, larger pieces for hearty, rustic textures. For a richer sauce, include stems from varieties where they’re tender — finely chopped stems add concentrated flavor.

Freshness shows in firmness and a dry surface. If you find mushrooms beginning to soften, you can still use them for sauces where they’ll be cooked down, but avoid those with a slimy feel. When buying mixed types, match textures so no single variety overwhelms. I often combine cremini for body and shiitake for umami depth; the contrast brings complexity without confusing the palate. Experiment gradually so you learn what combinations you prefer.

Constructing a sauce that sings

A great mushroom sauce balances fat, aromatics, liquid, and seasoning to complement the potatoes. Start by sweating aromatics like shallot or onion and garlic in butter or olive oil, then add mushrooms to brown and concentrate their flavor. Deglazing the pan with wine or stock pulls up fond and layers additional taste. Finish with cream for a classic velvetiness or use a slurry or puree for a lighter, dairy-free option. Acid at the end brightens the dish and prevents the flavors from sitting heavy.

Texture matters as much as flavor: some sauces benefit from a little body provided by a roux or cornstarch, others from reduced stock and the natural juices of mushrooms. If using cream, avoid boiling once it’s added to prevent separation; instead simmer gently. For a chunkier, rustic sauce, keep the mushrooms in larger pieces; for a refined coating, chop finely or pulse briefly in a blender. Season incrementally and taste frequently — mushrooms can ride salt differently depending on how much liquid reduces.

Cream-based mushroom sauce

The classic version uses heavy cream and a splash of wine or stock to create a silky sauce that clings to potatoes. Begin with butter and aromatics, add mushrooms until deeply caramelized, and deglaze with a dry white wine. Reduce the wine slightly, then pour in cream and lower the heat, stirring until the sauce thickens and coats a spoon. Finish with chopped parsley, a squeeze of lemon, and a pinch of freshly ground black pepper to brighten the richness.

To make the sauce more complex, add a teaspoon of Dijon mustard or a few drops of soy sauce for extra umami. If you prefer a lighter option, use half-and-half or a mix of milk and a small amount of cornstarch dissolved in cold water to thicken. For a gluten-free roux, opt for arrowroot or cornstarch; they give glossy results and require careful whisking to avoid lumps. Each small tweak changes the texture and flavor, so adjust to your preferred balance.

Stock and wine sauces, and vegan versions

Stock-based sauces rely on reduction rather than dairy to achieve body and depth. Use a good-quality vegetable or mushroom stock and reduce it with aromatics until it becomes concentrated and slightly syrupy. A splash of fortified wine like Marsala, or dry vermouth, can elevate the sauce without overwhelming the mushroom’s voice. Finish with olive oil and fresh herbs for a lighter, herbaceous profile that pairs especially well with pan-roasted potatoes.

Vegan sauces are surprisingly easy and pleasing. Sauté mushrooms in olive oil, deglaze with wine or stock, then thicken gently using a puréed cooked potato, cashew cream, or blended white beans. Nutritional yeast delivers a cheesy umami note that complements mushrooms beautifully. Lemon zest and chopped tarragon or chives provide lift. The goal is the same as with dairy sauces: a balanced texture that hugs the potatoes and delivers satisfying savoriness.

Techniques for cooking potatoes

Potatoes with Mushroom Sauce. Techniques for cooking potatoes

How you cook the potatoes determines the dish’s identity more than any single seasoning. Roasting yields crispy edges and a caramelized surface, offering contrast against a silky sauce. Boiling then mashing produces an ideal vehicle for sauce absorption, creating a homely, spoonable plate. Pan-frying or making a hash gives each bite a toasted, crunchy element that’s especially nice under a hearty mushroom ragout. Think about the experience you want and choose your method accordingly.

Timing and temperature are practical details that carry flavor consequences. For roasting, higher heat creates browning but requires even pieces; for boiling, salt the water well to season the potatoes from within. When pan-frying, avoid crowding the pan because that traps steam and prevents crisping. If combining methods — say roasted potatoes with a warm sauce — consider keeping the potatoes slightly underdone so they don’t dry out during reheating. Little technique adjustments translate into much better results at the table.

Roasting for depth and texture

Roasted potatoes develop caramelized edges that add textural contrast to the sauce’s silkiness. Parboil larger pieces briefly to ensure tender centers, then toss with oil, salt, and your chosen aromatics before roasting at high heat. Flip once or twice to encourage even browning, and finish with a sprinkle of coarse salt to highlight the flavors. Roasted baby potatoes or wedges work especially well when you want pieces that hold their shape under a thick mushroom gravy.

For extra flavor, roast potatoes with garlic cloves and sprigs of rosemary or thyme so aromatics infuse the flesh while crisping the exterior. A final drizzle of good olive oil or a pat of butter right before serving adds sheen and flavor. If you plan to reheat leftovers, slightly under-roast them and finish in a hot pan later to refresh the crust. This approach preserves texture and keeps the potatoes from turning mealy.

Boiling and mashing for comfort

Boiled and mashed potatoes make a classic base that absorbs sauce like a sponge. Start in cold, salted water and bring to a gentle simmer to ensure even cooking from edge to center. Drain thoroughly and return to the pot over low heat for a minute to evaporate residual moisture — this prevents gluey mash. Use a potato masher or ricer depending on the smoothness you want; fold in butter and a little cream or milk for richness before topping with mushroom sauce.

Smashed potatoes are a hybrid approach that offers both fluffy interior and a craggy surface for sauce clinging. Boil small potatoes until tender, gently press them flat with a fork, then roast briefly until edges crisp. The texture created by smashing encourages the sauce to nestle into the nooks, making each bite flavorful. This method is forgiving and visually appealing for family dinners or casual entertaining.

Pan-frying and skillet methods

Pan-fried potatoes invite a golden crust and quick cooking, ideal for weeknights. Slice or dice uniformly and fry in a combination of oil and butter over medium-high heat until deeply browned. You can cook the mushrooms in the same pan afterwards, which lets flavors mingle and reduces washing up. Deglazing the pan releases fond accumulated on the surface; that fond is pure flavor for your sauce.

When making a hash, add bell peppers, onions, or cooked greens for interest and color. Finish with a sauce spooned over the top or fold the sauce through the pan briefly to integrate textures. Pan methods are fast and adaptable; they shine when you want an immediate, texturally exciting plate without much fuss. A well-timed flip and the right heat are often all that separate good from great results here.

Classic recipe: Potatoes with Mushroom Sauce (step-by-step)

Below is a reliable, flexible recipe that I return to often. It balances approachability and flavor depth so you can tweak components to taste. The ingredient list is intentionally straightforward: common pantry items create big flavor when handled properly. Follow the steps in order and taste as you go to calibrate seasoning and texture. Use this as a base for variations, which I’ll outline after the instructions.

  • Serves 4

Ingredients: 1.5 pounds potatoes (Yukon Gold or russet), 12 ounces mushrooms (mix cremini and shiitake), 2 tablespoons butter, 1 tablespoon olive oil, 1 medium shallot (finely chopped), 2 cloves garlic (minced), 1/2 cup dry white wine or 3/4 cup vegetable/chicken stock, 3/4 cup heavy cream or cashew cream for vegan version, 1 teaspoon Dijon mustard (optional), salt and pepper to taste, chopped parsley for finishing, lemon juice for brightness.

Instructions: 1) Prepare potatoes according to chosen method — roast at 220°C for 30–40 minutes after tossing with oil and salt, boil for mash until tender, or dice and pan-fry until golden. 2) While potatoes cook, heat butter and oil in a large skillet over medium-high. 3) Add shallot and sauté until translucent, then add garlic briefly. 4) Add mushrooms in a single layer; resist stirring too often so they brown. 5) Once golden, deglaze with wine or stock, scraping up browned bits. 6) Reduce liquid by half, then lower heat and stir in cream and mustard if using. 7) Simmer gently until sauce thickens, season with salt, pepper, and a squeeze of lemon. 8) Spoon sauce over potatoes, sprinkle parsley, and serve immediately.

Notes on timing and adjustments

If you’re short on time, dice the potatoes for quicker roasting or pan-fry thin slices. For a crowd, roast large trays of potatoes and keep warm in the oven; reheat the sauce briefly and spoon over just before serving. If the sauce seems thin, simmer a few extra minutes or whisk a teaspoon of cornstarch with cold water and stir it in. Too-thick sauce can be loosened with a splash of stock. These adjustments give you control without demanding additional ingredients.

Seasoning in stages makes a difference: salt the potatoes during cooking, taste the mushrooms after reduction, and adjust after cream is added. Acid is small but mighty — lemon juice or a dash of sherry vinegar can brighten a heavy plate instantly. If you prefer a smoother mouthfeel, pulse the cooked sauce briefly with an immersion blender; this also helps sauces bind to potatoes more evenly. Little techniques preserve the dish’s integrity while offering the flexibility to suit your kitchen rhythm.

Variations to suit mood and diet

The beauty of this dish is its adaptability. Swap dairy for plant-based alternatives, add bacon or pancetta for smoky saltiness, or fold in wilted greens for color and nutrients. You can infuse the sauce with smoked paprika for warmth or miso for a savory twist. For a Mediterranean tilt, incorporate sun-dried tomatoes and oregano; for an autumnal version, add roasted butternut cubes and sage. These options let you reinterpret the base while respecting the original concept.

For vegan eaters, cashew cream or blended silken tofu yield creamy results without dairy. Increase umami with a teaspoon of miso paste dissolved into warm stock, and finish with nutritional yeast for a savory bite. Gluten-free cooks should choose thickening agents like arrowroot or cornstarch rather than flour-based roux. If time permits, marinate and roast mushrooms with soy and balsamic before making the sauce for an extra layer of flavor. Each variation changes the dish’s character but keeps the comforting union of potatoes and mushrooms intact.

Pairings: what to serve alongside

This dish pairs well with simple green salads, roasted root vegetables, or a crisp slaw that offers acidity and crunch. If you serve it as a main, complement with a leafy side dressed in vinaigrette to cut richness. For protein, roasted chicken, pan-seared fish, or braised beef are natural companions; each protein absorbs the sauce’s notes in different ways. Grain sides like herbed farro or barley also work, turning the plate into a complete, textured meal.

When choosing wine, match intensity: a light, unoaked white or a bright rosé lifts a creamy version, while a medium-bodied red or an aged Chardonnay stands up to a deeper, wine-infused sauce. Non-alcoholic pairings include sparkling water with lemon or a tart apple cider to cleanse the palate. Keep beverages simple so the dish remains the evening’s focal point rather than the drinks overshadowing it.

Make-ahead, storage, and reheating

You can separate components to make service effortless later: prepare and chill the sauce while potatoes are roasted or boiled shortly before serving. The sauce thickens in the fridge; reheat gently over low heat and loosen with stock or a little water as needed. Potatoes keep well refrigerated for three to four days; re-crisp roasted pieces in a hot oven or skillet to restore texture. Avoid microwaving cream-based sauce aggressively because it can split.

For freezing, freeze sauce without cream by reducing it more and adding cream only after thawing and reheating. Potatoes freeze less successfully because they change texture; if you must freeze, use them in mashed form. Label everything clearly and reheat thoroughly until piping hot. These steps maintain flavor integrity and avoid disappointing texture changes after storage.

Troubleshooting common problems

If mushrooms steam and never brown, the pan is likely overcrowded or too wet; remove some mushrooms or use a hotter pan and less stirring. A watery sauce often means liquids were added too early or not reduced sufficiently; return to medium-high briefly to reduce, or thicken with a slurry. If your potatoes are bland, they were probably under-salted during cooking — add finishing salt sparingly and taste. Simple corrections can rescue the dish without starting over.

Split cream indicates it overheated; remove the pan from heat and whisk in a spoonful of cold water or stock to help reincorporate. A greasy mouthfeel suggests too much butter or oil; balance with acid and finishing herbs to cut richness. If the sauce is too salty, add unsalted cooked potatoes or a splash of unsweetened dairy alternative to absorb excess; simmer a little to marry flavors. Cooking is partly problem-solving — small interventions often yield satisfactory fixes.

Nutrition and health considerations

Potatoes provide potassium, fiber (when skin is left on), and vitamin C, while mushrooms add B vitamins, minerals, and plant-based protein. The overall nutrition depends on preparation: cream and butter increase calories and saturated fat, while olive oil and stock-based sauces keep the plate lighter. Adding vegetables like spinach or roasted carrots increases fiber and micronutrients and balances macronutrients on the plate. Portion control and ingredient swaps make this dish compatible with many dietary goals.

Vegan variations tend to be lower in saturated fat if you choose vegetable-based thickeners and oils carefully, though calories can remain comparable if nuts are used. For a lower-carb approach, serve sautéed cauliflower steaks or steamed greens instead of starchy potatoes. Mindful seasoning and including bright, acidic elements help the dish feel complete without relying solely on fat for flavor. These adjustments keep the meal nourishing as well as delicious.

Serving stories and final notes

Early in my cooking, I learned that a simple mushroom sauce could turn a batch of boiled potatoes into a celebration. Once, during a rainy evening, I abandoned an elaborate plan and put together a quick skillet of mushrooms and onions, tossed it over buttered smashed potatoes, and suddenly dinner felt intentional. Guests remembered that meal more than others where I labored for hours, which taught me that attention to basic techniques outweighs complexity. This dish rewards patience with caramelization and thoughtful seasoning, not with complicated steps.

Try building the recipe in stages the first few times: focus on achieving good mushroom browning, then dial in the sauce consistency, and finally perfect the potato texture. Keep a small jar of toasted breadcrumbs or grated Parmesan that you can sprinkle on top for crunch and a hint of salt. Above all, make the dish yours — change herbs, swap mushrooms, introduce an unexpected spice — and you’ll find versions that become staples in your rotation. The essentials remain the same: good ingredients, balanced seasoning, and a finishing touch that makes the plate sing.

Roasting Comfort: Root Vegetables with Yogurt That Steal the Show

There is something quietly persuasive about a pan of vegetables emerging from the oven browned at the edges, sweet where heat did its work, and tender at the center. When you pair those caramelized, earthy bites with a cooling, tangy yogurt sauce, the contrast lifts a humble side dish into something you want to serve again and again. This article explores how to cook roasted root vegetables with yogurt in ways that feel fresh, seasonal, and a little surprising — not a laundry list of instructions, but a rich conversation about ingredients, technique, flavor balance, and the small decisions that make each roast distinct. Along the way I share practical tips, a few personal experiments from my kitchen, and recipes you can adapt depending on the vegetables on offer and your pantry staples. Read on and you’ll learn to coax the best from beets, parsnips, carrots, turnips and more, turning them into a dish that fits weeknight dinners and dinner-party menus alike.

Why root vegetables deserve a central place on your plate

Root vegetables are quietly resilient. They store well, travel well, and tolerate heat in a way that brings out deep, sweet flavors when roasted. Unlike delicate greens that wilt quickly, roots respond to dry heat by concentrating sugars and softening fibers, developing caramelized edges and an interior that can be creamy or slightly fibrous depending on the variety. Their neutral backbone also makes them perfect for flavor pairing — you can brighten them with citrus, ground them with warm spices, or anchor them with savory herbs and garlic. For cooks who like versatility, roots are a canvas: swap a couple of varieties and the same technique yields a different flavor profile each time.

From a practical standpoint, root vegetables are economical and nutritious. Many are high in fiber, vitamin A, potassium, and antioxidants, which makes them both satisfying and healthful. They also provide different textures in a single roast — think the silky smoothness of roasted sweet potato against the firmer bite of parsnip or carrot. This textural play is one reason I often choose three or four types of roots to roast together; the mix keeps the dish interesting through every forkful. Finally, their rustic character pairs beautifully with yogurt-based sauces, which bring acidity and creaminess to counterbalance the roast’s sweet, toasty notes.

Choosing your vegetables: a short guide to the best options

Not all roots behave the same in the oven, so a little selection strategy helps. Carrots, parsnips, beets, rutabagas, celeriac, and sweet potatoes all roast well, but they differ in density and sugar content. Carrots and parsnips become tender quickly and gain sweetness, while beets are denser and need more time to become uniformly tender. Celeriac and rutabaga offer a savory, almost celery-like depth that contrasts nicely with sweeter roots. Consider cutting size — smaller pieces brown faster, larger chunks hold a meatier texture — when mixing vegetables so everything finishes at the same moment.

When shopping, look for firm, blemish-free roots with vibrant color and fresh tops if present. Avoid soft spots or sprouting that suggest age. If you find a mixture of small, tender carrots or baby turnips, use them whole or halved; they roast into glossy, almost candy-like morsels. For larger roots, peel or scrub depending on your preference, then cut into uniform pieces. My rule of thumb is to slice denser roots slightly smaller than softer ones so they align in cooking time and texture without overcooking the delicate pieces.

Tools and technique: how to roast for maximum flavor

A few simple choices in technique alter the outcome more than elaborate tricks. Use a heavy, rimmed roasting pan or a sheet pan with sides high enough to catch the oils and juices. Cast iron and stainless steel deliver more even browning than thin aluminum. Toss vegetables in a little oil to promote caramelization — too little oil yields dry, uneven browning; too much makes the pieces greasy rather than toasted. Spread pieces in a single layer with space between them; overcrowding creates steam and prevents the golden edges we aim for. Finally, high heat is your ally: 200–220°C (400–425°F) is a sweet spot for encouraging Maillard reaction without drying the interiors.

Turning the vegetables once during the roast helps expose new surfaces to the hot pan and avoids excess charring on one side. I usually roast at the higher end of the temperature range for the first 20–25 minutes to kick-start browning, then reduce heat slightly or move the pan up in the oven if any pieces are darkening too quickly. A brief blast under the broiler at the end can add gratifying crisp pockets, but watch closely. Keeping the vegetables cut to consistent sizes ensures predictable cooking and minimizes guesswork; a small paring knife and steadier hand are more useful than any gadget here.

Roasting times and cut sizes: a practical reference

Cut size is the primary variable that determines roasting time, along with the vegetable’s density. Below is a compact reference to help you match cut size to cook time so you can roast a mix without overcooking the tender pieces. Use this as a starting point; oven performance and pan choice will nudge times a bit. When in doubt, test with a fork — it should slide in easily without the center turning to mush.

Vegetable Recommended cut Oven temp Approximate time
Carrots 1/2-inch coins or batons 200–220°C 25–35 minutes
Parsnips 1/2-inch batons 200–220°C 30–40 minutes
Beets 1-inch cubes or wedges 200–220°C 35–50 minutes
Sweet potatoes 1-inch cubes 200–220°C 30–40 minutes
Rutabaga / turnips 1-inch cubes 200–220°C 35–45 minutes
Celeriac 3/4-inch cubes 200–220°C 35–45 minutes

Seasoning and spice combinations that work best

Seasoning a roast of root vegetables is a balancing act between amplifying natural sweetness and introducing counterpoints that keep the dish lively. Salt and freshly ground black pepper are essential, but beyond that I often add whole spices or herb sprigs that can be removed after roasting. Cumin and coriander lend a warm, citrusy depth; smoked paprika introduces a savory complexity that contrasts nicely with sweeter roots. Fresh herbs added at the end — parsley, dill, or cilantro — brighten the finished dish with a herbal lift. Keep powdered garlic or onion moderate unless you want a pronounced savory edge, since concentrated forms can char and become bitter.

For more adventurous flavor, experiment with a pinch of sumac or lemon zest to deliver acidity that the yogurt will echo. Drizzling a little honey or maple syrup over inherently starchy roots like sweet potato near the end of roasting can intensify caramelization, but do this sparingly. A final splash of good-quality olive oil brings sheen and mouthfeel, and finishing salts such as flaky sea salt add texture. The most reliable results are achieved when seasoning is layered: a base of salt and pepper, an aromatic spice in the toss, and a bright finishing element once the vegetables are out of the oven.

Yogurt sauces: the science of balance and texture

Yogurt is more than a garnish; it functions as a textural counterpoint and acid counterbalance to the rich, roasted roots. The tang and creamy mouthfeel cut through the caramelized sugars, refreshing the palate. Choose your yogurt based on the sauce you want: thick Greek-style yogurt offers body and richness, while plain yogurt thinned with a little water or lemon juice gives a lighter, drizzlable finish. Taste as you go — the acidity level varies between brands and batches — and adjust with salt, garlic, lemon, and herbs rather than assuming one formula will always work.

Beyond plain tang, yogurt absorbs and distributes flavors beautifully. You can stir in minced garlic or roasted garlic purée for depth, fold in chopped herbs for brightness, or whisk in a spoonful of tahini for nuttiness and extra creaminess. For a spiced yogurt, cumin, smoked paprika, and a pinch of cayenne create warmth; for a brighter profile, lemon zest, chopped mint, and a drizzle of olive oil make the sauce sing. Because yogurt is so adaptable, I often prepare a batch and keep it in the fridge; it’s a shortcut that elevates leftovers and acts as a multi-purpose condiment.

Three yogurt-based sauces to try

To make your life easier at the stove, here are three yogurt sauces that match different moods and vegetables. The first is bright and herbal, great with beets and citrus accents. The second is smoky and garlicky, excellent with sweet potatoes or parsnips. The third introduces Middle Eastern notes that pair well with root mixes and roasted chickpeas. Each sauce requires only a handful of ingredients and can be whisked together in under ten minutes, giving you flexibility during a busy cook.

  • Herbed Lemon Yogurt: Greek yogurt, lemon zest and juice, chopped dill and parsley, a pinch of salt, and a splash of olive oil. Use with roasted beets and carrots.
  • Smoked Garlic Yogurt: Plain yogurt, roasted garlic purée, smoked paprika, salt, and a little honey to balance. Use with sweet potatoes or parsnips.
  • Tahini-Yogurt Sauce: Yogurt, tahini, lemon juice, chopped cilantro, and ground cumin. Thin with water if you want a pourable consistency; excellent with mixed root medleys and toasted seeds.

Step-by-step: a reliable method I use regularly

Roasted Root Vegetables with Yogurt. Step-by-step: a reliable method I use regularly

My go-to process starts with preheating the oven to 220°C and arranging a rimmed sheet pan ready for action. I wash and peel where necessary, then cut the vegetables so similarly dense pieces are sized to finish together. Tossing is done in a large bowl with olive oil, salt, pepper, and a single primary spice — such as cumin or smoked paprika — to avoid muddled flavors. Spread the vegetables in a single layer and roast, turning once halfway through. Start checking for tenderness at the lower end of the time window listed earlier; remove pieces as they reach the perfect fork-slide stage so nothing overcooks.

While the vegetables roast, I prepare the yogurt sauce so the flavors have a moment to marry. A quick stir with a fork makes a creamier, silkier texture than over-stirring with a whisk. Once the vegetables are out, I taste for salt and collate final accents — a sprinkle of fresh herbs, a scatter of toasted seeds, or a squeeze of lemon. I often serve the roast family-style, spooning yogurt over the vegetables and finishing with a crack of black pepper and a drizzle of good olive oil. When hosting, this approach saves time and looks generous on the plate; the contrast between warm roots and cool yogurt is always a crowd-pleaser.

Presentation and pairings: turning a side into a centerpiece

Roasted root vegetables with yogurt can function as a side, a vegetarian main, or part of a composed bowl. For a main-course presentation, add grains like freekeh, farro, or barley; scatter roasted chickpeas or crumbled feta for protein; and finish with herbs and seeds for texture. As a side, these vegetables pair beautifully with grilled meats, roasted fish, or dishes with bright, acidic sauces, such as chimichurri or salsa verde, since the yogurt ties into those flavors smoothly. Consider plating on a long platter with the yogurt in a river down the middle and vegetables fanned across, then finish with colorful garnishes like pomegranate seeds or microgreens for an attractive contrast.

For weeknight bowls, I assemble cooked grains, a generous bed of roasted roots, a scoop of yogurt, and an extra element like preserved lemon or pickled shallots to provide acidity. Toasted nuts or seeds — pumpkin seeds, pistachios, or walnuts — add crunch and nutty warmth. If I want to lean Mediterranean, olives and za’atar are my go-to accents; if I prefer Middle Eastern hints, a sprinkle of sumac and chopped parsley does the job. The secret in presentation is restraint: let the vegetables and sauce speak for themselves, then add one or two textural or flavor contrasts to complete the composition.

Make-ahead, storage, and reheating strategies

Roasted root vegetables hold up well and can be cooked ahead without losing character, which makes them perfect for meal prep and entertaining. Store them in an airtight container in the refrigerator for up to five days; keep the yogurt sauce separate to preserve its fresh brightness. When reheating, a skillet over medium heat or a hot oven restores crisp edges more effectively than a microwave, which tends to soften the roast and dilute flavor. If using an oven, spread the vegetables on a pan and warm at 180–200°C for 8–12 minutes until heated through and the edges re-crisp slightly.

For freezing, roasted roots can be stored for up to three months, though texture softens with freezing and thawing. If you plan to freeze, under-roast slightly so they don’t become mushy upon reheating. Thaw overnight in the fridge, then re-crisp under high heat in a hot oven or skillet. Yogurt sauces do not freeze well because they separate; instead make small-batch sauces as needed or prepare a more stable tahini-yogurt mix with extra tahini to help maintain texture if you must freeze components.

Common pitfalls and how to avoid them

There are a few recurring mistakes that make a roast disappointing: cutting pieces unevenly, overcrowding the pan, skimping on oil, and neglecting seasoning are the most frequent culprits. Uneven cuts lead to mismatched doneness; overcrowding produces steam instead of roast; too little oil prevents browning; and under-salting makes otherwise great vegetables taste flat. The remedy is simple: cut thoughtfully, use enough space on the pan, dress lightly but thoroughly with oil, and salt at two points — once before roasting and again to taste when serving. These small habits save you from a soggy, bland outcome.

Another predictable error is using overly aggressive heat for delicate pieces, which char on the exterior while remaining hard inside. Use the roasting times and cut-size guidance above and adjust as needed for your oven. Also remember that sugar-laden roots like beets and sweet potatoes can darken faster; keep an eye on them late in the cooking window. Finally, don’t hector the dish with too many competing spices; choose a primary flavor theme and let the natural sweetness and char of the vegetables do most of the work.

Regional variations and flavor inspirations

Roasted root vegetables with yogurt can take cues from cuisines around the world. In Mediterranean kitchens, think lemon, oregano, and olive oil with a simple strained yogurt. A Levantine approach favors tahini, sumac, and pomegranate molasses alongside thick yogurt. South Asian influences encourage warm spices — cumin, coriander, turmeric — and a cilantro-mint yogurt to cut through richness. Each region highlights different aspects of the vegetables: some emphasize acidity and herbaceous brightness, others highlight nuttiness and deep spice. Borrow freely from these palettes to keep the dish feeling fresh and tailored to your meal.

My own experiments have wandered from a smoky Spanish-inspired roast with smoked paprika and sherry vinegar to a Persian-leaning plate with barberries and rosewater tucked into a delicate yogurt dressing. Not every experiment succeeded, but the successful ones reveal a pattern: the best combinations pair a clear primary accent — acid, smoke, or spice — with a secondary note such as herb or sweetener that echoes rather than competes. This principle makes it easy to riff on the basic roast-plus-yogurt template without losing balance.

Nutritional notes and mindful eating

Roasted root vegetables are filling without being heavy, offering fiber, vitamins, and complex carbohydrates that sustain energy. Pairing them with yogurt contributes protein, calcium, and probiotics when live cultures are present. For those watching calories, moderating oil and opting for low-fat yogurt can reduce energy density, while keeping the dish satisfying. If you need a gluten-free meal, roots and yogurt naturally fit; for added protein, incorporate legumes like roasted chickpeas or a scattering of seeds. The combination supports a balanced plate with carbohydrates, protein, and healthy fats when assembled thoughtfully.

Be mindful of sodium and added sugars: many store-bought accompaniments can raise salt or sugar levels quickly. Season by taste and favor fresh acids like lemon over sweet glazes unless sweetness is a deliberate choice. When cooking for others, it’s considerate to offer the yogurt sauce on the side so people can control portion and flavor intensity. Eating this way—vegetables roasted to depth and balanced with an unassuming yogurt sauce—feels nourishing, comfortably indulgent, and endlessly adaptable to dietary needs.

Personal notes from my kitchen

Over the years I’ve roasted hundreds of pans of root vegetables and developed a handful of simple rituals that reliably improve the outcome. I always taste a small bite right after seasoning and again after roasting; those two moments guide my adjustments and teach me how much salt or acid the particular batch needs. I also learned the hard way that tossing everything too early with delicate herbs saves nothing — I add fragile herbs at the end. One of my favorite memories is a winter dinner where a tray of roasted beets and parsnips with lemon-yogurt turned a group of skeptical guests into converts; they kept returning for spoonfuls of the sauce until the platter was nearly bare.

Another practice I adopted is to roast a small handful of extra vegetables whenever I have the oven on; they keep well and transform into fast lunches, tossed with greens and a scoop of leftover yogurt. On busy evenings this habit feels like culinary insurance: a versatile, delicious component in salads, sandwiches, and grain bowls. Small rituals like these matter because they make consistent, good food feel effortless rather than a special-occasion chore.

Bringing it to the table

Roasted root vegetables with yogurt are a dependable crowd-pleaser precisely because they balance comfort and brightness. They comfort with caramelized, meat-like textures and sweetness while the yogurt provides a cool, tangy foil that keeps the dish from feeling heavy. Whether you serve them as a star at a vegetarian dinner, a side at a family meal, or a make-ahead component for weekday bowls, the combination scales easily and adapts to what you have on hand. With a few simple rules — consistent cuts, adequate oil, high heat, and a purposeful yogurt sauce — you can transform pantry roots into a dish that feels both grounded and lively.

Try one of the yogurt variations suggested here, or invent your own by choosing a dominant accent and letting the yogurt echo it. Keep experimenting with spice blends and finishing touches; the best versions emerge when you cook a few times and learn how your oven and ingredients behave. Ultimately, the success of a roast is less about strict adherence to a recipe and more about attention to seasoning, timing, and contrast. So preheat the oven, grab a mix of roots, stir a simple yogurt sauce, and enjoy the kind of food that brings warmth and satisfaction year-round.

Lunch Reinvented: The Joy of Homemade Lunch Sandwiches That Travel Well

There is something quietly satisfying about a well-made sandwich packed into your lunchbox. It can be an act of care, a tiny ritual each morning, and a reliable source of good food when the day gets busy. This article explores the full landscape of making great sandwiches at home — from bread choices and flavor building to portable packing and make-ahead strategies. You will find practical recipes, sensible tips for keeping fillings fresh, and ideas for healthy swaps that do not compromise taste. If you enjoy food that is fast, portable, and genuinely tasty, these pages are for you.

Why Homemade Lunch Sandwiches Still Matter

Preparing your own lunch saves money, sure, but the greater value often lies in control — over ingredients, portions and flavors. When you make your own sandwich you choose the salt level, the fat content, and which vegetables are bright and crisp. That control matters not only for health but also for satisfaction: a sandwich you assemble yourself rarely feels like compromise. There is also an element of creativity; mixing simple pantry staples in new ways keeps lunches interesting instead of repetitive. For those with dietary restrictions or picky eaters at home, homemade options allow precise swaps and safe, tasty results.

Consider the workplace or school context: a packed sandwich can be an anchor during a hectic day. It eats well at a desk, on a park bench or in a meeting room, and it can be tailored to weather and season — light and crisp in summer, warm and comforting in colder months. A sandwich is also a very efficient vehicle for leftovers, turning yesterday’s roast, roasted vegetables or legumes into a fresh meal. Learning a few assembly tricks and storage rules will turn homemade sandwiches into a daily habit rather than a weekend novelty.

Bread Foundations: Choosing the Right Base

Start with the bread and much of the sandwich’s character is set. A sturdy, slightly dense loaf will hold wet fillings and layers, while a delicate roll brings a different, more tender experience. Whole grain, rye, sourdough, pita, wrap and brioche each bring unique textures and flavors; your choice should match the filling and eating context. For example, wet fillings or very saucy spreads do best on denser breads or when a protective layer is used. For portability, compact rolls, ciabatta halves or pressed flatbreads often work better than oversized slices.

Here is a compact reference to help pick the right loaf for your purpose.

Bread Best Uses Notes
Sourdough Hearty deli-style, grilled sandwiches Firm crust, tang balances fattier fillings
Whole grain Healthy daytime lunches, adds texture Toasts well, pairs with lighter proteins
Brioche Sweet-savory combos, breakfast sandwiches Rich, soft — best for drier fillings
Pita / Wrap Portable, packed lunches, salads-in-pocket Minimal crumbs, good for layered salads
Ciabatta / Roll Panini, pressed sandwiches Open crumb soaks sauces; grill-friendly

One practical habit: keep at least two types of bread in your kitchen. I usually rotate a whole-grain loaf and a crusty sourdough. That simple variety covers most mood swings and makes it easier to match bread to filling when planning lunches for the week.

Proteins and Layers: Anchoring the Sandwich

A satisfying sandwich needs a reliable protein as its backbone. Traditional options include sliced roast beef, turkey, ham or chicken; fish like tuna or smoked salmon is another classic route. For plant-based meals, consider mashed chickpeas, falafel, marinated tofu, tempeh or grilled portobello. Each choice suggests certain accompaniments: smoked salmon pairs with cream cheese and dill, while roasted vegetables and hummus complement a grainy bread. Think about temperature as well; cold cuts and salads usually stay cool, whereas warm proteins can be pressed or wrapped to keep heat and aroma.

Layering matters as much as what goes in. A proper order might start with a protective spread on both bread faces — butter, mayo or avocado — then the protein, followed by cheese and crunchy vegetables, with a final acidity element like pickles or a squeeze of lemon. This sequence helps prevent sogginess and distributes flavors evenly. When I build a sandwich I consciously place moisture-bearing items away from the bread, or I add a dry layer such as lettuce to create a barrier. It is a small detail that keeps a sandwich intact until you are ready to eat.

For those tracking macros or aiming for a healthy balance, lean proteins like turkey, canned tuna in water, or legumes are reliable. They combine well with fibrous vegetables and modest amounts of healthy fats, producing a meal that feels complete rather than heavy. If you prefer richer proteins, plan lighter sides or smaller portion sizes so the overall meal stays balanced.

Vegetables, Pickles and the Value of Crunch

Vegetables bring color, texture and freshness that lift a sandwich from adequate to memorable. Crisp lettuce, thinly sliced cucumber, pickled onions, and sweet peppers all contribute contrasting textures that play off creamy spreads. Pickles, especially vinegar-based ones, add brightness and cut through richness. Roasted or grilled vegetables offer a softer, deeper flavor; they pair especially well with melted cheese or hummus. When layering, cut vegetables thinly so they sit neatly and distribute flavor without overwhelming the other components.

Don’t neglect herbs and microgreens; a few sprigs of cilantro, basil or arugula change the sandwich’s tonal center. For contrast, include an acidic element like a drizzle of vinaigrette or a smear of mustard to counterbalance fattier proteins. For portable lunches, pack delicate greens separately and assemble at lunchtime when possible. This small extra step keeps the sandwich tidy and ensures a bright bite rather than a limp one.

Spreads, Sauces and Flavor Builders

Homemade Lunch Sandwiches. Spreads, Sauces and Flavor Builders

Spreads are the flavor engines of any sandwich. A small amount of the right spread can turn simple ingredients into a layered experience. Classic mayonnaise provides creaminess and a blank canvas for add-ins, while mustard adds a sharp, tangy note that pairs well with cured meats. For vegetal or vegan sandwiches, hummus, baba ganoush and tahini bring depth and umami. Pesto introduces herbaceous oil and nuttiness, and compound butters or flavored ricotta can be surprisingly effective with roasted veggies or grilled fruit.

Make a handful of versatile spreads and you will dramatically expand your sandwich options. Below are quick formulas you can make in minutes: garlic-yogurt spread (Greek yogurt, lemon, garlic, salt), spicy mayo (mayo mixed with sriracha and lime), and herb vinaigrette for drizzling. Store these in small jars for the week and use them to customize fillings on the fly. A useful habit is to taste as you go; a single spoonful of a spread can tell you whether a sandwich needs more acid, salt or heat.

Assembly Techniques: Building a Sandwich That Holds Up

A sandwich that falls apart on the second bite is frustrating; assembly technique prevents that. Start with spreads on both slices of bread to create barriers to moisture. Place firmer ingredients like cheese and thinly sliced meat next to the bread, and centralize soft or saucy components such as tomatoes and dressings. For very moist fillings, use lettuce, grilled eggplant or a folded slice of cheese as a moisture shield. For extra durability, wrap the sandwich tightly in parchment paper and then in a reusable container — the compression keeps components from shifting.

Temperature and pressing can change how a sandwich behaves. Toasting or grilling melts cheese and binds ingredients, which is useful for transporting warm lunches. Cold sandwiches often fare better when ingredients are chopped finely rather than stacked big; smaller pieces stick together and resist sliding. When packing a sandwich for several hours, avoid raw tomatoes or dress them and store separately to prevent sogginess. Little planning up front keeps a midday meal enjoyable rather than messy.

Make-Ahead Strategies and Packing for Travel

Meal prep makes weekday lunches effortless. One strategy is to cook or slice proteins on the weekend and portion them into containers for the week. Prepare versatile spreads and chop a variety of vegetables so you can assemble sandwiches in minutes. Use labeled containers and a plan: Monday might be turkey with slaw, Tuesday a tuna salad, Wednesday a veggie and hummus wrap. That rhythm saves decision time and prevents impulse orders from undermining your budget or health goals.

Packing well is key to keeping sandwiches fresh. Insulated lunch bags, small ice packs, and airtight containers extend freshness during transit. For bready sandwiches I favor breathable wraps like parchment plus a snug container rather than plastic wrap that can trap condensation. If you pack a toasted sandwich, let it cool slightly before sealing so steam does not soften the crust. For longer trips, pack wet components, like dressings and tomatoes, separately and assemble just before eating.

Healthy Swaps That Keep Flavor Intact

“Healthy” does not mean dull. Small swaps preserve taste while improving nutritional value. Try whole-grain or sprouted bread in place of white; it offers more fiber and a nuttier flavor. Replace full-fat mayo with mashed avocado or a yogurt-based dressing for creaminess and more vitamins. Choose lean proteins or legumes to raise fiber and reduce saturated fat without losing substance. Add a generous portion of vegetables to increase volume and satiety without excessive calories.

When making these swaps, pay attention to mouthfeel and seasoning because differences in fat and texture affect perception of flavor. A yogurt spread can feel less luxurious than mayo, so enhance it with herbs, lemon zest or a touch of olive oil. For plant-based proteins, seasoning is everything: smoked paprika, cumin, soy sauce or miso add savory depth. With a few judicious tweaks you can build sandwiches that are both satisfying and aligned with health goals.

Sandwiches for Kids and Picky Eaters

Kids often respond best to simple, consistent flavors and fun presentation. Cut sandwiches into shapes, make kabob-style bites with rolled-up fillings and sticks, or offer a “build-your-own” box with separate components like crackers, cheese cubes, and sliced turkey. Mild cheeses, thinly sliced meats and well-mashed spreads tend to be most acceptable. Introducing new ingredients alongside favorites — a little hummus with known turkey slices — helps widen tastes slowly without triggering rejection.

Texture and temperature influence acceptance as much as flavor. Crunchy elements like thin apple slices or toasted seeds can entice a child to try a new sandwich. For school lunches, avoid messy sauces; instead, offer dips in small containers. I have found that when I include one surprising but small element — a sliver of roasted red pepper or a taste of pesto — kids often mimic adults and develop curiosity rather than resistance.

Warm Sandwiches and Toasting Methods

Warm sandwiches transform bread and fillings into a melting, aromatic experience. A panini press gives predictable heat and attractive grill marks; a heavy skillet plus a weighted pan works nearly as well at home. Toasting allows cheese to melt and flavors to meld, and it also slightly dries the bread surface so fillings stay in place. For oven-warmed sandwiches, wrap them and heat briefly, then press in a skillet to crisp the exterior if desired. Always let a hot sandwich rest a minute before wrapping to avoid steam softening the crust.

Different heat methods suit different ingredients. Crisp, pressed sandwiches work well for deli meats and cheeses, while grilled vegetables and marinated tofu benefit from longer, gentler heat. For portability, convert a warm sandwich into a sealed pocket like a calzone or folded flatbread; that keeps heat and prevents spills. When traveling, place a thin paper towel next to the sandwich inside a container to absorb any excess steam and protect texture.

Creative Combo Recipes: Four Go-To Lunches

Mediterranean Chickpea Salad Sandwich

This vegetarian sandwich blends creamy legumes with bright herbs and crunchy veg for a filling, protein-rich lunch. It travels well and holds up for hours if you keep leafy greens separate or use them as a barrier. The chickpea mixture is forgiving and can be made thicker or thinner depending on whether you want a scoopable salad or a spread. I often double the recipe and use leftovers as a dip during the week. Serve on toasted whole-grain bread or in a pita pocket for easy eating.

  • Ingredients: canned chickpeas (drained), Greek yogurt or mashed avocado, lemon juice, olive oil, chopped cucumber, chopped red pepper, minced red onion, chopped parsley, salt and pepper, whole-grain bread or pita.

Method: Mash the chickpeas lightly, leaving some texture. Stir in yogurt or avocado, lemon, a splash of olive oil, and seasoning. Fold in vegetables and herbs. Assemble by spreading a layer on bread and topping with crisp lettuce or arugula. For a packed lunch, wrap the sandwich in parchment and include a small container of extra lemon for squeezing.

Classic Roast Beef with Horseradish Aioli

A meaty sandwich that balances savory roast beef with a punchy horseradish spread feels upscale but is easy to prepare. Use thinly sliced roast beef, a smear of horseradish aioli, sharp cheddar or provolone, and pickled red onions for contrast. This combo keeps well and reheats nicely if you prefer it warm; a quick press in a pan gives it a lovely crust and melty center. I like to make a batch of horseradish aioli at the start of the week to lift several sandwiches.

  • Ingredients: sliced roast beef, horseradish aioli (mayonnaise, prepared horseradish, lemon juice), sliced cheddar, pickled red onions, sourdough or ciabatta roll.

Method: Spread aioli on both bread surfaces to protect against juices. Layer cheese and roast beef, then add pickled onions. If you plan to eat it warm, press in a skillet over medium heat until the cheese melts. When packing cold, wrap tightly to keep flavors intact and avoid loosening the pickles to reduce moisture transfer to the bread.

Ultimate Veggie, Hummus and Grain Bowl Sandwich

This sandwich turns leftover grains and roasted vegetables into a hearty midday meal. Use a thick smear of hummus as the base, then add cooked quinoa or farro, roasted eggplant, zucchini, and a handful of spinach. The grains add chew and staying power, while hummus binds the ingredients and contributes a creamy texture. It is an excellent choice for plant-based diets and works well in wraps or sturdy flatbreads.

  • Ingredients: hummus, cooked quinoa or farro, roasted vegetables (eggplant, zucchini, red pepper), baby spinach, whole-wheat wrap or flatbread, olive oil and lemon for drizzling.

Method: Toss grains with a little olive oil, lemon and salt to enliven them. Layer hummus on the wrap, then pile on grains and vegetables. Add greens last and fold tightly. For transport, wrap in foil to keep the wrap compact. If you prefer a warm option, toast briefly in a skillet to fuse the edges.

Quick Tuna Melt with Pickled Capers

The tuna melt is a comfort classic that can be refreshed with bright accents like capers and lemon zest. Mix canned tuna with a small amount of mayo or Greek yogurt, chopped celery, lemon juice and capers for salinity. Top with a slice of melting cheese and grill until bubbling. The result is portable, protein-rich and deeply satisfying, with the capers adding a pop that keeps the sandwich lively.

  • Ingredients: canned tuna (in water or olive oil), Greek yogurt or mayo, chopped celery, lemon zest and juice, capers, sliced cheddar or Swiss, whole-grain bread.

Method: Combine the tuna with dressing and season. Spread on bread, add cheese and grill until the cheese melts and the bread is toasted. For a lighter variant, omit cheese and serve on an open-faced slice with greens on the side. Pack cold or warm depending on how soon it will be eaten.

Pantry Essentials and a Smart Shopping List

Stocking a few core staples makes it much easier to assemble great sandwiches on short notice. Keep a range of breads, a couple of protein options (eggs, canned fish, a roasted chicken), hummus or a jarred spread, a mix of fresh vegetables, pickles, and at least one cheese you enjoy. Basic condiments like mustard, mayonnaise and soy sauce expand possibilities tremendously. Fresh herbs and citrus are inexpensive ways to add brightness, and a jar of good olives or roasted peppers can transform simple fillings.

  • Breads: whole grain, sourdough or ciabatta, wraps
  • Proteins: canned tuna, eggs, sliced turkey or roast beef, tempeh or tofu
  • Spreads: hummus, mayo or yogurt, pesto
  • Veggies: lettuce, cucumber, peppers, red onion, tomatoes
  • Extras: pickles, olives, capers, lemon, fresh herbs

Troubleshooting Common Problems

Soggy bread, messy fillings and bland tasting results are the usual culprits that can derail a good sandwich. To prevent sogginess, use spreads as barriers and place juicy items in the center with dry layers around them. If a sandwich tastes bland, evaluate the balance of salt, acid and fat; a pinch of salt, a splash of vinegar or a spoonful of olive oil will often rescue the flavor. For transport issues, choose firmer breads, or assemble components right before eating.

If a sandwich becomes too dense or heavy, lighten it with acid — pickled vegetables, lemon juice or a vinaigrette. Conversely, if it feels dry, add a small amount of creamy spread or a tender vegetable like avocado. Testing a sandwich at home before packing it for the week helps you refine proportions and avoid surprises. Over time you will learn which combinations hold up best for your schedule and taste.

Putting It All Together

At its best a sandwich is simple, adaptable and delicious. With a few basic skills — choosing the right bread, layering to prevent sogginess, balancing textures and flavors — you can build lunches that sustain focus and pleasure throughout the day. Experiment with spreads and seasonings to discover your go-to combinations, and prepare components ahead of time to make weekday assembly fast and enjoyable. The small investment of planning yields repeated benefits: fewer impulse purchases, better nutrition, and lunches that actually make the day a little brighter.

Start small, keep a modest pantry and practice a handful of reliable recipes. Over weeks you will develop a repertoire of favorite builds and clever swaps. Whether you pack a chilled vegetarian wrap, a warm pressed panini, or a classic meat-and-cheese, the sandwich remains one of the most democratic and rewarding lunch formats. Make it yours, enjoy the process, and let lunchtime be a moment you look forward to.

Shortbread Cookies: The Quiet Joy of Butter, Flour and Simple Technique

There’s something almost indecent in how a few pantry staples can produce a moment of real pleasure. Shortbread cookies embody that paradox: few ingredients, modest preparation, and a result that feels both humble and indulgent. In this article I’ll walk you from the story behind these buttery biscuits to the small technical choices that make a batch sing. Expect practical tips, a couple of recipes, troubleshooting for common mishaps and ideas for flavoring and presenting your baking. If you’ve ever opened a tin and wondered how to replicate that perfect crumb at home, you’re in the right place.

A short history of these buttery biscuits

Shortbread traces its roots to Scotland, where medieval bakers transformed leftovers from twice-baked breads into a dense, crumbly treat. Originally richer than regular bread, the recipe relied on sugar and butter when those ingredients became more widely available. By the 17th century shortbread had become a festive item, associated with holidays and special occasions rather than everyday consumption. Over time the basic formula traveled and adapted, finding cousins in other countries under different names and textures.

The word “short” in baking means tender and crumbly, a quality achieved by heavy fat content interrupting gluten formation. In the case of shortbread, butter is the obvious hero, creating a soft, melt-in-the-mouth texture. The simplicity of the formula made it easy to customize, and regional variations appeared: some recipes use rice flour for a finer crumble, others fold in almond meal for depth. The enduring appeal is partly practical — the cookies keep well — and partly sensory: that initial buttery burst that leaves a dusting of crumbs on your fingers.

As trade expanded, so did the range of flavors and shapes. Victorian bakers introduced decorative techniques and stamped patterns, turning a humble cookie into a showpiece for tea tables. In modern times shortbread has gone global, surfacing in upscale patisseries and home kitchens alike. Despite stylistic shifts, the core idea remains unchanged: a small number of ingredients treated with care yields something quietly exquisite.

Essential ingredients and their roles

Shortbread depends on three basic components: flour, butter and sugar. Each contributes more than its face value: flour provides structure, butter supplies fat and flavor, and sugar both sweetens and affects texture. The ratio between these elements is what defines the final product. A higher butter content makes the cookie richer and more fragile; more flour yields a sturdier, sandier texture. Understanding these dynamics allows you to tweak the recipe without breaking it.

Salt and vanilla are small but important additions. A pinch of salt sharpens the butter and balances sweetness, while vanilla introduces aromatic notes that round out the flavor. Some bakers fold in a little cornstarch or rice flour to enhance tenderness, since those flours inhibit gluten development more than wheat flour does. When using unsalted butter, taste the dough before baking; adjust the salt accordingly to avoid a flat final bite.

Measure ingredients precisely when you’re starting out. Weighing flour and butter reduces variability between batches and makes results predictable. If you prefer measuring by volume, spoon flour into the cup and level it rather than scooping; scooping packs flour and will dry out your dough. Later, once you have a reliable feel for the dough, you can rely on visual and tactile cues: the dough should hold together without being greasy or crumbly.

Ingredient ratio table

Below is a simple reference showing common ratios for shortbread dough. These are guidelines; small adjustments let you shape the texture and richness.

Style Butter Flour Sugar Notes
Classic 1 part 2 parts 0.5 part Traditional crumb, reliable structure
Rich 1.25 parts 2 parts 0.4 part More melt, delicate handling
Sandier 0.9 parts 2 parts 0.6 part Denser, less prone to spreading

Classic recipes and regional twists

When people think of classic shortbread they often mean the three-ingredient version: butter, flour and sugar. In Scotland this appears as thick slabs or rounds studded with fork marks, baked until pale gold and still slightly soft to the touch. Around the world, bakers have played with the base to create distinctive variations. In the Scandinavian tradition, you might find shortbread spiced with cardamom. In Asia, there are versions incorporating matcha or sesame for both flavor and color.

Some regions add egg yolk to bind the dough and provide a richer color. Others substitute a portion of wheat flour with almond meal or ground hazelnuts, changing both taste and mouthfeel. The French sable is a close relative, often sweeter and more delicate, sometimes layered with jams or creams. Each regional twist highlights how a few adjustments to the foundation produce a recognizable yet novel result.

In recent decades patisseries and home bakers have continued to invent: filled shortbread sandwiches, lattice-topped bars, and modern shapes stamped by cookie cutters. The classic remains a reference point — a benchmark for butter quality, textural finesse and balance — but creative bakers keep pushing the form into new territory without losing the original’s charm.

Mixing, shaping and baking techniques that matter

Method affects texture more than you might expect. Overworking the dough develops gluten, resulting in a tougher cookie; under-mixing leaves uneven distribution of butter and sugar. The ideal approach is gentle handling: rub or cut butter into the dry ingredients until the mixture looks like coarse sand, then bring the dough together with just enough pressure for it to hold. Some bakers prefer to cream butter and sugar for a lighter, slightly leavened crumb, while others stick to the classic “rubbing in” method for a dense, crumbly bite.

Temperature plays a critical role. Cold butter will yield a different crumb from room-temperature butter. If you want defined edges and minimal spreading, chill the dough before slicing or stamping. For a meltier mouthfeel, bake the dough at a slightly lower temperature for longer, allowing the butter to integrate slowly without browning the edges too fast. Using an oven thermometer helps; small ovens vary widely from their set temperatures.

Baking surface and positioning matter as well. A heavy baking sheet distributes heat evenly and helps prevent bottoms from burning. If you prefer a paler shortbread, bake on a middle rack and rotate trays halfway through. Watch the cookies in the last few minutes; ideal doneness is a hint of color at the edges and a dry surface. Remember that the cookies continue to firm as they cool, so removing them while they are still slightly soft preserves the tender interior.

Cutting, molding and decorative finishes

There are many ways to shape shortbread: thick slabs cut into wedges, discs stamped with a pattern, or delicate fingers for dipping. Each shape affects baking time and texture. Thicker pieces keep a more buttery center; thin fingers crisp sooner and are excellent for dunking. When cutting, use a sharp knife or a floured cutter to avoid tearing the dough and creating rough edges that brown unevenly.

Traditional decoration includes docking with fork tines and scalloped edges for visual interest. For a fine finish, chill your molded dough before cutting to preserve edge definition. If you want to pipe the dough, adjust the consistency slightly by adding a touch of flour; piped shortbread is quite elegant for sandwich cookies. For stamped patterns, press firmly but evenly, and chill briefly before baking so the imprint holds.

Glazes, chocolate dips and sugar dustings change the eating experience without masking the shortbread’s character. Apply a thin glaze once the cookies have cooled completely to prevent moisture from softening the cookie. For a chocolate-dipped end, temper the chocolate or set it to a proper consistency so the coating snaps rather than smears. Decorative finishing should highlight, not overpower, the buttery simplicity at the heart of the cookie.

Flavor variations and smart pairings

Shortbread is a fantastic canvas for flavor because its backbone is mild and buttery. Zest from citrus brightens the dough without altering texture; lemon, orange and bergamot all lift the flavor. Spices like cardamom, cinnamon or finely ground nutmeg add warmth. More assertive additions, such as matcha powder or ground espresso, should be used sparingly so they complement the butter rather than dominate it.

Nuts and inclusions change both taste and structure. Finely chopped toasted almonds or pistachios folded into the dough add crunch and aroma, while coarser pieces require slightly longer baking times. Dried fruits can make the dough denser and moister, so consider reducing butter or adding a little more flour to compensate. For savory experiments, herbs such as rosemary or thyme with a pinch of coarse salt create an attractive contrast with the cookie’s richness.

Pairing shortbread with beverages is a joy. Black tea matches the cookie’s sturdiness, while a fragrant green tea complements citrus and matcha versions. Coffee works with chocolate or espresso-flavored shortbreads. For an adult pairing, a slice of mature cheese or a sweet dessert wine can accentuate the buttery notes. Think in terms of contrast: bright, acidic drinks cut through the fat and refresh the palate between bites.

Flavor combo suggestions

Here are a few combinations that I return to often because they are simple and reliably pleasing.

  • Classic lemon zest with a light dusting of powdered sugar
  • Matcha and white chocolate chips for color and subtle bitterness
  • Rosemary and sea salt for a savory-sweet balance
  • Toasted almond and orange zest for nutty brightness
  • Dark chocolate-dipped with a sprinkle of flaky salt

Troubleshooting common problems

Crumbly dough that won’t hold together usually means insufficient fat or liquid, or flour measured too heavily. If your dough falls apart into powdery crumbs, add a few drops of cold water or a small extra bit of softened butter and knead just until it comes together. Conversely, greasy or flat cookies indicate too much butter, often paired with over-handling. Chill greasy dough before shaping to firm the fat back up.

Cookies that spread excessively may have been shaped from warm dough or baked at too low a temperature. Make sure the dough is adequately chilled and that your oven is at the right heat. If the edges brown too quickly while the center remains pale, rotate the tray and decrease the temperature slightly to allow even cooking. Uneven texture can also be a sign of inconsistent ingredient distribution, so mix thoroughly but gently.

If your shortbread turns out tough, that’s a gluten issue. Overworking the dough develops gluten strands; let the dough rest and use a gentler technique next time. Consider using a portion of low-protein flour such as pastry flour or adding a small amount of cornstarch to reduce toughness. Keep notes on every batch; small changes in flour brand, butter temperature or humidity can shift outcomes between bakes.

Storage, gift wrapping and shelf life

One practical advantage of these biscuits is their shelf stability. Properly baked and stored in an airtight tin at room temperature, they will keep for one to two weeks without significant loss of texture. For longer storage, freeze the unbaked dough or fully cooled baked cookies in a freezer-safe container for up to three months. Thaw at room temperature to preserve crispness and avoid condensation by letting them come to temperature before opening the container.

For gifting, presentation matters but doesn’t need to be elaborate. Line a decorative tin or box with parchment and stack cookies with interleaving sheets to prevent sticking. A narrow ribbon or a simple label describing flavor and date adds a personal touch. If including glazed or chocolate-dipped cookies, use separators or individual wrapping to keep finishes intact during transport.

When rescuing slightly stale shortbread, refresh it by warming in a low oven for a few minutes to revive fragrance and crunch. Avoid microwaving for this purpose; it makes the cookie chewy. For storing variations with fillings or glazes, keep them in a single layer and avoid humid environments to prevent the sugar or chocolate from blooming or becoming sticky.

Tools and equipment worth investing in

You don’t need a lot of specialized gear to bake excellent shortbread, but a few tools make the process cleaner and more consistent. A reliable digital scale instantly improves accuracy and removes guesswork. A sturdy offset spatula and a heavy baking sheet help with handling and heat distribution. If you plan to stamp or pipe cookies, invest in a set of cutters or a piping bag and tips suited to the amounts you’ll make.

An oven thermometer is a small expense that pays dividends in consistent baking. For teams that enjoy rolled or molded shortbread, a tart tamper or a plain metal biscuit cutter creates uniform shapes and clean edges. For those who value finish and presentation, a small sifter for powdered sugar and a good-quality bench scraper for cutting slabs will improve both aesthetics and workflow.

Here’s a short list to get started; each item is practical and will be used beyond shortbread.

  • Digital kitchen scale
  • Heavy, rimless baking sheet
  • Bench scraper and sharp knives
  • Assorted cookie cutters or stamps
  • Oven thermometer

Recipe: Classic shortbread

Shortbread Cookies. Recipe: Classic shortbread

Below is a straightforward recipe that balances butter and structure. I include both weight and approximate volume measures, but if you can weigh ingredients, do so. The instructions emphasize gentle handling and include tips on chilling and baking times. Follow the method and then feel free to tweak flavorings as you gain confidence.

Ingredient Weight Volume (approx.)
Unsalted butter, room temperature 225 g 1 cup
All-purpose flour 300 g 2 1/4 cups
Granulated sugar 55 g 1/4 cup
Fine sea salt 3 g 1/2 teaspoon
Vanilla extract (optional) 5 g 1 teaspoon

Begin by creaming the softened butter with sugar and salt until just combined; you’re not aiming for airy peaks. Add vanilla if using, then sift in the flour and fold gently with a spatula until the dough begins to hold together. Turn the dough onto a lightly floured surface, press into a disk, and wrap in plastic. Chill for at least 30 minutes to firm the butter and make rolling or pressing easier.

For slab shortbread, roll the dough to about 1.5 cm thickness and trim to a rectangle. Dock the surface with a fork and cut into fingers or wedges, leaving the pieces in the tray to retain shape. For stamped rounds, press out shapes and place them on a baking sheet lined with parchment. Bake at 160–170°C for 18–25 minutes depending on thickness, until edges show the slightest color. Cool fully on a wire rack before glazing or storing.

When testing this recipe I learned that slight adjustments in butter temperature made the biggest difference. If the butter is too soft the dough spreads and loses definition; too cold and it resists forming into a smooth surface. Find that sweet spot where the butter yields under gentle pressure but holds its shape when cut. Keep notes, and you’ll build a reliable rhythm for future batches.

Recipe variations: citrus, chocolate and savory

It’s easy to adapt the base recipe for different flavor directions. For lemon shortbread, add the zest of one large lemon to the creamed butter and sugar, and swap a tablespoon of flour for an equal amount of finely ground almonds to maintain texture. Bake as directed; the bright citrus will lift the buttery base without masking it. A light dusting of powdered sugar after cooling enhances the visual appeal and adds a delicate sweetness.

For a chocolate twist, substitute 20–30 grams of flour with cocoa powder and fold in chopped dark chocolate or chocolate chips. Use Dutch-process cocoa for a smoother, less acidic flavor. The dough will be slightly drier with cocoa, so be attentive when bringing it together; a touch of milk or an extra egg yolk can help bind if needed. Dip one end of the cooled cookies in tempered chocolate and set them on parchment for an elegant finish.

Savory shortbread is a delightful alternative for cheese boards and appetizers. Reduce sugar to a scant tablespoon, fold in 50–70 grams of finely grated hard cheese such as Parmesan, and add a teaspoon of chopped fresh thyme or rosemary. Press into a shallow tart tin and bake until the edges are golden. Savory shortbreads are best served slightly warm and pair especially well with olives, cured meats and a crisp glass of white wine.

Serving suggestions and presentation ideas

Shortbread performs beautifully both as a simple tea-time treat and as part of a more elaborate dessert. Stack a few fingers on a small plate alongside fruit compote or lemon curd for contrast. For an afternoon spread, arrange an assortment of flavored shortbreads on a platter with small bowls of jam, honey and clotted cream. The tactile element of breaking or dunking makes the experience communal.

When serving at gatherings, consider a themed tin with assorted flavors. Label each variety so guests can sample intentionally. For holiday presentations, tie small bundles with twine and tuck a sprig of rosemary or a slice of dried orange under the ribbon. The visual detail signals care and elevates a homemade gift to something memorable.

In restaurants I’ve seen shortbread used as the crunchy component in plated desserts: a broken shard here, a crumbled base there, often paired with soft fruit, ice cream or a mousse. The cookie’s structural integrity allows it to support other elements without collapsing, and the buttery notes knit those components together. Think of your shortbread not only as a cookie but as an ingredient for larger compositions.

Why shortbread endures in kitchens and hearts

Shortbread survives because it does something rare: it makes simplicity feel luxurious. You don’t need cryptic techniques or exotic ingredients to produce something comforting and refined. This accessibility invites experimentation and ownership; almost anyone can make a decent batch and then take it in a personal direction. The cookie’s tactile quality — the satisfying crumble, the way it leaves a dusting of crumbs — connects with memory in a way that more elaborate desserts sometimes miss.

There is also a practical longevity. Shortbread stores well, travels well and scales easily. That makes it a baker’s friend for gifting and for preparing ahead of events. Because it tolerates additions and modifications, it also adapts to seasons and occasions: citrus in summer, spice in winter, herbs for savory pairings. That flexibility keeps it relevant across cultures and generations.

Finally, making shortbread is a modest way to practice fundamental baking skills. You learn about texture, timing and ingredient balance without the pressure of complex laminations or precise temperatures. Those lessons carry over to other pastries and increase your confidence in the kitchen. For many of us, a perfect batch marks not only culinary success but a remembered afternoon with flour on our sleeves and a warm tray in our hands.

Baking your first batch: a practical checklist

Before you begin, gather your ingredients and tools so the process is calm and efficient. Pre-measured components reduce stress and prevent the temptation to overwork the dough. Preheat the oven early, and line your baking sheet. If you’ve chosen a variation that includes nuts or citrus, prepare those in advance so you can fold them in quickly and evenly.

As you work, trust your senses. The dough should feel cohesive but not greasy. If it’s too dry, add a teaspoon of cold water at a time; if it seems overly soft, chill briefly. Watch the color of the cookies as they bake; they should remain pale with just the faintest hint of gold at the edges. Remove them slightly underbaked if you prefer a very tender interior; they will set while cooling.

When your batch is finished, take a moment to reflect. Note what you like and what you might change: perhaps a touch more salt, a different zest, a longer chill. Baking is iterative by nature, and the small adjustments you record will help you recreate or refine the cookie exactly as you want next time. Enjoy the process, share the results, and remember that the best shortbread is the kind that invites another piece.