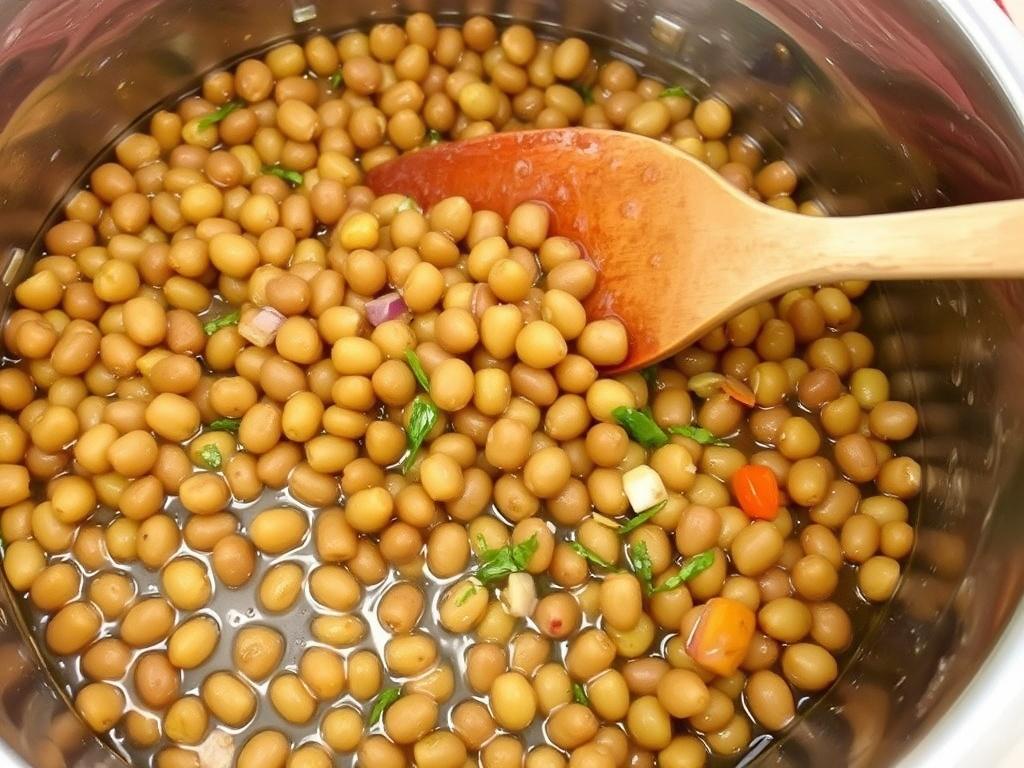
There is a particular comfort that wafts through a kitchen when a pan of cornbread comes out of the oven, edges deeply browned and the center still steaming. This article walks through the reasons a hot skillet transforms simple batter into something remarkable, explains ingredient choices in plain language, and offers practical tips so the next batch you bake turns out reliably delicious. I will share a classic cast-iron recipe, sensible variations, troubleshooting fixes, and serving ideas that turn this humble bread into a memorable side dish. Expect clear steps, a couple of short tables to compare options, and personal notes from my own cooking experiments. Read on and you will have everything you need to bake cornbread that holds its own beside stews, chilies, greens, and barbecues.
Where Cornbread Came From and How It Evolved
Cornbread traces its roots to Indigenous peoples of the Americas who ground maize into meal and baked or steamed it for sustenance long before European contact. Early colonial kitchens adopted cornmeal out of necessity, and the simple combinations of meal, water, and fat slowly evolved into the regionally distinct recipes we recognize today. In the American South, the addition of wheat flour, eggs, and leavening agents created a lighter loaf, while in other places cornbread remained coarse and dense, often served as a portable staple. Industrial milling, access to buttermilk, and cast-iron cookware all shaped modern versions that balance texture, flavor, and convenience. Understanding this history helps explain why techniques and ingredients vary so widely from household to household.
Regional preferences still dictate how cornbread appears on the plate: some cooks favor a slightly sweet, cake-like texture with added sugar, while others insist on a savory loaf with crunchy edges and no sweetness whatsoever. These differences are not failures but choices determined by what accompanies the bread, whether it is a spicy bean stew, a smoky barbecue plate, or a simple bowl of soup. Over time, the skillet has become synonymous with cornbread for good reason: the metal’s retained heat creates a crust that contrasts with a tender interior. Recognizing those traditions makes it easier to select a recipe that fits your meal and the mood you want to set at the table.
Why the Skillet Matters
The skillet, especially cast iron, is more than a vessel; it is an active participant in the baking process. When you preheat the pan in the oven with butter or oil added, the fat sizzles and forms a thin layer that crisps the batter immediately upon contact. That rapid searing at the edges locks in moisture toward the center, giving you the characteristic contrast between a crunchy perimeter and a soft crumb. A preheated skillet also helps with even browning, because the metal holds steady heat all around the batter instead of warming slowly from the bottom. This physical interaction between batter and hot surface is what separates ordinary pan-baking from skillet-baked cornbread.
Using a skillet changes how you approach timing and texture, and it requires a little more attention at the start of the bake. You should preheat long enough that a pat of butter melts and browns quickly; this is the moment to pour in batter. The thickness of the pan matters too: a heavy cast-iron pan retains heat well and produces dramatic crust, while a lighter metal will brown faster but may not sustain high heat as long. For those who prefer a softer crust with lighter color, a nonstick or glass pan will do, but you will not get the same singing sizzle that only a hot skillet provides. Accepting that trade-off is part of choosing how you want your cornbread to perform at the table.
Choosing the Right Cornmeal
Cornmeal comes in a few distinct textures and processing styles, and those choices directly affect mouthfeel and flavor. Fine cornmeal yields a smoother cake with less noticeable grain, which some people prefer alongside delicate soups. Medium ground cornmeal gives a pleasant corn grain without feeling gritty, and it is the most versatile choice for everyday recipes. Stone-ground varieties retain more of the corn’s oils and germ, offering a deeper, nuttier flavor and a coarser texture that many find appealing for traditional cornbread. Picking the right one depends on whether you want a refined crumb or a rustic bite.
Freshness matters as much as grind. Because cornmeal contains natural oils, it can oxidize and become stale if stored too long, which will show up as flat flavor. Store unopened bags in a cool, dark place; once opened, a sealed container in the refrigerator extends life and preserves aroma. Experimenting with different grinds is worthwhile: a blend of fine and stone-ground cornmeal can give you both tenderness and character in a single loaf. The table below highlights main differences to make selection easier.
| Cornmeal Type |
Texture |
Flavor Profile |
Best For |
| Fine |
Smooth, cake-like |
Mild |
Light cornbread, muffins |
| Medium |
Balanced grain |
Noticeable corn |
Everyday loaves |
| Stone-ground |
Coarse, hearty |
Nutty, deep |
Rustic, traditional cornbread |
Essential Ingredients and What They Do
At its core, this bread needs a handful of components that each play a specific role: cornmeal for structure and flavor, wheat flour to lighten the crumb, a leavening agent for lift, a liquid to hydrate, fat for tenderness, eggs for binding, and salt to balance. Cornmeal alone produces dense outcomes, which is why many recipes mix in all-purpose flour to give batter some elasticity and airflow when baking. Baking powder and sometimes baking soda react with acidity to create a finer texture and help the loaf rise. Buttermilk, sour cream, or a mix of milk and vinegar gives both tang and a tender crumb, while fat—whether butter, oil, or bacon drippings—adds flavor and keeps the bread moist after cooling.
Sweetness is optional and should be chosen deliberately based on the meal it accompanies: a tablespoon or two of sugar brightens flavors without making the bread taste like dessert, whereas larger quantities produce a cake-like cornbread that stands beautifully with fruit or butter. Eggs contribute structure so the bread cuts cleanly, and they also help suspend cornmeal particles in batter for even distribution. Salt is small in quantity but essential; it accentuates the corn’s natural sweetness and prevents the loaf from tasting flat. With the roles of each ingredient clear, you can tweak the quantities to reach your ideal texture and flavor.
Equipment: Picking the Perfect Pan
Cast-iron skillets are the traditional choice because they absorb and maintain a high, even heat that yields that coveted crisp crust. A 10-inch skillet produces a roughly two-inch thick cornbread that bakes evenly and fits most ovens, but sizes from 8 to 12 inches are common depending on how thick you like your loaf. If you do not own cast iron, a heavy-duty ovenproof skillet, a pie plate, or a square baking pan will work; you will simply adjust expectations for crust development. Make sure whatever pan you use can tolerate high oven temperatures and respond predictably when preheated.
Preheating the pan is an often-missed step that makes a substantial difference in texture. Place the skillet in the oven while it warms, then add the butter or oil to melt and lightly brown before the batter goes in. This step produces immediate searing and helps the edges pull away from the pan at the end of baking. Use an oven mitt and treat the hot skillet carefully; transferring a blazing-hot pan requires two hands to avoid spills. Over time you will learn how hot your pan needs to be to create the ideal crust without scorching the bottom.
For those who bake often, consider seasoning your cast iron and keeping it well maintained, because a well-seasoned pan contributes a subtle depth of flavor and natural release. Wipe it clean, avoid harsh soaps when possible, and dry thoroughly before storing to prevent rust. If you prefer nonstick ease, choose a reliable ovenproof nonstick skillet and reduce oven temperatures slightly to prevent coating damage. Your choice of pan changes the dynamic of the baking process, so match it to the texture you seek.
Classic Cast-Iron Cornbread Recipe
This recipe aims for balance: crisp exterior, moist interior, and a versatile flavor that works with both savory and slightly sweet accompaniments. It uses buttermilk for tang and tenderness, a modest amount of sugar so the bread remains flexible at the table, and preheated buttered cast iron to deliver the signature crust. Measurements are scaled for a 10-inch skillet; adjust the bake time slightly if using a different size. Read through the steps before you start so every action lands at the right time, particularly when dealing with a hot pan.
- 1 cup yellow cornmeal (medium grind)
- 1 cup all-purpose flour
- 1 tablespoon baking powder
- 1/2 teaspoon baking soda
- 1 teaspoon fine salt
- 2 tablespoons granulated sugar (optional)
- 2 large eggs
- 1 1/4 cups buttermilk
- 1/4 cup melted butter plus 2 tablespoons for the pan
- 1 tablespoon neutral oil or bacon drippings
Begin by preheating your oven to 425°F (220°C) and placing the skillet inside to warm thoroughly. Mix dry ingredients in a bowl, then whisk eggs and buttermilk in a separate bowl before folding wet into dry; stir only until just combined to avoid overdeveloping gluten. Once the pan is hot and the butter has melted and begun to foam, carefully pour it into the batter along with the oil, then pour the batter back into the skillet. The batter should sizzle on contact; this sound is a good sign that the crust will be crisp. Return the skillet to the oven and bake until the top is golden and a toothpick comes out mostly clean, usually 20 to 25 minutes for a 10-inch pan.
- Preheat oven and skillet to 425°F with the pan inside for at least 15 minutes.
- Combine cornmeal, flour, baking powder, baking soda, salt, and sugar in a bowl.
- Whisk eggs with buttermilk in a separate bowl until smooth.
- Stir wet into dry ingredients until just mixed; avoid overmixing.
- Remove hot skillet carefully, add 2 tablespoons butter to melt, then pour batter into the pan.
- Bake 20–25 minutes until golden and a toothpick comes out with a few moist crumbs.
- Let cool 10 minutes before cutting and serving, or spread butter over the hot top for immediate service.
Small adjustments can be made without derailing the bake. If you prefer a softer crust, reduce oven temperature to 400°F and lengthen bake time slightly to avoid over-browning. For an extra-moist crumb, add 1/4 cup of plain yogurt or sour cream to the batter. Once you’ve made this foundation a few times, feel free to tweak sugar, salt, or fat to suit your particular taste or the menu it will accompany.
Variations to Try
Adding character to cornbread is where the fun begins; a handful of chopped jalapeños and cheddar turns it into a lively companion for chili, while kernels of roasted sweet corn bring summer brightness to the loaf. Herbs such as chives and thyme combine well with honey butter for a refined side, and crumbled bacon folded into the batter provides smoky richness that pairs especially well with greens and beans. For a sweeter route, add blueberries or maple syrup into the batter and reduce salt slightly to keep things balanced. Keep portion sizes moderate when adding mix-ins to avoid weighing the batter down.
- Jalapeño and cheddar: chopped peppers, grated cheese
- Honey butter cornbread: brush with honeyed butter after baking
- Corn and scallion: fresh kernels and sliced scallions folded in
- Bacon and maple: crisp bacon bits with a drizzle of maple after baking
- Blueberry cornbread: fresh berries folded gently for a sweet touch
When incorporating add-ins, consider moisture and density: watery ingredients require a slight reduction in liquid elsewhere, and heavy items should be tossed in flour first to prevent sinking. Taste elements should harmonize with the main course, so a sweet cornbread suits fruit or breakfast whereas a savory, peppery version complements robust stews. Mixing textures—crunchy nuts, soft cheese, crisp corn—can make every bite interesting. With every variation, the skillet method remains effective at producing a satisfying contrast of crunchy edge and tender center.
Serving Suggestions: Making Cornbread a Star Side Dish
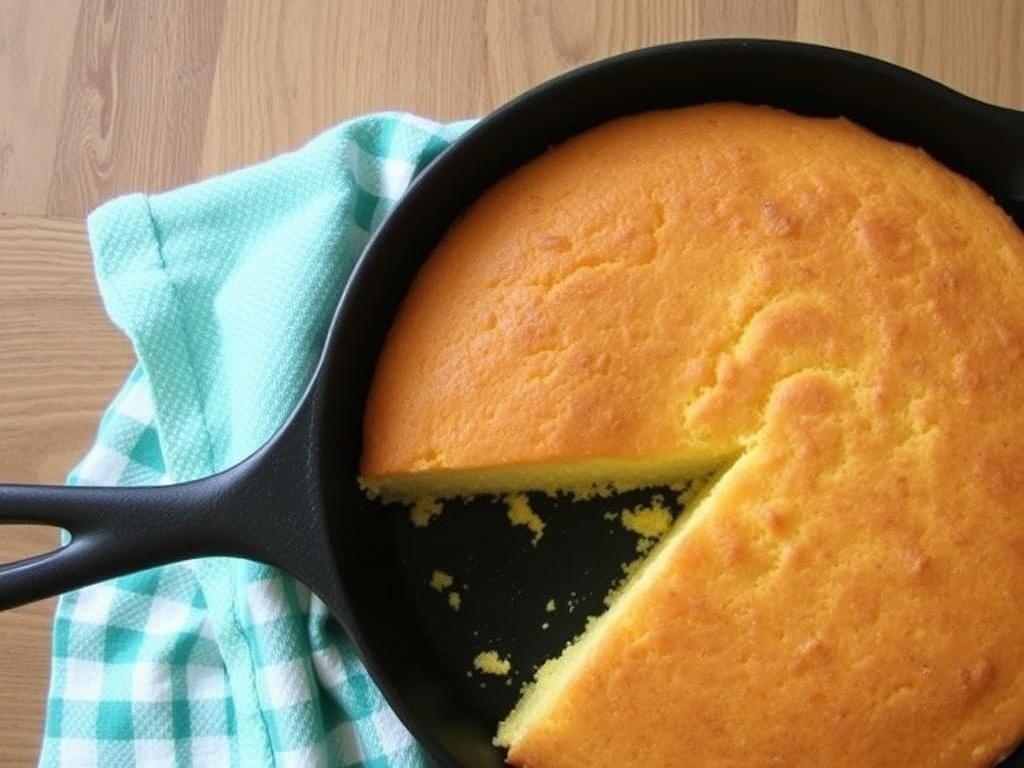
Cornbread’s versatility is a major asset; it acts as a foil for spicy, creamy, and smoky dishes alike. Serve it warm with a pat of butter and honey alongside chili for a classic pairing that soaks up sauce without falling apart. Plate slices next to braised greens and roasted meats where the bread offers a slightly sweet counterpoint to savory flavors. For more casual meals, cut into wedges and serve with pickles, sharp cheese, and cold slaw for a balanced plate that covers texture and temperature contrasts.
Presentation matters and does not need to be fussy. A wedge of hot cornbread garnished with a scattering of chopped herbs adds color and freshness, while a wooden board and a small dish of compound butter create an inviting family-style moment. Consider offering condiments like hot honey, chili oil, or herbed butter to let guests customize their bites. If serving cornbread as a side dish for a larger spread, time it so it finishes near the start of the meal so slices remain warm and appealing to pass around. The right pairing can elevate a simple loaf into the best part of the plate for many guests.
Make it part of a composed meal by matching textures and weights: a light soup asks for thinner, more cake-like cornbread, whereas a hearty barbecue benefits from thick wedges with rustic grain. Think about temperature contrasts too; warm bread and cold slaw form a satisfying mouthfeel. Use cornbread to soak up sauces and to act as a starch on the plate, interchangeable with rolls or biscuits depending on the cuisine. With a little attention to complementary flavors, cornbread can easily graduate from supporting role to crowd-pleasing highlight.
Troubleshooting Common Problems
Even experienced home bakers sometimes face issues, and most problems have straightforward fixes. If your cornbread turns out dense, the likely causes are overmixing the batter, insufficient leavening, or packed cornmeal. To correct density, stir gently until ingredients are combined and measure baking powder carefully to ensure proper rise. If the center is gummy while edges are done, the oven temperature may be too low or your pan too large for the amount of batter; increasing heat slightly or using a smaller skillet will help. Keeping a thermometer in the oven and testing for doneness with a toothpick are reliable habits.
| Problem |
Likely Cause |
Fix |
| Dense crumb |
Overmixing or old leavening |
Mix until just combined; replace baking powder |
| Burnt edges, raw center |
Oven too hot or pan too small |
Lower temp 25°F and use correct skillet size |
| Crumbly slices |
Too little fat or egg |
Add melted butter or an extra egg next time |
If the crumb falls apart when cutting, consider increasing the binding elements like eggs or reducing cornmeal slightly in favor of a bit more flour. Overbaking dries the loaf, so check for just a few moist crumbs on the tester rather than waiting for absolute dryness. For uneven browning, rotate the skillet halfway through baking and confirm that your oven racks are centered to provide balanced heat. These adjustments usually eliminate repeat problems quickly and let you hone a dependable method.
Storing, Freezing, and Reheating
Cornbread holds up well when stored properly, and quick handling right after baking preserves moisture and flavor. For short-term storage, cool the loaf completely and wrap it tightly in plastic wrap or place in an airtight container; it will keep at room temperature for one to two days. For longer life, freezing is effective: wrap individual wedges or the whole loaf in plastic, then in foil, and place in the freezer for up to three months. Label packages with the date for easy rotation and to avoid freezer fatigue where old packages hang on the back shelf.
To reheat, a hot oven revives crust and interior better than a microwave. Place slices in a 350°F oven for 8 to 12 minutes until warmed through and the surface crisps slightly. For single servings or quick warming, a brief microwave burst followed by a toast in a skillet can produce satisfactory results. If you have frozen cornbread, thaw overnight in the refrigerator before reheating to ensure even warmth and to prevent the exterior from drying out. These simple steps make it convenient to prepare batches ahead for gatherings or weekly meals.
Adapting the Recipe: Gluten-free and Vegan Options
Adapting cornbread for dietary needs is straightforward with a few ingredient swaps that preserve texture and flavor. For a gluten-free version, replace all-purpose flour with a cup-for-cup gluten-free baking blend that contains xanthan gum, and use a slightly coarser cornmeal to add structure. Baking times are similar, though gluten-free batters sometimes benefit from resting for 10 minutes before baking to hydrate the flours. Be vigilant about cross-contamination if cooking for someone with celiac disease, and confirm that your cornmeal is certified gluten-free to avoid issues.
Vegan cornbread demands substitutes for eggs and dairy, and several options work well: use flax or chia “eggs” (one tablespoon ground seed plus three tablespoons water per egg) for binding, swap buttermilk for a plant-based milk with a tablespoon of vinegar for acidity, and use melted coconut oil or vegan butter for richness. Texture can be exceptionally similar to the original when ratios are adjusted and a touch of extra fat is included. Taste will vary slightly, but a skilled balance of salt and acid will keep the cornbread satisfying and fully plant-based.
Finishing Touches and Presentation
Small finishing touches elevate cornbread from rustic to memorable and give guests a reason to linger over the table. Brush a bit of melted butter or a flavored compound butter on top while the loaf is still hot to add gloss and immediate flavor. Sprinkle flaky sea salt, chopped herbs, or a light dusting of coarse sugar to suit whether you chose a savory or sweet direction. Serving on a warm plate or straight from the skillet emphasizes hominess and practical heat retention for longer-lasting warmth.
Consider accompaniments that echo or contrast the loaf’s flavors: a lemony butter or a herb vinaigrette provides brightness, while a drizzle of hot honey introduces sweet-heat complexity. Arrange wedges on a wooden board with small ramekins of condiments to make the cornbread an interactive part of the meal. Even simple visual choices, like tearing a bit of bread at the table to show texture, can communicate care and invite conversation about the food. These finishing elements matter almost as much as the baking itself.
When I host, I often place the cast-iron skillet directly on the table with a spoonful of compound butter in the center and a small jar of honey nearby. Guests appreciate being able to take a warm wedge and customize it, and the shared skillet becomes a convivial focal point. Over the years I have learned to time the bake so the bread is finished as people sit down, and that rhythm creates an easy, relaxed feel. Little rituals like this turn a practical side dish into a moment worth remembering.
Personal Notes from the Kitchen
One particular winter, I baked cornbread in a heavy 10-inch skillet just as a snowstorm cut power to half the neighborhood, and the warm loaf became an impromptu consolation during candlelit dinner. The smell of butter and corn filled the small apartment and made the evening feel unexpectedly festive despite the inconvenience. That night I learned to rely on the skillet method for quick, reliable results: the intense, even heat produced a crust that seemed to hold stories in it, a texture that guests kept commenting on. Memories like that are part of why I reach for this recipe when I want food that comforts on many levels.
Another lesson came from scaling the recipe up for a large family reunion. I discovered that splitting batter into several smaller skillets produced more consistent results than crowding one oversized pan, and guests liked grabbing personal wedges from each skillet. That experience reinforced two principles that guide my cooking: match equipment to batch size, and favor methods that deliver repeatable results. These practical habits reduce stress and improve outcomes, which is why I include them here as part of a mindful approach to baking cornbread.
On a technical level, I keep a small jar of seasoned cornmeal in the pantry and measure by weight when possible for consistent texture. Digital scales remove the guesswork of scooping, and using a thermometer occasionally to verify oven accuracy has saved me from overbaking more than once. These small practices have made my skillet bakes steadier and have allowed me to explore variations without sacrificing reliability. Cooking becomes more joyful when a few reliable routines support experimentation.
Final Thoughts and Practical Encouragement
Skillet-baked cornbread is a dependable and versatile element in a home cook’s repertoire, capable of being both humble and attention-grabbing depending on how you season and serve it. Mastering the basic technique — preheating the pan, balancing wet and dry ingredients, and understanding your oven — delivers consistent results and opens the door to thoughtful variations. Trust the process, make small, deliberate adjustments, and remember that even imperfect loaves make excellent companions to a wide range of dishes. Keep practicing, enjoy the sensory rewards of scent and texture, and let your skillet become a tool you reach for whenever a warm, satisfying side is in order.
