Archive: 27 August 2025

Warm, Nutty Comfort: Mastering Oatmeal Cookies with Walnuts

There is something elemental about a warm cookie that carries the scent of toasted oats and walnuts through the kitchen, promising comfort with every bite. In this article I’ll walk you through everything you need to know to make consistently excellent oatmeal cookies with walnuts — from choosing the right oats to shaping and storing the finished batch. You’ll find practical tips, a dependable recipe, variations to suit different moods and diets, and a few stories from my own kitchen experiments. Read on if you want cookies that balance chew and crunch, that keep well, and that feel homemade without too much fuss. Let’s make baking feel like less of a chore and more of a small celebration, one tray at a time.

Why oats and walnuts belong in your cookie jar

Oats bring more than fiber; they add a texture backbone that can make a cookie chewy, tender, or pleasantly crumbly depending on how you treat them. Rolled oats retain structure and become pleasantly toothsome when baked, while quick oats soften more and give a finer crumb. Walnuts complement oats not only with their crunch but with a bitter-sweet, buttery flavor that offsets sugar and butter in the batter. Together they create a cookie that feels wholesome without tasting like a health-food attempt, which is why these two ingredients are a classic duo in home baking. Understanding how each component behaves helps you nudge the final cookie toward the texture and flavor you want.

Beyond taste and texture, those ingredients are forgiving. Oats are tolerant of small changes in moisture and fat, and chopped walnuts tolerate a range of toasting levels, from lightly warm to deeply fragrant, allowing you to experiment. They adapt well to additions such as chocolate, dried fruit, or spices, so the base recipe becomes a playground for flavor. For bakers who like routine but dislike boredom, a base oatmeal and walnut cookie recipe is a reliable starting point. Knowing why these ingredients work together gives you confidence to tweak without wrecking the dough.

Ingredients: building blocks for the best oatmeal and walnut cookies

Choosing the right ingredients matters more than you might expect: small changes can shift chewiness, spread, and flavor in noticeable ways. Use unsalted butter if you want control over the salt level, or a combination of butter and oil for a different mouthfeel. Brown sugar contributes moisture and a slight caramel flavor that pairs especially well with oats and nuts, while white sugar promotes crispness. Don’t overlook the role of eggs and flour in structure; they determine whether your cookies hold together or crumble. Finally, the difference between chopped and ground walnuts is not only texture — it affects how walnut flavor is distributed through each bite.

  • All-purpose flour
  • Rolled oats (old-fashioned) or quick oats for softer texture
  • Unsalted butter (or part butter, part neutral oil)
  • Granulated sugar and brown sugar
  • Eggs
  • Baking soda and a pinch of salt
  • Vanilla extract
  • Chopped walnuts, toasted if desired
  • Optional: chocolate chips, raisins, cinnamon

This list keeps things flexible: if you prefer a chewier cookie, opt for more brown sugar and one extra tablespoon of butter, and use rolled oats. If you want a crisper edge, increase white sugar slightly and flatten the dough before baking. When it comes to walnuts, I usually toast them briefly in a 350°F oven or a dry skillet; toasting amplifies their aroma and helps them hold up during baking. Small adjustments yield big textural differences, so consider the final shape and mouthfeel you want before you mix.

Equipment and preparation that save time and frustration

You don’t need a long list of gadgets to bake great cookies, but a few tools make the process cleaner and more reliable. A sturdy mixing bowl, a flat whisk or wooden spoon for the dry ingredients, and a paddle attachment or hand mixer for creaming butter will speed things up. A baking sheet lined with parchment paper prevents sticking and promotes even browning, and a cooling rack keeps bottoms from steaming and going soft. A small scoop or spoon for portioning ensures even sizes so each cookie bakes the same amount of time. Finally, an oven thermometer is an inexpensive helper; ovens often run hot or cold, and that variance changes cookie results more than you think.

Prep work is underrated. Measure ingredients carefully and have mix-ins chopped and ready before you start. If you toast the walnuts, cool them completely so they don’t melt butter or alter batter temperature. Bring butter to room temperature, not melted, for easier creaming; if it’s too soft, you can chill the dough briefly before baking to control spread. Little habits like wiping the baking sheet between batches and rotating pans halfway through the bake will keep your cookies uniform. These steps add minutes up front but prevent annoyance later.

Step-by-step recipe: how to mix, shape, and bake for predictable results

Below I describe a reliable method that produces cookies with a tender center and slightly crisp edges. The order you add ingredients matters because it builds structure in stages: creaming butter and sugar incorporates air, eggs bind and emulsion forms, then dry ingredients add structure, and finally oats and walnuts give body. Skipping or rearranging those steps can alter texture. Stay attentive to visual and tactile cues — the dough’s look and feel often tell you more than the clock. Follow the recipe as a framework and adjust based on what you observe during mixing.

  1. Cream room-temperature butter with sugars until light and slightly fluffy; this usually takes 2–4 minutes with a mixer.
  2. Add eggs one at a time and beat until incorporated, then stir in vanilla extract.
  3. Sift or whisk together flour, baking soda, salt, and any spices; add to wet mixture in two additions to avoid overmixing.
  4. Fold in oats and chopped walnuts by hand so they distribute without releasing excess oil from the nuts.
  5. Portion dough on a lined baking sheet, gently compact and slightly flatten for even baking; chill the sheet briefly if the dough seems too soft.
  6. Bake at a moderate temperature until edges are golden and centers look set but not dry, then cool on a rack.

Timing is approximate because ovens vary; start checking for doneness a minute or two before the recipe suggests. Cookies continue to firm up as they cool, so slightly underbaked centers can yield a pleasing chew rather than a doughy mess. Use a timer, but trust your eyes and a gentle press test: the cookie should spring back slightly and hold shape. If you want perfectly uniform cookies, weigh the dough portions — 30 to 36 grams per cookie makes a satisfying medium size.

A reliable recipe with quantities

Here is a straightforward recipe that has worked well in my kitchen for gatherings and weekday treats alike. It balances sweetness and texture and is easy to scale up for larger batches. The yields assume medium-sized cookies; adjust portion size if you prefer drop cookies or larger bakery-style rounds. Use this as your baseline, then refer to the techniques and variations in the rest of the article to tweak texture and flavor.

Ingredient Amount
All-purpose flour 1 1/4 cups (150 g)
Rolled oats 1 3/4 cups (160 g)
Unsalted butter, room temperature 1/2 cup (113 g)
Brown sugar, packed 3/4 cup (150 g)
Granulated sugar 1/4 cup (50 g)
Large egg 1
Vanilla extract 1 tsp
Baking soda 1/2 tsp
Salt 1/4 tsp
Chopped walnuts, toasted 1 cup (100 g)

Bake on a preheated 350°F (175°C) oven for 10–12 minutes, rotating the pan halfway through. Larger cookies may need 12–15 minutes; smaller 9–11. Remove the tray when edges are golden but centers still look slightly glossy; cool for five minutes on the sheet to set, then transfer to a rack to finish cooling. This timing creates cookies that retain chew and keep their shape without becoming hard. If your oven runs hot, reduce the temperature by 15–20°F and keep an eye on the first batch.

Techniques to get texture right: chewy, cakey, or crisp

Texture control mostly comes down to sugar ratios, fat state, and baking time. More brown sugar and less white sugar produce chewier cookies because brown sugar contains molasses and holds moisture. If you want a cakier cookie, increase flour slightly and add an extra egg yolk for structure. For crisp edges, flatten cookie mounds before baking, use more white sugar, and bake a little longer at a slightly lower temperature. Remember that thicker cookies will always be chewier in the middle simply because of geometry and heat transfer.

Oat type plays a major role too. Rolled oats yield distinct, toothsome bits in the cookie; quick oats absorb more moisture and create a finer crumb. For a tender interior with visible oat texture, use rolled oats and a little extra butter. Toasting the walnuts tightens their structure and reduces the chance they’ll go soft in storage. If you want uniformity in a professional-looking cookie, pulse walnuts briefly to ensure even chop and distribute them with a gentle fold to keep the dough from turning oily.

Flavors and variations: swaps that work

One of the charms of this cookie base is how well it accepts additions. Chocolate chips are an obvious and beloved choice; dark chocolate balances the sweet dough and highlights walnut bitterness. Dried fruit like cherries or cranberries introduce a chewy, tart contrast that pairs beautifully with the oats. If you enjoy spice, a teaspoon of cinnamon or a pinch of cardamom adds warmth without overpowering. For a savory twist, try a light sprinkle of flaky sea salt on top just as the cookies come out of the oven.

  • Chocolate chip and walnut: classic, slightly bittersweet
  • Dried fruit and orange zest: bright, slightly tart
  • Maple and pecan: swap walnuts for pecans and use maple syrup in place of part of the sugar
  • Gluten-free: use certified gluten-free oats and a 1-to-1 gluten-free flour blend
  • Vegan: replace butter with coconut oil or vegan butter and use flax egg (1 tbsp ground flax + 3 tbsp water)

Small changes to liquids and fat alter bake time and texture, so when you swap ingredients, adjust accordingly. Adding a liquid sweetener such as honey or maple syrup increases moisture and can reduce spread; reduce other liquids slightly. When substituting nuts, consider flavor intensity — pecans and hazelnuts are milder than walnuts, while almonds bring a cleaner, slightly sweeter note. Try a few small test cookies before committing to a full batch when making substantial ingredient swaps.

Troubleshooting common problems

Cookies spread too much: check your butter temperature. If it’s too soft or melted, chill the dough for 20–30 minutes before baking. Also, too little flour or overmixing liquid can contribute to excess spread, so measure and mix gently. Cookies harden after cooling: they were likely overbaked; try shaving off a minute or two from your bake time, or reduce oven temperature slightly. Underbaked interior that remains raw even after cooling often means the cookie was too large or oven temperature too low.

Oats taste raw or grainy: use a mix of rolled and quick oats for creamier texture or reduce oat quantity slightly. If nuts become bitter, they were probably over-toasted; toast only until fragrant, not dark. If your cookies crumble apart when handled, make sure the binding ingredients — egg and fats — were measured correctly and that the flour quantity is sufficient for the number of mix-ins. Accurate measuring and attention to dough consistency go a long way to preventing these issues.

Storing, freezing, and reheating for freshness

Cookies store well when you control moisture exposure. For short-term storage, keep baked cookies in an airtight container at room temperature for up to five days, with a slice of bread or a few apple slices to maintain moisture if you prefer softer cookies. For longer storage, freeze baked cookies in a single layer on a tray, then transfer to a freezer bag; they keep well for up to three months. To warm frozen cookies, thaw at room temperature and heat in a 300°F oven for five to seven minutes to refresh crisp edges and release aroma.

You can also freeze raw dough. Scoop the dough onto a tray, freeze until firm, then bag the scoops for later baking. This method allows you to bake fresh cookies on demand and yields slightly better texture than reheating a fully baked cookie. When baking from frozen, add about two minutes to the bake time and watch closely for a golden edge. Batch-freezing dough is a game changer for unexpected guests or busy mornings when a homemade treat feels luxurious but time is short.

Nutrition notes and sensible swaps

These cookies are an indulgence but there are ways to make them feel lighter without losing character. Reducing sugar by 10–20% is often imperceptible to most palates and keeps moisture fairly similar. Swapping half the butter for unsweetened applesauce can reduce fat while helping maintain chew; expect a slightly denser texture. Using whole grain or oat flour increases fiber and nuttiness but changes structure, so blend carefully with all-purpose flour to keep the cookie tender. Be mindful that nuts are calorie-dense; the volume you add affects nutrient density more than the base dough.

For allergy-friendly or dietary needs, many simple swaps work: gluten-free flours with xanthan gum for binding, dairy-free butter substitutes, and flax or chia eggs for vegans. Each swap changes moisture and structure, so test a small batch first. If tracking calories or macros, a medium cookie from the recipe above typically ranges in the 150–200 calorie window depending on size and mix-ins; adding chocolate or extra nuts increases that number. Use portion control or share the batch if you want to enjoy them regularly without overdoing it.

Serving suggestions and pairings

These cookies are versatile: they work as a breakfast accompaniment with thick yogurt, as a midday pick-me-up with tea, or as an after-dinner treat alongside coffee. For a simple dessert, sandwich two cookies with a spoonful of mascarpone or vanilla cream cheese and chill briefly. For a more celebratory presentation, warm the cookies and serve with a scoop of vanilla ice cream and a drizzle of maple or salted caramel. They also travel well in lunches or picnic baskets, where the walnuts add welcome crunch.

Scaling up and planning for batches

Making batches for a crowd is largely about logistics. Double or triple the recipe, but mix in stages if your bowl or mixer is small to ensure even incorporation. Bake on multiple sheets, rotating and swapping positions to account for hot spots in the oven. If you need a uniform look for gifting or a bake sale, chill shaped dough logs and slice before baking for consistently round cookies. Keep a sheet pan warm in the oven at the lowest setting for short-term hold if you need to present cookies warm to several people at once.

Label and date any frozen dough or baked cookies, and keep a note of any variations you liked. When baking a lot, consider a small kitchen scale and portioning scoops to reduce fatigue and maintain uniformity. I find that making multiple trays and storing them on cooling racks as I bake gives me a steady assembly-line rhythm, and it’s easier to keep quality consistent than trying to manage one colossal tray in a too-small oven. Small planning steps save time and improve outcomes when volume increases.

My kitchen experiments and what I learned

I learned early on that the best cookies came from small, deliberate experiments rather than wild improvisation. One memorable experiment was swapping half the butter for browned butter to deepen flavor; the result tasted richer and nutty in a way that highlighted the walnuts. Another trial involved adding citrus zest to dried cherry mix-ins; the bright fruit cut through the oat richness and felt surprisingly grown-up. I always test a few cookies at home before bringing a new version to friends — feedback in the moment is the fastest way to refine a recipe.

Baking for family gatherings taught me to favor sturdier cookies that travel well, which led to slightly flatter, crisp-edged versions that still tasted tender inside. I’ve also learned not to chase every trend; some combos look clever on paper but disrupt the oat-walnut balance. My advice is to keep the base intact and introduce one variable at a time — a new spice, a different sweetener, or an unusual mix-in — so you can judge what really works. That approach turns experimentation into a series of small wins rather than guesswork.

Final practical tips and an invitation to play
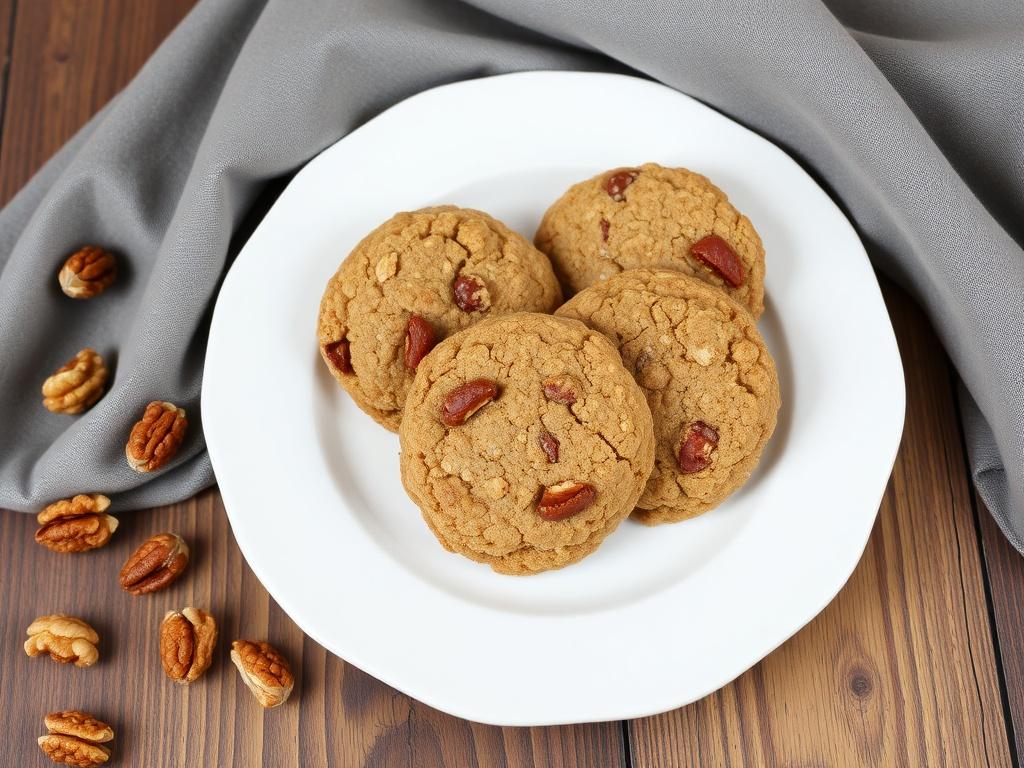
Oatmeal Cookies with Walnuts. Final practical tips and an invitation to play

Start with the basic recipe, then make one small change at a time. Keep notes on what you alter so you can repeat successes and avoid repeating mistakes. Taste the dough if you’re comfortable doing so and safe — raw eggs aside — to judge salt and sweetness before baking. Use fresh walnuts and store them in the refrigerator if you don’t plan to use them quickly, as their oils can turn rancid at room temperature. Most importantly, allow yourself the pleasure of imperfect cookies; they are meant to be enjoyed, not judged.

If you try the recipe or one of the variations, write down what you did and what you liked. Share a batch with someone and notice which mix-ins vanish first — that’s honest feedback. Baking is a practical craft and a creative outlet at once, and cookies like these reward both experimentation and care. Go on, preheat the oven and start with a small tray; you’ll be surprised how quickly the aroma alone can lift a day.
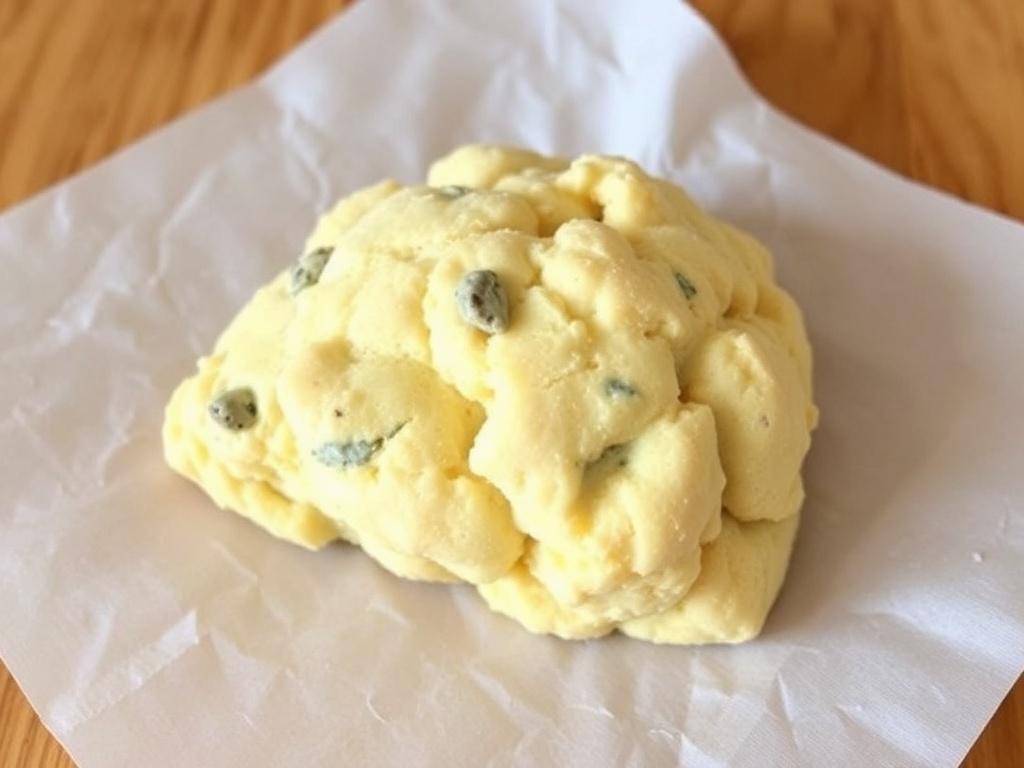
Cheesy Scones That Make Any Morning Feel Like a Small Celebration

There is something quietly triumphant about biting into a scone with warm, melty cheese threading through its crumb. These Cheesy Scones are the sort of thing that turns an ordinary morning into a sensory event: the crisp exterior gives way to a tender interior and that salt-kissed tang of good cheese elevates everything. In this article I will walk you through the why and the how — from ingredient choices to baking techniques, useful variations and sensible storage tips. Expect practical instructions, a few personal anecdotes from my own kitchen experiments, and enough detail so you can make reliably excellent savory scones at home. No fluff, just lively guidance to help you bake with confidence and a little adventure.

Why Cheesy Scones Are a Breakfast Game-Changer

Savory scones bridge the gap between pastry and bread: they’re richer than a roll but less fussy than laminated dough. When you add cheese, they transform into a warm breakfast staple that’s portable, comforting and unexpectedly versatile. You can pair a freshly baked scone with a soft-boiled egg, use it as a base for a sandwich, or set out a board of condiments and let everyone customize their plate.

They also reward improvisation. Unlike delicate soufflés, scones forgive a rough hand; a quick mix and gentle patting yields rustic, satisfying results. For busy mornings, that ease is invaluable: you can shape and bake a batch in under an hour and still have something that looks and tastes homemade. The key is understanding a few simple principles — temperature, hydration and cheese selection — which I’ll unpack in the next sections.

Understanding the Basics: Ingredients and Roles

Great Cheesy Scones rely on a small set of ingredients that each play a clear part. Flour provides structure, fat contributes tenderness and flakiness, leavening agents give lift, and dairy adds moisture and flavor. Cheese is both a flavor engine and a textural actor: it melts into pockets and browns on the surface, creating contrast within each bite.

Getting familiar with these roles helps when you want to tweak a recipe. For instance, more fat will yield a softer crumb but reduce oven spring, while a coarser grate of cheese creates distinct molten pockets rather than an even spread of flavor. A simple mental map of ingredients lets you adapt to what you have on hand without losing the essence of the scone.

Ingredient Primary Function Tip
Flour Structure Use all-purpose for balance; pastry flour gives a lighter crumb
Butter Tenderness, flakiness Cold butter produces lift; cut into small pieces
Leavening (baking powder) Rise and lift Ensure freshness; double-acting types are forgiving
Cheese Flavor, moisture, texture Grate finely for even distribution, coarser for pockets
Milk/Buttermilk Hydration, acidity Buttermilk adds tang and reacts with baking powder for extra lift

Choosing the Right Cheese

Not all cheeses behave the same under heat. Aged cheddar gives sharpness and browning; a mild cheddar melts smoothly and creates a creamier mouthfeel. Some cheeses, like aged Parmesan or Pecorino, won’t produce long molten strings, but they add a crystalline salty crunch and deep umami. For a classic savory scone, I usually reach for a vintage or extra-sharp cheddar, roughly 2–3 ounces per batch, grated on the coarser side to create pockets of melty goodness.

If you want gooey pull, choose cheeses with good meltability: young Gruyère, young Comté or fontina are excellent. For stronger flavor with less melt, mix a hard cheese into grated melting cheese; a tablespoon of finely grated Parmesan can punch up savory depth without dominating melt. Remember that some supermarket pre-shredded cheeses contain anti-caking agents that affect melting, so when possible grate blocks yourself.

Flour, Fat and Leavening: Balancing Texture

Flour type and handling determine whether your scones will be tender or tough. All-purpose flour is a reliable go-to, offering a pleasing balance. If you want a short, delicate crumb, combine half all-purpose and half pastry flour. Overworking the dough builds gluten, which yields chew — useful for some breads but not for flaky scones. That’s why mixing until just combined and handling with gentle presses matters.

Butter should be cold and in small pieces. As it heats in the oven, small pockets of steam create lift and layers, so those visible flecks of butter make a difference. For leavening, fresh baking powder is crucial; if it’s old, scones will be dense. A practical tip: preheat the oven while you finish shaping the dough so the baking powder begins its job as the scones hit hot air.

Step-by-Step Recipe: Classic Cheddar Cheesy Scones

This is a straightforward, reliable version I return to when I want quick, flavorful results. It produces scones with a golden crust and tender interior, where cheese pockets mingle with buttery notes. Quantities are scaled for a dozen medium scones; you can halve or double as needed. The method emphasizes cold butter, quick mixing and a hot oven for maximum rise.

Ingredients

Gathering ingredients first saves time and prevents overworking the dough. Measure flour by spooning into a cup and leveling it off for accuracy. Use good-quality cheese for flavor; a block grated by hand will always outperform pre-shredded blends in melt and texture.

  • 2 cups (250 g) all-purpose flour
  • 1 tablespoon baking powder
  • 1/2 teaspoon fine sea salt
  • 4 tablespoons (60 g) unsalted butter, very cold, diced
  • 1 1/2 cups (150–175 g) sharp cheddar, coarsely grated
  • 3/4 cup (180 ml) buttermilk, plus extra for brushing
  • 1 large egg
  • Optional: 2 tablespoons chopped chives or herbs

For a dairy-free or lighter version, you can swap some butter for oil and use a milder cheese alternative, but flavor and texture will change. If you don’t have buttermilk, mix one tablespoon of lemon juice or vinegar with milk and let it sit for five minutes; the acidity improves lift and tang. I prefer a touch of herbs for freshness, but the scones are excellent on their own.

Method

Start by preheating the oven to 220°C (425°F) and lining a baking sheet. Whisk together flour, baking powder and salt in a bowl to ensure even distribution. Coldness is your friend here: add the diced butter and work it in quickly using a pastry cutter, two knives or fingertips, leaving pea-sized pieces. The goal is a coarse, crumbly mixture with visible flecks of butter, not a smooth dough.

Add the grated cheese and herbs, tossing briefly to combine. In a separate bowl, whisk the buttermilk and egg together, then pour into the dry mix. Gently fold with a spatula until the dough just holds together; some streaks of flour are fine. Turn the dough out onto a lightly floured surface and pat it into a round about 1 inch (2.5 cm) thick — avoid kneading. Use a cutter for rounds or slice into wedges for a rustic look.

  1. Arrange scones on the prepared sheet, leaving space for expansion.
  2. Brush tops lightly with buttermilk for color and sprinkle a few extra shreds of cheese.
  3. Bake for 12–16 minutes until golden brown and set beneath.
  4. Let cool for five minutes on the pan, then transfer to a rack.

Timing matters: a very hot oven gives a rapid rise and flaky layers, while a slower oven will cause denser scones. After baking, resist the urge to slice immediately; a brief rest lets steam settle and the interior finish cooking. Serve warm for the best melting experience — that moment when the cheese loosens and reaches a slightly gooey texture is what makes them irresistible.

Variations and Flavor Twists

Scones are a playground for flavors. Add-ins can be savory — think caramelized onions, sundried tomatoes, or crumbled bacon — or herb-forward with rosemary, thyme or tarragon. Each addition changes the scone’s character: onions bring sweetness, bacon introduces smokiness and herbs lend brightness. Adjust salt accordingly when you add potent ingredients like olives or cured meats.

If you want something spicier, fold in finely chopped jalapeños or a pinch of cayenne. For a sweeter-savory balance, stir in a small handful of diced apple or pear with a milder cheese; the fruit caramelizes in the oven and pairs beautifully with cheddar or Gruyère. Mini scones are another option — perfect for entertaining — simply reduce baking time by a few minutes and watch closely.

For special occasions, top scones with seeds or flaky salt before baking for texture and visual appeal. You can also experiment with cultural twists: add za’atar and feta for a Mediterranean vibe, or mix in grated halloumi for a firmer, squeaky bite. Each approach teaches you more about how cheese behaves in different doughs.

Baking Tips and Troubleshooting

Cheesy Scones. Baking Tips and Troubleshooting

If scones come out dense, the likely culprits are overworked dough, expired baking powder or too much liquid. Avoid kneading; instead, press the dough gently into shape. Always test your baking powder by mixing a small amount with hot water — it should bubble actively. If it’s sluggish, replace it and your scones will perk up.

For flat or oily scones, check butter temperature. If the butter is warm or melted into the flour, the dough will be greasy and won’t create steam pockets. Conversely, too little fat leads to dry, crumbly scones. Aim for balance: visible, cold butter bits within the dough. If tops brown too quickly while the interior remains undercooked, lower oven temperature slightly and bake a few minutes longer.

Uneven cheese distribution can be resolved by grating the cheese on the larger side and tossing it into the dry mix, ensuring it’s coated and spread throughout. If your kitchen is warm, chill the assembled dough for 10–15 minutes before cutting shapes. This brief rest firms the butter and improves rise in the oven. Small adjustments like these are the difference between a decent scone and one you’ll make again and again.

Serving, Pairings and Presentation

Scones are happiest when served warm. Right from the oven they pair beautifully with softened butter, a smear of mustard or a dollop of tangy yogurt. For a full warm breakfast, I often set out scrambled eggs, sautéed greens and a stack of these savory scones; guests can build plates to their taste. The combination of protein, greens and a hearty scone feels complete without being heavy.

Beverage pairings depend on the scone’s flavor profile. A robust black tea or a rich coffee complements sharp cheddar, while lighter herbal teas suit herb-infused versions. For brunch with a crowd, present scones on a wooden board with small bowls of preserves, pickles and compound butter; the variety keeps the moment interactive and visually appealing. A scattering of fresh herbs on top adds color and signals flavor.

For sandwiches, split larger scones and fill them with sliced ham, roasted vegetables or simply a fried egg and greens. They also work well alongside soup — a cheddar scone with tomato soup is a classic match. Think of scones as the versatile member of the table that adapts to the meal’s mood and elevates humble ingredients.

Make-Ahead, Freezing and Reheating

Cheesy scones are excellent candidates for planning ahead. You can shape and freeze unbaked scones on a tray, then transfer them to a bag for longer storage. When ready to bake, place frozen scones on a sheet and add a minute or two to the baking time; they’ll bake from frozen without losing texture. This method gives you freshly baked results on a time-crunched morning.

For baked scones, wrap tightly and store at room temperature for up to two days or freeze up to one month. To reheat, I prefer a low oven for 8–10 minutes to revive crust and interior; a microwave zaps warmth quickly but softens the crust. For best texture, briefly pop frozen scones in a 180°C (350°F) oven after thawing, or bake from frozen with a slightly longer time. Little steps like this preserve the scone’s character and make weekday breakfasts more enjoyable.

Nutrition and Simple Swaps

While these scones are indulgent, small swaps can reduce calories or increase nutrient density without wrecking the spirit of the recipe. Replace half of the all-purpose flour with whole-grain flour for added fiber; expect a slightly denser crumb and adjust hydration if needed. Use a moderate-fat cheese or reduce the amount of butter, compensating with a tablespoon of olive oil for moisture if desired.

Buttermilk can be swapped for low-fat yogurt thinned with a bit of milk, maintaining acidity and tenderness. If you need lower sodium, choose a low-salt cheese or grate in a milder variety and add herbs for more perceived flavor. These alternatives keep the scone approachable for different dietary needs while preserving the essential texture and warmth that make them a favorite.

My Scone Experiments and Kitchen Notes

I remember the first time I tried making savory scones I treated the dough roughly and ended up with something dense and uninviting. After a few dozen attempts and variable ovens, I settled on the technique described here: cold butter, quick mixing and a high initial oven temperature. That simple rhythm transformed my results overnight. Baking is part measurement and part feel — watch how the dough behaves rather than just following a clock.

One memorable experiment involved roasting garlic and folding it in with thyme and aged cheddar. The kitchen filled with a heady aroma, and friends insisted I write down that combination. Another time, I made tiny scones as part of a tapas-style brunch; guests loved the bite-sized versions slathered in herb butter. Those small successes taught me that scones respond well to playful tweaks, as long as the foundational technique remains intact.

Common Mistakes and How to Avoid Them

A frequent mistake is overhydration: adding too much liquid produces a dough that spreads rather than rises. If the mixture feels too wet, scatter a tablespoon of flour at a time and fold minimally until it holds together. Another common error is using warm butter; if your butter melts into the flour, the resulting texture will be heavy. Keep tools cold and work briskly.

Undercooking is also a trap, especially with higher cheese content which browns quickly. Use the poke test: a scone should spring back slightly and not feel doughy in the center. If the top browns before the middle sets, lower the oven by 10–15°C and continue baking until done. These small adjustments prevent disappointment and make your baking more consistent.

Scaling Up for Crowd-Friendly Batches

When you bake for a group, multiply ingredients proportionally and prepare several baking sheets in advance. Space matters: crowded trays prevent proper browning and reduce rise, so bake in batches if necessary. I often prepare the dough, shape scones on multiple sheets, and chill them briefly while the first batch bakes; this keeps the butter cold and the schedule manageable.

Labeling and timing help when producing larger quantities. Keep a simple checklist by the oven to rotate trays and monitor doneness. If you plan to sell or gift scones, investing in sturdier packaging and clear reheating instructions will keep them tasting fresh. Efficient workflow eliminates stress and makes serving warm breakfast fare to many feel effortless.

Pairing Ideas for Different Occasions

For a casual weekday breakfast, pair a cheese-forward scone with soft-boiled eggs and fresh fruit for balance. At brunch, present them alongside smoked salmon, crème fraîche and sliced cucumbers for a more elegant spread. If you’re hosting an evening gathering, mini scones make great savory canapés — top with a smear of mustard mayo and a thin slice of cured meat.

Seasonal pairings also work beautifully: spring favors fresh herbs and young cheeses, while autumn benefits from roasted root vegetables and caramelized shallots. Think about texture contrasts — creamy, crisp and tangy elements complement the scone’s buttery crumb. Matching drinks to the mood — tea, coffee, or a light sparkling wine — completes the experience and highlights different flavor notes.

Technical Details: Oven Types and Bake Times

Convection ovens circulate air and tend to brown faster, so reduce temperature by about 15–20°C and watch closely. Conventional ovens work well with the temperatures listed earlier but can create hot spots; rotating trays mid-bake helps. Altitude affects rise too: at higher elevations you may need slightly less baking powder and a touch more liquid to keep the interior tender.

Investing in a reliable oven thermometer pays dividends, as many oven dials are not accurate. A shallow pan of water on the lower rack can moderate oven dryness in very hot environments, though it will slightly increase baking time. Small technical tweaks like these improve consistency and give you better control over final texture and color.

Finishing Touches: Visual and Flavor Details

Finishing touches make a difference: brush with buttermilk or an egg wash for glossy tops, sprinkle with flaky salt or seeds for texture, and add a few extra shreds of cheese for dramatic melting. A light dusting of smoked paprika or black pepper can accentuate savory notes. Presentation matters; a simple garnish of chopped chives or microgreens signals freshness and draws the eye.

For gifting, wrap scones in greaseproof paper and tie with twine, including a small note with reheating instructions. A thoughtfully presented batch communicates care and makes the recipient eager to taste. Small gestures like these turn good scones into memorable ones.

Quick Reference: Troubleshooting Checklist

Keep this short checklist nearby when you bake. It helps quickly diagnose problems without reading through pages of advice. The points are practical and based on repeated trial-and-error in a home kitchen setting.

  • Dense texture: check baking powder freshness and avoid overworking.
  • Oily dough: butter was too warm; chill dough before shaping.
  • Flat scones: not enough leavening or dough too wet.
  • Uneven cheese melt: grate cheese fresh from a block and distribute in dry mix.
  • Top browns too fast: lower oven temperature and bake longer.

These quick reminders are the sorts of things I write on a sticky note and keep near the oven. They save time and help maintain good results even on rushed baking days.

Bringing It All Together

Cheesy scones are deceptively simple: the ingredient list is short, but each element deserves attention. Mastering the basics — cold butter, correct hydration, and fresh leavening — gives you a flexible foundation for countless variations. Whether you stick to a classic cheddar or experiment with herbs, roasted vegetables, or different cheeses, the technique remains largely the same and rewarding.

Make a batch this week and notice the small satisfactions: the warm aroma filling the kitchen, the contrast of crisp exterior and tender inside, and the way a simple scone can turn an ordinary meal into something to remember. With a little practice and these practical tips, savory scones will become a reliable part of your baking repertoire and an easy way to bring a comforting warm breakfast to your table.

The Humble Wonder: How to Make a Carrot Cake That Feels Like Home

There are cakes that shout and cakes that whisper. The one we’re talking about lives somewhere in between: warm-spiced, textured, and quietly persuasive. A good carrot cake is more than an assembly of grated root and batter; it’s a balance of moisture, spice, and texture that invites second helpings. In this article I’ll take you through not only a reliable method, but the reasoning behind each choice, so you can bake with intention instead of guesswork. Expect practical tips, a few personal confessions, and a handful of variations to suit different moods and seasons.

Where It Came From: A Short Slice of History

Root-based desserts have a long pedigree. In times when sugar was scarce or expensive, cooks leaned on naturally sweet vegetables to make puddings and cakes. The carrot’s natural sweetness and fine texture made it an obvious candidate. Over centuries this evolved from rustic puddings into the layered, cream-cheese–frosted version most of us recognize today.

By the 19th and early 20th centuries recipes for “carrot puddings” were common in Europe, and wartime economies nudged the carrot into further prominence. The modern, cream cheese–frosted layer cake became popular in the United States in the mid-20th century and then enjoyed several revivals. Each era left its mark: some versions are studded with nuts, others studded with pineapple or raisins, and some lean into spice and orange zest for brightness.

Why This Recipe Works: The Principles Behind Texture and Flavor

Understanding the logic behind ingredients changes how you bake. Moisture is king with this kind of dessert: grated carrot contributes water, butter or oil adds fat, and eggs bind everything together. Too little fat or too much flour yields a dry crumb; too much liquid produces a heavy, sunken center. The sweet spot is a tender structure that holds up under frosting yet feels light when eaten.

Spices and inclusions provide personality. Cinnamon, nutmeg, and a touch of ginger play well with carrot’s natural sweetness, while citrus zest cuts through richness. Nuts add a contrasting crunch, an essential reminder that texture matters as much as flavor. Finally, the frosting—usually cream cheese—introduces tang, sweetness, and a creamy finish that contrasts the crumb.

Ingredients: What Really Matters

Good baking starts with good basics. Choose fresh carrots—medium-sized hold the best balance of sweetness and moisture. Use room-temperature eggs to mix more evenly. If you prefer a denser, more tender crumb, use oil instead of butter; butter will give more flavor but a slightly firmer texture. For sweetening, a mix of granulated sugar and brown sugar can add depth, with the brown sugar contributing a hint of caramel.

Don’t skimp on the nuts if you like texture. Walnuts are traditional, but pecans give a buttery note while hazelnuts bring a different, toasty profile. Toast them briefly in a dry pan to amplify their flavor. For the flour, all-purpose works fine, but if you’re after an almost custardy crumb, a small percentage of cake flour can be folded in to soften the structure further.

Essential Ingredient Table

Here’s a compact table of ingredient roles so you can improvise confidently. Think of it as a map for substitutions rather than a strict recipe.

Ingredient Function Common Substitutes
Carrots Moisture, sweetness, texture Grated parsnips or zucchini (adjust moisture)
Fat (oil or butter) Tenderness, mouthfeel Applesauce (partial), melted butter, neutral oil
Sugar (brown + granulated) Sweetness, moisture, flavor depth Coconut sugar, maple syrup (reduce liquid)
Nuts Crunch, contrast Pecans, hazelnuts, toasted seeds
Spices Warmth and aromatic profile Cardamom, allspice, orange zest

Step-by-Step Method: Mix, Bake, and Frost

A clear technique prevents mistakes. Start by grating the carrots finely—this creates uniform moisture and avoids long fibers that can make the crumb stringy. If you prefer a rustic feel, reserve a small portion coarsely grated for texture. Whisk your dry ingredients together to ensure even distribution of leavening and spices. When creaming, if you use butter, cream it with sugar until pale, which traps air and helps leavening.

For a simple, reliable workflow, follow these stages: prepare and measure, combine dry ingredients, mix wet ingredients, fold in the carrots and nuts, and bake. Timing matters; overmixing once flour is added will toughen the cake, while underbaking leaves a gummy core. Use a toothpick in the center near the end of the suggested time. If it comes out with a few moist crumbs clinging, that’s ideal—gooey batter is the problem, not a few crumbs.

Method Checklist

Use this checklist during the active steps so nothing gets missed. It helps especially when you’re juggling multiple bowls.

  • Preheat and prep pans: grease and line for easy release.
  • Grate carrots and toast nuts before mixing.
  • Whisk dry ingredients thoroughly.
  • Combine wet ingredients, then fold in dry gently.
  • Bake until set, then cool completely before frosting.

Frosting and Fillings: Beyond Plain Cream Cheese

Cream cheese frosting is a classic because the tang balances sweetness, but there are variations. A lightly whipped mascarpone frosting gives richness without overt sweetness. If you prefer something less dairy-forward, a brown-butter glaze or a tahini maple drizzle can complement spice and nuts beautifully. Consider a thin coat of frosting—what bakers call a “crumb coat”—followed by a final finish for a clean presentation.

Fillings add drama. Thinly sliced candied ginger or a layer of finely chopped, caramelized apples pairs well when you want a fruitier take. If you keep layers thin and even, the cake remains moist and slices cleanly. Remember that heavy fillings require firmer textures in the cake layers to prevent collapse; slightly underbake less when using rich fillings to maintain structure.

Texture and Add-Ins: Balancing Moisture and Crunch

Mix-ins are where personality sneaks in. Raisins and crushed pineapple add chew and extra moisture, while shredded coconut lends a tropical note and subtle chewiness. When adding any wet ingredient like pineapple, reduce other liquids slightly or increase flour to keep the crumb stable. Nuts—chopped and toasted—should be folded in gently at the end so they don’t sink.

One habitual mistake is assuming more carrots always equals better moisture. Beyond a point, excess grated vegetable simply changes the batter ratio and can make the cake dense. A standard range—about two cups grated for a two-layer cake—keeps that balance. If you want extra moisture, incorporate a small amount of sour cream or yogurt into the batter rather than adding more carrots; the cultured dairy adds fat and tang without weighing the structure down.

Quick Guide: Add-Ins and How Much

  • Nuts: 3/4 to 1 cup, chopped and toasted.
  • Raisins or currants: 1/2 cup, plumped in warm water or rum.
  • Crushed pineapple: 1/2 cup, drained tightly unless you reduce other liquids.
  • Coconut: 1/3 to 1/2 cup, for chew and flavor.
  • Ginger or orange zest: 1–2 teaspoons each, to brighten the profile.

Equipment and Baking Pointers

You don’t need fancy tools to make a memorable cake, but a few simple items make life easier. A box grater or food processor attachment speeds up work and gives a uniform grate. Accurate measuring spoons and a kitchen scale solve inconsistent results; weights are especially helpful for flour and nuts. Use an oven thermometer if your oven is older—many home ovens run hot or cool, and that single degree can change how the interior sets.

Pan size matters. A too-small pan produces overflow and dense centers, while a too-large pan flattens the cake. For layered cakes, two 8-inch pans are versatile. Grease them lightly and line bases with parchment for a clean release. Rotate pans halfway through baking only if your oven has hot spots; frequent opening cools the oven and can cause uneven rise.

Decorating: Look Like You Mean It

Decoration needn’t be intimidating. A rustic look with a thin, slightly imperfect layer of frosting feels inviting and modern. If you want a polished finish, use a crumb coat first, chill for 20–30 minutes, then apply the final layer. Garnishes are crucial: chopped nuts sprinkled around the edge, thinly candied carrot ribbons, or a scattering of toasted coconut can transform appearance without heavy effort.

For celebrations, consider piping a small border and using edible flowers or a dusting of ground cinnamon. I once iced a cake with a simple ring of crushed spiced nuts and a few candied orange slices for a winter event; people assumed it had taken hours to make, and the truth was it took forty extra minutes. Little accents elevate perception more than complex piping.

Storage, Transport, and Freezing

Cakes with cream cheese-based frostings should be refrigerated, covered to prevent condensation. A good practice is to leave the frosted cake at room temperature for up to two hours before serving so the frosting softens slightly. For transport, place the cake in a shallow box and slide a silicone mat underneath to prevent sliding; a small, insulated cooler can help on hot days.

Freezing works well if you want to prepare in advance. Freeze unfrosted layers wrapped tightly in plastic wrap and foil, then thaw in the refrigerator overnight before frosting. If you must freeze a frosted cake, chill it first until the frosting firms, then wrap gently to avoid smudging. Defrost slowly in the fridge to retain texture and flavor.

Flavors for Every Season

This cake adapts effortlessly to seasons. In spring, fold in lemon zest and a handful of lightly toasted pistachios for brightness. Summer benefits from the acidity of fresh pineapple or a thin layer of lemon curd between layers. Come winter, emphasize warming spices—cardamom and allspice—top with toasted walnuts, and call it a winter sweet centerpiece. Each change alters the mood without breaking the cake’s character.

For a festive holiday table, I often swap half the all-purpose flour for a fine almond flour and add a splash of dark rum to the batter. The crumb becomes more tender and the flavors deeper; the nuts on top toast to a shiny, aromatic crust. It’s my go-to when hosting in cold months because the aroma that fills the kitchen feels like a promise of comfort.

Healthier Tweaks Without Losing Soul

If you want to reduce sugar or fat, do it thoughtfully. Replace part of the sugar with apple sauce or mashed banana, but remember these add their own flavors. Swap half the oil for plain yogurt to maintain moisture while cutting fat. Whole-grain substitutions are possible—use part whole-wheat pastry flour for a nuttier nuance; too much will make the cake dense, so stay under using more than 25–30% replacement.

For a lighter dessert option, make one thicker 9-inch layer, allow it to cool, then slice horizontally to create two thinner discs and spread a lighter frosting in between. The smaller surface area of frosting lowers per-serving sugar and fat while preserving the experience. Pair slices with fresh fruit to add brightness and reduce the urge for a second helping.

Common Problems and How to Fix Them

Sinking centers often signal underbaking or too much liquid. Test with a toothpick and adjust baking time or temperature slightly on your next attempt. If tops crack, your oven might be too hot; lowering the temperature by 10–15°F and increasing time helps for even rise. Dense texture usually comes from overmixing; once flour is added stir just until combined.

Overly sweet frosting can overpower delicate spices. Counter this by adding a touch more cream cheese or a pinch of salt to the frosting, or thin it with a bit of heavy cream to regain balance. If nuts sink to the bottom during baking, toss them briefly in a tablespoon of flour before folding in; the flour gives them traction and prevents sinking.

Troubleshooting Table

Problem Likely Cause Fix
Sunken center Underbaked or too much leavening/liquid Increase bake time, check measurements, reduce liquid slightly
Dry crumb Too much flour or not enough fat Use oil or add sour cream/yogurt next time
Nuts at bottom Dense batter and lack of traction Toss nuts in flour before folding in
Frosting too sweet Excess sugar in icing Add more cream cheese or a pinch of salt

Variations Worth Trying

There’s no single “best” version—only preferences. Try a spiced loaf meant for slicing thinly at breakfast, packed with walnuts and a lightly sugared glaze. For a showstopper, make a layered cake with a thin smear of apricot jam between layers and finish with mascarpone frosting. If you want to be playful, fold in finely chopped dates and a touch of espresso powder to deepen flavors without tasting like coffee.

For a vegan approach, use flax eggs and a neutral oil; aquafaba can work in meringue-based frostings if you want to avoid dairy. A gluten-free cake can be achieved with a blend of rice flour and tapioca or a pre-made gluten-free flour mix; texture will differ but the aromatic spices and nuts still make it satisfying.

Pairings: Drinks and Accompaniments

Carrot Cake. Pairings: Drinks and Accompaniments

The right accompaniment elevates the experience. A robust tea—like Assam or lapsang—matches the cake’s spice, while an espresso highlights the caramel notes of brown sugar and toasted nuts. For dessert wine, a late-harvest Riesling or an amber rum pairs beautifully, especially if the cake includes candied citrus or toffee-backed nuts.

Fresh fruit is underrated with this cake. A side of lightly macerated berries slices through richness and adds color to the plate. If serving in winter, spoon a warm berry compote atop a slice; the contrast of hot and cool, tart and sweet, feels indulgent without heaviness.

A Personal Note: My Relationship with This Recipe

I learned to make this cake on a rainy afternoon when friends dropped by unexpectedly. I had grated carrots, some forgotten walnuts, and a block of cream cheese on hand. The first tentative batch was a hit—it sealed friendships and prompted requests for the recipe. Since then I’ve tweaked ratios and tried different nuts, but the memory of that spontaneous gathering is why I bake it when I want to make someone feel seen.

One baking habit I’ve developed: always roast nuts briefly. It only takes a minute, but the aromatic change is remarkable. Another lesson: don’t over-fret about perfect layering. A slightly imperfect slice tastes warm and honest, and guests remember the flavors more than the symmetry. Baking for people is, at its best, about care more than perfection.

Recipe: A Reliable Two-Layer Cake (Adaptable)

Below is a straightforward, adaptable recipe that embodies the principles discussed. Quantities and times assume standard home ovens and two 8-inch pans. Read through before you start and make small adjustments if you prefer a denser or lighter crumb. Remember that substitutions listed earlier will affect texture and timing.

  1. Preheat oven to 350°F (175°C). Grease and line two 8-inch pans.
  2. Whisk together 2 cups all-purpose flour, 1 1/2 teaspoons baking powder, 1 teaspoon baking soda, 1 1/2 teaspoons ground cinnamon, 1/2 teaspoon nutmeg, and 1/2 teaspoon fine salt.
  3. In a separate bowl, beat 3/4 cup neutral oil with 1 cup packed brown sugar and 1/2 cup granulated sugar until combined. Add 3 large eggs one at a time, then 2 teaspoons vanilla extract.
  4. Fold dry ingredients into wet just until combined. Stir in 2 cups finely grated carrots and 3/4 cup toasted chopped walnuts. If using mix-ins, fold them in now.
  5. Divide batter and bake 25–30 minutes, or until a toothpick comes out with moist crumbs. Cool in pans 10 minutes, then turn out to cool completely.
  6. For frosting, beat 12 ounces cream cheese with 1/2 cup softened butter, 3 cups confectioners’ sugar (adjust to taste), and 1 teaspoon vanilla. Chill briefly if too soft, then frost.

Final Thoughts on Making It Your Own

This cake rewards small, thoughtful decisions. A squeeze of citrus here, a different nut there, and you can make the same base feel new every season. Baking it is a practice in listening—to your oven, your batter, and your taste. Treat the recipe as a conversation, not a commandment, and you’ll end up with slices that feel both familiar and uniquely yours.

Try one variation at a time and note the differences. Keep a small notebook by your mixer with quick notes: extra minute in the oven, more cinnamon, swap walnuts for pecans. Over time you’ll assemble a personal map of adjustments that guarantee success. That’s the real joy of baking: learning to create reliably good food that also carries memory and intention.

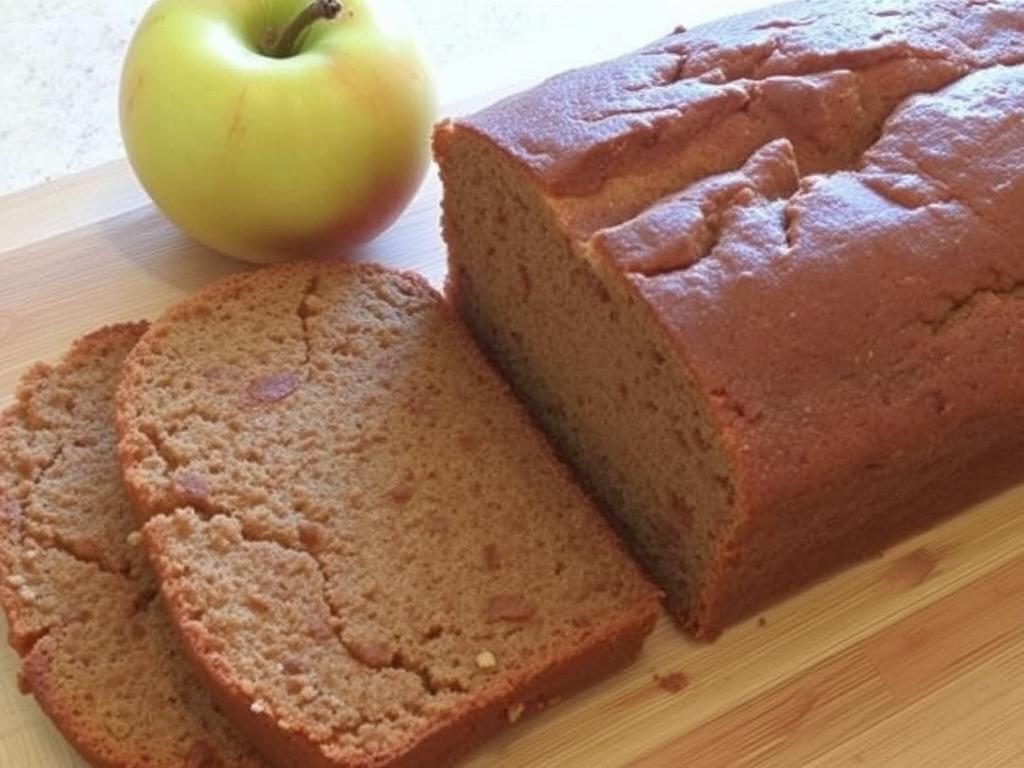
Warm Spice and Autumn Comfort: The Joy of Apple Cinnamon Bread

There are few things that smell as inviting as warm cinnamon mingling with tender apple as it roasts in the oven. This article explores that simple pleasure in depth, offering practical guidance, flavor science, and recipes so approachable you’ll want to bake a loaf tonight. Whether you call it a quick loaf, a spiced cake, or a everyday treat, the combination of fruit, spice, and tender crumb is a universal comfort. I will walk you through ingredients, techniques for reliable results, variations for different diets, and ways to store and serve the finished loaf. By the end you should feel confident to make a memorable apple-and-spice loaf without fuss.

Why Apple and Cinnamon Work Together

The pairing of apple and cinnamon is rooted in complementary aromas and textures: apples contribute brightness, juice, and a gentle acidity, while cinnamon adds warmth and aromatic depth. When baked into a batter, apple pieces release moisture that keeps the crumb tender, and their sugars caramelize slightly, creating pockets of flavor. Cinnamon contains cinnamaldehyde, a volatile compound that gives the spice its characteristic scent; when heated it becomes more pronounced and melds seamlessly with the natural sweetness of the fruit. This balance—fruit acidity versus warm spice—makes the loaf feel substantial without being cloying, a key reason the recipe endures in kitchens around the world.

Beyond chemistry, this pairing triggers strong memory cues for many people: family breakfasts, holiday gatherings, or autumn walks under trees. These memories are partly why a simple loaf can feel so comforting. From a culinary point of view, the apple provides structure and moisture while the spice layers complexity; together they turn stapled pantry items into something special. Understanding that balance helps you adjust the loaf for your taste: more spice for depth, more apple for a fruit-forward approach, or different apples for textural variation.

Choosing Apples: Texture and Flavor Matter

Not every apple behaves the same under heat. Some varieties break down into tender purée during baking, while others hold their shape and yield pleasant, chewy pieces. For a loaf that has discernible chunks of fruit, pick a firmer apple such as Granny Smith, Honeycrisp, or Braeburn. These varieties also bring bright acidity that cuts through the sweetness. If you prefer the apple to melt into the crumb and add overall flavor without visible chunks, softer apples like Cortland or McIntosh are good choices because they collapse more readily when heated.

Consider the sweetness and acidity, too: very sweet apples will reduce the need for added sugar, while tarter apples provide balance. A mix of apples can be especially interesting—use one firm variety and one softer one to get both texture and integrated flavor. Also think about skin and color. Leaving skin on saves time and adds visual flecks to the loaf, but peels can introduce a slightly firmer texture and sometimes astringency. For a refined crumb, peel; for a rustic look, leave the skin.

Essential Ingredients and What They Do

At its core, this loaf requires flour, sugar, fat, eggs, leavening, apples, and spice. Each ingredient has a job. Flour provides structure through gluten formation; sugar tenderizes and helps with browning; fat—typically butter or oil—lubricates the crumb and carries flavor; eggs bind and add richness; baking powder or soda gives lift; apples and cinnamon are the stars. When you know the role of each component you can tweak the recipe with more confidence, substituting one element without breaking the loaf.

For instance, swapping some butter for neutral oil will produce a moister loaf that stays fresh longer, while choosing melted butter over creamed butter changes the texture toward denser and more compact. Using buttermilk or yogurt introduces acidity that can react with baking soda for a more pronounced rise and tangy note. Whole wheat or nut flours add flavor but absorb more liquid, so adjust moisture accordingly. Finally, the amount and grind of cinnamon matters: freshly ground sticks to a higher aromatic intensity than pre-ground jars, so reduce if you prefer a subtle background scent.

Ingredients List for a Reliable Loaf

Here is a straightforward ingredient list for a dependable, medium-sized loaf. Quantities are flexible depending on loaf size and personal preference, but this baseline produces a tender, balanced crumb with noticeable apple pieces and warm spice. I favor a mix of sugar and brown sugar for depth, and a combination of butter and oil when I want both flavor and shelf life. If you like a streusel or glaze, I will provide proportions later so you can choose to finish the loaf as you wish.

  • All-purpose flour (about 2 cups)
  • Granulated sugar and/or light brown sugar (3/4 to 1 cup)
  • Baking powder and a pinch of baking soda (for lift)
  • Salt (1/2 to 1 teaspoon to balance sweetness)
  • Ground cinnamon (1 to 2 teaspoons, ground to taste)
  • Eggs (2, room temperature)
  • Butter (melted) or neutral oil (1/2 cup)
  • Milk or yogurt (1/2 cup for moisture)
  • Apples, peeled or unpeeled, diced (1 1/2 to 2 cups)
  • Vanilla extract (1 teaspoon)

Step-by-Step: A Simple, Foolproof Recipe

Below is a stepwise recipe written for clarity. Read it through once before starting and gather all ingredients and pans. The method follows a classic quick-bread technique: dry ingredients mixed together and wet ingredients combined separately, then folded gently. Overmixing will develop gluten and create a tough loaf; a few dry streaks in the batter are fine. This recipe is great for home bakers who prefer predictable results with minimal fuss.

Yield will depend on pan size; these proportions suit a standard 9×5 inch loaf pan. If you use mini pans or a bundt pan, adjust baking time and check doneness earlier. Also, the bake time below is a guideline—ovens vary, so use visual cues: a golden top, slightly pulling away from the pan edges, and a toothpick inserted in the center coming out with a few moist crumbs. Now for the actual procedure.

Ingredients

  • 2 cups (250 g) all-purpose flour
  • 3/4 cup (150 g) granulated sugar + 2 tablespoons light brown sugar (optional)
  • 1 1/2 teaspoons baking powder
  • 1/2 teaspoon baking soda
  • 1 teaspoon ground cinnamon
  • 1/2 teaspoon fine salt
  • 2 large eggs, room temperature
  • 1/2 cup (115 g) melted butter or neutral oil
  • 1/2 cup (120 ml) milk or plain yogurt
  • 1 teaspoon vanilla extract
  • 1 1/2 to 2 cups diced apples (about 2 medium apples)

Method

  • Preheat the oven to 350°F (175°C). Grease and flour a 9×5 inch loaf pan or line it with parchment paper for easy removal.
  • In a bowl, whisk the flour, sugars, baking powder, baking soda, cinnamon, and salt until evenly combined.
  • In another bowl, beat the eggs lightly, then whisk in melted butter or oil, milk or yogurt, and vanilla extract.
  • Make a well in the dry ingredients and pour in the wet mixture. Fold gently with a spatula until just combined and no large streaks of flour remain.
  • Fold in the diced apples, distributing them evenly through the batter.
  • Transfer the batter to the prepared pan, smooth the top, and bake 50–60 minutes, or until a toothpick inserted in the center comes out with a few moist crumbs.
  • Cool in the pan for 10–15 minutes, then transfer to a wire rack to cool more before slicing. A warm slice with butter is especially good.

Finishes and Toppings: From Glaze to Streusel

A simple glaze or crumb topping can elevate the loaf from homely to celebratory. A classic powdered-sugar glaze of equal parts confectioners’ sugar and milk drizzled across the warm loaf adds sweetness and a glossy finish. If you prefer crunch, a streusel made of flour, brown sugar, butter, and a pinch of cinnamon adds texture and caramelized edges. Toasted nuts—walnuts or pecans—introduce a brittle contrast to the soft crumb and pair wonderfully with both apple and spice.

Add toppings before baking rather than after for deeper integration: streusel will crisp and hold its shape when baked on top, while a glaze should be applied after the loaf cools slightly so it doesn’t run off. For a less sweet finish, brush the loaf with melted butter and sprinkle with coarse sugar or a cinnamon-sugar mix; this sears into a delicate crust. Consider also a cream cheese swirl for a richer, slightly tangy counterpoint to the fruit.

Simple Streusel Topping

Streusel is quick to make and only needs a fork or your fingers. Combine flour, brown sugar, a pinch of salt, and cold butter until clumps form; add a tablespoon of oats or chopped nuts if you like. Scatter the mixture over the batter before baking for a crunchy, caramelized top that contrasts nicely with the soft interior. This topping also helps lock in moisture for the underlying loaf.

  • 1/3 cup flour
  • 1/4 cup brown sugar
  • 3 tablespoons cold butter
  • Optional: 2 tablespoons chopped nuts or oats

Variations and Dietary Substitutions

One of the pleasures of this recipe is how adaptable it is. You can create a vegan apple loaf by replacing eggs with flax or chia “eggs” and swapping butter for a plant-based oil or vegan butter. For gluten-free diets, use a 1:1 gluten-free flour blend and add a tablespoon of psyllium husk or xanthan gum if the blend lacks binding agents. To reduce sugar, cut the added sugar by a third and rely more on naturally sweet apples; this keeps the loaf less sweet but still enjoyable.

Consider adding mix-ins like raisins, dried cranberries, or shredded coconut for textural contrast. Swapping some of the all-purpose flour for almond flour yields a denser, nuttier loaf that keeps well and tastes more sophisticated. If you want a lighter cake-like texture, try baking in muffin tins for 18–22 minutes, which offers individual portions and shorter bake times.

Diet-Specific Tips

For vegan baking, using applesauce or mashed banana can also replace some fat while adding moisture. If you substitute applesauce for oil, reduce the liquid elsewhere to avoid a gummy crumb. For low-carb options, almond flour and erythritol can work, but expect a different crumb and shorter shelf life. Always pilot small batches when experimenting with major swaps because textures respond differently to changes in fat, sugar, and gluten.

Troubleshooting: Common Problems and Quick Fixes

Even experienced bakers occasionally face issues. If your loaf sinks in the center, the likely culprits are underbaking, too much leavening, or opening the oven door too early. If the loaf is dry, you may have overmixed, overbaked, or used too much flour. A gummy center often means underbaking or too much liquid; in that case increase bake time and check with a toothpick at the center. Learning to read visual cues—browned top, slight pull from pan sides—and relying on toothpick tests will improve outcomes.

If apples sink to the bottom, toss them in a little flour before folding them in. For a loaf that is too dense, check the freshness of your leavening; baking powder older than six months loses potency. Finally, if the crust browns too quickly while the interior remains raw, tent the loaf with foil midway through baking to prevent over-browning while allowing the center to finish.

Storage, Freezing, and Make-Ahead Tips

A baked apple loaf stores well. For short-term storage, wrap the cooled whole loaf tightly in plastic wrap or keep sliced pieces in an airtight container at room temperature for 2–3 days. To preserve freshness longer, refrigerate up to a week; chilled slices are great toasted. For freezing, wrap individual slices or the whole loaf tightly in plastic and then foil, and freeze for up to three months. Thaw overnight in the fridge and warm slices in a low oven or toaster for that just-baked appeal.

For make-ahead convenience, prepare the dry mix and store it in a sealed container; combine wet ingredients and apples right before baking. Another easy trick is to bake muffins instead of a loaf: they reheat better and freeze as single servings. If you plan to make several loaves for gifts, stagger baking so each comes out fresh; a little warmth from the oven enhances aroma and makes any loaf irresistible.

Serving Suggestions and Pairings

A slice of this loaf pairs beautifully with many beverages. For breakfast, serve with coffee or black tea; the tannins of coffee cut through the loaf’s sweetness while tea accentuates subtle spice notes. For a more indulgent brunch, a dollop of crème fraîche or a smear of tangy cream cheese works wonders. In cooler weather, pair with mulled cider or spiced chai for a layered spice experience. For an afternoon treat, serve with a scoop of vanilla ice cream—warm bread, cold cream, and the apple’s texture make a simple, delightful dessert.

Consider presentation: slices on a wooden board with thinly sliced apples and a dusting of cinnamon make a rustic display. If you are serving guests, warm slices slightly and offer small bowls of butter, honey, or nut butter for a customizable experience. The loaf also holds up well as part of a brunch spread alongside savory items like quiche or smoked salmon, where its sweetness balances the salty counterparts.

My Own Baking Notes and a Small Anecdote

I remember the first time I baked an apple-and-spice loaf that was truly mine. I substituted half the butter with oil because I wanted a loaf that would keep for a few days, and I added a handful of chopped pecans for crunch. A neighbor stopped by with a cup of coffee and walked away with half the loaf—an impulsive act that revealed something important: this recipe travels well in both flavor and generosity. Since then I’ve refined the balance to emphasize bright apples and restrained sugar, making the spice a gentle companion rather than the headline.

One practical note I’ve learned: chop apples uniformly. Inconsistent pieces create pockets that either dry or go almost purée-like, and that unpredictability changes the eating experience. Also, let a freshly baked loaf rest slightly before slicing. A tempting early cut releases steam and creates a denser slice; patience rewards you with cleaner slices and better texture. Small habits like these help keep the baking process satisfying rather than experimental.

Quick Reference: Substitutions Table

Below is a compact table showing common swaps if you need to adjust ingredients quickly. Use it as a cheat sheet when shopping or tweaking for dietary needs. These substitutions maintain the essence of the loaf without requiring a complete rework of the method.

Ingredient Substitute Notes
Butter Neutral oil Use ¾ of the butter volume for oil; loaf will be moister and less flavorful
All-purpose flour Gluten-free 1:1 blend Add 1 tsp xanthan gum if blend lacks binder
Eggs Flax or chia egg 1 tbsp seed + 3 tbsp water per egg; may change texture slightly
Milk Yogurt or buttermilk Use same volume; buttermilk reacts with baking soda for extra lift

Frequently Asked Questions

Apple Cinnamon Bread. Frequently Asked Questions

How many apples should I use? Two medium apples diced typically yield the right balance of fruit to batter. Adjust upward for a fruitier loaf and downward if you want more cakey texture. What if my cinnamon is weak? Freshly ground cinnamon from whole sticks will be brighter; increase the ground amount slightly only if you prefer a strong spice note. Can I make mini loaves? Yes—bake at the same temperature but reduce time to 25–35 minutes, checking frequently.

If you wonder whether to peel apples, consider the presentation and texture you want. I often leave the skins on for weekday loaves to save time and get attractive speckles, but I peel the fruit for a smoother, more consistent crumb when serving guests. Lastly, don’t be afraid to taste and tweak sugar and spice levels—recipes are starting points, and home baking rewards small, thoughtful adjustments.

Putting It All Together

Making an apple-and-spice loaf is equal parts practical baking and creative expression. With a handful of pantry staples you can produce something that feels homemade and considered. Keep in mind the role of each ingredient, choose apples with the texture you prefer, and be gentle when folding batter to preserve a tender crumb. Small additions like a streusel or a handful of nuts enhance texture and offer contrast to the soft fruit.

Finally, remember that the best loaf is the one you enjoy sharing. Bake for yourself, for family breakfasts, or as a thoughtful neighborly gift—this is a recipe that rewards repetition and experimentation. As you practice, you’ll internalize what works in your oven and with your taste, and the process will become as satisfying as the result.

Cranberry Muffins: A Bright, Tangy Treat That Fits Breakfast and Dessert

There is something pleasantly surprising about a muffin that manages to be both comforting and brisk at the same time. These cranberry-studded cakes balance tartness and sweetness, offering a flavor lift that wakes up dark coffee on a chilly morning and finishes a dinner without feeling heavy. In this article I want to take you through why this particular recipe works, how to handle different forms of cranberries, and how to tweak the batter to suit your pantry or whim. Expect practical tips, a detailed recipe, and a few ideas that came from my own kitchen experiments. Whether you bake for company, pack lunchboxes, or simply crave a reliable dessert, you’ll find something useful here.

A brief look at origins and seasonal charm

Cranberries have a long history in North American food culture, treasured first by Indigenous peoples for both the fruit and its practical uses. Early settlers adopted cranberries in preserves and sauces, and the fruit naturally drifted into baked goods where its bright acidity offsets fat and sugar. Muffins as a format are flexible and quick to make, which helps explain why cranberries and muffin batter became such a staple pairing at holiday mornings and weekend bakeries. The tartness of the berry feels at home next to richer winter foods, yet it also matches lighter yogurt and citrus flavors for spring and summer breakfasts.

The seasonal appeal plays out in texture and color as much as in taste. Whole or halved cranberries create small pockets of tang that burst under the tooth, and their deep red hue makes the muffins visually inviting. With frozen cranberries available year-round, the recipe is not tied strictly to autumn and winter. Still, there is a special pleasure in baking these around colder months when spices and citrus are already on the counter, and the house fills with steam and aroma while the oven hums.

Why this formula works: balance of acidity, fat, and crumb

Good muffins are a study in balance. They need enough fat to be tender, enough liquid to create steam and lift, and the right proportion of flour to bind and give structure. Cranberries introduce an element that upsets conventional sweetness, which is actually an advantage. The fruit’s acidity brightens the batter, making you reach for slightly less sugar than with a neutral berry. That tendency lets other flavors—vanilla, orange zest, a pinch of spice—come forward without competing with cloying sweetness.

Texture is equally important. A soft crumb that holds together but isn’t gummy signals correct mixing and hydration. Overworking the batter turns that tender crumb into a dense brick. The method I prefer keeps wet and dry components separate until the very end, then folds briefly so the batter remains lumpy. Those lumps are your ally: they yield a light interior with just enough structure to pocket the cranberries, and the occasional surface crumble gives a satisfying contrast.

Key ingredients and smart substitutions

Cranberry Muffins. Key ingredients and smart substitutions

Every ingredient in a muffin has a reason. Flour provides structure, sugar sweetens and aids browning, eggs add cohesion and lift, and fat contributes tenderness and flavor. The fruit—cranberry—supplies acidity and moisture. A common question is which fats and liquids to choose. Butter offers best flavor and creates a fine crumb when creamed with sugar. Oil yields a moister product that keeps longer. Buttermilk or yogurt contributes tang and reacts with baking soda when used, giving extra lift and a delicate mouthfeel. If you are after an airy interior with a slight tang, aim for buttermilk or a buttermilk substitute.

Below is a compact table showing usual ingredients, their role, and simple alternatives you can use without losing the essence of the muffin.

Ingredient Function Swap option
All-purpose flour Structure Half whole wheat for nuttiness, but reduce to 25% max
Sugar (granulated) Sweetness, browning Brown sugar for caramel notes, or coconut sugar
Butter Flavor, tender crumb Vegetable oil for moistness, or half butter for taste
Buttermilk Tenderness, acidity Yogurt thinned with milk, or milk + 1 tbsp lemon juice
Cranberries Tart, moisture, color Frozen cranberries, or spare dried cranberries soaked briefly

Fresh, frozen, or dried cranberries: how to choose and adjust

Choosing the form of cranberry changes both technique and outcome. Fresh berries are ideal when in season because they burst with juiciness and are firm in texture. Frozen berries are nearby any time of year and are an excellent substitute. They hold up well and won’t bleed excessively if you toss them in a little flour before folding into the batter. Dried cranberries concentrate sweetness and require rehydration or pairing with extra acidity so the muffin doesn’t become cloying.

When using frozen berries, reduce the tendency to overmix and keep them mostly whole. For dried fruit, soak them briefly in hot water, orange juice, or a spirit like Cointreau to plump them up. If you use fresh and want a more even distribution, consider roughly chopping half of them so you get both large bursts of tartness and smaller notes scattered through the crumb. These small choices affect texture more than people expect, so treat the fruit as a design element, not merely an ingredient.

Sweeteners, spices, and add-ins that play nicely

Sweeteners and aromatics tune the cranberry’s tart edge. I prefer a mix of granulated sugar for structure and a modest amount of brown sugar for depth. Maple syrup or honey can replace part of the sugar for a more complex flavor, but reduce other liquids slightly to keep the batter from becoming too loose. Citrus zest—especially orange—lifts cranberries beautifully. A small pinch of cinnamon or cardamom warms the profile without turning the muffins into a heavy spice cake.

Add-ins extend the idea further. Pecans or walnuts add crunch and a toasted flavor that complements cranberries. White chocolate chips pair surprisingly well because their creaminess counters the berries’ sharpness. For a simple crunchy top, make a streusel with flour, butter, sugar, and a touch of salt and scatter it over the raw batter before baking. Here is a short list of reliable additions to consider.

  • Orange zest or a splash of orange juice
  • Toasted nuts: pecans, walnuts, or almonds
  • White chocolate chips or chopped dark chocolate
  • Streusel topping: flour, butter, brown sugar, and oats
  • Citrus glaze for finishing: powdered sugar + orange juice

Step-by-step recipe: reliable cranberry muffins for daily baking

Below you will find a recipe that I have tested and adapted for consistency. It leans toward moderate sweetness, with a tender crumb and a slightly domed top. The method follows a straightforward muffin approach: mix dry ingredients, mix wet ingredients, combine briefly, fold in the cranberries, and bake. Pay attention to oven temperature and mixing times—those are where bakers often unintentionally sabotage texture.

Ingredients (makes 12 standard muffins): 2 cups all-purpose flour, 3/4 cup granulated sugar, 1/4 cup packed brown sugar, 1 teaspoon baking powder, 1/2 teaspoon baking soda, 1/2 teaspoon fine salt, 2 large eggs, 3/4 cup buttermilk, 1/3 cup unsalted butter melted and cooled, 1 teaspoon vanilla extract, 1 tablespoon orange zest, 1 1/2 cups cranberries (fresh or frozen), optional streusel or coarse sugar for topping.

  1. Preheat oven to 400°F (200°C). Line a 12-cup muffin tin with paper liners or grease lightly. A hot oven gives the muffins a quick lift and pleasant browning.
  2. Whisk together the flour, baking powder, baking soda, and salt in a large bowl. Stir in the granulated and brown sugar so everything is evenly distributed.
  3. In a separate bowl, beat the eggs lightly, then whisk in the buttermilk, melted butter, vanilla, and orange zest. If using oil instead of butter, reduce the buttermilk by a tablespoon to compensate.
  4. Pour the wet ingredients into the dry and fold with a spatula until just combined. The batter should be lumpy; do not overwork. If you see dry flour pockets, a few quick folds will sort them out.
  5. Toss the cranberries with a teaspoon of flour, then fold them gently into the batter. This step helps prevent the fruit from sinking or bleeding color into the batter.
  6. Divide the batter among the muffin cups, filling them about two-thirds full. For taller tops, fill to three-quarters. Sprinkle streusel or coarse sugar if using.
  7. Bake for 18 to 22 minutes, until the tops are golden and a toothpick inserted in the center comes out with a few moist crumbs. Rotate the pan halfway if your oven has hot spots.
  8. Allow the muffins to cool in the tin for five minutes, then transfer to a wire rack. They’re best warm or at room temperature. If adding glaze, wait until they have cooled slightly so the glaze adheres without sliding off.

These instructions aim for predictable results even in different kitchens. Oven calibration varies, so the visual cues—golden top and toothpick test—are more reliable than a strict time. Overbaking dries them out quickly, so watch closely in the last five minutes. I often keep a pan of water in the oven for extra humidity when baking a large batch; it’s an old trick for keeping crusts tender without reducing internal structure.

Baking tips and troubleshooting common problems

A few recurring issues crop up with muffins: heavy texture, domed-top that cracks badly, or a wet center. Heavy muffins usually mean overmixing or too much flour compacting the structure. Measure flour by spooning it into the cup and leveling it, rather than scooping directly with the measuring cup, which packs it tight. Keep mixing gentle and brief. For domes that crack harshly, reduce oven temperature by 25°F and allow the heat to build more gradually. A strong initial blast is good, but an overly hot top combined with dense batter can cause ugly fissures.

If the center seems underbaked but the tops are golden, your oven may be too hot or set unevenly. Try lowering the rack or covering the muffins loosely with foil halfway through baking to slow surface browning. A wet center often means the batter was overhydrated or that the fruit released more juice than expected; in that case, reduce liquid slightly or use a portion of dried cranberries that have been rehydrated, which contributes less free water. Learning these adjustments will make your batches more consistent over time.

Serving ideas, storing, and scaling up

These muffins are versatile. For breakfast I like them warm with a smear of butter or a dollop of thick yogurt. As a dessert, pair them with a simple whipped cream or a drizzle of citrus glaze to emphasize the tartness. For a brunch spread, arrange them alongside savory quiches and fruit salad so their tangy profile provides contrast. They also travel well in a lunchbox and remain tender for a day or two at room temperature if stored in an airtight container.

To store longer, freeze cooled muffins in an airtight bag for up to three months. Thaw at room temperature or warm briefly in a low oven or microwave. If you need to scale the recipe for a crowd, the proportions scale nicely by whole multiples. When multiplying recipes, keep an eye on mixing times and oven load. A crowded oven reduces heat circulation, so bake in batches or increase baking time slightly and check doneness frequently. For events, I sometimes bake mini-muffins; they require less time and make a bite-sized presentation that guests appreciate.

Variations and creative twists

Once you know the basic formula, variations are limited only by taste. For a lemon-cranberry version, substitute lemon zest for orange and add a lemon glaze after baking. If you prefer a heartier texture, fold in rolled oats or substitute up to 25 percent of the flour with spelt or whole wheat. For a richer, almost cake-like muffin, increase brown sugar and add a tablespoon or two of sour cream. Those small shifts change the crumb, so experiment in single batches until you find a favorite.

For a more adult twist, soak dried cranberries in a splash of whiskey or port for twenty minutes and then fold them into the batter. This imparts warm notes that pair especially well with cinnamon or nutmeg. If you want a nut-free option that still has crunch, toast sunflower seeds and sprinkle them atop the batter before baking. I once tried mixing in a tablespoon of finely grated ginger and learned that it cleverly complements the berry’s tartness without turning the muffin into a spice-forward pastry.

For seasonal pivots, pair the cranberries with pumpkin and warm spices in autumn, or with light ricotta and lemon in late spring. The muffin format encourages creativity, so don’t be shy: make small test batches to refine ratios of sugar, fat, and acid when introducing a new ingredient. That way you retain the bright fruit character while exploring new textures and aromas.

Why these muffins can be both breakfast and dessert

Part of the charm is their dual identity. The natural acidity of the berry keeps the pastry from being too sweet for breakfast, while the tender crumb and optional toppings allow the same item to finish a meal as a restrained dessert. A modest glaze, a spoonful of mascarpone, or a scoop of vanilla ice cream transforms the muffin into an evening treat without much fuss. The ease of portioning also makes them flexible for timing and context: single-serving, hand-held, and instantly gratifying.

Another reason they work across meals is psychological: muffins feel homely and informal, so they lower the stakes when serving. You can present the same food at a morning meeting or a relaxed dinner and it will feel appropriate. That versatility makes them a kitchen staple. Keep a tried recipe in your repertoire, and you’ll find cranberries offer a reliable way to bring brightness to both everyday and celebratory moments.

Parting thoughts

Making cranberry muffins is about more than following a recipe. It is a small practice in balance: choosing the right sweetener, coaxing lift from the batter, and handling the fruit so it remains distinct. The recipe I outlined gives a dependable baseline, and the variations let you tailor flavor and texture to the occasion. Over the years I have baked these for rushed weekday breakfasts, for quiet weekend breakfasts with friends, and for holiday tables where they quietly outshone more elaborate desserts.

If you take away one thing, let it be this: treat the cranberries like the star they are. Protect their texture and accentuate their brightness with citrus or a touch of spice. With a few mindful choices, you will end up with muffins that are tender, flavorful, and versatile enough to be either a satisfying breakfast or a modest, elegant dessert. Happy baking, and enjoy the lift that these little red fruits bring to the table.

Hearty Comfort: Potato and Mushroom Pie to Warm Your Kitchen

There is a kind of food that arrives like a warm blanket: it holds you, fills the house with an inviting smell, and makes conversation come easier. This potato and mushroom pie is exactly that kind of dish — humble ingredients elevated by patience and little technique. It works for a family dinner, a potluck, or as a generous winter snack taken straight from the oven. In the pages that follow I will walk you through ingredient choices, pastry options, cooking techniques, variations, and the small tricks that make the filling creamy and the crust reliably crisp. Read on if you want a pie that tastes like a kitchen that cares.

Why this savory pie works so well

Potato and mushrooms are a classic pairing because they offer complementary textures and flavors: the potatoes give substance and creaminess, while mushrooms contribute an earthy, umami backbone. The starch from potatoes helps thicken the filling naturally, reducing the need for heavy binders, and mushrooms absorb fat and seasonings, intensifying the savory profile. When enclosed in a flaky pastry, the contrast between tender interior and crisp exterior becomes the main pleasure of eating. Finally, this combination adapts easily — add herbs, cheese, smoked elements or make it fully plant-based without losing its soul.

Choosing the right potato and mushroom

The variety of potato you pick affects both texture and cook time, so choose with purpose. Waxy potatoes such as Yukon Gold or Charlotte keep their shape and lend a silky mouthfeel; floury potatoes like Russet break down more and create a denser, creamier filling. For mushrooms, flavor intensity varies: cremini and chestnut have a balanced, meaty character, shiitake brings woodsy notes, and porcini (fresh or rehydrated) offers concentrated umami. Combining two types, for example Yukon Gold with cremini, gives depth and reliability in texture.

Freshness matters for mushrooms more than for potatoes — look for firm caps and dry stems, avoiding slimy or wet surfaces. If you use dried mushrooms, rehydrate them in warm water and save that soaking liquid to boost flavor, straining it to remove grit. Consider also size and slice thickness; thinner slices cook faster and brown more, while thicker pieces yield chew and presence in each bite. Finally, be mindful of moisture: mushrooms release water as they cook, and that liquid can dilute the filling unless reduced or managed with a thickener.

Ingredient list and suggested quantities

Below is a flexible ingredient list for a 9-inch pie that serves four to six people. Quantities can be adapted up or down, and I encourage swapping herbs or cheese according to taste. This list balances potato body with mushroom flavor and keeps the pastry straightforward. Use it as a foundation rather than an immutable rule; the next sections explain how each item behaves so you can improvise confidently.

Component Suggested items Quantity (9-inch pie)
Potatoes Yukon Gold, Charlotte, or Russet 800–1000 g (about 3–4 medium)
Mushrooms Cremini, chestnut, shiitake, or mixed 300–400 g
Pastry Shortcrust or puff One double crust or single top with base
Binding liquid Cream, milk, stock, or plant-based milk 150–250 ml
Fat for cooking Butter, olive oil, or margarine 2–4 tbsp
Thickening Flour, cornstarch, or arrowroot 1–2 tbsp
Seasoning Garlic, thyme, rosemary, salt, pepper To taste

Tools and pantry basics to make the process easier

You only need a handful of common tools to make a successful pie: a good chef’s knife, a heavy skillet for searing mushrooms, a sturdy potato peeler, a rolling pin, and a 9-inch pie dish or tart tin. If you have a bench scraper and a pastry cutter, they speed things up but are not essential. An oven thermometer is a small investment that pays off when aiming for a perfectly baked crust, and a cooling rack keeps the base from steaming after it comes out. Good lighting and a clean surface reduce accidents and make assembly quicker.

Shortcrust or puff: choosing the pastry

Shortcrust pastry is straightforward, buttery, and reliably crisp; it frames the filling without competing for attention. It pairs well with rich fillings and is forgiving for home bakers. Puff pastry on the other hand turns the pie into a flakier, more luxurious proposition, and works well if you want a dramatic top layer rather than a sturdy shell. Decisions come down to texture preference and how the pie will be served — shortcrust for slices that hold their shape, puff for rustic, tear-apart servings.

Making pastry at home matters less than handling it well. Keep ingredients cold, avoid overworking the dough, and rest it in the fridge before rolling to relax the gluten. If the filling is very moist, blind-baking the base for 10 minutes with weights helps prevent a soggy bottom. Alternatively, line the base with a thin layer of breadcrumbs or grated hard cheese before filling; they act as a sponge to absorb excess juices without changing flavor dramatically.

Preparing the filling: step-by-step technique

Start by parboiling or roasting the potatoes depending on your texture goal. For a chunkier pie, parboil whole or halved potatoes until just tender; for a creamier filling, roast cubes to concentrate flavor. While the potatoes cook, thinly slice mushrooms and sauté them in batches to encourage browning and evaporation of excess liquid. Use medium-high heat and avoid overcrowding the pan; this is the moment when mushrooms develop their signature nutty, meaty profile.

Once mushrooms are browned and potatoes are prepared, combine them with sautéed aromatics — garlic, shallots, or leeks — and fresh herbs. Introduce the binding liquid: a splash of cream creates richness, while stock keeps things lighter; for vegan pies, use coconut milk, cashew cream, or a thick vegetable stock. Thicken the mixture with a small dusting of flour or cornstarch, cooking briefly to remove raw taste, and adjust seasoning carefully: potatoes tend to mute salt, so taste before you fill the pastry.

Assembly: a clear sequence

Assembling the pie is less mystical than it looks if you follow a simple order. Roll the pastry to a size that comfortably covers the dish with a little overhang, then line the tin and fill it with the cooled mixture, pressing gently to level the surface. If using a top crust, brush the edges with a beaten egg or milk to seal, then place the lid, trim the edges, and crimp or flute according to preference. Vent the top with a few small cuts to release steam, or cut decorative shapes for a personal touch. Brush the surface with egg wash, cream, or plant-based milk for color, and sprinkle a little flaky salt or seeds if you like texture.

  1. Preheat oven to 200C (400F).
  2. Blind bake base for 8-10 minutes if using shortcrust and the filling is wet.
  3. Fill with mixture leaving space for a top crust if using one.
  4. Seal edges and vent; apply glaze.
  5. Bake until pastry is golden and filling bubbles, about 30–45 minutes depending on oven and crust type.

Baking times, temperatures, and what to watch for

Ovens vary, so bake with an eye rather than a stopwatch. A useful target is 200C (400F) for the first 10–15 minutes to set the crust, then reduce to 180C (350F) for the remainder to avoid over-browning. You want the filling to be bubbling slightly at the vent points; that indicates the interior has heated through and thickeners have activated. If the rim browns too quickly, shield it with foil and continue baking until the center is done. Allow the pie to rest for 10–15 minutes before slicing to let juices settle and make cleaner portions.

Flavor variations to keep things interesting

Small changes shift the whole character of the dish, and the potato-mushroom base is wonderfully receptive. Add caramelized onions and a handful of grated Gruyere for a French brasserie feel, or toss in smoked paprika, chorizo, and roasted red pepper for a bolder, Spanish-leaning pie. A smear of mustard on the pastry base adds a sharp counterpoint, while a drizzle of truffle oil at the end brings a heady aroma — use truffle sparingly as it dominates. Fresh herbs transform the flavor too: thyme and parsley are classic, sage works beautifully with potatoes, and dill brightens the profile unexpectedly.

For a lighter summer version, swap heavy cream for Greek yogurt or a yogurt-thin stock mix and add spring onions and peas at the end. If you like texture contrast, fold in roasted nuts such as hazelnuts for crunch or toasted breadcrumbs for a subtle crust within the filling. Experiment with cheeses: sharp cheddar provides bite, mozzarella gives stretch, and dollops of ricotta produce pockets of freshness. Each tweak teaches you what combinations you prefer; keep notes and refine the balance over a few attempts.

Vegan approaches and dietary swaps

Making this pie vegan is simple and satisfying. Replace dairy cream with blended cashews or a thick plant-based cream, and use olive oil or vegan butter for sautéing and pastry. For pastry, use a classic vegan shortcrust made from flour, cold oil, and water or a margarine-based dough that still yields flakiness. Nutritional yeast lends a cheesy depth without dairy, and a slurry of cornstarch plus reserved mushroom-soaking liquid helps the filling thicken beautifully. With careful seasoning, the vegan version can be equally hearty and will hold up well as a winter snack.

Serving ideas and turning the pie into a winter snack

A warm slice of this pie can be presented simply or elevated for guests. Serve it with a crisp bitter salad dressed in lemon and mustard to cut through richness, or offer pickled vegetables and a dollop of wholegrain mustard on the side for textural contrast. For a true winter snack, slice into wedges and wrap individual pieces in parchment to hand out at a casual gathering, or plate small tartlets as finger food with a sprinkle of flaky sea salt. Pairing matters: a bright, acidic beer or a lighter red wine can complement the earthy mushrooms and starchy potatoes without overpowering them.

Think also about temperature: slightly warm slices will keep filling cohesive for sharing, while very hot portions may spill when cut. For outdoor winter events, serve the pie in insulated carriers or on warmed platters to retain heat. Leftover slices make excellent sandwiches or can be transformed into skillet hash the next day — dice them and fry with an egg on top for a satisfying breakfast that nods to the original dish.

Storage, freezing, and reheating

Potato and Mushroom Pie. Storage, freezing, and reheating

Proper storage keeps texture and flavor intact for longer. Cool the pie completely before refrigerating to avoid condensation that makes the pastry soggy. Stored in an airtight container, the pie will keep three to four days in the fridge; for longer-term storage, wrap tightly and freeze for up to three months. When reheating, an oven or toaster oven yields far better results than a microwave: reheat at 180C (350F) for 15–20 minutes from chilled, longer if frozen, so the pastry regains crispness and the filling heats through evenly.

Troubleshooting common problems

A soggy bottom is the most common complaint, and it almost always traces back to excess moisture or inadequate blind-baking. Solve this by reducing mushroom liquid through proper browning, using a binder like a small amount of flour, and blind-baking the base when needed. If the filling is too dry, add a splash more liquid — stock, cream, or even a spoonful of butter — and mix thoroughly before baking. A dough that tears or shrinks is often overworked or lacks rest; return it to the fridge and roll gently, allowing the gluten to relax for better shape retention.

  • Too wet: Brown mushrooms in batches and use thickeners sparingly.
  • Pastry browned too fast: Lower oven temperature and cover the edge.
  • Under-seasoned filling: Taste before filling; potatoes mute salt.
  • Filling not set: Bake until bubbling, and allow resting time before slicing.

Nutritional snapshot and portion planning

Depending on pastry type, use of cream, and add-ins like cheese or meat, the caloric and macronutrient profile of the pie varies widely. Below is a general estimate for a slice from a 9-inch pie divided into six portions, using standard shortcrust and a cream-based filling. Use this as a guideline and adjust ingredients to suit dietary needs if you track calories or macros.

Nutrient (per slice) Estimate
Calories ~420–560 kcal
Protein 8–12 g
Fat 20–35 g
Carbohydrates 40–55 g
Fiber 3–6 g

Practical tips from my kitchen

Over the years I have learned that timing and small rituals make a pie feel effortless. I always sauté mushrooms in a wide pan in two or three batches; the small extra washing and reheating time is repaid in flavor. For weekend baking I roast the potatoes the day before — cooled, they mash or dice more cleanly and hold shape better in the filling. Another habit is to reserve one aromatic — a bay leaf or a sprig of thyme — in the cooking liquid while reducing it; remove before filling but keep the subtle perfume it imparts.

At a dinner where I served this pie as a winter snack, guests kept returning for seconds because I had included both a creamy version and a spiced, smoky variant with chorizo. Watching people compare the two, I realized how versatile the base recipe is: small changes turn the same core into different memories. That is the real gift of this dish — it is adaptable and forgiving, and each attempt teaches one more sensible shortcut or flavor pairing.

How to make it your own and keep improving

Start with the foundational technique explained above and then test one variation at a time so you can learn its effect. Swap in different cheeses, try alternative herbs, experiment with roasted vs boiled potatoes, and take notes on which combinations delighted friends and family. If you develop a favorite, double the batch and freeze one pie for a rainy day; there is comfort in knowing a homemade winter snack is ready whenever you want it. Invite feedback and treat every baking as a friendly experiment rather than a rigid exam.

Serving to please a crowd

For parties, make several smaller pies or tartlets rather than one giant pie; they travel well and allow guests to sample different fillings. Small pies also bake faster and reduce the stress of timing a single large centerpiece. Arrange wedges on a large board with pickles, a selection of mustards, and a simple green salad to provide freshness and acidity. Label each variation if serving multiple types so people can choose according to dietary restrictions or personal taste.

Final encouragement before you start

Making a potato and mushroom pie is a satisfying culinary project that rewards attention to simple details: how you brown mushrooms, how you treat the potatoes, and how you handle pastry. It is approachable yet flexible, making it a perfect dish to learn and personalize. If you take one piece of advice away, let it be this: treat each component — from potato to crust — with small acts of care, and the whole will shine. Go ahead, warm your oven, and let the kitchen fill with the kind of aroma that brings people to the table.

Root Vegetable Gratin: A Cozy, Crispy, Comforting Bake for Any Table

There is something quietly persuasive about a gratin that comes out of the oven: browned edges, a bubbling top, and the kind of scent that makes everyone pause what they are doing. My version of Root Vegetable Gratin celebrates the humble, knobby produce that often hides in the crisper drawer, elevating beets, parsnips, turnips and sweet potatoes into layered comfort with a golden crust. This dish is as much about technique as it is about flavor — a careful balance between thin slices, a silky sauce, and the right oven time so everything cooks through yet keeps a bit of structure. I’ll walk you through ingredient choices, slicing tips, and ways to adapt the gratin for different diets while sharing a few faults I learned the hard way. Expect practical advice you can apply the next time you want a baked dish that feeds a crowd and works equally well as weeknight fare or a holiday side.

Why a Root-Based Gratin Works So Well

Root vegetables have an earthy sweetness and firm texture that handle heat without falling apart, which is why they are excellent in layered, oven-baked dishes. When thinly sliced, their natural starches and sugars soften, concentrating flavor while still holding shape; that structural integrity lets each bite deliver a mix of tenderness and bite. The gratin technique — layering vegetables with cream or a binder and finishing with cheese or breadcrumbs — creates contrast: creamy interior, crisp top. This contrast is crucial. Without it, you end up with something one-note; with it, the dish sings. I’ve watched skeptical guests change their minds after the first spoonful, because this method turns simple roots into something generous and celebratory.

Texture is only part of the story; heat distribution and moisture control also matter. Roots vary in density and moisture content, so treating them thoughtfully avoids the two common traps: undercooked middles and soggy masses. A thin, even slice promotes uniform baking, while a sauce that is too watery will steam instead of brown. Browning — the Maillard reaction — and slight caramelization at the edges are what give a gratin its personality. Once you learn to coax those flavors from the oven, baking becomes less of a guessing game and more of a predictable, repeatable craft.

Choosing Vegetables: Which Roots Shine and Why

Good results start at the market. Choose firm, smooth-skinned roots without soft spots, shriveling or excessive blemishes. Each variety contributes different flavors and textures: sweet potato brings creaminess and natural sugars, parsnip adds nuttiness and a hint of spice, turnip offers a peppery edge, and beet gives color and earth. Combining three or four types creates depth; using one type gives a distinct, focused character. I often pair a sweeter root with a more assertive one to keep the dish lively rather than cloying.

Thickness matters as much as selection. Aim for slices about 2 to 3 millimeters thick — thin enough to soften in a reasonable time, thick enough to avoid dissolving into mush. A mandoline is a worthy investment for consistent results, though a sharp knife and steady hand work well if you prefer control. Uniformity in slice thickness ensures even cooking and helps the layers compact neatly, which improves both texture and appearance. If you don’t have a mandoline, work in small batches and take your time; uneven slices are the fastest route to uneven baking.

Vegetable Guide: Texture and Bake Time

Here is a compact reference to help you plan combinations and adjust oven time intelligently. The table lists common roots, their typical texture when baked, recommended slice thickness, and an approximate bake time when layered in a well-built gratin. Use these guidelines as starting points rather than hard rules: ovens and pans differ.

Vegetable Typical Texture Slice Thickness Approximate Bake Time
Sweet potato Soft, creamy 2.5–3 mm 40–50 minutes
Parsnip Firm, slightly fibrous 2–3 mm 45–55 minutes
Turnip Delicate bite, mildly peppery 2–3 mm 35–45 minutes
Beet Dense, earthy 2–3 mm 50–60 minutes
Rutabaga Starchy, sturdy 2.5–3 mm 50–60 minutes
Carrot Sweet, firm 2–3 mm 40–50 minutes

Building the Sauce: Creamy, Light, or Dairy-Free

A gratin is only as good as the liquid that brings the layers together. Classic versions use cream or a mixture of milk and cream, sometimes enriched with egg yolk for gloss and set texture. For a lighter feel, use whole milk with a tablespoon or two of butter and allow longer baking time to thicken and reduce. If you prefer dairy-free options, full-fat coconut milk or blended silken tofu with a splash of plant milk can create a satisfying binder. Season the sauce deliberately; a bland liquid will produce a bland finished dish.

Herbs, spices and aromatics can be steeped into the hot milk or cream before combining with the roots, which infuses the entire gratin. A simple bouquet of thyme and a smashed garlic clove lifted from the heat will lend subtle depth without overpowering the vegetables. If you want more body, stir in a tablespoon of flour or cornstarch into warm butter to make a light roux, then whisk in milk to form a smooth, slightly thickened base. This approach helps if you plan to layer quite a few vegetables and want to reduce runniness during baking.

Slicing, Layering and Assembly: The Art of Compact Layers

Slicing is a meditative part of gratin-making. The goal is consistent slices that stack easily. Start by trimming both ends and peeling if desired; some roots keep their skin and benefit from the flavor and texture it provides. Arrange the slices in overlapping rows or concentric circles depending on the shape of your baking dish. Overlap enough so the layers bind during baking, but avoid crowding them too tightly; a little room allows the sauce to circulate and coat every slice.

Layering also gives you control over flavor distribution. If you’re including cheese or herbs, scatter small amounts between layers rather than concentrating everything on top. This creates pockets of flavor throughout the dish. For a mixed-root gratin, think in terms of balance: place denser slices like beet and rutabaga lower in the dish where they will receive the most direct heat, and lighter slices like turnip higher up. A light press with the back of a spatula before pouring the sauce helps the layers settle and keeps air pockets from producing uneven cooking.

Step-by-Step Assembly

Follow this straightforward sequence to minimize mistakes and ensure an evenly cooked result. These steps assume you have prepped and sliced your vegetables and chosen a sauce.

  • Preheat your oven to the temperature recommended for your root mix, usually 180–200°C (350–400°F).
  • Lightly oil or butter the baking dish and arrange a single layer of slices to cover the bottom.
  • Season each layer with salt, pepper and a light scattering of herbs or cheese if using; repeat layers until nearly full.
  • Pour the sauce slowly over the arranged slices, letting it seep into the layers rather than pooling dramatically on top.
  • Finish with a final dusting of cheese, breadcrumbs or both for a crunchy, golden top.

Cheese Choices and the Role of the Crust

Cheese plays a central role in a gratin’s personality by adding salt, fat and melting behavior. A creamy Gruyère yields nutty richness and a beautiful brown surface, while a sharper cheddar cuts through sweeter roots. Pecorino or Parmigiano-Reggiano adds a savory, crystalline finish when used sparingly on top. For lighter versions, use smaller amounts of an intense cheese rather than heaps of mild varieties; less can be more. If you’re aiming for a crunchy crust without much dairy, a mix of panko breadcrumbs and a drizzle of olive oil or butter gives a pleasing texture.

Layering cheese inside enables melting throughout the dish, while a top-only approach emphasizes surface color and crunch. Keep in mind that some cheeses release more water when melted, which can slightly change the sauce consistency. To avoid a soggy top, grate cheese fresh and sprinkle it evenly, or combine cheese with breadcrumbs to create a barrier that rids moisture while browning nicely. When experimenting, note how each cheese behaves in your oven and tweak proportions accordingly.

Seasoning, Herbs, and Flavor Twists

Salt is non-negotiable; it draws out moisture and amplifies natural sweetness. Season every layer lightly, rather than salting only at the beginning or end. Fresh herbs such as thyme, rosemary and sage complement root flavors without overwhelming them. Bay leaves tucked into the sauce while it warms add complexity, and a small pinch of nutmeg in cream gives a subtle warmth that echoes holiday flavors. Spices like smoked paprika or ground cumin can introduce an interesting finish when used sparingly.

Consider adding an acid component after baking to brighten the dish—lemon zest, a drizzle of sherry vinegar or a spoonful of yogurt on the side brings contrast to the baked richness. If you enjoy a savory-sweet interplay, try layering thin slices of apple or pear with parsnip and sweet potato; the fruit lends a delicate lift that balances the creamy mouthfeel. Small inclusions — a few caramelized shallots or sautéed leeks — spread throughout the layers will add pockets of sweetness and fragrance that make each bite more interesting.

Baking: Temperature, Timing and Knowing When It’s Done

Predictable baking starts with the right temperature. A moderate oven, around 180–200°C (350–400°F), allows the interior to cook through while promoting a golden top rather than burning it quickly. Covering the dish for the first part of baking helps ingredients cook evenly and retain moisture; uncover for the final 15–20 minutes so the top can brown attractively. If your slices are thicker or your mix includes dense roots like beet and rutabaga, err toward the longer bake time to ensure tenderness throughout.

Signs of doneness are sensory rather than purely timed: the sauce should be set and slightly thickened, a knife should slide through the center without resistance, and the top should be a deep, even brown. Be cautious about relying solely on bake times; check about 10 minutes before the lower bound to avoid overcooking. After removing from the oven, give the gratin at least 10 to 15 minutes to rest. Resting lets the sauce settle and makes serving cleaner, because a too-hot gratin often falls apart when spooned.

Variations for Different Diets and Occasions

One of the best things about this baked dish is its adaptability. For a vegan gratin, replace dairy with coconut milk or blended cashews and swap cheese for nutritional yeast and toasted breadcrumbs for a savory, crunchy finish. Gluten-free versions simply use gluten-free breadcrumbs or crushed nuts on top; the interior rarely requires flour if you thicken the sauce with cornstarch. For a protein-rich variant, fold in cooked lentils or thinly sliced ham between layers to create a more substantial main course.

Seasonal twists keep the gratin fresh. In autumn, add roasted chestnuts and sage for a rustic feel. In spring, combine lighter roots like new potatoes and young carrots with lemon zest and fresh parsley. For a Mediterranean angle, include thin slices of fennel and finish with a sprinkling of chopped olives and oregano. Each variation calls for small adjustments to baking time and seasoning, but the basic technique remains the same: control moisture, slice evenly, and build layers thoughtfully.

Quick Idea List: Variations to Try

These quick combinations are easy to remember and fun to experiment with at home. Choose one as a starting point and adjust quantities to suit your taste.

  • Sweet Potato, Leek and Gruyère: creamy and slightly sweet, great with thyme.
  • Beet, Goat Cheese and Walnut Topping: earthy, tangy and crunchy.
  • Carrot, Parsnip and Hazelnut Breadcrumbs: nutty and aromatic with a brown butter finish.
  • Turnip, Potato and Smoked Paprika: robust and slightly smoky, pairs well with roasted meats.
  • Vegan Cashew Cream with Mixed Roots: dairy-free and lush, topped with toasted panko or seeds.

Serving, Pairing and Presentation

A gratin can be the centerpiece of a meal or a supporting side. Serve it straight from the dish to preserve the golden top, or spoon neat portions onto warm plates for a more refined presentation. It pairs beautifully with roasted or grilled proteins: roast chicken, pork tenderloin, or a simply seasoned steak all complement the gratin’s richness. For a vegetarian meal, accompany it with a green salad dressed with a bright vinaigrette to cut through the creaminess and add contrast.

Garnishes transform the final impression. Fresh herbs, a scattering of microgreens, or a few grated hard cheese shards look deliberate and lift the flavor. If you want a crisp contrast, offer pickled shallots or a small side of sharp chutney; acid here revives the palate between bites. For buffet-style serving, cut into squares and allow guests to take portions; the gratin holds together best after resting and then chilling briefly if you need to transport it.

Make-Ahead, Storage and Reheating

Root Vegetable Gratin. Make-Ahead, Storage and Reheating

Gratins are forgiving when it comes to make-ahead planning. Assemble the dish, cover it tightly and refrigerate for up to 24 hours; bring it to room temperature before baking to reduce uneven cooking time. You can also bake ahead fully, cool, cover and refrigerate; reheat in a 180°C oven until warmed through and the topping has crisped again. Avoid microwaving for reheating if you care about texture; the oven maintains the crunchy top and prevents the interior from becoming gluey.

For longer storage, freeze portions in airtight containers for up to three months. Thaw overnight in the refrigerator before reheating. When reheating from frozen, add extra time and cover with foil for the first part to allow the interior to warm without burning the outside, removing the foil at the end to restore browning. Leftovers make a handsome lunch when paired with a simple green salad and a drizzle of olive oil.

Troubleshooting Common Problems

Soggy gratin: usually caused by excess liquid in the sauce or insufficient browning. Reduce the sauce a bit before pouring, use a light roux or cornstarch to thicken, and uncover the dish for the final portion of baking to allow moisture to evaporate. Unevenly cooked slices: check for inconsistent slice thickness or overcrowded layers. If using a denser root like beet alongside softer roots, place the heavier ones lower and think about pre-roasting very thick slices briefly to speed their cooking.

Burnt top with raw center: oven too hot or dish positioned too close to the heating element. Lower the rack and reduce temperature slightly, then extend bake time to allow the interior to catch up. Dryness after baking: this can happen if there’s not enough sauce or if you over-baked. Add a splash of warmed cream, milk or a drizzle of olive oil and let the gratin sit for a few minutes to absorb moisture. Small fixes like these keep the dish reliable and forgiving.

Final Notes from My Kitchen

I remember the first time I intentionally layered three kinds of root in one dish. The kitchen filled with a sweet, grounding aroma and I learned quickly that patience matters more than speed. That early experiment taught me to respect slice thickness and to trust rest time — the gratin was better after cooling than it had been piping hot. Over the years I’ve honed little habits: seasoning every layer, preheating the baking dish slightly, and resisting the urge to cut into it immediately. These small rituals consistently turn a good gratin into one people remember.

Making a root vegetable, gratin or baked casserole is an invitation to slow cooking and thoughtful flavor building. Whether you aim for rustic comfort or a composed side, the technique rewards attention and small adjustments. Keep a mental list of which roots you like together, and be willing to tweak seasoning and bake time as you learn how your oven behaves. In the end, this dish is about generosity: it takes simple ingredients and, with an oven’s patience, returns something warm, golden and satisfying to the table.

Winter Comfort in a Baking Dish: The Joy of Cabbage Casserole

There is something quietly triumphant about turning a humble head of cabbage into a warm, fragrant bake that feeds a family and lingers in memory. This dish sits at the intersection of thrift and comfort: inexpensive ingredients transform under heat into a layered, savory whole. Whether you crave a vegetarian main or a cozy side to pair with roasted meats, the casserole format invites creativity and patience in equal measure. In the paragraphs that follow I’ll walk you through history, technique, flavor-building, and practical tips so you can make a cabbage-based casserole that belongs on any winter table. Expect clear steps, useful substitutions and a few tricks I’ve learned from cooking it many times.

Why cabbage works so well in a baked dish

Cabbage is a forgiving vegetable: its dense leaves withstand long cooking without collapsing into nothing, which makes it ideal for layered bakes. When roasted or braised, sugars in the cabbage caramelize and soften, bringing out a sweet-vegetal depth that pairs beautifully with creamy or tangy elements in a casserole. The texture contrast—tender leaves with crisped edges or a golden top—is part of the appeal; a well-made dish balances softness and bite. Economically, cabbage stretches a meal further than many vegetables, absorbing flavors from broths, dairy, or spices so a small amount can flavor a large pan. Its neutral profile is an invitation to experiment with herbs, smoked ingredients, or cheese without clashing.

In practical terms, cabbage tolerates many preparations. You can shred it fine and fold it into a custard-like filling, layer thick wedges with sauce, or chop it roughly and combine with grains or legumes for a heartier vegetarian option. It also keeps and stores well, which reduces waste in winter when fresh produce can be scarce. Because it takes on the characteristics of what it’s cooked with, the vegetable becomes a vessel for regional flavors: paprika and caraway in Central Europe, cumin and coriander in parts of Eastern Europe, or a mustardy cream in other kitchens. This adaptability is why cabbage often headlines budget-friendly casseroles that feel anything but cheap.

A brief culinary history and global cousins

It’s hard to trace a single origin for baked cabbage dishes because cabbage itself has been cultivated across Eurasia for millennia, finding its way into countless casseroles and gratins. In Eastern Europe, layered cabbage bakes resemble simplified versions of stuffed cabbage rolls—same components, different geometry. In Western kitchens, gratin-style bakes where cabbage is submerged in cream or sauce reflect French influences on comfort cooking. Migrant communities took their methods to new lands, adapting recipes to local staples and ovens.

Because a casserole is essentially a convenient, oven-finished assembly, many cultures have their own version: braised cabbage with potatoes in Scandinavian homes, rice-and-cabbage bakes in parts of Eastern Europe, and spicy stews with cabbage in some Asian cuisines. Each variation speaks to availability of ingredients and the household’s preferred textures. Observing these cousins reveals a common theme—cabbage often anchors meals where warmth and sustenance matter most, which explains why it resurfaces in winter kitchens worldwide.

Ingredients and smart substitutions

When planning a cabbage-based casserole, think in layers of function: body, binder, fat, aromatics, and finishing. The head of cabbage provides the body; eggs, cream, or a béchamel supply the binder; butter, oil, or rendered fat add richness; onions, garlic, herbs and spices bring aroma; and cheese, breadcrumbs, or nuts give a welcome crust. Aim for balance so the dish isn’t overly watery or cloyingly rich. I’ll give a classic ingredient list below and follow with substitution ideas for dietary needs.

Classic vegetable-forward ingredient list (serves 6):

  • 1 medium head of green cabbage, cored and sliced
  • 2 large onions, thinly sliced
  • 3 cloves garlic, minced
  • 2 tablespoons butter or olive oil
  • 1 cup grated cheese (cheddar, Gruyère or similar)
  • 2 eggs
  • 1 cup milk or cream
  • Salt, pepper and 1 teaspoon caraway or thyme
  • Optional: 2 cups cooked potatoes or cooked rice for heft

Substitutions are straightforward and often improve the dish if you match texture and moisture. For a lighter casserole use low-fat milk with a spoonful of flour or cornstarch for body instead of cream. To make it vegetarian or vegan, swap eggs and dairy with silken tofu blended with a little plant milk and nutritional yeast, and use vegan cheese or a crust of toasted nuts. If you want to add protein without meat, cooked lentils or chickpeas mix well. Smoky elements—smoked paprika or a splash of liquid smoke—can mimic the depth that bacon or ham would add if you choose to include meat.

Essential tools and prep techniques

A good casserole doesn’t demand exotic equipment, but a few tools make life easier. A sturdy ovenproof baking dish, ideally ceramic or cast iron, helps with even heat distribution and attractive presentation. A wide sauté pan is useful for softening onions and starting the cabbage caramelization before it goes into the oven. A sharp knife or mandoline speeds up even slicing; texture consistency affects cooking time and the final bite. Finally, a small whisk and mixing bowl come in handy for combining eggs or custard with milk and seasonings.

Prep techniques influence both flavor and time to table. For sweeter, more complex cabbage, sauté slices in butter or oil until a little golden before assembling the casserole. If you’re short on time, parboiling or steaming the cabbage briefly reduces oven time and prevents excess moisture in the final dish. Browning onions slowly until they’re deeply golden transforms them from mere aromatics into a rich, almost caramelized backbone. Layer confidently: drain any excess liquid from pre-cooked elements and press layers gently to remove pockets of air for more uniform baking.

Step-by-step: a reliable cabbage casserole recipe

This recipe is flexible—it welcomes additions and scales well. Preheat your oven to 375°F (190°C). Start by preparing the cabbage: remove outer leaves, halve, core, and slice into roughly 1/4-inch ribbons or cut into wedges depending on your preferred texture. Heat butter or oil in a large pan, add sliced onions and a pinch of salt, and sweat them until translucent; push them to the side and add the cabbage, cooking until it softens and begins to color in places. Season with pepper and your chosen herb; at this point you can mix in cooked potatoes, grains, or legumes if using them.

For the custard: whisk together eggs and milk or cream, then fold in half the cheese and a teaspoon of mustard or a splash of vinegar for brightness. Layer half the cabbage mixture in the prepared baking dish, pour half the custard over it, then repeat. Sprinkle the remaining cheese on top and finish with breadcrumbs or crushed nuts for a textured crust. Bake for 35 to 50 minutes, depending on depth of dish and moisture content, until the center is set and the top is golden. Let it rest at least 10 minutes before serving to firm up and allow flavors to settle.

Small technique notes matter: if the top browns too fast, tent loosely with foil and finish cooking. If the casserole seems dry when it comes out of the oven, a spoonful of butter or a drizzle of olive oil over the top can restore silkiness. For my personal preference, a little tang—pickled onions or a dollop of yogurt—balances richness at the table. Keep a close eye during the final 10 minutes of baking to achieve a golden crust without drying the interior.

Vegetarian and vegan variations

Making a vegetarian cabbage casserole is simple because the vegetable and dairy pair so well. Replace meat with hearty additions: cooked mushrooms provide umami, roasted root vegetables contribute sweetness, and pulses like lentils add protein. I often add a layer of caramelized mushrooms and shallots before the cabbage for a deep, savory note that makes the dish feel substantial without any meat. Finish with a drizzle of aged balsamic or a scattering of fresh herbs to lift the richness.

For a vegan version, use a tofu-based custard: blend silken tofu with lemon juice, a touch of olive oil, nutritional yeast and a little cornstarch to bind. Season generously—vegan dishes often benefit from bolder herbs and spices to compensate for the absence of cheese. Toasted seeds or a seasoned breadcrumb topping gives crunch where cheese melt would have provided it. In winter kitchens, I’ve found that layering roasted winter squash or parsnips with cabbage makes a vegan bake that satisfies meat-eaters and vegans alike.

Why this casserole is perfect for winter

Winter invites slow cooking, and casseroles embody that mood: they require time and reward patience with transformed flavors. The dense structure of cabbage and the warming properties of baked dairy or starches create energy-dense meals suitable for cold days. Root vegetables and preserved ingredients—pickles, smoked salts, hard cheeses—often enter the mix in winter because they store well through the season and contribute layers of flavor. The result is a one-dish comfort food that warms from the inside out.

Seasonal harvest influences subtle choices. In the depths of winter I reach for sturdier cabbages with compact heads; their firmness holds up to baking and stores longer. Adding winter aromatics like thyme, bay leaves, or mustard seeds complements the cabbage’s natural sweetness. Serve portions with pickled sides or a crisp, vinegary salad to cut through the richness and refresh the palate. For a weekend dinner, a warm cabbage casserole pairs beautifully with mulled wine or a robust ale.

Building flavor: techniques that matter

Layering flavor is more than piling ingredients into a dish; it’s about purposeful steps that develop taste at each stage. Start by seasoning elements as you cook them—salt accelerates moisture release and deepens caramelization in onions and cabbage. Deglaze the pan with a little white wine or vinegar after frying vegetables to lift fond and incorporate it into the dish. Toasting spices briefly in fat releases oils and perfumes the casserole more effectively than adding them raw.

Another important technique is timing the addition of delicate flavors. Fresh herbs like parsley or dill are best scattered at the finish to preserve brightness, while hardy herbs such as thyme can be cooked confidently with the vegetables. Acid is a secret weapon: a squeeze of lemon juice or a teaspoon of mustard in the custard balances fats and prevents the bake from feeling flat. Finally, resting the casserole after baking allows juices to redistribute, making each slice cohesive rather than runny.

Pairings, sides and serving suggestions

Cabbage casseroles can be a main course or a side, depending on how they’re composed. A heavy, cheese-laden bake with potatoes becomes the centerpiece; a lighter, vegetable-and-grain version sits comfortably beside roasted poultry or fish. Pickled vegetables provide a lively counterpoint—think quick-pickled beets, cucumbers or a sharp sauerkraut. A simple green salad with vinaigrette helps cut richness and add crisp contrast to the warm casserole.

For beverages, aim for balance: acidic wines or a crisp lager work well with richer casseroles, while a fuller-bodied red stands up to casseroles that include smoked or spiced components. For family-style serving, bring the casserole directly to the table with a carving knife and let guests serve themselves; this informal presentation fits the dish’s homely character. Garnish with chopped herbs, a swirl of yogurt or a drizzle of flavored oil to add a finishing flourish and a burst of color.

Nutrition: what to expect and how to boost it

Cabbage itself brings vitamin C, fiber and modest amounts of vitamin K and folate, making it a nutritious base. The overall nutrition of a casserole depends on added ingredients: dairy and eggs increase protein and fat, while grains and legumes add complex carbohydrates and fiber. To boost nutrients without compromising texture, incorporate legumes, chopped greens like kale, or a layer of quinoa mixed into the custard. Roasted nuts or seeds atop the casserole add healthy fats and a crunch that’s also nutrient-dense.

For a lighter profile, reduce cream and increase vegetable volume, or use yogurt-based sauces instead of heavy creams. Salt control matters—test before adding more at the end—and acidic components can enhance perceived saltiness so you can use less. If you’re aiming for a fiber-rich meal, include whole grains or potatoes and serve alongside a raw vegetable salad to maintain balance. With thoughtful choices, a cabbage casserole can be both comfort food and a reasonably nutritious meal.

Make-ahead, freezing, and storage tips

One of the casserole’s virtues is its suitability for batch cooking and make-ahead planning. You can assemble the casserole the day before and refrigerate; bring to room temperature for about 20 minutes before baking to reduce oven time and ensure even cooking. If you plan to freeze, bake fully, cool completely, then wrap tightly and freeze up to three months. Thaw overnight in the refrigerator and reheat in a moderate oven until warmed through to preserve texture.

Leftovers keep well and often taste better after flavors mingle overnight. Reheat portions gently in a small ovenproof dish to revive crustiness; a few minutes under a broiler will re-crisp the top without drying the interior. If you stored a casserole that contained dairy, consume within three to four days for safety and quality. Label frozen packages with the date and contents so you can rotate through your freezer with ease.

Common mistakes and how to avoid them

Cabbage Casserole. Common mistakes and how to avoid them

Two recurring errors are excess moisture and under-seasoning. Cabbage releases water as it cooks, and if you assemble raw cabbage without draining or pre-cooking, the casserole can become watery. To avoid this, sauté or steam briefly and pat dry, or use a thicker custard with a bit more binding agent like flour or cornstarch. Under-seasoning is equally problematic: taste components as you build them rather than relying on the final bake to magically pull flavors together.

Another misstep is topping too early. Breadcrumbs or nuts add contrast but can burn if they’re exposed at high heat for too long. Add delicate toppings during the final 10 to 15 minutes of baking. Finally, uneven slicing leads to inconsistent textures; use a consistent cut so all pieces cook at the same rate. Small attention to these details elevates a good casserole into a dependable favorite.

Regional variations at a glance

Every kitchen has a twist on baked cabbage—some rustic, some refined. Below is a compact comparison of a few notable variations to inspire your own experiments. Use the table as a primer and adapt ingredients to what you have on hand.

Region/Style Key Ingredients Characteristic
Eastern European Cabbage, rice, ground meat or mushrooms, tomato, caraway Layered like stuffed cabbage, hearty and tangy
French-style Cabbage, cream or béchamel, Gruyère, nutmeg Rich, velvety gratin with golden crust
Scandinavian Cabbage, potatoes, dill, smoked fish or bacon Simple, smoky, potato-forward
Vegan Modern Cabbage, tofu custard, nutritional yeast, roasted roots Plant-based, umami-rich, often gluten-free

Each style suggests different cooking times and moisture profiles, so adapt the techniques discussed earlier. If you’re trying a meat-inclusive version, render the meat first and use the fat to sauté onions and cabbage; if vegan, layer flavors through roasting and toasting techniques rather than relying on animal fat. The remarkable thing is how easily these approaches cross-pollinate, giving rise to hybrid bakes that feel both familiar and new.

Personal notes from my kitchen

Over years of cooking, I’ve learned that the simplest changes often make the biggest difference. Once, pressed for time during a snowstorm, I substituted leftovers—mashed potatoes and a jar of caramelized onions—for the usual custard; the result was unexpectedly comforting and became a regular winter standby. I also find that a handful of chopped preserved lemons or a tablespoon of capers, added at the finish, can cut through heavy, cheesy versions and make them sing. These small improvisations are what keep a recipe alive and responsive to the seasons.

Sharing this dish with friends has always felt intimate because it’s served warm and spooned from the pan. At potlucks the cabbage casserole is often the quiet surprise: not the flashiest dish, but reliably satisfying. Try it once with a classic approach, then experiment—swap in a spice you adore or fold in a leftover grain. Over time you’ll develop a version that speaks your language, one pan at a time.

Final tips and encouragement

Start modestly and build complexity as you grow more confident. Use the techniques here as a toolkit rather than a script—pre-cook when you need speed, brown when you want depth, and add acid when the dish feels heavy. Keep a jar of good pickles or a lemon on hand to brighten each serving. The joy of a cabbage casserole is its flexibility: it adapts to seasons, to appetite, and to whatever is in the larder that day.

Invite friends or family to add their touches. One person’s favorite herb, another’s preferred cheese, can turn a recipe into a shared tradition. Above all, remember that the best casseroles develop character: patience in the kitchen yields a warm, layered dish that comforts in cold months and nourishes more than the body alone. Embrace the process and enjoy the simple pleasure of a hearty, baked cabbage dish this winter.

Golden Comfort: Baked Pumpkin with Honey That Warms the Heart and Kitchen

I still remember the first time I slid a whole pumpkin into the oven, a sticky trail of honey already whispering caramel at the edges. That aroma — warm, slightly floral, with a hint of roasting sugar — filled the house and invited everyone into the kitchen. Baked pumpkin with honey is deceptively simple, yet it transforms ordinary winter evenings into something celebratory and restorative. This recipe and its variations celebrate seasonal produce, honest flavors, and the easy rituals that make cooking pleasurable. Read on for practical techniques, flavor ideas, and thoughtful tips to get the best out of this humble squash.

Why bake pumpkin with honey?

Baking intensifies the pumpkin’s natural sugars without drowning its delicate flesh in sweetness, and a finishing touch of honey rounds those flavors with floral notes and a glossy finish. The heat concentrates taste and texture, turning fibrous raw pumpkin into tender, spoonable comfort that pairs well with both spices and savory elements. Choosing to bake instead of boiling preserves more nutrients and gives you caramelized edges that boost mouthfeel and visual appeal. For many, the dish signals autumn and holidays, but it’s versatile enough to appear on weekday tables or even as a simple dessert. The technique is forgiving, approachable for cooks of all levels, and invites experimentation with spices, herbs, and fillings.

Honey adds more than sweetness; it acts as a subtle glaze, helps browning, and can alter texture depending on the type used and how long you roast the pumpkin. A mild blossom honey will enhance the pumpkin without dominating it, while a darker, richer honey brings molasses-like depth that pairs well with spices like cinnamon and cloves. When honey meets heat, its sugars interact with the pumpkin’s natural sugars to create complex flavors you won’t get from granulated sugar alone. You will also notice differences in aroma and finish when you choose local honey versus an imported varietal. Small changes in honey, roasting time, or temperature yield markedly different results, which makes the dish endlessly interesting.

Choosing the right pumpkin

Baked Pumpkin with Honey. Choosing the right pumpkin

Not every pumpkin is built for baking; the jury-rigged jack-o’-lantern pumpkins are often watery and stringy, better suited to smiling faces than pies. For roasting, pick sugar pumpkins or pie pumpkins — they are smaller, denser, and sweeter, with finer-grained flesh. Look for pumpkins that feel heavy for their size, with a hard, blemish-free rind and no soft spots where moisture might have started to spoil the flesh. If you buy pre-cut pumpkin, check the color inside: a deep, vivid orange indicates concentrated flavor, whereas pale flesh suggests underdeveloped sweetness. Choosing the right squash is the first step toward a dish that tastes intentional rather than improvised.

Size matters for practical reasons too; a medium sugar pumpkin yields manageable portions and fits into most ovens without fuss. Larger varieties, like Cinderella or Musque de Provence, offer floral and nutty complexity and are excellent if you’re serving a crowd or making stuffed preparations. If you prefer convenience, look for vacuum-sealed pumpkin cubes or canned puree, but know the texture and moisture content will differ from freshly baked flesh. I sometimes buy a couple of different pumpkins to test which one the family prefers; doing side-by-side comparisons can be revelatory and fun. Whatever you select, plan for a bit of trimming and scooping — good knives and a sturdy baking dish are worth the investment.

Ingredients: simple, seasonal, and adaptable

The basic ingredient list reads like a pantry love letter: pumpkin, honey, olive oil or butter, a pinch of salt, and optional spices. These few items interact in straightforward chemistry: fat conducts heat and helps caramelize edges, salt amplifies sweetness, and spices create aromatic layering. You can keep the list deliberately short to highlight the pumpkin’s character, or expand it to suit mood and company with additions such as citrus zest, toasted nuts, or a splash of spirits. One advantage of this recipe is that amounts are guidelines; you can scale the dish up or down and adjust sweet or savory notes to taste. Below is a clear ingredients table to help you shop and plan.

Ingredient Amount (serves 4) Notes
Sugar pumpkin (or small pie pumpkin) 1 medium (about 2–3 lbs) Choose dense, heavy-for-size fruit
Honey 2–3 tbsp Adjust by sweetness and honey type
Olive oil or melted butter 1–2 tbsp Oil for savory, butter for richer finish
Salt ¼ tsp Enhances flavors
Spices (optional) ½–1 tsp total Cinnamon, nutmeg, or smoked paprika

Step-by-step recipe: Roast to perfection

Before you preheat the oven, gather your equipment: a sharp chef’s knife, a baking tray or dish with a rim, and a spoon for scooping. Preheat the oven to 375°F (190°C); this moderate temperature allows the pumpkin to cook through evenly and develop a golden surface without burning the honey. Cut the pumpkin in half or into wedges depending on your presentation goals, remove seeds and stringy fibers, then brush the exposed flesh with oil or melted butter. Drizzle honey over the cut surfaces, sprinkle with salt and your chosen spices, and place cut-side down or up depending on whether you prefer blistered edges or deeply caramelized tops. Roast until a paring knife slips in easily and the flesh looks tender and slightly translucent.

  1. Preheat oven to 375°F (190°C).
  2. Cut, deseed, and brush pumpkin with oil or butter.
  3. Drizzle honey, sprinkle salt, and add spices.
  4. Roast on a rimmed tray for 35–60 minutes depending on size.
  5. Cool briefly, scoop or slice, and finish with extra honey if desired.

Timing depends on pumpkin size and whether you bake halves or cubed pieces; small wedges may take 35–45 minutes while a whole medium pumpkin could need closer to an hour. If you want crisped edges, roast cut-side up and allow the surface to caramelize toward the end of cooking, watching closely because honey darkens quickly. For a creamier texture suitable for purees or soups, roast flesh-side down so steam collects and softens the interior. Once out of the oven, let the pumpkin rest; this brief pause lets juices settle and flavors knit. Serve warm, at room temperature, or chilled depending on how you’ve flavored it and what you plan to pair alongside.

Practical oven tips for even baking

Understanding your oven will make a tangible difference: an oven thermometer is a small investment that pays off in consistent results. Convection settings shorten cooking time and promote even browning, but reduce recommended temperatures by about 25°F or watch the pumpkin closely. Use a rimmed baking sheet to catch any honey that bubbles over and consider lining it with foil for easy cleanup. Position the rack in the center for the most uniform heat; too close to the top will burn the honey. Finally, rotate the pan halfway through the bake to compensate for any hot spots in older ovens.

Another subtle trick is to start at a slightly lower temperature and finish higher for better texture control: 350°F to heat through, then bump to 425°F for the last ten minutes to caramelize. If you are working with cubed pumpkin, arrange pieces skin-side down in a single layer to maximize caramel contact and crisp exterior. A light tent of foil for the first half hour can prevent premature browning if you’re roasting a larger piece. If a recipe calls for stuffing the hollow pumpkin, par-bake the shell so the cavity firms up and won’t collapse under the weight of the filling. Little adjustments like these save you from drying the flesh or burning the honey while chasing color.

Choosing honey and spices wisely

Honey varieties matter. Clover honey is mild and predictable, buckwheat honey is bold and molasses-like, and orange blossom offers citrus-fresh notes that brighten roasted vegetables. Local, single-flower honeys can carry terroir that complements the pumpkin’s sweetness and should be selected with the final flavor profile in mind. For a delicate finish, glaze the pumpkin with honey after baking so the floral character remains vivid; alternatively, baste during roasting for deeper caramelized flavor. If serving children or guests sensitive to allergens, remember honey has dietary considerations — for infants under one year it should never be used.

Spices pair differently depending on whether you aim for sweet or savory. For dessert-style preparations, a pinch of cinnamon, ginger, and nutmeg is classic and comforting. For savory spins, smoked paprika, cumin, and crushed garlic combined with olive oil and a drizzle of honey create a compelling sweet-smoky contrast. Fresh herbs such as thyme or sage added near the end of baking introduce a fragrant lift and prevent the dish from becoming cloying. Experimentation is part of the joy: try a hint of cayenne with honey for a faint kick, or finish with lemon zest to cut through richness. Keep spice amounts modest so the pumpkin itself remains the star.

Sweet or savory: ideas for flavor balancing

Baked pumpkin with honey sits at a crossroads between dessert and side dish, and the finishing touches determine which road you travel. Dress it with a dusting of toasted nuts and a dollop of yogurt for a lighter, breakfast-style option that balances sweetness with acidity and crunch. To go savory, sprinkle flaky sea salt, toss with roasted chickpeas, or add crumbled feta for a salty counterpoint that highlights the pumpkin’s inherent sweetness. A spoonful of tahini or a scattering of pomegranate seeds can introduce texture and visual contrast while aligning with Mediterranean flavors. Small adjustments transform the same base recipe into distinct dishes across meals and seasons.

When pairing with proteins, think of complementary textures and aromas: roasted pumpkin pairs beautifully with roasted chicken, pan-seared duck, or grilled tempeh. Serve it alongside a grain salad with farro or quinoa to make a hearty vegetarian plate that’s both satisfying and nutritionally rounded. For holiday spreads, add baked pumpkin as a colorful component between richer dishes to lighten the meal and provide a naturally sweet alternative to sugar-heavy desserts. Even simple additions like a squeeze of lemon over the top before serving can pivot the dish from rich to bright. The versatility is one reason this preparation returns to my table repeatedly.

Plating, presentation, and serving suggestions

Presentation elevates humble ingredients; consider serving wedges arranged in a fan or scooping roasted flesh into a shallow bowl and topping with contrasting textures. A final drizzle of high-quality honey before serving adds shine and immediate aroma that guests notice. Garnishes such as chopped toasted hazelnuts or pepitas, a scattering of microgreens, or a few torn mint leaves can provide color and crunch. For family-style service, place the roasted pumpkin on a wooden board and pass small bowls of suggested toppings so everyone customizes their portion. Such simple rituals make a meal feel thoughtful and help diners engage with the flavors more deliberately.

If you plan to serve the pumpkin as a dessert, offer accompaniments like Greek yogurt, crème fraîche, or a scoop of vanilla ice cream to balance warmth and sweetness. For brunch, pair it with poached eggs and a drizzle of olive oil for a savory-sweet contrast that surprises the palate. Temperature matters: warm pumpkin releases volatile aromas and tastes sweeter, while chilled preparations showcase a firmer texture and are excellent in composed salads. Consider the plate color too; white or pale-toned dishes let the pumpkin’s orange hue pop, while dark plates create dramatic contrast. Little choices in plating increase the perceived value of the dish and make it memorable.

Health benefits and nutrition of roasted pumpkin

Pumpkin is a nutrient-dense squash rich in beta-carotene, a precursor to vitamin A, which supports vision and immune function. It’s also a good source of fiber that aids digestion and helps moderate blood sugar response, making roasted pumpkin a wholesome side or component of balanced meals. When you bake instead of deep-frying or loading it with refined sugars, pumpkin remains a healthy choice for weight-conscious diners and families. Honey, while still a sugar, brings antioxidant compounds and trace minerals absent in white sugar, though it should be used judiciously in health-focused preparations. Combining pumpkin with protein, healthy fats, and whole grains helps create meals that sustain energy and satiety.

Portion control and ingredient choices determine just how healthy your final dish is: a drizzle of honey and a sprinkle of seeds keep calories reasonable while boosting flavor and texture. Replacing butter with olive oil shifts the fat profile toward monounsaturated fats, which are heart-friendly when used in moderation. If you follow special diets such as gluten-free or vegetarian, baked pumpkin fits seamlessly and can be adapted into paleo or low-carb meals with minor swaps. I often reach for roasted pumpkin as a nutrient-dense way to anchor lunches during colder months; its natural sweetness means I add less sugar to the overall meal plan.

Variations: stuffed pumpkin, purees, and cubes

One of my favorite variations is a stuffed pumpkin that transforms the shell into both vessel and oven-safe serving bowl. After par-baking the cavity, fill it with a mixture of cooked grains, sautéed mushrooms, herbs, and a touch of honey to echo the sweet base. For a sweeter route, fill with spiced apples, raisins, and a crumb topping for a rustic mini-pie effect. Cubed and roasted pumpkin is excellent when tossed with olive oil, salt, and spices for salads or grain bowls; cubes roast faster and develop more caramelized edges than halves. Puree roast pumpkin to intensify flavor before blending into soups, custards, or pasta sauces for a deeper, more complex sweet base.

Another technique is confit-style pumpkin, where you slowly roast cubes immersed in fat and aromatics until tender and richly flavored; this method produces a silky texture that’s luxurious on toast. Candied pumpkin is an intriguing dessert: slow roast larger chunks in a honey syrup until translucent, then chill and serve with whipped cream. For a quick weeknight meal, mash roasted pumpkin and stir into risotto or use it as a simple sauce for gnocchi. Each variation leverages the same core flavors but tailors texture and complexity to different dining contexts.

Storage, reheating, and using leftovers

Roasted pumpkin keeps well refrigerated in an airtight container for up to five days and freezes nicely for three months when puréed or cubed. If you plan to reheat, do so gently to avoid drying: a brief interval in a low oven or a covered skillet over low heat with a splash of water or oil restores moisture. Frozen purée is especially handy for soups, smoothies, or baking projects; thaw overnight in the fridge and stir before use. Leftover cubes crisp up nicely when pan-seared or brushed with oil and finished over high heat, giving you a second-day texture upgrade. Always label and date frozen portions to maintain clear kitchen organization and reduce waste.

Using leftovers creatively prevents flavor fatigue: blend roasted pumpkin into hummus for a seasonal twist, fold it into pancake batter for autumn breakfasts, or mix with mascarpone for a quick tart filling. If you’ve made a honey-glazed batch, reserve a spoonful of the pan juices as a concentrated syrup to drizzle over yogurt or oatmeal. Leftover stuffed pumpkin filling becomes a filling for savory hand pies or a topping for baked potatoes. These repurposing strategies save time and keep the meal plan interesting throughout the week.

Essential tools and small investments that matter

A few well-chosen tools simplify the process considerably: a sturdy chef’s knife for safe cutting, a spoon with a sharp edge for cleanly scraping fibers, and a rimmed baking sheet to catch bubbling honey. A silicone spatula helps spread glazes evenly, and an oven thermometer ensures you’re not relying on an inaccurate dial. If you bake pumpkin often, a heavy ceramic baking dish distributes heat evenly and gives more consistent results than thin metal trays. For those who like to puree, an immersion blender or a food processor yields smooth textures with minimal fuss. These small upgrades make the work feel less like a chore and more like craft.

Don’t overlook safety: cutting pumpkin requires patience and attention because the tough skin can cause slips. Stabilize the pumpkin on a towel or non-slip surface and work slowly, using a rocking motion with a heavy knife for initial cuts. If you’re uncomfortable cutting large squash, ask your produce clerk to quarter it or buy pre-cut pieces from a trusted source. A sharp knife is safer than a dull one, so keep blades honed and store them properly. These precautions protect you and keep the cooking experience pleasant rather than perilous.

Troubleshooting common issues

If your honey darkens too quickly and burns, reduce oven temperature slightly and baste less often, or cover the pumpkin loosely with foil to shield it while the interior cooks. Watery, bland results usually signal an immature or poor-quality pumpkin; choose a denser variety next time and avoid overcooking, which can dilute flavors. If the flesh is dry, you likely roasted at too high a temperature for too long; add a bit more fat and lower the heat on your next attempt. Flavor imbalance—too sweet or too bland—can be corrected with a sprinkle of acid, such as lemon juice or a dash of vinegar, and some finishing salt to amplify tastes. Troubleshooting helps refine technique and gives you confidence to adapt recipes to your preferences.

Tips and tricks: quick list for reliable success

  • Use sugar or pie pumpkins rather than carving pumpkins for best flavor and texture.
  • Brush with oil or butter before honey to prevent sticking and promote browning.
  • Roast on a rimmed sheet to catch honey drips and make cleanup easier.
  • Finish with a sprinkle of flaky salt to balance sweetness before serving.
  • Experiment with local honey varieties for subtle regional flavors.

These quick rules have saved me on busy evenings; they’re easy adjustments that reduce mistakes and enhance results. I follow them religiously when cooking for guests and share them with friends who are newly exploring seasonal vegetables. Small habits become big differences in the kitchen over time, and these five are among the most reliably transformative. Keep a list near your stove if you like checklists when cooking; they help you stay calm and methodical.

Personal note: how baked pumpkin with honey came into my rotation

I first encountered this preparation at a neighbor’s impromptu autumn dinner, where wedges of glossy, honey-brushed pumpkin redefined what a side dish could do at a casual table. The host had kept things simple: fresh pumpkin, a light coating of olive oil, local honey, and a scattering of toasted seeds at the end. That evening taught me about restraint and balance; the dish was humble yet thoroughly satisfying, and it quietly outshone more elaborate options. Since then I’ve adapted the basic technique for family dinners, holiday spreads, and solo weekday meals where comfort matters more than fuss. The recipe’s adaptability is what keeps me returning to it again and again.

Final invitations: try it and make it yours

Baked pumpkin with honey rewards curiosity and small acts of care: a slightly longer roast, a different honey, a new spice combination, and suddenly the dish feels fresh and personal. Invite friends or family to experiment with toppings and fillings, or keep it intimate and simple with just a drizzle of honey and a pinch of salt. The next time you pass a pile of pumpkins at the market, bring one home with the intention to slow-roast, to taste, and to share. You’ll find that such a modest dish opens room for conversation, memory-making, and the quiet joy of seasonal cooking.

Oven-Baked Zucchini: an Uncomplicated Way to Make Zucchini Shine

There are dishes that shout for attention and there are quiet ones that win you over slowly; oven-baked zucchini belongs to the second kind. It slips into weeknight rotations and Sunday spreads with equal ease, bringing gentle textures and adaptable flavors that take whatever you pair it with up a notch. In this article I will walk you through everything from choosing the best squash at the market to confident, restaurant-worthy finishing touches. Expect practical tips, a reliable base recipe, a few variations to spark creativity, and notes from my own kitchen where I learned which shortcuts are worth keeping. By the end you will have not just a method but a handful of options to tailor baked zucchini to your taste.

Why choose oven baking for zucchini?

Baking zucchini in the oven is a wonderful way to concentrate flavor without drowning the vegetable in oil, and it does so while preserving tenderness and subtle sweetness. Compared with frying, the oven produces less greasiness and a cleaner, more versatile texture that works equally well in salads, as a side, or layered into casseroles. Roasting at moderate to high heat caramelizes the zucchini edges and creates gentle Maillard notes that complement garlic, herbs, and cheeses without overpowering them. For busy cooks, a sheet-pan approach also means you can batch-cook a sizable amount and repurpose leftovers into sandwiches, grain bowls, or breakfast frittatas. Finally, oven methods scale predictably — whether you make a single tray or four, the technique remains the same.

Baked zucchini also plays nicely with dietary preferences and simple pantry ingredients, which makes it a go-to for hosting mixed groups or feeding picky eaters. It can be dressed up with Parmesan and breadcrumbs for indulgence, or kept lean with citrus, herbs, and a drizzle of olive oil. The gentle texture helps carry sauces and spices without becoming mushy, provided you use the right slice thickness and roasting time. For anyone trying to eat more vegetables without complicated techniques, oven-baked zucchini is a low-barrier, high-return solution. In short, it’s both forgiving for beginners and flexible enough for more adventurous cooks.

Selecting and storing zucchini

Not all zucchini are created equal, and knowing what to look for will save you from watery, bland results. Choose fruit that feels firm and heavy for its size, with smooth, glossy skin and few blemishes; a thin stem end is fine, but avoid overly soft spots or deep cuts. Smaller to medium-sized zucchini tend to be sweeter and less seedy, which is especially useful when you want clean slices that hold shape during baking. If you shop at farmers’ markets, look for slightly irregular shapes — they often indicate minimal handling and better flavor. At home, store zucchini loosely wrapped in a perforated plastic bag in the crisper for up to four days to keep texture intact.

If you need to keep zucchini longer, blanching and freezing works well for cooked preparations, though raw-frozen zucchini becomes watery once thawed and is better suited for soups, stews, or baked goods. For fresh use, try to plan your baking within two days of purchase for peak texture and taste. If you notice excess moisture on the zucchini surface before slicing, pat it dry with a kitchen towel; that little step helps oil and seasonings stick and prevents steaming in the oven. Selecting good produce and respecting simple storage habits will translate into a noticeably better result after baking.

Essential preparation techniques

Before the zucchini hits the oven, a few small decisions determine the final texture: how you slice it, whether you salt it, and how you oil and season the pieces. Slice thickness matters — thin rounds become tender quickly and can crisp at the edges, while thicker batons or wedges offer a meatier bite and stand up well to stuffing or heavy toppings. If you prefer a firmer texture, slice around 1/4 to 1/2 inch; for creamier, melt-in-your-mouth results, aim for slightly thicker cuts and higher oven temperature. I often salt thicker slices lightly and let them sit for 10 minutes to draw out a bit of moisture, then pat them dry to avoid excess sogginess during baking.

Seasoning is simple but deliberate: a neutral oil to promote browning, a pinch of salt, freshly ground black pepper, and at least one aromatic such as minced garlic, lemon zest, or chopped herbs will suffice. Use oils with a relatively high smoke point for hotter roasts; olive oil works beautifully at moderate temperatures and brings its own flavor. Toss the zucchini in a bowl rather than brushing it on the tray; this ensures even coverage and avoids sticking. Finally, give the oven and pan a moment to preheat — a hot tray helps the zucchini begin browning on contact instead of steaming.

Classic oven-baked zucchini recipe

Oven-Baked Zucchini. Classic oven-baked zucchini recipe

This straightforward preparation is a dependable starting point for the many variations that follow, and it embodies the “easy recipe” spirit without sacrificing taste. The goal here is to coax natural sweetness, create pleasant browned edges, and keep the interior tender. Below you’ll find a concise ingredient list and a clear set of steps that work in most household ovens; once you’ve mastered this you can scale, tweak, or embellish with confidence. Expect a finished dish that serves as a simple side, a component for sandwiches, or the base for layered bakes.

Ingredients for about four servings:

  • 3 medium zucchini (about 1.2–1.5 pounds), washed and sliced into 1/3-inch rounds
  • 2 tablespoons olive oil
  • 3 cloves garlic, thinly sliced or minced
  • 1/2 teaspoon fine sea salt and 1/4 teaspoon black pepper
  • 1 teaspoon dried oregano or a tablespoon chopped fresh herbs (basil, thyme, or parsley)
  • Optional finish: 2 tablespoons grated Parmesan or lemon zest and a squeeze of lemon juice

Method:

  1. Preheat the oven to 425°F (220°C) and position a rack in the center. Line a rimmed baking sheet with parchment, or lightly oil it to prevent sticking.
  2. Place the zucchini slices in a large bowl, add olive oil, garlic, salt, pepper, and herbs, then toss until evenly coated. Spread them in a single layer on the sheet, making sure pieces are not crowded.
  3. Bake for 14–18 minutes, turning once halfway through, until edges are browned and the centers are tender. For extra browning, finish under the broiler for 1–2 minutes while watching closely.
  4. Remove from the oven, sprinkle with Parmesan or lemon zest if using, and serve immediately while warm and fragrant.

Notes on timing and temperature

Different ovens and slice thicknesses change timing, so treat the suggested bake window as a guideline rather than a rule. Thin slices will finish closer to 12–14 minutes and develop crisp edges, while thicker cuts need the upper end of the range to fully soften. If you prefer a deeply caramelized surface, increase the oven to 450°F for the last five minutes, or use the broiler briefly, but beware of burning the garlic. Consistent spacing on the pan prevents steaming and encourages even browning. Keep an eye on the zucchini during the final minutes to catch the moment it reaches your preferred level of color and tenderness.

Flavor variations to expand the base recipe

Once you know the basic technique, the possibilities multiply quickly; zucchini responds beautifully to Mediterranean, Italian, Middle Eastern, and Asian flavors. For a Mediterranean twist, add chopped sun-dried tomatoes, olives, and a sprinkle of feta after baking; the salty tang lifts the gentle squash beautifully. An Italian-inspired version benefits from a breadcrumb and Parmesan topping that crisps in the oven, while Middle Eastern spices like cumin, paprika, and a drizzle of tahini create a more exotic profile. Small adjustments in spices, herbs, and finishing touches let the same base dish adapt to different meals without extra hassle.

Here are a few quick ideas to try that alter only the final toss or sprinkle: a gremolata of lemon zest, parsley, and garlic; a North African rub of ras el hanout with harissa yogurt; or an Asian-inspired soy-sesame glaze finished with scallions and toasted sesame seeds. If you favor a cheesy crust, combine equal parts panko and grated hard cheese, press it lightly onto oiled slices, and bake until crisp; the contrast of crunchy topping and tender interior is very satisfying. For a lighter option, accent with fresh herbs, a drizzle of good olive oil, and a squeeze of citrus just before serving.

Stuffed zucchini boats for a heartier presentation

Transforming zucchini into boats gives you a substantial, oven-finished centerpiece that can be vegetarian or include meat. To make boats, halve medium zucchini lengthwise and scoop most of the seeds out to create a cavity, then fill with a savory mixture such as cooked quinoa or rice, sautéed vegetables, herbs, and a touch of cheese. Top with breadcrumbs or additional cheese and bake at 400°F for 20–30 minutes, until the filling is warmed through and the top is golden. These boats travel well and make an impressive addition to a casual dinner when you want something prettier than a simple side. Leftovers of the filling also work great stuffed into peppers or folded into omelets the next day.

Pairings and serving ideas

Baked zucchini is a remarkably cooperative companion at the table and pairs well with proteins, grains, and robust salads. Serve it alongside roast chicken or grilled fish for a balanced plate, or layer it into lasagna and gratins where its mild flavor keeps the dish from becoming too heavy. For casual meals, combine warm zucchini with cooked farro or quinoa, drizzle with a lemony vinaigrette, and scatter fresh herbs and toasted nuts on top for texture and freshness. It also makes a fine bridge between courses — mild enough to let a main shine, but flavorful enough to make the vegetarian option interesting.

Think about contrast when you serve it: a crunchy element like toasted almonds or a herby chimichurri adds brightness, while creamy components such as ricotta or a yogurt sauce bring soothing richness. For summer gatherings, cool roasted zucchini can be tossed into a tomato and basil salad or layered in chilled antipasto platters. In my own kitchen I often use leftover baked zucchini in grain bowls with roasted chickpeas and tahini dressing — it keeps the bowl from feeling dry and adds a comforting roasted note.

Make-ahead, storage, and reheating strategies

Oven-baked zucchini stores well if handled correctly, which makes it an excellent prep-ahead vegetable for busy weeks. Cool the zucchini to room temperature before refrigerating in an airtight container; it will keep for three to four days and remains useful for quick lunches or dinner components. If you want to freeze it, flash-freeze single layers on a tray first, then transfer to a sealed bag; frozen baked zucchini works best in cooked applications after thawing and reheating rather than as a standalone side. Avoid leaving it at room temperature for extended periods to maintain quality and safety.

Reheating in the oven or on a skillet keeps texture more appealing than the microwave, which tends to make zucchini soggy. Spread slices on a tray and reheat at 375°F for 8–10 minutes, or crisp them briefly in a nonstick skillet over medium heat to restore some edge browning. If you plan to repurpose leftover baked zucchini into a new dish, add it toward the end of cooking so it warms through without overcooking. I frequently refresh leftovers by tossing them with vinaigrette and fresh herbs to revive aroma and flavor.

Troubleshooting common problems

If your baked zucchini turns out watery, the usual culprit is overcrowding on the pan or overly thin slices that release moisture quickly. When pieces are too close together or stacked, they steam instead of roast, so always space them in a single layer for best results. Over-salting early in the process can also draw out excess water; if you want to salt beforehand, remember to pat the slices dry after they sit so they crisp properly. Using parchment or a lightly oiled pan helps manage sticking, but heavy oils pooled on the tray can contribute to sogginess, so use oil judiciously.

Another common issue is uneven browning, which often results from inconsistent slice size or temperature fluctuations in the oven. Slice uniformly, rotate the pan halfway through baking, and use the middle rack for most even heat. If garlic browns too quickly and tastes bitter, add it later in the roasting time or use garlic powder as an alternative during the initial bake, finishing with fresh garlic or greens afterward. These small adjustments prevent predictable pitfalls and yield a more reliable final dish.

Nutritional perspective and health benefits

Zucchini is a low-calorie, nutrient-dense vegetable that contributes fiber, vitamin C, and potassium to your meals with minimal fuss. Baking preserves many of these nutrients while avoiding excessive added fats compared with frying, making it a sensible choice for those watching calories without sacrificing satisfaction. Because zucchini has a high water content, it helps bulk up dishes and may aid in satiety when combined with proteins or whole grains. Incorporating baked zucchini into weekly menus is an easy way to increase vegetable intake and add variety to standard sides.

Nutrient (per 100g raw) Amount
Calories 17 kcal
Carbohydrates 3.1 g
Fiber 1.0 g
Vitamin C 17.9 mg
Potassium 261 mg

Tools, equipment, and small investments that matter

You don’t need fancy gear for great oven-baked zucchini, but a few modest tools make the process easier and more consistent. A sharp chef’s knife and a sturdy cutting board are essential for even slices that cook uniformly, while a rimmed baking sheet prevents juices from spilling into the oven. Parchment paper simplifies cleanup and reduces sticking, but a well-seasoned sheet pan works fine if you prefer less waste. If you cook often, a digital oven thermometer is worth the small investment to ensure your oven reads accurately; many home ovens vary significantly from their set temperature.

Other helpful items include a fish spatula or thin metal turner to flip delicate slices, and a small fine-mesh strainer if you plan to salt and drain zucchini before roasting. For breadcrumb crusts or gratins, a small blowtorch is a nice-to-have for precise browning but absolutely unnecessary; the broiler does the job. These simple tools streamline technique and let you focus on flavor rather than wrestling with equipment.

Personal notes and practical habits from my kitchen

Over years of cooking I developed a handful of small rituals that consistently improve baked zucchini without adding complexity. I always taste and adjust — a final squeeze of lemon frequently brightens the whole pan, while a finishing swirl of good olive oil brings back aroma lost in reheating. When entertaining, I often pre-roast zucchini slightly underdone and finish it off in the oven at the last moment; this gives me flexible timing and a fresher texture at table. Small habits like slicing uniformly, using a hot pan, and finishing with a textural element have saved many weeknight dinners.

One memorable experiment involved swapping breadcrumbs for crushed pita and adding za’atar; the result became a family favorite because it combined crunch, herbaceousness, and a faint lemony tang. On another occasion I used baked zucchini as my base for a make-your-own-taco night, letting guests top slices with salsa, crema, and pickled onions; it was an unexpectedly satisfying substitution for tortillas. These real-world trials taught me that the simplest preparations are often the most adaptable, which is why I keep this dish in regular rotation.

Final thoughts on building this into your cooking repertoire

Oven-baked zucchini is both a dependable weekday ally and a canvas for culinary curiosity, offering simple satisfaction and room for invention at the same time. Once you internalize a few basic rules about slicing, spacing, and heat, the rest becomes a matter of flavor preferences and timing. Keep a few staple seasonings on hand, experiment with a single new topping each week, and use leftovers creatively to extend the value of every batch. With minimal effort you gain a versatile vegetable component that fits into salads, mains, and even snacks with ease.

Try making the basic recipe a couple of times exactly as written, then pick one variation and adapt it to your pantry — that’s how these techniques become second nature. The real pleasure comes when you start relying on oven-baked zucchini as your quiet, reliable solution for tricky dinner nights, unexpected guests, or the simplest desire for something roasted and wholesome. It’s an easy recipe that rewards attention with flavor, and once it’s mastered, you’ll find it popping up in more of your meals than you expect.