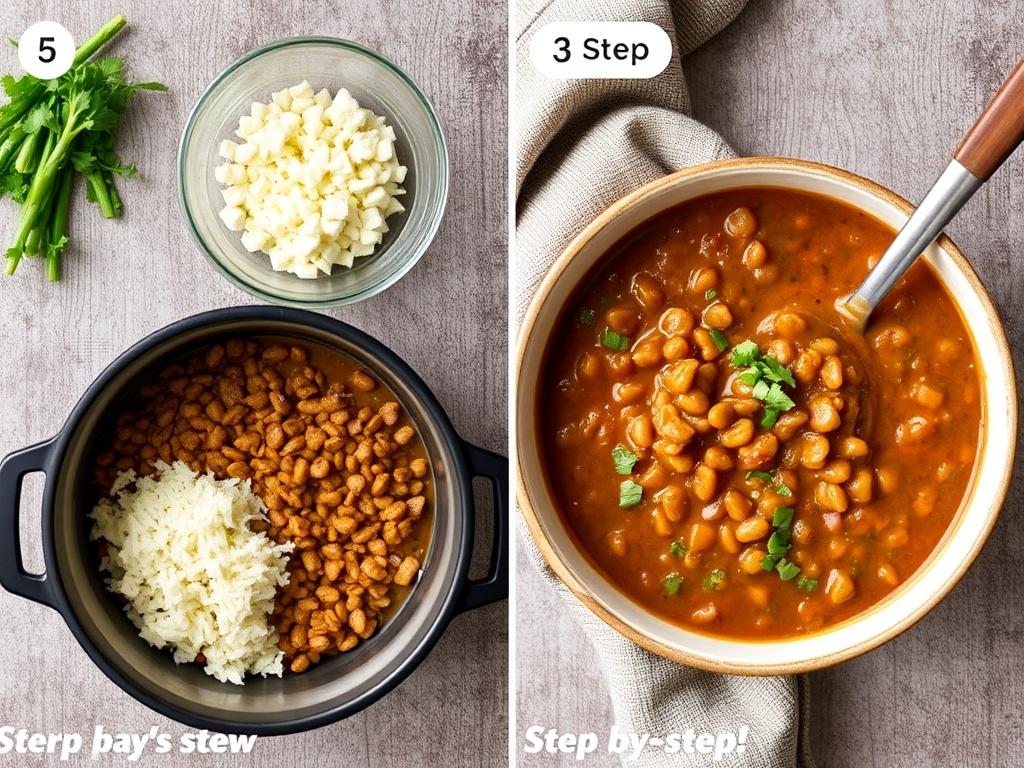
Archive: 29 August 2025

One-Pot Comfort: Slow Cooker Sausage Casserole That Feeds a Crowd

This dish is pure kitchen diplomacy: it solves weekday dinnertime skirmishes and wins over picky guests without drama. A Slow Cooker Sausage Casserole is the kind of meal that smells like home the second it begins to bubble, while you get on with your day. It requires modest hands-on time, and the slow cooker does the heavy lifting — melding meat, vegetables, and sauce into a thick, spoonable comfort food. In this article I’ll walk you through ingredients, technique, sensible substitutions, and a few small tricks that make the difference between a good casserole and a memorable one. Expect practical tips, personal notes from my kitchen experiments, and a few serving ideas so you never stare blankly at the fridge again.

Why choose a slow cooker for sausage casseroles?

Using a slow cooker for a sausage-based casserole makes seasonal sense: it’s forgiving, efficient, and the low heat encourages flavors to marry rather than clash. Sausage has a lot of natural fat and seasoning; when cooked slowly it releases those oils into the sauce, deepening the profile without any sharp edges. A slow cooker also rescues busy evenings — toss the browned meat and prepped veg in before you leave and come home to a finished dish. For families, it’s a way to stretch ingredients: root vegetables and beans bulk up the casserole, turning a few links into a full tray of dinner. Finally, the appliance prevents overcooking of delicate components that might dry out in an oven, especially when you include starchy elements like potatoes or pasta.

There’s also a practical side to this method: temperature stability. Once the unit reaches cooking heat, it stays steady, which reduces the need to babysit the pot or adjust vanshingly small variables. That stability is a boon when layering ingredients that need different cook times — vegetables soften evenly while the sausage settles into its warm, savory groove. Because most slow cookers are sealed, moisture doesn’t escape quickly, preserving texture and preventing the sauce from reducing too fast. This means you can plan for a thicker, stew-like casserole or a saucier one simply by adjusting the amount of liquid at the start.

Ingredients and flavor building: assembling the essentials

The backbone of any great casserole is ingredient choice. For a sausage casserole, pick sausages that match the flavor direction you want: sweet Italian for a tomato-forward version, spicy chorizo for a smoky kick, or good-quality breakfast sausage for a homier, herb-driven dish. Fresh vegetables anchor the dish — onions, carrots, and bell peppers are classic; root vegetables like parsnips and potatoes add heartiness. Acidic elements such as canned tomatoes or a splash of wine cut through the richness, while herbs and aromatics round the profile. Finally, texture boosters like canned beans, pearl barley, or short pasta make a single pot feel like a banquet.

Below is a simple ingredient table for a family-sized casserole (about 6 servings). Use it as a baseline and scale up or down as needed. If you prefer a vegetarian partner for the meat, think in terms of the same volume of mushrooms or smoked tofu. The table lists common pantry and market items that play well together.

Ingredient Amount (approx.) Notes
Raw sausages (links or removed from casing) 1.2–1.5 lb (550–700 g) Italian, pork, or chicken — choose by flavor
Onion 1 large Yellow or sweet, diced
Carrots 2–3 medium Sliced or chopped
Bell pepper 1 large Any color, diced
Canned tomatoes (crushed or diced) 14–28 oz (400–800 g) One standard can for a thicker casserole
Liquid (broth or wine) 1/2–1 cup Less for thicker sauce, more for stew
Beans or pasta 1 can or 1–2 cups cooked Optional; adds body and protein
Herbs & spices To taste Bay leaf, thyme, smoked paprika, salt, pepper

Choosing sausage: what matters

When selecting sausage, flavor intensity and fat content matter most. A very lean sausage will cook faster and won’t contribute as much body to the sauce, while an overly fatty link can make the casserole greasy unless skimmed. I like sausages with a moderate amount of fat and clear seasoning — fennel and garlic in Italian links, smoked paprika in Spanish-style chorizo, or herbed chicken sausages for a lighter touch. If the sausage casing is tough or inedible, remove it and crumble the meat before browning; this creates more surface area for caramelization and helps integrate the protein into the casserole.

Step-by-step method: from prep to table

Good technique isn’t complicated, but a few purposeful steps lift the result. Start by browning the sausage — that Maillard reaction produces deep, savory characters that a slow cooker alone doesn’t always create. Sauté the aromatics next to coax out sweetness from onions and peppers. Deglaze the pan with a splash of broth or wine to loosen flavorful browned bits, then combine everything in the slow cooker with tomatoes, herbs, and any sturdy vegetables. Cook low and slow until vegetables are tender and the sauce has thickened to your liking.

Here’s a clear, practical sequence to follow. I recommend writing it on a sticky note when you begin; it’s easy to forget small, meaningful steps when you’re juggling family and work. Feel free to tweak times based on your slow cooker model; older or smaller units can run hotter, so monitor the first time you try a new recipe in a different pot.

  1. Brown sausage over medium-high heat, then remove and drain slightly.
  2. Sauté onion, carrot, and pepper until softened and slightly caramelized.
  3. Deglaze pan with broth or wine, scraping browned bits, then add tomatoes and seasonings.
  4. Transfer mixture to slow cooker, nestle in sausage, and add any root veg or beans.
  5. Cook on low for 6–8 hours or on high for 3–4 hours until everything is tender.

Browning and why it matters

Skipping the browning step is tempting when short on time, but it’s one of those shortcuts that costs you flavor. Browning changes the chemistry of the meat and creates caramelized crusts that melt into the sauce — those browned bits are umami gold. I recommend doing this in batches so the pan doesn’t steam the sausages; overcrowding lowers temperature and prevents Maillard coloring. After browning, reserve any rendered fat if it’s flavorful; a tablespoon or two added back to the slow cooker enhances mouthfeel and ties the sauce together.

One trick I use is to brown half the sausages and remove them, then crumble the remainder in the pan so you get both chunky and fine textures in the final bake. That contrast makes the casserole feel homey but not sloppy. If you’re short on time, you can also use a hot oven or skillet to get a fast turn on browning; the key is high heat and attention rather than long cooking time.

Vegetable prep and layering

Vegetables should be cut to even sizes for uniform cooking. Dense items like potatoes or parsnips can be diced smaller, while mushrooms and bell peppers can be chunkier since they soften quickly. Layering matters in a slow cooker: put root vegetables toward the bottom because they take longer to become tender, and place quicker-cooking ingredients on top. If you’re adding pasta, wait until the final hour to avoid overcooking; if you prefer a one-pot approach with rice, parboil the rice slightly first.

Another practical note: canned beans are forgiving and integrate beautifully into a casserole. If you prefer dried beans, soak and par-cook them before adding, because raw dried beans can remain mealy and even contain traces of toxins if undercooked. For greens like spinach or kale, stir them in during the last 15–30 minutes so they wilt but retain texture and colour. Small timing adjustments save a lot of regret at dinner time.

Variations and substitutions: tailor it to mood and pantry

The beauty of a sausage casserole is how adaptable it is. Swap tomatoes and Italian sausage for chorizo and smoked paprika to create a Spanish-leaning bake, or use a creamy base with mustard and cream for a Northern European vibe. If you want vegetarian, replace sausage with smoked tempeh or a mix of mushrooms and white beans, and add a splash of liquid smoke for depth. The slow cooker is forgiving enough to handle most substitutions, but keep an eye on moisture: ingredients that release a lot of liquid, like tomatoes or thawed frozen veg, will change the sauce’s density.

  • Tomato-based: Italian sausage, canned tomatoes, oregano, basil.
  • Creamy version: chicken sausage, cream or crème fraîche, mustard, thyme.
  • Smoky chorizo: Spanish chorizo, smoked paprika, red peppers, white beans.
  • Vegetarian: smoked tofu or mushrooms, white beans, vegetable broth, rosemary.

Another substitution I often use is replacing part of the meat with lentils or barley to stretch the meal when feeding a crowd or saving on cost. Lentils add earthiness and body while keeping protein levels respectable; barley lends chew and hoovers up sauce nicely. When you introduce grains or legumes, reduce liquid slightly or extend cooking time so the casserole doesn’t end up soupy. These are small tweaks that keep the casserole interesting week after week.

Serving suggestions and accompaniments

A robust sausage casserole pairs well with simple, fresh side dishes that provide contrast. A crisp green salad, dressed with a bright vinaigrette, cuts through the richness. Crusty bread or garlic-rubbed slices are essential for sopping up remaining sauce, and a dollop of yogurt or crème fraîche on the finished plate adds pleasant acidity and coolness. For a more substantial meal, serve with creamy mashed potatoes or buttered egg noodles that soak up the casserole juices.

For a casual family dinner, I often place the slow cooker on the table and let everyone serve themselves, with bowls of grated cheese, chopped parsley, and pickled chillies on the side for customization. This communal approach turns a simple meal into a small event, and kids usually enjoy assembling their own plates. If you’re hosting, consider finishing the casserole under a hot broiler for five minutes with a cheese topping to create a browned crust that looks special without extra effort.

Make-ahead, storage, and reheating

One of the practical virtues of this dish is its make-ahead friendliness. The casserole can be made a day in advance and refrigerated; flavors often deepen overnight. When storing, cool the casserole to room temperature and then transfer to airtight containers. Refrigerate for up to four days or freeze portions for up to three months. Labeling with the date saves confusion when your freezer becomes a time capsule of dinners.

Reheating is simple: thaw in the fridge overnight if frozen, then reheat gently on the stovetop or in the slow cooker on low until warmed through. If using a microwave, stir halfway through heating to avoid cold spots, especially if the dish includes dense root vegetables. Add a splash of broth when reheating if the sauce has tightened or seems dry. Reheated casserole rarely tastes identical to fresh, but its comfort factor remains intact.

Troubleshooting common issues

Even with a forgiving method, a few things can go sideways. If the casserole is watery, it likely needed less liquid at the start or more time to cook uncovered to reduce. Remove the lid for the last 30–60 minutes to concentrate the sauce, or stir in a slurry of flour or cornstarch mixed with cold water. If ingredients are undercooked, check your slow cooker’s temperature setting; older units sometimes run cool. Cook longer on low rather than increasing to high, as higher heat can dry out components unevenly.

If the casserole tastes flat, it needs brightness and seasoning. A generous pinch of salt, a squeeze of lemon, or a splash of vinegar can wake a heavy stew instantly. Fresh herbs added at the end preserve vibrancy better than those cooked for hours. For overly salty results, dilute with more vegetables, a peeled potato to absorb salt (remove before serving), or an unsalted starch like cooked rice or pasta.

Nutrition notes and ways to lighten up

Sausage dishes are often indulgent, but you can make this casserole lighter without sacrificing satisfaction. Choose leaner sausage options, remove visible fat after browning, and bulk the dish with vegetables and legumes. Swap some or all of the sausage for chicken sausage or turkey sausage to reduce saturated fat. Incorporating lots of tomatoes, peppers, and greens increases fiber and vitamins while keeping the calorie count reasonable.

If you’re watching sodium, use low-sodium broth and no-salt-added canned tomatoes, seasoning carefully at the end. Adding acid in the form of lemon or vinegar often allows you to use less salt while maintaining perceived flavor. For a lighter finish, skip heavy creams in favor of a dollop of Greek yogurt stirred in off-heat, which gives creaminess without overwhelming richness.

My favorite tweaks and kitchen stories

I remember the first time I fully trusted the slow cooker with a sausage casserole: I tossed everything together before a long workday, convinced I would come home to a disappointing soggy mess. Instead, the house smelled like a rustic kitchen in eighties cinema, and the sauce had a mellow, sophisticated tang I didn’t expect. Since then I’ve learned to embrace small variations. Adding a tablespoon of tomato paste while sautéing makes the sauce deeper; a splash of balsamic vinegar at the end brightens the whole pot.

One of my go-to hacks for feeding sudden guests is to double the recipe, freeze half, and serve the fresh portion with a simple cucumber salad. The frozen half has rescued more than one hectic weekend; defrosted and reheated, it develops a rustic firmness that’s perfect with crusted bread. If you enjoy experimentation, try a wedge of sharp cheese grated on top during the final ten minutes and then briefly broiled — it makes a modest casserole feel celebratory.

Final serving ideas and a gentle nudge to try it

Slow Cooker Sausage Casserole. Final serving ideas and a gentle nudge to try it

A Slow Cooker Sausage Casserole is more than a recipe; it’s a template. It teaches you how to balance richness with acidity, comfort with freshness, and time with technique. Start with the simple version and vary one element at a time — swap the sausage type, change the beans, or add a new herb — and each week you’ll discover a different face of the same dependable dish. Invite friends or family, set out condiments, and enjoy the pleasant ritual of ladling from a warm pot at the center of the table.

Try this approach next time you need a meal that’s low in fuss but high in satisfaction. With modest prep and a patient slow cooker, you’ll produce a filling, flavorful casserole that becomes an easy favorite. And if you find a unique twist that wins over your table, tuck it into your mental cookbook — these are the recipes that get repeated, improved, and eventually loved by everyone who sits down to eat.

From Bone to Broth: The Art of a Cozy Pork Shoulder Hotpot

This article explores how a humble cut of meat, a pile of root vegetables and a generous pot of simmering liquid can become a ritual worth returning to. I want to take you beyond recipes and timers toward the little decisions that make a pork shoulder hotpot sing: the browning, the stocks, the balance between sweet carrots and sharp parsnips, the way collagen turns to silk. Read on for practical technique, flavor theory, equipment options and serving ideas, with enough detail to cook with confidence and enough inspiration to make the dish your own.

Why pork shoulder works so well for hotpots

Pork shoulder is built for slow, patient cooking. It has a mix of muscle, fat and connective tissue that melts during long simmering, producing both tenderness and a luscious mouthfeel. Unlike lean cuts that can dry out, shoulder gives you forgiving timing; overshoot by an hour and it is still appealing. The fat also carries flavor into the broth and into root vegetables that soak it up, so every spoonful tastes cohesive rather than disjointed.

In a one-pot context, shoulder performs multiple roles. It yields rich stock, bites of meat to scoop up, and a comforting texture that stands up to hearty accompaniments like potatoes or barley. This cut is economical too, which makes the hotpot approach suitable for feeding a family or turning a simple grocery list into something celebratory. When planning a meal that should feel like an embrace rather than a dazzle, shoulder is the sensible hero.

Choosing the right piece and prepping it

Look for a well-marbled piece of pork shoulder with some exterior fat but not an excessive rind. Bone-in shoulders add extra gelatin and flavor; boneless is easier to portion but slightly less complex in the final stock. When buying, consider size relative to your pot and guest list—2 to 3 pounds serves four comfortably when paired with vegetables and starch. Always check the smell and color; fresh shoulder has a faint, clean aroma and a soft, slightly rosy surface.

Before cooking, pat the meat dry and trim any awkwardly large flaps of fat while leaving a thin protective layer. Seasoning early with salt helps extract moisture and concentrates flavor, but avoid over-salting if you plan to reduce the final broth heavily. For even cooking, allow the meat to sit at room temperature for twenty to thirty minutes before searing. These small prep steps make a visible difference in texture and taste.

Searing and the role of browning

Searing is often billed as a flavor forge and that’s accurate up to a point. Maillard reaction adds savory, roasted notes that deepen the broth and give the meat appealing color. Use a heavy-bottomed pot or a skillet on medium-high heat, and sear the shoulder in small batches. Resist the temptation to crowd the pan; steam will stop browning and you’ll lose that toasted edge that cuts through the richness.

Collect the fond—the browned bits on the pan—and deglaze with a splash of wine, vinegar or stock. This dissolves concentrated flavor back into the cooking liquid. Some cooks skip searing to cut calories or time, but the trade-off is a flatter-tasting broth. In my kitchen, a quick sear is non-negotiable because it creates the backbone for everything that follows.

Building a balanced cooking liquid

The cooking liquid is the canvas for your hotpot. A straightforward base combines stock with aromatics, an acid and often a touch of sweetness. Use chicken or pork stock if available; good-quality store-bought broth can work when time is tight. For acidity, a modest amount of apple cider vinegar or wine brightens the profile and helps extract flavors from vegetables and bones. Avoid heavy-handed additions—this is about subtle framing rather than masking.

Salt the liquid conservatively at first. Flavors concentrate as the hotpot reduces, and root vegetables will absorb salt as they cook. Add herbs like thyme, bay leaves and a few peppercorns to round the profile. If you want an umami boost, a spoonful of miso or a piece of kombu yields depth without making the dish taste overtly Asian; treat those ingredients like seasoning, not the star.

Root veggies: pairing and timing

Root vegetables are a cornerstone of the hotpot concept: they withstand long cooking and transform into tender, earthy complements to the meat. Classic choices include carrots, parsnips, turnips, and potatoes. Each brings a textural and flavor contrast—carrots sweeten the broth, parsnips add a nutty spice, turnips contribute a clean pepperiness and potatoes give body and starch. Choosing a mix creates layers that unfold as you eat.

Timing is important. Dense roots like carrots and parsnips can be added early so they break down and enrich the broth. Waxier potatoes hold shape longer and can be added in the last third of cooking if you want defined chunks. If you prefer every component soft and melting, add everything near the beginning. Keep sizes consistent to ensure even cooking and consider cutting some pieces larger for texture variation.

Herbs, aromatics and flavor layering

Aromatics do the silent work in a hotpot. Onions, garlic and leeks give an initial savory base while celery or fennel lightens the mix with green notes. Toasted whole spices—coriander, mustard seeds or cloves—can add warmth when used sparingly. Fresh herbs added at the end preserve brightness; dried herbs deserve the early part of the simmer to fully bloom. The trick is layering: add some aromatics up front, a second wave midway and finishing herbs just before serving.

Mirepoix-like foundations (onion, carrot, celery) are useful, but don’t be afraid to vary them. Browning shallots lends sweetness, while adding a strip of citrus peel can lift the broth without tasting citrusy. I sometimes throw in a halved apple when cooking pork to play up its natural affinity for fruit; it dissolves and leaves a rounded sweetness. These nuances matter when you want a hotpot that feels thoughtful rather than mechanical.

Techniques: stovetop, oven, slow cooker and pressure cooker

There are multiple valid paths to a successful hotpot; choose one based on time and temperament. Stovetop simmering gives you control and the comfort of being present, but requires periodic checks. An oven set to 300 to 325°F creates a stable, evenly distributed heat that’s forgiving and hands-off. Both methods reward a heavy pot with a tight-fitting lid to lock in steam.

Slow cookers excel at convenience: set it and forget it for six to eight hours, and you’ll have tender pork. They generally produce less evaporation, so your broth will be more abundant and less concentrated. Pressure cookers drastically cut time and extract gelatin quickly; the result is rich broth and fork-tender meat in under an hour. Each method yields slightly different textures; the choice comes down to personal preference and schedule.

How long to cook and how to test doneness

Pork Shoulder Hotpot. How long to cook and how to test doneness

Cooking time depends on size, method and whether the meat is bone-in. As a rule of thumb, oven or stovetop braises at low heat take 2.5 to 4 hours for a 2 to 3 pound shoulder, while a pressure cooker needs 45 to 60 minutes. The measure of doneness is not internal temperature alone; you want collagen to dissolve so meat shreds easily and feels silky. Use a fork to test: properly cooked pork will separate with gentle tugs rather than resist.

Be mindful of vegetable texture during long cooks. If roots are too soft for your taste, remove them early and hold in the warm pot. If the broth feels thin, remove the meat and reduce the liquid on medium-high heat to concentrate flavor. Cold-to-hot transitions and resting after cooking allow flavors to knit together; a brief rest allows the juices to reabsorb and the broth to settle.

Finishing touches: adjusting flavor and texture

Taste at multiple stages and adjust near the end. A bit of acid—lemon juice, vinegar or a spoonful of pickle brine—can brighten a heavy broth. For richness, finish with a knob of butter or a splash of cream if it suits the meal. Freshly chopped herbs or a scattering of chopped parsley or chives bring a green lift that prevents the bowl from feeling cloying. Texture can be adjusted by thinning with stock or reducing for concentration.

If you want a silky mouthfeel, shred some of the cooked shoulder and stir it back into the reduced broth. Alternatively, leave larger hunks of meat for rustic presentation. Sprinkle crunchy elements at service—fried onions, toasted seeds or crisped bacon—to contrast the soft components. Little contrasts like these make each spoonful interesting and keep the palate engaged across a long, comforting meal.

Serving ideas and accompaniments

A hotpot invites communal eating and flexible plating. Serve it in a family-style pot on the table with bowls of pickles, crusty bread and a fresh salad to cut through the richness. Rice, mashed potatoes or buttered noodles are excellent starch beds that soak up the broth. For a lighter route, think of the hotpot as a topping for roasted vegetables or an ingredient in tacos with pickled onions and cilantro.

Condiments matter. Sharp condiments like whole-grain mustard, apple chutney, or a drizzle of herb oil can lift the dish. If the hotpot leans sweet from root veggies, balance it with a tart element at table. Portion sizes can be generous—this dish stretches well and is ideal for leftovers that taste even better the next day as flavors have time to meld.

Leftovers and creative repurposing

Leftover hotpot is a kitchen jackpot. The meat and vegetables transform easily into sandwiches, shepherd’s pie or a thick stew. Shred the pork into tacos with pickled radish, fold it into pasta with a squeeze of lemon, or stir through a risotto for a deeply savory twist. Broth left after serving freezes well and becomes an instant base for future soups.

When reheating, do it gently to preserve texture—low heat on the stove or a short, gentle microwave cycle is best. If the broth has gelled in the fridge, that gelatin will melt with heat and provide luscious mouthfeel. I often divide leftovers into single portions and freeze them, which makes weekday dinners effortless and delicious.

Shopping list and timing checklist

Preparing a hotpot requires a mix of planning and improvisation. Below is a concise shopping list and a timing checklist you can adapt. The aim is to have everything prepped before you start so the cooking process flows without scrambling. A well-organized mise en place saves time and reduces stress, which is essential when balancing long simmer times with last-minute garnishes.

  • Shopping list: pork shoulder (bone-in or boneless), onions, garlic, carrots, parsnips, potatoes, stock, fresh herbs (thyme, parsley), bay leaves, apple cider vinegar or wine, salt and pepper, optional: apples or root herbs, mustard, butter.
  • Equipment checklist: heavy pot with lid or Dutch oven, cutting board and sharp knife, slotted spoon, ladle, tongs, oven mitts, optional: slow cooker or pressure cooker.
  • Timing checklist: 30–45 minutes prep (searing, chopping), 2.5–4 hours braise (stovetop/oven), 15–30 minutes resting and finishing, variable if using other methods.

Safety, storage and reheating

Food safety matters when dealing with large volumes of cooked meat and broth. Cool leftovers quickly by dividing into shallow containers and refrigerate within two hours. Store in the fridge for up to four days, or freeze for three months. When reheating, bring to a bubbling boil for at least one minute if the food has been refrigerated for a while; this ensures bacterial safety and revives the broth.

Label frozen portions with contents and date to avoid freezer mystery meals. Thaw frozen hotpot in the refrigerator overnight rather than at room temperature. A gentle reheating preserves texture; high heat risks drying the meat and overcooking root veggies into anthermically soft state. These small practices keep the dish both delicious and safe.

Troubleshooting common issues

If the meat is tough, it likely needed more time or a slightly higher simmer to dissolve collagen. Low-and-slow is sturdier than high-and-fast for shoulder. If broth is too thin, remove the meat and reduce the liquid to concentrate flavors. Conversely, if the stew becomes overly salty or intense, add unsalted stock, water and a peeled raw potato briefly to absorb excess salt then remove it.

Vegetables that disintegrate completely can be corrected by adding starchy elements toward the end in future attempts—cutting potatoes larger or adding beans later, for instance. A greasy surface can be skimmed with a spoon or chilled and defatted before reheating. These fixes let you rescue a dish without starting over, which is a valuable skill when cooking large one-pot meals.

Variations: cultural twists and ingredient swaps

Hotpot is a concept that stretches across cuisines. For a Mediterranean spin, braise shoulder with tomatoes, olives and rosemary and serve with polenta. An Asian-inspired hotpot can use soy, star anise and ginger with bok choy added late. Swap root veggies for sweet potatoes and yucca for different starch and sweetness profiles. Playing with spice blends and liquids transforms the same technique into a dozen distinct dinners.

Smaller adjustments—substituting cider for wine, adding smoked paprika, or finishing with gremolata—create new identities without changing the core method. I often adapt the hotpot to seasonal produce: in winter I roast parsnips and add them to the pot, while in early spring I lighten the dish with new potatoes and a handful of fresh peas. These variations keep the technique fresh and relevant throughout the year.

Personal notes and kitchen habits

Over the years I learned to trust the pot. Early on I worried obsessively about timings and exact liquid levels. Now I aim for a generous layer of liquid that just covers bones and main components; if it reduces too much, I can always adjust. I also learned to embrace pauses. Letting a hotpot rest off the heat for twenty to thirty minutes concentrates flavors and makes serving easier because the broth settles.

Another habit that improved results was using inexpensive bones or meaty ribs along with the shoulder for extra gelatin. Tossing in a halved carrot or onion that I later strain gives subtle sweetness and reduces waste. Finally, I keep a jar of preserved lemons and pickled shallots in the fridge for finishing—these bright, acidic touches cut the richness and are life-savers on heavy winter nights.

Recipes to try: core hotpot and a faster weeknight option

Here are two practical, contrasting recipes: a classic slow-braised pork shoulder hotpot and a quicker pressure-cooker version. The classic is about layering flavors and patience; the pressure variant trades time for concentration of liquid and is perfect when you want depth without all-day cooking. Both use root veggies to complement the pork and a balance of acid and herbs to keep the broth lively.

Classic slow-braised pork shoulder hotpot

Ingredients: 2.5–3 lb pork shoulder, 3 onions sliced, 4 garlic cloves, 4 carrots, 3 parsnips, 3 small potatoes, 4 cups pork or chicken stock, 1 cup dry cider or white wine, 2 tbsp apple cider vinegar, 2 bay leaves, 4 sprigs thyme, salt and pepper. Method: sear, deglaze, add aromatics and stock, simmer low for 3 hours adding potatoes in the last hour, finish with chopped parsley and a splash of vinegar. Serve with crusty bread.

Pressure-cooker pork shoulder hotpot (weeknight friendly)

Ingredients: 2 lb pork shoulder, 2 onions, 3 carrots, 2 parsnips, 2 cups stock, 1/2 cup wine, 1 tbsp soy or Worcestershire, 1 tbsp vinegar, thyme, salt and pepper. Method: sear in the pot, add liquid and aromatics, seal and cook on high pressure for 45 minutes, quick-release carefully, shred or slice meat, adjust seasoning and serve with mustard or pickles. The pressure method yields concentrated flavor fast.

Quick reference table: cook times and texture expectations

Use the following table to match method with expected time and texture. It’s a shorthand to choose technique based on your schedule and desired result.

Method Approx. Time Texture
Oven low braise (300°F) 2.5–4 hours Silky, slightly shreddable
Stovetop simmer 2.5–4 hours Evenly braised, rich broth
Slow cooker 6–8 hours Very tender, less reduction
Pressure cooker 45–60 minutes Fast, gelatin-rich

Final thoughts on making the dish yours

A hotpot built around pork shoulder is an invitation to be both precise and playful. The technical parts—searing, correct liquid ratio, timing—ensure success, while the creative parts—herb choices, vegetable mix, finishing condiments—make it yours. Small experiments produce new favorites: a smoked paprika twist, a wedge of lemon at the end, or a handful of chopped herbs mixed into the hot broth. Let the pot be a canvas.

At its best, this dish is about warmth and generosity. It feeds bodies and slows down time just enough for stories and conversation to settle around the table. Whether you cook for guests or keep the leftovers for solitary weeknight comfort, the pork shoulder hotpot rewards curiosity and patience. Try it various ways, trust your palate, and you’ll find versions that feel like home.

Stroganoff for the Home Cook: A Rich, Comfortable Dish with Roots and Room to Play

When you think of a weeknight supper that feels like a small celebration, this creamy, savory stew of tender meat and mushrooms often comes to mind. The dish commonly called Beef Stroganoff carries an old-world charm while remaining remarkably adaptable to modern kitchens. I want to take you through its origin story, the choices that matter when you buy ingredients, the exact steps that produce a silk-smooth sauce, and plenty of options for variation. Along the way I’ll share practical tips I’ve learned from cooking for friends and family, so you can avoid the potholes that turn a promising recipe into a dry, rubbery disappointment. This is a careful, lively exploration, designed to give you confidence at the stove and joy at the table.

Where It Began: A Short History of a Russian Classic

The roots of this Russian classic reach back to the 19th century, credited to a wealthy St. Petersburg family whose name became attached to the dish. Early recipes were simpler than many of the versions we see today: thinly sliced meat, a sauce enriched with sour cream, and basic seasonings. As the recipe traveled, it absorbed local ingredients and techniques, so the comfort on your plate speaks both of its aristocratic origin and of the countless home cooks who adopted it. Understanding that background helps explain why technique matters more than fancy components: the dish is about balance, texture, and timing rather than complex flavor chemistry.

Stories differ about the precise first incarnation, and that’s part of the charm: recipes evolve when people cook them repeatedly. Imports and emigrés carried the idea to Western Europe and North America where it became anglicized, multiplied, and sometimes simplified for mass kitchens. Despite those changes, the essence remains recognizable: seared slices of meat in a creamy sauce, usually accompanied by a starchy side. Seeing it as a family-style, adaptable plate rather than a rigid formula opens up possibilities while preserving the comforting soul of the original.

Core Ingredients: What to Buy and Why It Matters

At its simplest the dish relies on three pillars: meat, mushrooms, and a creamy, tangy binder such as sour cream. Within those categories there’s room for nuance: not all cuts of meat behave the same, and mushroom choice affects both texture and flavor. Invest in decent quality ingredients; a modest upgrade in meat or fresh mushrooms pays off dramatically because there are few competing flavors to mask poor components. Freshness also matters: crème fraîche or high-quality sour cream makes the sauce lively and prevents it from breaking when you finish the dish.

Here’s a concise ingredient outline to keep in mind. This list is flexible, intended as a foundation you can adapt for portion size or pantry reality.

  1. Beef: Choose a tender cut like sirloin, ribeye, or striploin, trimmed and thinly sliced against the grain.
  2. Mushrooms: Cremini or button mushrooms are classic; wild mushrooms add earthiness if available.
  3. Aromatics: Yellow onion or shallots, and garlic for freshness.
  4. Fat: A neutral oil for searing plus butter for finish, or clarified butter if you prefer.
  5. Liquid: Good beef stock or broth, and a splash of dry white wine or Madeira for depth.
  6. Dairy: Sour cream or crème fraîche, optionally a little mustard for brightness.
  7. Seasoning and herbs: Salt, black pepper, and fresh parsley or dill for garnish.

Picking the Right Cut of Beef

Not every cut will yield the tender strips you want. For quick-cooking recipes, select cuts that are naturally tender and slice them thinly across the grain. Sirloin, tenderloin, and ribeye are reliable choices; flank and skirt work if you marinate and slice paper-thin, but they demand more attention. Budget cuts such as chuck can be used if you switch to a slow-cook approach, turning the dish into a braise rather than a fast sauté. The important thing is to match method to meat so you don’t end up with toughness.

Below is a simple table comparing common options. It should help you choose based on texture, price, and the method you plan to use.

Cut Texture Best Method Notes
Sirlion Tender, lean Quick sauté Great balance of flavor and price
Tenderloin Very tender, mild Quick sauté More expensive; excellent for special occasions
Ribeye Marbled, rich Quick sauté Adds more beefy flavor to the sauce
Flank / Skirt Coarser grain Marinate and thinly slice, or slow braise Affordable, needs careful slicing
Chuck Tough, economical Slow braise Great for long-cooked versions

Mushrooms, Onions, and the Aromatic Base

Mushrooms do more than fill volume; they provide umami and a pleasant bite that contrasts the silk of the sauce. Cremini and button mushrooms are economical and readily available, while shiitake or chanterelles offer a deeper, woodsy flavor. Slice mushrooms evenly so they cook at the same rate. Onions or shallots provide sweetness and a little body to the sauce when they are caramelized lightly rather than simply softened.

Don’t rush the browning stage. Good color on the mushrooms and onions contributes to both taste and appearance, and some chefs even caramelize the onions first to build a richer base. Use medium-high heat so the mushrooms sweat then color instead of releasing all their liquid and steaming. If moisture accumulates, lift and give the pan a moment to evaporate it; that concentrated flavor is worth the extra attention.

Technique: Searing, Deglazing, and Sauce Building

The signature texture comes from quick searing of the meat followed by a sauce finished with sour cream. The most common mistake is overcooking the beef; another is adding the cream too early so it curdles. Your sequence should be: sear in small batches, remove meat, sauté aromatics and mushrooms until golden, deglaze with a wine or stock to lift the fond, reduce, and finish with dairy off the direct heat. This order protects the dairy and ensures the sauce captures the fond’s deep flavors.

Here is a step-by-step flow to guide you at the stove. It assumes a stovetop method for about four servings.

  1. Pat beef dry and season; heat pan until hot and sear in batches to achieve a brown crust, then remove.
  2. Add butter and onions or shallots to the same pan; cook until soft and lightly caramelized.
  3. Increase heat, add mushrooms and cook until browned and most moisture has evaporated.
  4. Deglaze with white wine or a splash of stock, scraping up browned bits; reduce slightly.
  5. Add beef stock, return beef and any juices to the pan, and simmer briefly to meld flavors.
  6. Remove from direct heat and stir in sour cream or crème fraîche, then adjust seasoning and finish with mustard or herbs.

Timing and Temperature: Small Details with Big Impact

Timing matters more than exotic ingredients. Searing quickly on high heat locks flavor while keeping the center tender; extended simmering toughens delicate cuts. If you’re using a cut meant for quick cooking, treat the simmer as a brief flavor marriage, not a slow stew. With tougher cuts used for braising, allow the meat to cook low and slow until collagen has softened into unctuous texture. Use an instant-read thermometer if you want precision: remove medium-rare beef around 125-130°F because it will carryover cook while resting.

Temperature also affects the sauce’s final mouthfeel. Too hot and the sour cream will split; too cool and the sauce can feel heavy. Incorporate dairy off the direct flame and warm it gently to integrate smoothly. Crème fraîche is more forgiving than standard sour cream because it tolerates higher heat without breaking, making it a practical choice if you plan to reheat leftovers.

Traditional Russian Classic versus Global Interpretations

The Russian classic emphasizes simple, balanced flavors: tender strips of beef, onions, a modest amount of mushrooms, and that distinctive tang from sour cream. In Russia you might also find variations with mustard or pickles, and some family recipes add a pinch of paprika or tomato paste. Outside Russia, especially in North America, the dish often becomes creamier and richer, sometimes thickened with flour or enriched with heavy cream. Both approaches honor the spirit of the dish, but they yield different experiences at the table.

Understanding these regional tendencies helps you choose how you want the final plate to taste. If you want a closer feel to the original, keep the sauce restrained and focused on the balance between meat, mushrooms, and sour cream. For a more Americanized comfort version, slightly thicker, richer sauces with added herbs and cream can be satisfying. Think of tradition as a compass, not a commandment: it guides choices rather than dictating them.

Vegetarian and Protein Alternatives

Vegetarian versions replace beef with seared king oyster mushrooms, seitan, or thick slices of eggplant, each bringing its own texture and flavor. King oyster mushrooms have a meaty bite when seared and stand up well to the same technique used for meat. For those avoiding dairy, silken tofu blended with a little miso and plant-based yogurt can mimic the tang and creaminess without curdling. These swaps let you preserve the dish’s structure and depth while aligning with dietary needs.

If you want to use fish or poultry, adapt your timing: chicken breast can be used if sliced thin and not overcooked, while fish generally doesn’t pair well with such a heavy, cream-based sauce. Plant-based meat alternatives can work, but approach them as their own ingredient—taste and adapt seasoning, don’t expect the same texture or cooking time as beef. Treat each protein as an invitation to experiment rather than a direct substitution.

Recipe: A Reliable Home Version

Below is a tested recipe that balances authenticity, flavor, and approachability. It’s written for four servings and designed for a typical home kitchen. Read through before starting so you can prep ingredients and manage timing efficiently. Mise en place—having everything measured and ready—makes the process fluid and reduces the risk of overcooking the meat.

Ingredients and approximate quantities:

  • 1 to 1.2 pounds of sirloin or ribeye, thinly sliced against the grain
  • 10 ounces mushrooms, sliced
  • 1 medium onion, thinly sliced
  • 2 cloves garlic, minced
  • 2 tablespoons neutral oil and 2 tablespoons butter
  • 1/2 cup dry white wine or additional beef stock
  • 1 to 1 1/2 cups beef stock
  • 3/4 cup sour cream or crème fraîche
  • 1 teaspoon Dijon mustard (optional), salt, and black pepper to taste
  • Fresh parsley for garnish

Putting It All Together: Step-by-Step Cooking

Start by patting the beef dry and seasoning lightly with salt. Heat a large skillet over medium-high heat and add the oil; when it shimmers, sear the beef in batches to avoid crowding. Each batch should take just a couple of minutes per side to form a brown crust while the interior stays tender. Transfer seared slices to a plate and tent loosely with foil to rest while you build the sauce.

In the same pan, reduce heat slightly and add butter. Sauté the onions until they begin to color, then add mushrooms and continue to cook until they release moisture and then brown. Add garlic toward the end, as it browns quickly. Deglaze with wine or a splash of stock, scraping the bottom to lift browned bits, then pour in the remaining stock and let it reduce briefly. Return the meat to the pan, remove from heat, stir in sour cream and mustard, and warm gently. Finish with a grind of black pepper and sprinkle of parsley before serving.

Serving Suggestions: Starches and Vegetables

The dish pairs beautifully with a starchy base that soaks up the sauce. Classic options include buttery egg noodles, mashed potatoes, or plain steamed rice. For a lighter touch, consider cauliflower mash or simple buttered pasta with a bit of lemon zest to cut through the richness. The choice of side can transform the meal from cozy dinner to elegant supper, so pick according to the occasion and appetite.

Vegetable sides should balance creaminess with brightness. Steamed green beans, a simple arugula salad with lemon vinaigrette, or roasted Brussels sprouts provide contrast. If you plan to serve bread, choose something with a crust that can help mop the sauce without falling apart—a country loaf or a sturdy baguette works well. Presentation matters: pile the meat and mushrooms on the starch, spoon sauce over, and add a scattering of fresh herbs for color.

Wine and Beverage Pairings

For wine, lean toward medium-bodied reds or richer whites depending on your sauce’s profile. A Pinot Noir offers bright acidity and soft tannins that complement beef without overpowering the cream; a Merlot or young Rioja can work if you prefer red with more structure. If you favor white, an oaked Chardonnay or a fuller-bodied dry Riesling provides enough weight to stand up to the sauce’s richness while refreshing the palate.

Non-alcoholic options include sparkling water with a squeeze of lemon, or a lightly brewed black tea served cool. The key is acidity or effervescence to cut the richness so each bite feels clean and inviting. Matching beverage to the meal enhances the experience, but the most important pairing is what you enjoy drinking with this fare.

Storage, Leftovers, and Reheating

Leftovers keep well for a couple of days if stored in an airtight container and refrigerated promptly. Sour cream-based sauces can thicken when chilled; gently reheat over low heat and add a splash of stock or milk to restore creaminess. Avoid high heat which can cause curdling or separate the sauce. If you plan to freeze, skip storing the sauce with the dairy included; instead, freeze the meat and mushroom component and add fresh sour cream when reheating for best texture.

To revive refrigerated leftovers, warm the pan over low heat, add a little liquid to loosen the sauce, and stir until smooth. For a more substantial second meal, serve leftover portions over toasted bread and top with a fried egg for a rich, satisfying variation. Leftover stroganoff often tastes even better the next day as flavors meld, provided you reheat gently and avoid boiling the cream.

Troubleshooting Common Problems

If the beef turns out chewy, you most likely overcooked it or used a cut unsuited for quick searing. Next time, choose a tender cut or switch to a braise for tougher meat. If the sauce splits or looks curdled, it was exposed to too high heat when the dairy was added; rescue it by whisking in a small spoonful of cold water or a splash of stock off the heat, then gradually bring it back up while stirring gently. Patience and gentle handling are crucial with dairy-based sauces.

When the sauce is overly thin, simmer it a little longer to reduce and concentrate flavors, or whisk a small amount of beurre manié—equal parts flour and butter—into the hot liquid to thicken. Conversely, an overly thick sauce responds well to a spoonful of stock or even a splash of milk to reach the desired consistency. Taste and adjust salt and acid towards the end, because acidity brightens flavors and can revive a flat-tasting pan.

Personal Notes from the Home Kitchen

Over the years I’ve made this dish dozens of times for different crowds, and small changes matter more than dramatic ones. Once I served a version with wild mushrooms gathered on a rainy weekend, and the woodsy aroma lifted the whole meal; on another occasion, a last-minute substitution of crème fraîche turned a slightly bland plate into something remarkably bright. Those moments taught me to trust ingredients and not to overcomplicate: technique wins over tinkering.

One practical habit I recommend is prepping everything before you heat the pan. When serving to guests, searing the meat in batches and keeping it warm in a low oven produces consistent results without frantic last-minute juggling. Also, always taste your stock and adjust seasoning before the final dairy addition; salt becomes less obvious once the cream is in, so it’s better to correct earlier. Small rituals like these make weeknight cooking less stressful and more successful.

Modern Twists That Work

Contemporary cooks have introduced several tasteful riffs that expand the dish’s personality without losing its identity. Adding smoked paprika gives a hint of heat and smoke, while a spoonful of horseradish boosts sharpness in a way that complements beef. For texture, crispy fried shallots or a scatter of toasted hazelnuts adds crunch against the silky sauce. These are adjustments, not overhauls: subtlety keeps the dish coherent.

Another successful twist replaces a portion of the sour cream with strained yogurt for a lighter tang, or incorporates a tablespoon of tomato paste for a deeper, slightly sweet note. When experimenting, change one element at a time so you can learn how it shifts the final flavor. The dish rewards careful, incremental variation more than wholesale reinvention.

Feeding a Crowd: Scaling and Timing

Beef Stroganoff. Feeding a Crowd: Scaling and Timing

Scaling the recipe up is straightforward but requires attention to pan space, especially during searing. Use two skillets if necessary to avoid overcrowding and maintain high heat during browning. Keep finished meat warm in a shallow baking dish in a low oven rather than piling it in a single heap; that preserves texture and prevents steaming. When serving large groups, consider preparing the mushrooms and sauce ahead and finishing with freshly seared meat just before guests sit down.

For buffet-style service, hold the sauce and mushroom mixture warm in a slow cooker set to low, and quickly warm the seared beef before adding to the pot. This approach keeps the meal interactive while preserving quality. Timing the final assembly about 10 to 15 minutes before serving gives you a window to make last-minute adjustments in seasoning and texture.

Recipes from the Family Table

Families pass down versions of this dish the way they do roast chicken or potato salad, often with secret touches that seem minor until you try them. In my family there was a tradition of stirring a spoonful of Dijon into the sour cream at the end; that little bit of mustard always brightened the plate without announcing itself. Another household used a splash of pickle brine for acidity, an odd but effective trick that plays on the Russian tradition of pickled accompaniments.

These household signatures teach a useful lesson: tradition and personal taste coexist. If you find a tweak that consistently makes you smile, remember it. Food that sustains families does so through familiarity and small, reproducible pleasures, not through following a recipe to the letter. Keep the parts that work for you and adapt the rest.

Final Thoughts on Making It Your Own

This dish thrives at the intersection of simplicity and attention. The best versions come from cooks who respect ingredients, manage heat carefully, and adjust seasoning thoughtfully. Whether you aim for a faithful Russian classic or your own modern interpretation, the path to success is the same: quality meat, properly browned aromatics, and a gentle hand with dairy. Those elements produce a plate that feels comforting and a little indulgent without being heavy-handed.

Cooking this at home gives you more control than restaurant versions often allow: you can choose the cut, the cream level, and the side that suits your occasion. Take the basic structure and fine-tune it with small experiments: a different mushroom one week, a mustard-sour cream ratio the next. Over time you’ll build a version that tells your story—something both familiar and distinctly yours.

The Cozy Art of Chicken Pot Pie: A Warm Slice of Home

There is something irrepressibly comforting about a bubbling, golden-topped savory pie coming out of the oven. In many kitchens it signals an end to a long day, the promise of warmth and a full table. This article will take you through the story, the technique, and the little hacks that turn a modest chicken and vegetable filling into a memorable dish. Along the way I will share practical recipes, variations for different diets, storage advice and pairing ideas so you can make this pie again and again with confidence. Whether you want a classic family favorite or a contemporary twist, you will find clear guidance and reasons behind every step.

Origins and the appeal of a hearty pastry

The concept of enclosing meat and vegetables in pastry stretches back centuries and across continents, where cooks sought portable, preservable meals. In North America the version that most people know evolved from English meat pies and early colonial cooking, blending available poultry, root vegetables and buttery crusts. What keeps this dish alive is its adaptability: it can be humble or celebratory depending on the ingredients and care you put into it. A good pot pie balances textures—a flaky crust, a creamy filling and bite-sized pieces of chicken or other proteins. That balance is what transforms food into comfort, the kind that warms both body and memory.

Beyond tradition, the practical side of this dish is important: it feeds a crowd, reheats well and travels easily. For weeknight cooking it can be streamlined; for holidays it can be dressed up with herbs, different crusts or individual portions. This versatility is why many home cooks keep a pot pie recipe in rotation all winter long. It also makes the dish an ideal winter dinner: dense, warming and satisfying when temperatures drop. Learning a reliable method means you can focus on nuance later—smoking the chicken, adding mushrooms, or stacking flavors with caramelized onions.

What makes the filling sing: ingredients and roles

Good filling comes down to intent: each ingredient must do a job. Chicken supplies the meaty backbone and protein; a mix of white and dark meat keeps texture interesting and prevents dryness. Vegetables provide sweetness, texture and color—carrots, peas and celery are classic because they hold up during baking and contribute complementary flavors. The liquid and thickener (stock and roux, most commonly) determine mouthfeel: too thin and the pie will be soupy, too thick and it will feel heavy and pasty. Finally, seasoning and herbs—thyme, parsley, a touch of nutmeg—lift the whole mixture and make the aroma as inviting as the look.

Choosing the right chicken is one of the easiest upgrades. Roasted or poached whole chicken yields deeper flavor than plain poached breasts, and the bones make a richer stock. If you are short on time, quality store-bought rotisserie meat trims minutes from prep and still gives good taste. Vegetables can be varied seasonally: rutabaga in colder months, leeks instead of onion for a softer profile, or frozen vegetable blends for convenience. The interplay of these choices defines whether your pie is rustic and chunky or smooth and refined.

Pastry matters: types of crust and how they change the dish

People often fixate on the filling, but pastry shapes the experience. A top-only crust keeps the filling saucy and is less labor-intensive, while a full double-crust traps steam and yields a more structured slice. Shortcrust pastry provides a crisp, biscuit-like shell; puff pastry creates dramatic, airy layers and a flakier chew. For a biscuit-style finish you can use drop dough, which yields a casual, golden crown. Each pastry type interacts differently with moisture and heat, so choose according to the texture you want and the ease of execution.

Technique influences texture as much as ingredients do. Cold butter worked into flour in small, uneven pieces gives the best rise for shortcrust or puff pastry, while overworking produces toughness. Resting dough in the refrigerator is not optional if you seek flakiness; it calms gluten and solidifies fats. When lining a dish, an edge crimp can be decorative but also functional, sealing juices inside during baking. If you want the crispest crust, consider blind-baking briefly before filling, especially if you expect extra-wet fillings or are using a thin, delicate top.

Classic recipe: a reliable method for a weeknight or weekend

Chicken Pot Pie. Classic recipe: a reliable method for a weeknight or weekend

Below is a straightforward recipe that balances approachability with depth of flavor. It scales easily and uses simple techniques most home cooks can manage. Start by cooking the chicken and preparing a basic roux-based sauce, then fold in vegetables and herbs before encasing everything in pastry. I recommend making a good stock from bones if you have time—it rewards you with a fuller, more savory filling. The final bake should be golden and bubbling to indicate the filling is hot throughout and the crust is cooked.

Ingredients and approximate quantities follow; adjust to taste and serving size. Use fresh herbs if possible and salt judiciously at each stage so layers of flavor build properly. If you plan to freeze the pie, slightly undercook the sauce so it does not become overly thick after reheating. Remember that ovens vary; use visual cues—golden crust, bubbling center—rather than strict minutes alone. Presentation matters too: a few quick slashes in the top crust let steam escape and create an appealing finish.

Ingredient list

To make a 9-inch pot pie suitable for 6 to 8 people, assemble fresh ingredients for flavor and texture. Use a mix of white and dark chicken meat to keep the filling moist and interesting. Vegetables should be diced into uniform, bite-sized pieces so mouths experience balanced spoonfuls. Butter, flour and a rich stock make the base of the sauce; cream or milk can be added for silkiness. Salt and pepper are essential, as are a couple of herbs such as thyme and parsley for aromatic depth.

  • About 3 cups cooked chicken, diced
  • 2 tablespoons butter and 2 tablespoons olive oil
  • 1 medium onion, finely chopped
  • 2-3 carrots, peeled and diced
  • 2 celery stalks, diced
  • 1 cup frozen peas
  • 3 tablespoons all-purpose flour
  • 2 cups chicken stock
  • 1/2 cup cream or full-fat milk (optional)
  • Fresh thyme leaves and chopped parsley
  • Salt and freshly ground black pepper
  • 1 sheet puff pastry or 1 batch shortcrust dough

Step-by-step preparation

Start by rendering flavor: sweat the onion, carrot and celery in butter and oil until softened and slightly caramelized. Sprinkle in flour and cook out the raw edge for a minute or two to build the roux; this prevents a floury taste. Gradually whisk in chicken stock until smooth, then simmer until the mixture thickens to a saucy consistency. Stir in diced cooked chicken, peas and herbs, taste for seasoning, and cool the filling slightly before adding to the pastry-lined dish. Top with pastry, brush with egg wash for color, and bake until the crust is deep golden and the center bubbles.

  1. Preheat oven to 400°F (200°C).
  2. Sauté vegetables in butter and oil until soft, about 8 minutes.
  3. Add flour, cook 1–2 minutes, then slowly whisk in stock and simmer.
  4. Fold in chicken, peas, cream and herbs; adjust seasoning.
  5. Fill pastry-lined dish, top with pastry, brush with egg and bake 35–45 minutes.

Common pitfalls and troubleshooting

Many problems have simple fixes. If the filling is too watery, simmer it longer before assembling to evaporate excess liquid, or stir in a slurry of cornstarch and water to thicken. A soggy bottom crust often results from adding filling that is too hot; allow the filling to cool slightly to prevent steam saturation. Overbrowned pastry can be shielded with foil partway through baking to allow the center to finish cooking. If the chicken dries out, next time choose a mix of dark meat or fold in some reserved cooking juices to add moisture back into the finished pie.

Another frequent issue is uneven cooking: edges may be done while center remains cold. Using a dish of even thickness and allowing the pie to rest after baking will help heat distribute more evenly. For individual pot pies, reduce baking time and monitor closely as they can brown faster. If you prefer a crispier top but worry about undercooked center, start at a high temperature for 15 minutes and then lower the heat to finish gently. These small adjustments prevent disappointment and make the technique resilient across kitchens.

Variations: from elegant to rustic

The basic formula lends itself to countless twists. Add mushrooms and shallots for an earthier, slightly richer version. Swap in leeks and white wine for a subtler, sophisticated profile. For a hearty, country-style pie, include potatoes and root vegetables and use a biscuit topping for a denser bite. If you want to highlight spice, experiment with curry powder, coconut milk and cilantro for a fusion take that still feels familiar because of the pie structure.

Vegetarian adaptations are straightforward: replace chicken with hearty mushrooms, lentils, or roasted squash and use vegetable stock for the sauce. For pescatarian variations shrimp or firm white fish can work, but handle gently to avoid overcooking. Gluten-free crusts are widely available or can be made with almond flour and butter substitutes—just mind differences in texture and baking time. These variations show that the comfort of a pie is more about the method than any single ingredient.

Make-ahead, freezing and batch cooking

One of the strengths of this dish is how well it lends itself to make-ahead routines. Prepare the filling up to two days in advance and store it in the refrigerator; assemble and bake when you are ready. Fully assembled pies freeze well for up to two months—wrap tightly in plastic and foil to prevent freezer burn. For convenience, you can also flash-freeze individual portions on a sheet pan and then transfer them to bags for grab-and-bake meals later.

When reheating a frozen pie, do not microwave from fully frozen; instead bake it at a moderate temperature until hot throughout to preserve texture. Thawed pies can be refreshed in a 350°F (175°C) oven for 20–30 minutes. If you frequently cook for a family, doubling the filling and freezing half saves time while maintaining flavor. This approach turns busy nights into simple, satisfying dinners with minimal active cooking.

Tools, equipment and small investments that pay off

You don’t need a lot of fancy gear, but a few items make the process smoother. A heavy-bottomed skillet or Dutch oven helps build flavor without hot spots. A bench scraper is underrated for handling pastry; it lifts and moves dough cleanly and speeds up work. A reliable oven thermometer ensures accurate baking temperatures; many home ovens run hotter or cooler than their dials indicate. Finally, good knives and a sturdy cutting board make vegetable prep faster and more precise, which matters for even cooking.

Optional investments can yield big dividends: a food processor speeds dough-making and a stand mixer takes the chore out of pastry. A rimmed baking sheet beneath the pie catches any overflow, preventing burned drips that are a nuisance to clean. If you plan to make individual pies often, ramekins or small cast-iron skillets create crisp edges and elegant presentation. These tools are small conveniences that let technique shine without adding complexity.

Nutrition and mindful choices

While often thought of as indulgent comfort food, pot pie can be balanced. Use leaner cuts, increase the proportion of vegetables and choose a lighter milk or stock to reduce calories without sacrificing satisfaction. Whole-grain or nut-based crusts add fiber and nutrients, though they change the pastry texture. Controlling portion sizes and pairing the pie with a simple salad or steamed greens can create a complete meal that feels both nourishing and restorative.

Salt management matters—seasoning at each step rather than dumping a lot at the end produces a more nuanced final dish. If you follow specific dietary requirements, the recipe is forgiving: swap dairy for plant-based alternatives, use gluten-free flour blends for roux and crusts, and choose high-protein legumes for vegetarian fillings. Such swaps allow you to maintain the essence of the dish while honoring personal health goals or household needs.

Pairings and serving ideas for a winter dinner

For a classic winter dinner, serve the pie with bright-sourced sides that cut through richness. A crisp green salad with a lemony vinaigrette, roasted beets with orange, or a simple braised cabbage provide contrast in texture and acidity. For drinks, a medium-bodied white wine such as Chardonnay complements the buttery crust, while a malty amber ale or brown ale offers warm, toasty notes that harmonize with the pie. Non-alcoholic options like sparkling apple cider or a warm spiced tea also pair well for a cozy family meal.

Think about presentation: a wedge served with a scattering of fresh herbs and a drizzle of pan juices makes the dish feel intentional. Individual pot pies are festive for guests, while a large shared pie creates a sense of home and communal comfort. For winter gatherings, provide complementary sides that require little last-minute work so you can focus on guests and conversation rather than finishing touches.

My personal notes and kitchen-tested tips

Over years of cooking and testing, I learned that small rituals elevate the result. I always reserve the pan juices when roasting a whole bird and fold a few tablespoons into the sauce to add depth I can’t achieve with stock alone. I also chill my assembled pies for thirty minutes before baking when time allows; the pastry firms up and browns more evenly. When time is tight, using a quality rotisserie chicken with a good homemade roux still produces comfort with minimal fuss.

One memorable experiment involved adding roasted garlic and a splash of sherry to the filling—the aroma was transformative and gentle rather than overpowering. Another time I made miniature pies for a winter potluck; the single-serving versions disappeared first, perhaps because they felt both individual and indulgent. These small discoveries taught me that pot pie rewards curiosity: a measured tweak can turn a familiar favorite into a new tradition.

Global cousins and cultural spins

Variations of meat-and-vegetable pies exist worldwide: the British chicken-and-veg pies, empanadas in Latin America, and savory tarts across Europe. Each tradition adapts to local ingredients and techniques, offering inspiration for your own experiments. For instance, use pimentón and olives for a Spanish-inspired filling, or fold in cilantro and green chiles for a southwestern twist. Exploring these cousins broadens the flavor vocabulary while keeping the comforting structure intact.

Learning from other cuisines also reveals different pastry approaches, such as using laminated dough from French techniques or unleavened empanada dough for handheld portions. These techniques can be hybridized: a flaky puff crown with Latino-seasoned filling, for example, makes a pot pie uniquely yours. Such cross-cultural play keeps cooking exciting and respects the long history of enclosing savory mixtures in dough.

Quick reference table: baking times and temperatures

Below is a compact table to help with timing depending on pie size and whether it’s assembled cold, room temperature, or frozen. Use these values as starting points and adjust for your oven and crust thickness. Visual cues—golden crust, bubbling filling—remain the most reliable indicators of doneness.

Pie Size Assembled, chilled Room temp assembly Frozen
9-inch single pie 40–50 minutes at 400°F 35–45 minutes at 400°F 60–80 minutes at 375°F, tent if browning
Individual (ramekins) 20–30 minutes at 400°F 18–25 minutes at 400°F 35–50 minutes at 375°F

Smart shortcuts without sacrificing quality

Busy cooks need reliable shortcuts that preserve flavor. Use pre-made puff pastry or quality pie dough when time is limited; it delivers excellent texture with far less effort. A good rotisserie chicken is a shortcut I rely on frequently—it brings roast flavor and tender meat in minutes. Frozen mixed vegetables are convenient and reduce prep time, especially in winter when fresh options are limited or expensive.

Another time-saving trick is to make a large batch of stock and freeze it in measured containers for future pies. Ready-to-use stock eliminates guesswork when you decide to assemble a pie on a whim. Keep in mind that any shortcut should support the core flavors rather than mask them: choose quality packaged items and enhance them with fresh aromatics and proper seasoning.

Final thoughts that bring it together

Mastering a dependable chicken-and-vegetable pie gives you a dish you can customize for family dinners, gatherings and seasonal celebrations. Focus on texture contrast, proper seasoning and pastry care and the rest will follow. Small investments—good stock, a reliable oven thermometer, a few minutes of attention to dough—yield consistently better results. This is a recipe that rewards repetition: the more you make it, the more you’ll refine timing and seasoning to your taste.

At its best, the pie is a warm, shared moment, a simple way to say comfort and hospitality through food. Keep experimenting, take notes on what you prefer and don’t be afraid to fold in new influences. Once you have a dependable method, the dish becomes a canvas for family flavors and a trusted solution for any chilly evening that calls for a satisfying winter dinner.

A Hug in a Bowl: The Art and Soul of Creamy Mushroom Soup

There are soups that warm you and soups that change your idea of warmth. Creamy Mushroom Soup belongs to the second group: it’s soft, earthy and precise in its comfort. When the weather sends a chill through the bones or when you crave something calm but rich, a bowl of this soup answers like a patient friend. In the next pages I’ll walk you through choices, techniques and small decisions that make the difference between a decent pot and one you’ll want to write home about. Expect practical tips, a clear recipe you can adapt, and a few kitchen stories from my own experiments.

Why this soup feels like comfort food

Mushrooms carry a kind of quiet depth that other vegetables rarely match; they bring umami without shouting. Combined with cream, whether dairy or plant-based, they produce a rounded mouthfeel that settles on the tongue and soothes. That tactile quality is partly why people reach for this soup when they want solace: it fills the space that a heavy stew would, but it is gentler and faster to make. Calling it a winter soup is natural—its warmth and density match cold evenings—but the soup also works as an elegant starter for a spring dinner, or a simple lunch with crusty bread.

Beyond texture and temperature, there is psychological comfort in the scent: sautéed garlic and onions, the nutty scent of browned mushrooms, a hint of thyme or bay. Those aromas trigger memory and relaxation in many of us. Also, the soup’s flexibility invites creativity: you can make it restrained and subtle or bold and aromatic, and either path yields satisfaction. That adaptability means it fits many occasions, from quiet nights in to informal dinner parties.

Choosing the right mushrooms

Not all mushrooms deserve equal billing in a rich, cream-based soup. Button mushrooms are fine and inexpensive, but for deeper flavor choose cremini, shiitake or chestnut mushrooms when possible. Porcini — dried or fresh — will lift the profile into something almost savory-woody, while oyster or maitake bring delicate textures and complexity. If using a mix, balance tender types with meatier ones: the combination makes each spoonful varied and interesting.

If you work with dried mushrooms, rehydrate them in warm water and reserve the soaking liquid for part of the stock; it concentrates flavor without adding salt. Clean fresh mushrooms with a soft brush or a quick wipe on damp paper towel instead of submerging them in water, because mushrooms are sponges and will dilute their taste. Slice them to varying thicknesses if you like a textural contrast: thin ribbons for silkiness, thicker pieces for bite. Finally, buy only what you will use within a few days—mushrooms degrade quickly and lose both texture and depth of flavor when old.

Building the flavor: aromatics, herbs and fats

Good soup begins with the aromatics. Onion and shallot are classic partners for mushrooms; shallots give a gentle sweetness and a slightly refined edge. Garlic is essential but restrained; add too much and it will fight the mushroom’s subtlety. For fat, butter offers immediate richness and browning power, while a neutral oil can carry higher heat when you want aggressive caramelization. A short initial sauté to develop color is more important than a long simmer for flavor in this recipe.

Herbs should be chosen with restraint. Thyme and bay leaf are reliable: they underscore the earthiness without stealing the show. Fresh parsley or chives added at the end brighten the bowl, while dill or basil would change the character markedly, so use them only if you intend that shift. Acid is a secret ally—finish with a splash of sherry, dry white wine, or a little lemon juice to lift the cream’s weight and sharpen the mushroom notes. A finishing oil such as a drizzle of good olive oil or a light truffle oil can transform ordinary into memorable, used sparingly.

The role of cream and alternatives

Cream is responsible for silkiness, but it is not the only route to a luscious texture. Heavy cream, single cream or half-and-half will each produce different thicknesses; choose according to how indulgent you want the soup to be. For a lighter finish, whole milk with a small addition of butter will do the job, and for vegan or dairy-sensitive diets, unsweetened coconut cream, cashew cream, or full-fat oat cream create a satisfying mouthfeel without dairy. When using alternatives, taste carefully: some plant creams carry their own flavor notes that interact with the mushrooms in unexpected ways.

Thickening can be handled several ways. A classic roux made from butter and flour integrates smoothly and stabilizes the cream, but pureed mushrooms alone also thicken the soup and keep it gluten-free. Potatoes or cooked white beans can be blended into the base for a naturally thick body and a dose of nutrition. Whichever method you choose, add cream toward the end of cooking and avoid boiling once cream is introduced to prevent separation and an oily sheen.

Equipment and technique essentials

A few tools make consistent soup easier: a wide, heavy-bottomed saucepan or shallow sauté pan gives mushrooms room to brown rather than steam. A good chef’s knife and a stable cutting board speed prep and reduce frustration. For smoothing, a handheld immersion blender keeps more texture than a countertop blender and is less messy; nevertheless, a countertop blender gives silkier results when a velvety finish is desired. A fine-mesh sieve is useful if you want an ultra-smooth strain and to remove any grain from plant-based creams.

Technique matters more than quantity of gear. Give mushrooms space and heat when browning, stir occasionally but resist the urge to constantly agitate them, and leave them alone long enough to develop color. Deglaze the pan after browning to lift browned bits into the flavor base. When simmering, do so gently: an active boil will reduce cream too fast and can separate it. Finally, rest the soup off heat for a few minutes before serving; this short pause lets flavors settle and integrate.

Ingredients and recipe

Below is a straightforward recipe that balances clarity and room for personalization. Read it once through before starting, and gather everything—mise en place saves time and keeps the kitchen calm. The ingredient list leans on accessible items but includes options so you can swap freely depending on diet and pantry staples. Quantities here make enough for four generous bowls, and scaling up is simple.

  • 500–600 g mixed mushrooms (cremini, shiitake, oyster), roughly chopped
  • 1 medium onion, finely chopped
  • 2–3 cloves garlic, minced
  • 3 tablespoons butter or neutral oil, plus more for finishing
  • 1 tablespoon flour (optional, for roux)
  • 750 ml vegetable or chicken stock
  • 150–200 ml heavy cream or preferred plant-based cream
  • 1–2 sprigs thyme, 1 bay leaf
  • Salt and freshly ground black pepper to taste
  • Splash of dry sherry or white wine (optional)
  • Fresh parsley or chives for garnish
Mushroom Flavor Role in soup
Cremini Earthy, mild Reliable body and depth
Shiitake Umami-rich, smoky Adds savory complexity
Porcini (dried) Concentrated woodsy Boosts intensity, use soaking liquid
Oyster/Maitake Delicate, slightly sweet Textural variety

Step-by-step method

Begin by heating your pan over medium-high heat and adding butter or oil. Toss in the mushrooms in a single layer so they brown rather than steam; you may need to work in batches. Once they are deeply caramelized, transfer most of them to a bowl and reserve a few for garnish. In the same pan, reduce heat to medium, add more fat if necessary, and sweat the onion and shallot until translucent. The aromatic base should be soft and slightly golden, not burned.

Add garlic briefly and then sprinkle the flour if you’re using a roux; cook the flour for a minute to remove rawness. Deglaze with a splash of sherry or white wine, scraping up browned bits from the pan. Return mushrooms to the pot, add stock and herbs, and simmer gently for 15 to 20 minutes so flavors unify. Remove the bay leaf and thyme stems, then blend with an immersion blender until you reach your preferred texture: leave some pieces whole for interest or fully purée for silkiness. Stir in cream, warm through without boiling, adjust seasoning, and finish with a small squeeze of acid if desired.

Variations and twists

The base recipe invites countless variations. For a vegan version, swap cream for cashew cream or full-fat oat cream, and use olive oil instead of butter. To introduce a smoky note, roast the mushrooms in a hot oven until almost charred before adding them to the pot. For a richer, more indulgent bowl, incorporate a small amount of crème fraîche at the end rather than stirring in all cream; it gives brightness and a light tang. A splash of dry marsala or madeira adds warmth and complementary sweetness.

If you want a textural reinterpretation, reserve a portion of mushrooms and crisp them in a hot pan with a pinch of salt until their edges caramelize; sprinkle these over each serving for contrast. Adding cooked barley or farro turns the soup into a substantial meal. For a herby lift, fold in chopped tarragon or parsley just before serving. Each change alters the soup’s personality, so make small adjustments and taste as you go to keep the balance intact.

Serving, pairing and presentation

Presentation matters, even for something as humble as soup. Serve in warm bowls to help the cream hold its texture longer, and finish with a drizzle of good oil or a few drops of truffle oil for an aromatic lift. A scatter of fresh herbs or a few toasted breadcrumbs adds color and contrast. For a rustic touch, place a slice of grilled sourdough beside the bowl; for a more formal setting, a small parmesan crisp tucked on the rim is elegant and delicious.

Pairings depend on the meal’s context. As a starter, pair the soup with a crisp white wine like a dry Riesling or an unoaked Chardonnay; the acidity cuts through the cream and highlights mushroom umami. For a casual meal, a malty beer complements the earthy notes. If you offer the soup as the main course, add a bright salad with vinaigrette to balance the richness. Think about texture and acid when planning accompaniments; they will keep the meal lively.

Storage and reheating

This soup stores well, making it excellent for weekday lunches. Cool it quickly and refrigerate in airtight containers for up to three days. If you want to freeze, leave out fresh herbs and dairy when cooling: freeze the base (mushrooms and stock) and add cream when reheating to preserve texture. When reheating from chilled or frozen, warm gently over low heat and stir frequently to prevent separation; adding a splash of stock or water rescues thickness that has stiffened in the fridge.

Reheating in a microwave is convenient but uneven; instead, use a saucepan and bring the soup to a gentle simmer. If you notice slight separation or a grainy texture after freezing, whisk in a tablespoon of cold butter or a small splash of cream off the heat—this helps bind the fats and smooth the surface. Always taste and adjust seasoning before serving because cold storage can mellow flavors and require a final lift with salt or acid.

Troubleshooting common problems

If your soup tastes flat, the usual culprits are under-seasoning or lack of acid. Salt brings forward savory notes, and a squeeze of lemon or a splash of sherry brightens the bowl. If the soup is thin, reduce it gently over low heat, or stir in a mashed potato or cooked beans to thicken without a roux. Conversely, if it is too thick, loosen it with stock or water, adding a tablespoon at a time until you reach the desired consistency.

Curdling or separation most often happens when cream is boiled or when very cold cream hits a hot base—prevent this by tempering the cream: add a cup of hot soup to the cream, then stir the warmed cream back into the pot and heat gently. If you encounter a bitter taste after browning, it may be due to burnt garlic or overcooked herbs; remove the burned bits and balance with acid or a touch of sweetness like a small pinch of sugar. Keeping a calm, low-and-slow simmer is the best general advice to avoid most issues.

Nutrition and mindful eating

Mushrooms are light in calories but rich in minerals and flavor, which makes this soup satisfying without being heavy on volume. Using cream increases calories and saturated fat, so balance portions accordingly or choose a lighter cream if you serve it frequently. Adding legumes like white beans raises protein and makes the dish more filling while keeping the same comforting quality. For those watching sodium, use low-sodium stock and adjust salt at the end.

Consider portions and accompaniments when crafting a meal around this soup. A modest bowl paired with a vibrant salad and whole-grain bread results in a balanced plate. If serving to families, you can bulk the soup with barley or diced root vegetables to stretch it further without sacrificing texture. Mindful eating here is not about deprivation; it’s about building a nourishing bowl that feels complete and restores energy.

Seasonal notes and sustainable choices

Creamy Mushroom Soup. Seasonal notes and sustainable choices

In autumn and winter, foraging or sourcing locally grown mushrooms can be a seasonal joy, but buy only from trusted suppliers and avoid wild varieties unless you have solid identification skills. Cultivated mushrooms available year-round are a reliable option and often grown with lower food-miles than exotic imports. When cooking for the seasons, match the soup’s weight to the weather: more cream and richer garnishes in colder months, lighter broths and more herbs in early spring.

Sustainability also touches technique: use mushroom stems and trimmings to make stock, and roast peeling and trimmed vegetable bits for a better-tasting soup base. Compost what you cannot use, and be mindful of single-use packaging when purchasing specialty mushrooms. Small choices add up: buying from a farmer’s market or a responsible grocer supports producers and usually yields fresher fungi with fuller flavor.

My kitchen stories with this soup

I remember the first time I took a risk with this recipe: an improvised dinner for houseguests where I replaced part of the stock with the soaking liquid from dried porcini. The room changed after the first spoonful—silence fell, people smiled, and conversation shifted to childhood food memories. That night taught me how a single ingredient adjustment can elevate a simple soup into something memorable. Since then, I often keep a jar of dried porcini on the shelf for exactly that purpose: a small, reliable shortcut to depth.

Another household experiment involved crisped mushroom slices used as a built-in garnish. I browned a handful until they were almost chip-like and scattered them on top of each bowl. The contrast between silk and crunch became a signature trick I now use whenever I want to impress without fuss. Through these small trials I learned that texture and timing are just as important as ingredients; the same recipe can tell different stories depending on those choices.

Final thoughts and an invitation to experiment

Creamy mushroom soup is forgiving yet expressive: it rewards attention in the form of pungent browning, careful seasoning and a final brightening note. Use the recipe as a framework rather than a strict commandment; tweak mushroom types, try different creams, and adjust herb choices to match the mood you want to create. Keep notes on what works for you—whether that’s a splash of sherry, a favorite mushroom mix, or a preferred finishing oil—and over time you’ll build a personal version that friends will ask you to repeat.

Above all, enjoy the process. The soup’s simplicity allows you to practice technique and taste, and it yields comfort without much fuss. Serve it warm, share it slowly, and don’t hesitate to bring a little extra bread to mop up what remains. If you try a variation that surprises you, I’d encourage saving that memory: good recipes travel better when they’ve been lived in a few times.

A Deep, Cozy Dive into French Onion Soup: How to Make It Sing

There is a comfort in a bowl that bubbles with caramelized onions, savory broth and a golden, stretchy crown of cheese. This article walks through the origins, technique, ingredients and small secrets that turn a humble pot of simmering onions and stock into a memorable meal. You will find practical tips, a full recipe, variations to suit different diets and honest troubleshooting when things go off track. I write as someone who has cooked this dish dozens of times, testing heat, timing and types of cheese to learn what matters and why. Read on and you will be ready to make a dish that tastes like slow patience and a good appetite combined.

Where French Onion Soup Came From and Why It Endures

The story behind the classic dish is as layered as the soup itself. Roots reach into rustic peasant cooking where inexpensive ingredients—primarily onions—were transformed by slow cooking into something richer than their parts. Over time the preparation migrated from farmhouse tables to Parisian brasseries, earning a reputation as a simple comfort food elevated by technique. Its staying power comes from the contrast of textures and flavors: sweet, deeply browned onions against a background of savory stock and the creamy bite of melted cheese on crusty bread. Knowing this history helps understand why taking time with each step matters; the method is the point, not just the final plate.

The phrase “French Onion Soup” often conjures steam, a bubbling gratin and the clink of spoons against ceramic crocks. Yet regional and historical versions vary; some older recipes used water or weak wine instead of strong beef stock, and others relied on local cheeses and bread styles. That variability shows the dish’s adaptability, which is why modern cooks feel free to tweak a French recipe to their pantry or appetite. Still, certain constants remain: a high proportion of onions, patient caramelization, a good liquid base and a gratinée stage where bread and cheese are browned. Master those points and the rest becomes experimentation rather than rescue work.

Selecting Onions: Varieties, Size and Flavor Impact

Onions are the protagonist here, so selection matters more than you might think. Yellow onions offer the best balance of sweetness and structure when cooked long; they brown well without turning mushy too quickly. Sweet varieties like Vidalia or Walla Walla can give a faster caramelization and a pronounced sweet profile while red onions add color and a sharper edge, better used blended with yellows. Choose medium to large bulbs for easier slicing and more consistent slices, which helps them cook evenly in a single pan. Fresh, firm onions without soft spots are ideal; their water content and integrity influence how they break down during the long cook.

Peeling and slicing technique affects texture and the way sugars release during cooking. Halve each onion from pole to pole, then slice thinly across the rings for ribbons that collapse uniformly under heat. Aim for thickness between 2 and 4 millimeters; too thin and they vanish, too thick and they resist caramelizing. Keep a sharp knife to avoid crushing cells, which would release water and slow browning. These small choices—variety, size, slice—create the base flavor profile before the stock even hits the pot.

Caramelization: The Scientific and Culinary Heart

Caramelizing onions is not mere browning, it is a controlled chemical transformation where natural sugars change into hundreds of flavor compounds. Time and steady heat encourage the Maillard reactions and sugar breakdown that produce complex, almost meaty flavors. Start with a wide, heavy-bottomed pan to maximize contact and avoid crowding; more surface area means faster evaporation and better browning. Use a moderate heat and plan to stir frequently enough to prevent burning but not so often that the onions never settle. Patience is the essential ingredient—rush this step and the final soup will taste shallow.

Fat choice influences flavor and mouthfeel. Classical versions use butter for its richness, sometimes combined with a bit of oil to raise the smoke point. If you prefer a lighter profile, a neutral oil works, but be aware you’ll miss some of the butter’s rounded notes. Deglazing with wine or sherry after deep browning lifts those fond bits into the sauce, capturing concentrated flavor. Salt at the start draws moisture and helps with breakdown, but hold back on heavy seasoning until the end so you can balance against the stock. Small adjustments—heat, fat and timing—alter the caramelization curve and the soup’s final character.

Common Approaches and a Practical Timeline

A practical timeline helps manage the process without watching the pot obsessively. Slicing takes 10 to 15 minutes for a couple of large onions, then give yourself 40 to 60 minutes for proper caramelization depending on heat and pan size. Add aromatics like thyme or bay leaf near the end of browning so their delicate oils don’t burn. Deglaze with wine or fortified wine for acidity and complexity, then add stock and simmer for another 20 to 40 minutes to marry flavors. This rhythm—slice, brown, deglaze, simmer—creates a predictable and repeatable procedure for reliable results.

Choosing the Right Stock: Beef, Chicken, Vegetable or Bouillon

Stock is the supporting actor that makes the lead shine, and its choice changes the soup’s tone. Traditionally, a rich beef stock gives a deep, savory foundation that complements the onions’ sweetness, but high-quality chicken stock can produce a lighter, delicate version that still tastes complex. For vegetarian renditions, a robust vegetable stock made from roasted vegetables and mushrooms supplies umami and depth. Avoid weak store-bought broths unless you reduce them to concentrate flavor; quality and depth of stock matter more here than in many other soups. Homemade stock requires time but rewards with layers of flavor; even a reduced boxed stock benefits from an added splash of soy sauce, miso or mushroom powder to boost umami.

Balancing acidity and fat in the broth keeps the final bowl lively. A splash of dry white wine or a teaspoon of sherry vinegar brightens the richness without overwhelming the onions. Finish with a knob of butter for silkiness if you used a leaner stock, and adjust salt carefully, tasting after the soup has had time to marry. The liquid should support the onions, not overpower them; think of the broth as a frame that sets the onions’ color and flavor into relief. Small additions—acid, fat and salt—are the final calibrations that make the soup sing rather than just be warm and salty.

Cheese and the Gratinée: Texture and Temperament

The gratinée stage is the theatrical moment when soup turns into an event. A slice of bread is floated on top, then generously cloaked with cheese and broiled to a golden crust. Gruyère is the classic choice for its nutty flavor and excellent melting behavior; Comté or Emmental are suitable alternatives that maintain that elastic melt. For a sharper profile opt for a mix with aged Gruyère or even a touch of cheddar, but beware of overly oily cheeses that separate when grilled. A light dusting of Parmesan adds umami and browning without overwhelming the primary cheese flavor.

Bread must be dense enough to resist immediate sogginess and absorb some broth without disintegrating. Rustic baguette slices, lightly brushed with olive oil or butter and toasted, perform reliably. Place the bread on the soup either before broiling, so it roasts into the cheese, or toast it separately and add it just before serving to preserve crunch. Temperature control is vital while broiling; the goal is a bubbling, blistered top, not smoked or burnt edges. Respecting these textural contrasts—soft onions, crisp bread, molten cheese—elevates the dish from good to memorable.

Bread, Bowls and Presentation: Small Details That Matter

What you serve the soup in affects both safety and aesthetics. Traditional French crocks handle the broiler heat and create a pleasing, rustic presentation, while ovenproof ceramic or cast iron bowls also work well. Avoid thin glass or low-quality ceramics as thermal shock from broiling can crack them. Preheat bowls a little in the oven to keep the soup warm longer at the table, which helps maintain the cheese’s stretch and the broth’s aroma. Presentation need not be fussy: a simple sprinkle of fresh thyme or cracked black pepper provides a bright, finishing note.

Pairing the soup with an appropriate side completes the experience. A simple green salad dressed with a sharp vinaigrette cuts through the richness, while pickled vegetables add contrast and lift. For drinks, a light-bodied red or a crisp white wine with good acidity harmonizes with the sweetness of the onions and the salt of the cheese. Even a rounded porter or brown ale complements roasted flavors. Matching textures—crisp salad, soft soup—creates a balanced meal rather than a one-note bowl.

Variations and Modern Twists

Once you understand the fundamentals, variations let the dish adapt to seasonality and taste. Swap beef stock for mushroom broth and finish with a drizzle of truffle oil for an earthy vegetarian version. Add caramelized leeks or shallots for a subtler aromatic profile, or throw in a handful of thinly sliced fennel for a licorice-like lift. For a lighter, soup-forward rendition, skip the gratinée and serve the onions and broth with toasted croutons on the side. These tweaks preserve the spirit of a French recipe while acknowledging contemporary palates and ingredient availability.

If you want to push boundaries while keeping the soul intact, consider integrating international touches. A dash of fish sauce or miso adds umami depth to vegetarian stocks without tasting Asian; smoked paprika or a ribbon of chorizo introduces smoky warmth that complements the caramelized base. In cold weather, stir in small roasted root vegetables for heartiness. The guiding principle: maintain a balance between sweet and savory and ensure the onion remains the star. Small, deliberate additions amplify rather than compete with the core flavors.

Troubleshooting: Fixes for Common Problems

Even experienced cooks run into issues, and knowing quick fixes helps save a batch. If your onions taste sharp and raw after a short cook, they haven’t caramelized enough—keep sweating them longer and add a pinch of sugar only if necessary. If they burn, immediately transfer them to a clean pan, add a little water to lift the fond and continue on low heat; burning leaves a bitter note that’s hard to mask. When the broth tastes flat, concentrate it by boiling briefly to reduce volume, or stir in condensed stock or umami boosters like anchovy paste in minute amounts. Salt after reduction, because water loss intensifies sodium and can quickly oversalt the soup.

When the gratinée becomes greasy or the cheese separates, the problem is often too much heat or oily cheese. Lower the broiler temp slightly and move the bowls further from the heat source. Use cheeses with proven melting behavior and consider mixing a small amount of starch-thickened béchamel into the cheese to stabilize it for a glossy finish. If the bread sinks and becomes mush, toast it longer or place it on top only after broiling. These quick interventions rescue texture and flavor so leftovers don’t taste like lessons learned the hard way.

Make-Ahead, Freezing and Reheating

French Onion Soup. Make-Ahead, Freezing and Reheating

French Onion Soup is surprisingly forgiving when it comes to make-ahead strategies, which makes it a practical choice for dinner parties. The caramelized onions and base broth can be made a day or two in advance and refrigerated; flavors often meld and deepen overnight. For longer storage, freeze the soup base without the bread and cheese; cool completely, portion into freezer-safe containers and thaw gently in the refrigerator before reheating. Avoid freezing after adding dairy or bread, as textures degrade on thawing. When reheating, warm slowly on low heat and adjust seasoning because flavors shift after storage.

For parties, assemble bowls up to the point of broiling: ladle hot soup into ovenproof bowls, top with toasted bread and cheese, then broil just before serving. This preserves the crisp-chewy contrast between bread and soup and spares you the last-minute scramble. If you must reheat a cooled assembled bowl, briefly oven-toast instead of microwaving to avoid soggy results. These practical steps reduce stress and keep presentation intact when timing matters most.

A Few Practical Tools and Equipment Notes

Equipment choices streamline the process without changing the outcome substantially. A wide, heavy-bottomed sauté pan or stainless steel skillet provides even heat distribution and enough surface area for onions to spread and brown. A good chef’s knife and sturdy cutting board speed preparation and produce consistent slices. Ovenproof crocks or shallow gratin dishes work best for broiling cheese; if you lack them, use a baking sheet and broil open-faced to achieve similar results. A thermometer is unnecessary, but a sense of timing and consistent heat control is indispensable.

My Personal Experience: Trials, Errors and Small Triumphs

I remember my first attempt decades ago when I shredded far too many onions and then panicked as the kitchen filled with steam. The early batches were either too pale and sweet or scorched and bitter, teaching me to respect the slow climb of caramelization. Over time I learned to split the work across two pans, control heat, and experiment with tiny additions of balsamic or sherry for acidity. A little ritual developed: a radio station, a wooden spoon and a stopwatch on lazy evenings. Those small habits turned recipe attempts into reliable dinners that friends and family started to ask for repeatedly.

One memorable twist came when I substituted roasted mushrooms for beef stock to host a vegetarian friend. The result had surprising depth and texture; we all agreed it was a valid, satisfying route. Another success was using leftover sourdough heels toasted thin and sprinkled with garlic before broiling; the crumb held up, and the garlic cut through the richness in a pleasing way. These experiments confirmed a simple idea: technique matters more than strict adherence to a single set of ingredients, and confident tweaks make the dish personal rather than derivative.

Detailed Classic Recipe and Ingredient Table

Below is a straightforward, reliable recipe that produces a classic, richly flavored result and leaves room for small adaptations. Quantities aim for four generous servings and assume a modest level of pantry items like butter, wine and herbs. Read the method fully before starting so timing—particularly for caramelization and broiling—fits your kitchen setup and cookware.

Ingredient Quantity Notes
Yellow onions, thinly sliced 2.5–3 pounds (about 6 large) Main flavor; avoid watery varieties
Unsalted butter 4 tablespoons Can combine with 1 tablespoon oil
Dry white wine or dry sherry 1/2 cup Deglaze and add acidity
Beef stock (or chicken/vegetable) 6 cups Use quality stock or concentrate
Fresh thyme and bay leaf 2 sprigs thyme, 1 bay leaf Optional but recommended
Baguette, sliced and toasted 6–8 slices Brush with butter or oil
Gruyère cheese, grated 2 cups Substitute Comté or Emmental
Salt and black pepper To taste Adjust after reduction

Step-by-Step Method

This method emphasizes patience during the caramelization and care during the gratinée. Read through at least once so each stage—browning, deglazing, simmering and broiling—flows without surprises. Timing will vary by stove and pan, so use visual cues more than clocks: deep amber color, glossy onions and a syrupy pan fond are signals to move on to the next step.

  1. Heat a wide heavy pan over medium, add butter and oil until the foaming subsides, then add sliced onions and a generous pinch of salt.
  2. Cook slowly, stirring every few minutes, allowing onions to soften and then to brown; expect 40 to 60 minutes until deep golden amber.
  3. When well browned, add wine to deglaze, scraping up browned bits, and continue cooking until liquid reduces by half.
  4. Add stock, thyme and bay leaf, bring to a gentle simmer and cook for 20 to 30 minutes to marry flavors. Taste and adjust salt.
  5. Ladle soup into ovenproof bowls, float a slice of toasted baguette on top, cover with grated cheese and broil until cheese bubbles and browns.
  6. Serve immediately, garnished with a sprig of thyme or cracked pepper.

Final Thoughts on Crafting Your Best Bowl

Making this soup well rewards patience, attention to small details and willingness to refine. The technique—the long, careful caramelization, the calibrated stock choice and the gratinée finish—transforms simple onions into a deeply flavored, comforting dish. Treat it as a ritual rather than a rush: the time invested returns many times over in depth of flavor. Whether you stick to the classic French recipe or explore variations, aim for balance and texture so every spoonful delivers warmth, complexity and satisfaction.

Try the recipe as written once, then make one small change each subsequent time: a different stock, a different cheese, or a touch of acidity. Over a few cooks you’ll internalize how each variable changes the dish and gain the freedom to improvise confidently. In the end, a great bowl of this soup feels like hospitality you can make at home—simple to start, rewarding to finish, and, in my experience, impossible not to share. Enjoy the process and the first steaming spoonful.

Hearty Lentil Stew: Cozy, Nourishing, and Ridiculously Easy

There are meals that fill the belly and there are meals that warm something deeper. A bowl of Hearty Lentil Stew belongs to the second category: modest ingredients, slow kindness, and a texture that invites you to linger. Whether you’re chasing comfort on a raw winter evening or planning a make-ahead meal that improves every day in the fridge, this recipe rewards with little fuss and big flavor. Below you’ll find a practical guide from pantry staples and technique to variations and storage, all written to help you cook with confidence and enjoy the process.

Why Lentils Deserve a Place on Your Stove

Lentils are one of those ingredients that quietly do everything well. They cook more quickly than dried beans and carry flavor beautifully, absorbing spices and liquids without falling apart unless you want them to. From a nutrition standpoint they are a powerhouse: high in protein and fiber, low in fat, and packed with iron and folate. That makes them ideal for plant-forward cooking and an easy route to satisfying vegan meals that don’t rely on processed meat substitutes.

Beyond the nutrition card, lentils are economical and forgiving. A small pot can feed a crowd, leftovers behave nicely, and different varieties offer distinct textures. Brown and green hold shape; red and yellow turn silky and are perfect when you want a stew that leans toward creamy. For people who cook for weeks with a busy schedule, lentils offer reliability: they rarely surprise you if you watch them for a few minutes during cooking.

Picking the Right Type of Lentil

Not all lentils are interchangeable, and choosing the right kind makes a practical difference in the finished dish. Brown and green lentils maintain their shape and provide that toothsome bite associated with rustic stews. French green lentils, also called Puy, are firmer and hold up in salads or in stew where you want distinct kernels. Red and yellow lentils break down faster and produce a thicker, almost porridge-like consistency, which is lovely when you want a silky body without added thickening agents.

When shopping, check packaging for harvest or best-by dates; older pulses can take longer to soften. Split lentils will cook more quickly, so adjust timing accordingly. If you like a stew with varied textures, consider mixing types—half brown for shape, half red for creaminess. That small tweak can transform a simple pot into something nuanced without adding extra work.

Essential Ingredients and Smart Substitutions

A robust pot of lentils begins with a handful of pantry staples and a few optional upgrades. Aromatics like onion, garlic, and carrot form a savory foundation. Celery and leeks are welcome companions and add subtle sweetness. Tomatoes—either canned or fresh—bring acidity that brightens the earthy lentils. A bay leaf or two, a good pinch of smoked or sweet paprika, and a splash of vinegar or lemon at the end lift the whole stew. Olive oil or a neutral oil helps sweat the vegetables and bind flavors.

Substitutions are part of making this dish your own. No carrots? Use parsnip or sweet potato for a different sweetness. If you lack canned tomatoes, a spoonful of tomato paste plus extra water will do the trick. For protein variety, toss in diced tempeh, cubed firm tofu, or browned sausage for a non-vegan option. Herbs swap easily: thyme and rosemary yield woodsy notes, while cilantro and cumin push the profile toward Latin or Middle Eastern flavors.

Ingredient Typical Amount (for 4–6 servings) Easy Substitutions
Brown or green lentils 1 1/2 cups (300 g) Mix with 1 cup red lentils for creamier texture
Onion 1 large, diced Use 2 shallots or 1 leek
Carrot 2 medium, diced Parsnip, sweet potato, or bell pepper
Garlic 3 cloves, minced 1 tsp garlic powder
Canned crushed tomatoes 14 oz / 400 g 2 tbsp tomato paste + 1 cup water
Vegetable broth 4–5 cups Water + bouillon cube
Leaf herbs & spices Bay leaf, paprika, salt, pepper Smoked paprika or cumin for smoky/earthy twist

Building Flavor: How to Layer Tastes

Good stew depends on layers. Start by sautéing aromatics until they soften and take on a little color; that browning yields sweetness and complexity. Toast your dry spices in the pot for thirty seconds to a minute to coax out their oils; this matters more than most home cooks realize. Deglaze with a splash of broth or wine to lift browned bits from the bottom—those bits taste like home.

Acidity is the finishing touch. A squeeze of lemon or a tablespoon of sherry vinegar at the end brightens a dense pot. Salt gradually during cooking rather than dumping it in at the start; lentils absorb seasoning as they swell. Taste as you go and aim for balance: earthy, a little sweet, a little bright, and comforting without being flat.

Step-by-Step Recipe

Hearty Lentil Stew. Step-by-Step Recipe

The following method produces a rich, satisfying stew that serves four to six people and keeps well. It emphasizes technique over rigid timing, so you can adapt it to what’s on hand and how you like textures. Prepare ingredients before you start: chop aromatics, rinse lentils, measure broth. That mise en place makes the cooking flow and prevents overcooking anything while you scramble to find a missing spice.

Set a large, heavy-bottomed pot over medium heat and proceed through the stages. Use the table above as a guide for amounts and substitutions. After the step-by-step section, I include timing suggestions for alternative cooking methods like slow cooker and pressure cooker so you can pick what suits your week.

  1. Heat 2 tablespoons olive oil in a large pot. Add diced onion, carrot, and celery and cook until softened and beginning to brown, about 7–10 minutes.
  2. Add minced garlic and your chosen dry spices—1 teaspoon smoked paprika, 1/2 teaspoon ground cumin, salt and pepper—and cook 30–60 seconds until fragrant.
  3. Stir in lentils and canned tomatoes; coat everything in the aromatics. Pour in 4–5 cups vegetable broth so lentils are covered by about an inch.
  4. Bring to a simmer, then reduce heat to low, partially cover, and cook until lentils are tender: 25–40 minutes depending on type. Stir occasionally and add more broth if necessary.
  5. When lentils are soft, taste and adjust seasoning. Remove bay leaves and finish with a tablespoon of vinegar or lemon juice and a drizzle of olive oil for silkiness.

Cooking Techniques: Stovetop, Slow Cooker, and Instant Pot

Each method has its merits. Stovetop gives the most control and allows for a slight reduction of liquid to intensify flavor. It’s the quickest if you use split lentils or smaller quantities, and it’s ideal for a one-pot dinner you watch and tweak. The pot’s shape and heat distribution affect how quickly liquid evaporates, so keep an eye on it during the last phase of cooking.

Slow cookers are perfect for set-and-forget comfort. Sauté aromatics first to build flavor, then transfer everything to the slow cooker and cook on low for 6–8 hours. Because slow cookers trap moisture, reduce added liquid slightly and check texture toward the end. The hands-off time is attractive for busy days, and the results are deeply infused and forgiving if you leave it a bit longer.

Pressure cooking cuts time dramatically. Using an electric pressure cooker, brown the aromatics on the sauté setting, add all ingredients, seal, and cook for 10–12 minutes at high pressure with a natural release. This method locks in a roasted depth while delivering tender lentils fast. Note: red lentils break down quickly under pressure, so use brown or green if you want distinct textures.

Variations to Keep Things Interesting

One great thing about this stew is its versatility. You can steer it toward Mediterranean, Middle Eastern, Indian, or Latin flavors with simple swaps. Add cumin, coriander, and turmeric for a spiced stew; stir in harissa and preserved lemon for North African notes; finish with coconut milk and curry paste for a creamy, Thai-ish bowl. Each direction shifts the personality of the dish while keeping the base technique identical.

Protein additions expand its appeal. Crisped tempeh or browned cubes of tofu add chewiness and extra nutrition to keep a vegan label while adding texture contrast. For omnivores, slices of smoky sausage stirred in near the end provide fat and umami that many find irresistible. Vegetables like kale or spinach stirred in during the last five minutes add color and a fresh pop. Experiment with add-ins gradually and make notes—stew is excellent research material.

Serving Suggestions and Pairings

A bowl of lentil stew is excellent on its own, but pairing elevates it to a satisfying meal. Serve over steamed rice or creamy polenta to catch every spoonful. A smear of yogurt on top adds coolness and tang; for a vegan version, use coconut yogurt or a cashew-based alternative. A sprinkle of chopped herbs—parsley, cilantro, or dill—adds brightness and a fresh texture contrast.

Crusty bread is a classic partner. A slice of rustic sourdough soaks up the broth and adds to the tactile pleasure of eating. For lighter sides, a crisp green salad with lemon vinaigrette acts as a palate cleanser. In colder months, pair the stew with roasted root vegetables and pickled beets to cut through the richness. For drinks, a medium-bodied red wine or a malty amber beer pairs nicely; for non-alcoholic choices, try a tart apple cider.

Nutrition, Protein, and Dietary Notes

Lentils are an efficient source of plant protein and are naturally gluten-free, making this stew inclusive for many diets. A typical serving provides substantial fiber, which aids digestion and keeps you full longer. If you are watching sodium, use low-sodium broth and adjust salt at the end. Adding a source of vitamin C—lemon juice or chopped tomatoes—improves iron absorption from the lentils, a useful tip for those relying on plant iron sources.

For those needing a higher protein content, combine lentils with whole grains like farro or barley, or add quinoa at the end to maintain texture. Nuts and seeds sprinkled over individual bowls contribute healthy fats and a pleasing crunch. If calorie density is a concern, reduce added oils and increase vegetables for bulk. These small adjustments let you tailor the nutrition profile without changing the essence of the dish.

Batch Cooking, Storage, and Freezing

This stew is an ideal candidate for batch cooking. It gains depth after a day in the refrigerator, so consider making a double batch if you have the capacity. Store in airtight containers: it will keep for 4–5 days in the refrigerator. For freezing, portion into meal-sized containers and leave some headspace; frozen lentil stew keeps well for up to 3 months. Thaw in the fridge overnight or reheat gently on the stove, adding a splash of water if the stew has thickened.

Reheating is forgiving: simmering slowly restores texture and melds flavors. If the lentils have absorbed too much liquid in the fridge, add broth or water and warm until the stew reaches the desired consistency. Fresh herbs added after reheating revive the dish. For quick weekday dinners, freeze single portions and combine with fresh sides like a simple salad or warmed bread.

Troubleshooting Common Problems

If your lentils are still hard after the expected cooking time, a few causes are likely. They may be old; older lentils take longer to soften. Another possibility is insufficient liquid or too low a simmer. Increase heat gently and add hot broth, then continue cooking until tender. Avoid adding acidic ingredients like vinegar or tomatoes at the start, since acids can toughen legumes; add them after the lentils have softened.

Too thin? Simmer uncovered to reduce liquid until you reach the desired thickness or mash a portion of the lentils against the pot to naturally thicken the base. Too thick? Stir in broth or water and heat through. If the stew tastes flat, finish with acid—lemon juice or a splash of vinegar—and a final pinch of salt; those two moves will often rescue a listless pot.

Spices, Herbs, and Creative Condiments

Spice choices steer the personality of the stew. Smoked paprika gives a faint campfire note, while ground coriander and cumin add warmth and earthiness. A small stick of cinnamon tucked in during cooking produces a subtle background sweetness in certain regional versions. Fresh herbs used at the end—parsley, cilantro, dill, or mint—add lift and color that dried herbs cannot match.

Condiments and toppings turn each bowl into a curated experience. A dollop of plain yogurt or a vegan cashew cream brings cooling richness. A drizzle of chili oil or a spoonful of fermented hot sauce introduces heat and complexity. Toasted seeds and chopped nuts add texture, and pickled red onions or preserved lemon provide acidity. Think of toppings as a finishing orchestra: gentle changes produce predictable results.

Personal Notes from My Kitchen

I remember the first time I intentionally cooked lentils as the main event rather than a side; it was the middle of a bleak winter and I wanted something honest. I had only a handful of items in the pantry and a small jar of smoked paprika. The result was unpretentious but satisfying, and the next day it tasted even better. That experience taught me to trust simple techniques: good browning, patient simmering, and a bright finish.

Over the years I’ve tweaked proportions, tested spice blends, and learned that lentil stew adapts to seasons. In summer I make a lighter version with chopped tomatoes and basil; in autumn I add roasted squash for sweetness. Batch-cooking this dish has saved many evenings when time was short but appetite was large. It remains a go-to not because it’s flashy but because it reliably comforts and feeds more than just hunger.

Quick Tips for Consistent Results

Small habits yield consistent results: always rinse lentils to remove dust, sauté aromatics until translucent and a little caramelized, and hold off on acidic ingredients until the end. Use a heavy-bottomed pot for even heat distribution and reduce heat if the stew is boiling too hard—lively simmering is what you want. Taste at several points rather than assuming your first seasoning is final; lentils change as they cook.

Another practical tip: reserve some cooked lentils before mashing if you like textural contrast. That way you get both creaminess and bite in the same bowl. Finally, make room on the stove for a final flourish: lemon juice, fresh herbs, or a drizzle of good oil can lift an ordinary pot into something memorable without much effort.

Shopping and Pantry Guide

Keep lentils and a handful of complementary staples in your pantry and you’ll always have the potential for a nourishing meal. Canned tomatoes, a jar of vegetable broth or bouillon, olive oil, and a couple of dried spices like paprika and cumin cover a majority of variations. Fresh aromatics—onion, garlic, carrot—are inexpensive and store well enough to maintain a steady supply for weeks when stored properly.

Buying lentils in bulk can save money and reduce packaging waste. Store pulses in a cool, dark place in airtight containers to extend shelf life. Rotate stocks: use older packages first. If you like experimenting with different traditions, keep items like coconut milk, harissa, or tahini on hand; they open many regional doors without cluttering the kitchen.

When to Serve It and Who Will Love It

This stew shines in cold weather, as an easy weeknight dinner, at casual gatherings, or as a meal prep anchor. It’s particularly welcoming when you want something nourishing and approachable without complicated technique. Families appreciate its flexibility—children often enjoy the mild, comforting flavors—while plant-based eaters value the protein density and heartiness. It’s also a friendly pot to bring to potlucks; it travels well and feeds a crowd.

If you cook for friends with dietary restrictions, this stew is easy to adapt: ensure the broth is vegan, skip optional dairy toppings, and label any meat additions. The simplicity is the point: with a basic template you can craft menus around preferences without stress. That reliability is the reason I return to lentils again and again.

Final Serving Notes

Finish each bowl with an element that contrasts the stew’s warmth. A squeeze of citrus, a handful of herbs, or a crunchy topping transforms the experience and makes leftovers feel fresh. Serve with bread or a grain if you want something more filling, or keep it lighter with a salad alongside. A well-made pot is generous enough to share and simple enough to return to time and again.

Take a breath before you sit down. The aroma, the way steam fogs your spoon, the first warm bite—those are small pleasures worth noticing. Lentil stew does not rush you; it invites reflection, conversation, and comfort. Keep the base recipe in mind, then personalize with spices, toppings, and stories. You’ll find it’s not only a dependable dinner but a mirror for your culinary tastes.

Rice Porridge with Dried Fruits: A Warm Bowl That Feels Like Home

There is something quietly irresistible about a gently steaming bowl of rice porridge studded with sweet, chewy dried fruit. This dish travels easily between cultures and seasons, comforting in cold months and light enough for spring mornings. It is both humble and versatile, a blank canvas for spices, nuts, citrus peel or a drizzle of honey. In the pages that follow I will walk you through practical choices of ingredients and techniques, share ideas for flavor combinations, and give tips to rescue a too-thin or lumpy pot. Whether you cook it for an unexpected guest or a slow weekend breakfast, this recipe rewards attention and invites small experiments.

What is rice porridge and why add dried fruit?

Rice porridge is one of those basic preparations that appears in many culinary traditions under different names: congee, juk, kheer, arroz caldo. At its core it is simply rice cooked in more liquid than usual until the grains break down and the texture becomes creamy. Adding dried fruit introduces concentrated sweetness and chewy texture; it also brings preserved summer flavor into the winter pantry. Dried apricots, raisins, dates or figs contribute natural sugars, while preserved citrus peel or cranberries add brightness and acidity that keeps the bowl lively rather than cloying.

Choosing to sweeten your porridge with dried fruit instead of refined sugar alters both taste and nutrition. Fruit provides small amounts of fiber, vitamins and antioxidants alongside the sugars, and it pairs remarkably well with spices such as cardamom, cinnamon and star anise. Dried fruit can be soaked before cooking to plump up and release flavor into the cooking liquid, or stirred in near the end for a chewier contrast. Either approach makes the porridge more interesting than a plain, monotone cream.

Grains and liquid: choosing rice for porridge

Every type of rice behaves differently in porridge. Short-grain Japonica rice will break down and yield a silken, gluey texture because of its higher amylopectin content. Medium-grain rice gives a balanced creaminess while preserving some individual grain identity. Long-grain rice remains more separate, resulting in a looser, stew-like porridge unless cooked for a very long time. For a classic, velvety result, I prefer short or medium-grain varieties; when I want a lighter, more rustic porridge I reach for basmati or jasmine and extend the cooking time.

Liquid choice matters as much as the rice. Water is neutral and shows off the flavor of the dried fruit and added spices, while milk or a mix of milk and water creates a richer, dessert-like bowl. Plant milks, such as oat or almond, add subtle sweetness and aroma; coconut milk brings a tropical roundness that pairs beautifully with mango or papaya. If you use milk, add it in the latter half of the cooking time to avoid curdling and to prevent it from scorching on the bottom of the pot. A good rule is to start with two to three parts liquid to one part rice and then adjust while cooking.

Picking and preparing dried fruit

Rice Porridge with Dried Fruits. Picking and preparing dried fruit

Not all dried fruit is interchangeable. I tend to keep a small selection in my pantry: tart cranberries, sweet golden raisins, plump Medjool dates, and tangy dried apricots. Each brings its own flavor profile and texture. Dried apricots add vibrant color and a pleasant chew; golden raisins are soft and subtly honeyed; dates provide deep caramel notes and can almost dissolve into the porridge. Sulfured fruits retain brighter color but may taste slightly medicinal to sensitive palates; unsulfured varieties have a deeper, earthier flavor.

Preparing the fruit is a small but meaningful step. For denser fruits like dates or figs I chop them to promote even distribution. Tiny fruits like raisins can be rinsed briefly to remove dust and then soaked to plump them up. Soaking in warm water or warm tea for 10 to 20 minutes softens them and releases flavor into the liquid before rice is added. Alternatively, you can simmer the fruit with the rice so they meld completely; this works well when you want a unified, jammy texture rather than distinct bites of fruit.

Essential spices and aromatics

Spices elevate porridge from simple to memorable. Cardamom pods, cinnamon sticks, star anise, and a strip of lemon or orange peel are classic partners for rice and dried fruit. Cardamom offers floral citrus notes that complement raisins and dates; cinnamon provides warmth that harmonizes with apples and pears; star anise gives a whisper of licorice if used sparingly. Vanilla extract or a split vanilla pod added near the end of cooking rounds flavors beautifully, while grated nutmeg offers gentle earthiness when used with caution.

Fresh aromatics deserve a mention too. A knob of ginger simmered briefly adds a bright, peppery counterpoint to the sweetness of dried fruit, and a little citrus zest at the end cheers the whole bowl. Salt, even in sweet porridge, is crucial: a small pinch amplifies all other flavors. If you enjoy savory notes, stir in a little butter or ghee at the finish; in vegan versions a splash of toasted sesame oil or coconut oil can create satisfying richness.

Step-by-step basic recipe

This straightforward method yields a creamy porridge with tender, plump dried fruit. Measure rice and liquid carefully at the outset, and taste as you cook to adjust consistency. Begin by rinsing the rice under cold water until the runoff is mostly clear; this reduces excess surface starch and limits clumping. Toasting the rice briefly in a dry pan or with a small amount of butter enhances the cereal’s aroma and can add a pleasing nuttiness to the final dish.

  • Ingredients (serves 3-4): 1 cup short-grain rice, 4 cups liquid (water, or 2 cups water + 2 cups milk), 3/4 cup mixed dried fruit, 1 cinnamon stick or 3 cardamom pods, pinch of salt, sweetener to taste.
  • Method: After rinsing, combine rice and liquid in a medium pot over medium heat. Add the whole spices and a pinch of salt. Bring to a gentle simmer, then lower the heat and cook uncovered, stirring occasionally, until the rice breaks down and the mixture thickens—about 25 to 40 minutes depending on rice type. Fifteen minutes before the end add soaked or chopped dried fruit. Finish with butter or a splash of milk, and sweeten if needed.

Stirring is not only practical it helps prevent sticking and encourages grains to release starch for creaminess. Keep the simmer gentle; a vigorous boil can break grains unevenly and create a rough texture. If the porridge becomes too thick, add hot water or milk in small amounts until you reach the desired silken loaf-like viscosity. Conversely, if it’s thin, continue simmering gently; patient evaporation is the most natural way to thicken the bowl without compromising flavor.

Quick reference table: rice type and expected texture

Rice Type Typical Texture in Porridge Cooking Time (approx.)
Short-grain (sushi rice) Very creamy, almost gluey 20–30 minutes
Medium-grain Creamy with some grain integrity 25–35 minutes
Long-grain (basmati/jasmine) Looser, firmer grains unless cooked long 30–45 minutes

Sweeteners, toppings and presentation

Decide early whether you want the bowl to be a lightly sweetened breakfast or a dessert-like porridge. Honey, maple syrup, coconut sugar, or brown sugar each shift the flavor in distinct directions and are best added at the end so you can control final sweetness. Toppings provide texture and visual appeal: toasted nuts and seeds offer crunch, while a spoonful of yogurt or labneh introduces creaminess and tang. Fresh fruit slices, a scattering of citrus zest, or a drizzle of nut butter make the porridge feel composed rather than utilitarian.

Presentation matters because a humble bowl appears more inviting when colors and textures are in balance. Arrange dried fruit so that it punctuates the surface. Sprinkle with a handful of toasted almonds or chopped pistachios for color contrast. A little flaked sea salt on top of a honey-sweet version creates a pleasing tension between sweet and savory. Serve in warmed bowls to keep the porridge at an ideal temperature longer, and provide spoons or small bowls of additional toppings so each person can tailor their serving.

Variations to explore

One of the joys of this dish is how readily it adapts to different cuisines and seasonal produce. For a South Asian twist, cook the rice with cardamom and saffron and finish with chopped pistachios and rosewater. To make a Mediterranean-inspired porridge, combine dried figs and apricots with a splash of orange blossom water and top with toasted walnuts. For a Southeast Asian mood, use coconut milk, add bits of dried mango, and finish with toasted coconut flakes. Each variation shifts the emotional tone of the bowl while keeping the method familiar.

If you like texture contrasts, combine both soaked and raw dried fruits: soak a portion to release flavor into the porridge and scatter some unsoaked pieces at the end so they remain chewy. You can also stir in grains or seeds like millet or quinoa toward the end of cooking for a multi-textured breakfast. Another satisfying trick is to roast some fruit with a little butter or oil and spices beforehand; the caramelized edges add complexity and depth.

Dietary adaptations and vegan versions

Rice porridge is naturally gluten-free and easily made vegan. Swap cow’s milk for oat, almond or soy milk to achieve the creaminess of a milk-cooked porridge. Be mindful of subtle flavor differences: almond milk is fragrant and light, oat milk is neutral and creamy, and coconut milk imparts a distinctive tropical note. For added protein, stir in a spoonful of nut butter, a scoop of silken tofu, or a sprinkle of toasted hemp seeds. If you need the dish to be lower in sugar, choose tart dried fruits and rely on spices and a squeeze of citrus for flavor instead of extra sweetener.

For those watching carbohydrates, use small portions of rice and bulk up the bowl with chopped nuts, grated apple, or steamed squash to increase volume without solely relying on cereal. Although this changes the character of the dish, it retains the comforting aspect of porridge while balancing macronutrients more thoughtfully. Experimentation and tasting as you go are key to finding the right balance for your dietary preferences.

Storing, reheating, and freezing

Porridge stores well in the refrigerator for up to four days. Transfer cooled porridge to an airtight container; if you plan to eat leftovers, slightly undercook the rice initially to prevent it from becoming overly mushy after reheating. Reheat gently on the stove with a splash of milk or water to loosen the texture, stirring frequently to restore creaminess. Microwave reheating works when you add liquid and stir every minute, but take care to avoid hot spots.

Freezing is possible but not ideal for texture. Frozen and thawed porridge tends to separate slightly and can become grainier, though stirring vigorously while reheating can restore some cohesion. For best results freeze portions with minimal milk and add fresh milk when reheating. If you anticipate frequent leftovers, cook the porridge a bit firmer and add fruit fresh at serving time to preserve texture.

Troubleshooting common problems

Sometimes porridge turns out too thin, too thick, or glutinous in an unwelcome way. If it is too thin, increase heat slightly to encourage evaporation and stir to prevent sticking; cover partially to avoid overboiling. If it is too thick, whisk in hot water or milk in small increments until the desired consistency returns. Lumpy or uneven porridge often results from adding cold liquid to a hot pot or from using an uneven heat; use warm liquid and keep the simmer gentle.

If you find the flavors flat, check for seasoning—salt is often the missing element in sweet preparations. A little acid brightens heavy sweetness, so a squeeze of lemon juice or a splash of a vinegar-based shrub can rescue a cloying bowl. For burnt or scorched flavor, sadly the only remedy is to discard the base and rescue any unsinged portion from the top; using a heavy-bottomed pot and stirring regularly prevents this scenario.

Serving occasions and cultural contexts

This kind of porridge appears at the crossroads of comfort and ritual. In many cultures it is a breakfast staple; in others it is associated with convalescence or postnatal care because it is easy to digest. I have seen it served at festive breakfasts where dried fruit signals abundance and hospitality. In colder climates, a bowl of hot rice porridge with dried fruit feels like a deliberate act of care—both practical and symbolic.

For gatherings, present a porridge bar with bowls of different dried fruit, nuts, spices and sweeteners so each guest can build their own version. For a more formal course, finish the porridge simply with a single garnish—thin ribbons of candied citrus and a few toasted almond slivers—so the flavors remain clear and the texture takes center stage. It performs equally well as weekday breakfast or as a soft, comforting dessert after a heavy meal.

A personal note from my kitchen

When I first learned to make rice porridge, I was surprised by how many memories it unlocked. My grandmother used to add a scattering of chopped dried apricots and a drizzle of honey to my bowl, and the aroma of warm cardamom instantly transported me back to that kitchen. Over the years I have refined the balance of milk and water, learned to time the addition of fruit, and discovered that soaking dates overnight makes the most vividly flavored porridge. These small adjustments transformed a simple recipe into something I turn to when I want comfort without fuss.

Once, on a blustery morning when friends dropped by unexpectedly, I improvised a porridge with leftover short-grain rice, a handful of mixed dried fruit, a split vanilla pod and a generous splash of oat milk. That spontaneity produced one of the most satisfying bowls I’ve made; the fruit had softened but still kept its shape, the aroma filled the room, and people lingered over the second helpings. It reminded me that this dish rewards improvisation almost as much as it does precision.

Quick versions for busy mornings

On rushed days I keep a jar of pre-soaked mixed dried fruit and a packet of quick-cooking rice or pre-cooked rice in the fridge. Combine them with hot water and a pinch of salt, microwave or simmer for a few minutes, and finish with a spoonful of nut butter for richness. Another time-saver is to cook a larger batch the night before and reheat individual portions with a splash of milk. Add fresh fruit or toasted seeds just before serving to introduce texture and freshness.

Instant pot and slow cooker methods are helpful if you prefer set-and-forget. A short program on an electric pressure cooker yields a creamy porridge within 20 to 30 minutes with minimal supervision. Slow cookers develop deep, melded flavors over a few hours, making them ideal for weekend breakfasts. Whatever method you choose, plan to add sensitive ingredients like citrus zest or nut toppings at the end to preserve their bright flavors and textures.

Flavor pairings to try

Some combinations are reliably delightful. Try cardamom, saffron and chopped pistachios with golden raisins for a Persian-inspired bowl. Mix dried cherries with almond milk, vanilla and toasted almond flakes for a northern European vibe. For an autumnal version, simmer porridge with diced dried apples or pears, cinnamon and a spoonful of real maple syrup, then top with roasted pecans. Think about contrast: a bit of acid, a crunchy element and a fat to carry flavors will make each bite interesting.

For a breakfast with a savory edge, include a pinch of smoked salt and top the porridge with a dollop of ricotta or labneh and a scattering of toasted sunflower seeds. The dried fruit contributes a counterpoint to the savory elements and prevents the bowl from becoming flat. Balancing flavors is less about rules than about listening: taste as you go and add small adjustments until the composition feels right to you.

Practical shopping and pantry tips

Keep a small selection of dried fruit in airtight containers away from heat and light; this extends shelf life and preserves flavor. Buy in modest quantities if you do not use them often, because dried fruit can harden and lose complexity over long storage. For rice, purchase a few varieties that suit different uses: short-grain for creamy porridge, basmati for lighter bowls, and a hearty brown rice for nutty, fiber-rich versions. Label storage containers with purchase dates to avoid mystery jars accumulating at the back of the pantry.

When selecting dried fruit, read labels and choose options with no added sugars or minimal preservatives if possible. Some commercial mixes are convenient but may contain sweeteners or oils that change flavors. For savory-sweet experimentation, pick one or two high-quality fruits and supplement with fresh seasonal produce. The better the raw ingredients, the less effort you need later to coax depth of flavor from the pot.

Final notes on making this dish your own

Rice porridge with dried fruits is forgiving and open to interpretation. Start with a simple base and add one or two accents that excite you—a little orange zest, a spice you love, or a novel nut. Keep notes: record ratios that pleased you, the timing for adding fruit, and which rice varieties gave textures you liked. Over time those notes will become your personal playbook, and you will find yourself improvising confidently to suit mood, season and available ingredients.

Above all, approach the pot with patience. Good porridge rewards gentle attention more than urgent stirring. Let the grains release their starch slowly, allow the dried fruit to hydrate and mingle, and taste toward the finish. In doing so you create a modest but meaningful ritual: a warming bowl that satisfies hunger, stimulates memory and invites simple pleasure. Make one small change each time and you will discover dozens of ways to keep this timeless dish fresh and surprisingly new.

Autumn Comfort in a Bowl: Millet Porridge with Pumpkin to Warm Your Week

There is a particular coziness that arrives when a simple grain and a humble squash meet in a simmering pot. Millet Porridge with Pumpkin is that kind of dish: modest, nourishing and surprisingly versatile. It can be a gentle breakfast, a soothing side or a light supper depending on how you flavor it. In this article I’ll walk you through why these two ingredients make such a good team, how to choose the best components, reliable cooking techniques, and a range of sweet and savory variations. Expect practical tips, a clear recipe to follow, and a few little tricks I’ve picked up after cooking this porridge many times at home.

Why millet and pumpkin belong together

Millet is a small, round grain with a mildly nutty taste and a tender texture when cooked right; pumpkin brings sweetness, moisture and a bright color that lifts the whole pot. Together they create a porridge that balances starch, fiber and natural sugars, which makes each spoonful comforting without being cloying. The grain absorbs the pumpkin’s flavor and color, while the squash adds body so you don’t need a lot of added fat or sweetener to make the dish satisfying. Culinary traditions across Asia and parts of Africa treat millet as a staple porridge base, and adding seasonal produce like pumpkin feels both logical and modern. This combination works whether you aim for a morning bowl that steadies your day or a savory accompaniment to reach for on chilly evenings.

Texture plays a big role in food satisfaction, and millet plus pumpkin hits a pleasant middle ground between creamy porridge and a slightly chewy rice dish. If you prefer a silky porridge you can cook the millet longer and mash some pumpkin into the mix; leave a bit of grain al dente and you get contrast. The neutral profile of millet is also forgiving: it takes well to spices, herbs and toppings without losing its identity. That means you can reinvent the same base as an autumnal sweet treat or a hearty vegetable-forward plate by changing seasonings and garnishes. For many cooks, that flexibility is the real appeal—one pot, many lives.

Nutrition and health benefits

Millet is naturally gluten-free, making it a solid choice for people avoiding wheat, and it provides plant-based protein, B vitamins and trace minerals. Pumpkin contributes vitamin A in the form of beta-carotene, vitamin C and fiber, plus a pleasant dose of hydration because of its water content. Together they form a bowl that is energy-sustaining yet not overly dense, which is why this porridge often appears in lists of healthy breakfasts. Because the flavors are mild, you can control sugar and salt to keep the dish aligned with dietary goals without sacrificing enjoyment.

For people watching blood sugar response, the fiber in both components helps slow digestion, especially if you keep some grain texture and include a source of healthy fat or protein. Adding yogurt, nuts, or a dollop of nut butter turns this bowl into a more balanced meal. If you prefer plant-forward nutrition, stir in some seeds or a splash of fortified plant milk to boost calcium. Below is a compact table highlighting typical nutrients you get from a single serving when made with whole millet and pure pumpkin puree; values are approximate and depend on portion size and specific ingredients.

Nutrient (approx.) Contribution per serving
Calories 250–350 kcal
Carbohydrates 40–55 g, mostly complex carbs
Fiber 4–7 g
Protein 6–10 g (higher with yogurt/nuts)
Vitamin A (beta-carotene) High (from pumpkin)
Fat 2–8 g depending on added fats

Choosing ingredients: grain and squash

Millet Porridge with Pumpkin. Choosing ingredients: grain and squash

Which millet to buy

Millet comes in several forms: hulled (whole) millet, cracked millet and millet flour. For porridge, hulled millet gives the best texture and nutrition because it retains the whole grain. If you want a creamier result more quickly, cracked millet or pre-rinsed pearl millet can speed cooking. Look for fresh bags with a light, slightly sweet aroma; old millet may smell stale or oily and will shorten the shelf life of your porridge. Whole-grain millet benefits from a quick rinse and, optionally, a brief toast in a dry pan to deepen the flavor before you add liquid.

When buying, prefer small packages from reputable vendors if you won’t use it quickly; stored in a cool, dry place or in the refrigerator, millet keeps longer. If you’re exploring gluten-free grains routinely, consider this grain as a pantry staple—its neutral profile makes it useful beyond porridge for salads, pilafs and baking. Finally, consider organic or non-GMO labels if that matters to you; while such certifications don’t change the cooking behavior, they reflect production choices you may prefer.

Picking the right pumpkin

“Pumpkin” covers a range of winter squashes; sugar pumpkin and kuri squash have denser flesh and sweeter notes ideal for porridge. Avoid the giant carving pumpkins—they tend to be watery and bland compared with smaller culinary varieties. If you see labels like “pie pumpkin” or “sugar pumpkin,” those are great choices for texture and flavor. You can use fresh roasted pumpkin, steamed cubes mashed into puree, or canned pumpkin puree; each brings different convenience and flavor intensity.

Fresh pumpkin requires more prep—cutting, seeding and roasting or steaming—but the payoff is a fresher, brighter flavor and more control over texture. Canned puree is the quick route and is perfectly acceptable when time is short; choose versions without added sugar or spices. If you roast a pumpkin, use the caramelized bits to add depth; those slightly browned edges carry a warm, almost toffee-like note that elevates a simple porridge remarkably well.

Basic recipe: a dependable millet and pumpkin porridge

Below is a straightforward recipe that emphasizes technique over tricks. It produces a gently sweet, creamy porridge with a hint of spice, and you can adapt it to be dairy-free, vegan or richer depending on preference. Quantities target two generous servings and scale easily. Read the method through before you start so you can time the pumpkin prep and toasting of the grain if you choose to do it.

Ingredients and brief notes follow. If you like your porridge looser, increase the liquid by 10–20 percent; for thicker texture, reduce it slightly. I prefer to add a small knob of butter or coconut oil at the end to give the surface a glossy finish and to carry spices, but this is optional.

  • 1 cup hulled millet, rinsed
  • 2 cups water (or broth for savory version)
  • 1 cup milk or plant milk, plus extra if desired
  • 1 cup pumpkin puree (fresh or canned)
  • 1–2 tablespoons maple syrup or honey (optional for sweet)
  • 1/2 teaspoon ground cinnamon, pinch of nutmeg
  • Pinch of salt
  • Butter, ghee or neutral oil for finishing (optional)

Method: Start by rinsing the millet under cool water until it runs clear; this removes any dust and helps the grains cook more evenly. Place millet and water in a medium saucepan and bring to a simmer, then reduce heat and cover. Cook for about 15 minutes until the millet begins to absorb the liquid. At that stage stir in the milk and pumpkin, add spices and salt, and continue to simmer gently until the millet is tender and the texture is creamy, generally another 5–10 minutes. Finish with a splash of milk or a spoon of butter, adjust sweetness, and serve warm.

  1. Rinse millet; toast briefly in a dry pan for nuttiness if desired.
  2. Simmer millet in water until most liquid is absorbed.
  3. Add milk and pumpkin puree; stir and simmer until creamy.
  4. Season with salt, sweeten to taste and finish with fat if using.
  5. Top and serve immediately or cool to refrigerate.

Sweet and savory variations to expand the idea

One thing I love about this porridge is how effortlessly it accepts different profiles. For a sweet breakfast, deepen the autumn character with warming spices, dried fruits and crunchy nuts; for a savory bowl, invert the idea entirely—use broth, herbs and roasted vegetables for a comforting side. Both directions showcase millet’s neutrality and pumpkin’s adaptability, letting you rotate flavors across seasons without losing the heart of the dish. Below are several easy variations to try.

Sweet variations

For a breakfast porridge that evokes bakery spices, stir in cinnamon, cardamom and a little vanilla while simmering. Add chopped toasted pecans or walnuts for crunch and a handful of raisins or chopped dates for bursts of sweetness. A drizzle of maple syrup or a spoonful of fruit compote brightens the bowl; if you’re using dairy or plant yogurt, swirl it in just before serving to add tang and creaminess. To make it decadent, fold in a spoon of almond butter or mascarpone; it transforms the texture into something closer to dessert while still being wholesome.

  • Spice mix: cinnamon, cardamom, pinch of ginger
  • Toppings: toasted nuts, seeds, dried fruit, yogurt, honey
  • Accents: citrus zest, a splash of vanilla, a dot of nut butter

Savory variations

For an evening bowl, swap water for low-sodium vegetable or chicken stock and omit sweeteners. Add sautéed shallots, garlic and a bay leaf during cooking, then finish with fresh herbs like parsley or chives. Stir in grated hard cheese or a swirl of olive oil for silkiness, and top with roasted seeds for texture. In this mode, pumpkin functions like a squash puree that enriches but doesn’t dominate, pairing beautifully with legumes or a fried egg on top.

  • Broth instead of water for depth
  • Herbs and aromatics: thyme, sage, garlic
  • Toppings: roasted pumpkin seeds, crispy onions, a soft-cooked egg

Cooking techniques and common pitfalls

Two central techniques determine your success: the way you handle millet at the start, and how you balance liquids as the porridge finishes. Rinsing is simple but important; it removes dust and reduces the chance of a bitter aftertaste in some packages. Toasting the grain briefly in a dry pan before simmering adds a toasty note, but don’t let it burn. When simmering, keep the heat low to prevent the bottom from catching—millet can cling to the pan when the liquid becomes low.

Another common issue is texture: cooks sometimes end up with a gluey porridge if they over-stir or use too much liquid at once. To avoid this, add milk toward the end and stir gently to incorporate; let the millet do most of the softening in barely moving liquid. If you find the porridge is thickening too fast, add a splash of hot milk or water rather than cold, which risks cooling the pot and interrupting the cooking. Finally, remember that the porridge will thicken on standing, so aim for a slightly looser texture if you plan to reheat later.

Serving suggestions and pairings

Serving options depend on whether you’ve prepared the porridge sweet or savory. For breakfast, a scattering of toasted seeds, a drizzle of maple and a smear of yogurt make the bowl visually pleasing and nutritionally rounded. Fresh fruit like sliced banana or poached pears adds acidity and contrast. For savory servings, think in terms of texture: something crunchy, like fried sage leaves or roasted pumpkin seeds, pairs beautifully with the porridge’s softness.

Millet and pumpkin porridge also works as a side to protein-centered mains. A spoonful alongside roasted poultry or a stew soaks up sauces and lends a subtle sweetness that contrasts rich meats. For vegetarian plates, use it as a bed for sautéed mushrooms and wilted greens. It plays well with strong flavors—sharp cheeses or fermented condiments—because the porridge itself is mild and receptive.

Storage, reheating and meal prep

This porridge stores remarkably well, which makes it a reliable meal-prep candidate. Cool it quickly after cooking and transfer into airtight containers; kept in the refrigerator it will stay good for three to four days. Because the mixture firms up as it cools, you may need to add liquid when reheating—water, milk or stock depending on whether the batch is sweet or savory. Reheat gently over low heat, stirring occasionally, or use short bursts in a microwave with a splash of liquid to revive creaminess.

Freezing is possible but not ideal for dairy-heavy versions because texture can change upon thawing. If you plan to freeze, keep portions small and pack in freezer-safe containers. Thaw overnight in the refrigerator and reheat with a little extra liquid. For long-term planning, cook a big pot of plain millet and freeze pumpkin puree separately; combine and finish on the stovetop when you want a fresh bowl with no wasted leftovers.

Substitutions and adaptations for special diets

If you follow a gluten-free diet, millet is naturally suitable; just ensure other ingredients are certified gluten-free when needed. For vegan diets, use plant milk such as oat, almond or soy and replace butter with coconut oil or a neutral vegetable oil. Those watching sodium or sugar can adjust seasoning and sweeteners to taste—pumpkin provides sweetness that often reduces the need for added sugar. For higher-protein needs, stir in Greek yogurt, a scoop of protein powder, or top with roasted chickpeas to make the bowl more sustaining.

People with digestive sensitivities sometimes prefer soaked millet or using cracked grain, which shortens cooking time and can make digestion gentler for some individuals. If you’re experimenting, try the porridge with a small portion and adjust how you prepare the grain; liking the end result often depends on small technique tweaks—water ratio, simmer time and finishing fat all matter.

Flavor pairing ideas and spices

Classic sweet pairings include cinnamon, nutmeg and cardamom, which highlight pumpkin’s warm notes. For a citrus lift, add a bit of orange zest or a spoon of lemon curd on top; the bright contrast elevates the whole bowl. If you want a deeper, more savory profile, smoked paprika and cumin can add a surprising depth without overwhelming the pumpkin. Fresh herbs like thyme or sage are especially good with roasted pumpkin in savory bowls, creating a balance between sweetness and herbal complexity.

Salt is an underrated enhancer in sweet bowls—just a small pinch can sharpen flavors and make the spices sing. When experimenting with spices, add them early if you want infused warmth, or sprinkle at the end for a fresher punch. Bitterness from toasted seeds or browned butter can be an intentional counterpoint, lending complexity that turns an ordinary porridge into something more grown-up.

My tried-and-true tips from home cooking

I make this porridge most often on chilly mornings when the house smells like toasted grain and baked squash. One personal trick I rely on is roasting a tray of pumpkin cubes with olive oil and a pinch of salt, then freezing leftovers in small containers; when I want porridge, I thaw a cube quickly and stir it into simmering millet for a fresher flavor than canned puree. Toasting millet first gives a nutty backbone I prefer, but if time is short I skip that step and still get a lovely bowl. I also keep a jar of toasted pumpkin seeds mixed with warm spices; a handful on top adds crunch and makes the bowl feel finished.

Another small habit: always add a tiny pinch of salt even to sweet versions. It opens up flavor in ways sugar alone cannot and keeps the palate engaged through the bowl. Finally, when serving guests, I make two small topping stations—one sweet and one savory—so each person can customize. That little set-up sparks conversation and makes the meal feel interactive rather than routine.

Pairing this porridge with seasonal menus

During autumn and winter, this millet and pumpkin porridge fits naturally into seasonal menus. Serve it as a first course at a relaxed dinner party, then follow with roast chicken and root vegetables for a warm, cohesive menu. For brunch, pair the porridge with poached eggs and lightly dressed arugula to balance richness and brightness. In a vegetarian meal, place it alongside braised greens and roasted mushrooms; the flavors complement each other without competing.

Because the porridge is adaptable, it can also be a child-friendly dish: reduce strong spices, add a touch of honey or fruit puree and top with sliced banana for a family breakfast. For a more sophisticated adult palate, experiment with a splash of sherry vinegar or a smear of aged cheese on a savory bowl—small acidic notes can lift the sweetness in surprising and delicious ways. The dish’s quiet nature leaves room for companions to shine.

Quick troubleshooting guide

If your porridge turns out bland, check seasoning first—salt and acid bite through sweetness and round flavors. If it’s too thick, stir in hot milk or water a little at a time until the texture softens. If grains are hard, simmer longer on low heat with the lid on so the steam finishes the cooking; adding liquid in small increments prevents splattering and uneven texture. For a gritty mouthfeel, ensure millet was rinsed well before cooking and consider toasting less next time. Burnt flavor usually comes from too-high heat or not enough stirring toward the end, so reduce heat and use a heavy-bottomed pan to prevent hotspots.

When the flavors feel one-dimensional, add a contrasting element: bright citrus zest, a sprinkle of coarse salt, or a crunchy topping. These counterpoints make the bowl interesting without adding more pots or complicated steps. The goal is a balanced bowl that rewards the first and second spoonfuls equally.

Final thoughts and an invitation to experiment

Millet Porridge with Pumpkin is a small ritual that opens a lot of possibilities: modest cooking, nourishing results and room for creativity. Whether you make it as a slow weekend breakfast or a quick weeknight side, the techniques are simple and forgiving. Try different liquids, swap in roasted squash varieties, experiment with toppings and watch how the same basic steps yield distinct bowls. Cooking like this becomes less about following a strict formula and more about learning what you prefer—texture, sweetness, spice balance—and adjusting from there. Invite curiosity into the pot and you’ll find a versatile recipe that serves you through seasons and moods.

Forest Comfort: Buckwheat Porridge with Mushrooms That Feels Like Home

There is something quietly satisfying about a bowl that warms you from the inside out, and when buckwheat meets mushrooms, the effect is almost nostalgic. This dish blends the nutty, almost smoky character of hulled buckwheat with the earthy, savory depth of sautéed fungi, producing a meal that is at once rustic and elegant. Whether you pursue plant-based cooking or simply love hearty grains, the combination offers versatility: it can be breakfast, a main course, or a side that makes guests ask for seconds. In the pages that follow I’ll guide you through why this pairing works, how to choose the best ingredients, step-by-step cooking, smart variations for vegan diets, plus storage and serving tips. Expect practical techniques, flavor-building strategies, and a handful of personal notes from my own kitchen experiments. Let’s get into the pot and learn to coax the best from buckwheat and mushrooms together.

Why buckwheat and mushrooms make such a good match

Buckwheat has a distinctive profile: nutty, slightly bitter, with a firm texture when cooked properly, and it stands up well to bold flavors. Mushrooms, by contrast, contribute an umami backbone and a texture that ranges from silky to meaty depending on the variety and how they’re cooked. When combined, the grain’s chewiness balances the fungi’s succulence, creating mouthfeel contrast that keeps each bite interesting. Beyond texture, both ingredients benefit from the same set of flavor enhancers: garlic, shallot, fresh herbs, a splash of acid, and a finish of butter or olive oil. That shared affinity means you can build layers of flavor without overcomplicating the recipe. In short, buckwheat provides structure while mushrooms bring depth, and together they form a complete, satisfying dish.

There’s also a nutritional synergy that makes this pair attractive for everyday cooking. Buckwheat is not a true cereal grain; it’s a seed, naturally gluten-free, with a robust amino acid profile that complements plant proteins. Mushrooms contribute B vitamins, minerals, and umami compounds that make vegetarian or vegan dishes feel more substantial. For cooks aiming to reduce meat without losing satisfaction, this combination hits key marks: comforting density, savory flavor, and a sense of fullness. Texture, taste, and nutrition all point to why people keep returning to buckwheat and mushrooms when they want a simple yet meaningful meal. You’ll find that with minimal fuss you can create something that feels indulgent and wholesome at once.

Nutritional benefits and why they matter

Buckwheat brings fiber, plant-based protein, and micronutrients like magnesium, manganese, and phosphorus, which support metabolism and cardiovascular health. Its resistant starch and slow-digesting carbohydrates help regulate blood sugar, making porridge a slow-burning source of energy rather than a quick spike. Mushrooms add their own value: B vitamins including riboflavin and niacin, selenium, and compounds that support immune health. While mushrooms are low in calories, their concentrated flavors and textures enhance satiety, so you end up eating less while feeling more satisfied. Together they create meals with balanced macronutrients—complex carbs, a touch of protein, and very little saturated fat—especially when prepared vegan-style with olive oil or plant-based butter. For anyone focused on nutrient density and simplicity, this pairing is a smart choice.

For those following vegan diets, buckwheat porridge with mushrooms is a reliable way to add diversity without relying on processed meat substitutes. Buckwheat’s protein complements legumes and seeds across a day’s meals, and mushrooms deliver umami that often gets lost in plant-forward dishes. If you season well with aromatics like garlic, thyme, smoked paprika, or nutritional yeast, the result comes close to the savory satisfaction many seek in animal-based dishes. Micronutrient-wise, combine this dish with leafy greens or a sprinkle of toasted seeds to round things out, and you’ll have a small, nutrient-rich meal that travels well into lunches. It’s practical, flexible, and genuinely tasty rather than just “healthy.”

Choosing your ingredients

Selecting the right buckwheat

There are two common forms of buckwheat used in cooking: whole groats and kasha, which is roasted groats. Whole groats are pale, delicate, and offer a subtler, nuttier flavor when toasted; kasha has a deeper, toasted character that brings instant warmth to a dish. If you want a porridge with distinct grain integrity and a light flavor, go for hulled whole groats and cook them gently until tender. For a quicker route to a toasty profile and richer color, choose kasha—its pre-roast shortens the time you need to develop flavor. Also consider the texture you prefer: whole groats keep their shape and provide chew, whereas partially crushed groats or coarse buckwheat can produce a creamier porridge. Whatever form you pick, a light rinse will remove dust, and a brief dry toast in the pan opens up the aroma before you add liquid.

Pay attention to freshness: buckwheat can pick up off flavors if stored too long, especially in warm or humid conditions. Buy from stores with good turnover or keep sealed packages in the fridge to prolong shelf life. Organic options are widely available and often preferred because buckwheat farming usually uses fewer inputs, but non-organic choices are fine if you source from reputable producers. For one-pot convenience, look for quick-cooking buckwheat if time is tight, yet remember that faster-cooking varieties will give you a softer final texture. Ultimately the choice of buckwheat should align with the texture and flavor profile you want for your porridge; there’s no single “correct” option, only preferences.

Choosing mushrooms for maximum flavor

Mushrooms vary dramatically in flavor and texture, so choosing the right type is crucial to achieving the taste you want. Cremini and button mushrooms are accessible and have mild, versatile flavors that brown nicely; shiitakes offer a pronounced umami intensity and a meatier chew when sliced; oyster mushrooms have a delicate texture and pleasant, almost sweet notes; porcini or dried wild mushrooms give a woodsy, deep character that elevates a simple porridge into something special. For a home cook, a mix of two varieties often yields the most satisfying result: one for savory depth, another for texture. If you’re using dried mushrooms, hydrate them in warm water and reserve that soaking liquid as flavoring for the porridge—just strain it to remove grit.

Size and cut matter as much as type: slice larger caps thinly to encourage caramelization, while chopping smaller mushrooms into chunky pieces preserves bite. Cook mushrooms slowly to allow the water they release to evaporate and for Maillard browning to occur; this develops flavor beyond simple sauté. Seasoning during the browning process—salt, cracked pepper, and perhaps a touch of soy sauce or tamari—will coax out extra umami. If you’re keeping the dish vegan, finish with a knob of plant-based butter or a drizzle of robust olive oil and a sprinkle of fresh herbs. Carefully chosen and properly browned mushrooms transform the porridge from bland to memorable.

Complementary ingredients and flavor enhancers

Beyond the core duo, a handful of supporting ingredients will lift the porridge without overpowering it. Aromatics like onion, shallot, and garlic form the foundation, while herbs such as thyme, parsley, or chives add freshness. Acid is crucial—a squeeze of lemon juice or a splash of good vinegar at the end brightens the dish and balances richness. For a smoky edge, smoked paprika or a drop of liquid smoke can be used sparingly; nutritional yeast provides cheesy umami for vegan preparations. Nuts or seeds toasted and sprinkled at the end bring crunch and extra protein, and roasted root vegetables can be folded in for seasonal heartiness. Use these elements judiciously; the goal is to enhance the buckwheat and mushrooms, not to mask them.

Basic Buckwheat Porridge with Mushrooms recipe

Ingredients

  • 1 cup hulled buckwheat groats (or kasha for a toasted flavor)
  • 2 to 2 1/2 cups vegetable broth or mushroom soaking liquid
  • 300–400 g mixed mushrooms, cleaned and sliced
  • 1 medium onion or 2 shallots, finely chopped
  • 2 cloves garlic, minced
  • 2 tbsp olive oil or vegan butter
  • 1 tbsp soy sauce or tamari (optional)
  • Fresh thyme or parsley, chopped
  • Salt and black pepper to taste
  • Optional: lemon juice, toasted seeds, nutritional yeast

This ingredient list is intentionally simple to let the core flavors shine, and it suits vegan diets when plant-based fats are used. Measure liquids carefully—buckwheat absorbs differently than rice or oats—so the range given lets you choose texture from fluffy to softer porridge. The optional soy sauce deepens umami without adding meat-based products; use tamari for gluten-free needs. Fresh herbs finish the dish with a lift, so reserve them for the end. If you’re cooking for more people, scale up buckwheat and liquid proportionally and keep an eye on cooking time as larger batches take a bit longer.

Step-by-step cooking method

Begin by rinsing the buckwheat under cold water until the rinse runs clear. If using whole groats, toast them briefly in a dry skillet until they release a warm, nutty scent—this step is optional with kasha because it’s already roasted. Meanwhile, heat olive oil in a heavy-bottomed pan and sweat the chopped onion or shallot until translucent, then add garlic and cook briefly until aromatic; do not let the garlic burn. Add the sliced mushrooms and cook over medium-high heat, stirring occasionally, until they release their moisture and begin to brown; this may take 8–12 minutes depending on mushroom type. Season with a pinch of salt during browning to help draw out moisture and intensify flavor, and if you like, add a tablespoon of soy sauce near the end of the mushroom cook to deepen the savory notes.

While the mushrooms brown, bring the measured broth to a simmer in a separate pot and add the toasted buckwheat. Reduce heat to a gentle simmer and cook, uncovered, until the groats are tender and most of the liquid is absorbed; this typically requires 12–18 minutes for hulled groats, less for quick-cooking types. If the buckwheat seems to dry out before it’s tender, add hot water or broth a splash at a time—the texture should be creamy but not soupy unless you prefer porridge that way. Once the groats are done, fold in the caramelized mushrooms, taste for seasoning, and finish with fresh thyme, a squeeze of lemon, and a drizzle of oil or a small pat of vegan butter. Stir gently, then let the porridge rest for a couple of minutes so flavors meld before serving.

Practical timing and equipment notes

A heavy-bottomed saucepan or small Dutch oven helps maintain steady simmering without scorching the buckwheat. A wide skillet is preferred for mushrooms because it offers more surface area for browning and evaporation. You can cook everything in a single pan if you prefer minimal cleanup: start the mushrooms and aromatics, push to the side, toast the buckwheat briefly, then add liquid and simmer, but keep an eye on stirring so nothing sticks. Total active time is about 30 to 40 minutes from start to finish, making this a reasonable weeknight meal. For larger groups, increase liquids by a half-cup per cup of extra buckwheat and extend simmering time by a few minutes. The method is forgiving as long as you manage heat and pausing to adjust liquid as needed.

Variations and flavor experiments

Buckwheat Porridge with Mushrooms. Variations and flavor experiments

This basic formula is a canvas. Swap herbs, change mushroom types, or introduce bold seasonings to suit moods and seasons. For a creamier texture, stir a spoonful of tahini or cashew cream into the finished porridge; they add richness without dairy. If you crave a smoky accent, a small amount of smoked salt or paprika will shift the profile toward rustic comfort. For autumnal notes, fold in roasted squash or caramelized onions; in spring, toss in fresh greens and ramps if you can find them. Keep the ratios similar and add stronger-flavored elements at the end so they don’t overpower the earthy buckwheat base.

Here is a helpful substitutions table that can guide swaps when pantry items differ or you want to change the dish’s direction:

Ingredient Substitution Effect on Dish
Hulled buckwheat Kasha (roasted buckwheat) Deeper toasted flavor, darker color, slightly firmer texture
Cremini mushrooms Shiitake or porcini (dried) More pronounced umami, woodsy aroma, chewier texture
Olive oil Vegan butter or coconut oil Richer mouthfeel; coconut adds sweetness so use sparingly
Soy sauce Tamari or coconut aminos Gluten-free option; coconut aminos are milder, slightly sweeter

Use this table as a starting point rather than a rulebook. When experimenting, make small tweaks so you can evaluate what each change brings to the final bowl. I often try one new element per batch—maybe smoked paprika or a different mushroom blend—so I can distinguish what I like and keep improvements incremental. That approach protects the core harmony while allowing creative exploration.

Serving suggestions and plating ideas

Simplicity is often the most elegant approach to plating: a generous scoop of porridge in a shallow bowl, mushroom pieces arranged on top, a scattering of fresh herbs, and a final drizzle of oil or a sprinkle of toasted seeds. For a brighter contrast, add a wedge of lemon on the side so diners can tailor acidity to taste. If serving as a main course, accompany the porridge with a crisp salad of seasonal greens dressed lightly in vinaigrette to cut through the earthiness. For brunch, present it alongside roast tomatoes and sautéed spinach, and for a heartier dinner, set it next to roasted root vegetables or braised greens. Use garnishes to signal the dish’s personality: flaky sea salt and cracked pepper for rustic warmth, or microgreens and lemon zest for a fresher vibe.

Consider serving temperature: slightly warm is ideal because both buckwheat and mushrooms preserve texture and flavor that way; piping hot can mask nuances and cool temperatures flatten them. If you plan to serve family-style, keep a pot warm on the stove and offer small bowls of optional additions—hot sauce, toasted nuts, nutritional yeast, and a citrus wedge—so guests can customize. Presentation matters less than the experience of tasting, but a few thoughtful touches make a home-cooked bowl feel cared-for. The goal is that each bite offers balance: nutty grain, savory mushroom, bright herb, and a touch of fat to carry flavors.

Storing, freezing, and reheating

Cooked buckwheat porridge stores well in the fridge for up to 4 days in an airtight container. Because the grain continues to absorb moisture, you’ll often need to loosen the texture when reheating: add a splash of water or broth and stir over low heat until it returns to a pleasant consistency. For freezing, portion into individual containers and leave a little headroom because liquids expand; frozen porridge can last 2 to 3 months. Thawing in the fridge overnight is best, then reheat gently with added liquid to refresh the consistency. Avoid reheating at very high heat in a microwave without stirring, as uneven heat can create hot spots and a rubbery texture.

If mushrooms were cooked into the porridge, they will maintain flavor but lose some of the high-end texture upon freezing, similar to most cooked fungi. If you expect to freeze portions, consider cooking mushrooms separately and adding fresh or quickly reheated mushrooms to the reheated porridge for improved mouthfeel. Another trick: reserve a small batch of caramelized mushrooms and a simple vinaigrette—you can toss them with reheated porridge to recreate brightness and texture. These small steps keep leftovers from becoming dull and enhance the enjoyment of a reheated bowl.

Troubleshooting common issues

If your buckwheat porridge turns out gluey or overly soft, the likely cause is excess liquid or overcooking; next time reduce the liquid slightly and shorten simmer time. Conversely, if the groats remain hard or chalky, they simply need more time and gentle liquid additions; turn the heat down and cover partially to finish cooking without scorching. Mushrooms that steam instead of brown can be overcrowded in the pan—cook in batches or use higher heat and a wide skillet so moisture evaporates quickly and you get good caramelization. If the final dish tastes flat, add a small brightener such as lemon juice, a splash of vinegar, or a pinch of salt to pull flavors into focus. Taste at each step; seasoning early and finishing with acid will keep the porridge lively rather than flat.

For vegan cooks who miss creaminess, a common workaround is a swirl of cashew cream, a spoonful of tahini, or a drizzle of rich olive oil right before serving. If you’re concerned about sodium, reduce added salt and use a low-sodium broth, then compensate with umami from mushrooms, a little soy sauce, and aromatic herbs. For texture-lovers who want more bite, stir in toasted seeds or nuts at the end—pumpkin seeds and chopped hazelnuts are personal favorites. Small adjustments solve most problems, and once you’ve made the porridge a few times you’ll instinctively know how to nudge it to your ideal balance.

Context, traditions, and a personal note

Buckwheat has deep roots in many cuisines from Eastern Europe to Japan, where it appears as kasha and soba respectively, and mushrooms are a pantry staple in countless traditions. The pairing feels timeless because it taps into simple, local ingredients that sustain and comfort people across seasons. In my own kitchen, this dish became a ritual during late autumn when farmers’ markets brimmed with mushrooms and I wanted something that smelled like a wood-fired kitchen without much fuss. I remember one chilly evening inviting a neighbor over, serving the porridge with a blunt loaf of rye and watching how a simple bowl seemed to encourage long conversation—food doing what it should, creating warmth and connection.

That memory influences how I cook it now: generous with herbs, restrained with salt, and always with an eye toward texture. I started adding a squeeze of lemon because on a dreary day the brightness felt as necessary as heat. Over time I learned to respect the grain’s rhythm—its simmer, rest, and gentle fluffing—and to coax the mushrooms until they sing rather than simply soften. Cooking this porridge is both practical and meditative; it rewards patience, and it’s forgiving to improvisation. That makes it perfect for anyone who wants an easy, nourishing dish that can be adapted to pantry or mood.

Pairings and meal planning ideas

Think of this porridge as a foundation rather than a one-off meal, and it becomes an element in many different menus. For breakfast, top with roasted cherry tomatoes and a scattering of microgreens to brighten the plate; for a lunch bowl, add pickled vegetables and a scoop of hummus for contrast. At dinner, serve alongside roasted meat substitutes for vegan guests or with braised greens and a simple grain salad for variety. It also plays well as part of a shared spread: small bowls of condiments, smoked paprika, and toasted seeds invite diners to personalize their portions. Planning meals around this dish saves time: cook a large batch of buckwheat at the start of the week, and transform it into breakfasts, lunches, or quick dinners by varying toppings.

For a seasonal menu, pair the porridge with spring peas and mint in April, or with roasted beets and walnut dukkah in November. Wine pairings are flexible: an earthy red like pinot noir complements the mushrooms, while a crisp white such as unoaked sauvignon blanc can refresh the palate between bites. For non-alcoholic options, try a tart kombucha or a sparkling herbal infusion that counters the dish’s umami depth. The key is balance—match the porridge with elements that add acidity, crunch, or sweetness to create complete, memorable meals.

Bringing it to the table

Making buckwheat porridge with mushrooms is less about following a rigid formula and more about learning the personalities of your ingredients and responding to them. Respect the grain’s need for gentle simmering and the mushrooms’ demand for space to brown, season deliberately, and finish with something bright. Keep a small toolkit of flavor enhancers—acid, oil, fresh herbs, and toasted seeds—and use them to adjust rather than overwhelm. The result is a dish that can be humble or refined according to your intention, and it travels well from weekday simplicity to special-occasion warmth.

Try the basic recipe, then make a deliberate change each time you cook it: swap in a different mushroom, add a contrasting herb, or test a new fat. You’ll build confidence quickly, and before long the process will feel intuitive. Most importantly, serve it with curiosity and invite others to taste—good cooking is a conversation, and this porridge gives you plenty to talk about. When a humble bowl can spark warmth, nutrition, and pleasure, you know you have something worth cooking again and again.