Archive: 31 August 2025

Hearty Winter Chili: A Bowl That Warms Beyond the Soup Spoon

There are dishes that simply fill the stomach, and then there are meals that wrap around you like a worn wool blanket on a January evening. This Hearty Winter Chili belongs to the second kind. It’s thick, aromatic, and built to stand up to frosty sidewalks and late-night work shifts. In the pages that follow I’ll walk you through why this pot of food works so well in cold months, how to assemble layers of flavor, and ways to make it your own whether you prefer beef, beans, or a leaner protein. Expect practical technique, a few personal notes from my own winters in a drafty kitchen, and clear steps so you end up with a deeply flavored, reliably comforting bowl every time.

Why This Chili Feels Like Winter in a Bowl
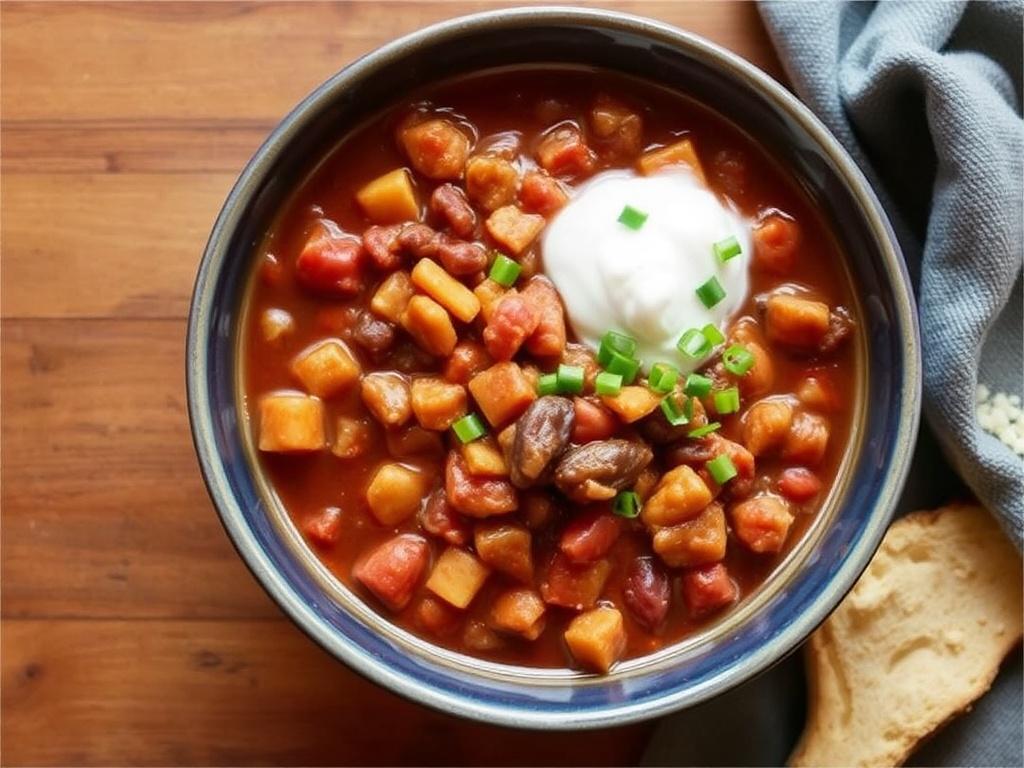
Hearty Winter Chili. Why This Chili Feels Like Winter in a Bowl

Winter cooking calls for weight and fragrance: something that carries heat, slow-cooked depth, and a hint of nostalgia. A good chili delivers on all three by concentrating savory and smoky notes while softening the beans and beef into melt-in-your-mouth textures. The dish’s body comes from the interaction of long-simmered tomatoes, gelatinized meat juices, and softened legumes; together they make a thick, spoonable stew rather than a thin soup. Aromatics—onions, garlic, toasted spices—release volatiles that feel indulgent on cold evenings, and the final hit of acid or chocolate balances sweetness from carrots or caramelized onions. In short, this chili fills both the appetite and the senses, which is exactly what winter calls for.

Core Ingredients and Why Each Matters

Every ingredient in this recipe has a role beyond flavor: it contributes texture, mouthfeel, or structure. Coarsely ground beef gives body and a savory backbone; beans add creaminess and bite; tomatoes supply acidity and body; spices create warmth, and aromatics set the first impression. Choose a chuck roast for grinding or a 80/20 mince if you want richer mouthfeel; leaner cuts need extra fat or olive oil to avoid dried-out meat. For beans, I prefer a mix—pinto for creaminess, kidney for shape—because the contrast keeps each spoonful interesting. Good canned tomatoes are worth the small splurge: their concentrated acidity and sweetness carry the whole pot.

Shopping List: Essentials and Nice-to-Haves

Keep your pantry stocked with a handful of reliable items so you can pull this chili together on short notice. Essential: dried or canned beans, ground beef, canned tomatoes, onion, garlic, beef stock, chili powder, cumin, and salt. Nice-to-have: smoked paprika, dark chocolate (70% cocoa), a shot of espresso or strong coffee, cornstarch for thickening, and pickled jalapeños for bright heat. Fresh cilantro and lime make excellent finishing touches, but a good shredded cheddar and sour cream will please more people at the table. Buy spices in small quantities; freshness matters more than a branded label.

The Step-by-Step Recipe (Practical, Not Fussy)

Start with mise en place: chop the onions, mince the garlic, measure spices, and open cans. Heat a heavy-bottomed pot over medium-high heat and add a tablespoon of oil. Brown the beef in batches so it sears instead of stews; this creates Maillard flavors that no spice can replace. Remove the browned meat, sweat the onions until soft, and add garlic and spices to toast them briefly; this bloom brings sharper, more complex flavor from the powdered spices. Return the beef to the pot, add tomatoes, stock, and beans, then simmer gently until everything comes together and the flavors meld into a cohesive whole.

Browning Meat: The One Trick That Changes Everything

Do not crowd the pan when you brown beef. Crowding lowers surface temperature and causes steaming, which prevents the savory crust you want. Work in small batches, spreading meat into a single layer and letting it sit until a deep, dark crust forms before stirring. Use a wooden spoon to scrape the brown bits from the bottom of the pot and deglaze with a splash of stock, beer, or coffee; those browned bits are condensed flavor in microfilm. If fat accumulates, you can tilt the pan and spoon some off, but keep enough to carry the aromatics and spices. That crisp, roasted flavor is the backbone of any memorable chili.

Choosing and Preparing Beans

Dried beans require planning but reward you with superior texture and flavor. Soak overnight for even cooking and reduce gas-producing oligosaccharides, then simmer gently until tender but not falling apart. Canned beans are an excellent shortcut—rinse them to remove excess sodium and canning liquid; they’ll hold better in the pot and absorb the chili’s juices. If you combine dried and canned, add the canned beans later so they don’t disintegrate into the broth. For creamier results, mash a portion of the cooked beans against the pot wall and stir them back in; this thickens without relying on thickeners.

Layering Flavor: Spices, Heat, and Depth

Building flavor in chili is cumulative. Start with aromatic vegetables, follow with toasted spices, and finish with components that tweak acid, salt, and umami. Chili powder and cumin are the core; smoked paprika adds warmth, and a pinch of cinnamon or a square of dark chocolate can anchor the sweetness. A small shot of strong coffee or brewed espresso deepens roastiness without making the bowl taste like a café. Salt goes in stages—some while cooking, then adjust at the end—because reductions will concentrate brine. Taste often but sparingly; you want to learn how each ingredient shifts the profile.

Controlling Heat: How to Make Chili Mild or Spicy

Heat management is about layers rather than a single choice. Use mild ancho powder for background warmth, add jalapeños or serranos for fresh heat, and reserve a concentrated chili paste or cayenne to dial up intensity near serving. If the pot becomes too piquant, dairy like sour cream or plain yogurt will soothe the mouth, while a squeeze of lime brightens and balances. Seeds and membranes contain the most capsaicin; remove them if you want less burn. Remember, heat mellows with time, so a chili that bites on day one may feel more balanced after a rest in the fridge.

Variations to Suit Different Diets and Moods

One of the strengths of this recipe is its adaptability. Swap beef for turkey or shredded chicken for a lighter profile that still carries spices well. For a vegetarian route, use mushrooms and lentils with extra umami from miso or soy to mimic meatiness. Try a white chili with chicken, white beans, and green chiles when you crave brightness instead of deep red richness. Another variation uses chunks of short rib for an extravagantly tender stew; the long braise dissolves collagen into silky goodness. Each change shifts texture and taste but preserves the comfort at the dish’s core.

My Winter Experiment: A Crowd-Pleasing Twist

One January I hosted a neighborhood soup swap during a snowstorm and made a pot of chili using half ground beef and half shredded brisket saved from a weekend barbecue. The brisket brought a smoky echo and soft ribbons of fat that dissolved into the broth, while the fresh beef supplied the essential meat granules. I added a single square of dark chocolate and a splash of strong coffee at the end; people asked for the recipe and came back for seconds. That night taught me that combining textures and cooking techniques—grilling then simmering—creates a bowl that feels both rustic and composed.

Serving and Toppings: Small Things That Elevate

Toppings change the conversation at the table. Basic options—shredded cheddar, chopped green onions, a dollop of sour cream—soften heat and add contrast. Toasted pepitas or crushed tortilla chips introduce crunch against the chili’s dense body, and pickled red onions supply a bright, acidic note that cuts richness. Serve with cornbread, rice, or a hearty rye to sop up juices. For a more composed meal, offer avocado slices and a crisp green salad so the palate alternates between richness and freshness.

Pairings: Drinks and Side Dishes

Pairing chili can be as simple as matching weight and contrast. A malty amber ale or a porter complements the roasted flavors of beef and smoked spice. If you prefer wine, look for fruity reds with soft tannins, such as Zinfandel or a ripe Tempranillo. Non-alcoholic options include a tart kombucha or a cold ginger beer which cuts fat and refreshes the palate. Side dishes should offer textural contrast: a crisp slaw, creamy polenta, or buttered corn all work well. Think of the bowl as the anchor and sides as punctuation marks that keep each bite lively.

Make-Ahead, Cooling, and Freezing: Practicalities for Busy Cooks

Chili is forgiving and benefits from time: flavors integrate and heat mellows after a day. Cool it quickly by transferring to shallow containers and refrigerate within two hours. Reheat gently on the stovetop with a splash of water or stock to loosen the sauce. For freezing, portion into airtight containers so you can thaw only what you need; chili freezes and reheats very well because its structure is stable. Here’s a compact reference for storage times so you don’t waste effort or food:

Storage Method Time at Recommended Temperature Notes
Refrigerator (≤4°C) 3–4 days Keep in shallow containers; reheat thoroughly to 74°C
Freezer (≤-18°C) 3 months Label with date; thaw in fridge overnight
Vacuum-sealed 6–9 months Best quality retained; freeze flat for space saving

Scaling Up for a Crowd Without Losing Quality

To feed a group, multiply ingredients proportionally but keep an eye on pot size and simmer time. Larger volumes need longer simmering to meld, and evaporation will be slower, so adjust final thickness by reducing uncovered or stirring in a mashed bean slurry. If cooking in a single large vessel, maintain even heat by stirring more frequently and keeping the simmer gentle to avoid scorching. Alternatively, divide the work across two pots and combine near the end for consistent texture. And if you plan to serve from chafing dishes or slow cookers, keep the temperature safe and stir occasionally to maintain an even consistency.

Presentation Tips for Casual or Formal Serving

For casual gatherings set out a toppings bar with bowls of grated cheese, chopped cilantro, sliced jalapeños, lime wedges, and crushed chips. For a polished dinner, ladle portions into warmed bowls, place a quenelle of sour cream in the center, sprinkle microgreens, and finish with a drizzle of chili oil. Warm plates keep chili from cooling too fast and encourage guests to savor each spoonful. Small ramekins of cornbread or sourdough rounds make the presentation homey without feeling rustic to the point of sloppiness. Serving style shapes the mood as much as the recipe itself.

Nutrition and Sensible Swaps

Chili can be hearty without being heavy if you make intentional swaps. Use leaner beef, or substitute ground turkey to cut saturated fat; lean meats still develop plenty of flavor when seared properly. Increase the ratio of beans to meat to add fiber and plant protein; beans also help with satiety and cost-effectiveness. Reduce sodium by choosing no-salt-added canned tomatoes and rinsed beans, then season at the end for control. For extra vegetables, add diced carrots, bell peppers, or sweet potato; they add natural sweetness and nutritional balance. These tweaks keep the dish comforting while aligning with healthier eating patterns.

Allergens and Accommodations

Chili is adaptable to common dietary restrictions. For gluten-free cooking, use gluten-free stock and check spice blends for hidden wheat. Dairy can be omitted or replaced with coconut yogurt if needed; toppings can include dairy-free cheeses. For low-FODMAP diets, reduce onion and garlic and use infused oils to capture flavor without the oligosaccharides. Label dishes clearly when serving a crowd and keep potential allergens like nuts or dairy separate from communal bowls. Thoughtful accommodations mean more people enjoy the meal comfortably.

Final Thoughts on Building Your Signature Pot

Making an exceptional winter chili is a practice in layering, patience, and small adjustments. Start simple, then make notes about what you liked and what you’d change: more heat, less acid, extra smoke. Over time you’ll develop a personal template—maybe you’ll always include coffee, or never skip a bay leaf—and that template becomes your signature. I recommend cooking a few times with the same basic method but different proteins or beans to see what combinations speak to you. The best chili is the one you keep returning to, tweaking in small ways until it feels inevitable.

A Parting Note from My Kitchen

On a particularly icy evening I once delivered a pot of chili to an elderly neighbor who couldn’t leave the house. The bowl wasn’t fancy, but the warmth and simple, steady flavors made her eyes brighten in a way I didn’t expect. That memory is why I return to this recipe each winter: it’s food that does more than satisfy hunger. It creates comfort, offers a practical solution for feeding many with minimal fuss, and carries a kind of quiet generosity. Keep this recipe in your rotation; it will serve you well on nights when you need something both honest and comforting.

Golden Comfort: The Art and Heart Behind a Perfect Chicken and Rice Casserole

This dish lives somewhere between nostalgia and practicality, the kind of meal that fills a house with smell before footsteps have finished reaching the kitchen. A Chicken and Rice Casserole can be humble or elevated, simple or layered with flavors, but its essence stays the same: tender meat, soft grains, and a cozy binding that pulls everything together. In the following pages I will walk you through history, techniques, variations, troubleshooting and little secrets I have picked up over years of cooking for family, friends and late-night guests. Expect practical recipes, thoughtful tips on texture and flavor, and a few personal notes that might help you make the bake your own. This is a working guide, meant to be read with an oven mitt at hand and a willingness to experiment.

Where this casserole comes from and why it resonates

The idea of combining cooked poultry with rice and a binding element goes back centuries across many cultures: think stews and pilafs, layered casseroles and simple bakes. In American kitchens the casserole evolved as a practical response to busy households, preserving leftover chicken and turning pantry rice into a full meal with minimal fuss. Its resonance comes from texture contrast — the softness of rice, the bite of chicken and the golden top that forms in the oven — and from its flexibility: it accepts whatever vegetables, herbs and dairy you have on hand. Casseroles became staples in mid-20th century home cooking because they could be prepared ahead and stretched to feed many. That adaptability is why the dish still locks into family routines today; it feeds hunger and memory at once.

Another reason this dish persists is emotional: casseroles symbolize care. Bringing a warm dish to someone is practical help and a comfort gesture, and a chicken-and-rice bake fits both roles. On a more technical level, the interaction between starch in rice and a liquid binder creates a creamy structure when baked, which contrasts nicely with roasted or shredded chicken. Regional differences matter too: southern-style bakes favor cream-of-soup bases and cheddar, Mediterranean versions introduce olives and lemon, while Asian-inspired takes rely on soy, sesame oil and aromatics. So when you choose a direction, you are joining a long tradition of turning basic ingredients into something reassuring.

Essential ingredients and what each one does

At its simplest the casserole needs three things: chicken, rice and a binder to bring the components together into a sliceable or scoopable dish. Chicken provides protein and flavor depth — depending on whether you use dark meat, white meat or a mix, the result will differ in juiciness and richness. Rice acts as both starch and texture engine: long-grain varieties maintain separation while short-grain produce creamier results. The binder, which might be cream, broth, beaten eggs or a sauce, controls moisture and sets the final structure. Vegetables, cheese and aromatics act as modifiers, shifting the profile from homey and cheesy to bright and herbaceous.

To make this practical, think of ingredients in functional terms: protein for substance, grain for body, liquid for cohesion and fat for mouthfeel. Fresh herbs and acid add brightness and cut through richness while aromatics such as garlic and onion build the savory base. A small amount of acid — lemon juice, vinegar, or even a splash of wine — can wake up the entire casserole, especially if it leans heavily on dairy. Salt should be layered: season the chicken, the rice, and the binding liquid so the finished casserole tastes balanced. Below is a compact table that clarifies typical ingredients and sensible swaps when you need them.

Ingredient Primary Role Common Substitutes
Chicken (breast or thigh) Protein, flavor base Turkey, cooked beans for vegetarian option
Rice (long or short grain) Texture, starch backbone Quinoa, farro, cauliflower rice (lower-carb)
Broth or cream Moisture, binding and richness Milk plus a bit of roux, coconut milk
Vegetables and aromatics Flavor, texture contrast Frozen mixes, sautéed greens
Cheese and butter Mouthfeel, browning Plant-based cheeses, oil-based finishes

Choosing the right rice: grain matters more than you think

Picking rice is not just a pantry decision; it determines the final mouthfeel. Long-grain rice, such as jasmine or basmati, tends to stay distinct and provides a lighter casserole that is less likely to become gluey. Short-grain rice, like arborio, absorbs liquid quickly and gives a creamier, risotto-like body. Parboiled rice holds shape under prolonged baking and is forgiving when made ahead. If you plan to assemble the casserole and bake immediately, slightly undercooked stovetop rice works well because it can finish with the chicken and liquid during baking.

Pre-cooking rice can be a time-saver, especially for high-volume cooking, but beware of excess starch clumping. Rinsing long-grain rice until water runs clear removes surface starch and helps maintain separate grains. When using instant or minute rice, reduce excess liquid since these varieties absorb differently; follow packaging but also test in a small portion first. For gluten-free versions or more fiber, substitute quinoa or a mixed-grain blend, but adjust liquid ratios and baking time because these grains behave differently when baking. In short, grain choice shapes structure, so match the rice to the texture you want.

Flavor architecture: building layers that sing together

Good flavor architecture starts with a foundation and builds upward: aromatics, then seasoning, followed by complementary accents. Begin with cooked chicken that’s been seasoned and perhaps roasted for flavor concentration. Sauté onions and garlic to create the savory base, then introduce vegetables and herbs that match your target cuisine. If using dairy, add it later to prevent splitting, and finish with acid and fresh herbs right before serving to preserve brightness. Think of the casserole as a small orchestra: every instrument should have a clear part without overcrowding the melody.

Balancing richness is essential. If the binder is heavy, like cream or cream-of-soup, counter with a tangy cheese or a splash of lemon. If the dish is leaner, with broth and minimal dairy, enrich with butter, roasted nuts or a crisp cheese topping. Textural contrast helps the palate stay engaged, so add something crunchy — toasted breadcrumbs, fried shallots or a scattering of chopped parsley — when plating. Taste as you go; small adjustments to salt, pepper and acid often resolve what initially feels flat. Once you understand these principles, you can pivot the basic formula toward Italian, Mexican, Asian or any regional profile you prefer.

Classic recipe: a reliable chicken-rice bake

Below is a dependable recipe that works for weeknights and small gatherings. It strikes a balance between accessibility and flavor, and it allows straightforward substitutions if you need to scale, make it lighter or adapt to what’s in the refrigerator. Read through once before starting to make sure your timings line up, especially if you want to poach the chicken rather than using roasted leftovers. Assemble everything before bringing heat into play; this helps the process move smoothly and avoids last-minute improvisation that can lead to uneven cooking.

  • Ingredients: 2 cups cooked rice, 2 cups cooked shredded chicken, 1 medium onion diced, 2 cloves garlic minced, 1 1/2 cups mixed vegetables (frozen peas, carrots or fresh sautéed mushrooms), 1 1/2 to 2 cups chicken broth, 1 cup grated cheddar or gruyere, 1/2 cup sour cream or Greek yogurt, 2 tablespoons butter, 1 tablespoon olive oil, salt and pepper to taste, chopped parsley.

Method overview: Preheat the oven to 180°C (350°F). Sauté onion and garlic in butter and olive oil until translucent then stir in vegetables and cook briefly. Combine the cooked rice and shredded chicken in a large bowl, fold in the sautéed mixture, add broth, sour cream and most of the cheese, seasoning carefully. Transfer to a buttered baking dish, sprinkle remaining cheese and a few buttered breadcrumbs on top, then bake for 25 to 30 minutes until bubbling and golden. Let rest for 10 minutes before serving so the casserole sets and becomes easier to slice; serve with chopped parsley for freshness.

Advanced technique: achieving ideal moisture and browning

Many home cooks face two common problems: a casserole that’s either too watery or too dry. The fix is in measuring and timing rather than intuition alone. Start with the rice texture you prefer and estimate liquid by type: creamy binders require less broth than a purely broth-based casserole. If using raw rice, follow stovetop instructions for water absorption and account for extra liquid released by vegetables and thawed frozen ingredients. A little extra liquid is acceptable because the rice continues to absorb during a brief resting period after baking.

Browning makes a difference to both flavor and appearance. For a crustier top, broil for the last two to three minutes while watching closely to avoid burning. Using a mix of cheeses encourages browning and depth; a sharper cheese will combat heaviness with tang. For the underside, a cast-iron or enamel baking dish can produce pleasing caramelization, but remember to use non-stick techniques or butter the dish well. Lastly, if you prefer a creamy interior and a golden top, remove the lid for the last part of baking to evaporate excess steam.

Variations around the world: how to pivot the dish

This casserole is a chameleon: swap a few ingredients and you move between cuisines. A Mediterranean version introduces sun-dried tomatoes, olives, feta and oregano; an Asian-inspired bake uses ginger, soy, sesame oil and green onions; Mexican flavors appear with roasted corn, black beans, cumin, and a topping of queso fresco. Each approach changes both technique and balance of liquids, so adjust broth and dairy accordingly. Spices and acid determine the personality, while the basic method stays constant: combine, bind, bake.

  • Southern Comfort: cream of mushroom soup, cheddar, green beans
  • Mediterranean: lemon zest, artichokes, feta, oregano
  • Asian: coconut milk, ginger, soy, cilantro
  • Mexican: salsa, cumin, corn, Monterey Jack
  • Vegetarian swap: chickpeas or jackfruit, vegetable broth, cheddar alternative

When creating a variation, always think in layers: primary protein (or substitute), complementary vegetables, binder choice, and finishing accents. Some cuisines demand acidic balance — Mexican with lime, Mediterranean with lemon — while others depend on toasted aromatics and umami-rich condiments. Also consider heat levels and textural expectations; a Mexican-style bake might welcome a crunchy crushed tortilla topping whereas an Italian take benefits from a crisp Parmigiano breadcrumb crust. Allow these small changes to guide your shopping list next time you plan a themed dinner.

Make-ahead, freezing and meal prep strategies

Chicken and Rice Casserole. Make-ahead, freezing and meal prep strategies

One of the strongest arguments for this dish is its suitability for make-ahead cooking. Assemble the casserole up to the point of baking, cover tightly and refrigerate for 24 to 48 hours. If you plan to freeze, assemble in a freezer-safe dish and freeze before baking; thaw in the refrigerator overnight before finishing in the oven. When reheating, add a splash of broth to revive moisture, cover with foil for the first part of reheating, and uncover toward the end to re-crisp the topping. These strategies keep weeknight dinners efficient without sacrificing texture.

For bulk meal prep, consider portioning into individual ramekins before freezing; single servings reheat more evenly and are useful for packed lunches. Label containers clearly with cooking instructions and date; frozen casseroles usually keep well for 2 to 3 months. If you are freezing leftovers, avoid adding fresh crunchy toppings like herbs or breadcrumbs until after reheating to preserve texture. With practice you can have a rotation of casserole flavors ready to deploy, saving time and stress on busy days.

Serving ideas and complementary sides

A chicken-rice bake pairs well with simple, bright sides that provide contrast both in texture and acidity. A crisp green salad with a lemon vinaigrette cuts through richness, while roasted vegetables add a deeper, caramelized note. Pickles or a quick slaw can introduce acidity and crunch, refreshing the palate between bites of creamy casserole. Bread is optional; if the bake is rich, a small slice of rustic bread or a soft roll can be welcome, but try to avoid too many starchy sides that compete with the rice.

For beverages, light whites, dry rosé or a medium-bodied red often work, depending on the casserole’s seasoning profile. For an herb-laced Mediterranean version, a crisp Sauvignon Blanc complements the citrus and feta; for a southern-cheesy bake, an amber beer or a fruity red can stand up to the richness. Serving temperature matters: let the dish rest so steam settles and flavors meld; an overly hot casserole can taste flat because the heat suppresses subtle aromatics. Presentation is simple — garnish with fresh herbs and perhaps a wedge of lemon for visual brightness.

Troubleshooting common problems

If your casserole turns out watery, it may be because the rice was undercooked before assembling or because frozen vegetables released excess water. Partially cook rice and sauté vegetables well to reduce moisture. Conversely, if the dish is dry and grainy, you probably used too little liquid or overbaked; rescue it with a ladle of warm broth and a brief cover-and-rest period. Timing matters: check midway through baking if you’re trying a new rice or substitution so you can adjust rather than discover issues at the table.

Flavor imbalances are another frequent concern. If a bake tastes flat, add acid such as lemon juice or a touch of vinegar, and a pinch of salt can unlock hidden flavors. If it is too salty, introduce a mild starchy element like plain cooked rice stirred in after baking or a dollop of unsweetened yogurt on top to soften the saltiness. For texture problems where chicken is dry, use dark meat next time or incorporate shredded roasted chicken tossed with a little olive oil before adding to the rice; fat carries flavor and keeps the protein tender. Keep notes on adjustments so you refine the method with each attempt.

Health-conscious adaptations

You can make this casserole lighter without losing satisfaction. Swap half-and-half or cream for low-fat milk plus a tablespoon of cornstarch to emulate thickness, or use Greek yogurt stirred in at the end for creaminess and protein. Choose brown rice or a mixed grain blend for more fiber and a nuttier profile; remember that these grains may need longer cooking times and more liquid. Reduce sodium by making your own chicken stock and by limiting processed soup bases, and add more vegetables to increase volume while lowering calories per serving.

For plant-forward diets, replace chicken with baked tofu, tempeh or pulses such as white beans. The method stays similar: provide a savory searing step to develop Maillard flavor on the protein, and use vegetable broth with umami boosters like miso or nutritional yeast to deepen taste. These swaps allow you to tailor the casserole to dietary restrictions while keeping its satisfying structure intact.

My kitchen lessons: simple things that changed my bakes

Over years of testing I learned that small tweaks yield outsized improvements. For example, using a combination of shredded leftover roast chicken and a few quick-seared thigh pieces adds both texture and concentrated flavor. Toasting rice briefly in butter or oil before adding liquid imparts a subtle nutty note that elevates the whole dish. Another habit I adopted is folding in a handful of grated cheese into the warm mixture rather than placing it all on top; this creates pockets of melted richness throughout instead of a single cheesy skin on the surface.

I also learned the value of resting time: even a ten-minute wait after baking dramatically improves sliceability and flavor harmony because the starches finish their work and the ingredients settle. Once, after serving a too-wet casserole to a small crowd, I began pre-testing assembly by spooning a small portion into a ramekin and baking it briefly — a quick trial that shows moisture and seasoning balance without committing the whole pan. These are practical habits any cook can adopt to make consistent, satisfying casseroles.

Scaling up for a crowd and presentation tips

When cooking for a larger group, scale ingredients linearly but pay attention to baking depth and time; too deep a dish will bake unevenly. Use multiple pans for more reliable results rather than one oversized, deep vessel. If you must use a large casserole, increase oven time modestly and tent with foil to prevent excessive browning while the center finishes cooking. For buffet-style serving, consider baking in disposable pans with lids for easy transport, but add fresh herbs and maybe a drizzle of olive oil at the venue to revive the dish before serving.

Presentation matters even for humble fare. Scatter microgreens or finely chopped scallions over the top, or set out small bowls of pickled jalapeños, lemon wedges, or chili oil for guests to personalize their portions. If you expect leftovers, slicing into square portions and briefly pan-frying slices in butter creates attractive golden edges and makes the dish feel freshly cooked. These small gestures turn a practical meal into something memorable.

Cooking a chicken-and-rice bake is both art and management: you control timing, textures and flavors while adapting to constraints like time, ingredients and appetite. The techniques here give you a framework to innovate confidently, whether you’re making a quick weeknight dinner or preparing several pans for a family gathering. Try a couple of variations, keep notes about what worked, and over time you will instinctively reach for the right grain, liquid and final flourish every time. The goal is a warm, reliable dish that sings at the table and leaves people satisfied.

Slow-Cooked Comfort: Lamb Stew with Root Vegetables to Warm Any Evening

There is a particular kind of comfort that comes from a pot simmering on the stove, the house filling with the scent of roasted meat and sweet earth from the roots. This recipe, centered on tender lamb and an assortment of root vegetables, delivers both depth and simplicity—flavors that feel like shelter on a blustery day. I will guide you through choosing ingredients, building layers of flavor, and techniques that turn good components into a memorable stew. Along the way I’ll share practical tips, a detailed recipe, and a few variations for dietary needs or equipment constraints. The aim is not just to give instructions, but to help you feel confident enough to improvise when inspiration strikes in your own kitchen.

Why lamb and root vegetables form a natural pairing

Lamb has a richness and slightly grassy note that stands up to long, slow cooking and benefits from bold aromatic support. Root vegetables—carrots, parsnips, turnips, rutabagas, and celeriac among them—bring sweetness, texture and body that develop and concentrate during braising. Together they balance one another: the meat provides savory depth while the roots add starch and subtle sugar, creating a stew with both heft and sweetness. This combination works across seasons because the preserved sweetness of roots echoes summer produce in a comforting winter form. When simmered low and slow, the fibers of the lamb loosen and the roots collapse into a silky complement that feels thoughtful but straightforward.

Beyond flavor balance, there is a practical harmony to this pairing: both lamb and roots improve with time and heat. Tougher cuts of lamb reward patient cooking; their connective tissues melt into gelatin that thickens the broth and coats the palate. Root vegetables release pectin and natural sugars that round the dish without needing excessive thickeners or sweeteners. The result is a stew that is intensely flavorful while feeling honest and unpretentious, ideal for a family dinner or a small gathering where the food should comfort rather than impress with flash. This kind of dish encourages leisurely eating and conversation, the kind of meal that slows the household down in the best way.

Choosing the right cut of lamb

Not all lamb is equal when it comes to stewing; this is where the cooking method dictates the cut. Shoulder, neck, and shank are the classic choices because they contain collagen and connective tissue that break down with sustained heat, producing tender meat and a rich, velvety liquid. These cuts are typically more economical than loin or rack, so you get superior texture and depth without stretching the budget. If you can, buy bone-in pieces: the bone adds flavor and mouthfeel while also helping to carry the stew’s savory identity. When trimming, remove excessive surface fat but keep enough fat to render slowly and enrich the base; a little fat is there to do useful work during cooking.

When shopping, look for meat with a fresh, slightly sweet smell and a rosy-pink color; avoid cuts that appear dull or have an off odor. Ask your butcher for stewing lamb if you are unsure, and specify whether you prefer larger chunks or smaller cubes for a particular mouthfeel. If you choose frozen lamb, thaw it in the refrigerator a day before cooking and pat it dry thoroughly before searing. Drying the surface helps with browning, which is a crucial step in flavor development. Good searing transforms the stew by adding Maillard complexity that no amount of seasoning can replicate later.

Selecting and preparing root vegetables

Root vegetables are the backbone of this stew, both visually and texturally, so selection matters. Choose firm roots without bruises or soft spots; inspect carrots for straight, crisp bodies and parsnips for smooth skin. For variety and contrast, combine at least three kinds of roots—carrots for sweetness, parsnips for anise-like depth, and turnips or rutabagas for a gentle bite. Celeriac offers an aromatic, celery-like earthy note, and adding small potatoes helps bind and thicken the stew while keeping some pieces intact. Aim to cut the vegetables into consistent sizes so they cook evenly; too small and they disintegrate, too large and they remain underdone compared with the lamb.

Peeling is often a matter of preference. I usually peel parsnips and celeriac because their skins can be bitter, but I leave the skins on robust new potatoes and well-scrubbed carrots for additional texture and color. Acidulated water—water with a splash of lemon or vinegar—keeps lighter roots from oxidizing while you prep. When it comes to layering into the pot, add denser roots earlier in the braise so they soften fully, saving tender items for the final part of cooking. This staging helps maintain individual textures and prevents the stew from turning into a uniform mash unless that is the intended result.

Roasting some of the roots before adding them to the stew is an option I recommend when you want concentrated flavor and caramel notes. Toss chunks with a little oil and a pinch of salt, roast until browned, then fold into the simmering liquid. This step adds complexity without changing the stew’s character, and it is useful when your lamb pieces are small and the cooking time will be relatively short. Roasting also creates an attractive finish for serving, with browned edges that catch the eye. Consider roasting especially when you are using a leaner cut of lamb and want additional richness from the vegetables themselves.

Essential flavor building blocks

At the heart of the stew are three kinds of components: aromatics, liquids, and umami boosters. Onion, garlic, and often a carrot or celery stalk form the aromatic base, softened and sweetened to lift the broth. Liquid usually comprises a combination of stock and wine—use a good-quality lamb or beef stock for body and a dry red wine for acid and backbone. Umami can come from anchovy paste, tomato paste, a splash of soy, or mushrooms; these deepen the savory profile without making the dish overtly fishy or salty. Fresh herbs—rosemary, thyme, bay leaf—added early release earthy oils, while parsley tossed in at the end brightens the finish.

Salt and pepper are simple but crucial: season in stages, not all at once, so you can adjust as the stew reduces and flavors concentrate. Acid at the end—a squeeze of lemon or a few drops of good vinegar—revives the entire pot, balancing fat and sweetness. The use of tomato paste is small but transformative, providing a gentle tang and helping with color and texture. If you prefer a thicker stew, reduce the liquid or incorporate a slurry of cornstarch and water near the end, but often the natural gelatin from lamb and the starch from roots make a pleasantly coatable broth without extra agents. Taste repeatedly in the final hour of cooking; subtle adjustments at that stage yield the most satisfying results.

Ingredients and quantities

Below is a practical ingredient list suitable for serving six to eight people and adaptable to taste or availability. Quantities are intended for a traditional stovetop braise but can be scaled for a slow cooker or pressure cooker with minor timing changes. Freshness matters more than exactness: a generous hand with herbs and a careful eye for the lamb’s fat will influence the outcome more than strict gram-for-gram precision. Keep in mind any dietary restrictions among your diners and prepare simple swaps in advance to avoid last-minute scrambles. The table lists primary ingredients; optional items and garnishes follow afterward in the instructions.

Ingredient Amount
Lamb shoulder or shank, bone-in 2.5–3 lbs (1.2–1.4 kg), cut into large pieces
Carrots 4 medium, peeled and cut into chunks
Parsnips 2–3 medium, peeled and cut
Turnips or rutabaga 2 medium, peeled and cubed
Celeriac or celery root (optional) 1 small, peeled and cubed
Onions 2 large, chopped
Garlic 4 cloves, minced
Tomato paste 2 tablespoons
Dry red wine 1 cup (240 ml)
Lamb or beef stock 4–5 cups (about 1–1.2 liters)
Fresh rosemary and thyme 3–4 sprigs each
Bay leaves 2 leaves
Salt and black pepper To taste
Olive oil or neutral oil 2–3 tablespoons

Step-by-step method

Before you start, organize mise en place: chop vegetables, measure liquids, and pat the lamb dry to ensure even searing. Sear the lamb in batches to avoid crowding the pan; browning is non-negotiable for flavor development. After deglazing with wine and adding tomato paste, return the meat to the pot with stock and aromatics. Simmer low and slow until the lamb is fork-tender, then add the roots in stages depending on density so everything finishes simultaneously. Finally, adjust seasoning and add a splash of acid to balance the richness just before serving.

  1. Heat 2 tablespoons oil in a heavy casserole or Dutch oven over medium-high heat. Season lamb with salt and pepper and brown in batches until well caramelized on all sides, transferring to a plate as done.
  2. Reduce heat slightly and add onions; cook until translucent and beginning to brown, then stir in garlic and tomato paste and cook for another minute to deepen flavors.
  3. Pour in the red wine to deglaze the pan, scraping up browned bits, and let it reduce by half to concentrate flavor.
  4. Return lamb to the pot, add stock to cover most of the meat, and tuck in rosemary, thyme and bay leaves. Bring to a gentle simmer, then reduce heat to low.
  5. Cover and cook slowly on the stovetop or in an oven at 325°F (160°C) for 1.5–2 hours, until the lamb begins to yield when prodded with a fork.
  6. Add denser root vegetables first (rutabaga, turnip) and continue to braise, checking every 20–30 minutes; add carrots and parsnips later so they remain distinct but tender.
  7. When meat and roots are tender, remove herb stems and bay leaves, taste and correct seasoning, then finish with a splash of vinegar or lemon and a handful of chopped parsley.

The method above assumes a gentle, patient approach; if you use a pressure cooker, reduce the initial braising time to about 25–30 minutes under high pressure and add vegetables for a short additional cycle. For a slow cooker, sear as directed, then transfer everything to the crockpot and cook on low for 6–8 hours, adding more delicate roots in the final 90 minutes. If you prefer a thicker stew, reduce uncovered for ten minutes on medium-high heat at the end or whisk in a small beurre manié (butter and flour) and simmer until glossy. Keep tasting: the right balance between savory, sweet, and acidic will vary by stock strength and the vegetables’ natural sugars. The leftovers often taste better the next day because flavors have melded further.

Technique tips: achieving great texture and color

Browning is where the stew earns its first layer of complexity; do not rush it by overcrowding the pan. A hot, dry pan and enough space around the pieces create a deep, flavorful crust; this crust dissolves into the sauce later and gives the final dish a roasted personality. Deglazing with wine lifts those caramelized bits and incorporates them into the broth; allow the wine to reduce sufficiently so its acidity complements rather than dominates. Low simmering is the gentlest way to convert collagen to gelatin without turning meat stringy, so maintain a barely moving surface rather than a rolling boil. Patience in temperature control pays off in a silky, cohesive stew instead of a broken, oily one.

For texture control of the roots, stagger their addition based on density and size; the goal is tender pieces that hold shape and contribute to the stew’s body. If you want some roots to disintegrate and thicken the broth, reserve a few to mash and stir back in toward the end. Skimming the fat can create a lighter mouthfeel if desired, but leaving a tablespoon or two often improves flavor and sheen. When finishing, add bright elements—fresh herbs, a little acid, or even finely diced raw celery for crunch—to contrast the stew’s slow-cooked depth. These accents give the final spoonful nuance and prevent monotony across several bites.

Variations and dietary adjustments

If lamb is unavailable or you prefer a milder animal flavor, beef chuck makes a capable substitute; cooking times and technique remain essentially the same. For a leaner profile, trim additional fat and incorporate more mushrooms or lentils to add body and umami without extra oil. Vegetarians can emulate the stew’s character by using a medley of roasted root vegetables with smoked tomatoes, mushroom stock, and a handful of pearl barley or lentils for protein and texture. Gluten-free eaters should avoid any wheat-based thickeners and rely instead on reduction or naturally starchy roots to achieve body. Adjust seasoning and finishing acid to taste for each variation so the dish keeps its coherence despite ingredient swaps.

Spicing also allows regional reinterpretations: add a pinch of ground cumin and a cinnamon stick for a North African touch, or use smoked paprika and bay leaf for a Spanish twist. Coconut milk and curry paste will turn the stew toward Southeast Asian flavors, pairing especially well with sweeter roots like sweet potato or kabocha. When altering the profile, keep one anchoring element—rosemary for European styles, cumin for North African, or lemongrass for Southeast Asian—to maintain unity across the dish. These modifications let you prepare essentially the same technique with a new voice each time you cook, keeping the recipe exciting and versatile for different meals.

Make ahead, storage and reheating

This stew is forgiving and actually improves with time, making it ideal for planning ahead or feeding a crowd the next day. Cool the cooked stew quickly by transferring to shallow containers and refrigerate within two hours of cooking; it will keep for three to four days in the fridge. For longer storage, freeze in airtight containers, leaving some headroom as liquids expand; the stew freezes well for up to three months, and thawing overnight in the fridge before reheating preserves texture. Reheat gently on the stove over low heat, stirring occasionally and adding a splash of stock or water if the liquid has thickened too much. If the sauce tastes flat after refrigeration, brighten it with lemon juice or a teaspoon of vinegar and finish with fresh herbs to revive the aromas.

When serving leftover stew, you can refresh textures by roasting a small tray of root wedges until crisp and placing them atop each bowl, creating contrast between soft, stewed components and crunchy fresh ones. Another option is to quickly pan-sear leftover lamb pieces to restore a little exterior texture before plating. For meal prep, portion into single-serve containers and include a separate small container with a fresh element, such as chopped parsley or pickled shallots, to add just before eating. These small touches keep weeknight meals from feeling repetitive and maintain a restaurant-worthy finish with minimal effort.

Serving suggestions and pairings

Serve this stew with something that soaks up the sauce: crusty bread, buttered egg noodles, or creamy mashed potatoes all work excellently. For lighter accompaniment, a simple green salad dressed with mustard vinaigrette provides a refreshing foil to the stew’s richness. Wine pairings should match the stew’s depth: choose a medium- to full-bodied red like Syrah, Grenache, or a well-structured Cabernet Franc; the wine’s tannins should find balance with the lamb’s fat. Beer lovers will enjoy a malty amber ale or brown ale whose caramel notes echo the roasted flavors of the roots. For non-alcoholic options, a tart apple or blackcurrant spritzer complements the dish with acidity and brightness.

Garnishes matter: a spoonful of gremolata—lemon zest, garlic and parsley—lifted onto the bowl just before serving brings perfume and contrast. A dollop of plain yogurt or thick crème fraîche introduced at the table adds cool creaminess that blends with the broth for a comfortingly lush mouthfeel. If you prefer heat, a few chopped preserved chilies or a drizzle of harissa oil bring complexity without overpowering the stew’s inherent character. Fine-tune these finishing touches to your guests’ preferences; small adjustments at plating can transform the same stew into a casual family supper or a memorable dinner-party centerpiece.

Personal memories and practical habits that improve the dish

I learned the virtues of long-simmered lamb from weekend afternoons at my grandmother’s house, where the stove would emit a slow perfume and family members gathered around the kitchen table. She taught me to trust time and to taste rather than measure flavor, an approach that shaped how I season now: little by little, always returning to the pot for a final judgment. One practical habit I recommend is keeping a small jar of concentrated stock in the freezer for days when your homemade stock isn’t available; a tablespoon or two can elevate a stew instantly. Another is to always brown the meat in separate batches; it’s extra work but the payoff is immediate and unmistakable in the finished sauce.

On busy days I use a multifunction electric pressure cooker to achieve similar tenderness in a fraction of the time, while on Sundays I favor the Dutch oven for the ritual of stirring and watching flavors deepen. I also keep a list of root combinations that work well together, rotating in less common vegetables like salsify or Jerusalem artichoke when they are in season. These small systems—favoring bone-in cuts, maintaining an arsenal of stocks, and preserving herbs properly—make producing an exceptional lamb stew with roots both reliable and joyful. Over the years these practices have turned an occasional recipe into a dependable favorite in my repertoire.

Final notes to inspire your next pot

Lamb Stew with Root Vegetables. Final notes to inspire your next pot

Think of this stew as a template rather than a rulebook: the technique matters far more than precise quantities, and good ingredients rewarded by deliberate cooking produce satisfying results. Practice the steps a few times, paying attention to how browning, deglazing, and gentle simmering alter flavor; after that you can improvise confidently with seasonal roots or different herb profiles. Invite friends or family to join the process—chopping, roasting, and eating together enhances the meal in ways that no single ingredient can replicate. Above all, allow patience to be part of the recipe: the most memorable dishes are quietly built over time and finished with a small flourish at the table.

Slow-Simmered Comfort: A Fresh Look at Beef Goulash

There is something elemental about a pot of rich, aromatic stew cooking on the stove: it fills the kitchen with warm, smoky notes and promises a meal that feels like a small celebration. In this article I want to take you beyond a single recipe and into the craft of making a hearty beef goulash that respects tradition while staying practical for modern kitchens. Expect clear technique, ingredient choices that matter, and a few ways to make the flavors sing without fuss. Whether you are curious about paprika varieties, wondering which cut of beef gives the best texture, or seeking ideas for side dishes, you will find both detailed guidance and a few personal tricks. Let’s unpack history, method, and tasteful variations so your next pot becomes the one friends ask for again and again.

Where Goulash Came From and Why It Matters

The roots of goulash reach into Central Europe, with Hungary most often credited for shaping what many of us recognize today. Originally a herdsman’s dish, it was designed to be portable, nourishing, and simple to make over a fire. Over time regional cooks added vegetables, varied the spice mix, and adjusted the meat to local availability, turning a basic stew into a family of related dishes. Knowing that history helps when you choose how traditional or inventive you want to be: some versions lean heavily on paprika and a silky sauce, others focus on chunks of meat and robust aromatics. Thinking about origin improves your decisions in the kitchen, because each ingredient carries purpose born from climate and culture.

When you make goulash, you are participating in a centuries-old conversation about comfort food. The classic Hungarian spirit insists on generous paprika, patience while simmering, and a balance between meat and sauce. Yet Austrian, Czech, Slovak, and more contemporary American takes show how adaptable the dish is. These variations teach a useful lesson: the core idea — tender meat, flavored broth, and a depth that develops over time — is what defines the dish, not a strict list of items. That freedom is part of the joy in cooking it; you can honor tradition and still make something that reflects your palate.

Regional Variations: How Local Palates Shape the Dish

In Hungary, goulash often appears more soup-like, with thin broth and soft vegetables, making it suitable as a standalone course. Czech and Slovak versions can be richer and thicker, meant to be spooned over dumplings or potatoes. Austrian adaptations sometimes introduce wine or heavier creams, while in parts of the United States cooks have embraced beef and tomato combinations, broadening the flavor profile. Each region tunes the seasoning and consistency to match local staples, so observing those differences helps decide how you want your pot to end up.

Modern fusion approaches blur borders intentionally. You can find paprika-forward stews with cumin and coriander in urban bistros, or smoky versions that use chipotle and dark beer. These experiments reveal a single truth: pivot a few ingredients and cooking times, and the same base technique yields very different results. If you are crafting your own version, consider which regional cues you want to borrow and which to leave behind so the dish feels cohesive rather than scattered.

Ingredient Essentials: Choosing the Right Beef and Produce

The choice of beef determines both texture and flavor in the final dish. For long, gentle cooking the classic picks are chuck, brisket, or shin — cuts with connective tissue that break down into gelatin, enriching the sauce. Lean steaks cook quickly and dry out; they rarely suit a slow stew unless you add them at the very end to remain tender. The goal is to pick meat that rewards time, so a modestly marbled cut typically yields the most satisfying result.

Vegetables are simple but vital: onions form the aromatic backbone, while carrots and parsnips give sweetness and structure. Bell peppers are common in many regional recipes, and ripe tomatoes or a bit of paste add acidity that brightens the broth. Balancing these elements creates a sauce that is neither flat nor cloying. Pay attention to produce quality; a deeply caramelized onion will contribute more than any single spice.

Beef Cuts at a Glance

Cut Why it works Texture after long cook
Chuck Well-marbled, widely available, affordable Tender and shreddable
Brisket Rich flavor, good fat content Deeply tender, slightly stringy
Shin (shank) High collagen, great for gelatinous sauce Very soft, almost silky
Stewing beef (blade/round) Cut into cubes, convenient Good if not overcooked

Spices and Seasoning: Paprika Beyond Color

Paprika is the spice most commonly associated with goulash, but there is a wide world beyond the red powder in supermarkets. Sweet paprika gives color and a gentle pepperiness; hot paprika brings heat; smoked paprika introduces a campfire note. Quality varies dramatically, so try to buy paprika from a reputable source; a fresh jar smells floral and slightly sweet rather than dusty. The amount you add shapes the dish, and layering the spice during cooking—some early, some later—makes a more integrated flavor.

Beyond paprika, a few supporting spices elevate performance. Caraway seeds add a faint anise-like finish that cuts richness without dominating. Bay leaves contribute subtle woodsy aromatics, while black pepper provides a clean, upward lift. Garlic is optional but effective for depth. Salt is the silent sculptor: season at stages, tasting as the pot reduces, because under-salted goulash never offers the same satisfaction as one with precise seasoning.

Technique: How to Build Flavor, Step by Step

Start by dry-roasting or browning the meat; this creates Maillard reactions that, once deglazed, turn into deeply flavored fond. Work in batches to avoid crowding the pan, which can steam the meat instead of browning it. After meat is out, use the same pot to sweat onions and other aromatics until they soften and begin to color. Those caramelized bits that cling to the pan are flavor gold — don’t scrub them away too soon.

Deglazing with a splash of stock, wine, or even water loosens those sticky browned bits and carries their flavor into the sauce. Add tomato elements and spices, then return the beef to the pot along with enough liquid to allow a gentle simmer. Simmering low and slow is the usual recommendation, as it grants collagen time to convert into gelatin; the result is mouth-coating richness that makes the stew feel luxurious. If time is tight, a pressure cooker can shorten this stage while still producing tender meat.

Comparing Cooking Methods

Method Time Result
Stovetop simmer 2.5–3.5 hours Classic texture, hands-on monitoring
Oven braise 2.5–3.5 hours at 160–170°C Even heat distribution, less evaporation
Slow cooker 6–8 hours low Convenient, very tender results
Pressure cooker 35–60 minutes Fast, can match slow-cook tenderness

Step-by-Step Recipe: A Reliable Base for Customization

Below is a dependable template that balances classic flavors with practicality. I present the steps in a way that allows room for personal adjustments, such as swapping sweet paprika for smoked, or adding a tablespoon of mustard for a tangy backbone. The method prioritizes technique rather than rigid measurements so you can scale the dish for two or for a crowd. Follow the sequence closely: browning, aromatics, deglazing, simmering, finishing. These stages are where flavor builds and holds.

Before starting, gather mise en place: cut the beef into even cubes, measure spices, and have your liquids ready. This planning reduces stress and keeps the cooking flow steady. Cooking is easier and more enjoyable when you aren’t hunting for an ingredient mid-simmer. Also, a heavy-bottomed pot or Dutch oven makes the process more forgiving and helps you achieve an even, steady heat.

Ingredients

  • 1.5 kg beef (chuck or shin), cut into 3 cm cubes
  • 3 large onions, thinly sliced
  • 2 tablespoons sweet paprika, plus 1 teaspoon smoked if desired
  • 2 tablespoons tomato paste or 2 ripe tomatoes, chopped
  • 2 carrots, diced; 1 red bell pepper, sliced (optional)
  • 3 cloves garlic, minced
  • 1 teaspoon caraway seeds (optional)
  • 2 bay leaves, salt and black pepper to taste
  • 1.2–1.5 liters beef stock or water
  • Vegetable oil or lard for browning

Method

Pat the beef dry and season lightly with salt. Heat oil over medium-high until shimmering, then brown the meat in batches until each piece has a deep, savory crust. Remove the browned meat and set aside to avoid crowding. This step is worth the extra time because it seeds the whole stew with roasted flavors that cannot be replicated by later additions.

Lower the heat to medium and add the sliced onions to the same pot. Cook slowly until they release moisture and begin to caramelize, scraping up any browned bits from the bottom. Stir in paprika and tomato paste briefly to bloom the spice—avoid burning the paprika, which can turn bitter. Return the beef to the pot, add carrots, peppers, garlic, bay leaves, and enough stock to barely cover the meat. Bring to a gentle simmer.

Cover partially and simmer for two to three hours on low, checking occasionally and skimming any excess fat. If using a slow cooker, transfer everything after the deglaze and cook on low for six to eight hours. For a pressure cooker, bring to high pressure for about 45 minutes, then allow a natural release. The stew is ready when the meat pulls apart easily and the liquid has a concentrated, silky texture that clings to a spoon.

Finishing Touches: Texture and Balance

Beef Goulash. Finishing Touches: Texture and Balance

Once the meat is tender, adjust the sauce. If it is too thin, reduce it gently over higher heat uncovered until it reaches the desired thickness. If it is too thick, stir in a small amount of hot stock. Taste and correct salt and pepper. A splash of vinegar, a spoonful of mustard, or a few minced fresh herbs can brighten the final bowl; add these at the very end so their notes remain distinct. The aim is a harmonious balance where neither the meat nor the sauce dominates.

Serving Suggestions: What to Put Next to the Bowl

Traditional companions include egg noodles, boiled potatoes, or bread designed to mop up sauce. Hungarian nokedli—small, soft dumplings—are a classic match, but polenta, spaetzle, or a crusty country loaf work equally well. Pickles or a simple cabbage slaw cut through the richness and introduce a contrasting texture. Serving temperature can influence perception: slightly cooler goulash tastes denser, while piping-hot batches feel lighter and more aromatic.

Plating matters more than most home cooks assume. Offer the sauce generously over the starch so every bite mixes meat, sauce, and carbohydrate. Garnish with a scattering of chopped parsley or a few rings of raw red onion for a crisp note. If you expect leftovers, consider serving the initial portion slightly saucier than you might otherwise, because the sauce tends to thicken and intensify after refrigeration.

Useful Side Dish Ideas

  • Egg noodles or buttered spaetzle
  • Mashed or boiled potatoes with parsley
  • Polenta, creamy or firm
  • Crusty rye or country bread
  • Pickled cucumbers or cabbage for contrast

Wine and Beverage Pairings

A rich, paprika-forward stew pairs well with medium-bodied red wines that have moderate tannin, such as a young Rioja or a Croatian plavac mali. If you prefer white, look for fuller styles with good acidity; a dry Riesling works especially well with dishes that include a touch of sweetness in the vegetables. For beer drinkers, brown ales, bocks, or a malty lager complement the caramelized flavors. Non-alcoholic options like black tea or a tart apple juice deliver a refreshing counterpoint.

Nutrition, Leftovers and Storage Tips

Goulash is a fairly nutrient-dense dish, supplying protein, iron, and B vitamins from the meat and a variety of vitamins from its vegetables. The calorie count depends largely on the meat cut and the amount of oil used for browning. To lighten the dish, trim visible fat and reduce added oil by using a nonstick pan for initial browning. You can also bulk it with extra vegetables or legumes for added fiber and volume.

Leftovers improve in flavor, often tasting better the next day once the spices settle. Cool the stew quickly by transferring it to shallow containers and refrigerate within two hours. It will keep well for three to four days in the fridge, and freezes happily for up to three months. Reheat gently on the stove so the sauce loosens without overheating the meat; a splash of stock helps restore the original texture after refrigeration.

Troubleshooting Common Issues

If the meat is tough, it likely needed more time at a low simmer or the cut was too lean. Return the pot to a gentle heat and continue cooking, checking every 30 minutes. If the sauce tastes flat, it is often under-salted; adjust salt in small increments and re-taste as the sauce concentrates. Bitterness can come from overcooked paprika—if that happens, brighten the dish with acidity such as lemon juice or a teaspoon of honey to balance the harsh edge.

If the goulash becomes greasy, chill it briefly and spoon off the congealed fat from the surface before reheating. Conversely, if the sauce is too thin, remove the meat, reduce the liquid until it coats the back of a spoon, then return the meat. Simple corrections often save a pot and keep the meal enjoyable rather than disappointing.

Variations and Creative Twists

There is room for many playful adaptations. Try substituting lamb for beef in a regionally inspired twist, or add smoked sausage in the final hour for an extra layer of smokiness. For a lighter weeknight version, cut smaller pieces of beef and simmer for a shorter time, finishing with a spoon of Greek yogurt or sour cream to introduce creaminess without heavy reduction. Each variation highlights a different aspect of the same core technique.

Plant-based versions can be surprisingly satisfying. Use hearty mushrooms, seitan, or textured vegetable protein for the base, and cook with vegetable stock and a bit of soy or miso to replicate savory depth. Add a splash of liquid smoke or smoked paprika to substitute for beefy umami. Texture won’t be identical to slow-braised meat, but thoughtfully chosen ingredients can deliver a comforting, richly flavored stew that honors the spirit of the original.

Personal Notes from My Kitchen

I have several goulash memories tied to workdays and gatherings. One that stands out was a winter evening when a simple pot stretched to feed an unexpected crowd after a neighborhood blackout. Using a dutch oven and three cuts of beef I discovered by chance, the stew matured beautifully over several hours on low heat. By the time the lights returned, the dish had turned into more than dinner: it became the reason neighbors lingered, talked, and swapped stories over bowls of steaming sauce.

That experience taught practical lessons I still use. First, never rush the browning stage; it repays the extra time tenfold. Second, keep the pantry stocked with a few spice staples, particularly a quality paprika—freshness changes the outcome. Finally, treat the pot as a living process: taste, adjust, and remember that small changes in seasoning at the end can rescue or transform the final flavor. Cooking goulash is as much about attention as it is about ingredients.

Final Tips and Reminders

Make goulash when you have the patience to layer flavors. Invest in a solid pan, buy decent paprika, and choose cuts of meat that like long, slow heat. Taste in stages, and don’t be afraid to tweak acid, salt, or fat at the finish. Remember that side dishes and condiments are not afterthoughts; they can lift the whole meal and provide contrast that turns a good stew into a memorable one.

Give yourself room to experiment. Try small changes over several cooks and keep notes so you can reproduce a favorite version. Whether you aim for a faithful Eastern European pot or a personal modern riff, the heart of the dish remains the same: comfort, depth, and the quiet reward of a meal built on patience and simple, well-chosen ingredients. Enjoy the process, and let the aroma be the invitation to gather the table and taste something made with care.

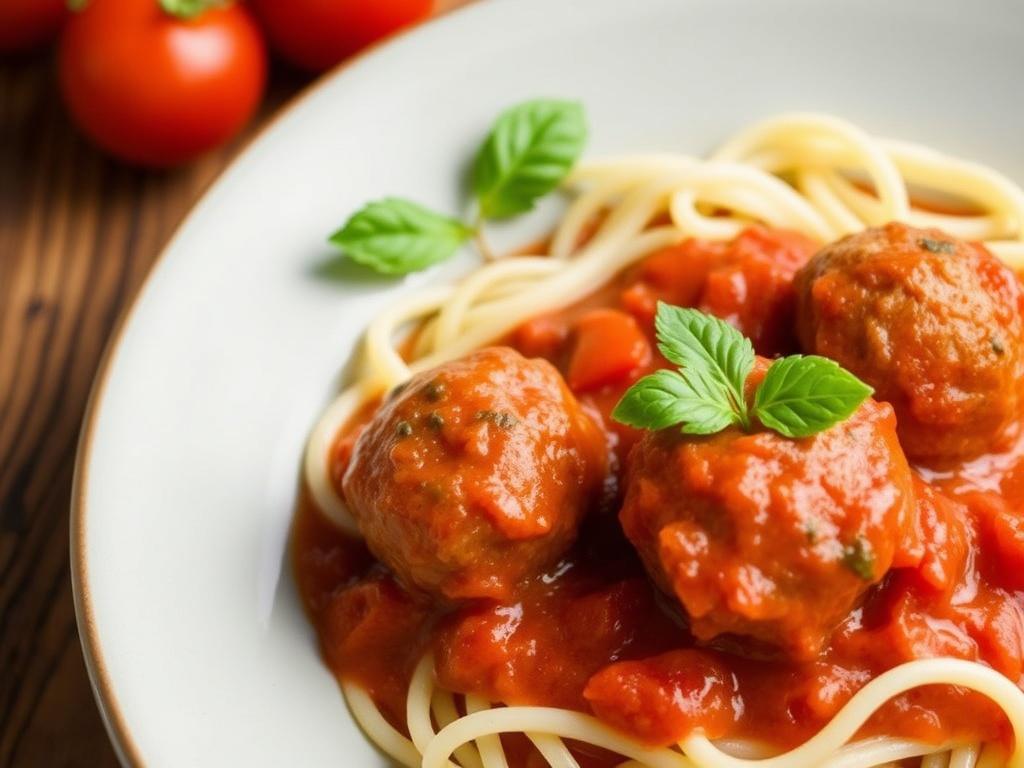
Meatballs in Tomato Sauce: A Cozy, Savory Dish That Feels Like Home

There are dishes that soothe the appetite and dishes that mend a mood; meatballs in tomato sauce belong squarely to the second category. They carry warmth in every spoonful, a kind of edible hug made of ground meat, herbs, and bright, simmered tomatoes. This recipe crosses cultures and kitchens: from weeknight family dinners to slow-simmered Sunday feasts, the combination of tender meatballs and glossy red sauce feels universally calming. In the paragraphs that follow I will walk you through ingredients, techniques, variations, and sensible tips so you can make this classic dish confidently. Expect practical guidance, a couple of personal kitchen notes, and ideas to adapt the recipe for a comforting winter dinner or a light summer meal.

Why meatballs and tomato sauce comfort so deeply

First, consider texture: a well-made meatball yields a soft, yielding bite that pairs perfectly with the silky acidity of a tomato sauce. That contrast between plush center and tangy sauce creates a balance the brain reads as satisfying. Second, aromatics like garlic, onion, and herbs trigger familiar sensory memories; those scents are cornerstones of comfort food. Third, the dish scales beautifully, which means it can be a quick weeknight meal or a slow Sunday project that feeds a crowd. Taken together, these qualities explain why this pairing is a go-to in many homes when someone needs a simple, reliable meal.

There is also a social element: meatballs are inherently shareable, easy to serve family style, and they invite conversation while you eat. In many cultures the act of rolling meatballs is communal, a kitchen ritual that tightens bonds. When we sit down to a bowl of meatballs and tomato sauce, we aren’t just consuming calories; we are taking part in a tradition of gathering. That social memory adds another layer to their comforting power, particularly during colder months when a hearty winter dinner helps anchor the day.

A brief culinary history

Meatballs appear in the culinary records of many regions, each with its own twist, but the common thread is hand-shaped meat combined with spices and a binding agent. Recipes from the Middle East, Asia, and Europe demonstrate how versatile the idea is; the Italian-style meatball simmered in tomato sauce became emblematic only after tomatoes gained acceptance in European cooking. By the 18th and 19th centuries, tomatoes had become commonplace in Mediterranean kitchens and the marriage of meat and tomato developed into beloved regional classics.

Over time, the dish migrated and morphed. Immigrant communities brought their versions across oceans, adapting seasonings and proteins to local markets. What remained constant was the emotional resonance: meatballs in tomato sauce were not haute cuisine, but they were reliably heartening and affordable. That history explains why you find both simple, rustic preparations and elaborate restaurant presentations today.

Core ingredients: what matters and why

At its base, this dish relies on three building blocks: ground meat, a tomato component, and aromatics. The quality and balance of these ingredients determine whether the result feels homemade or flat. Ground meat provides richness and structure; breadcrumbs and egg act as binders to keep meatballs tender rather than dense; a good tomato base delivers acidity, sweetness, and depth. Fresh herbs lift the profile and finishing fats, like a splash of olive oil, round the sauce.

Below is a compact table showing typical ingredient proportions for about four servings. Use it as a starting point, not a rule, and adjust seasoning to taste.

Component Amount (approx.) Purpose
Ground meat (beef, pork, or mix) 500–700 g Main body, flavor, and fat
Breadcrumbs 50–80 g Binder; keeps meatballs tender
Egg 1 large Binder; adds moisture and cohesion
Onion and garlic 1 small onion, 2–4 cloves Aromatics for depth
Tomato (passata or crushed) 700–900 ml Base for the sauce
Fresh herbs (parsley, basil) Handful Bright finishing notes

Preparing the meat mixture

Start this stage by finely chopping or grating the aromatics so they blend smoothly into the meat without creating large, raw pockets. Sweating the onion briefly in olive oil softens its sharpness and adds sweetness; some cooks prefer to cool the onion before mixing it into the meat to avoid cooking the egg. When combining the ground meat with breadcrumbs and egg, use a gentle hand: overworking the mix results in tough meatballs. Season well with salt and pepper and add a note of acidity like a teaspoon of mustard or a splash of vinegar to brighten the meat.

Texture is everything: the mixture should hold together when you press it but not feel gummy. If the mix seems dry, add a tablespoon or two of milk or water; if too wet, add more breadcrumbs sparingly. I often chill the mixture for 20 to 30 minutes before shaping, which firms it and reduces the chance of collapsing during cooking. Chilling also gives the flavors a moment to marry, which matters more than you might expect.

Shaping and cooking the meatballs

Traditionalists roll meatballs by hand, aiming for even sizes so they cook uniformly. A small ice cream scoop is an excellent tool for consistent portions and saves time when preparing many. For a tender interior, resist compacting the meat too tightly; cup your hand and roll lightly. Sizes vary by culture and preference, but a two to three centimeter diameter is perfect for simmering in sauce.

Cooking method influences flavor and texture. Browning meatballs in a skillet creates a caramelized crust and deepens the aroma, while baking them in the oven yields lighter, evenly cooked spheres with less hands-on work. A hybrid approach also works: sear quickly for color and finish in the tomato sauce, which prevents overbrowning and infuses the meatballs with more flavor. If you prefer frying, use a neutral oil and keep the pan crowded just enough to maintain pan temperature.

Tomato sauce basics

A great sauce starts with good tomatoes and patient simmering. Use canned crushed tomatoes or passata for convenience and consistent flavor; fresh tomatoes can be used when ripe, but they require longer cooking to achieve depth. Begin by sweating onions and garlic until translucent, then add tomatoes and a pinch of sugar if the acidity feels harsh. Simmer the sauce gently to concentrate flavors; aggressive boiling breaks down texture and makes the sauce taste flat.

Seasoning the sauce is an act of balance: salt brings out flavor, but herbs make the sauce sing. Bay leaf during the simmer and a handful of chopped parsley at the end are reliable choices. For a silky finish, stir in a splash of olive oil or a pat of butter just before serving. If you like a rustic sauce, leave some tomato pieces whole; for a smoother result, blend briefly with an immersion blender.

Finishing touches and assembly

When the meatballs and sauce meet, treat the moment gently. Add the partially cooked meatballs to the sauce and allow them to simmer at low heat until cooked through; this takes around 15 to 20 minutes depending on size. Avoid stirring aggressively; a few gentle nudges now and then prevent breaking the meatballs apart. Finish with a scatter of fresh herbs and a grind of black pepper to refresh the flavors.

A final flourish often makes the difference between a nice dinner and a memorable one: a drizzle of good olive oil, a shower of grated cheese, or a few torn basil leaves. These additions don’t mask the dish; they enhance the existing elements. Taste as you go and adjust acidity, salt, or sweetness at the end, not at the beginning, because flavors concentrate during simmering.

Variations and flavor profiles

Meat choice shifts the character dramatically. Beef offers a bold, beefy base; pork brings sweetness and fat; lamb adds a gamey note that pairs beautifully with mint or cumin. A common and delicious route is to mix beef and pork to combine structure and succulence. For leaner choices, turkey or chicken work but benefit from added fat or olive oil to prevent dryness.

Spice choices open the door to global interpretations. Add smoked paprika, cumin, and coriander for a North African flair. Use oregano, garlic, and red pepper flakes for a Mediterranean profile. A touch of soy sauce or sesame oil leads toward Asian-inspired meatballs that still play well with a tomato base if you keep the flavors subtle. Don’t be afraid to experiment with unexpected herbs like thyme or tarragon in small amounts.

If you prefer a vegetarian approach, make balls from lentils, mushrooms, or finely chopped eggplant bound with breadcrumbs and egg or a flaxseed mixture. These alternatives hold their own in a tomato sauce and are excellent when roasted first to develop texture. Seafood meatballs, made from white fish or shrimp, are lighter and pair nicely with a bright, lemony tomato broth.

Serving suggestions and pairings

This dish adapts to many formats: over pasta for an old-school plate, tucked into a sandwich roll for a rustic sub, spooned atop polenta for a creamy base, or served with rice for a hands-on family meal. Each pairing changes the eating experience in useful ways; pasta emphasizes comfort and stretch, while polenta adds creaminess and a different regional texture. A simple green salad or sautéed greens provide freshness to cut through the richness.

Here are a few pairing ideas to try the first time you make this dish:

  • Classic: spaghetti with grated hard cheese and cracked black pepper.
  • Rustic: ciabatta or sourdough rolls for meatball subs.
  • Cozy: creamy polenta or mashed potatoes to soak up the sauce.
  • Light: herbed couscous and lemony greens for balance.

Make-ahead, freezing, and planning for winter dinners

Meatballs and tomato sauce are excellent candidates for make-ahead cooking, which is a boon when you want a reliable winter dinner waiting in the fridge. Prepare the meatballs and sauce a day or two ahead, store them separately, and combine softly reheating to finish. Flavors often deepen overnight, making next-day eating even better. For holiday prep, you can prepare and freeze meatballs raw or fully cooked; frozen meatballs can be dropped straight into simmering sauce from the freezer.

For freezing, portion into meal-sized containers and cool completely before sealing to prevent ice crystal formation. Label with the date and use within three months for best quality. Reheat gently on low heat to avoid breaking the texture or overcooking the meat. If meal planning for cold months, making a double batch and freezing portions saves time and gives you a truly comforting winter dinner on demand without compromising taste.

When you plan ahead, consider accompaniments that reheat well: roasted root vegetables, braised greens, or a sturdy bread. These sides keep in the fridge and bring variety to repeat meals. Over time you’ll assemble a small repertoire of sides that suit your household and make cold evenings easier to manage.

Nutrition and tips for healthier versions

Meatballs in Tomato Sauce. Nutrition and tips for healthier versions

Traditional meatballs can be rich, but small swaps yield a healthier plate without losing satisfaction. Use leaner meat or mix in finely chopped mushrooms to reduce calories while adding moisture. Substitute whole-grain breadcrumbs for added fiber, and control sodium by choosing low-salt canned tomatoes or making your own sauce. Each change nudges the dish toward better nutrition while preserving the comforting mouthfeel.

Portion control also matters. Serving meatballs alongside vegetables or a grain allows you to enjoy the taste without overeating. If you want to lower fat content further, bake instead of frying the meatballs and drain any excess oil from the sauce. Small changes like these allow you to keep meatballs in your rotation throughout winter without regret.

Troubleshooting common problems

One frequent issue is dry, dense meatballs, typically caused by overmixing or excessive breadcrumbs. If that happens, add a little milk, an extra egg, or more fat from the meat to loosen the texture. Conversely, meatballs that fall apart usually need more binder or gentler shaping. Chilling the formed balls before cooking helps them hold together, as does not overcrowding the pan during browning.

Another common problem is a flat or too-acidic tomato sauce. Balance acidity with a pinch of sugar or a grated carrot added while the sauce simmers. If the sauce tastes thin, reduce it slowly over low heat to concentrate flavor. Remember that salt intensity and aromatics evolve during simmering, so adjust seasoning toward the end of cooking rather than at the beginning.

Practical tips from my kitchen

Over the years I learned that small routines save time and improve consistency. I keep a jar of seasoned breadcrumbs and a jar of chopped garlic in the fridge; they speed up prep on busy nights. When I roll meatballs for a crowd, I line a sheet pan with parchment and freeze them solid before transferring to a zip-top bag. That simple step prevents sticking and keeps portions tidy for future meals.

Another habit: I always brown a few meatballs until they are well caramelized and tuck them into the pot first to test seasoning. If those samples taste flat, I adjust the sauce before committing the whole batch. This tasting method has saved many dinners and helps me learn what each batch of meat needs. Finally, I find that adding a splash of cream or a knob of butter at the finish gives a luxurious mouthfeel that family members notice immediately.

Serving this dish for gatherings and weeknights

For large gatherings, move the meatballs and sauce to a slow cooker to keep them warm and supple. Label serving utensils to avoid cross-contamination when guests help themselves. Present bread or pasta on the side and set up a small garnish station with grated cheese, chopped herbs, and chili flakes for guests to customize plates. This approach turns a homey dinner into a relaxed, semi-restaurant experience without drama.

On weeknights, keep the process simple: bake the meatballs while making the sauce, then combine and simmer briefly. Use a timer and set up mise en place to make the evening efficient. The goal is to enjoy the meal without feeling like the kitchen owns your evening, and this recipe adapts well to that pace.

Final thoughts on making the dish your own

Cooking meatballs in tomato sauce is part science, part improvisation, and mostly memory. The first time you make them, follow a trusted recipe closely to understand proportions and technique. After that, adjust spices, meats, and textures to suit your palate and the rhythm of your household. The beauty of this dish is its tolerance for variation and its capacity to reward small gestures—an extra pinch of herb, a slow simmer, or a quick sear can elevate an everyday meal.

As winter days shorten and comfort matters more in the kitchen, this recipe becomes a reliable friend. Whether you serve the meatballs atop pasta, tuck them into rolls, or ladle them over creamy polenta, the combination of tender protein and bright tomato sauce will keep earning its place at the table. Try a few of the suggestions in this article, make notes as you go, and soon you will have a personalized version that feels uniquely yours.

Crisp Comfort: Rediscovering the Classic Waldorf Salad with Walnuts

The Waldorf Salad with Walnuts is one of those dishes that feels like a friendly handshake from the past — familiar, bright, and unexpectedly versatile. At first glance it’s simple: fruit, nuts, and a creamy dressing. But beneath that simplicity hides a balance of textures and flavors that can be coaxed in countless directions. In this article I’ll trace its origins, break down the ingredients, offer modern variations, and walk you through a fail-proof recipe that highlights apples and walnuts without overwhelming them. Whether you’re serving it at a Sunday lunch or tucking it into a weeknight meal, this salad rewards a little attention.

Where the Waldorf Began

The salad that came to be known as the Waldorf originated in the late 19th century at the Waldorf Hotel in New York. A clever chef combined crisp apples, crunchy nuts, and a light dressing to create a refreshing course that fit the era’s appetite for novelty and refinement. Over time the dish traveled from hotel dining rooms into family kitchens, changing subtly as cooks added grapes, celery, or raisins. Those small alterations didn’t erase the original charm; instead they showed how resilient the core concept is — a simple trio of textures and tastes that works in many settings.

As the recipe spread, different regions and households stamped their personality on the salad. Some chefs favored mayonnaise for creaminess, others chose yogurt to lighten the dish. The use of walnuts became particularly popular because their rich, slightly bitter flavors complement the sweetness of apples. Today the Waldorf stands as an example of how a straightforward combination can become a canvas for creativity, and why ingredients like apple and walnuts remain central to the salad’s identity.

The Heart of the Dish: Apples and Walnuts

Apples are the backbone of this salad; their crispness provides structure and a bright, refreshing acidity. Choose apples with a firm bite so they don’t turn mushy when mixed with dressing. Varieties such as Honeycrisp, Granny Smith, or Pink Lady each contribute a different profile: Honeycrisp brings juiciness and floral notes, Granny Smith offers tartness, and Pink Lady adds balanced sweetness. Slicing size matters too — thin wedges preserve crunch, while small dice spread apple flavor more evenly through the salad.

Walnuts offer contrast. Their earthy, slightly bitter richness anchors the sweetness of the apple and the creaminess of the dressing. Toasting walnuts briefly in a dry skillet intensifies aroma and adds a deeper crunch that elevates the whole dish. If you prefer a milder nut note, use halves rather than chopped pieces; for more texture, chop them coarsely. Walnuts also pair well with other ingredients often found in this salad — celery, grapes, and leafy greens — creating a harmonious interplay of textures.

Anatomy of a Classic Waldorf Salad

A traditional Waldorf salad typically includes apple, celery, walnuts, and mayonnaise, sometimes with the addition of grapes and lemon juice. Each component serves a clear purpose: apple for crispness and sweetness, celery for a vegetal snap, walnuts for richness, and dressing to bring it all together. Grapes add juiciness and visual contrast, while lemon juice keeps apples from oxidizing and brightens the overall flavor. The result is a composed yet relaxed salad that can be served on a bed of lettuce or as a standalone dish.

Beyond the main ingredients, the way you assemble the salad affects the experience. Tossing components gently preserves their individual textures; overmixing can dull the crunch. Likewise, combining dressing and solids just before serving keeps everything fresh. If you’re presenting the dish at a buffet, keep dressing on the side to prevent sogginess. These small practical choices protect the integrity of the salad and ensure every forkful delivers the intended contrasts of crisp, creamy, and crunchy.

Modern Variations and Creative Twists

Contemporary cooks have stretched the Waldorf concept into a playground of variations where apple and walnuts remain central but the supporting cast changes. Substituting Greek yogurt or a blend of yogurt and mayonnaise yields a lighter dressing with a pleasant tang. Swapping celery for fennel introduces a subtle anise note that complements walnuts beautifully. Some chefs add herbs like tarragon or mint for unexpected freshness, while others fold in blue cheese for a sharper contrast that works well at dinner parties.

Fruit additions broaden the flavor range: halved seedless grapes are classic, but pomegranate arils provide tartness and a jewel-like appearance. Dried fruit such as cranberries or cherries adds chewy sweetness and works especially well in autumn and winter. For a savory turn, roast the apples lightly to bring caramel notes, then combine them with toasted walnuts and a vinaigrette rather than a creamy dressing. These adaptations keep apple and walnuts in focus but let the salad inhabit different culinary moods.

For those who like to experiment with texture, try swapping regular walnuts for candied ones or using a mix of nuts — pecans and walnuts together add depth. A sprinkling of seeds, such as pumpkin or sunflower, gives a subtle crunch without overpowering the main flavors. The beauty of this dish lies in its flexibility: once you understand its basic ratios and goals, you can tailor it to seasons, dietary preferences, and the company you’re serving.

Choosing Ingredients: Picking the Best Apples, Walnuts, and Greens

Selecting the right produce makes a noticeable difference. For apples, prioritize firmness and balanced flavor over cosmetic perfection; avoid soft spots that signal early overripeness. If you can, taste different varieties at the market and pick one that suits your preference for tartness or sweetness. When buying walnuts, look for whole kernels that smell fresh — rancid nuts have a sharp, unpleasant odor. Store them in the refrigerator if you won’t use them right away to preserve their oils and crunch.

Greens transform the salad from a side into a composed plate. Butter lettuce makes the dish feel delicate and elegant, while arugula adds peppery warmth that pairs nicely with walnuts. Spinach offers a silky backdrop and mild flavor. If you’re serving the salad as a bed for roasted poultry or fish, choose sturdier greens that won’t wilt. Whatever greens you pick, wash and spin them thoroughly; grit and residual water can compromise both texture and dressing adhesion.

Consider the balance of flavors when adding other elements. Celery should be bright and firm; wilted stalks will make the salad limp. Grapes should be firm, not wrinkled. If you add onion or shallot, use very thin slices so they don’t dominate. Small, deliberate choices at the market save time and trouble in the kitchen and ensure the final salad sings with fresh, contrasting notes rather than muddled ones.

The Dressing: Traditional and Alternative Approaches

The dressing is where the Waldorf’s simplicity either sings or falls flat. Classic recipes pair mayonnaise with a squeeze of lemon and a pinch of salt; this creates a creamy, slightly tangy coating that binds apples and walnuts without overpowering them. If you prefer a lighter touch, swap in plain Greek yogurt or use a half-and-half mixture of yogurt and mayonnaise. A touch of honey or maple syrup can harmonize flavors if your apples lean tart, but use sweeteners sparingly to avoid masking the fruit.

For a vinaigrette-style approach, whisk extra-virgin olive oil with apple cider vinegar, Dijon mustard, and a hint of honey. This lighter dressing lets the walnuts and apple shine while adding a shimmering, less clingy finish — perfect when serving the salad over peppery greens. If you favor creaminess but want less fat, try silken tofu blended with lemon and a pinch of salt; it yields a smooth, neutral base that carries the flavors well. Each dressing choice shifts the salad’s character, so pick one that complements the occasion and your ingredients.

Seasoning is crucial. A small amount of salt enhances sweetness and softens the bitterness of walnuts. Freshly ground black pepper adds warmth; a dash of cayenne gives unexpected lift for those who enjoy a gentle kick. Always taste the dressing with a scrap of apple — adjustments are easier that way than after everything’s been combined. These finishing touches ensure the dressing supports, rather than competes with, the central apple and nut interplay.

Step-by-Step Recipe: Classic Waldorf Salad with Walnuts

Below is a reliable recipe that highlights apple and walnuts while remaining flexible. It’s designed for home cooks who want clear proportions and simple techniques. I include optional ingredients so you can adjust according to taste or what’s in your pantry. Read through the steps before starting; a little mise en place keeps the assembly quick and keeps apples crisp.

Ingredient Amount (serves 4)
Apples (firm variety) 3 medium, cored and diced or sliced
Walnuts 1 cup, toasted and roughly chopped
Celery 2 stalks, thinly sliced
Seedless grapes (optional) 1 cup, halved
Mayonnaise or Greek yogurt 3/4 cup (or 1/2 cup yogurt + 1/4 cup mayo)
Lemon juice 1 tablespoon, fresh
Salt and pepper To taste
Leafy greens (optional) 4 cups, washed and spun

Steps:

  • Toast the walnuts in a dry skillet over medium heat for 4–6 minutes, shaking the pan occasionally until fragrant. Let cool before roughly chopping to preserve crunch.
  • Prepare the apples: core and dice or slice them, then toss with lemon juice to prevent browning and add brightness. Cut immediately before dressing to keep them crisp.
  • Combine diced apples, sliced celery, halved grapes if using, and walnuts in a large bowl. Add mayonnaise or yogurt and fold gently until everything is lightly coated. Season with salt and pepper and adjust lemon or sweetener to taste.
  • Serve the mixture over a bed of greens or chilled on its own. If assembling ahead, keep dressing separate and combine within an hour of serving for best texture.

Make-Ahead, Storage, and Serving Tips

This salad benefits from a little planning. Apples brown when exposed to air, so if you must assemble ahead, toss apples in lemon juice and store the dressed mixture in an airtight container for no more than 12 hours. For longer storage, keep the dressing separate and bring components together just before serving. Walnuts will soften if immersed in dressing; to retain crunch, sprinkle them on top just before serving.

When serving a large group, set up a small assembly station with dressed components and extra dressing on the side so guests can choose how saucy they want their portions. If presenting the salad as a side for a roast or grilled proteins, dress more lightly; if serving it as a sandwich filling or on crostini, a richer dressing helps bind the ingredients. Small touches like chilled serving bowls or a scatter of extra chopped walnuts create an appealing contrast and make the dish feel thoughtfully composed.

Pairings and Occasions

The apple-and-walnut profile of this salad pairs well with roasted meats, especially poultry and pork; its brightness cuts through richness and refreshes the palate. It’s a natural companion to turkey at holiday tables, where the crispness of apple and the earthiness of walnuts complement stuffing and gravy. For lighter meals, serve the salad alongside a simply grilled fish or as part of a Mediterranean-style spread with cheeses and charcuterie.

Because it travels well when components are kept separate, the salad is a reliable choice for potlucks and picnics. In summer, choose crisp, juicy apples and chilled grapes; in autumn, try a mix with roasted pear and a drizzle of maple syrup for seasonal warmth. The recipe’s versatility makes it suitable for casual lunches and more formal gatherings alike, and with a few thoughtful tweaks it can adapt to virtually any menu.

Nutrition and Dietary Considerations

This salad can be tuned to fit many dietary needs. Using yogurt instead of mayonnaise lowers saturated fat and adds protein, making it a better choice for heart-conscious eaters. Walnuts contribute beneficial omega-3 fatty acids, fiber, and plant-based protein, but they’re calorie-dense, so portion control is useful for those watching intake. Apples deliver fiber and vitamin C, and pairing them with a fat source improves absorption of fat-soluble nutrients.

For gluten-free and vegetarian diners, the Waldorf is naturally suitable with no significant changes. Vegan versions are simple too: substitute plant-based yogurt or a blended silken tofu dressing for mayonnaise. Be mindful of added sweeteners or candied nuts if you’re limiting sugar. Overall, the salad offers a nutrient-rich choice that feels indulgent without being heavy when prepared thoughtfully.

Troubleshooting Common Issues

If the salad tastes flat, check the balance between acid and fat. A squeeze more lemon or a teaspoon of apple cider vinegar revives muted flavors. If apples soften too quickly, they were likely cut too far in advance or stored improperly; fresh-cut and dressed just before serving usually solves that problem. Overly sweet dressings can be countered with extra lemon or a pinch of salt to restore contrast.

When walnuts lose their crunch, toasting them briefly can help, but once soggy they won’t fully recover. Prevent this by adding them at the last minute or keeping a small bowl of toasted nuts for garnish. For pieces that are too large and awkward to eat on a fork, chop them coarsely before adding to the salad; this spreads their flavor and texture more evenly. These practical fixes help maintain the crisp, contrasting experience that defines the dish.

Personal Notes from My Kitchen

I grew up seeing a version of this salad at family gatherings where the walnuts were always the first thing to disappear from the serving bowl. Over the years I learned small habits that make the dish consistently satisfying: never slice apples until you’re ready to dress them, always toast the nuts, and keep the dressing restrained. Once I served a lightened Waldorf at a backyard dinner and was surprised when a guest declared it the highlight of the meal — a reminder that small, well-executed touches can steal the show.

Another time I experimented with roasted apples and a warm walnut vinaigrette during a chilly autumn weekend. It shifted the salad toward something more autumnal and comforting, and guests kept asking for the recipe. Those experiments taught me to treat the Waldorf as a living idea rather than a rigid formula; as long as apple and walnuts remain central, you can bend the salad toward freshness, richness, or comfort depending on the moment.

Bringing It to the Table

Waldorf Salad with Walnuts. Bringing It to the Table

Waldorf Salad with Walnuts endures because its foundation is both sound and adaptable. Crisp apples provide brightness, walnuts give depth, and the dressing ties everything together. Whether you stick to the classic composition or explore contemporary substitutions, the goal is the same: achieve a satisfying balance of textures and flavors. Try a few versions, take notes on what you and your guests prefer, and soon you’ll have a personal favorite ready to serve at impromptu lunches and special occasions alike.

Spinach and Cheese Pasta: A Comforting Green Twist on an Old Favorite

There is a kind of quiet pleasure in a bowl of warm noodles tangled with silky greens and melting cheese, the kind that warms hands and clears the mind after a long day. This recipe idea — Spinach and Cheese Pasta — lives somewhere between simple weeknight cooking and the kind of dish you bring to a friend’s house when you want to impress without fuss. It combines bright, tender spinach with creamy, salty cheese and the toothsome bite of perfectly cooked pasta, and yet it leaves a lot of room for personality. In the paragraphs that follow I’ll share practical techniques, ingredient choices, variations for different diets, and tips I’ve learned in real kitchens to keep the result vibrant and balanced. Expect concrete recipes, troubleshooting, and serving ideas so that the next time you reach for greens and a wheel of cheese, you’ll know exactly how to turn them into something memorable.

Why Spinach and Cheese Works So Well Together

Spinach brings fresh vegetal flavor and a vivid color that lifts a dish visually and nutritionally, while cheese contributes fat, salt and a creamy mouthfeel that makes every forkful feel indulgent. Together they strike a harmony of textures: the slight chew of cooked spinach, the silk of a melted cheese sauce, and the spring of al dente pasta. The pairing is flexible enough to wear many culinary hats — from quick weekday bowls to oven-baked gratins — yet simple enough that basic pantry staples are often all you need. Unlike heavier greens, spinach softens quickly and absorbs the surrounding flavors, which means a little garlic, lemon or nutmeg can transform the profile dramatically. That adaptability is why this combination turns up across cuisines, from Italian-style béchamel pastas to Mediterranean lemony sautés.

Beyond taste and texture, spinach and cheese dishes are easy to scale and substitute, a practical advantage in every kitchen. Whether you’re cooking for one or feeding a crowd, the formula holds: more pasta if you need belly-filling calories, extra greens to stretch the meal, and a bigger portion of cheese when you want decadence. The nutritional picture is favorable too: spinach supplies fiber, vitamins and iron, while cheese brings protein and calcium to the table. With a few deliberate choices — whole grain or legume pasta, lighter cheeses, or an olive oil-based sauce — you can lean the dish toward health without losing the comforting core that makes it so satisfying. That balance between practicality, flavor and flexibility is the real charm of spinach and cheese pasta.

Essential Ingredients and How to Choose Them

For a dependable baseline you need four categories: pasta, fresh spinach, cheese, and aromatics plus a binding liquid or sauce. The obvious pantry items take center stage, but the quality of each makes a noticeable difference. For pasta, pick a shape with pockets or ridges — fusilli, penne, rigatoni or farfalle — so the sauce clings and every bite contains a little of everything. Fresh spinach is preferable to frozen when you want bright color and a clean taste, but frozen leaf is a perfectly fine alternative when time or budget is tight; thaw and squeeze before using to avoid soggy results.

Cheese choice dictates texture and saltiness: a mix of a high-melting, creamy cheese like fontina or mozzarella combined with a salty, aged option such as Parmesan or Pecorino Romano yields both stretch and complexity. For a lighter finish, ricotta stirred in off the heat gives cream without heaviness, while cream cheese and mascarpone create a silkier body. Aromatics — garlic, shallot, a pinch of red pepper flakes — provide contrast, and acid in the form of lemon juice or white wine brightens the whole dish. Olive oil, butter, or a splash of cream will bind the ingredients; which you choose depends on whether you prefer a lighter glisten or a richer sauce.

Ingredients Table: A Basic Shopping List

Below is a compact table listing a versatile set of ingredients and suggested quantities for four servings. Use it as a starting point and scale up or down as needed depending on appetite and available add-ins.

Ingredient Quantity Notes
Pasta (penne, fusilli, or rigatoni) 350–400 g (12–14 oz) Choose shapes with ridges or hollows
Fresh spinach 300–400 g (10–14 oz) packed Baby spinach is tender; mature needs longer wilting
Cheese (Parmesan or Pecorino) 80–100 g (3–4 oz), grated For finishing and salt
Melting cheese (fontina, mozzarella, or ricotta) 150–200 g (5–7 oz) Makes sauce creamy and cohesive
Garlic 2–3 cloves Adjust to taste
Olive oil or butter 2–4 tbsp For sautéing and flavor
Optional: lemon, cream, nuts To taste Lemon juice brightens; cream enriches

Picking the Right Pasta Shape

Not all pasta shapes are created equal when it comes to holding sauce, greens and cheese in the same bite; texture and geometry matter. Short, tubular shapes like rigatoni or penne trap wilted spinach and small cheese curds inside their cavities, making each forkful balanced. Twisted shapes like fusilli or rotini have ridges that grab thin sauces and minced aromatics, so if you’re stirring in a light olive oil- and garlic-based dressing, those shapes work beautifully. Long noodles — spaghetti, linguine, tagliatelle — provide a different, more elegant mouthfeel, and when coated heavily in a creamy béchamel or ricotta sauce they can feel luxurious and restaurant-worthy.

The material of the pasta makes a subtle difference too. Fresh egg pasta is softer and absorbs sauces quickly, which can be perfect for cream-based preparations but may risk turning mushy if overcooked. Dried durum semolina pasta holds up better in baked dishes and has a firmer bite when boiled al dente, which I usually recommend for mixed salads and casseroles. As a rule, aim for al dente cooking and reserve a cup of starchy pasta water during draining; that water is an invisible glue that transforms separate components into a cohesive, glossy sauce.

Selecting Cheeses: Texture, Salt, and Melting Ability

Cheese is the emotional center of this dish; it governs creaminess, salt level and how the final texture behaves. For melt and stretch, young cheeses such as mozzarella or fontina are excellent, while ricotta and mascarpone add silk without becoming stringy. Aged cheeses bring savory depth; Parmesan, Grana Padano or Pecorino Romano lend umami and a sharper finish to counterbalance the sweet, vegetal notes of spinach. Combining a melting cheese with an aged cheese is often the best approach, because the two play complementary roles — body and seasoning — without one overwhelming the other.

If you need to watch sodium, choose low-salt cheeses and rely on lemon, herbs and toasted nuts to add interest. Vegetarians who avoid animal rennet can find suitable hard cheeses labeled with microbial or vegetable rennet. For a distinctive blue-cheese accent, crumble a bit into the sauce at the end, but use sparingly to avoid masking the greens. Taste as you go and be cautious: cheeses vary widely, and a single handful more or less can change the final balance dramatically.

Techniques for Cooking Spinach So It Stays Bright and Flavorful

Spinach cooks fast but is fragile; the trick is to preserve its color and fresh flavor while removing excess moisture. If you’re using baby spinach, a quick toss in a hot skillet with a splash of olive oil and a pinch of salt until it just wilts is usually enough. Mature or larger leaves benefit from a brief blanching in boiling water followed by an immediate ice bath; this stops the cooking process and locks in the green hue. After blanching, squeeze the leaves gently in a clean towel or press through a fine sieve to remove water that would otherwise dilute the sauce.

Aromatics are best cooked before the spinach goes in, because garlic and shallots need more time to develop sweetness and depth. Add crushed garlic to the hot oil for just 30–60 seconds to soften its edge without browning, then toss in the spinach to finish. When you combine the greens with pasta, do it off the direct heat if you plan to add cheese that might separate under high temperature. Gentle handling preserves color, texture and the lively herbal notes that make spinach interesting rather than flat.

Sauces That Complement Greens and Cheese

There isn’t a single correct sauce for spinach and cheese pasta; the best choice depends on whether you want a light, olive oil-based dish or something richer and baked. For a simple stovetop option, a garlic-lemon emulsion with olive oil, a little reserved pasta water and shaved Parmesan creates a bright, silky coating that lets the spinach sing. If you prefer comfort food, a béchamel enriched with grated cheese becomes a luscious binder for pasta and greens before finishing under the broiler for a golden top. Ricotta stirred in off the heat offers a middle ground: it thickens without heaviness and adds a fresh dairy note that pairs beautifully with lemon zest.

Cream-based sauces are indulgent and forgiving: they tolerate added proteins like chicken or sausage and help temper the sometimes metallic edge of very young greens. Pesto is another excellent partner; a basil or walnut pesto blended with spinach creates color harmony and a herby backbone that soft cheeses can round out. For a dairy-free approach, pulse blanched spinach with toasted nuts, olive oil, garlic and nutritional yeast to mimic richness while keeping the dish vegan-friendly. Each sauce type demands slightly different cooking sequences, so read ahead and assemble mise en place to keep timing tight and textures optimal.

Step-by-Step Recipe: A Reliable Spinach and Cheese Pasta

This recipe aims for balance: bright spinach flavor, melty cheese, and perfectly cooked pasta, all assembled in a single pan and finished with a sprinkle of salty hard cheese. Start by bringing a large pot of water to a rolling boil and salt it generously; the pasta should taste slightly seawater-salty when done. While the water heats, wash and roughly chop spinach if the leaves are large, grate your cheeses, and mince a couple of garlic cloves; having these elements ready avoids overcooking the greens or burning the aromatics. Cook the pasta to one minute shy of package instructions for al dente texture, reserving about a cup of pasta water before draining. Meanwhile, warm olive oil or butter in a large skillet, soften the garlic, add the spinach to wilt, then fold in the drained pasta along with cheese and a few spoonfuls of the reserved water to create a glossy, binding sauce.

Finish with lemon juice or vinegar to brighten, and adjust salt carefully because the cheeses will bring additional seasoning. If you prefer a creamier texture, stir in ricotta or a splash of cream off the heat so the dairy doesn’t split. Serve immediately, topped with extra grated hard cheese, a drizzle of high-quality olive oil and cracked black pepper. If baking is desired, transfer the combined pasta to a buttered baking dish, top with remaining melting cheese and breadcrumbs, then broil until the surface is bubbly and golden. This method yields a more textural contrast — crisp top, soft interior — that’s excellent for feeding a crowd.

Variations: Proteins, Vegetables and Flavor Profiles

Spinach and cheese pasta is a blank canvas for additions. Add roasted mushrooms for earthiness, sun-dried tomatoes for concentrated sweetness, or sautéed leeks for a softer onion flavor. For protein, diced chicken, crumbled Italian sausage, or seared shrimp integrate seamlessly; if using cured meats like pancetta or bacon, render the fat first and use it as the base for frying garlic and then wilt the spinach in that flavorful fat. Legumes such as chickpeas or white beans are good for plant-based protein and contribute body without overpowering the dairy notes.

Regional twists are easy: add nutmeg and cream for a classic Italian-style bake, incorporate curry powder and coconut milk for a fusion take, or toss in za’atar and lemon with feta for a Mediterranean vibe. Nuts — toasted pine nuts, walnuts or almonds — add crunch and a toasty counterpoint to the lush sauce. Don’t forget herbs: basil, parsley, dill or chives can change the character of the dish at the last minute and bring freshness that elevates simple ingredients into something nuanced.

Storage, Make-Ahead, and Freezing Tips

You can prepare many components ahead to save time without sacrificing quality. Cooked pasta combined with the sauce holds in the refrigerator for up to two days, though it will absorb liquid and can dry out; store with a splash of olive oil or reserved pasta water to maintain silkiness. If planning to reheat, add a little cream, milk or broth and warm gently on the stove to revive the sauce; avoid microwave reheating at high power or the cheese can separate and the greens become rubbery. For baked versions, assemble and refrigerate pre-topped, then slide into the oven for a reheated casserole that tastes nearly as good as fresh.

Freezing cooked spinach and cheese pasta is possible but requires caution: cheeses like ricotta and cream can become grainy after freezing and thawing, altering texture. If freezing is necessary, freeze the sauce and pasta separately if possible, or undercook the pasta slightly before combining, so it won’t become mushy when reheated. Thaw in the refrigerator overnight and reheat gently in a skillet with added liquid, stirring until the sauce re-emulsifies and the greens relax back into a pleasant texture.

Troubleshooting Common Problems

Spinach and Cheese Pasta. Troubleshooting Common Problems

Sometimes the dish can go flat, greasy or clumpy, but the fixes are straightforward. If the pasta becomes gluey, it’s likely overcooked or lacked enough oil at the outset; rescue it with more reserved pasta water and a short burst of gentle heat while stirring. If the sauce splits or looks oily, remove from the heat and whisk in a spoonful of cold water or a bit of ricotta; that can bring the emulsion back together. For bland results, acid is your friend: a squeeze of lemon, a splash of vinegar or a few flakes of chili can lift the flavors dramatically.

When the greens turn muddy in color or flavor, it usually means they were overcooked or cooked in a pan that’s too crowded. Cook them quickly in a hot pan in batches if necessary, and add them at the right moment so they wilt but retain brightness. Salt judiciously and taste as you go, particularly before adding cheese, because different cheeses have varying salt levels and can quickly push the dish into over-seasoned territory.

Pairings: What to Serve with Spinach and Cheese Pasta

The right accompaniment complements texture and flavor without competing. A crisp green salad with a sharp vinaigrette provides a pleasant contrast to the richness of melted cheese and gives the meal a refreshing counterpoint. Toasted bread or garlic focaccia offers a crunchy vehicle for scooping up any remaining sauce, and roasted vegetables like cherry tomatoes or asparagus bring both color and an earthy backdrop. For drinks, a bright white wine with acidity — think Sauvignon Blanc or a dry Vermentino — cuts through the creaminess, while a light red like Pinot Noir works well if the dish includes browned sausage or mushrooms.

Simple finishing touches make a difference: toasted breadcrumbs for crunch, a drizzle of extra virgin olive oil for lushness, or a few lemon zests to add perfume. If you’re serving a crowd, offer grated hard cheese at the table and small bowls of chili flakes, chopped herbs and lemon wedges so guests can personalize their plates. These small rituals of service turn a humble dinner into a more intentional, restaurant-like experience.

Nutritional Considerations and Healthier Swaps

Spinach and cheese pasta can be adapted to many dietary needs without losing its core appeal. Swap traditional pasta for whole wheat, legume-based, or vegetable-infused noodles for higher fiber and protein content, keeping in mind that legume pastas often require slightly different cooking times. Use part-skim ricotta, cottage cheese, or a smaller amount of a strongly flavored aged cheese to cut calories while preserving taste. Incorporate extra vegetables such as roasted peppers or zucchini to increase volume and micronutrients so you can serve smaller portions of the richer elements.

For dairy-free or vegan versions, use a blend of soaked cashews pureed with nutritional yeast, garlic and lemon as a creamy base, and add a touch of miso for savory depth. Nutritional yeast contributes cheesy umami without dairy, and a sprinkle of toasted seeds adds crunch and healthy fats. Keep seasoning in mind: many store-bought vegan cheeses are more salty or processed, so adjust additional salt sparingly and favor whole-food alternatives when possible.

Personal Notes from My Kitchen

Years of testing recipes taught me to respect timing when working with delicate greens; nothing signals kitchen frustration faster than a bowl of brown, soggy spinach. Early on I learned to reserve pasta water religiously after a fluke batch that turned into a gluey mess — that saved many later attempts and became my small ritual for rescue. I also discovered that a quick finish of lemon zest and a few basil leaves can turn an ordinary weeknight dinner into something unexpectedly lively, and I now treat those final minutes like an orchestra tuning to get the perfect ending.

One memorable Sunday I made a large tray of baked spinach and cheese pasta for friends and, short on time, used a combination of ricotta and fontina. We ate standing around the kitchen island, and someone commented on how the dish tasted like a warm memory rather than a recipe. That evening reinforced the idea that technical precision is useful, but generosity and timing — serving the food while it’s hot and sharing it without fuss — are what truly make a dish stick in people’s minds. I still follow that simple rule: cook well, plate quickly, and pass it around.

Final Practical Tips Before You Cook

To make your best spinach and cheese pasta, prep in advance: grate the cheese, wash and dry the spinach, and have aromatics chopped before you heat the pan. Use the reserved pasta water as a texture tool rather than a contingency; it’s the easiest way to create a glossy, cohesive sauce without adding excess fat. Taste at every step, especially after adding cheese, because fine-tuning salt and acid makes the difference between good and memorable. If you’re trying a new cheese or pasta shape, cook a small test batch first so you know how variables will behave under your stove and pans.

Finally, embrace experimentation. Small substitutions often lead to exciting discoveries — a lemon-thyme finish, a handful of toasted hazelnuts, or a swipe of pesto can shift the dish into an entirely new mood. Keep the core idea in mind: bright greens, melted cheese, and pasta that holds everything together. With a few thoughtful choices and attention to timing, you can turn those three ingredients into a wide range of inviting meals that feel both comforting and alive.

Green Gold on Your Plate: A Fresh Take on Kale and Quinoa Salad

There are dishes that feel like chores and others that quietly change your week — this salad belongs to the second group. Combining the chewy bite of kale with the light, nutty grain of quinoa creates a bowl that is texturally satisfying and nutritionally generous. Whether you need a quick weekday lunch, a colorful side for guests, or a make-ahead option for busy days, this recipe fits the bill. I’ll walk you through ingredient choices, technique, dressings and variations so you can make a version that feels personal and reliable. Read on and you’ll have more than a recipe; you’ll have a small culinary toolkit for building healthy, flavorful bowls.

Why this combination works: nutrient power and palate balance

Kale has earned a reputation as a superfood for good reason: it’s dense with vitamins, minerals and fiber while being low in calories. Quinoa, an ancient grain, brings complete protein and a pleasing texture that offsets kale’s sturdiness. Together they become more than the sum of their parts — protein meets greens, chew meets lightness, and the whole salad can satiate without weighing you down. For anyone trying to eat more whole foods, this pairing is a practical cornerstone; it adapts well to vegetarian, vegan and gluten-free diets and carries through breakfast, lunch, dinner or snacks.

On the palate, you get contrasts that keep each bite interesting. Kale provides a slightly bitter, leafy baseline that benefits from acid and oil; quinoa adds subtle nuttiness and tiny pops of texture. A thoughtful dressing brightens both components and tames bitterness while additional elements like roasted vegetables, nuts or fruit introduce sweetness and crunch. This salad is not a one-note health food; it’s a canvas where flavors and textures play off each other. Understanding that balance is the key to building a bowl you won’t tire of.

Choosing your ingredients: quality matters

Start by buying the freshest kale and the best quinoa you can find. For kale, look for firm, crisp leaves without yellowing or limp stems; fresh bunches will feel heavy for their size. Quinoa varies by color — white cooks fluffier, red keeps a firmer chew and black yields an earthier flavor — so pick the one that matches your texture preference. If you’re buying packaged quinoa, check the roast date or packaging integrity; rancid oil in older grains can give an off taste. Small choices at the market translate directly into the final bowl’s clarity.

Other components deserve equal attention. Extra virgin olive oil should smell bright and peppery rather than flat. Fresh citrus or good vinegar lifts the whole salad, so avoid those dull, cheap bottles when possible. Nuts and seeds should be toasted fresh for flavor and aroma; stale walnuts or pumpkin seeds will deaden the dish. If adding fruit like pomegranate or apple, choose firm, ripe specimens; they should be juicy and crisp. When each ingredient is chosen with care, the salad assembles itself into something memorable.

Picking the right kale

Not all kale behaves the same. Curly kale is bold and textural, lacy leaves that clamp down on dressing in satisfying ways; dinosaur or lacinato kale is darker, slightly sweeter and more tender; baby kale offers a milder taste and needs less massaging. For a salad that holds up well through a lunch hour, I often use lacinato because it blends tender mouthfeel with enough structure to stay interesting two or three hours later. If you prefer a delicate bite, baby leaves work beautifully but wilt faster once dressed.

Preparation is also important. Remove the fibrous stems by running a knife or your fingers down the leaf and discard or save stems for stocks. Slice leaves into thin ribbons for better mouthfeel and easier eating. For massaging, a pinch of salt and a drizzle of oil, worked into the leaves for a minute or two, softens toughness and releases sweetness — this is quick chemistry you’ll notice immediately. The right cut and a few strokes with your hands make the greens sing.

Picking and cooking quinoa

Quinoa cooks fast but benefits from a couple of small technique adjustments. Rinsing is non-negotiable; there’s a natural coating called saponin that can make quinoa taste soapy if not washed away. Use a fine mesh sieve and rinse under cold running water until the water runs clear. For cooking, a ratio of roughly two parts water to one part quinoa produces a light, fluffy result; a little less water yields a chewier kernel. Toasting the dry grain for a minute in the pot before adding water brings out nuttier aromas and adds complexity.

Once cooked, allow quinoa to cool to near room temperature before folding it into greens; hot quinoa wilts kale and can turn the salad limp. Fluff with a fork to separate grains, and if you plan to refrigerate it, spread the cooked quinoa on a tray to cool faster. If you want extra flavor, cook quinoa in vegetable broth instead of water, or stir in an aromatic like a smashed garlic clove or bay leaf while it simmers. These small steps elevate a simple grain into something resonant.

Dressing strategies: acidity, fat and texture

Every great salad depends on its dressing. For this bowl, the aim is to balance acid, fat and a hint of sweetness to counter kale’s bitterness and harmonize quinoa’s mild nuttiness. A citrus vinaigrette brightens both components, while a tahini-based dressing adds creaminess and a touch of umami. Use an acid you enjoy — lemon, lime, apple cider vinegar or sherry vinegar — and pair it with a neutral oil or an olive oil with a gentle profile. Sweetness can come from honey, maple syrup or a mashed date, and a pinch of salt rings the flavors together.

Texture matters as much as flavor. Creamy dressings cling to leafy surfaces, while a thinner vinaigrette slides into quinoa crevices and disperses flavor evenly. Consider making a double-textured dressing: a creamy tahini base thinned with lemon and water becomes spoonable but still coats leaves. Emulsify by whisking vigorously or shaking in a jar; a small spoonful of mustard acts as a natural binder if you want extra stability. Taste as you go and adjust acid, sweetness and salt to match your ingredients that day.

Citrus tahini dressing — a versatile recipe

This dressing bridges bright acidity and nutty creaminess, perfect for greens and grain salads. Ingredients are simple and easy to tweak: tahini for body, lemon juice for brightness, garlic for depth, maple syrup to balance, and water to reach the right consistency. Whisk these in a bowl or shake in a jar until smooth; if the mixture thickens, add water teaspoon by teaspoon to loosen. A little flaky salt at the end wakes up the tahini’s subtle bitterness and completes the dressing.

  • Ingredients: 3 tbsp tahini, 2 tbsp fresh lemon juice, 1 tbsp maple syrup, 1 small garlic clove minced, 3–4 tbsp cold water to thin, salt and black pepper to taste, 1 tbsp olive oil (optional).
  1. Combine tahini, lemon, maple and garlic in a jar. Whisk or shake until combined.
  2. Add water slowly until dressing pours easily but still clings to a spoon. Season with salt and pepper, then stir in olive oil if using for silkiness.
  3. Taste and rebalance: more lemon for brightness, more maple for sweetness, more water if too thick.

Store leftovers in the fridge for up to a week; stir before using as separation is natural. This dressing adapts well: swap lemon for orange for a sweeter twist, or add a teaspoon of hot sauce for a spicy kick. Its versatility makes it a go-to for lunches and potlucks alike.

Assembling the salad: choreography, not chaos

Building the salad is about layering textures and distributing flavor evenly. Start with massaged kale to create a tender, receptive base. Fold in cooled quinoa and toss gently so the grains nestle between leaves rather than sit on top. Add any roasted vegetables, fresh herbs and reserved crunchy elements last so they remain textural. Dress the salad sparingly at first; you can always add more, but overdressing is hard to reverse. Aim for light coverage so each bite reveals multiple layers.

Pay attention to proportions. A good rule is roughly two parts kale to one part quinoa by volume, adjusted by appetite and whether you add a starchy or protein-rich component. If the salad will sit for several hours, underdress slightly and add a finishing splash of vinaigrette before serving. Tossing technique matters too: use broad, gentle folds rather than aggressive stirring to preserve delicate add-ins like pomegranate arils or microgreens. Thoughtful assembly keeps every mouthful balanced and interesting.

Variations and add-ins: make it your own

One reason this salad is beloved is its adaptability. Add roasted sweet potato cubes for sweetness and heartiness, or toss in shredded carrots and cucumber for a lighter crunch. Proteins like grilled chicken, roasted chickpeas or flaked salmon convert the bowl into a complete meal. For a Mediterranean twist, include feta, kalamata olives and sun-dried tomatoes; for an autumnal feel, try roasted beets, chopped walnuts and slices of pear. Each variation shifts the salad’s character while keeping kale and quinoa at the base.

Texture is your friend. Toasted nuts or seeds add crunch; creamy elements like avocado or soft cheese add richness; pickled red onions or capers introduce brightness and bite. If you follow a plant-based diet, roasted tempeh or spiced lentils are excellent protein bumps. For an extra flavor layer, finish with a handful of fresh herbs — parsley, mint or cilantro — which lend immediate vibrancy. Experimenting with a few consistent combinations will give you weekday winners without guesswork.

Serving ideas and pairings

This salad travels well from counter to table. Serve it as a main dish with a side of warm flatbread or as a composed accompaniment to simple roasted proteins. It’s also excellent in mason jars layered for grab-and-go lunches: dressing on the bottom, followed by quinoa, sturdy vegetables, kale, and delicate toppings on top. If you serve it buffet-style, offer dressings on the side so guests can choose their preferred intensity and keep crunchy toppings in separate bowls to preserve texture.

Beverage pairings are straightforward. Light white wines or sparkling water with citrus suit the bright, vegetal notes, while a chilled rosé complements richer add-ins like nuts or roasted squash. For warm-weather dining, fresh iced tea with lemon is refreshing and keeps the meal feeling clean. Consider the salad’s dominant flavor when pairing: citrus-forward dressings benefit from brighter drinks, whereas nutty tahini-based bowls pair well with fuller, mildly tannic wines.

Make-ahead, storing and transporting

One of this salad’s strengths is make-ahead friendliness. Cook quinoa up to three days ahead and refrigerate, and wash and dry kale so it’s ready to be massaged quickly. Store dressings separately to prevent sogginess; a tight-lidded jar preserves freshness and allows easy shaking before use. If you assemble the entire salad in advance for a few hours, underdress and keep crunchy toppings separate. For longer storage, keep components compartmentalized: greens in one container, grains in another and toppings in small bags or containers.

Transporting the salad for a picnic or potluck is easy with layered jars or bento boxes. Pack toasted nuts and seeds in a sealed container to add at serving; they retain crunch better that way. If you must travel with a dressed salad, pack the dressing on the side and toss just before eating. When refrigerated, the salad keeps well for two to three days, but watch for textural changes: avocados brown and soft vegetables can lose their crispness. A quick freshening toss revives most make-ahead bowls.

Nutrition snapshot: what you actually get

Here’s a practical view of the salad’s nutritional strengths. A typical serving combining two cups of massaged kale, one cup cooked quinoa, a dressing portion and modest add-ins offers a solid hit of fiber, plant protein, vitamins A and C, calcium and iron. The grain-and-greens pairing makes the bowl more satiating than a greens-only plate and provides a broader amino acid profile. For those watching calories, reducing oil in the dressing and focusing on citrus can keep the bowl light while preserving flavor.

Component Approx. per serving
Calories 350–420 kcal
Protein 10–15 g
Fiber 7–10 g
Vitamin C 40–80% DV
Iron 8–15% DV

Numbers vary widely based on portion sizes and added ingredients like cheese or nuts, so consider this a ballpark. If you need extra protein, add a lean source and the bowl turns into a complete meal; if your goal is calorie control, reduce the dressing and increase vegetables. The flexibility allows the salad to align with dietary goals without sacrificing deliciousness.

Troubleshooting common problems

Sometimes salads disappoint — limp leaves, bland flavor or uneven textures. To avoid limp greens, don’t pour hot quinoa onto cold kale; cool the grain first. If the salad tastes flat, add a splash of acid or a pinch of salt and re-toss. When crunch is missing, introduce toasted nuts or seeds at the end; they transform the experience. Keep in mind that a small, well-placed ingredient can rescue a bowl: a handful of herbs, a squeeze of lemon, or a scattering of shaved cheese often does the trick.

Overdressing is a frequent misstep. Start with less and add gradually, tasting after each tweak. If you’ve already over-dressed, lift excess liquid with a paper towel or add more dry components like extra greens or grains to absorb it. For bitter kale, massaging and adding salt and sweet or acidic elements neutralize sharpness. These simple fixes make the difference between a salad that fades and one that becomes a weekly staple.

My kitchen notes: lessons from tinkering

I first made a kale and quinoa combination out of pantry necessity and stubborn appetite for something fresh. The very first attempt was underdressed and my family called it “sadder greens.” After a few nights of adjustments — a splash of lemon, a handful of toasted almonds and a better technique for massaging — it turned into the dish everyone asked for. Over time I learned to match crunch with cream, acid with bitterness, and texture with timing. These small refinements turned a utilitarian bowl into something I happily bring to friends’ potlucks.

One memorable version included roasted cauliflower, cranberries and a citrus-tahini dressing; it became a holiday side that balanced heavier mains. Another favourite late-summer bowl swapped quinoa for a mix of farro and barley and added grilled peaches; although not strictly the same, the technique was identical and the concept translated smoothly. The lesson: once you understand the base mechanics, shifting ingredients by season yields reliable, inspired results without starting from scratch each time.

Frequently asked questions

Can I use frozen kale? Yes, though texture differs. Frozen kale can be thawed, squeezed dry and used in warm preparations like grain bowls that are served slightly warm. For crisp salads, fresh kale is preferable. If you must use frozen, consider warming the quinoa and folding the greens in while still slightly warm to create a comforting variation rather than a crisp salad.

Is quinoa gluten-free? Yes, quinoa is naturally gluten-free and makes this salad suitable for people avoiding gluten. Be mindful of cross-contamination if you are highly sensitive; buy packages certified gluten-free if necessary. Quinoa’s protein quality is notable among grains, making it a particularly good choice for vegetarian and vegan meals.

Seasonal shopping and small upgrades

Kale and Quinoa Salad. Seasonal shopping and small upgrades

Seasonality changes the salad’s personality. In winter, add roasted squash, pomegranate seeds and blood orange segments for depth; in spring, bright peas, radishes and fresh mint lighten the bowl. Summer invites grilled corn, tomatoes and basil; fall calls for roasted root vegetables and toasted hazelnuts. Shopping seasonally not only improves flavor but also keeps the salad feeling new across months, preventing repetition fatigue and showcasing local produce at its peak.

Little upgrades have a big effect. Splitting and lightly toasting a lemon over the stove before juicing mellows bitterness and adds caramelized notes. A pinch of smoked paprika in the dressing introduces an unexpected savory layer. Toasting sesame seeds or adding a spoonful of preserved lemon finely chopped can shift the bowl from familiar to memorable. These micro-choices create personality without complicating the recipe.

Final thoughts before you dive in

This kale-and-quinoa approach is less about strict rules and more about a method that yields reliable results: choose good ingredients, respect texture, balance acid and fat, and finish with a crunchy element. The bowl is forgiving and invites experimentation, so start with a trusted base and let seasonal produce steer your variations. If you approach it as a practice rather than a one-time recipe, you’ll discover combinations you return to again and again.

When you make your first version, pay attention to what you liked and what you would change next time. Keep a mental note — or a quick line in your phone — about dressings you prefer and which add-ins worked best. Over a few weeks, you’ll build a small repertoire of bowls tailored to your tastes. That’s the real joy: a simple formula that adapts to mood, season and appetite, giving you a fresh, nourishing meal whenever you need it.

Sunlit Skillet: Mastering the Vegetable Frittata at Home

I remember the first time I turned a patch of garden vegetables and a few spare eggs into something that felt like a small celebration, and that moment is the origin of my affection for the vegetable frittata. It is one of those dishes that looks fancier than it is and rewards a little attention with big flavor, whether you serve it for breakfast, a casual lunch, or a light dinner. In this article I will walk you through the logic behind a great frittata, the choices that make it sing, and the techniques that keep it from becoming rubbery or soggy. You will find practical tips for selecting produce, handling eggs, and adapting the recipe for different diets. Expect recipes, troubleshooting, and a few personal tricks I picked up from years of cooking for family and friends. By the end you should feel confident turning whatever vegetables you have on hand into a bright, healthy, satisfying meal.

What exactly is a frittata and how does it differ from similar dishes?

A frittata is an Italian-style egg dish similar in spirit to an omelette or quiche, but it has its own personality thanks to technique and texture. Unlike an omelette, which is folded and cooked quickly over high heat, a frittata is started on the stove and finished in the oven or gently covered so the eggs set evenly without folding. Compared to a quiche, a frittata needs no crust, which makes it quicker and often lighter, while still carrying plenty of mix-ins like sautéed vegetables, herbs, and sometimes cheese. The result is a tender, slightly puffed cake of eggs that holds together when sliced yet still feels homey and rustic. Understanding those differences helps you decide when a frittata is the right vehicle for your ingredients and how to adjust cooking times for the texture you prefer. Once you grasp the basic method, you can vary seasonings, fillings, and even the fat you use, while keeping the core method intact.

Why choose a vegetable-based frittata?

Making a frittata centered on vegetables is one of the easiest ways to increase the variety and volume of produce in your diet without sacrificing flavor or comfort. Vegetables add texture, color, and nutrients, while eggs supply protein and structure, creating a balanced dish that is naturally portable and good for meal prep. A vegetable-forward frittata can be tailored to seasons: think spring asparagus and peas, summer peppers and tomatoes, autumn squash and kale. For people aiming to eat more healthy meals without spending every evening at the stove, this dish is a reliable ally because it repurposes leftovers and works with whatever is fresh at the market. From a hosting perspective, a vegetable frittata scales well, travels safely, and slices into neat portions that look appealing on a shared table. All of these benefits explain why I keep a favorite skillet and a jar of herbs near the stove at all times.

Essential ingredients and how to choose them

At the heart of a good frittata are a few simple elements: eggs, vegetables, fat for cooking, salt and pepper, and often a bit of cheese or herbs for brightness. Choosing eggs is straightforward but worth a moment of thought; fresher eggs hold together better and have a rounder, creamier texture when cooked. When selecting vegetables, lean toward those that release little moisture when cooked or pre-cook wetter items like mushrooms and tomatoes to avoid a watery finished dish. Use an oil with a neutral flavor or a knob of butter to develop caramelization on vegetables, which adds depth without masking delicate herbs. Cheese is optional, and when used sparingly it enhances mouthfeel while keeping the dish balanced rather than heavy. Finally, herbs and citrus zest can lift the whole preparation, so have a small herb—like parsley, chives, or basil—on hand for finishing.

Eggs: how many and how to treat them

Eggs determine the structure of your frittata, so a straightforward ratio helps: plan on roughly two to three large eggs per person depending on appetite and the amount of vegetables you stir in. Whisk eggs until the white and yolk are fully combined but stop before creating too much foam, because excessive air leads to a fragile, spongy texture rather than a cohesive bite. Season the beaten eggs with salt modestly; salt draws moisture out of vegetables and can affect texture, so sometimes it is better to salt the vegetables during sautéing and adjust the final seasoning. If you want a silkier custard, add a splash of milk, cream, or even yogurt, but know that dairy will also make the dish richer and slightly softer. Pour the egg mixture over veggies that are warm but not steaming; this helps the eggs begin to set at the edges and promotes even cooking. Small tests—like tilting the pan to see if the egg flows—make the difference between underdone and perfectly set.

Vegetables: selection, preparation, and cooking order

Choosing vegetables is where creativity steps in, and the best combinations follow a simple rule: pair items with similar cooking times or give slower vegetables a head start. Onion, pepper, and carrot need longer to soften and benefit from a gentle sauté, while spinach and herbs wilt quickly and should be added at the end. Cut vegetables into uniform pieces so they cook evenly, and consider texture contrasts: tender zucchini and crisp red pepper make for better mouthfeel than a plate full of one single texture. Root vegetables and dense squash should be par-cooked—roasted or steamed—before mixing with eggs to prevent a soggy center or extended oven time. Salt vegetables during their initial cooking to draw out moisture and concentrate flavor, but taste as you go so final seasoning remains balanced. When in doubt, imagine each vegetable’s role: base, flavor note, or flourish, and prepare accordingly.

Tools and pans: what works best

A sturdy, oven-safe skillet is the classic tool for a frittata and for good reason; it gives you the ability to sauté vegetables and finish the dish under the broiler without changing cookware. Cast iron and heavy-gauge stainless steel pans both conduct heat well and create a pleasant crust on the bottom if you preheat properly and use enough fat. Nonstick pans are comfortable for delicate eggs and make flipping slices easier, but they do not brown as deeply and can feel less rustic on the plate. Whatever pan you choose, a size of 10 to 12 inches is a practical middle ground for serving four people; adjust egg counts accordingly. Remember to check oven compatibility—many skillets have handles that cannot tolerate high heat, so know your pan before preheating. Lastly, keep a silicone spatula and an oven mitt at the ready; they are small details that keep the process smooth and safe.

Step-by-step technique: stovetop to oven method

Start by heating the pan and cooking the vegetables until they have released their aromas and, where appropriate, taken on color; this is the flavor base of your dish. Reduce the heat slightly, pour the beaten eggs evenly over the warm vegetables, and make small circles with the spatula to lift edges and encourage uncooked egg to flow underneath. Cook on the stovetop until the edges begin to set but the center remains loose—this is the moment to add cheese if you are using it, scattering it so it melts into small pockets. Finish the frittata under a hot oven or a quick pass under the broiler until the top is lightly puffed and just golden; keep an eye on it because broilers vary and eggs go from perfect to overcooked quickly. Let the frittata rest for a few minutes after removing from the oven so it firms and slices cleanly, then serve warm or at room temperature. This method rewards attention and produces a texture that is tender without being wet.

Variations and flavor pairings

A frittata thrives on variation, and swapping spices or cheeses can transform the dish entirely while keeping the same technique. For Mediterranean flavors, include roasted red peppers, olives, and feta with a touch of oregano; for a Mexican twist, add black beans, corn, cilantro, and a sprinkle of queso fresco. Asian-inspired combinations work well too: think shiitakes, scallions, a little soy or mirin, and toasted sesame to finish. If you want to keep the dish lighter and healthy, load it with greens, tomatoes, and a modest amount of goat cheese or ricotta for creaminess without heaviness. Another approach is to pick one dominant vegetable and build around it, such as caramelized leeks with thyme or roasted eggplant with basil. These shifts demonstrate how the basic formula can satisfy wildly different cravings with simple pantry adjustments.

Dietary adaptations: vegetarian, low-carb, and dairy-free options

Because eggs are the structural ingredient, vegetarian versions are the default and naturally balanced when you add hearty vegetables and herbs for flavor. For dairy-free preparations, skip cheese or substitute with a small amount of nutritional yeast for umami, or use dairy-free grated cheese if you prefer a melted note. Low-carb and gluten-free diets are easily accommodated since a traditional frittata has no crust and relies on eggs and vegetables rather than starches; simply avoid starchy mix-ins like potatoes if you are limiting carbs. Vegan alternatives exist, using chickpea flour batter or blended silken tofu to mimic the custard-like body of eggs, though these versions require different seasoning and cooking times. Whatever your dietary preference, the method encourages creativity, and small experiments will reveal what you and your guests prefer.

Sample ingredient swaps and quick reference

To keep decision-making simple when you stand in the kitchen, a table of swaps helps you pivot without hesitation and keeps the dish healthy and balanced. Use firmer vegetables in place of one another if you lack a specific item, choose cheeses with stronger flavor in smaller amounts, and pick herbs that mirror the cuisine you want to evoke. Fat choice also affects flavor; olive oil suggests Mediterranean notes, while a dab of butter hints at comfort. Below is a short table to guide substitutions so you can improvise with confidence and avoid a last-minute trip to the store.

Ingredient Swap Effect
Spinach Kale or Swiss chard More robust texture, longer cooking
Feta Goat cheese or ricotta Softer melt, tangy to mild
Potato Cauliflower florets Lower carbs, lighter texture
Milk/Cream Yogurt or plant-based milk Less rich, tangier or neutral

A reliable, everyday recipe I use often

I tend to cook in rhythms, so one frittata became my default on nights when I had little time but wanted something tasty and healthy; here is that version adapted into a clear, practical recipe. Start with 8 large eggs for a 10-inch skillet, add a cup of chopped mixed vegetables—such as bell pepper, onion, and zucchini—plus a handful of greens like baby spinach. Use a quarter cup of grated cheese if you like, a tablespoon of olive oil, and salt and pepper to taste; herbs such as chives or parsley finish the dish beautifully. Sauté the vegetables until softened, beat the eggs with a pinch of salt and a splash of milk if desired, pour them over the veggies, and cook on low until edges set. Finish in a preheated oven at 375°F for 6 to 10 minutes or until the top is set and slightly golden, then let rest before slicing.

Ingredient list and brief steps

Below is a tidy ingredient list and condensed method that I often give to friends who want a no-fuss approach to weeknight cooking. The list is flexible so you can tailor quantities to the number of people and to what you have on hand. The steps emphasize timing so you avoid watery centers or overcooked eggs, and they are written to help you develop an intuitive sense of doneness. Keep a small bowl for mixing and a quick-read thermometer if you like precision, although visual cues usually suffice. This simple framework takes the uncertainty out of improvising and produces a consistent result even the first few times you try it.

  • 8 large eggs
  • 1 cup mixed vegetables, chopped (peppers, zucchini, mushrooms, etc.)
  • 1 cup leafy greens or herbs
  • 2 Tbsp olive oil or butter
  • 1/4 cup grated cheese (optional)
  • Salt, pepper, and any fresh herbs to finish

Timing, temperature, and what to watch for

Timing is where many home cooks either win or stumble, and keeping control of heat is the key to a well-set center without overcooking the edges. Start with moderate heat to sweat vegetables, lower the flame before adding the eggs, and resist the urge to turn up the heat to hurry the set; eggs cook gently or they turn tough. If finishing under the broiler, move the pan to the top rack and watch closely, as a minute can change the outcome. Resting the frittata for five to ten minutes after it comes out of the oven allows carry-over cooking to finish the center and makes slicing easier. Use the wobble test: the center should have a slight jiggle but not be liquid, and the edges should pull away slightly from the pan. These cues are more useful than rigid timers because pan type and oven calibration vary.

Presentation and serving ideas

A frittata is equally comfortable served from the pan at the table as it is plated on individual plates, and a few finishing touches go a long way toward making it look deliberate and inviting. Scatter fresh herbs, a drizzle of good olive oil, or a squeeze of lemon to brighten flavors and draw the eye; a light salad on the side adds a contrasting texture and keeps the meal balanced. For brunch, add crusty bread and a bowl of pickled vegetables to introduce acidity, or offer sliced avocado and hot sauce for a relaxed lunch. Warm slices are silky, but room-temperature frittata is excellent for picnics and buffets because it holds shape. Think of presentation as a final seasoning: simple accents lift the dish without requiring elaborate plating skills.

Storage, leftovers, and meal prep

One of my favorite things about this dish is how well it stores and how useful it becomes as a quick meal option across the week. A properly cooled frittata keeps in the fridge for three to four days when covered or stored in an airtight container, and individual slices can be wrapped for lunches or snacks. Reheat gently in a low oven or in a skillet with a lid to avoid drying out; microwaves are fast but can make eggs rubbery if overheated. You can also freeze slices for up to two months, though texture softens slightly; thaw overnight in the fridge before reheating. Batch-cooking a couple of pans on a weekend can yield effortless weeknight dinners and a steady supply of protein-rich, vegetable-packed meals for an efficient routine.

Troubleshooting common problems

Problems like a soggy center, sticking, or a rubbery texture are common but fixable once you understand the cause. A wet middle usually means too much moisture in the vegetables or insufficient initial cooking; drain or sauté watery vegetables longer to concentrate flavor. Sticking often stems from inadequate fat or an overheated pan; warm the skillet fully and use enough oil so the eggs release cleanly when the frittata is done. Rubberiness occurs when eggs are cooked too fast at too high a temperature; control heat, finish gently, and avoid excessive whisking that traps air. If the top browns too quickly while the center remains soft, lower the oven rack or reduce broiler time and allow a longer finish at a moderate temperature. Learning these fixes turns mistakes into lessons rather than ruined meals.

Nutritional perspective: why this can be a healthy choice

A vegetable-filled egg dish is naturally positioned as a nutrient-dense option because it pairs high-quality protein from eggs with the fiber, vitamins, and minerals found in vegetables. Eggs contain essential amino acids and provide vitamins A, D, B12, and choline, which support multiple aspects of health, while colorful vegetables contribute antioxidants and fiber that aid digestion and satiety. By favoring olive oil over butter, adding plenty of leafy greens, and moderating cheese, you can keep the dish heart-friendly and lower in saturated fat. Portion control and pairing the frittata with a salad or whole grain such as quinoa make a balanced plate that keeps you full longer. For people tracking macros or seeking a healthy everyday meal, this preparation hits the marks without feeling like a restriction.

Personal tips I learned from trial and error

Over the years I developed a few small habits that consistently improve results and make cooking more enjoyable, habits I now share with friends who ask for tips. I always salt vegetables early in their sauté to draw out excess water and deepen flavor, but I wait to add finishing salt after the eggs set so I can taste properly. I also preheat the skillet with oil until it shimmers; this prevents sticking and encourages a lovely browning that contrasts with the tender interior. When entertaining, I double the recipe and bake in a sheet pan, then slice squares for a buffet-style presentation that stays moist and appealing. Finally, I keep a small jar of mixed chopped herbs in the fridge—parsley, chives, and dill—and use them at the end to make even a humble weekday frittata feel celebratory.

Scaling the recipe for groups and gatherings

Vegetable Frittata. Scaling the recipe for groups and gatherings

Scaling up is simple: maintain the same egg-to-vegetable ratio and use a larger pan or multiple skillets so everything cooks evenly without crowding the pan. For a crowd, a rimmed sheet pan works well; pour the egg mixture over evenly distributed vegetables and bake at a slightly lower temperature to ensure a uniformly set custard. When serving many people, cut the finished frittata into bite-sized pieces for easy grazing rather than large slices, and supply toothpicks or small plates for convenience. If you prepare more than one variety, label them and arrange them with complementary condiments such as chutney, pesto, or salsa so guests can mix flavors. Planning the timing is important: cook when your oven is free and rest the pieces on racks to avoid condensation that makes the bottom soggy.

Classic pairings and side dishes

A frittata pairs well with bright, acidic elements and crunchy textures that create contrast on the plate, and choosing sides depends on the meal context. For brunch, serve it alongside a green salad dressed in lemon vinaigrette, roasted cherry tomatoes, and toasted country bread for a rounded spread. For a light dinner, pair slices with steamed vegetables dressed with a dab of olive oil and herbs, or a simple grain salad mixed with herbs and citrus. Think also about temperature contrast: a warm frittata and chilled cucumber salad make a pleasant balance, especially in warmer months. Finally, add a small bowl of pickles or olives when serving a crowd to provide a tangy counterpoint that cuts through richness.

Creative uses beyond the plate

Leftover frittata slices can move beyond the bowl into sandwiches, wraps, and salads, extending their life and usefulness in the weekly menu. A slice tucked into toasted sourdough with arugula and a smear of pesto makes a hearty sandwich for lunch, while diced pieces tossed into a grain bowl add protein and texture. I also use cold slices as a picnic protein, arranging them alongside pickled vegetables and crackers for an effortless spread. For little ones, cut the frittata into fun shapes and serve with fruit to make an easy, nutritionally balanced meal. These small shifts in presentation keep the dish interesting and prevent the feeling of repetition over a busy week.

How to develop your own signature frittata

Making this preparation your own is really about pattern recognition and willingness to experiment with ratios and flavor profiles until something clicks. Keep a mental note of the vegetables that crisp best, the herbs that brighten your palate most, and the cheeses that melt in a way you prefer, and combine them intentionally. Start with a tried formula—such as three eggs per person and a cup of vegetables—and tweak one element at a time: swap herb, change cheese, or alter cooking finish. Invite feedback when you serve others; people will often suggest small preferences you hadn’t considered, like a touch more acidity or an herb they love. After a few iterations you will have a go-to version that reflects your taste and fits your lifestyle.

Final encouragement and an invitation to experiment

Cooking a vegetable-based egg dish is one of the most forgiving and rewarding experiments you can run in your kitchen, and the lessons learned are portable to many other recipes. Start with the foundational technique, respect the vegetables by cooking them appropriately, and pay attention to heat so the eggs set gently and retain a pleasant texture. Don’t be afraid to improvise with seasonings and cheeses, and treat each attempt as data for the next one: note what worked and what you would change. Above all, enjoy the process; a frittata is meant to be communal and adaptable, not precious, and it can become the backbone of many nourishing meals in your rotation. Try a new combination next time you open the fridge and keep a skillet handy—the results may surprise you in the best way.

Ukha Unveiled: The True Taste of Russian Fish Soup

There are soups that comfort, and there is ukha, a clear, bright fish broth that feels like sunlight in a bowl. In these pages I want to take you beyond the basics and show how a simple Russian fish soup becomes a signature dish when approached with attention and a little patience. I will walk through history, fish selection, stocks and spices, and give practical, tested steps so you can make a memorable version at home. Expect anecdotes from my kitchen, tips that save time, and a few ideas for modern twists that still respect tradition. If you love clean flavors and a soup with character, this will be worth your attention.

What Ukha Is and Why It Matters

Russian Ukha (Fish Soup). What Ukha Is and Why It Matters

Ukha is more than a recipe; it’s a culinary tradition that dates back centuries in Russia and surrounding regions. At its heart, ukha is a clear fish soup where the quality of the broth — its clarity and flavor — defines the dish. Historically, this soup was prepared outdoors by fishermen who used the freshest catch and boiled it gently over an open fire. The result was a healing, restorative broth that also served as a communal meal, eaten directly from the pot or ladled into bowls with rye bread.

Many modern cooks conflate ukha with generic fish soups, but the emphasis here is on restraint and balance. Unlike thick chowders or cream soups, ukha celebrates the delicate flavors of freshwater fish and simple aromatics. The tradition values a transparent broth, restrained seasoning, and an almost medicinal clarity that soothes the palate. This approach to fish soup reveals how technique and ingredient choice can turn humble elements into something memorable.

Origins and Regional Variations

The origins of ukha are tied to rural life, riverbanks and lakes where freshwater species were abundant. Each region adapted the dish according to its local catches, herbs and cooking methods. In some places, ukha was made with several kinds of fish combined to build depth; in others, it was a single-species clear broth highlighting that fish’s character. Variations also exist in the use of potatoes, root vegetables, or even small additions like a splash of hard liquor for warmth on a cold day.

Coastal communities developed their own takes, sometimes using saltier, firmer sea fish, while inland villages relied on pike, perch, roach or carp. There are versions that include barley or millet, and more rustic preparations that leave pieces of fish in the soup. Whether the broth is ladled over freshly boiled potatoes or served with pickled vegetables, ukha has always reflected place as much as technique. Understanding regional differences helps you choose an approach that suits your pantry and taste.

Choosing the Right Fish

Picking the fish matters more than most home cooks assume. Freshness is paramount; the broth’s clarity depends on fresh, firm flesh and minimal handling that avoids bruising and ruining flavor. In classic ukha, freshwater species like pike, perch, and ruffe are common, but modern cooks often use trout, salmon, cod or sea bass with excellent results. Each species contributes a different profile: pike gives gelatin and structure, perch offers sweetness, and salmon gives richness and color.

When assembling fish for the pot, consider a balanced selection: a main fish for body and a small, bony fish or carcasses for stock. If you can source whole fish, use the heads, collar and bones to make the first, flavorful stock. Avoid oily fish like mackerel or very strong-tasting varieties unless you intend a heartier, less traditional profile. If using fillets, add a few heads or bones from the market to preserve depth and mouthfeel in your broth.

Ingredients That Make the Broth Sing

The ingredient list for ukha is short, but each item plays a critical role. Onions, carrots and a mild root like parsnip or celery root are common aromatics; some cooks prefer only onion to keep the palate spare. Bay leaf, black peppercorns and a few sprigs of fresh dill and parsley are typical herbal accents. Importantly, salt should be added carefully and towards the end, because reducing the broth concentrates saltiness and can easily go too far.

Another element often overlooked is the use of cold water at the start and a gentle simmer throughout cooking. Rapid boiling emulsifies fats and makes the broth cloudy, ruining the signature clearness of ukha. A small addition of vodka or grain alcohol appears in some regional recipes; the spirit is said to extract additional flavor from the fish bones and then evaporates, leaving behind subtle warmth. Whether you use it or not depends on personal taste and the style you aim for.

Preparing the Fish and Stock

Stock is where most ukha succeeds or fails. Start with clean, cold water and fish heads, collars and bones. Simmer slowly, skimming foam and impurities frequently to keep the liquid clear. Use gentle heat and patience; a long, low simmer extracts flavor without clouding. After an hour or so, strain the stock through a fine sieve or cheesecloth and discard the solids, keeping only the clear, golden liquid.

Once the stock is ready, add the flesh of the main fish in chunks or fillets. Cook them just until opaque and tender, which takes only a few minutes for thin pieces. Overcooked fish flakes into the broth and can make it cloudy or mealy. If you prefer, poach the fish separately and remove it to serve later, then return it to the broth only at plating. This keeps textures distinct and the presentation tidy.

Step-by-Step Russian Ukha (Fish Soup) Recipe

Below is a practical, tested method that blends tradition and home-kitchen sense. Quantities are deliberately flexible because ukha scales easily and benefits from tasting as you go. The recipe emphasizes clarity: cold water, slow simmer, frequent skimming, and minimal stirring. Note that the names of ingredients vary with your language and location, so choose items that match the profiles described here.

Follow these steps carefully and resist the urge to rush. Allow time for the stock and avoid heavy-handed seasoning. The goal is a bright, nuanced broth that feels both simple and refined. After the instructions, I include adjustments for dietary preferences and seasonal variations so you can fine-tune the soup to your kitchen.

Ingredients

Here is a straightforward ingredients list for about 6 servings. Quantities can be adjusted and some items substituted depending on availability. Keep in mind that fresher fish and high-quality aromatics make the biggest difference.

  • 2 to 3 pounds assorted fish bones, heads and fillets (e.g., pike, perch, trout)
  • 3 liters cold water
  • 1 large onion, halved
  • 1 carrot, coarsely chopped
  • 1 small parsnip or celery root, optional
  • 6-8 black peppercorns
  • 1-2 bay leaves
  • Salt to taste
  • Fresh dill and parsley for finishing
  • Optional: 1 tablespoon vodka or grain spirit

Method

1. Rinse fish parts in cold water and place them in a large pot. Cover with the cold water and set over very low heat. Bring slowly to a barely perceptible simmer to avoid emulsifying fats. Skim any foam or scum from the surface frequently during the first twenty to thirty minutes.

2. Add the onion, carrot and peppercorns. Continue to simmer gently for 45 to 60 minutes, or until the flavors feel developed. If you are using the optional spirit, add it about halfway through to help extract bone flavors, then continue simmering so the alcohol cooks off. Taste the stock occasionally; it should be fish-forward but not greasy or bitter.

3. Strain the broth through a fine sieve into a clean pot, discarding the solids. Return the clear broth to the stove, bring it back to a low simmer, and add the fish fillets cut into even pieces. Cook for just a few minutes until the fish is opaque and tender. Finish with chopped dill and parsley, and check salt levels before serving.

Timing, Temperatures and Troubleshooting

Ukha rewards precise temperature control. Start cold and aim for a gentle simmer rather than a rolling boil. A simmer that is too vigorous will churn fat and protein into the liquid and make it cloudy. If your stock becomes cloudy, a simple trick is to cool it slightly, then strain again through a very fine cloth; chilling briefly also allows fat to rise and be removed easily.

If the broth tastes weak, reduce it gently to concentrate flavors, but do so slowly and watch the salt. If it becomes too salty, dilute with a little fresh water and adjust other seasonings. For a flat or dull profile, a small squeeze of lemon or a few extra sprigs of fresh dill can brighten the flavor without making it sour. Keep tasting and tweaking — ukha benefits from small, deliberate adjustments rather than major fixes.

Serving Suggestions and Accompaniments

Ukha is often served simply, with a slice of dark rye bread or boiled potatoes on the side. In Russia, a dollop of sour cream is sometimes offered though traditionalists may frown upon it. Pickled cucumbers or tomatoes complement the clean fish flavors with acidity and texture. For a heartier meal, offer boiled new potatoes or buckwheat groats alongside the bowls.

When plating, garnish with a scattering of fresh herbs and a lemon wedge if you like. Serve the broth hot, but not scalding, so the flavors register on the tongue. A light, crisp white wine or a dry cider can be a pleasing accompaniment, but ukha also pairs well with the humble glass of kvass or even a shot of chilled vodka for those who enjoy the classic pairing.

Regional Twists and Creative Variations

Ukha adapts well to modern palates. Some cooks add a few potatoes directly to the pot for a fuller mouthfeel, while others include a handful of buckwheat to echo older peasant dishes. For a smoky note, briefly roast the fish heads over an open flame before boiling them, which can add depth reminiscent of campfire ukha. Coastal versions sometimes incorporate small amounts of shellfish for extra umami.

If you prefer a vegetarian take, create a deeply flavored vegetable broth with kombu, dried mushrooms, roasted vegetables and a splash of soy for umami; then finish with robust herbs and lemon to mimic the freshness of the original. While such adaptations depart from classic ukha, they demonstrate how the principles — clear broth, restraint, and bright finishing — can guide many approaches to soup.

Common Mistakes and How to Avoid Them

A few recurring errors spoil many attempts at ukha. The first is overboiling the stock, which clouds the broth and dulls flavor. Maintain low heat and skim frequently. Secondly, over-seasoning early makes balancing hard later because reduction will concentrate saltiness. Add salt at the end, tasting as you reduce the broth. Third, overcooking the fish turns it to mush and loses its character. Add delicate fillets only toward the final minutes of cooking.

Another mistake is using only fillets for stock. Fillets are fine for the final fish pieces, but the bones and heads are where gelatin and depth come from. If you must rely on fillets, supplement the pot with a few inexpensive bony parts from the market. Finally, ignoring the quality of water can dull the broth. Use filtered water if your tap has strong mineral flavors.

Making Ukha Ahead and Reheating

Ukha keeps well if you plan cleverly. Store the broth and cooked fish separately in the refrigerator for up to two days. Reheat the broth gently to simmering and add the fish just long enough to warm through; this prevents overcooking. For longer storage, freeze the broth but not the fish pieces; frozen stock can last several months and thaws quickly in a warm water bath.

When reheating, avoid boiling which will break down textures and concentrate flavors too much. If the soup tastes flat after refrigeration, brighten it with a teaspoon of lemon juice or a few fresh herb sprigs. Leftover ukha can be the basis for other dishes as well; use it to cook grains or make a seafood risotto for a second, flavorful meal.

Nutritional Notes and Health Benefits

Ukha is naturally light and relatively low in calories compared with cream-based soups. It provides protein from fish and valuable micronutrients like iodine, B vitamins and omega-3 fatty acids when made from fatty species such as trout or salmon. The clear broth is hydrating and easy on the stomach, which explains its traditional role as restorative food after long days outdoors or during convalescence.

Herbs like dill add antioxidants and a bright aroma without calories. If you add potatoes or grains, you increase carbohydrate content and make the dish more filling. For those watching sodium intake, hold back on salt and use more herbs and lemon for flavor. Ukha can be adapted to many dietary needs while remaining satisfying and nutritious.

My Kitchen Experience and a Favorite Memory

I remember the first time I made ukha with a friend who had grown up beside a northern lake. We bought a selection of freshwater fish from a market seller who laughed at our modern curiosity. Back home we simmered the bones and heads slowly, and the kitchen filled with an impossible clarity of scent, as if the room itself had been washed clean. The first spoonful was quiet and precise: no heavy cream, no overpowering spice, just the honest sweetness of fish and a herbaceous finish.

That afternoon I learned to respect the slow simmer. We ate under a gray sky with rye bread, and the soup warmed us thoroughly. Since then I have varied the recipe many times, sometimes adding a roast onion for caramel depth or a few tiny potatoes for comfort. But the guiding principle remains the same: keep it simple, steady and attentive.

Pairing Ukha with Drinks and Starters

Ukha pairs best with beverages and starters that mirror its freshness. Light, acidic wines such as a dry Riesling or a crisp Sauvignon Blanc bring out the herbal notes. If you prefer non-alcoholic options, a tart kvass or a lightly flavored kombucha will complement rather than compete. For a rustic meal, serve pickled vegetables, rye toast with butter, or a small plate of herring and onions as an appetizer.

For a fancier presentation, offer small, warm potato pancakes or blini with a dollop of sour cream and dill. The key is balance: avoid heavy creamy starters that will overpower the delicate broth. Ukha shines when it is the star, supported by simple, honest accompaniments that respect its flavors.

When to Choose Ukha Over Other Fish Soups

Choose ukha when you want clarity and subtlety rather than richness and creaminess. If you are serving a light, elegant dinner or seeking a restorative dish after a long day, ukha is ideal. Its restrained nature makes it a good first course for a multi-course meal where you expect stronger flavors later. Conversely, if you want a hearty winter stew or a creamy chowder, this is not the soup to reach for.

Ukha also works well when you have excellent fish to showcase. The soup is designed to highlight the natural taste of good fish, so invest in freshness and you will be rewarded. It excels in settings where conversation is the focus and the food is meant to accompany social warmth rather than dominate it.

Simple Table: Suggested Fish Choices and Characteristics

Below is a compact reference to help you choose fish depending on the profile you want to achieve. Use it as a quick guide when shopping or planning the soup for different occasions.

Fish Characteristic Best Use
Pike Lean, firm, rich gelatin Traditional stock base for body
Perch Sweet, delicate flesh Final fish pieces for subtle flavor
Trout/Salmon Richer, slightly oily Adds color and depth; use sparingly
Cod/Sea bass White, flaky, mild Good everyday option for clean taste

Finishing Touches That Elevate the Dish

Small details can make your ukha feel polished. Adding fresh chopped herbs at the last minute preserves their brightness. A few drops of lemon juice right before serving often lifts the entire bowl. For texture contrast, offer thinly sliced radishes or a few microgreens on the side. Finally, warm the bowls before ladling the soup in; a pre-warmed bowl keeps the broth at the ideal temperature for longer.

Presentation matters less with ukha than with some dishes, but a neat slice of lemon and an artful sprinkling of dill signal care. If you serve in rustic bowls, provide a small plate for bones or shells so guests can enjoy the meal without fuss. These little practical touches enhance the experience without changing the recipe.

Bringing Tradition into a Modern Kitchen

Adapting ukha for modern life means balancing tradition with convenience. Use a pressure cooker or slow cooker to extract flavor if you are short on time, but be mindful that higher pressures can cloud the broth; finish carefully and strain well. You can also make a concentrated fish stock and freeze it in portions so a good ukha is possible on a weeknight. Preserve the essence of ukha by keeping aromatics simple and adding fresh herbs and lemon at service.

For entertaining, prepare the stock in advance and assemble the final soup right before guests arrive. This keeps the fish textures perfect and allows you to enjoy company rather than fuss over the stove. Modern tools and a little planning let ukha retain its soul while fitting into a busy lifestyle.

Final Thoughts on Mastering Ukha

Ukha rewards care, good ingredients and restraint. It may look simple, yet it requires control of heat, timing and seasoning to reach its potential. Learn to read your stock: its scent, color and mouthfeel will tell you when it is ready. With practice you will develop an intuition for how long to simmer, how much salt to add and which finishing touches suit your palate.

Make this Russian fish soup often, vary it with seasons and local catches, and keep the principle of clarity close at hand. Whether you make a rustic lakeside ukha or a refined bowl for dinner guests, the result can be both humble and profound: a bright, clean broth that celebrates the best qualities of fish and the quiet art of simple cooking.